CNXSoft: When ELEGOO offered us the Centauri Carbon CoreXY for review, Kajornsak was already busy with the review of the Saturn 4 Ultra 16K resin 3D printer, and I was busy (and still is) with other reviews. However, after learning it was suitable for beginners, I asked Kuljira, a high school student learning IT, whether she was interested in reviewing a 3D printer. She accepted and ELEGOO sent a sample for review. I did not provide much support apart from links to my review of the Creality Ender-3 S1 Pro 2-in-1 3D printer (in English) and Kajornsak’s review of the Twotrees SK1 CoreXY 3D printer (in Thai). Apart from that, I did not provide any support except once I told her she might need to add support after a print with spaghetti, and Suthinee helped her take pictures and handle writing a review in WordPress. The review below is a translation of her review in Thai language with a few edits here and there.
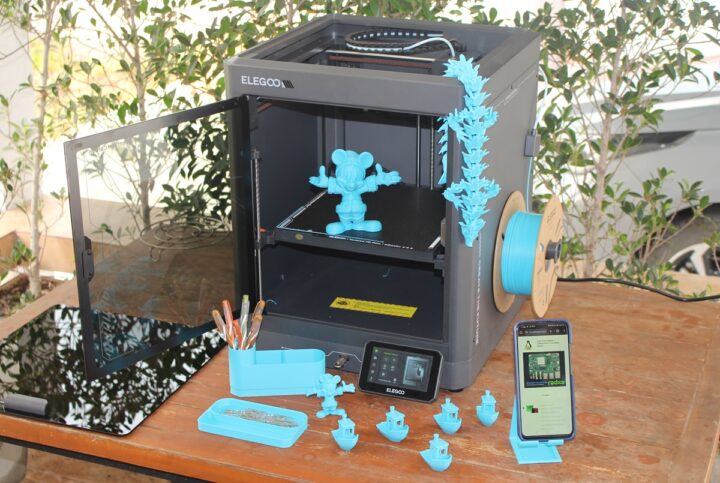
ELEGOO Centauri Carbon is the company’s first CoreXY 3D printer suitable for a range of applications for hobbyists as well as engineers. It’s a fully enclosed 3D printer with a 256×256×256 mm print volume and support for high-speed printing up to 500 mm/s. The 3D printer supports common materials such as PLA, as well as ABS, PETG, and more. The Centauri Carbon is also equipped with an AI camera enabling timelapse recording, an auto-leveling function, and WiFi and USB ports for remote and local printing.
ELEGOO sent us a complete Centauri Carbon 3D printer kit for review. This machine is suitable for beginners, and this is my (Kuljira) first time using a 3D printer. We will start by looking at the specifications, going through an unboxing, and assembling the 3D printer (not much had to be done here), before using the 3D printer with the 4.3-inch capacitive touchscreen display as well as the ElegooSlicer program.
ELEGOO Centauri Carbon specifications
- Printer type – FDM (Fused Deposition Modeling)
- Build volume – 256 x 256 x 256 mm³
- Print accuracy – ± 0.1 mm
- Nozzle diameter – 0.4mm (standard)
- Print speed – Up to 500 mm/s
- Supported filament – Carbon/Glass Fiber Reinforced, Filaments/PLA/PETG/ABS/ASA/TPU/PET/PC/PA
- Operating Temperature Range – 5°C to 40°C
- Nozzle temperature – Up to 320°C
- Heated Bed temperature – Up to 110°C
- Slicer software – ELEGOO Slicer (recommended)
- Supported Files –STL, OBJ, 3MF, STP
- Output file – G-code
- Interface – USB (flash drive) or WiFi (remote)
- Power Supply – AC 100-240V; 50/60Hz
- Max power – Up to 1100 Watts @ 220V, 350 Watts @ 110V
- Dimensions – 398 x 404 x 490mm
- Weight – 17.5 kg.
ELEGOO Centauri Carbon 3D printer can also resume printing after a power failure.
ELEGOO Centauri Carbon Unboxing
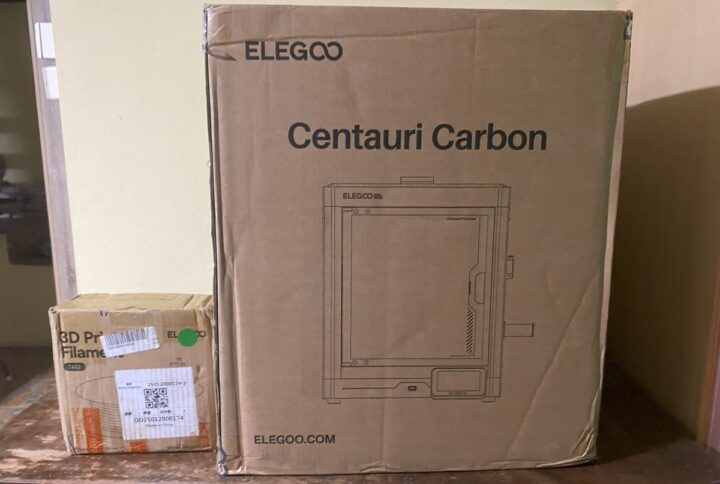
We received 2 boxes: a small box with 3D printer filament (PLA) and three days later we received a much larger package with the ELEGOO Centauri Carbon 3D printer.
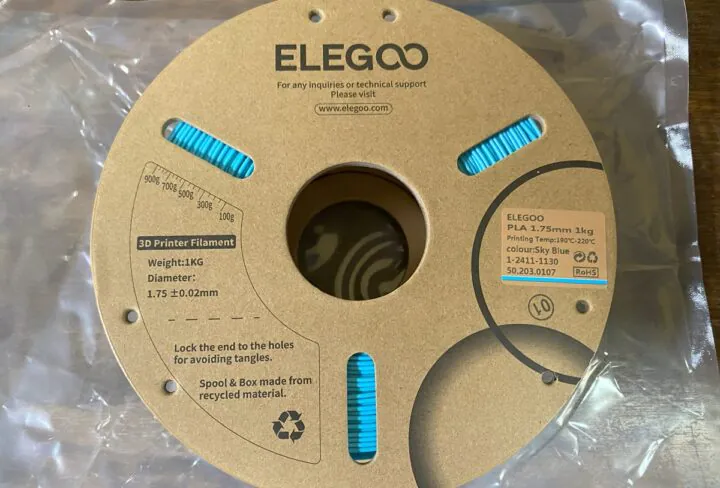
The filament roll has one kilogram of ELEGOO PLA 1.75mm filament. The color we received was “Sky Blue” and the filament is designed for 190 to 220°C printing.
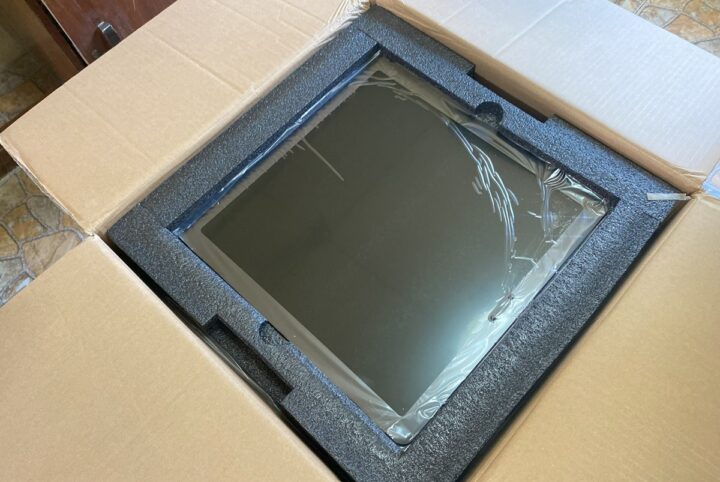
The large box contains the 3D printer itself with plenty of foam to protect it during transport.
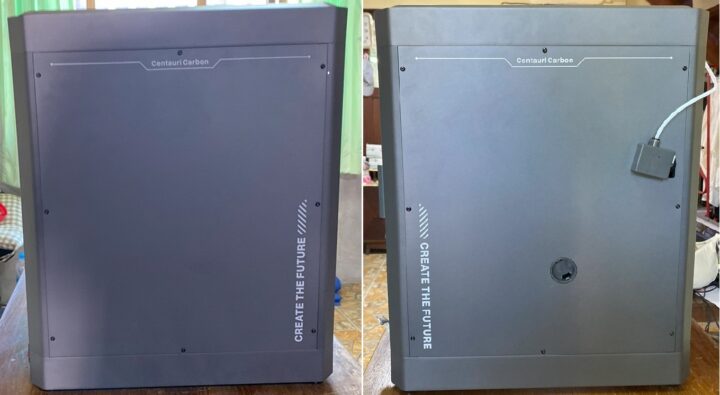
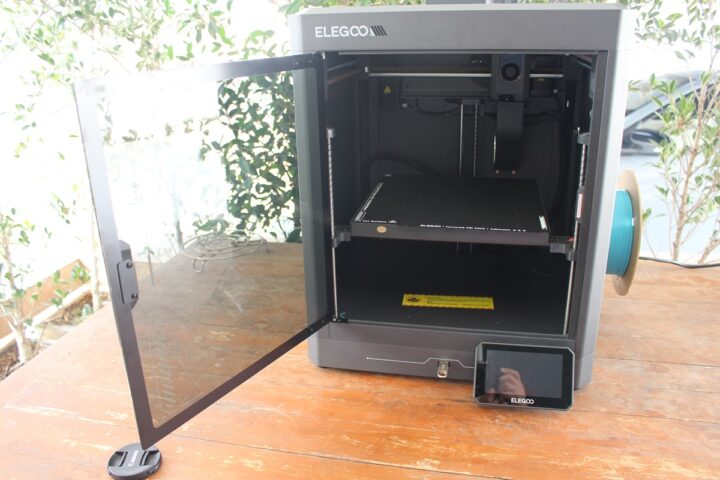
The front has a door made of durable tempered glass that allows the users to monitor the printing process while preventing dust from getting into the printer when not in use. We also find a USB Type-A port to connect a flash drive and the display connector. The back side has a filament inlet, an air filter, an “excess chute” opening for a filament waste bin (not used in the review), a power socket, and a power switch.
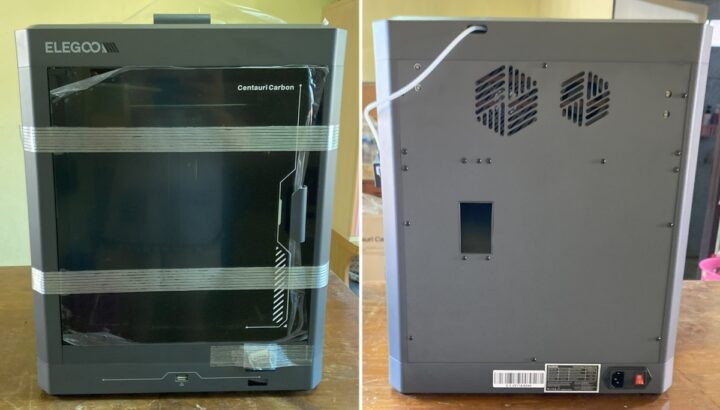
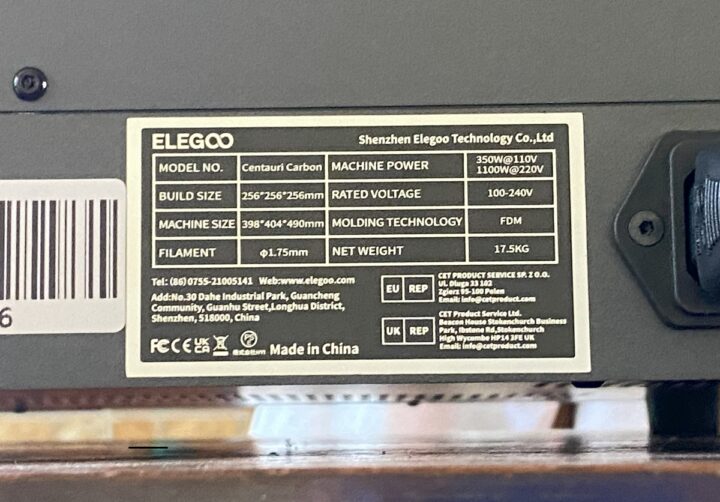
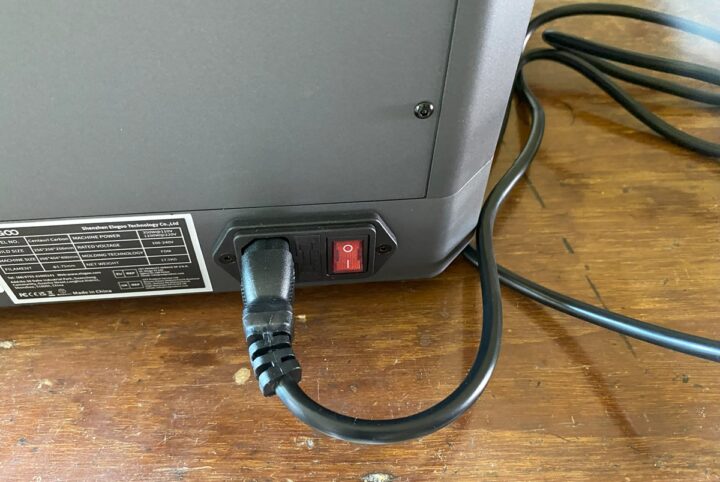
There’s also a sticker with important information like the rated voltage (100-240V) and certifications (FCC, CE, UK CA).
There is nothing on the left side, while the right side has a filament detection sensor and an opening to install the filament spool holder.
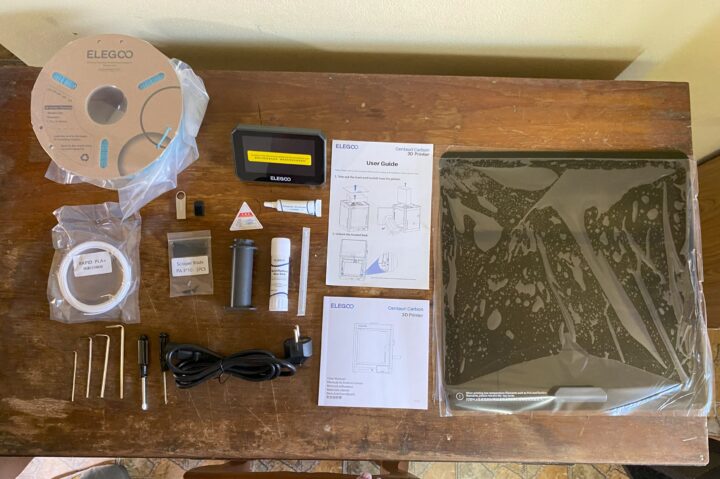
The package also includes various other accessories and tools.
- 1.5/2.0/2.5/3.0 mm Allen wrenches
- Screwdriver
- Power cord
- Filament sample (white)
- Assembly and user manuals
- Scraper blade
- Filament spool holder
- Glue Stick
- Unclogging pin tool used to fix clogged nozzles
- Stickers
- Lubricant or grease
- USB Flash Drive
- Spare heatbed nozzle wiper
- Touch screen
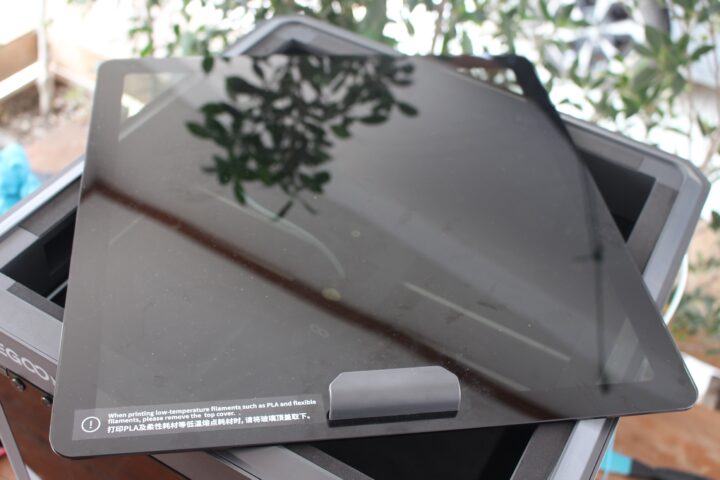
- Top cover
Let’s take a look at the machine. When we open the door, we will see the heated bed which relies on an AC heating system supporting up to 1000W (at 220V) for rapid heating to the desired temperature, reducing preparation time before printing.
The heated bed has two sides: Side A (Textured PEI Plate) is suitable for printing PLA/TPU/ABS/PETG/Carbon-Fiber, while side B (PLA Specific Plate) is for printing PLA only.
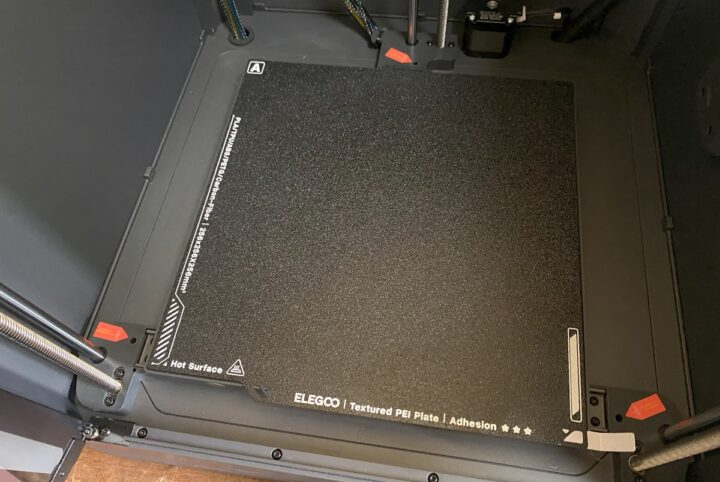
The X and Y axes are equipped with high-speed, high-efficiency 4260 stepper drivers providing strong power for stable and fast printing.
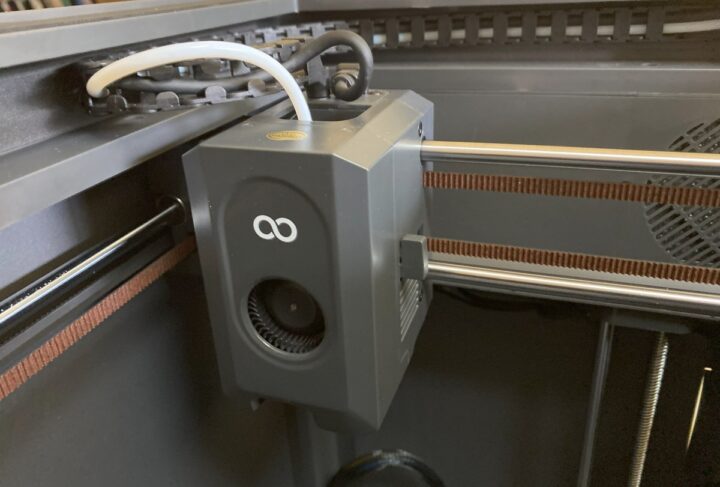
Designed with CoreXY motion structure, it increases the speed (up to 500 mm/s), acceleration (up to 20000 mm/s²), and accuracy and precision of printing.
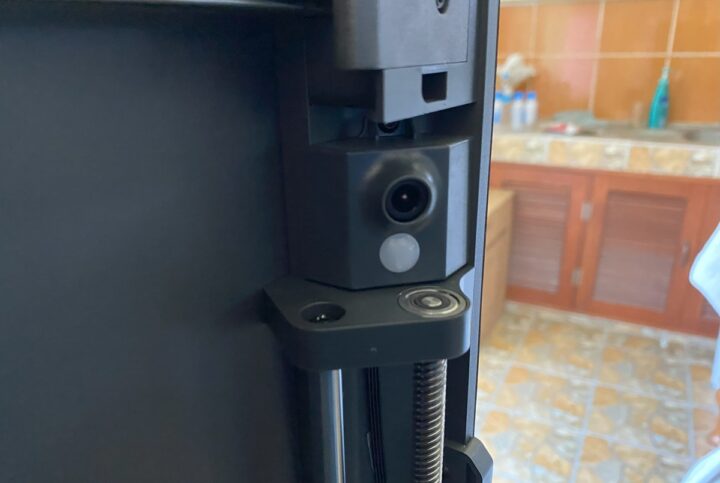
The camera has a Time-Lapse feature for recording the entire process, or you can watch the printing live remotely. The camera also has a built-in LED light for darker environments.
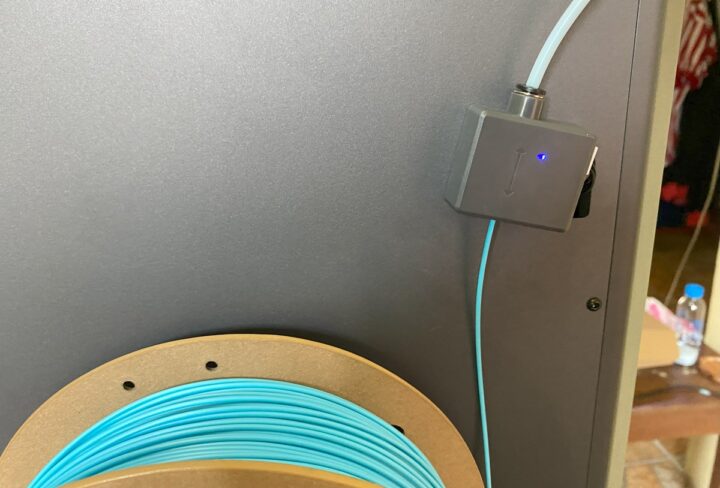
The right side of the machine features a filament detection sensor whose Blue LED will turn on if the filament is detected. The machine will automatically stop the printing process if a filament shortage is detected. You should then be able to install another filament roll before resuming the print from where it stopped (not tested in this review).
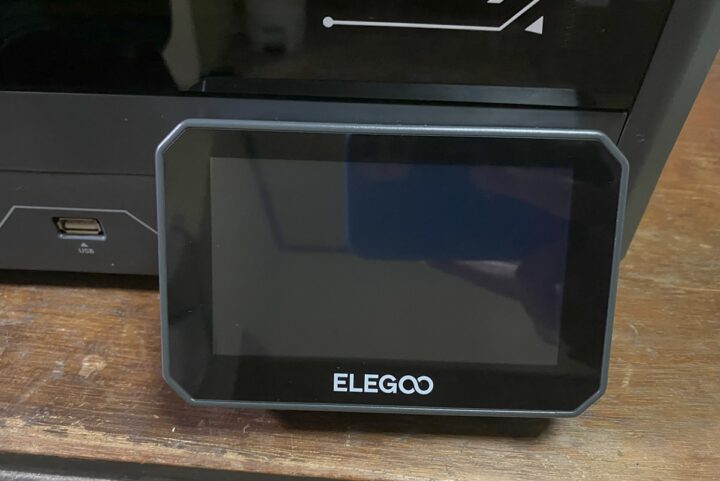
The ELEGOO Centauri Carbon ships with a 4.3-inch capacitive touchscreen color display used to control the machine. It’s mostly useful when printing from a USB flash drive (see USB Type-A port on the left) and quickly checking the remaining time once the print has started.
The top cover is great for preventing dust from entering the machine, but it should be removed when printing low-temperature filaments such as PLA and flexible filaments.
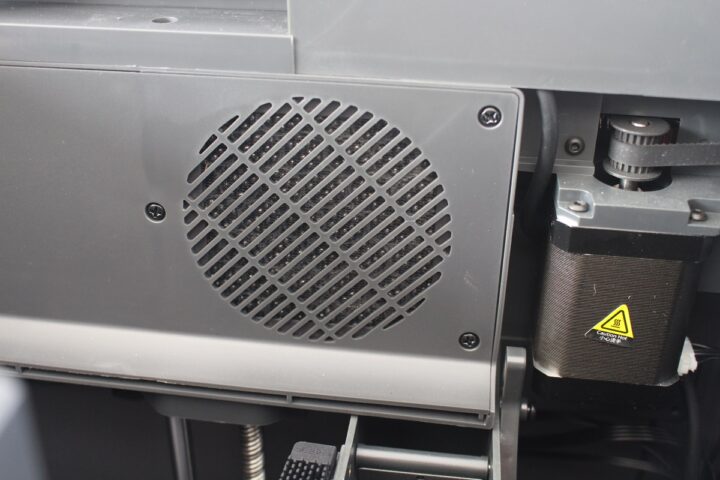
The internal cooling fan is a 4-wire 5020 high-speed fan with precise speed response and control. The high-power external cooling fan (placed next to the filter on the back of the chassis) is designed to enhance cooling for high-speed printing models.
The 3D printer supports printing via WiFi and USB flash drive with the modes copied to the internal 8GB flash memory. The Centauri Carbon relies on silent stepper drivers to effectively reduce noise during printing (but it’s not super quiet either…).
Assembly and preparation of the Centauri Carbon before printing
The ELEGOO Centauri Carbon is mostly preassembled, so it only takes a few steps to assemble and prepare the machine. It’s great for beginners, and there’s no need to spend one hour or more to assemble the 3D printer. It’s just done in minutes.
The important part is to follow the instructions in the assembly guide (called User Guide) or in the more detailed user manual which also includes a QR code pointing to a video unboxing and assembly guide on YouTube.
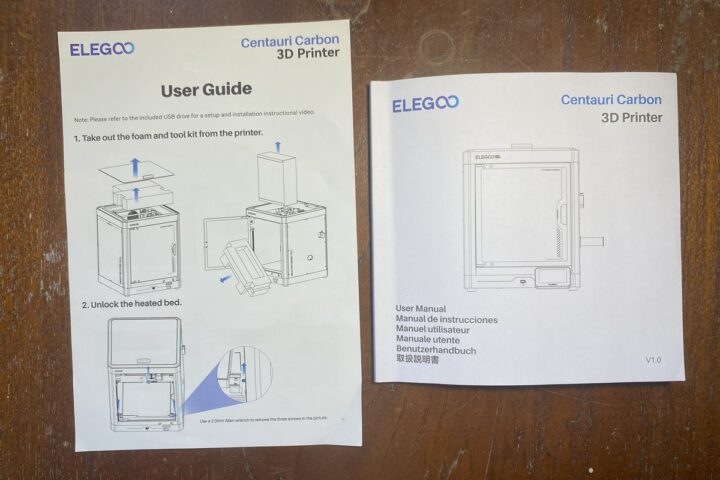
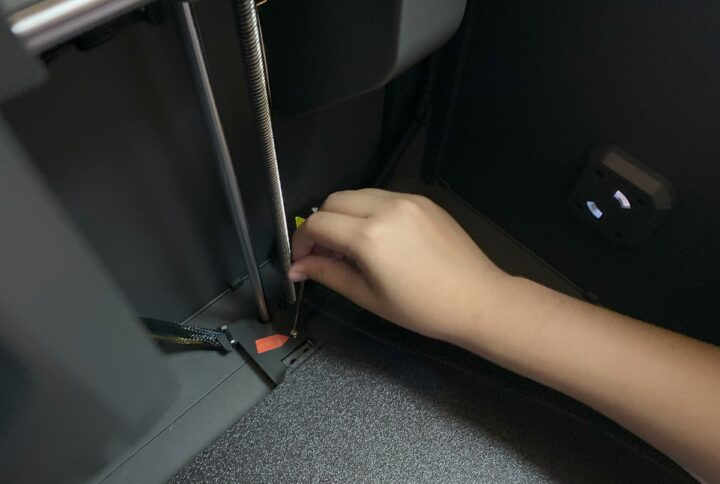
The first step is to unlock the heated bed by tightening all 3 bolts marked with red arrows using a 3.0 mm wrench.
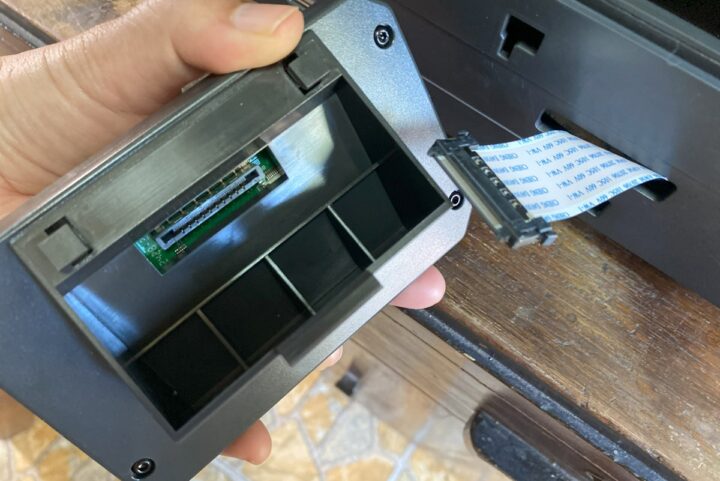
Then we connected the 4.3-inch touchscreen display to the 3D printer by inserting the ribbon cable and placing the display in the two holes reserved to that effect.
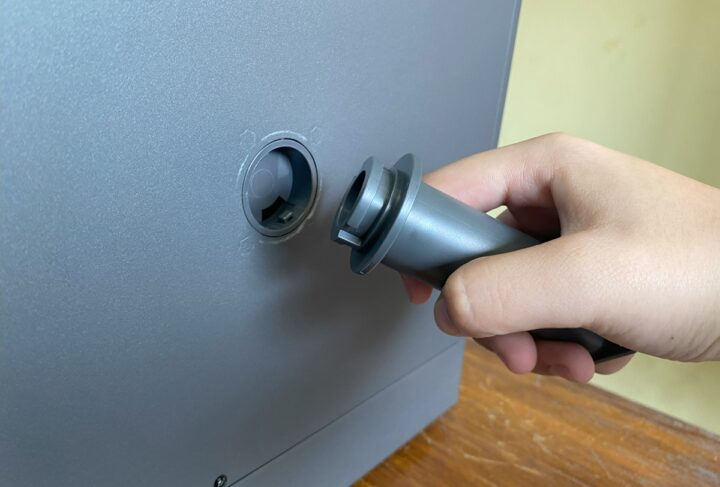
We can then rotate the filament holder on the right side of the machine to secure it.
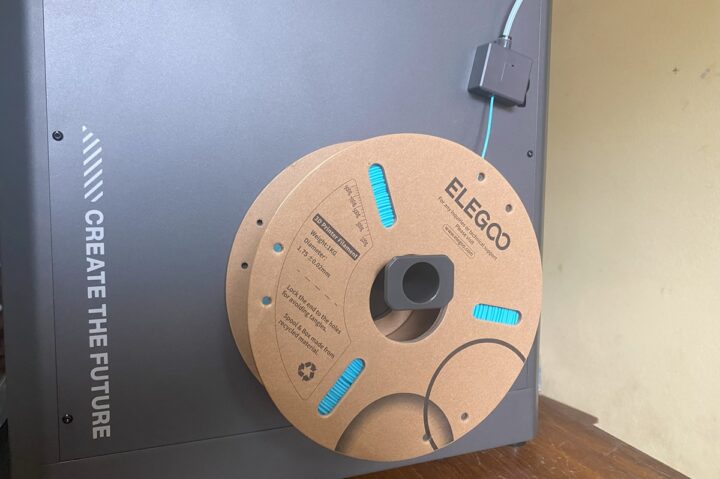
Once done, we can place the filament roll there, and insert the filament through the detector until it can’t be pushed anymore.
The 3D printer has an input voltage of 100-240V AC 50/60Hz meaning it can be used worldwide, so it’s safe to insert the power cable, and then we can turn on the machine and use it using the ON/OFF switch next to it.
First print with the ELEGOO Centauri Carbon 3D printer
You’ll first need to select the languages between simplified Chinese, English, Spanish, French, Italian, Russian, German, or Japanese on the display and tap the Confirm button.

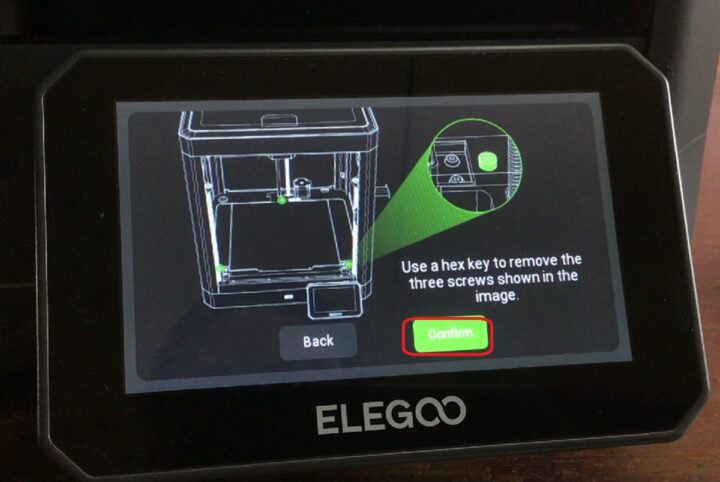
The machine will ask us to remove the three locking screws. Since we have already done this, let’s tap the Confirm button.
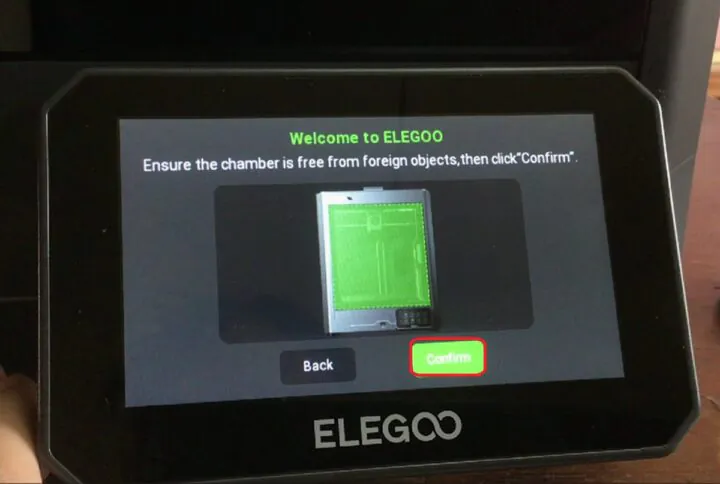
The next screen is another safety check asking the user to ensure the chamber is free from foreign objects. Let’s tap Confirm again.
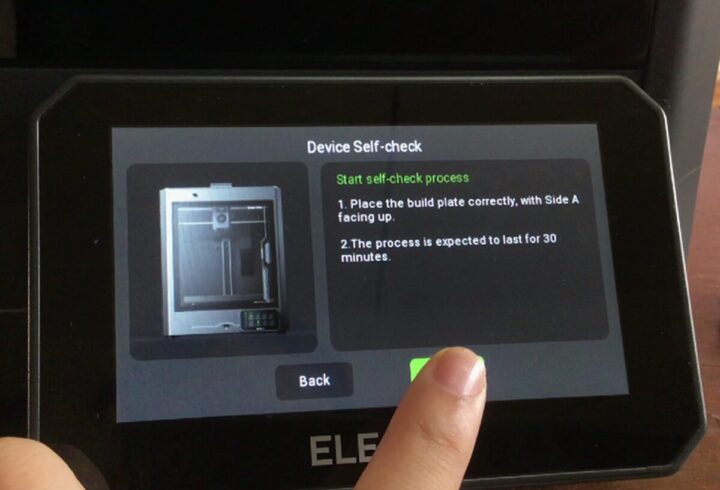
The printer will then start a self-check process, but not before asking the user to make sure the build side has Size A facing up. The process takes around 30 minutes.
During that process, the 3D printer made a lot of noise as if it was going to explode, but it ended up being normal. There was some airflow coming out of the machine as demonstrated with the sheet of paper below.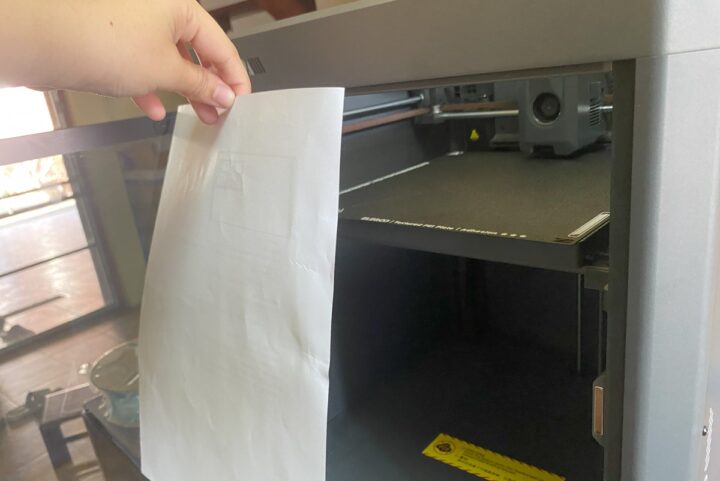
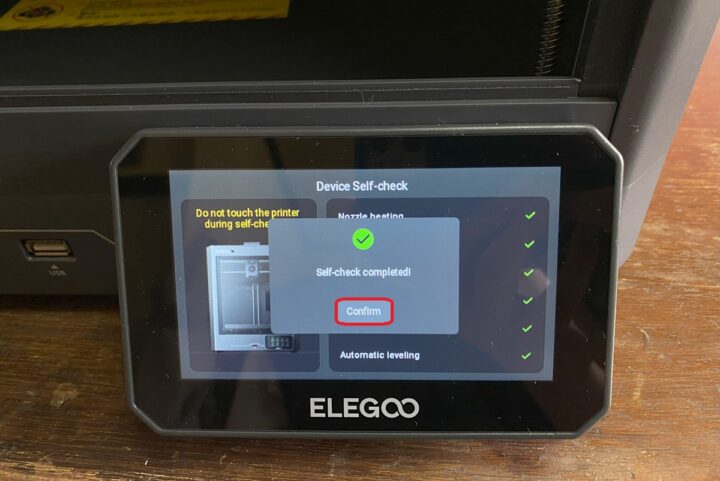
Once the process is complete a window will pop up reading “Self-check completed”. We can tap Confirm again.
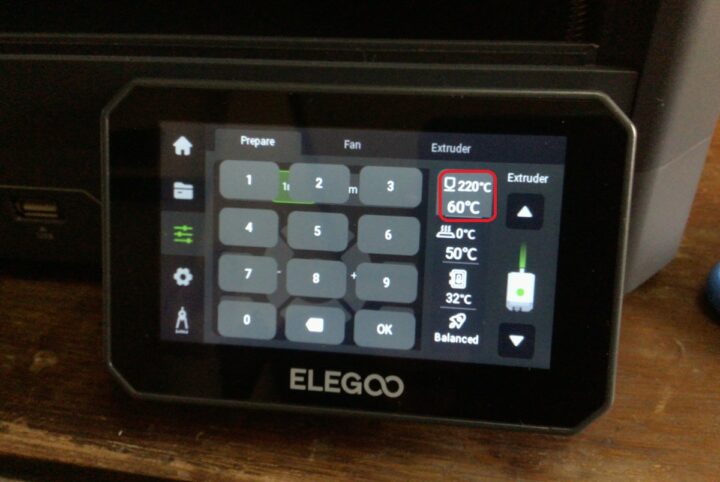
We tested the first print by turning by setting the temperature to 220°C.
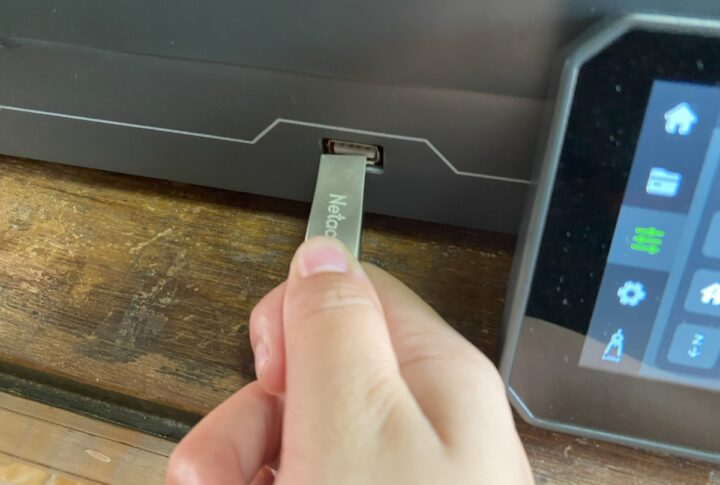
Then insert the USB flash drive to the USB Type-A port of the 3D printer.
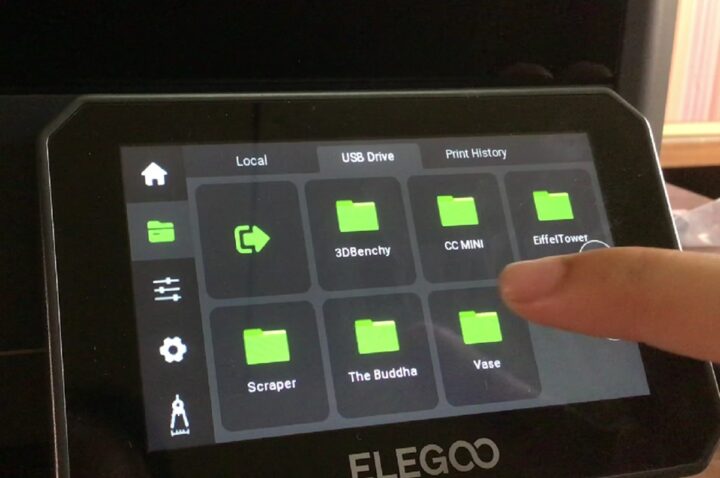
Click on the Folder icon, the Local section will be empty since we have not printed anything yet, but the USB Drive section will show the folders from the USB drive.
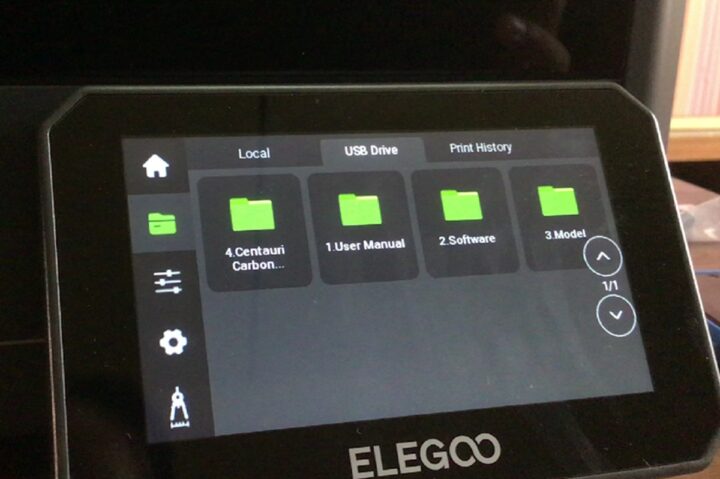
Once we enter the “3.Model” folder we’ll find more folders with pre-generated models. Let’s try 3DBenchy.
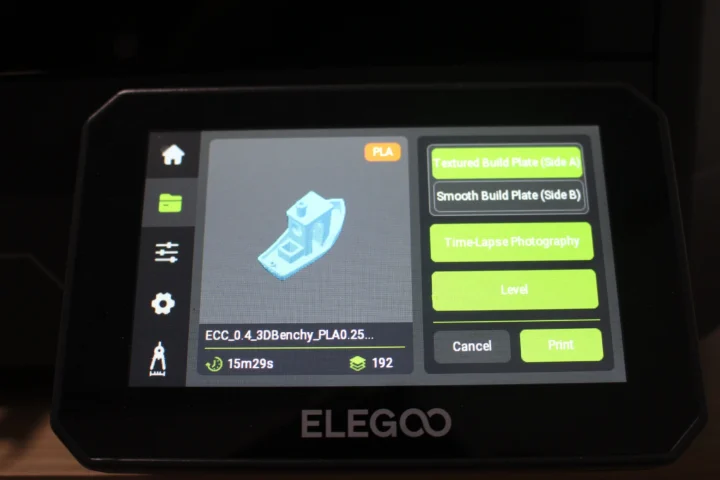
After selecting the file, you can select Side A or Side B build plate, Time-lapse Photography, and/or Level. The latter does auto-leveling which is important when for the first print or after moving the machine, but it might be necessary for subsequent prints, albeit it won’t hurt and just add a minute or two to the prints. Once you can ready, just tap the Print button.
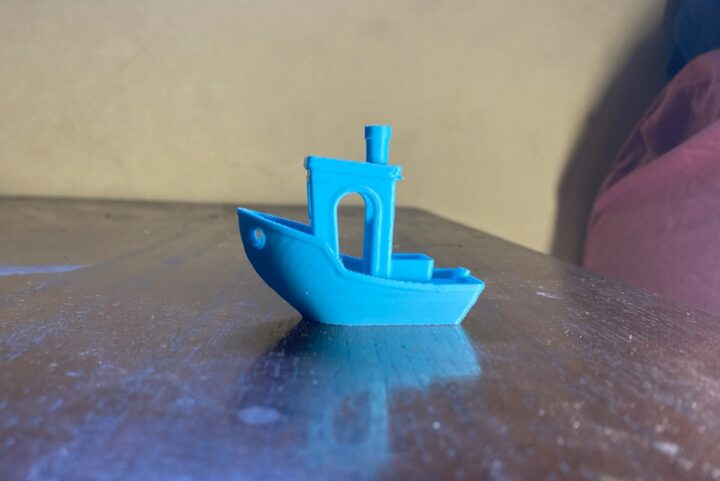
The machine will start printing and within about 15 minutes our print will be ready. We can remove the build plate that is magnetically attached to the printer to bend it a little and easily remove the sample which looks fine.
That’s it for our first print and it was much easier than expected.
Using ELEGOO Centauri Carbon 3D Printer with ElegooSlicer
While it’s OK to print files from the USB drive, we’ll need to install the ElegooSlicer program to print models downloaded from the Internet and have more control over the print process. So we will install ElegooSlicer from the USB flash drive.
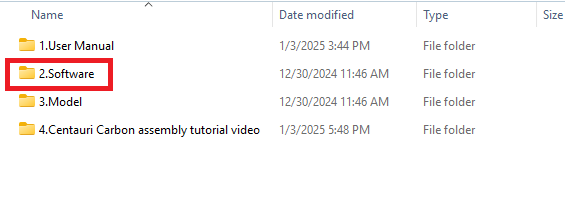
ElegooSlicer_Windows_Installed_V1.1.5.5.exe installation file for Windows can be found in the “2.Software” folder. The USB flash drive also contains installers for MacOS x86 and Arm64, but not for Linux. ElegooSlicer is based on OrcaSlicer, and you should be able to build the program from source and install it on Ubuntu or other Linux distribution.

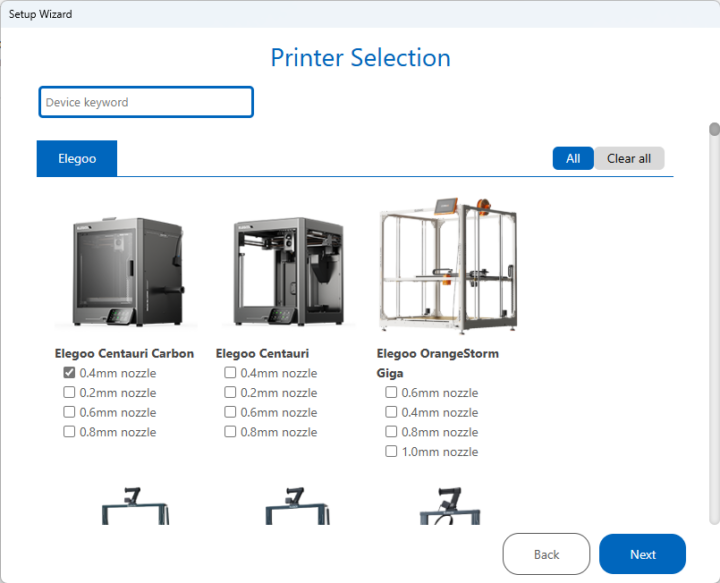
Once the program is installed, we can go through the Setup Wizard where we are first asked to select the printer: Elegoo Centauri Carbon with 0.4mm nozzle.
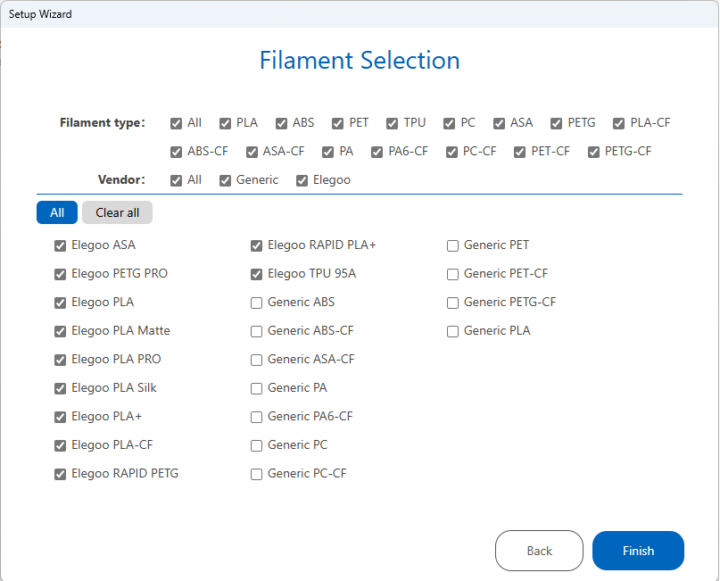
After clicking on Next, the Filament Selection window shows up and we can click on Finish.
Before we can connect the computer to the 3D printer, we need to configure WiFi on the touchscreen display. Go to Settings->Network, select the SSID, and enter the password. Once done, you’ll get an IP address for the machine (172.20.10.10).
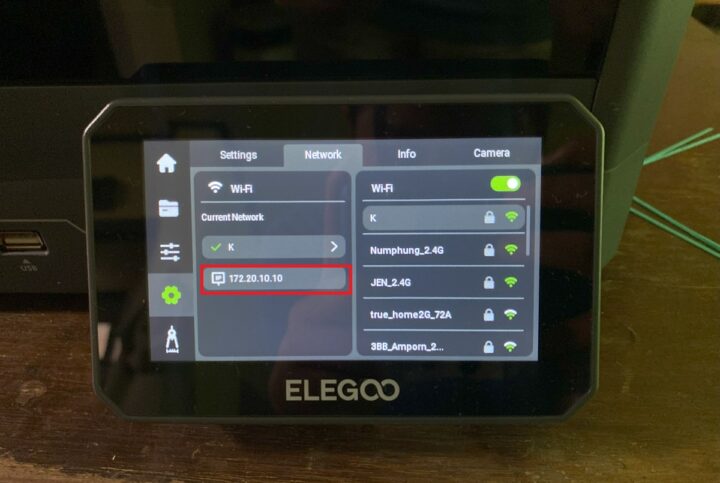
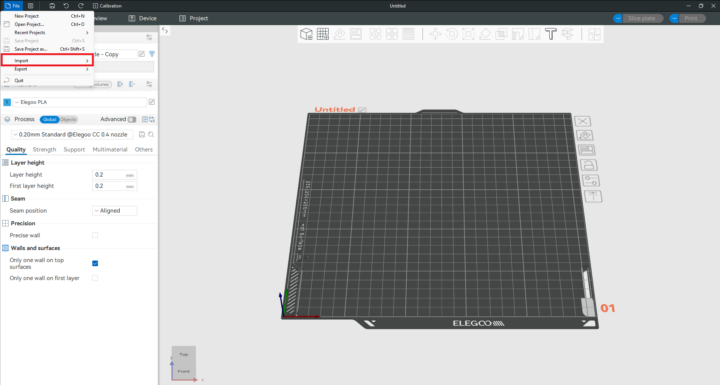
We can go back to the ElegooSlicer program and in the top menu select File->Import.
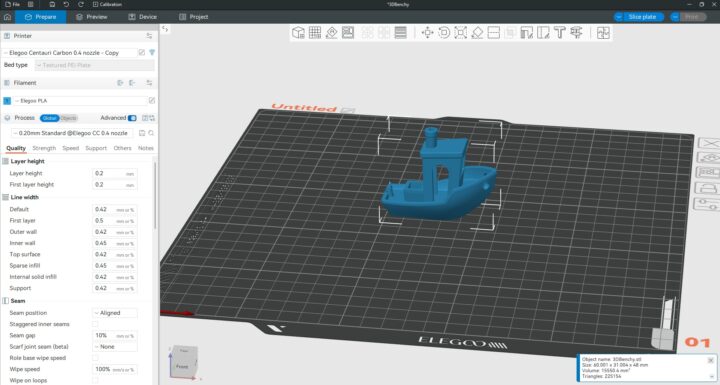
We selected 3DBenchy.stl file from the USB flash drive but other formats can be imported including 3MF, STEP, or others. You can then export G-code or press Print at the top right corner of the program when connected to the 3D printer after the model has been sliced.
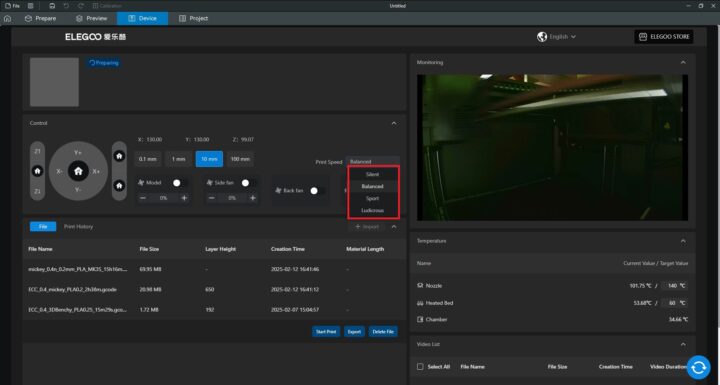
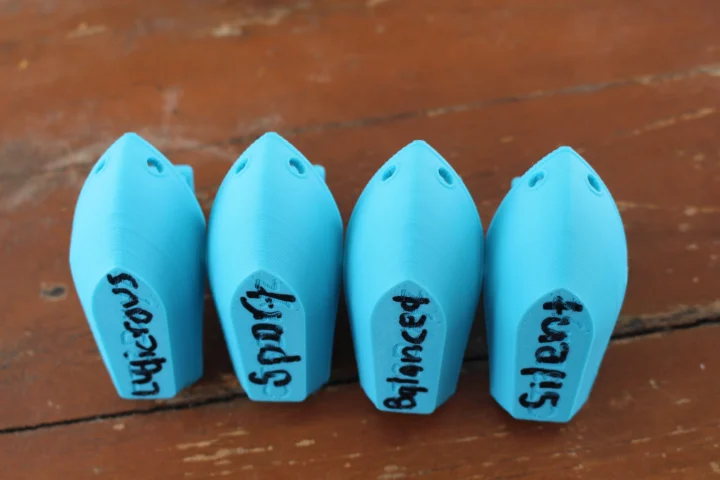
In the Device tab, we can select various parameters including the Print Speed which can be set to Silent, Balanced, Sport, or Ludicrous. There’s also the camera output in this section.
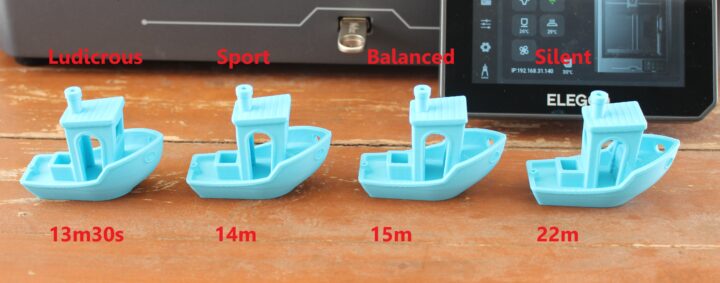
We tested all four speeds but did not notice any significant differences in terms of noise. One a small model like that the time difference is not that great, except for the Silent mode which takes a few minutes longer.
The differences in quality are also hard to spot. The layers are slightly more regular as the speed decreases when looking at the boat hull, and you may notice a difference when zooming in on the photo below.
We have experimented with printing models downloaded from the Internet. We first imported the Mickey Mouse Chritmas STL model, and from the interface, we can edit the design making it smaller or larger as needed.
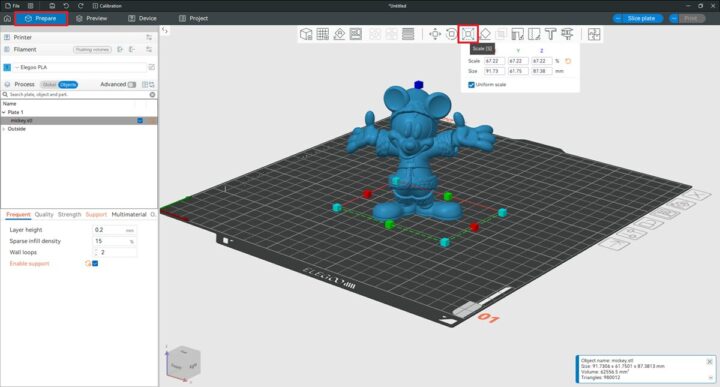
The first print was not successful with filament spaghetti under the arms of the model.
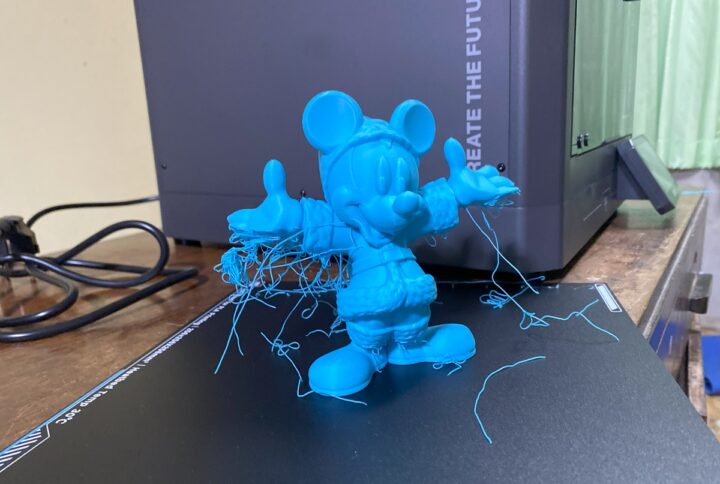
Jean-Luc told me I would need to add support to avoid this issue. So I found the “Enable Support” option in the program which generated support automatically.
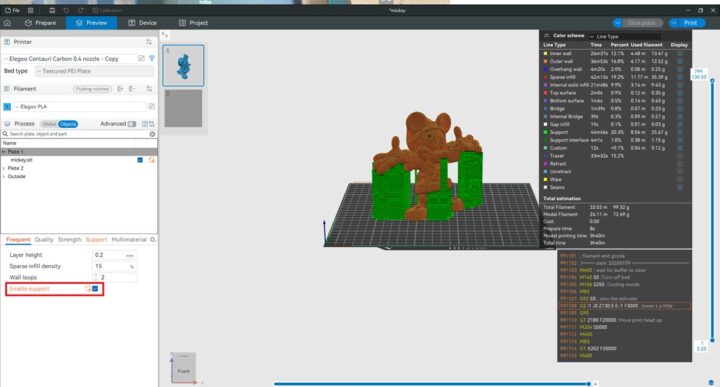
The support mode has two styles: Grid and Snug. Grid supports are characterized by boxy, vertical pillars arranged in a grid pattern, while Snug supports are an evolution of Grid supports designed to conform tightly to the shape of the overhang without extending beyond the model’s boundaries.
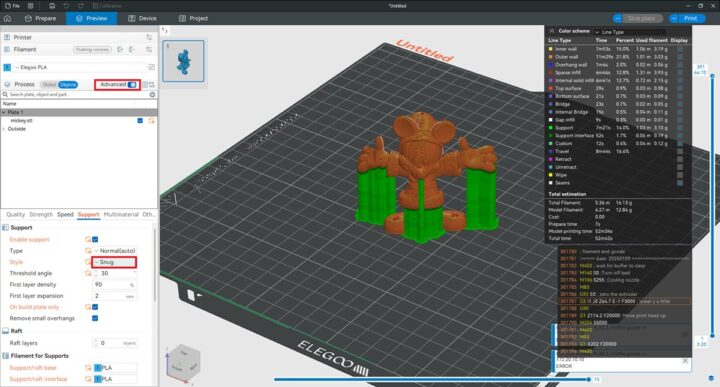
We used to Grid style for the print and also resized the model to make it smaller.
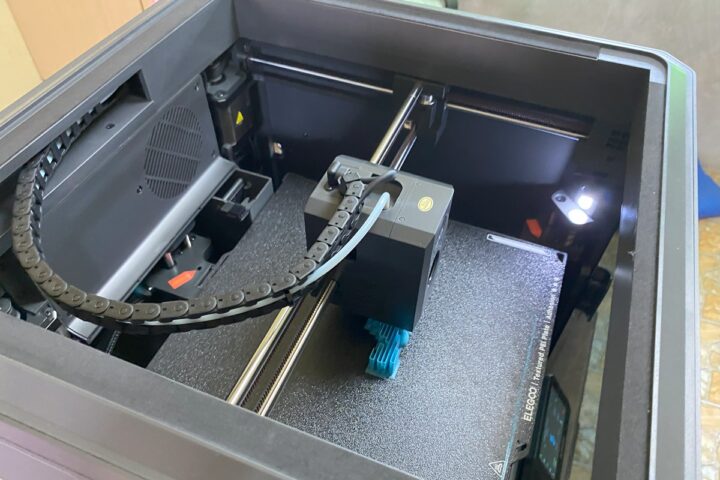
Then we noticed that the support around Mickey Mouse might be too thick and difficult to peel.
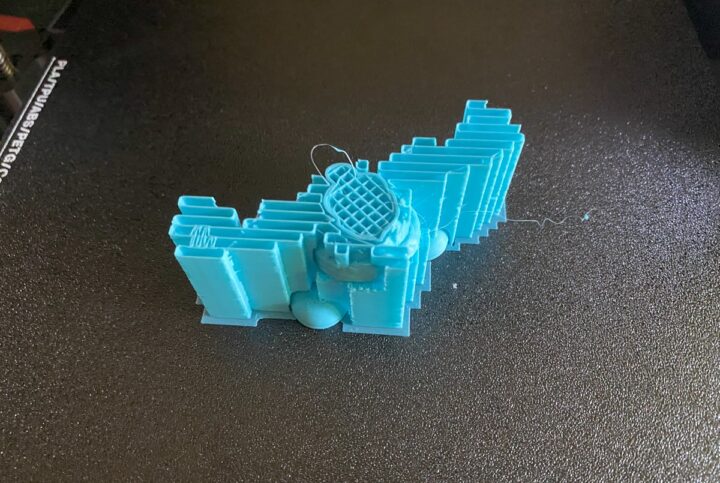
We changed support to Snug and tried again. Here’s the result.
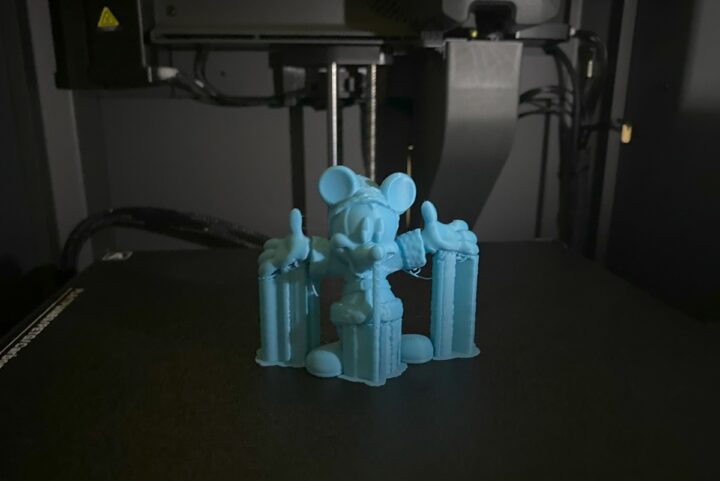
We removed the support and the result looks much better than our very first attempt with the Mickey Mouse model.

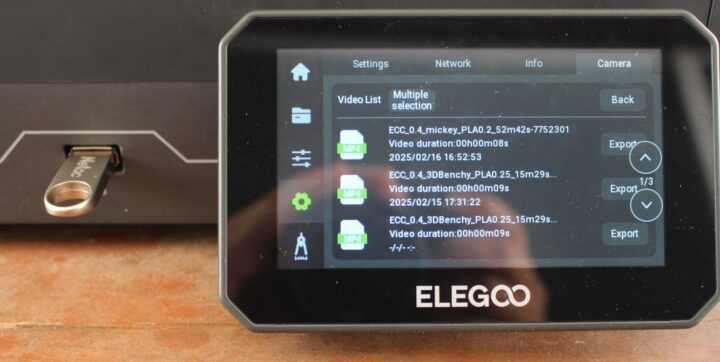
We can export the timelapse from the program or by going to the display menu in Settings-> Camera->Video List, and tap the Export button to copy the video(s) to the USB flash drive.
We uploaded the video to YouTube to show what it looks like.
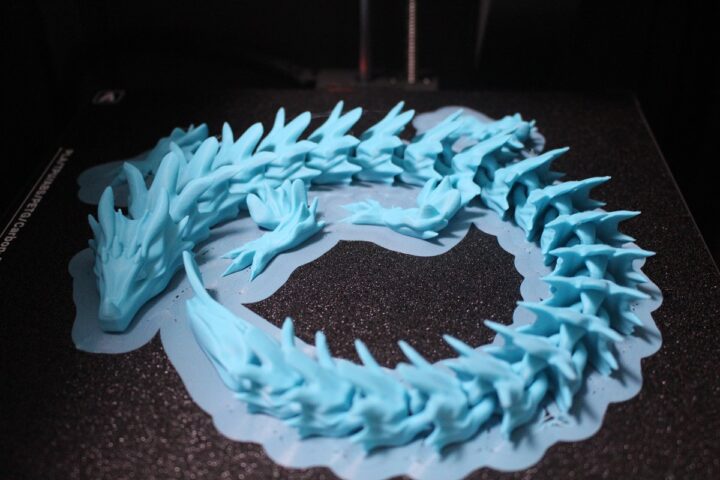
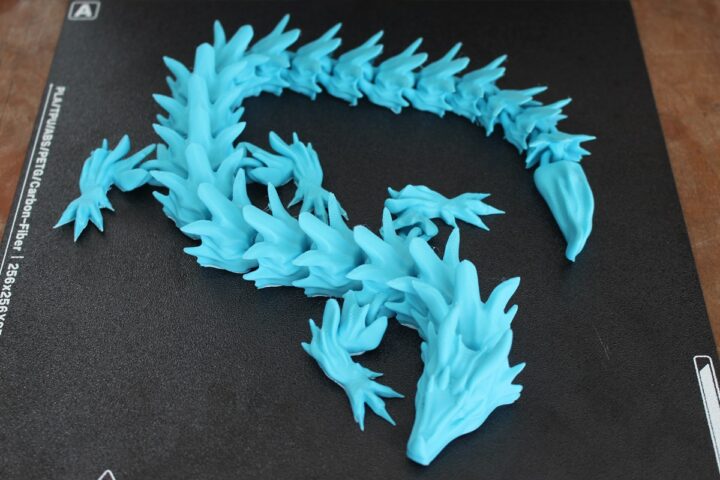
We also tested other prints downloaded from the Internet. The water dragon model was enlarged with ElegooSlicer to use most of the surface of the build plate and took 4 hours and 31 minutes to print.
The brim did not come off easily, but after using hands and pliers to cust parts that would not come off, we managed to get a decent result.
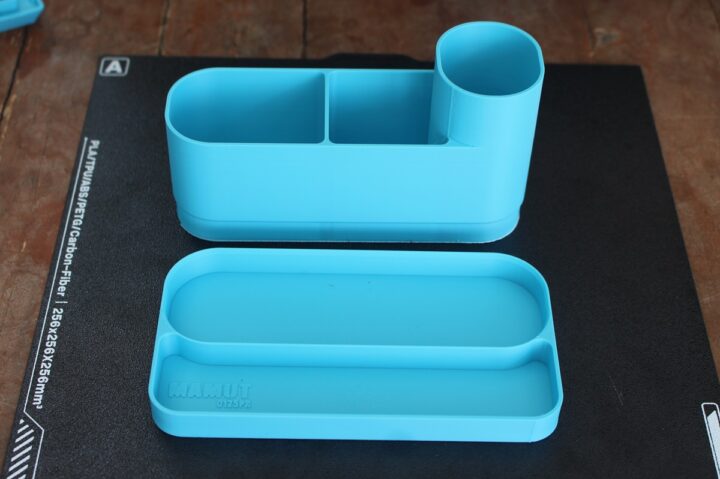
A pencil holder and organizer could be printed in about 1 hour and 50 minutes.
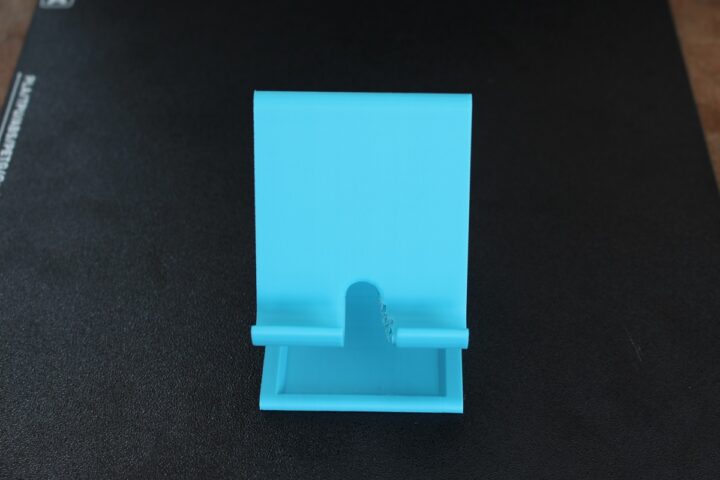
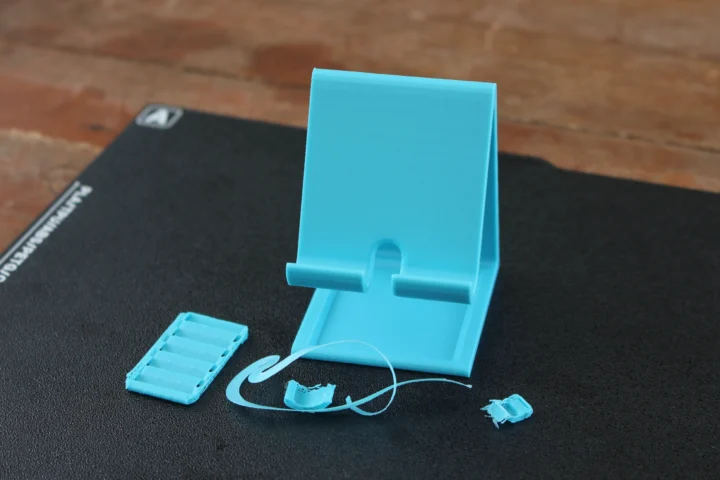
We also printed a phone holder model in 57 minutes in total. The result was not very good, because we did not add support in the ElegooSlicer program and it was needed.
Trying again after adding support yielded a much better result.
Conclusion
After trying out the ELEGOO Centauri Carbon 3D printer, I (Kujira) found this machine very easy to use for beginners and it works well. The 3D printer comes in a nearly pre-assembled form so it just takes a few steps to get started, and using a 3D printer is much easier than I initially expected. The fully-enclosed design will also make it easier to dust off the machine over time.
The user manual provided clear and easy-to-understand instructions making the setup and operation smooth. The 3D printer can be used from the touch screen display or connected to a computer via WiFi and the ElegooSlicer program for more flexibility. The program is easy to use and beginners can easily use and understand it. The Centauri Carbon also comes with a camera for real-time monitoring of the printing process. You can also watch a timelapse video of the print as it’s complete. Users must remember to remove the top cover while printing with PLA filament or the chamber may become too hot, and it’s easy to forget. I also had to learn about adding support when required. Overall, it is a great choice for people wanting to learn about 3D printing technology or simply to print workpieces from time to time.
We’d like to thank ELEGOO for sending the Centauri Carbon CoreXY 3D printer for review. The 3D printer is also cheap, and there’s no excuse not to get one at home with ELEGOO taking pre-orders for just $299.99. Shipments from the US warehouse are expected to start by June 30, 2025.

Jean-Luc started CNX Software in 2010 as a part-time endeavor, before quitting his job as a software engineering manager, and starting to write daily news, and reviews full time later in 2011.
Support CNX Software! Donate via cryptocurrencies, become a Patron on Patreon, or purchase goods on Amazon or Aliexpress





Looks more like a tutorial on how to use the 3d printer, and a review.
It also looks like a copy of bambulab but cheaper. It’s good they are trying at least and the market is opened for the brands to try their luck with it.
At least you guys didn’t do a side comparison with the X1C and to say it’s better ( as some other reviews did), so kudos to you guys to keep it just on the review side👌👌👌
Very nice review, thank you!
what is corexy ?
Traditional 3D printers have a fixed bed and the printing head moves in X, Y, and Z directions.
CoreXY 3D printers have a bed that moves along the Z axis, while the print head only moves in X and Y directions.
CoreXY has statically positioned stepper motors for X and Y axis and some mechanism with belts to move the print head so it moves with less weight and can be very fast.