SMARTHON Smart City IoT Starter Kit for micro:bit is an educational kit for 10+ years old teaching basic projects from turning an LED to more complex projects with multiple sensors, IFTTT integration, and mobile app development. The company sent us a sample of the Start Kit along with a BBC Micro:bit board for review, and we’ll report our experience with the kit in this review.
Unboxing of SMARTHON Smart City IoT Starter Kit for micro:bit
The package I received includes the SMARTHON Smart City IoT Starter Kit for Micro:bit and a BBC Micro:bit V2 board since it’s not included in the starter kit.
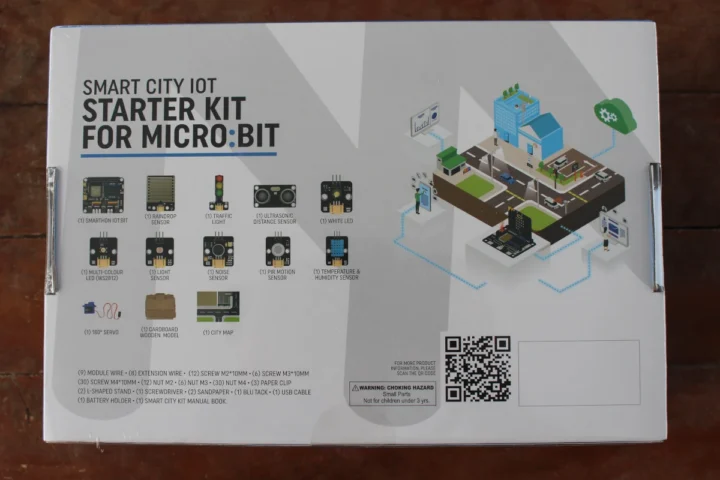
The bottom side of the package lists the main components and features a QR code pointing to the product page.
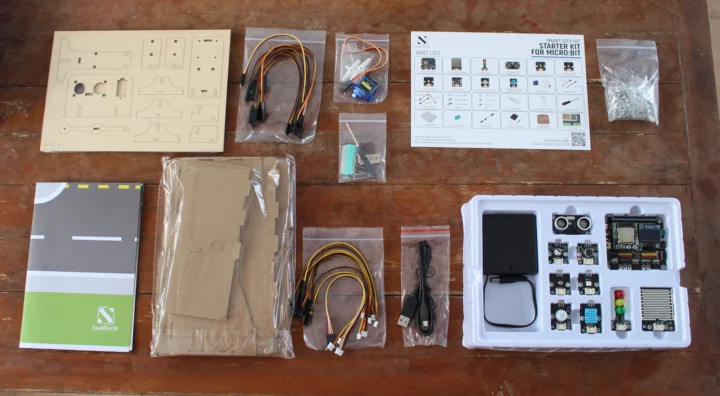
The package includes cardboard and wooden models, various cables, a 180° servo, a screw set, a city map, the Smarthon IoT:bit carrier board for the BBC Micro:bit, battery holder, and various modules namely a traffic light module, a white LED light, a multi-color LED (WS2812), an ultrasonic distance sensor, a light sensor, a temperature and humidity sensor, a PIR motion sensor, and a raindrop sensor.
There’s no printed-out documentation, but it’s available online as a digital handbook (PDF) which is better if you want to print it, or an online guide suitable for use on a laptop, a tablet, or even a smartphone if you have good eyes… Since I spend most of my day in front of a computer or mobile phone, I prefer reading on paper to rest my eyes, so I printed out the part I needed. The PDF does not have the more complex lessons, so I printed some pages from the digital handbook and the online guide.
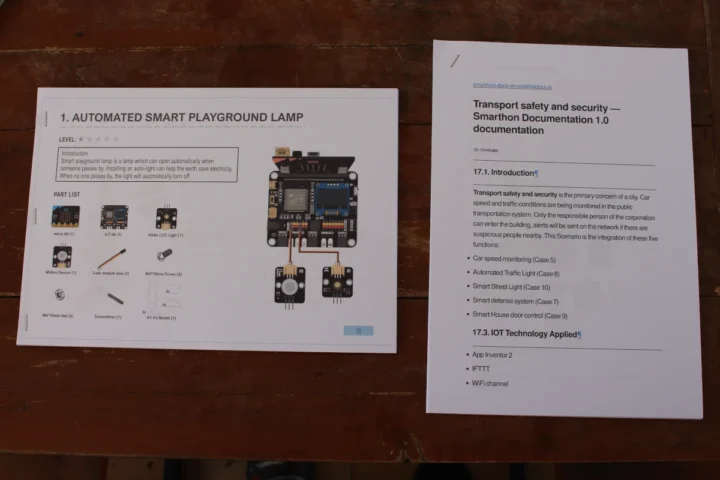
One thing missing that’s found in some other educational kits is a storyline, for example, Doctor Who in the “BBC Doctor Who HiFive Inventor Coding Kit” or a time-traveling scientist in Acebott QE007 Smart Home IoT kit. I’m not sure it’s a negative though, since the SMARTHON kit gets straight to the point and it’s already fun to play with the kit and instructions without having to read a story.
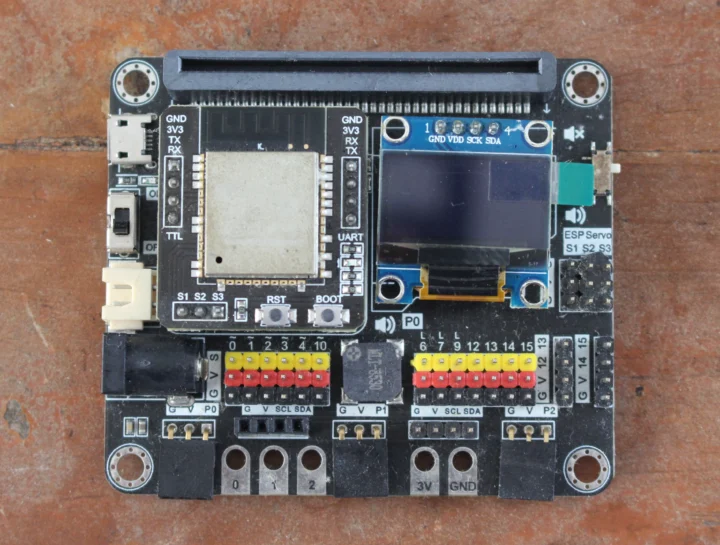
A closer look at the IoT:bit board reveals an edge connector for the BBC Micro:bit, an ESP32-WROOM-32 module, an OLED display, three power options through a micro USB port, a 2-pin connector for a 3.7V battery, and a DC jack for power, a buzzer, and various headers for expansion, plus some crocodile pins.
Adding Smarthon to Makecode
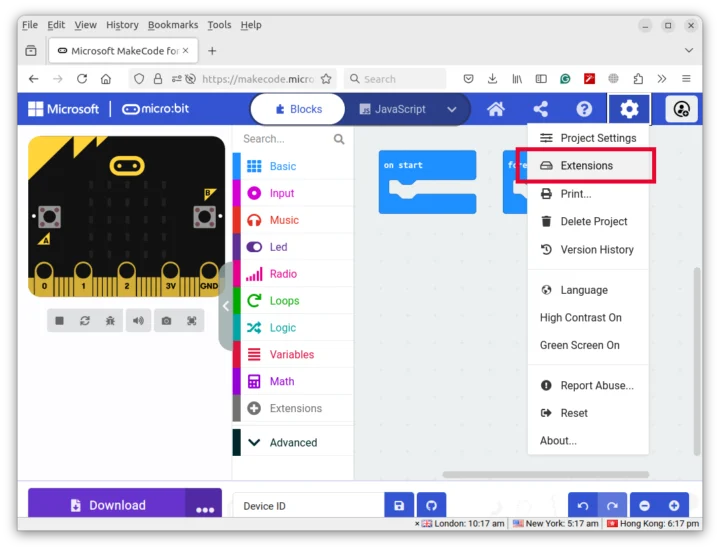
Before starting with the first tutorial, we should create a new project in Microsoft MakeCode, click on the Gear icon, and select Extensions.
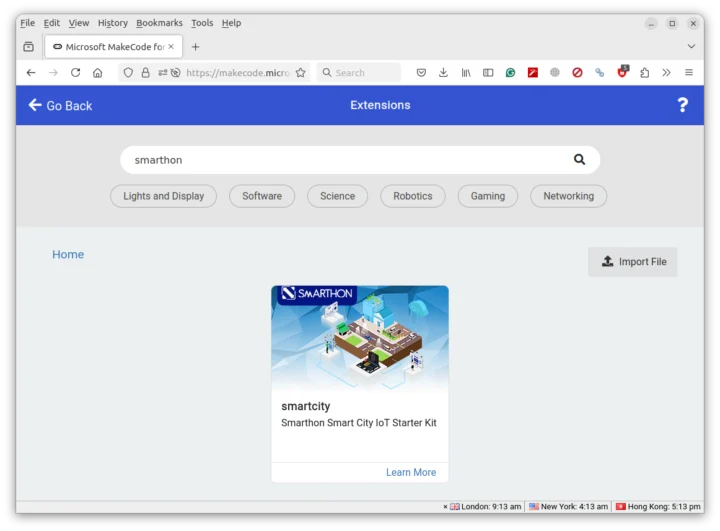
From there, we can search for smarthon, and install the smartcity extension.
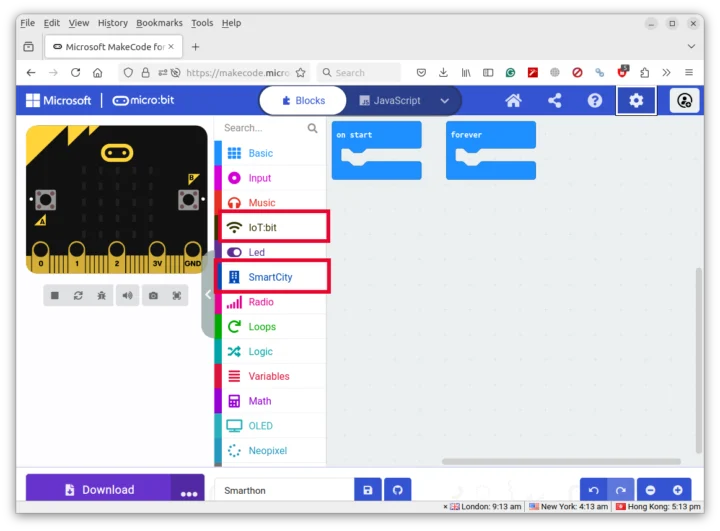
Once done, we’ll find new sections called IoT:bit and SmartCity with additional blocks for programming.
Automated Smart Playground Lamp demo
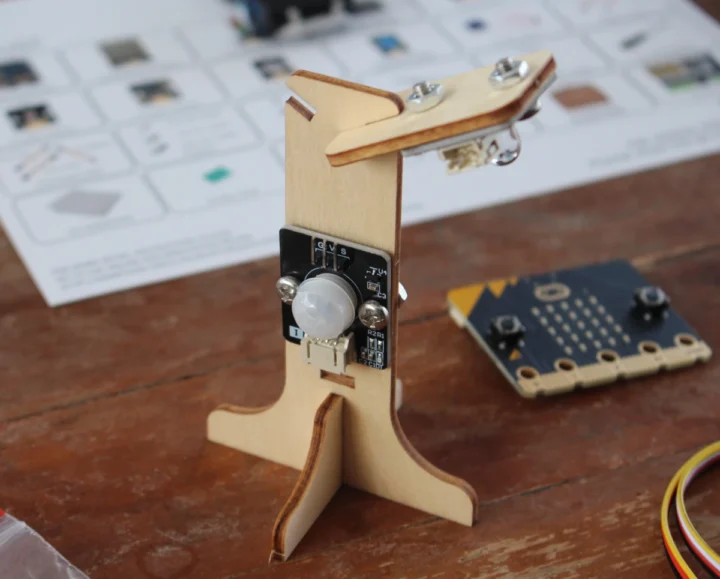
The first lesson is called “Automated Smart Playground Lamp”. It’s basically a street light (white LED module) activated when motion is detected through a PIR motion module. The first step is to assemble the kit following the instructions provided by the company.
The wooden parts are properly marked and easy to take out, but I wish there were some sticks on the bolts and nuts bags since not everybody may know what an “M4 100mm screw” looks like, and it would make things easier.
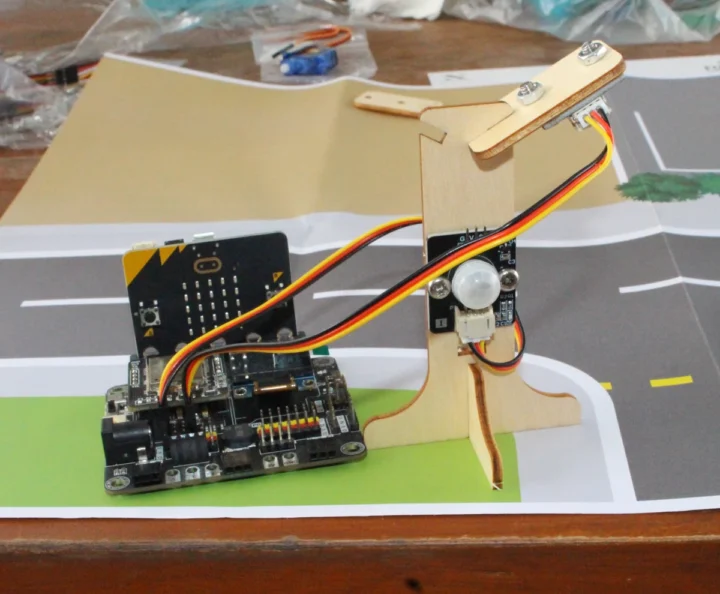
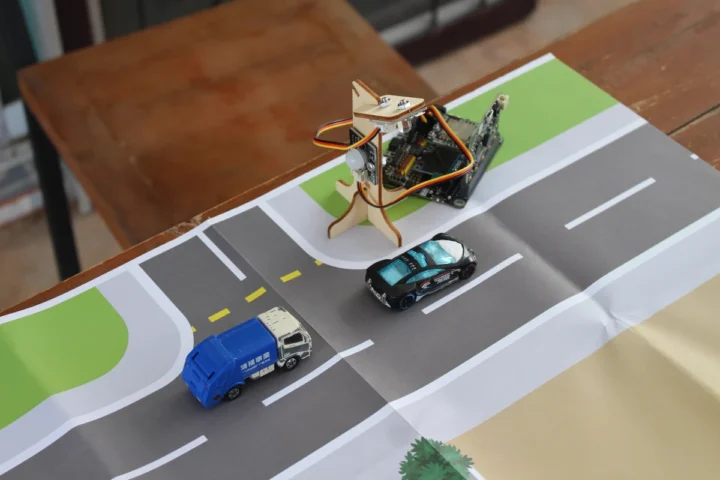
The next step is to wire the kit by adding cables as instructed. I borrowed some car toys and once placed on the map it looks nice.
Students can be decided to create blocks through visual programming themselves, or simply open the project on MakeCode. We’ll need to click on edit before downloading the hex file (firmware).
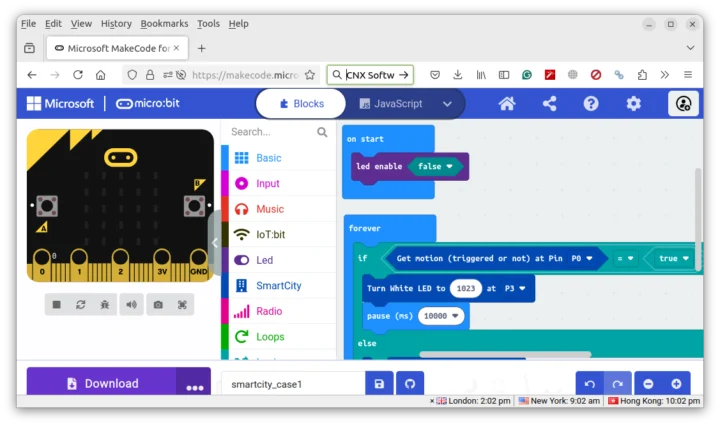
It’s also possible to check out the Javascript code by clicking on the JavaScript tab:
|
1 2 3 4 5 6 7 8 9 |
led.enable(false) basic.forever(function () { if (SmartCity.read_motion_sensor(AnalogPin.P0) == true) { SmartCity.turn_white_led(1023, AnalogPin.P3) basic.pause(10000) } else { SmartCity.turn_white_led(0, AnalogPin.P3) } }) |
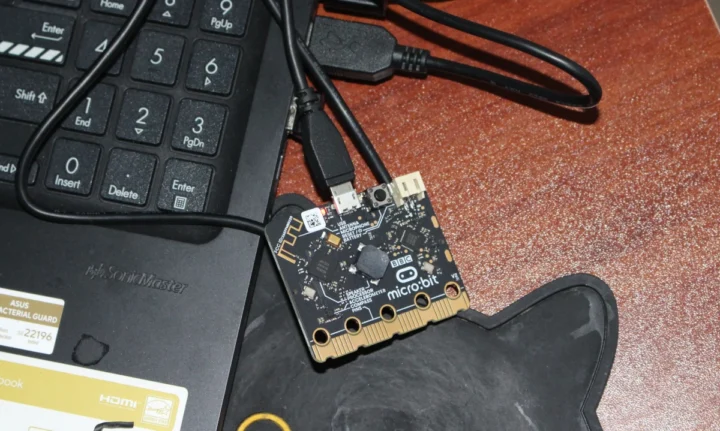
At this point, we’ll need to connect the BBC Micro:bit to our computer through the provided USB-A to micro USB cable.
We can copy the microbit_smartcity_case1.hex firmware file we’ve just downloaded to the MICROBIT drive. If you’ve ever used a Raspberry Pi Pico, the procedure will be familiar.
 Waiting until the file is fully copied to the drive and the board restarts before disconnecting it. If the procedure is slow, check the drive after the update and if there’s a FAIL.TXT file, you should start again. It happened to me twice during the review.
The white LED will turn on for 10 seconds when motion is detected. Here’s a short video demo.
Garbage disposal system demo
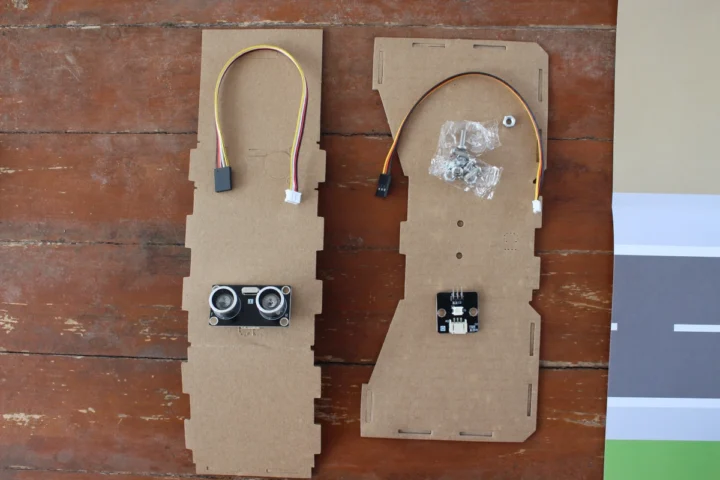
SMARTHON rates its lessons with one to five stars depending on the difficulty. The first lesson above was rated one start, so let’s now try a 2-star lesson with the garbage disposal system. We’ll need an ultrasonic sensor, an RGB LED module, some cables, nuts and bolts, and carboards to build the dumpster.
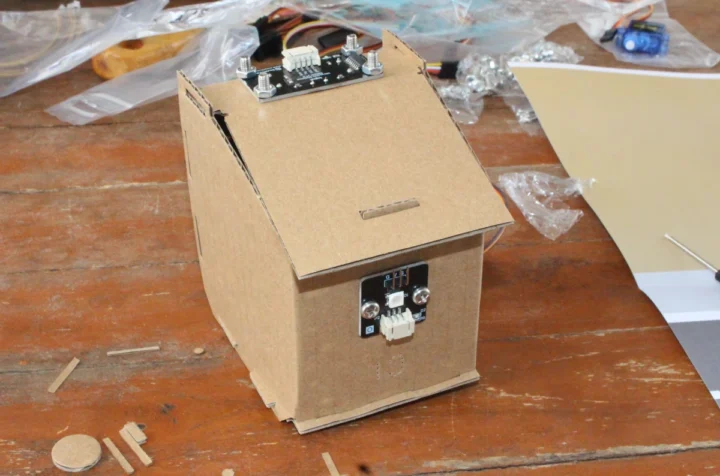
The instructions are again fairly easy to follow. Cardboard models are probably fine for a kit used at home, but I would worry about durability if the kit was used in a classroom.
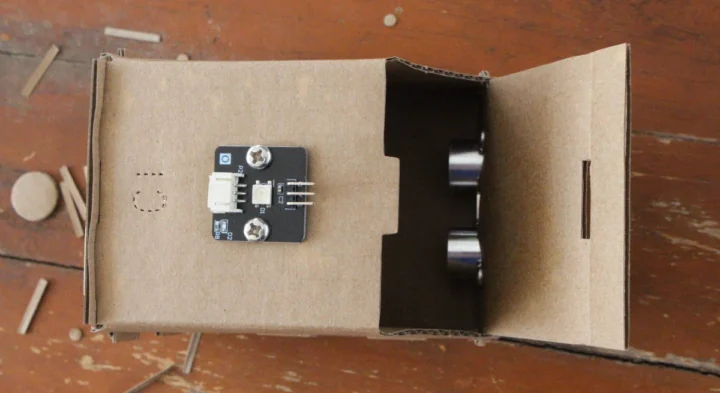
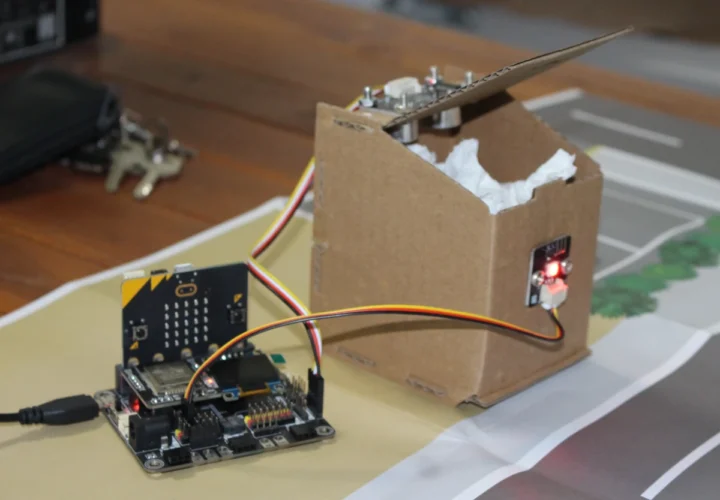
We can see the ultrasonic sensor points inside the dumpster and the RGB module will indicate whether the dumpster is full (red color) or not (green color).
Wiring is similar to the previous project, except the ultrasonic sensor requires a 4-wire cable.
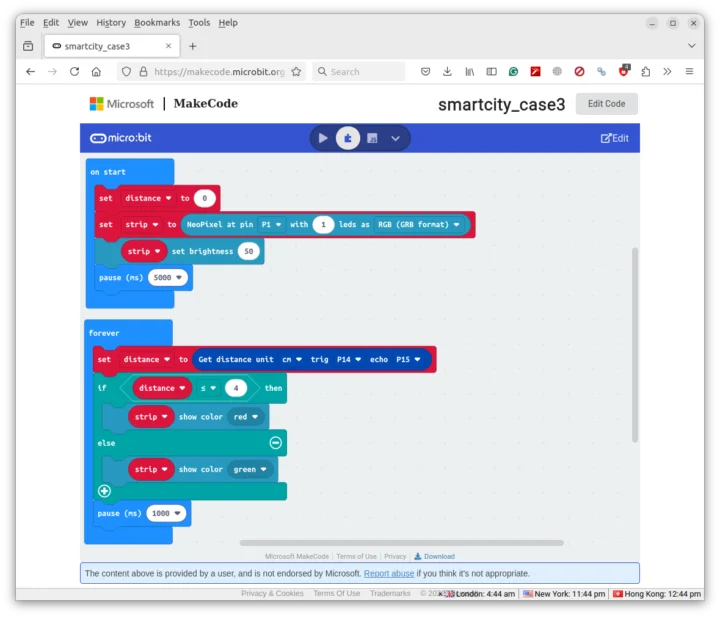
We can create the code from scratch ourselves or open the project directly.
The RGB LED will turn on when the distance is less than 4cm. I added some tissue paper, and the RGB LED turned red.
But it does not actually work as expected since the RGB LED blinks between red and green. I don’t see any issue with the code, so I’m guessing the sensor sends some zero values between each sample for whatever reason. See the short video below.
Complex scenario (lesson 17): Transport safety and security
We’ve just gone through 1-star and 2-star lessons for beginners, but let’s now jump to a more complex 5-star lesson: “Scenario 3: transport safety and security” to see what students will master at the end of the course. Note that this lesson only has one page in the PDF and the details can only be found in the online documentation (27 pages printed). It’s fairly long because each code block is clearly explained line-by-line.
The “scenario 3” tutorial combines the components and lessons learned from five other lessons:
- Car speed monitoring
- Automated Traffic Light
- Smart Street Light
- Smart defense system
- Smart House door control
Students will connect the board to WiFi, learn how to set up IFTTT applets and create their own mobile app with MIT App Inventor 2.
The first step is to assemble the cardboard and wooden parts and attach the sensors and servo for the five lessons listed above.
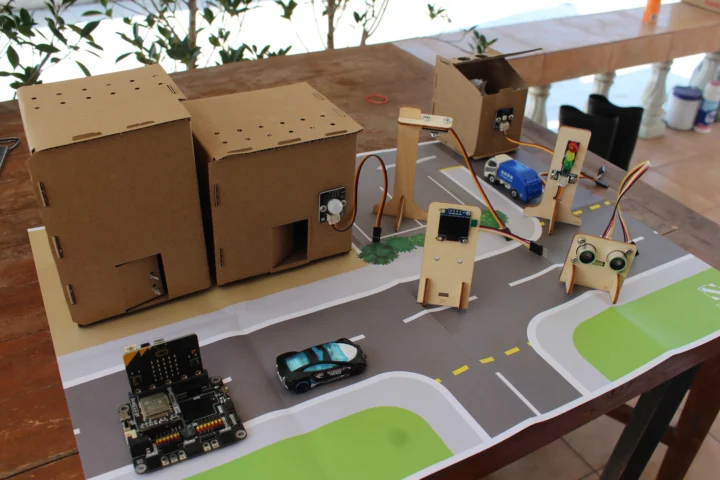
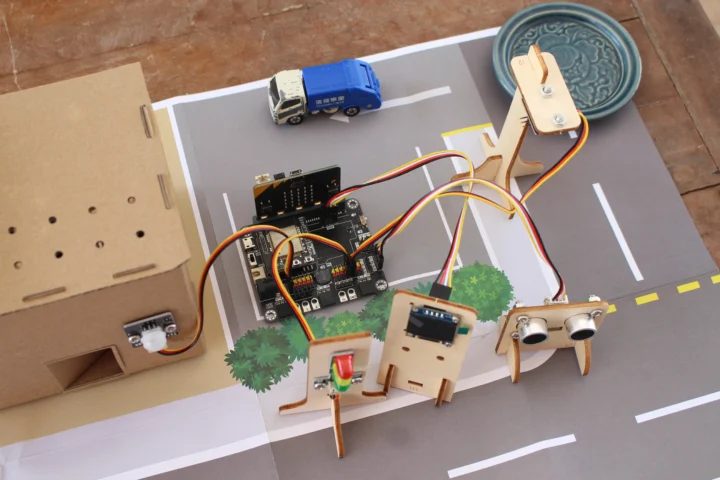
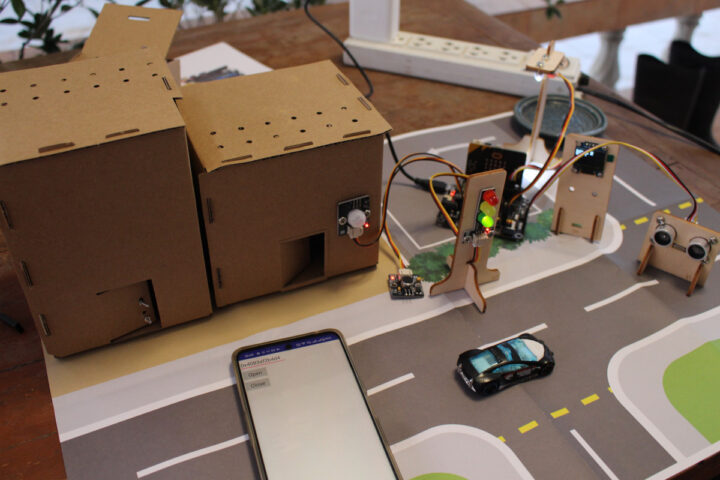
We’ve got a cardboard house with a door controlled by a servo (attached through a paper clip), another house with a PIR motion sensor, a street light, a traffic light, an ultrasonic sensor, and an OLED display to show speed, traffic status, etc… We can now wire all those to the IoT:bit board.
I could not wire the servo of the house on the left since the cable is too short [Update: I missed that there are expansion cables). We can do that by moving one of the houses on the parking lot… Not a big issue although not ideal. Getting the balsa wood models to stand straight was a struggle since the models are light and the cables are relatively rigid and heavy. I had to twist the cables quite a lot. It would be good to either have some weight added to the models or use more flexible wires, although the kit includes Blu tacks to address this issue. Note that one of the tutorials (automated traffic light) requires additional IoT:bit and micro:bit boards since there’s a receiver and a transmitter, so I had to skip that one [Update: In Scenario 3, the receiver and transmitter are not used like in Lesson 8, and the light sensor and traffic light are both directly connected to the IoT:bit board).
The full program is quite long and you’ll find it on MakeCode like the others. The code needs to be modified for this project since we need to enter the ssid and password for WiFi.
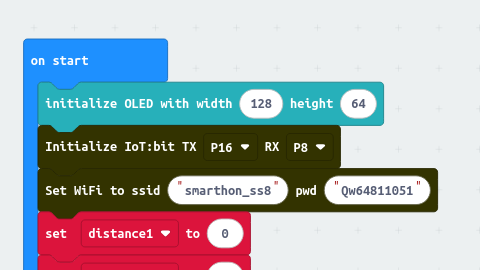
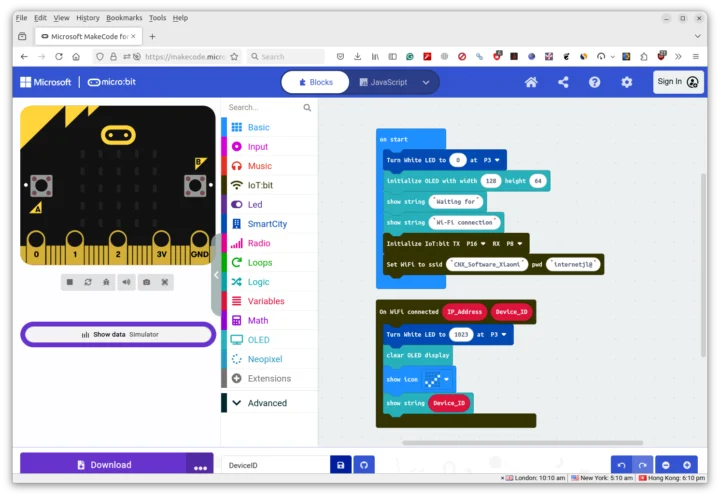
But we’ll need to load another program first since we need the Device ID for IFTTT and the Android app we’re about to build. The program is documented in Chapter 4, getting device ID section of the wiki for the IoT:bit. Since I had some issues running the program, I added the street light as a debugging LED, and the Device ID program looks as follows.
One of the silly things I did was to connect the Micro:bit in the wrong direction. Make sure the display matrix is always in front. It eventually worked and I could get a WiFi connection and the Device ID.
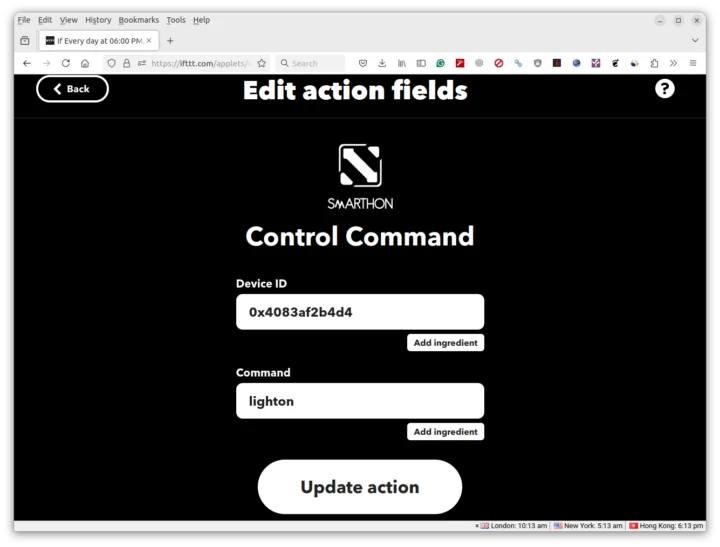
We’re not done yet, as we need to configure some IFTTT applets. This starts by adding a Date & Time-triggered applet that turns on the smart street light at 6 pm by sending a control command. I won’t go into the full details here, but basically users have to follow the IoT:bit cloud control tutorial. After setting a Date & Time trigger, you’ll need to add an Action by searching for Smarthon services, and selecting “Smarthon IoT(micro:bit)”.
Once it’s done enter the Device ID you’ve gotten from the OLED, and add the lighton command.
 The tutorial also explains how to configure another IFTTT applet for the house with the PIR motion sensor to receive a web request when motion is detected and send an email.
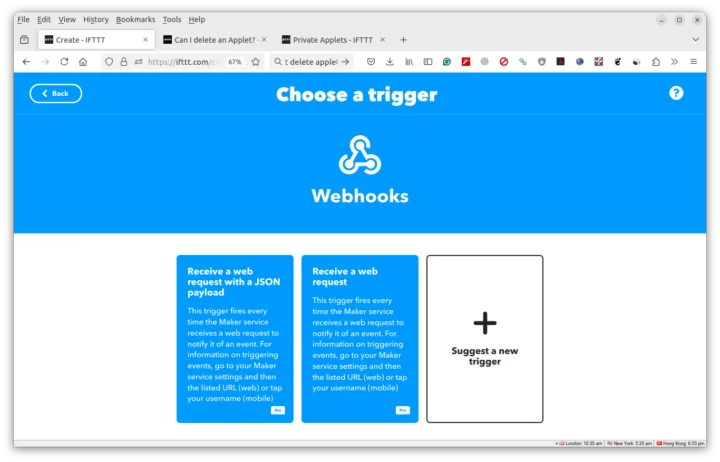
You’ll need to add a Webhooks trigger to “Receive a web request”…
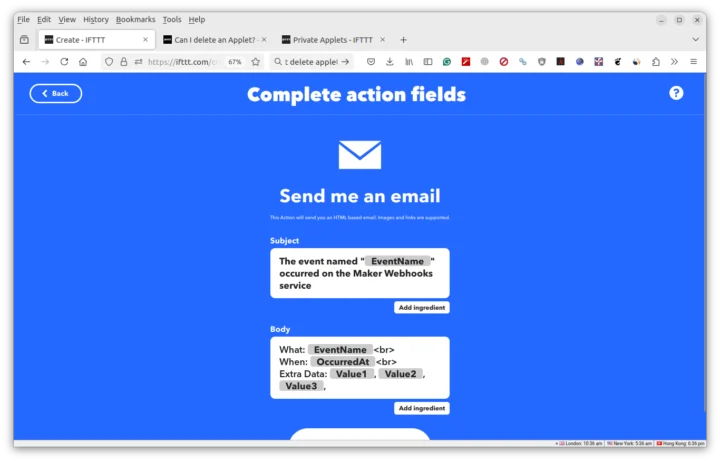
… and configure the action to send an email.
That requires a Pro IFTTT account for $12.50 per month since both are Pro features. The end result would be that you receive an email each time a motion is detected.
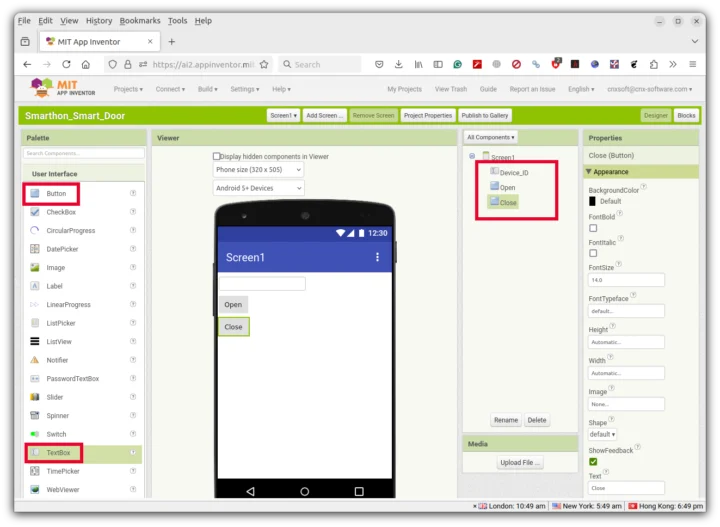
We’re still not done since we’ll now “develop” a mobile application using MIT App Inventor 2. After registering and creating a new project, we can add a text box for the Device ID and Open and Close buttons to control the door.
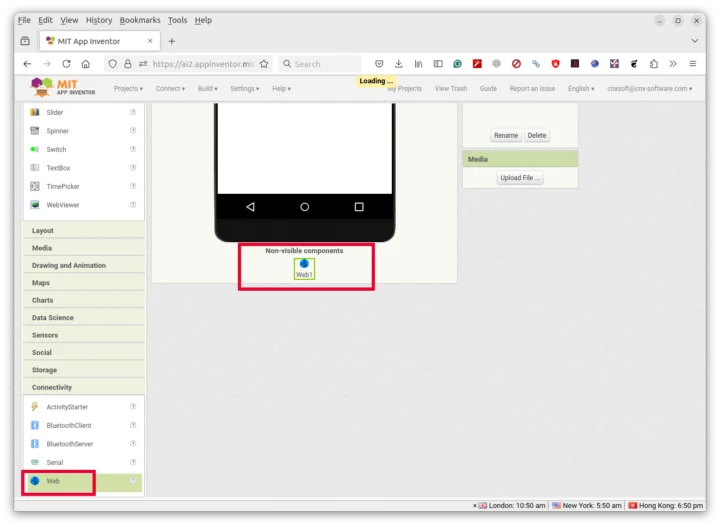
We also need to drag and drop the non-visible Web components from the Connectivity section.
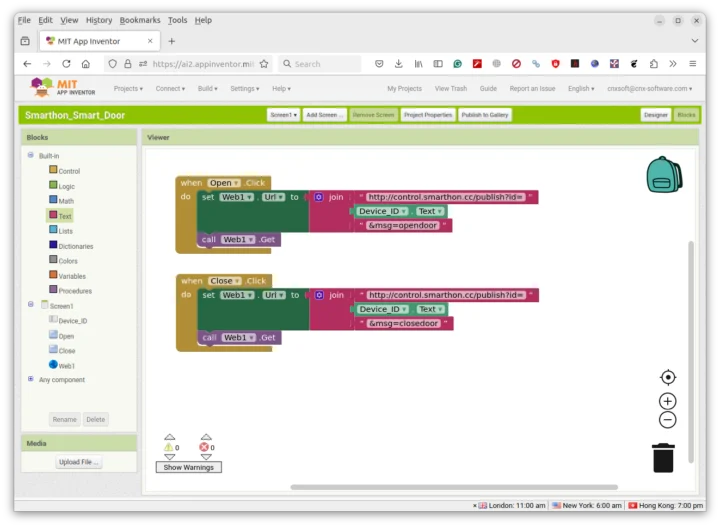
Time to switch to the Blocks view to add code that will send an HTTP command to either open or close the door using the Device ID inputted into the text box.
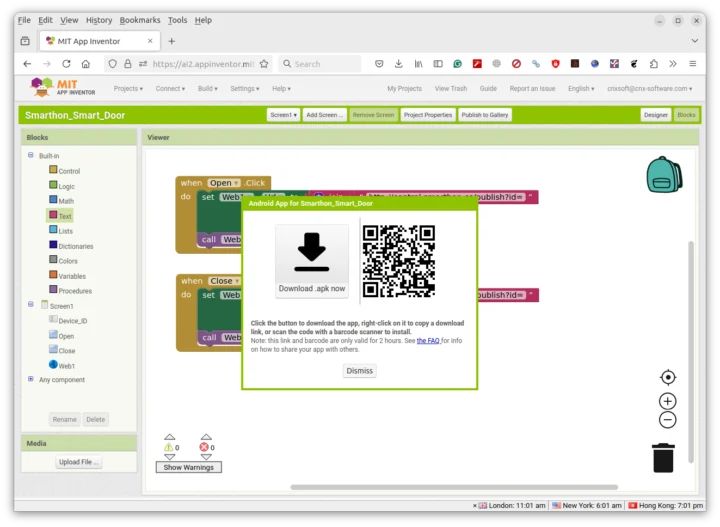
We can now go to the top menu and click on Build->Android App (.apk) to build the mobile app. It can be download to the computer, or you can scan the QR code to conveniently download the app directly into your Android smartphone.
I could install the Smarthon_Smart_City app without issues, although Android will ask us to scan it first.
We can finally copy the firmware to the BBC Micro:bit and try some of the demos.
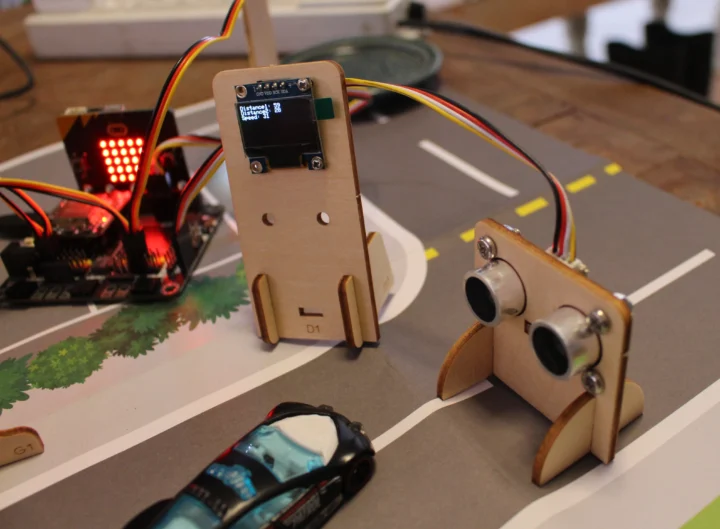
First, I flashed the firmware at around 17:30, and by 18:00 the street light automatically turned on. So the IFTTT applet works fine. The OLED display will also check the speed of the car and traffic jam status (not implemented here since it requires another Micro:bit). If I move the car with my hand, the display will indeed report the speed (in mm/s?) after two distance measurements spaced by 500ms.
I also tried the mobile to open and close the door as you can see in the video below. Note the servo horn needs to be adjusted properly the first time using the app for this to work properly.
Conclusion
The SMARTHON Smart City IoT Starter Kit for BBC Micro:bit is a great and fun-to-use educational kit that will provide many hours of learning. Students will start easy with the equivalent of a blinking LED in the “automated smart playground lamp” lessons, and end up controlling electronics modules through IFTTT, ThingSpeak, and your own mobile app. You’ll also learn visual programming and potentially JavaScript in the process.
Some potential improvements I can see include adding stickers with descriptions on the screw packs to make assembly easier, finding a way to have the balsa models stand straight more easily (either some metal weight or using flexible cables) [Update: the company pointed out to me that there are five Blu tacks in the accessory pack that can be used for this purpose], and fixing a few mistakes/inconsistency in the documentation here and there. I also have some concerns with the durability of the cardboard models over the years when used in a classroom. The company does offer a “Smart City Refill Material Pack”, so educators can purchase a new pack with a city model set, a city map, an accessory pack, and screw packs when needed.
I’d like to thank SMARTHON for sending the Smart City IoT Starter Kit for BBC Micro:bit for review along with a Micro:bit board. The full kit tested here sells for $108.90. You’ll be able to complete 95% of the tutorials with it, but if you want to complete the full course, you’ll also need an IFTTT subscription ($12.50 per mont, but the company is working on an IFTTT app so it will not be needed in the future) and additional IoT:bit expansion board ($30.70) and BBC Micro:bit board ($18.49). Mobile application development through the MIT App Inventor 2 program also requires an Android phone or tablet. iOS is supported via the App Inventor iOS Companion app but the process looks more complicated.

Jean-Luc started CNX Software in 2010 as a part-time endeavor, before quitting his job as a software engineering manager, and starting to write daily news, and reviews full time later in 2011.
Support CNX Software! Donate via cryptocurrencies, become a Patron on Patreon, or purchase goods on Amazon or Aliexpress


