ACEBOTT QE007 ESP32-based Smart Home Starter Kit is a STEAM (Science, Technology, Engineering, Arts, and Maths) education platform that involves story reading, assembling a wooden house with various electronics sensors wired to an ESP32 board, and learning about electronics concepts (such as voltage and current) and coding with the Arduino IDE through an 18 lesson course.
ACEBOTT has various STEAM education kits, and the company sent us the QE007 “IoT Smart Home Starter Kit” for evaluation and review. So I’ll go through an unboxing, report my experience with the assembly process, and the Arduino tutorials by going through some of the eighteen lessons.
ACEBOTT QE007 unboxing
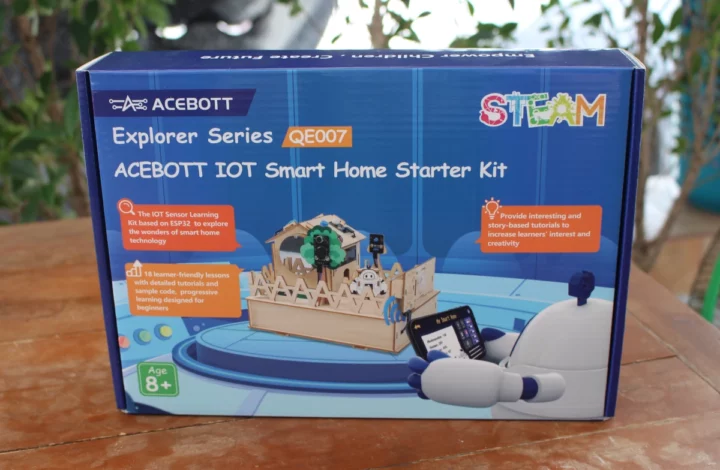
The kit comes in a nice-looking retail that reads “ACEBOTT Explorer Series QE007” and “ACEBOTT IOT Smart Home Started Kit”. The front of the package also highlights its a STEAM education kit designed for 8+ years old kids.
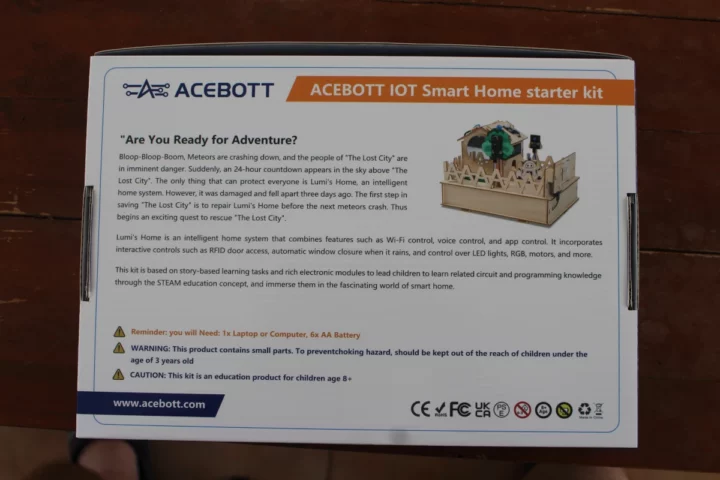
The bottom side gives the backstory and which tasks you’ll be expected to complete in order to save the world! The company also mentions you’ll need six AA batteries, but that’s optional since we can power the system with a 9V or 12V power supply.
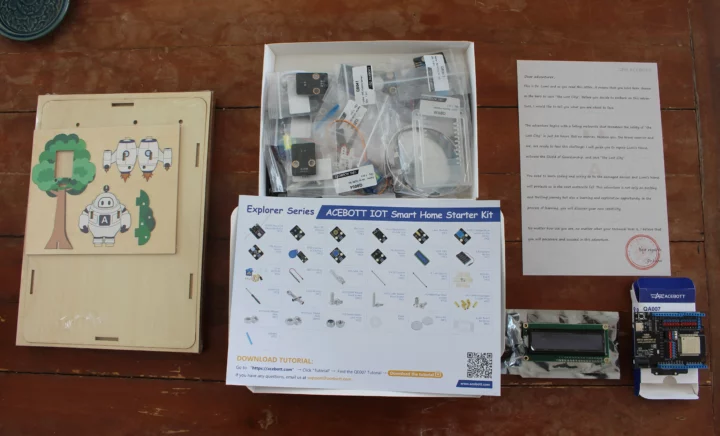
Everything is neatly packed inside with a box with the ES32 Arduino board, an LCD display, basswood cutouts, a white box with all sensor modules, screws, standoffs, and other accessories, and a letter from “Dr. Lumi”.
What’s missing is documentation. That’s because all documentation is available online and you can read it on your computer or print it out.
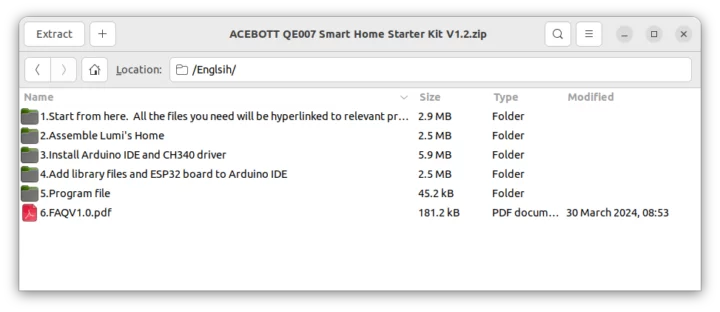
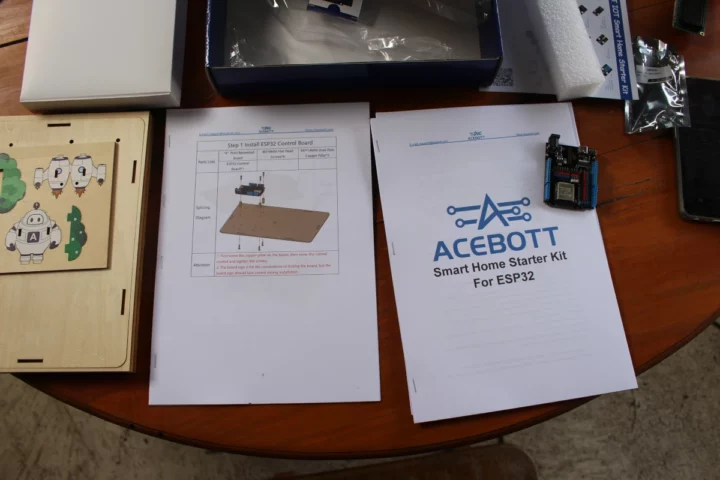
The documentation is available in English, Czech, and Russian right now. I printed the “Start from here” and “Assemble Lumi’s Home” since I don’t like reading long instructions on screens, I prefer kits with a printed manual. But that’s just a matter of personal preference.
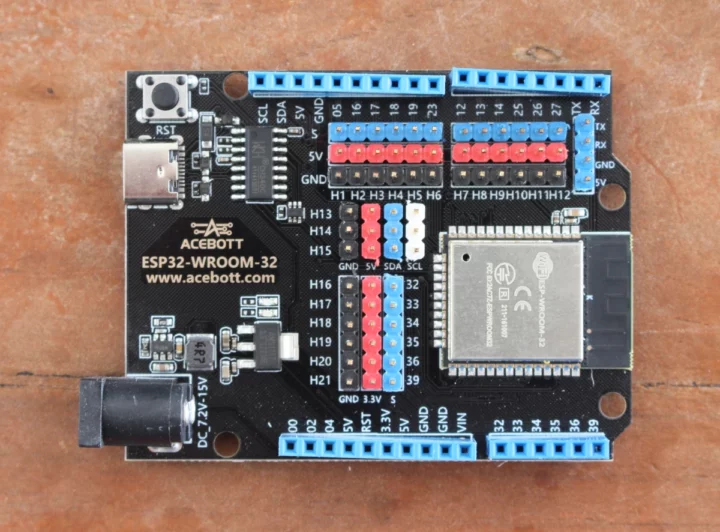
The ACEBOTT ESP32-WROOM-32 is a typically ESP32 WiFi and BLE board with Arduino UNO form factor that takes 7.2V to 15V DC input from a DC jack, and a 5V USB port for programming (and power, but it may be enough for some sensors). The Arduino UNO headers have not been soldered in the best way (especially the header with pin 12 to Rx) on my sample, but it won’t matter with this kit since those are not used and all sensors are connected to the 3-pin and 4-pin headers in the middle of the board.
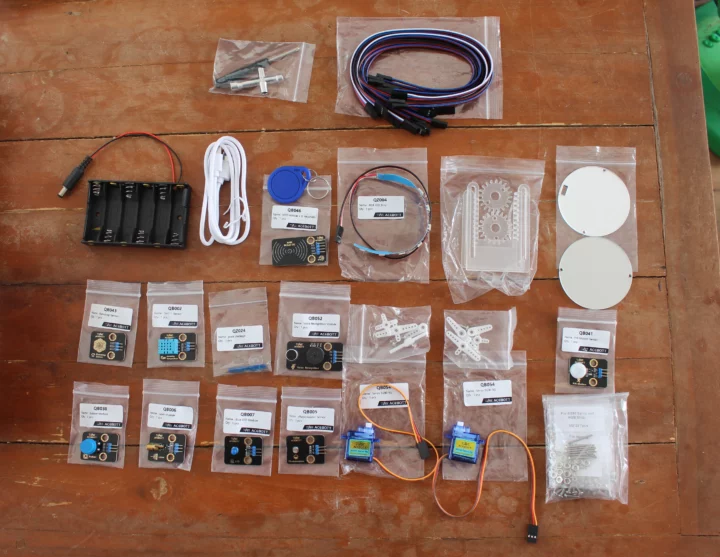
It took out all items from the white box and all are properly marked for easy installation. Those include a 6AA battery holder, jumper cables, sensor modules for light, temperature, rain detection, etc…, two servo motors, a button, an RFID kit, and more.
Assembly of ACEBOTT QE007 Smart Home Starter Kit for ESP32
Now that we have opened the box and printed the manual, we can get started. It went straightaway to the assembly guide. But you may want to start reading the “ACEBOTT Smart Home Started Kit for ESP32” first with your child(ren) since it explains the background of the story with Dr. Lumi having traveled in time due to a mishap from his cat and now having to save the world by fixing the Smart Home which will magically restore the protective shield of the city and prevent an oncoming meteor from destroying everything. So serious stuff 🙂 You’ll now be acting as Dr. Luni (or his assistant) to complete various tasks to save everyone… The English grammar is not 100% perfect, but not too bad. You can download the document beforehand and read it if that’s important. The first task is to repair Dr Lumi’s house, meaning assembling the kit…
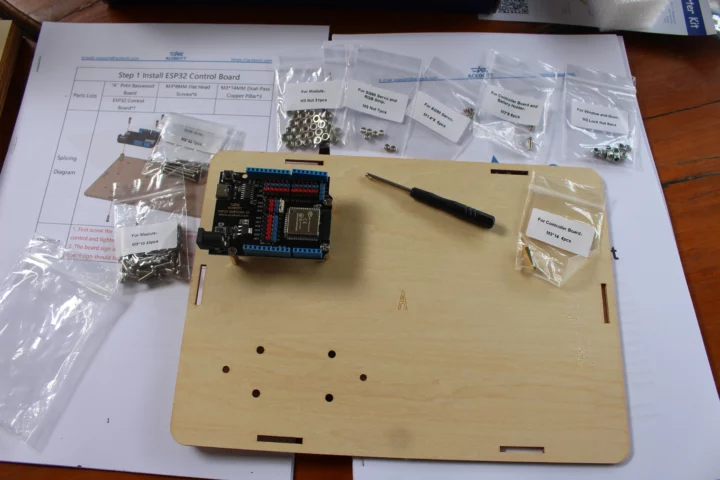
It took me around 2 hours to complete assembly, so you may want to reserve 3 to 4 hours for that part if you do that with children. No tools are needed except for the screwdriver and hex key included in the kit. Instructions are very easy to follow and we’ll start by installing the ESP32 board to the “A” basswood board. All bags with screws, nuts, and standoffs are clearly marked, and there are some spare parts, which is always appreciated. For example, if the kit requires four XYZ screws, they’ll have provided five of those. All items are neatly precut and the parts all came off easily.
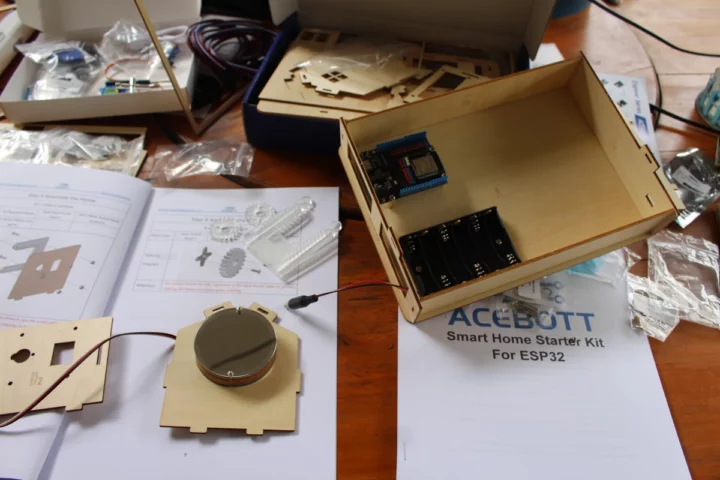
The assembly manual is 28 pages long, so I won’t show all the steps here, and report some of the steps. After having prepared the base with the ESP32 board, battery holder, and walls, we’ll assemble the walls of the houses with accessories such as the Time Mirror with an actual mirror and an RGB LED strip inside. That part went mostly smoothly, except I had to move the strip two or three times inside the ring to make sure the cable was in the right position. It’s also important to always read the text in red as you’ll avoid many potential mistakes.
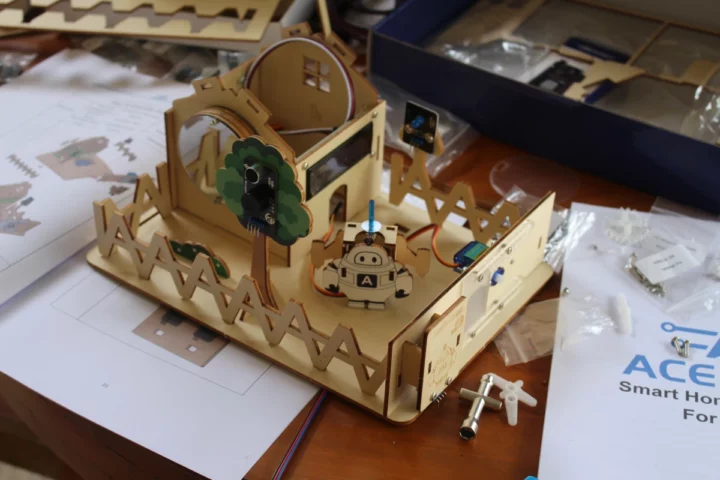
Once the three walls are fitted with their respective modules (Time mirror, LCD, window with servo) we can install some jumper cables by making sure the black wire is also connected to the “G” pin (Ground), and then insert the walls on another basswood board.
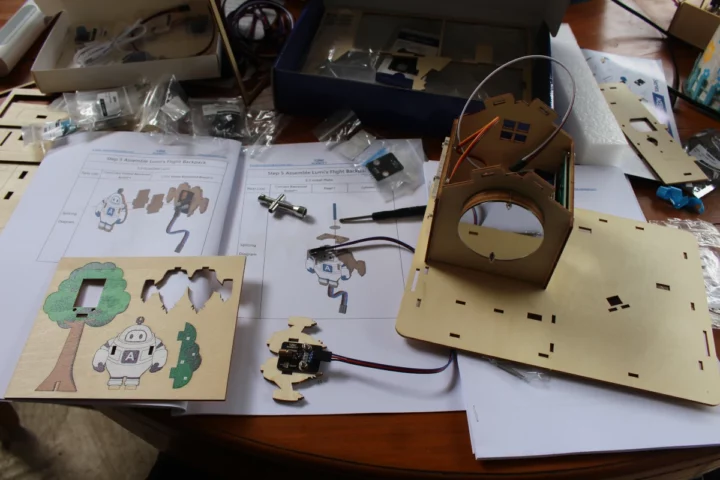
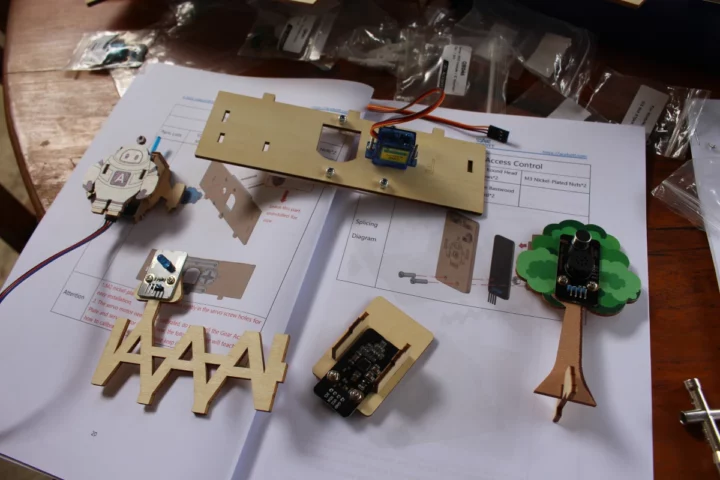
We can start assembling more accessories such as a voice module fitted to a tree, a laser module (and by that I mean Flight backpack) attached to Dr. Lumi’s space suit, some street lighting, and so on.
Once done, it’s time to install all those accessories and put up the fences. One of these features an RFID sensor for access and an automatic door controller by the second servo. Note that the window on the house and door on the fence must be able to slide, so do not tighten the lock nuts too hard.
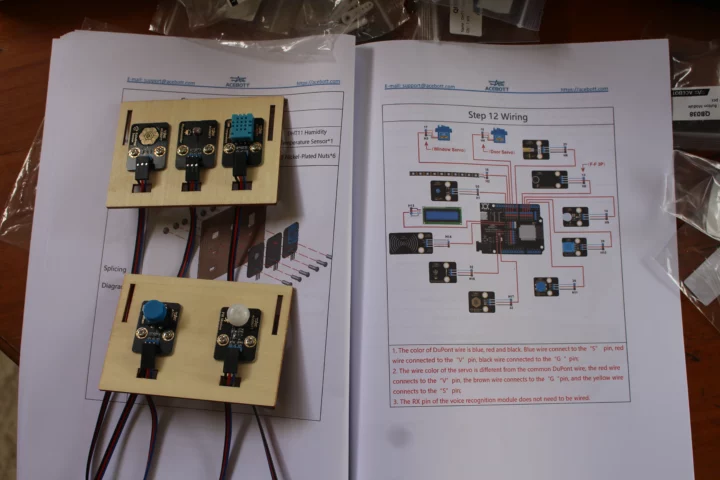
We don’t have a roof, so let’s work on that. The roof will have five modules namely a raindrop sensor, a light sensing, a DHT11 temperature and humidity sensor, a PIR motion sensor, and a button module.
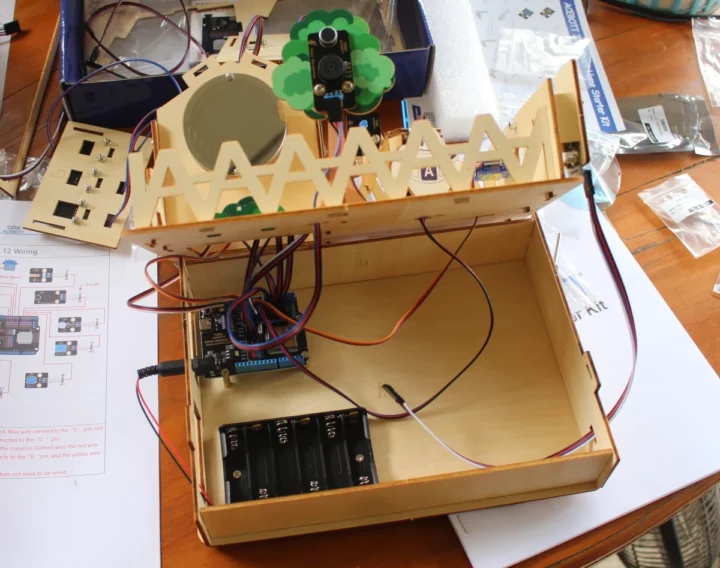
The assembly is almost complete, and it’s time to wire the house. You’ll need to pay attention here as wrong connections could potentially damage the board, so if you let your kid/student do that part by himself/herself, you’ll want to double-check before applying power. The basswood boards all have holes designed to install the jumper cables. The voice module on the three can be confusing, since it has four pins, but only requires a 3-pin cable as the Rx pin is not used.
You’ll want to install six AA batteries before completing the assembly. I didn’t do it since I’ll be powering the kit with a 9V power adapter instead. You might be able to use a 5V USB-C adapter instead, but the company says the power may not be enough for some tutorials.
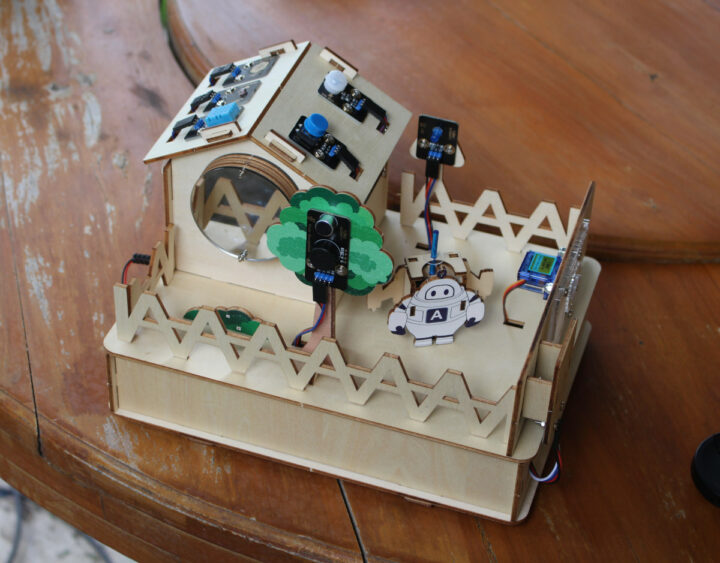
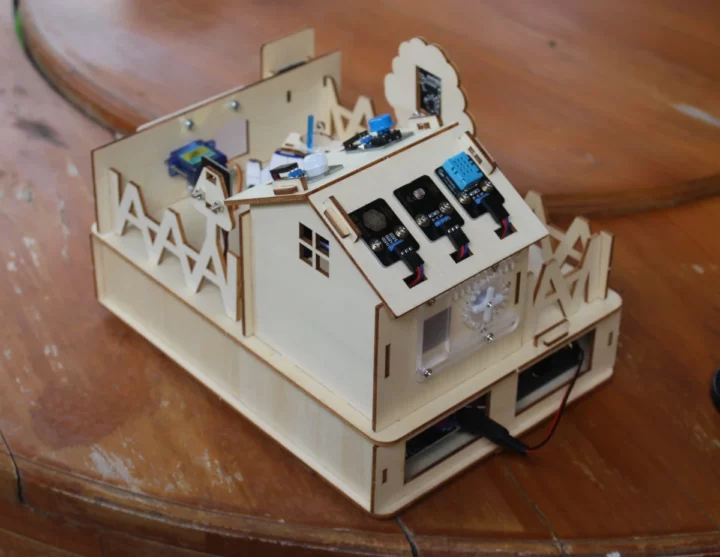
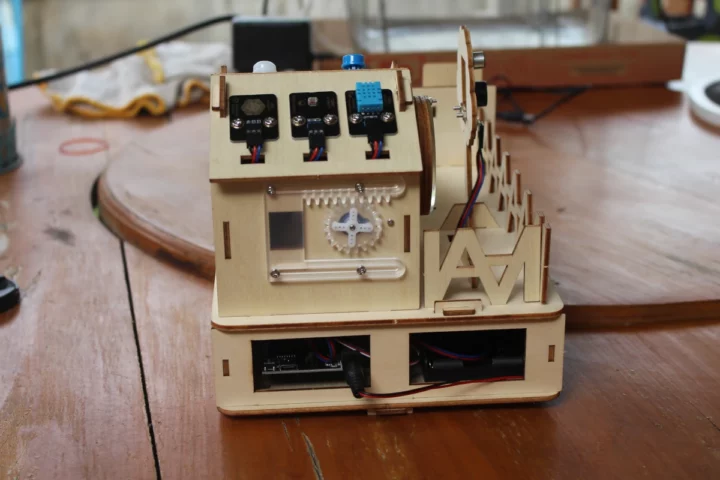
That’s the final result. It looks pretty neat if you ask me.
Note that I’ve installed the servo gears to take photos, but this should only be done after calibration the first time an Arduino sketch with a servo is used.
The photo above shows the battery holder powering the ESP32 board, but since I won’t be using batteries, I unplugged it and connected a 9V power supply for a quick test and see whether any smoke comes out ;).
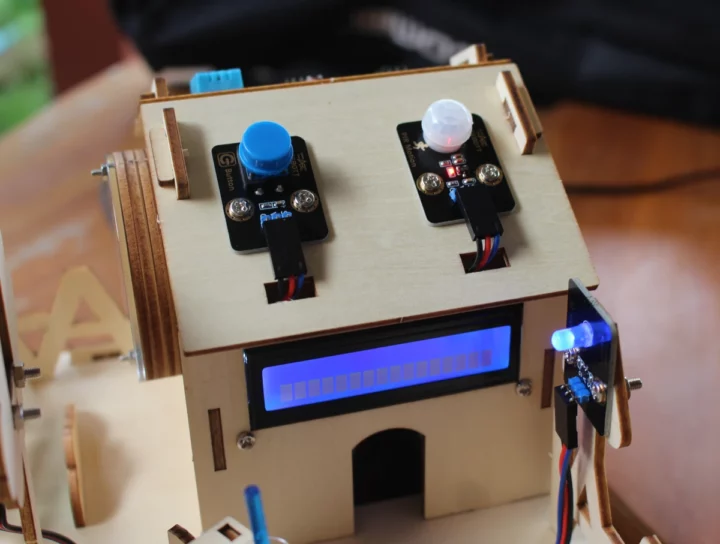
The blue light (street light) turns on and we can hear a (low volume) voice through the voice module that says “Hi, I am Lumi, welcome to my smart home”.
The PIR motion sensor is active and a red LED will light up if motion is detected, plus the display shows a row of rectangles. The latter should show on the first line, so I installed the display wrong, and I had to disassemble the roof to rotate it by 180 degrees. Nevertheless, that looks like success to me, and it was fun to assemble.
Programming the Smart Home Kit with the Arduino IDE
ACEBOOT provides 18 lessons for the kit:
- Repair the street lights to illuminate the yard
- Give the street lamp wisdom – Let the street lamp learn to breathe
- Save energy! Let’s add a switch to control the light
- Add eyes to the street lamp
- The Secret in the Light
- It’s dark and someone please light up
- Test whether the Shield works properly
- The secrets of the Time Mirror Light
- It’s starting to rain. Come in!
- The most important part of the Smart Home
- Make the temperature and humidity values visible
- The rain has stopped. Start repairing the Gate!
- The Guardian’s Shield has been launched
- Try something new
- A magical communication method–WIFI
- WIFI can also control doors and windows
- A new interactive control
- Leave a gift
I’ll test the first one (blinky sample), the Time Mirror Light, the laser demo, and “new interactive control” using an Android app connected over WiFi to control sensors, the door, the laser module, etc…
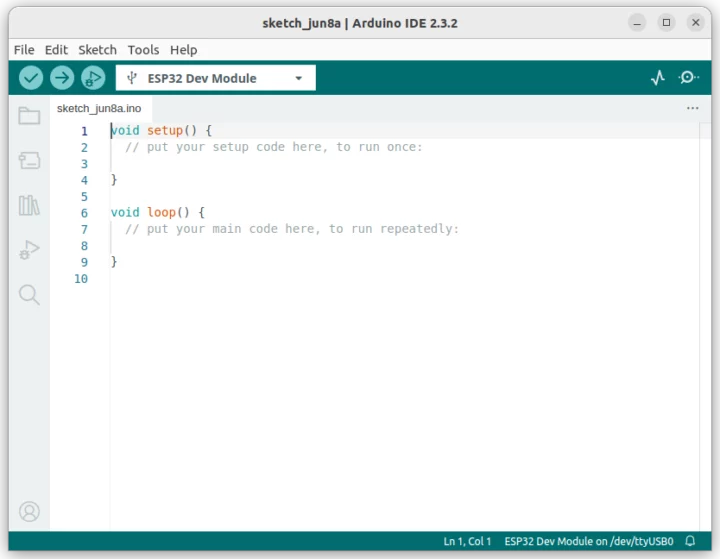
We’ll first need to install the Android IDE and ESP32 Arduino Core, then select ESP32 Dev Module, after having connected the board through its USB-C port, the COM port for the board, in my case /dev/ttyUSB0 as I’m testing the kit with Ubuntu 24.04.
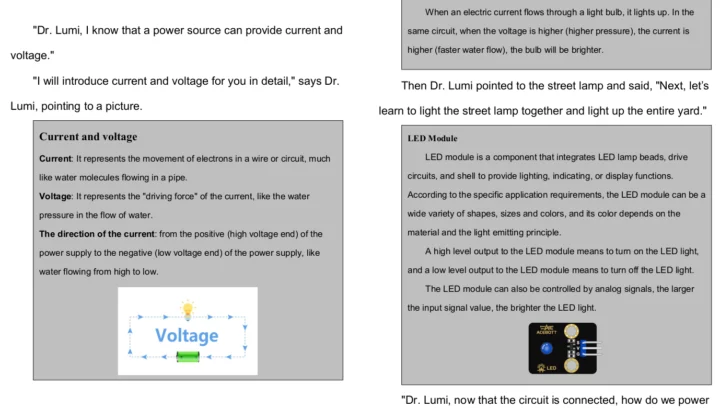
All lessons start with a story, in the case of lesson 1 we need to repair the street light, followed by an explanation of some basic concepts (current and voltage), a description of the hardware module (LED module), then one Arduino sketch, and instructions to load it to the board.
Here’s the code for the LED module which can be found in the documentation tarball with other Arduino sketches:
|
1 2 3 4 5 6 7 8 9 |
void setup() {// put your setup code here, to run once pinMode(5, OUTPUT);//set pin 5 as an output } void loop() {// put your main code here, to run repeatedly digitalWrite(5,HIGH);//let the light on delay(1000);//wait for one second digitalWrite(5,LOW);//let the light off delay(1000);//wait for one second } |
After we compile and upload the code to the board through the Arduino IDE the LED will flash every second.
The second demo program will test is the “Time Mirror Light”
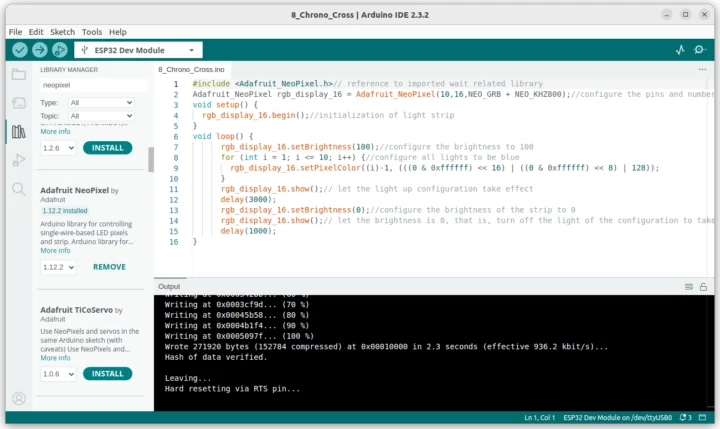
This sketch relies on the Adafruit Neopixel library which you can install through the library manager, or maybe better for future lessons, install a bunch of libraries as explained in folder 4 of the documentation tarball.
The result does indeed look like a time travel machine…
I wanted to test the laser module, so I loaded the code for lesson 7 “Test whether the Shield works properly”:
|
1 2 3 4 5 6 7 8 9 |
void setup() { pinMode(23, OUTPUT);// set pin 23 as output for the laser } void loop() { digitalWrite(23,HIGH);// turn on the laser by setting pin 23 to a high state delay(5000); digitalWrite(23,LOW);// turn off the laser by setting pin 23 to a low state delay(1000); } |
It’s really basic because it only turns on the laser for 5 seconds, then turns it off for one second in an infinite loop. But the demo itself is fun because you can rotate the transparent plastic ring that is carved with tiny motifs that show on the ceiling.
Here’s the video after turning off the room’s light.
There are lessons for each module, including one for the voice module where you can give voice commands to open/close the door or window and turn on/off the RGB LED strip, the LED, or laser. The last sample I will try is Lesson 17 as the kit will be used in the way an actual Smart Home that adults would use… We need to load an Android app to control the lights, monitor sensor, open door, etc… over WiFi.
I won’t include the full code here since it’s much longer than other samples with over 300 lines. The important part is to change the SSID and password to match your router settings before uploading the code to the board.
|
1 2 3 4 5 6 7 8 9 10 11 12 13 14 15 |
#include <Arduino.h> #include <WiFi.h> #include <ESPmDNS.h> #include <WiFiClient.h> String item = "0"; const char* ssid = "ACEBOTT";//change to your own WIFI name const char* password = "1234567"; // change the WIFI password to your own WiFiServer server(80); volatile int wifi_mark=0,wifi_time=0; volatile int RGB_RED=0,RGB_GREEN=0,RGB_BLUE=0; //WIFI configuration #include <Adafruit_NeoPixel.h> Adafruit_NeoPixel rgb_display_16 = Adafruit_NeoPixel(10,16,NEO_GRB + NEO_KHZ800); volatile int buttun; |
Since we’ve never run a servo sketch, the servos will calibrate. You should now open the window and door fully, and install the gears. Sadly, my window servo appeared to be stuck, so I could only test the door. It’s apparently not an uncommon issue, and I tried to open the servo to fix it but was unsuccessful.
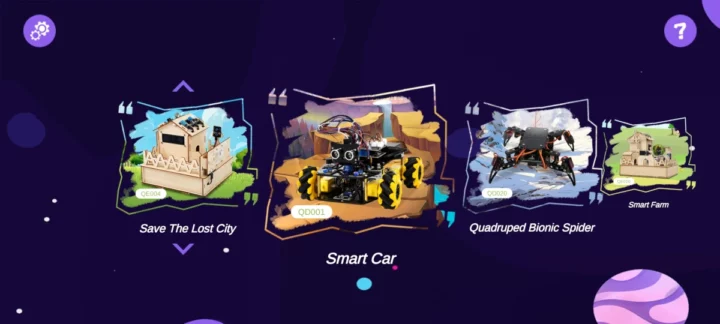
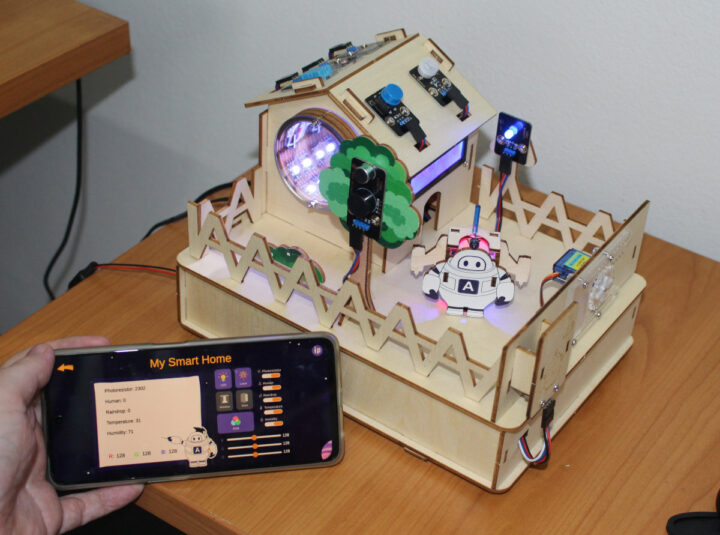
We can now download the ACEBOTT app from Google Play or the Apple Store and you’ll also find QR codes to the mobile apps on the ACEBOOT website. I installed the Android app, and we’re greeted with the following screen designed for all education kits from the company. There’s also background music in the background, which you can disable if you find it annoying.
I was confused at first as I could not find the QE004 kit. That’s because there are multiple “Save The Lost City” kits, and I had to scroll down to find the QE007 kit.
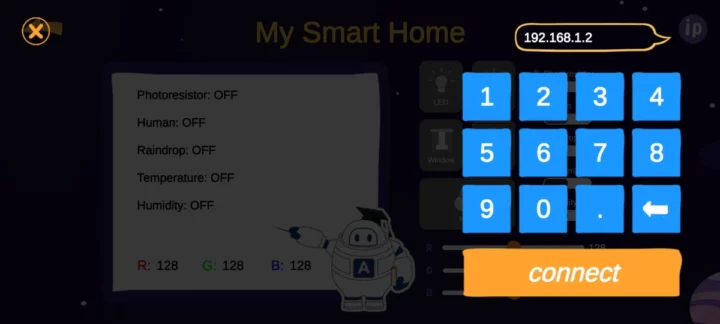
Once we enter the interface, we need to tap on the IP icon in the top right corner to enter the IP address of the ESP32 board. It can be found in the serial monitor, as somehow the LCD is not used, and shows some old values from a previous sketch (Temperature and Humidity data in my case).
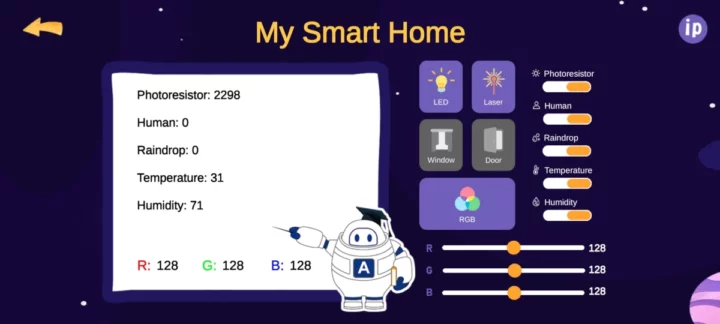
But once we press connect, you should be greeted by a “Connected” message, and then you can turn on the LED, the RGB strip in the Time Mirror, the laser, and all the roof sensors to read the value in the app. I could also close and open the door, although it’s not always operating smoothly. I further tighened the screws and nuts holding the servo, and it was better.
Watch the short demo below to see the ACEBOTT app and the QE007 Smart Home kit in action.
Conclusion
Overall I’m pretty happy with the ACEBOTT QE007 Smart Home Starter Kit as it is a fun STEAM education to play with thanks to an interesting background story making the user the hero to save the world, a rather challenging and entertaining assembly, and eighteen lessons from easy (blinky) up to more complex IoT solution (Android app for remote management) where student learn electronics theory and Arduino coding.
A few things that could be improved include the door/window mechanism as it takes time to fine-tune it to work reasonably well, the voice module’s volume is rather low, and the tutorials may benefit from editing by a translation company with native speakers. Don’t get me wrong, the textbook is perfectly understandable, and I’m only saying this considering it’s going to be read by children who are in the process of learning English.
The price is also right as the ACEBOTT QE007 kit selling for $67 plus shipping while offering many hours of learning experience. CNX Software readers can also get a 10% discount with the coupon code CNX10 valid until July 5, 2024.

Jean-Luc started CNX Software in 2010 as a part-time endeavor, before quitting his job as a software engineering manager, and starting to write daily news, and reviews full time later in 2011.
Support CNX Software! Donate via cryptocurrencies, become a Patron on Patreon, or purchase goods on Amazon or Aliexpress








Not many languages…
Based on the language selection, I assume they only translate the user manual and other documents when they have a distributor agreement or a larger order because it should cost a few thousand dollars per language for the translation.