e-con Systems See3CAM_24CUG a full HD color global shutter USB 3.1 Gen 1 camera based on an Onsemi AR0234CS CMOS image sensor capable of capturing moving scenes at up to 120 fps. This global shutter camera is especially useful for robotics and other applications that may require a high frame rate such as Automatic Number Plate Recognition (ANPR), Autonomous Mobile Robots (AMR), gesture recognition, drones, barcode scanners, factory automation, conveyor monitoring cameras, and traffic monitoring systems.
e-con Systems sent a See3CAM_24CUG USB global shutter camera sample to CNX Software for review. I’ll go through an unboxing before testing in Ubuntu with both an AMD Ryzen 7 2700U laptop and a Raspberry Pi 4 single board computer. It happens to be based on the same sensor as the e-CAM20_CURB camera for Raspberry Pi 4 that we reviewed last year.
See3CAM_24CUG specifications
- ON Semiconductor AR0234CS CMOS sensor with 1/2.6″ optical form-factor
- Global Shutter, Fixed focus (adjustable by user)
- Onboard ISP image sensor from ON Semiconductor
- Uncompressed UYVY streaming
- HD (1280 x 720) up to 120 fps over USB 3.2 Gen 1
- Full HD (1920 x 1080) up to 60 fps over USB 3.2 Gen 1
- 2.3 MP (1920 x 1200) up to 55 fps over USB 3.2 Gen 1
- MPJEG streaming
- HD (1280 x 720) up to 120 fps over USB 2.0 or 3.2 Gen 1 (Note: 10% vertical cropping)
- Full HD (1920 x 1080) up to 120 fps over USB 2.0 or 3.2 Gen 1 (Note: 10% vertical cropping)
- 2.3 MP (1920 x 1200) up to 120 fps over USB 2.0 or 3.2 Gen 1
- Holder – M12 (S-Mount)
- FOV – 128.2°(D), 104.6°(H), 61.6°(V) with the lens provided by e-con Systems
- Host interface – USB 3.1 Gen 1 Type-C female port; UVC compliant, no additional drivers needed
- Expansion – 6-pin GPIO connector (CN2) with I2C, external trigger input, strobe output, 5V, and GND
- Supply Voltage – 5V via USB-C
- Power Consumption – Max: 2.02W, Min: 0.86W
- Dimensions & Weight
- Without Lens: 30 x 30 x 26 mm | 20 grams
- Without Lens + enclosure: 35.3 x 35.3 x 29 mm | 51 grams
- Lense weight – 6 grams
- Temperature Range – -30°C to 70°C without enclosure; 0°C to 50°C with enclosure
- Compliance – FCC, RoHS
The external trigger is used for synchronizing multiple cameras, for example, for stereo vision applications. e-Con Systems provides support for Windows and Linux by default, but Android can also be supported through the Webeecam SDK, and Mac OS support can be done upon request. As we’ll see below 64-bit Arm is also supported in Ubuntu.
See3CAM_24CUG unboxing
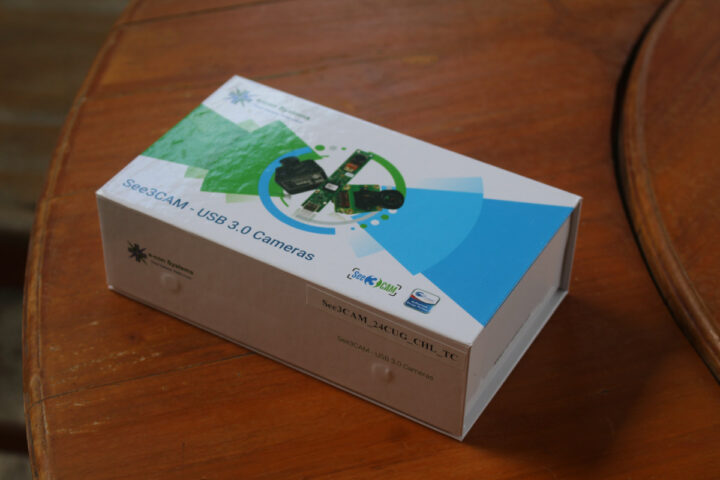
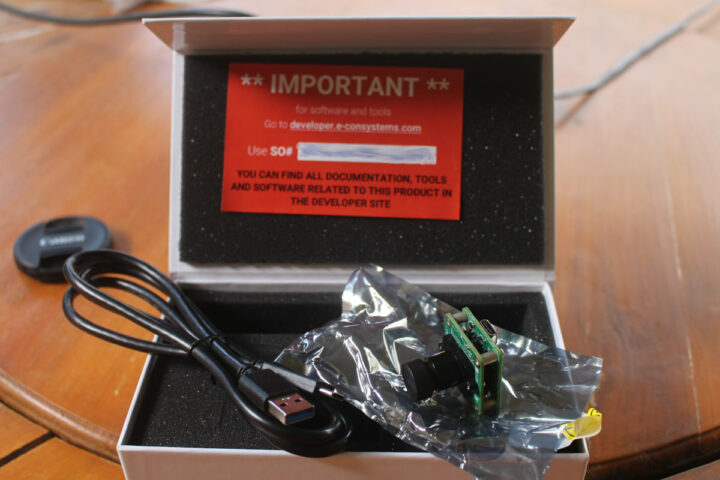
The camera came in the same package design as the one we received last year, and the company provides a serial number to access documentation and software tools.
The kit comes with the See3CAM_24CUG USB camera and a USB to USB-C cable.
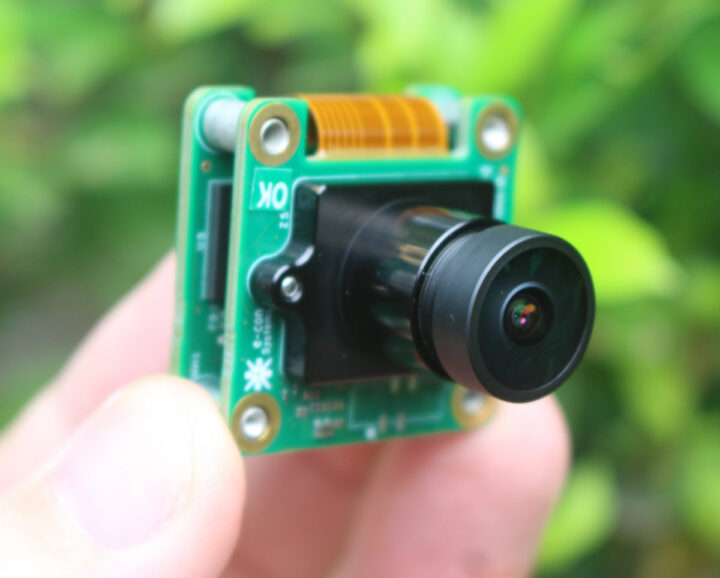
The camera lens allows for manual focus adjustment.
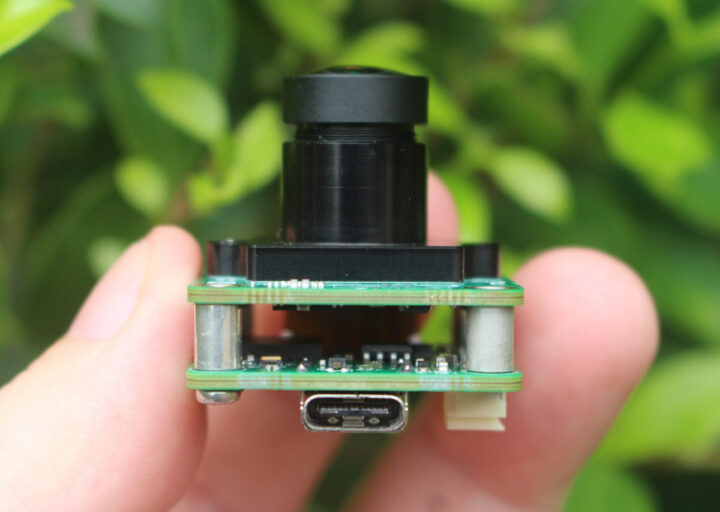
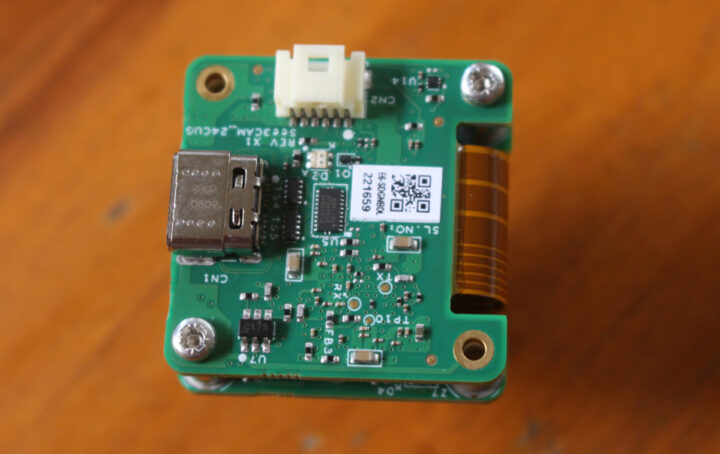
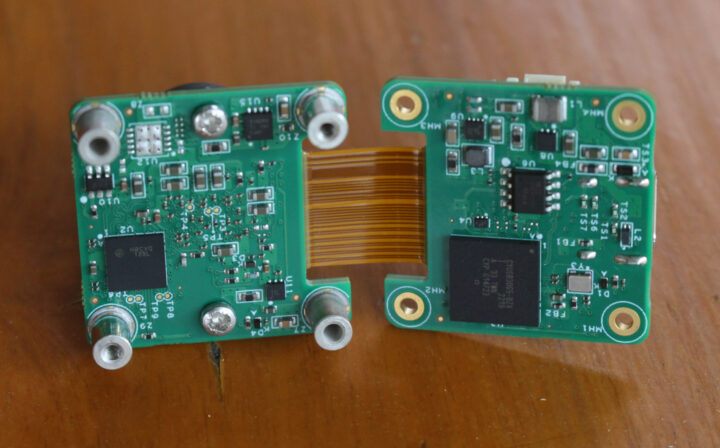
It’s a two-board design, one for the camera module, and the other handling MIPI CSI to USB 3.1.
The female USB-C port and CN2 GPIO connector can be found on the bottom of the camera.
The bottom board relies on an Infineon CYUSB3065-BZXI EZ-USB CX3 programmable MIPI CSI-2 to USB 5 Gbps camera controller.
Quick test in Ubuntu 22.04
I first connected the camera to my laptop running Ubuntu 22.04 and it’s detected as a USB camera called “See3CAM_24CUG” and supporting UVC 1.00:
|
1 2 3 4 5 6 7 8 9 10 11 |
[13367.822568] usb 2-1: new SuperSpeed USB device number 2 using xhci_hcd [13367.842852] usb 2-1: LPM exit latency is zeroed, disabling LPM. [13367.843118] usb 2-1: Int endpoint with wBytesPerInterval of 1024 in config 1 interface 0 altsetting 0 ep 130: setting to 64 [13367.843570] usb 2-1: New USB device found, idVendor=2560, idProduct=c128, bcdDevice= 0.00 [13367.843577] usb 2-1: New USB device strings: Mfr=1, Product=2, SerialNumber=3 [13367.843580] usb 2-1: Product: See3CAM_24CUG [13367.843583] usb 2-1: Manufacturer: e-con systems [13367.843586] usb 2-1: SerialNumber: 1711D309 [13367.846129] usb 2-1: Found UVC 1.00 device See3CAM_24CUG (2560:c128) [13367.873663] input: See3CAM_24CUG as /devices/pci0000:00/0000:00:08.1/0000:04:00.3/usb2/2-1/2-1:1.0/input/input35 [13367.874666] hid-generic 0003:2560:C128.0006: hiddev1,hidraw5: USB HID v1.11 Device [e-con systems See3CAM_24CUG] on usb-0000:04:00.3-1/input2 |
The device on Bus 2, Port 1 is using a 5Gbps USB connection as expected:
|
1 2 3 4 5 6 7 8 9 10 11 12 13 14 |
jaufranc@cnx-laptop-4:~$ lsusb -t /: Bus 04.Port 1: Dev 1, Class=root_hub, Driver=xhci_hcd/1p, 10000M /: Bus 03.Port 1: Dev 1, Class=root_hub, Driver=xhci_hcd/2p, 480M |__ Port 1: Dev 2, If 0, Class=Video, Driver=uvcvideo, 480M |__ Port 1: Dev 2, If 1, Class=Video, Driver=uvcvideo, 480M |__ Port 2: Dev 3, If 0, Class=Human Interface Device, Driver=usbhid, 12M |__ Port 2: Dev 3, If 1, Class=Human Interface Device, Driver=usbhid, 12M /: Bus 02.Port 1: Dev 1, Class=root_hub, Driver=xhci_hcd/4p, 10000M |__ Port 1: Dev 2, If 0, Class=Video, Driver=uvcvideo, 5000M |__ Port 1: Dev 2, If 1, Class=Video, Driver=uvcvideo, 5000M |__ Port 1: Dev 2, If 2, Class=Human Interface Device, Driver=usbhid, 5000M /: Bus 01.Port 1: Dev 1, Class=root_hub, Driver=xhci_hcd/4p, 480M |__ Port 4: Dev 2, If 0, Class=Wireless, Driver=btusb, 12M |__ Port 4: Dev 2, If 1, Class=Wireless, Driver=btusb, 12M |
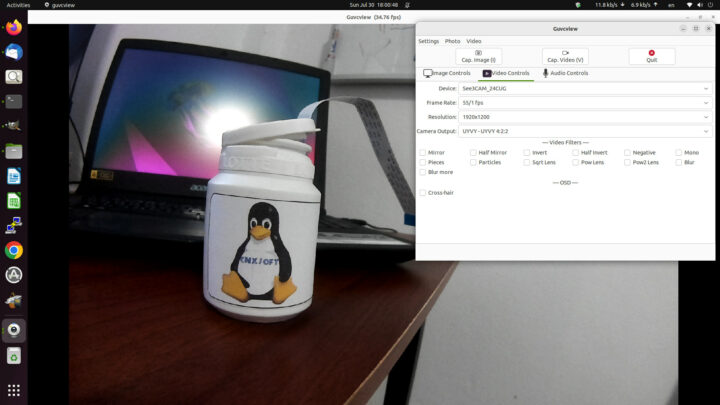
Since it’s a UVC camera I should be able to use it with standard tools such as guvcview.
It works, but somehow I can’t go much over around 30 fps in the preview window above whether I use Uncompressed UYVY or MJPEG camera output. The resolution has an impact too, but I eventually noticed the biggest impact on the frame in the video preview is the scene itself. I can get 60 fps when pointing to a bright scene, but when I point the camera to show my keyboard the preview frame rate drops to 15 fps.
Using Qtcam on Raspberry Pi 4
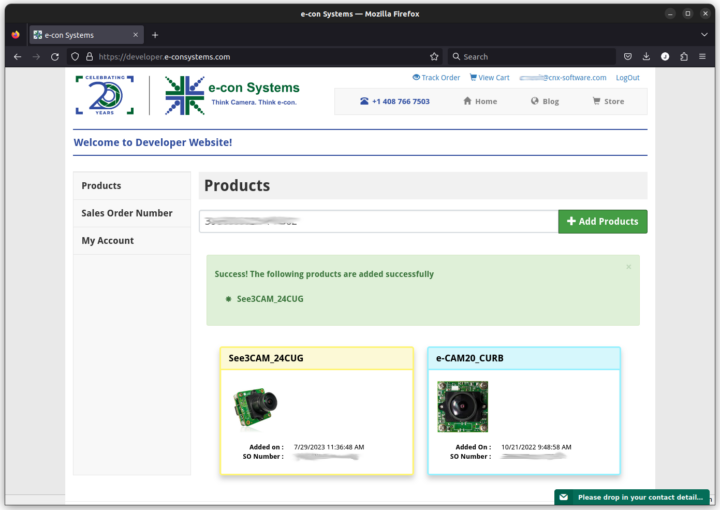
But since e-con Systems provides documentation and tools, I’ll stop with guvcview and head to the developer website to register the device with its serial number and access the documentation and tools.
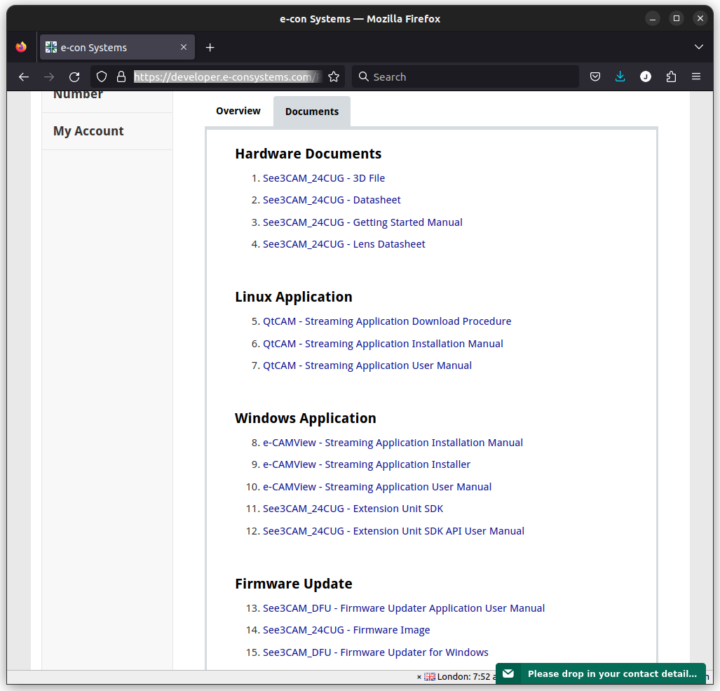
The company provides hardware documents with a 3D file, datasheets, and a getting started guide, Linux and Windows applications, a Windows SDK, as well as firmware and related tools.
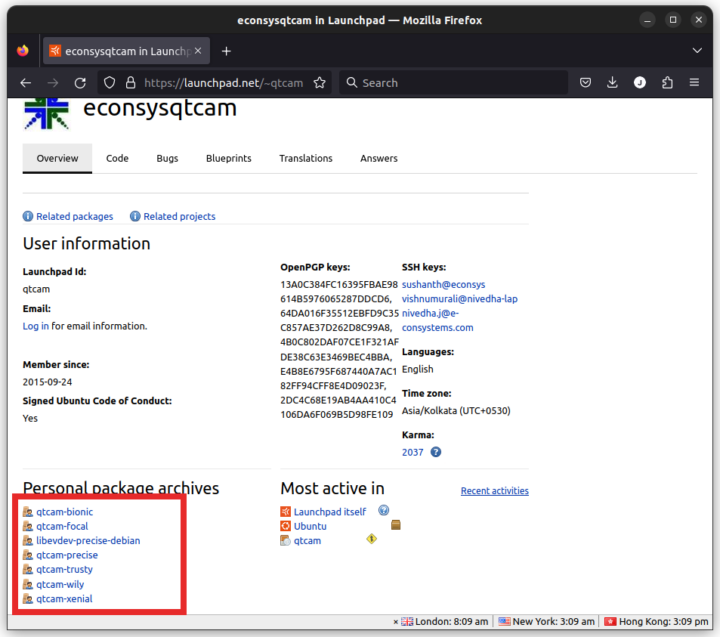
The document says QtCAM can be installed on Ubuntu 14.04 to 20.04, and indeed, the PPA for the program is only available on Ubuntu 14.04 (Trusty), Ubuntu 16.04 (Xenial), Ubuntu 18.04 (Bionic), and Ubuntu 20.04 (Focal), as well as some non-LTS versions and the 11-year old Ubuntu 12.04 Precise.
I have updated all my machines to Ubuntu 22.04, and I’d rather not use a machine with Windows such as the Khadas Mind, so I decided to install Ubuntu 20.04.5 Server 64-bit Arm on Raspberry Pi 4 and install the desktop environment since I’ve never used Ubuntu on the Pi 4, and I can see QtCam for Ubuntu 20.04 is supported on both amd64 and arm64 architectures.
Since we’ll need a desktop environment to check out the programs and the camera output, I installed the Ubuntu Desktop package as well:
|
1 2 3 |
sudo apt update sudo apt dist-upgrade sudo apt install ubuntu-desktop |
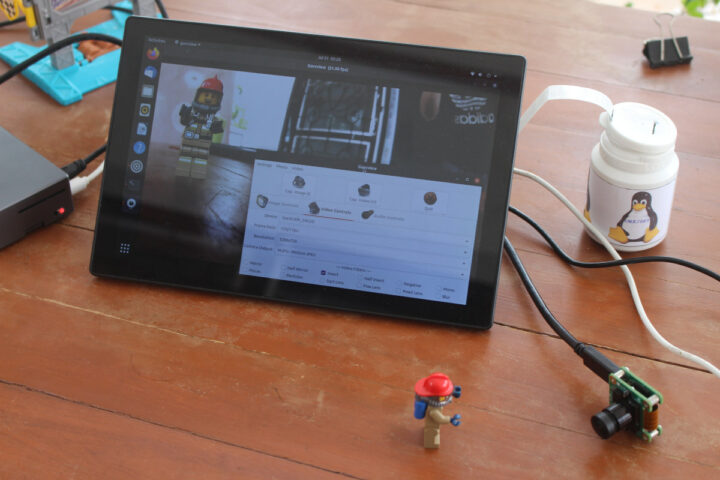
After a reboot, I connected the camera to one of the USB 3.0 ports of the Raspberry Pi 4 and try it out with guvcview to confirm I could reproduce what I did on my laptop.
It works fine, although you’ll notice a 21.50 fps in the photo above. An important note is the e-CAM20_CURB MIPI CSI camera is better suited to the Raspberry Pi due to its lower price, while the See3CAM_24CUG can work on more platforms including computers, laptops, and single board computers that do not come with a MIPI CSI connector, but have a spare USB 3.0+ port.
Time to install QtCam in Ubuntu 20.04:
|
1 2 |
sudo apt-add-repository ppa:qtcam/focal sudo apt install qtcam |
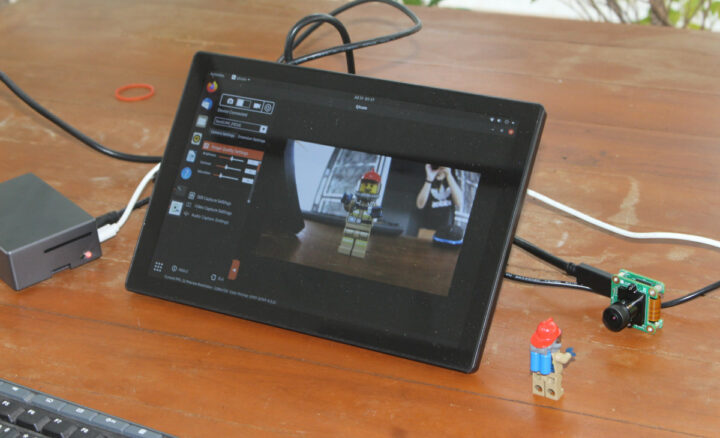
It works as well. If you want to build the Qtcam application yourself the source code can be found on LaunchPad. It might be possible to compile it for Ubuntu 22.04, but since it has not been tested by e-con Systems, there may be issues.
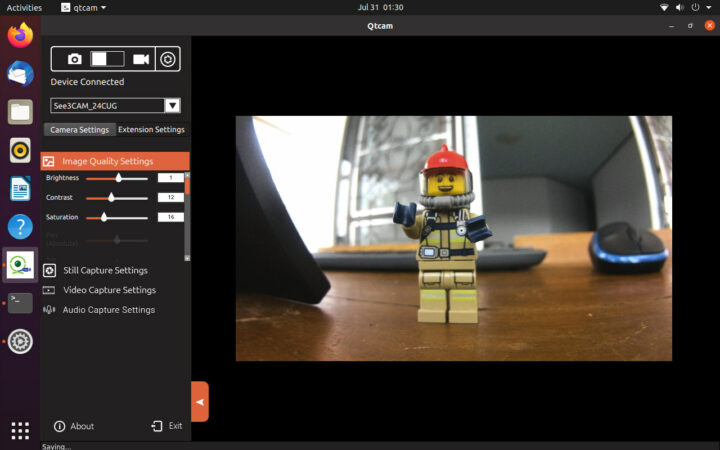
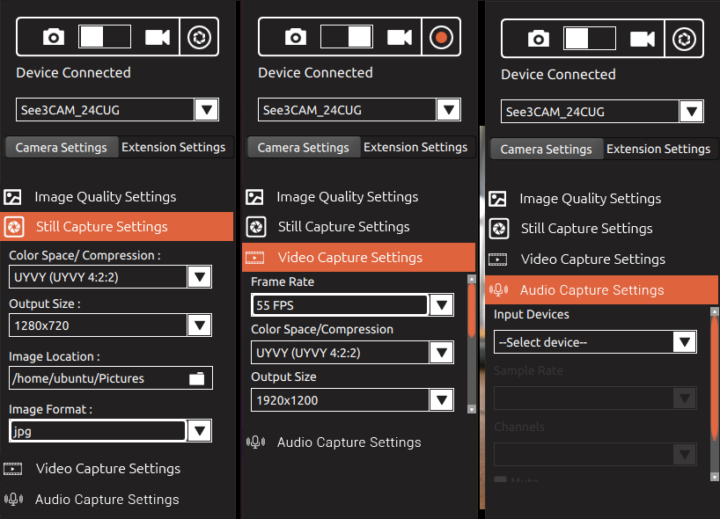
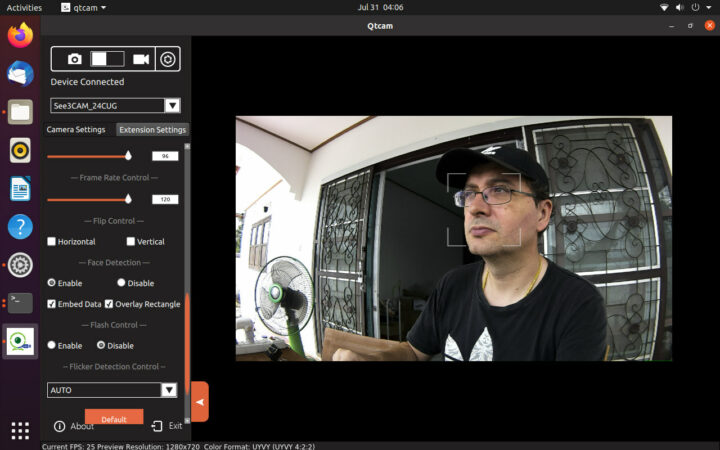
The user interface has camera and video modes with the ability to take photos or shot videos. The “Camera Settings” tab includes image quality settings (Brightness, Contrast, Saturation), still capture settings (color space, output size…), video capture settings (frame rate, color space, output size…), and audio capture settings (sample rate, channels…) that we can’t use with this specific camera since there’s no audio.
The selectable color space/compression, output size, and frame rate options match the ones from the specifications, meaning we can select UYVY or MPEG, three resolutions namely 1280×720, 1920×1080, and 1920×1200, and a frame rate of up to 120 fps when using 1280×720 resolution. If I select 1920×1200 resolution, I get some green lines and other artifacts on the preview windows, and the Raspberry Pi 4 may be struggling a bit. But there’s no problem when taking a photo with the Qtcam application.

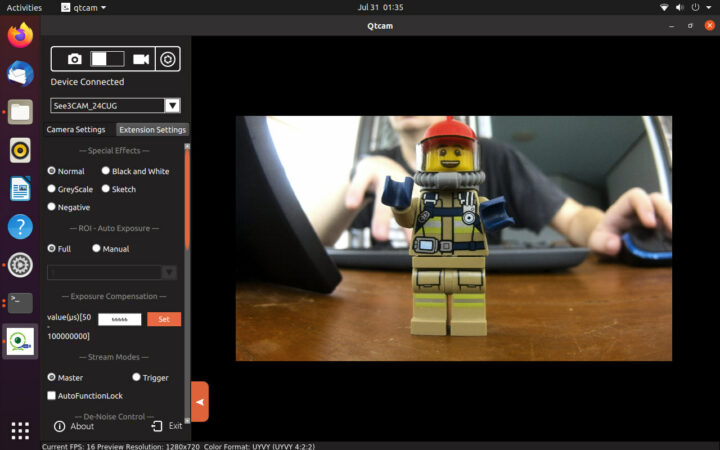
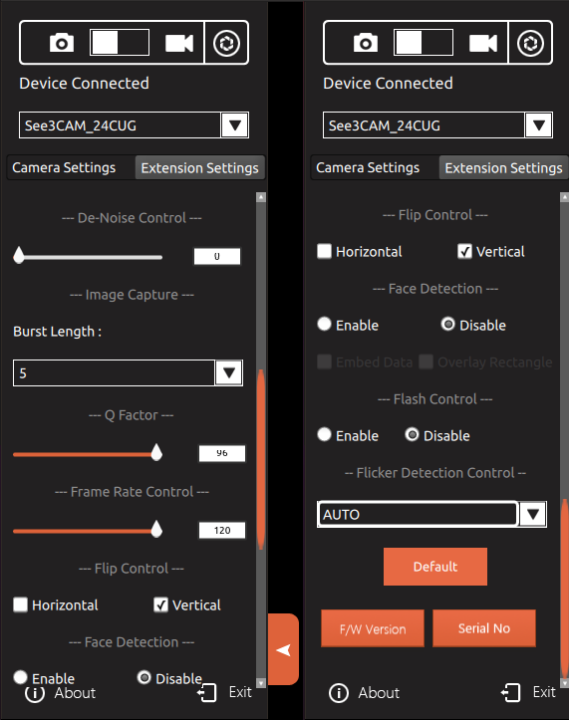
Besides the basic settings we’ve gone through, the Qtcam program also comes with additional options in the “Extension Settings” tab, notably to use the trigger function of the camera.
I gave the Face Detection demo a quick try, but the Raspberry Pi 4 is struggling with the actual frame rate in the preview windows being closer to 1 fps despite what’s shown in the screenshot below.
I’ve captured a few videos with some motion to show the performance of the global shutter camera. First at 1280×720 resolution with the framerate set to 120 fps.
|
1 2 3 4 5 6 7 8 9 10 11 12 13 14 15 16 17 18 19 20 21 22 23 24 25 26 27 28 29 |
$ mediainfo Qtcam-23_07_31-01_45_30.avi General Complete name : Qtcam-23_07_31-01_45_30.avi Format : AVI Format/Info : Audio Video Interleave File size : 29.2 MiB Duration : 17 s 517 ms Overall bit rate : 14.0 Mb/s Writing application : Lavf58.29.100 Video ID : 0 Format : JPEG Codec ID : MJPG Duration : 17 s 517 ms Bit rate : 14.0 Mb/s Width : 1 280 pixels Height : 720 pixels Display aspect ratio : 16:9 Frame rate mode : Variable Frame rate : 120.000 (24/30) FPS Minimum frame rate : 24.000 FPS Maximum frame rate : 30.000 FPS Color space : YUV Chroma subsampling : 4:2:0 Bit depth : 8 bits Compression mode : Lossy Bits/(Pixel*Frame) : 0.126 Stream size : 29.2 MiB (100%) |
The resolution is indeed 1280×720, but the frame rate is slightly confusing as we are both shown a 120 frame rate and a minimum and maximum frame rate of 24 and 30 fps. I understand that the camera can handle 120 fps, but the video itself is recorded at a variable frame rate between 24 and 30 fps. It already looks more capable than the Raspberry Pi Global Shutter camera with higher video resolutions.
Let’s switch to 1920×1080 @ 60 fps.
|
1 2 3 4 5 6 7 8 9 10 11 12 13 14 15 16 17 18 19 20 21 22 23 24 25 26 |
mediainfo Qtcam-23_07_31-01_47_40.avi General Complete name : Qtcam-23_07_31-01_47_40.avi Format : AVI Format/Info : Audio Video Interleave File size : 20.2 MiB Duration : 12 s 167 ms Overall bit rate : 13.9 Mb/s Writing application : Lavf58.29.100 Video ID : 0 Format : JPEG Codec ID : MJPG Duration : 12 s 167 ms Bit rate : 13.9 Mb/s Width : 1 920 pixels Height : 1 080 pixels Display aspect ratio : 16:9 Frame rate : 60.000 FPS Color space : YUV Chroma subsampling : 4:2:0 Bit depth : 8 bits Compression mode : Lossy Bits/(Pixel*Frame) : 0.112 Stream size : 20.1 MiB (100%) |
The 1920×1080 video is captured at 60fps but it does not look that smooth to me…
and finally 1920 x 1200 @ 55 fps.
|
1 2 3 4 5 6 7 8 9 10 11 12 13 14 15 16 17 18 19 20 21 22 23 24 25 26 |
jaufranc@cnx-laptop-4:~/edev/See3CAM$ mediainfo Qtcam-23_07_31-01_46_40.avi General Complete name : Qtcam-23_07_31-01_46_40.avi Format : AVI Format/Info : Audio Video Interleave File size : 24.3 MiB Duration : 12 s 473 ms Overall bit rate : 16.4 Mb/s Writing application : Lavf58.29.100 Video ID : 0 Format : JPEG Codec ID : MJPG Duration : 12 s 473 ms Bit rate : 16.4 Mb/s Width : 1 920 pixels Height : 1 200 pixels Display aspect ratio : 16:10 Frame rate : 55.000 FPS Color space : YUV Chroma subsampling : 4:2:0 Bit depth : 8 bits Compression mode : Lossy Bits/(Pixel*Frame) : 0.129 Stream size : 24.3 MiB (100%) |
The 1920×1200 is also recorded at 55 fps, but there are lots of artifacts in the video and it’s basically unusable. I’d guess the Raspberry Pi 4 may be struggling to handle the higher resolution and MJPEG compression. H.264 is also an option, but it’s done by software here, so it would be even harder to manage for the Pi.
See3CAM_24CUG USB 3.1 global shutter camera tested with Windows 11
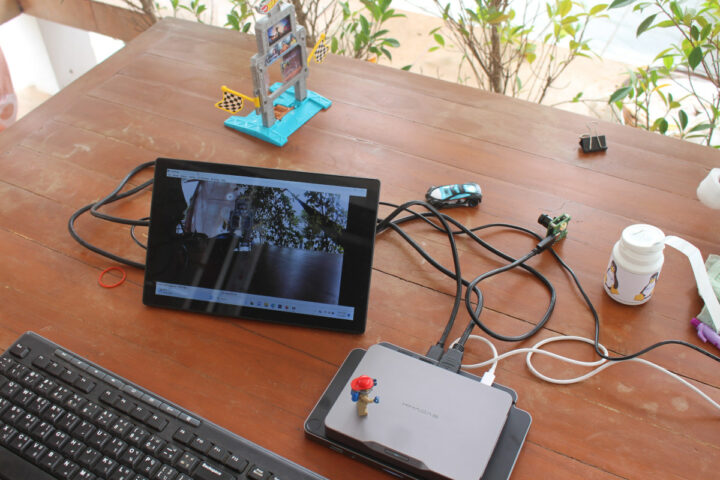
So I decided to remove the CPU bottleneck and installed the e-CAMView program on Khadas Mind mini PC (Intel Core i7-1360p 12-core Raptor Lake processor, 32GB RAM, 1TB NVMe SSD) running Windows 11.
The e-CAMView program has fewer options than the Qtcam, and I was unable to change the resolution which was set to 1920×1080. The preview window runs at 55 to 60 fps whatever I do with the camera. I recorded another video sample “driving” on the table…
This is much better and the video is really smooth, albeit there are some horizontal green lines on a couple of frames at the beginning of the video. So the Raspberry Pi 4 struggles with higher resolutions and a more powerful system is required for smooth video streaming or recording using the software provided.
|
1 2 3 4 5 6 7 8 9 10 11 12 13 14 15 16 17 18 19 20 21 22 23 24 25 26 27 28 29 30 31 32 33 34 35 36 37 38 39 40 41 42 43 44 45 46 47 48 49 50 51 52 53 54 55 56 57 58 59 60 61 62 63 64 65 66 67 68 69 70 71 72 73 74 75 |
$ mediainfo Qtcam-23_07_31-01_47_40.avi General Complete name : Qtcam-23_07_31-01_47_40.avi Format : AVI Format/Info : Audio Video Interleave File size : 20.2 MiB Duration : 12 s 167 ms Overall bit rate : 13.9 Mb/s Writing application : Lavf58.29.100 Video ID : 0 Format : JPEG Codec ID : MJPG Duration : 12 s 167 ms Bit rate : 13.9 Mb/s Width : 1 920 pixels Height : 1 080 pixels Display aspect ratio : 16:9 Frame rate : 60.000 FPS Color space : YUV Chroma subsampling : 4:2:0 Bit depth : 8 bits Compression mode : Lossy Bits/(Pixel*Frame) : 0.112 Stream size : 20.1 MiB (100%) jaufranc@cnx-laptop-4:~/edev/See3CAM$ jaufranc@cnx-laptop-4:~/edev/See3CAM$ cd ~/Downloads/ jaufranc@cnx-laptop-4:~/Downloads$ mediainfo 20230731-115941.mp4 General Complete name : 20230731-115941.mp4 Format : MPEG-4 Format profile : Base Media / Version 2 Codec ID : mp42 (mp41/isom) File size : 89.1 MiB Duration : 17 s 899 ms Overall bit rate mode : Constant Overall bit rate : 41.8 Mb/s Encoded date : UTC 2023-07-31 04:59:43 Tagged date : UTC 2023-07-31 04:59:43 Video ID : 1 Format : AVC Format/Info : Advanced Video Codec Format profile : Main@L4.2 Format settings : CABAC / 1 Ref Frames Format settings, CABAC : Yes Format settings, Reference frames : 1 frame Format settings, GOP : M=1, N=60 Codec ID : avc1 Codec ID/Info : Advanced Video Coding Duration : 17 s 899 ms Bit rate mode : Constant Bit rate : 41.5 Mb/s Width : 1 920 pixels Height : 1 080 pixels Display aspect ratio : 16:9 Frame rate mode : Variable Frame rate : 59.836 FPS Minimum frame rate : 19.993 FPS Maximum frame rate : 60.302 FPS Original frame rate : 60.000 FPS Color space : YUV Chroma subsampling : 4:2:0 Bit depth : 8 bits Scan type : Progressive Bits/(Pixel*Frame) : 0.334 Stream size : 89.1 MiB (100%) Encoded date : UTC 2023-07-31 04:59:43 Tagged date : UTC 2023-07-31 04:59:43 mdhd_Duration : 17899 Codec configuration box : avcC |
Mediainfo confirms the video has a 1920×1080 resolution and a 60 fps frame rate, but it is recorded with a variable framerate between 19.993 and 60.302 fps and a 41.5 Mbps bitrate.
Finally, I recorded a fan with the See3CAM_24CUG USB camera and my mobile phone (rolling shutter) camera to illustrate how global shutter cameras like the one from e-con Systems can better capture motion.
On the software side, the camera is UVC compatible so it can be used with most camera programs. Having said that, e-con Systems provides its own Windows program (e-CAMView) and SDK and Linux program (Qtcam) with source code, so developers have a starting point to add support for the camera capabilities and special features like trigger mode (for multiple camera synchronization).
I’d like to thank e-con Systems for sending the See3CAM_24CUG USB global shutter camera for review. The kit can be purchased on e-con Systems store for $199. Note you can also purchase it without lense for $179 or with an enclosure for $259.

Jean-Luc started CNX Software in 2010 as a part-time endeavor, before quitting his job as a software engineering manager, and starting to write daily news, and reviews full time later in 2011.
Support CNX Software! Donate via cryptocurrencies, become a Patron on Patreon, or purchase goods on Amazon or Aliexpress






Be aware that there is no continuity of supply guarantee, or much in the way of support.
It’s cheap but there are compromises.
Do you know of an alternative?