DFRobot’s UniHiker is a STEM educational platform that was originally launched in China, but now UniHiker is now available worldwide through the DFRobot shop. The company has sent us a UniHiker sample for review, so let’s unpack the kit and learn how to use the UniHiker platform. The main component of the kit is the Linux-powered UniHiker board which features a 2.8-inch resistive touchscreen display and a BBC Micro:bit edge connector, so we can use expansion boards for the Micro:bit board. Let’s start unboxing it together.
UniHiker unboxing
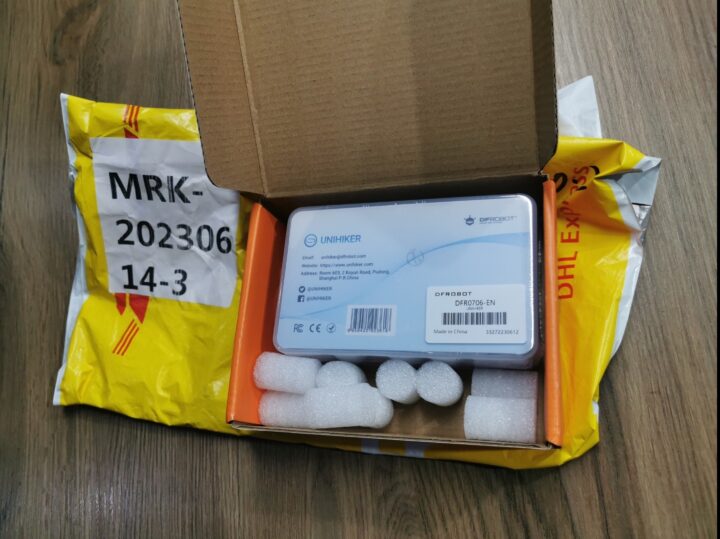
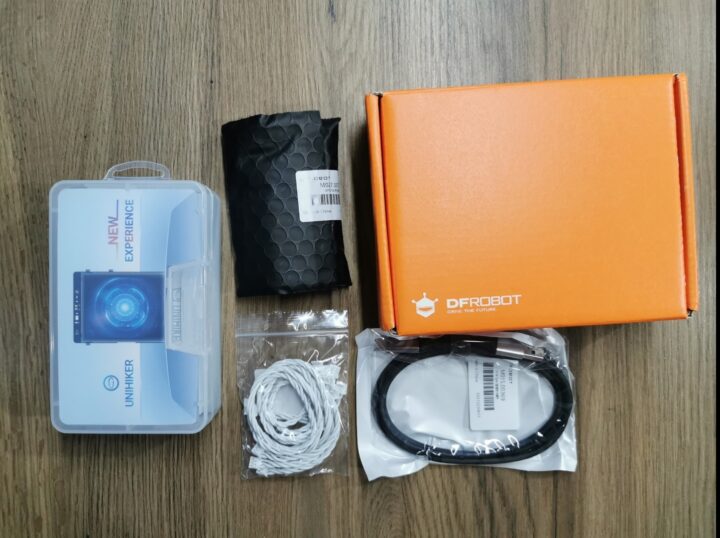
DFRobot sent us the UniHiker platform by DHL. The package is a familiar-looking DFRobot box in orange color and comes with a plastic box to safely store the UniHiker board and accessories after use.
The plastic box contains another plastic box with the board, some 3-pin and 4-pin cables for Gravity ports, and a USB Type-C cable.
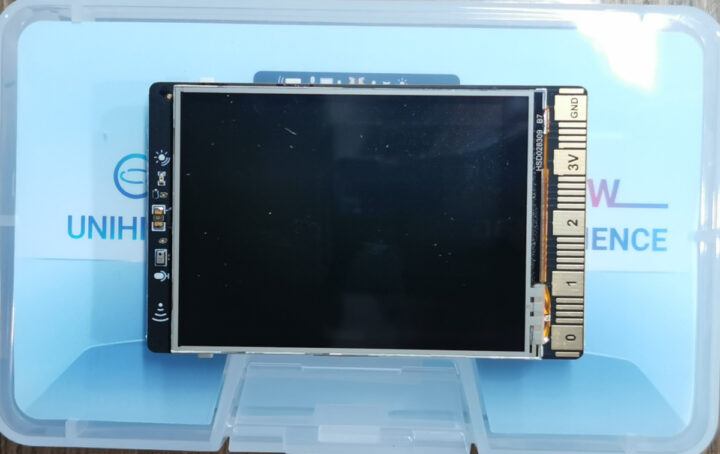
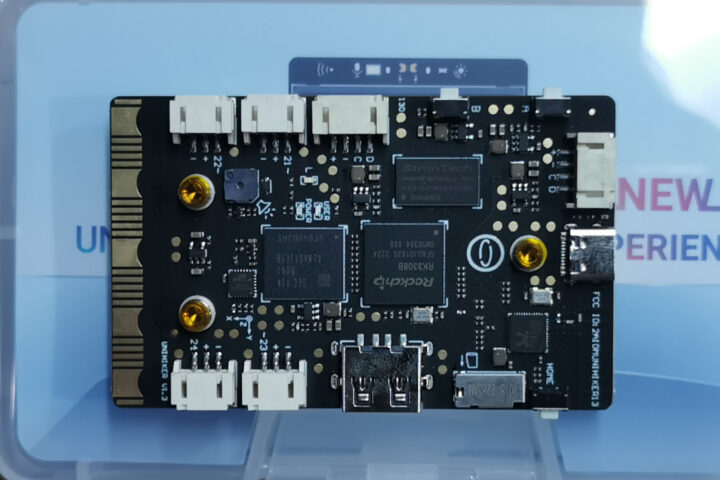
The UniHiker is like a super-powered BBC Micro:bit with a 2.8-inch color display with 320×240 resolution replacing the 5×5 LED matrix on the BBC board, a Rockchip RK3308 quad-core Cortex-A35 processor running Linux and able to handle IoT and AI workloads, and various sensors such as a microphone, a light sensor, an accelerometer, and a gyroscope.
Unihiker specifications
We’ve already covered Unihiker specifications in our initial announcement, but here they are again for reference:
- SoC – Rockchip RK3308 quad-core Arm Cortex-A35 processor @ 1.2GHz without GPU
- MCU – Gigadevice GD32VF103C8T6 RISC-V microcontroller @ 108MHz with 64KB flash, 32KB SRAM
- System Memory – 512MB DDR3
- Storage – 16GB eMMC flash, MicroSD card socket
- Display – 2.8-inch resistive touchscreen color display with 320×240 resolution
- Connectivity – 2.4 GHz Wi-Fi & Bluetooth 4.0 via RTL8723DS module
- USB
- 1x USB Type-C port for power and programming
- 1x USB Type-A host port for peripherals
- Sensors
- Light Sensor (PT0603)
- 6-axis accelerator and gyroscope (ICM20689)
- Built-in microphone
- Expansion
- 2x 4-pin Gravity I2C headers
- 4x 3-pin Gravity header with 10-bit PWM, 2x 12-bit ADC
- Micro:bit compatible edge connector with up to 19x GPIO, I2C, UART, 2x SPI, 6x 12-bit ADC, and 5x 10-bit PWM
- Misc – Home button, A/B buttons, passive buzzer, Blue LED
- Power Supply
- 5V via USB Type-C port (Not the 3V/GND pin on the edge connector can not be used for power
- Operating voltage – 3.3V
- Maximum current – 2,000 mA
- Dimensions – 83 x 51.3 x 13 mm
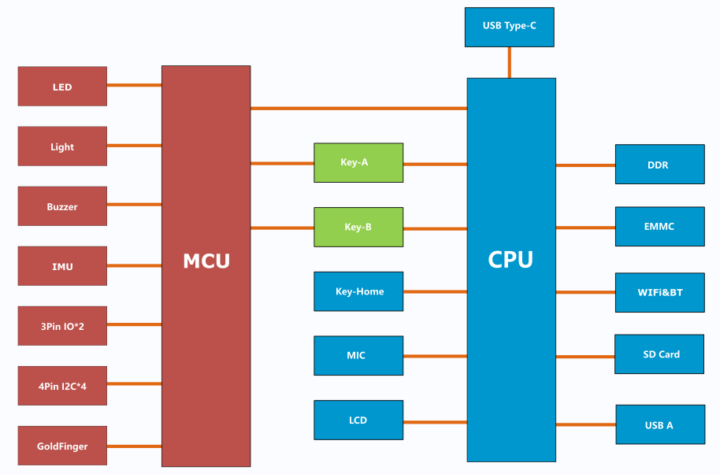
While the Rockchip processor runs Linux, the GD32VF103 microcontroller handles all sensors – except the microphone – and controls all the actuators as shown in the block diagram below.
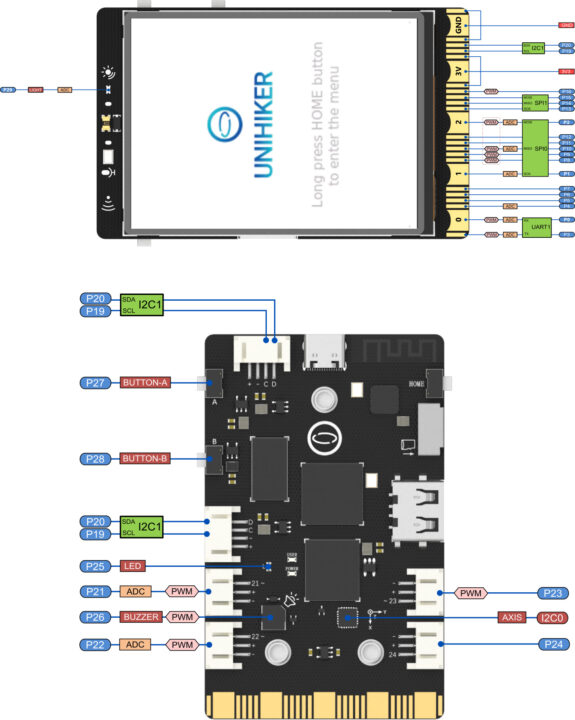
Further details about the pins connected to the GD32VF103 RISC-V MCU can be seen in the illustration below.
First run
The UniHiker board will automatically boot once we powered it from its USB Type-C port and quickly show a menu-style GUI called Home menu where we can select all menus. There are eight different sections as shown in the video below and this allows us to configure the board without having to use a computer.
Network connection configuration
The UniHiker board can be connected to the network for programming or using the Internet in four different ways:
- USB
- Wi-Fi
- Wi-Fi hotspot
- USB to Ethernet
Let’s test three of the ways:
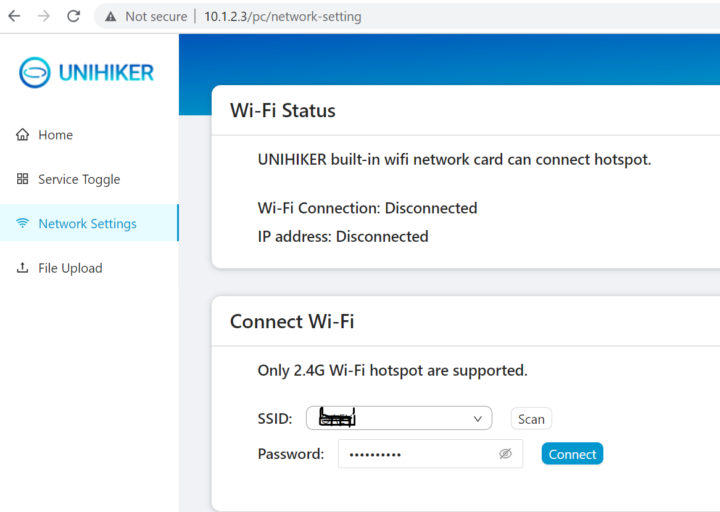
- Open the Wi-Fi hotspot and use your computer to connect to it, then open a web browser from your computer to set up a Wi-Fi connection to the UniHiker board through the web interface.
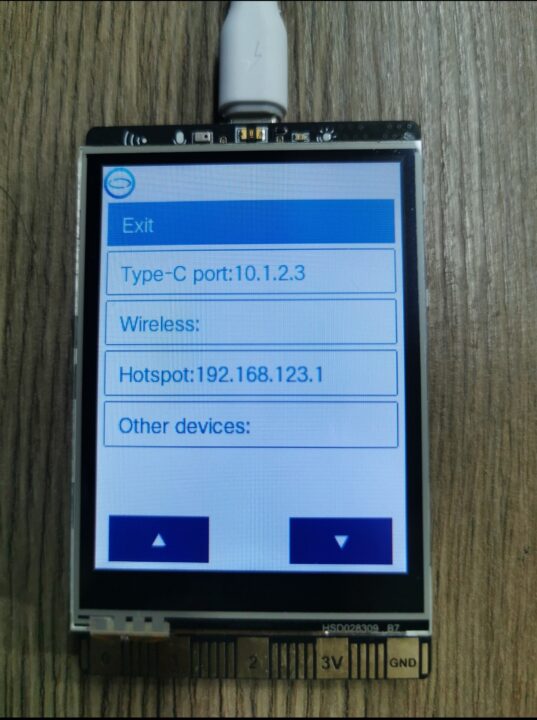
- Connect a USB Type-C cable between your computer and the UniHiker board, then open a web browser window from your computer to the IP address 10.1.2.3 to set up a Wi-Fi connection for the UniHiker board.
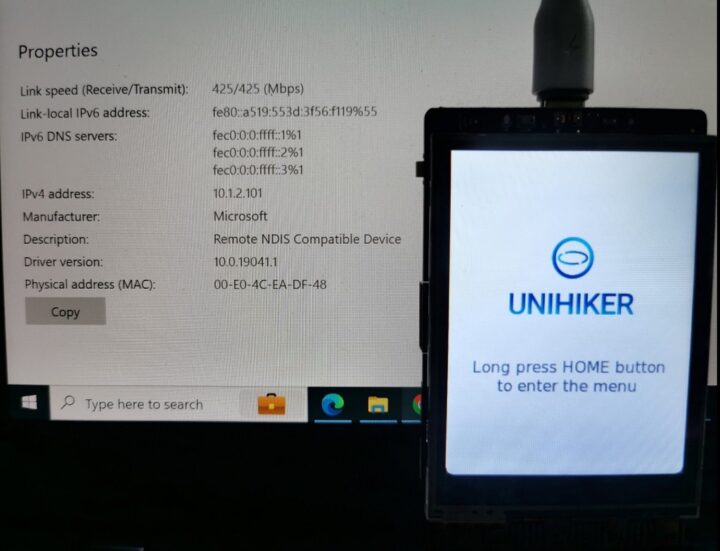
- Connect the USB Type-C cable between the computer and the UniHiker board, which will be seen as an Ethernet device with the IP address 10.1.2.3. Note that this method requires a USB cable to be connected at all times.
Testing IoT with the Unihiker platform
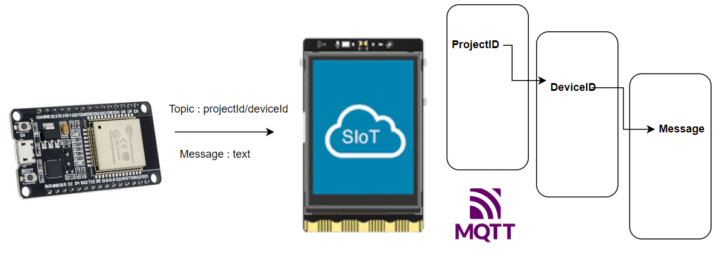
The UniHiker board comes with a built-in IoT service platform called SIoT (Science and Simple Internet of Things), which consists of an MQTT broker and a data visualization platform. Written in Python, the platform provides an easy way to collect and export IoT data.
Overview of the functionality of the SIoT platform
The SIoT platform is an MQTT broker that transfers data between IoT devices. The platform’s project ID and device ID structure are designed to be easy to manage without the user having to create a project or device in the system. The SIoT platform automatically generates a project ID and device ID from the name of the topic sent to the system formatted using projectId/deviceId.
Enabling SioT on the Uniker platform
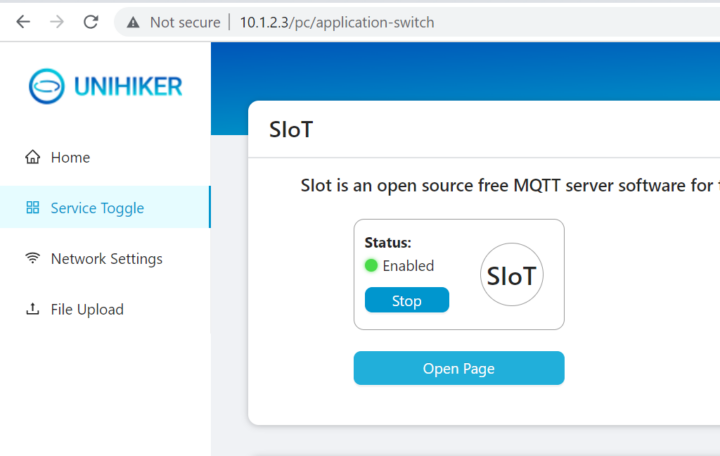
We need to check the SIoT status on the UniHiker board by accessing the Service Toggle menu on the web interface and make sure it is enabled.
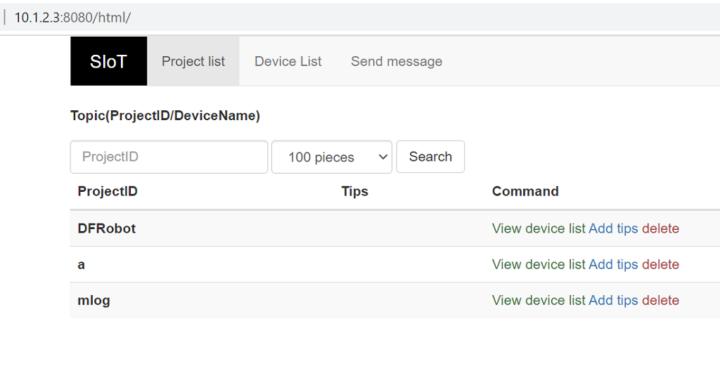
We can now click on the “Open Page” button to take us to the login page (using port 8080) where the default username and password are siot:dfrobot.
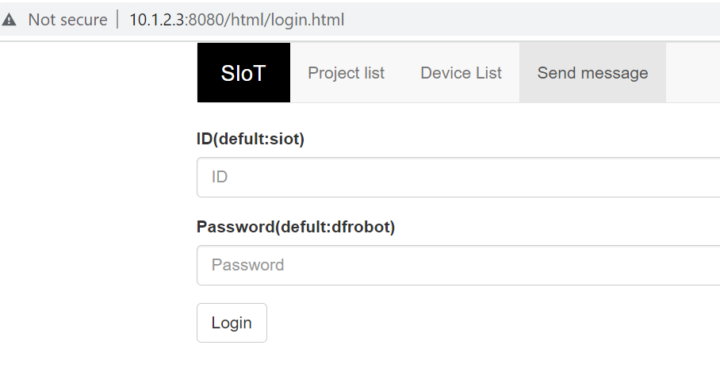 From there, we can access the Project list, Device List, and Send message tabs. As described above, the topic constructor will automatically generate a project and a device.
Testing the SIoT platform with MQTTX
We will be sending values to the SIoT platform with the MQTTX program as we previously did with GL.iNet GL-S10 BLE to MQTT gateway by setting up the connection as follows.
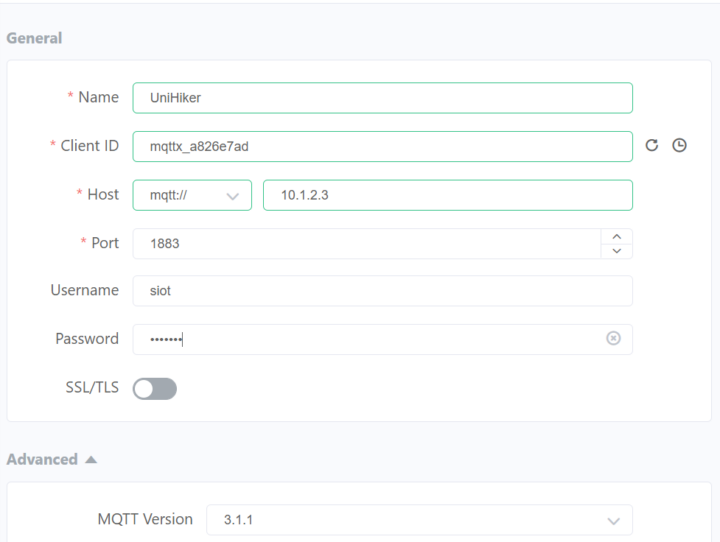
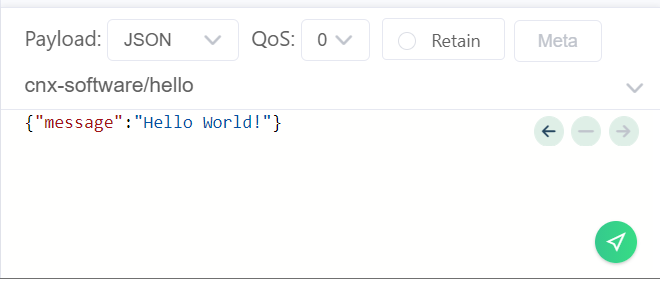
and then publish a message to a topic named cnx-software/hello using a JSON payload.
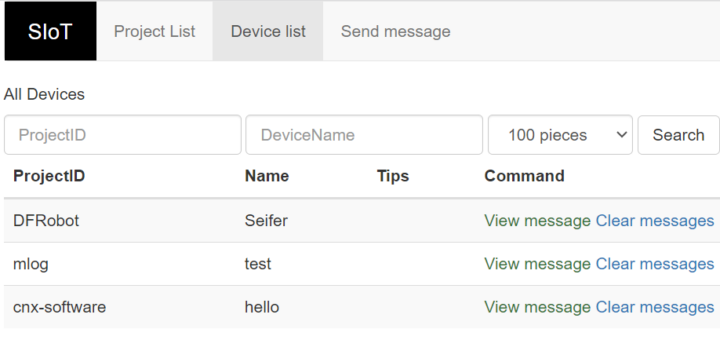
You will see a project named cnx-software appear and a device called hello displayed in the device section.
One special feature of the SIoT platform is the ability to select whether the data sent is a command or telemetry data for time series to be saved into a database. If the message starts ->, it will be detected as a command that will not be saved to the database.
Programming the UniHiker platform
The UniHiker board can be programmed in four different ways:
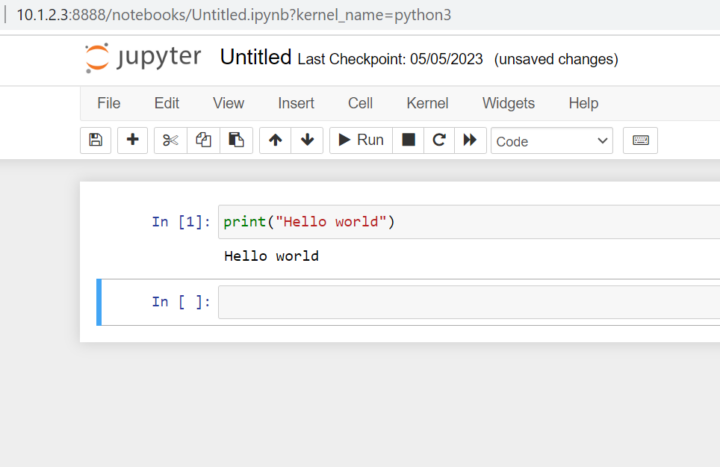
Jupyter Notebook – We can open the web interface, enter the IP address of the UniHiker board, and start programming immediately.
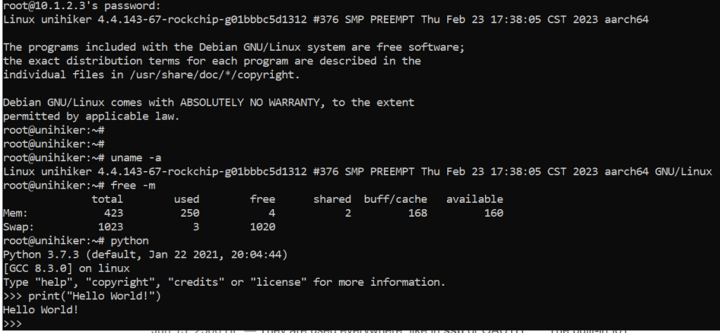
Terminal – Connect to the board via SSH and program it from there using a Python script, or other programming languages available in Linux.
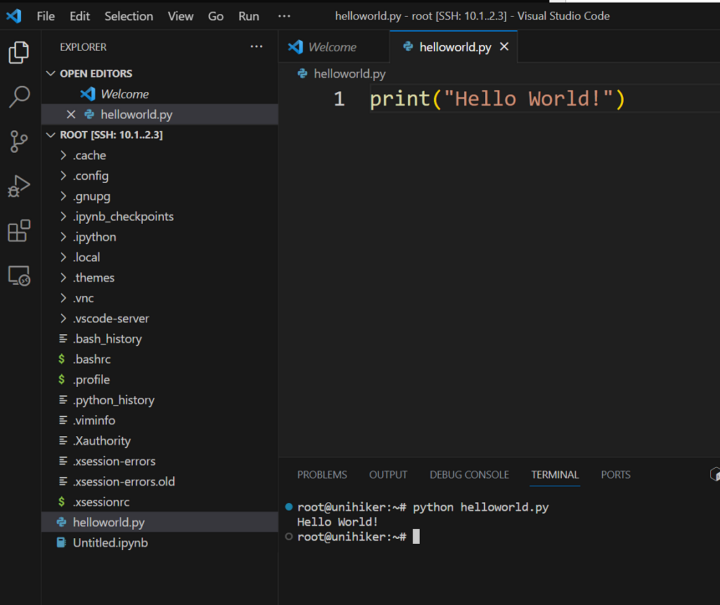
Microsoft VS Code
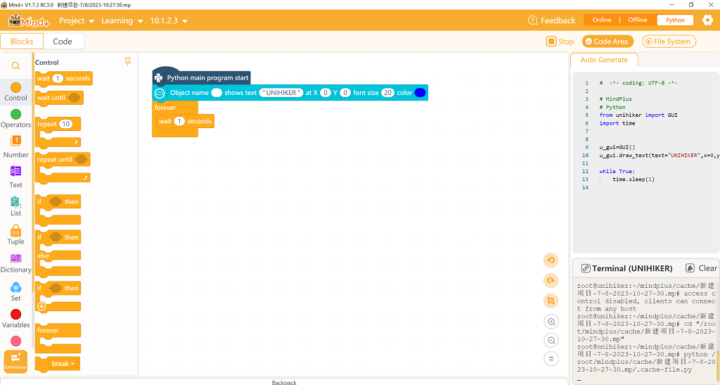
Mind+ visual programming – Note: the installer is about 1 GB in size.
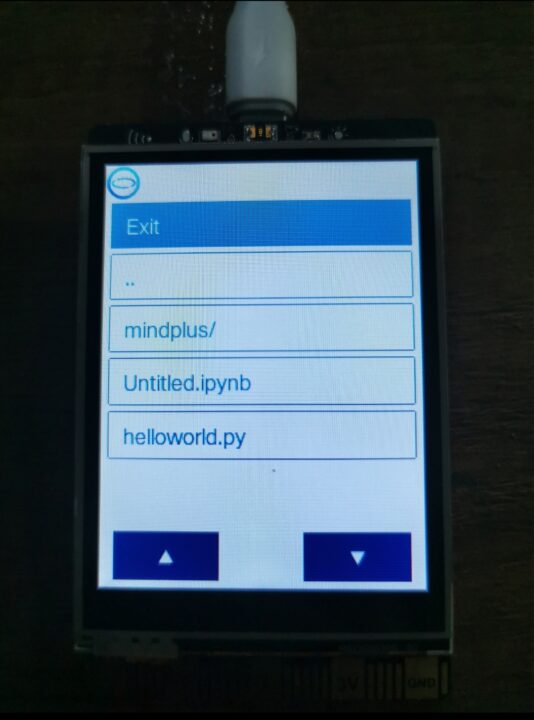
We can run test programs using the home menu on the screen of the UniHiker board by selecting the “2-Run Programs” menu and the directory where the program is saved. A list of files will then appear and we can click on the desired file to run the program.
A versatile platform
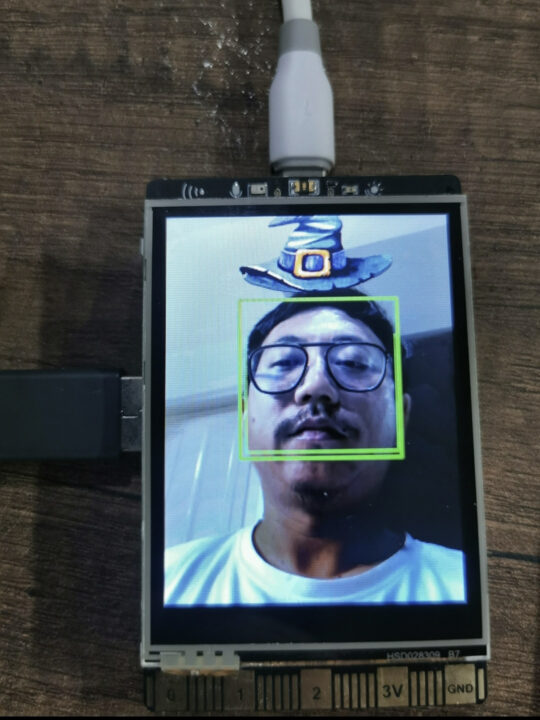
The UniHiker board is a versatile platform and we can create all sorts of STEM projects including IoT applications for the Smart Home, Smart Agriculture, and so on. That’s because we can connect additional sensors via USB Type-C and Type-A ports, 3-/4-pin Gravity connected, the Micro:bit edge connector, be it webcam, a driver, a servo, or other sensors and actuator, and because the UniHiker board runs on the Linux operating system so we have a large choice of programs that can be installed such as the Node-RED platform to use as an IoT gateway to manage other IoT devices such as ESP32 modules and board through the SIoT platform.
Conclusion
The UniHiker board is an intermediate board between more powerful single board computers and microcontroller boards. The platform is suitable for both beginners and advanced students by offering the ability to test programs right out of the box, Mind+ visual programming for beginners, and up to VS Code or Jupyter Notebook for university students. An added bonus is the easy-to-use SIoT IoT platform.
Educators may also appreciate the many tutorials provided by DFRobot for teaching STEM. After testing the UniHiker for more than one week, we were quite impressed by the platform. But having said that, there are still some features that could be further developed, such as a Web-based version of Mind+, because most pupils in primary school (in Thailand) are mainly using tablets running either Android or iOS operating systems. Its PC-only support makes it difficult for students to use outside of school compared to some other STEM education platforms.
We’d like to thank DFRobot for sending us the UniHiker board for review and testing. If you are interested you can buy the kit for $79.90 plus shipping.
CNXSoft: This is a translation of the original UniHiker review on CNX Software Thailand by Arnon Thongtem

Jean-Luc started CNX Software in 2010 as a part-time endeavor, before quitting his job as a software engineering manager, and starting to write daily news, and reviews full time later in 2011.
Support CNX Software! Donate via cryptocurrencies, become a Patron on Patreon, or purchase goods on Amazon or Aliexpress





Mr. Thongtem made a nicely comprehensive article, I hope to see his works on English version again.