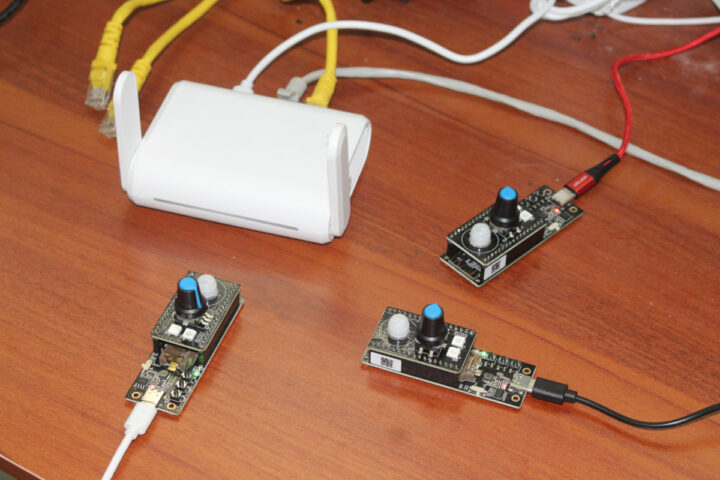
Last week we checked out the hardware for the GL.iNet GL-S200 Thread Border Router kit with three nRF52840 Thread Dev Boards, and I’ve now had time to work with the kit, so I’ll report my getting started experience in the second part of the review.
GL-S200 Initial Set Up
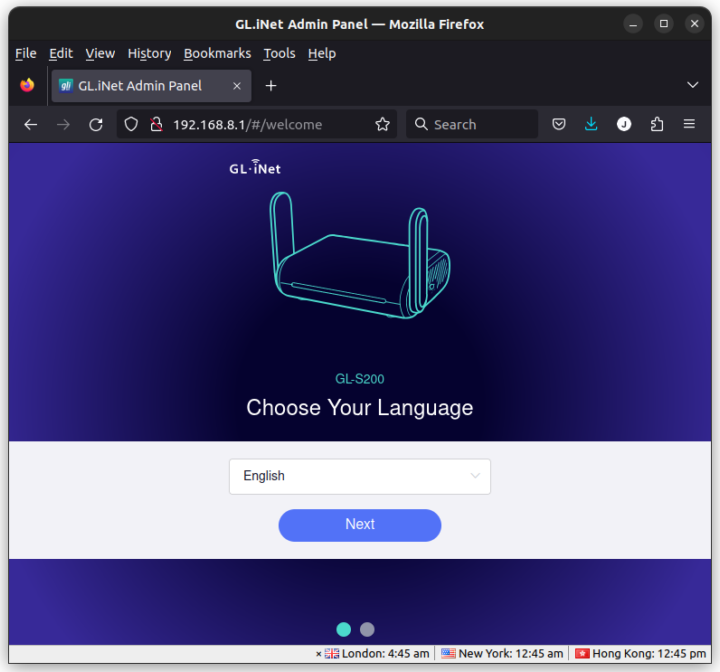
I connected the WAN port to my Ethernet Switch itself connected to my modem router and the LAN port to my laptop, so I could access the web interface using the default IP address (192.168.8.1). The GL-S200 uses the same Admin Panel as other GL.iNet routers such as the Beryl AX router we reviewed at the beginning of the year.
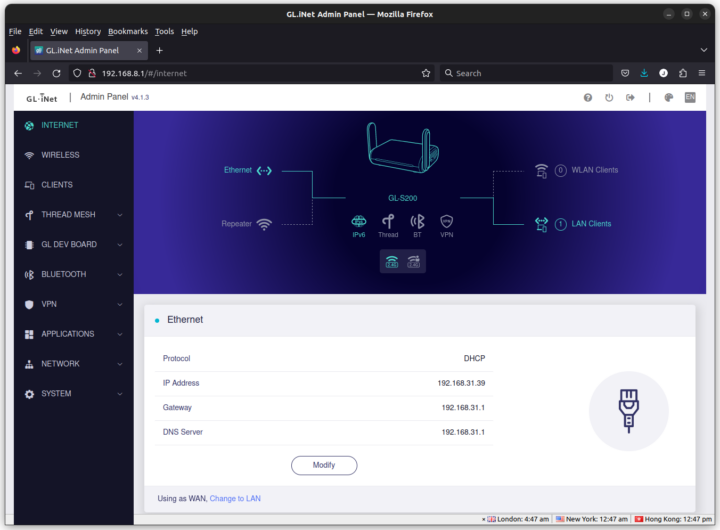
You’ll be greeted by a wizard to let you select the language and set a new password for the Admin Panel, and once you’re done you’ll have access to the familiar GL.iNet Admin Panel 4.x.x.
After completing the wizard, the system should automatically connect to the Internet, and the middle RGB LED will change to green on the device.
Thread Network
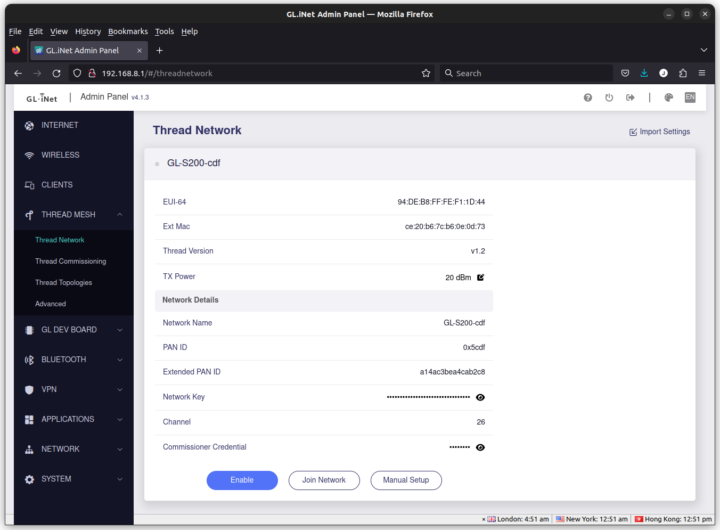
The first step is then to go to THREAD MESH in the left panel in order to enable the Thread network.
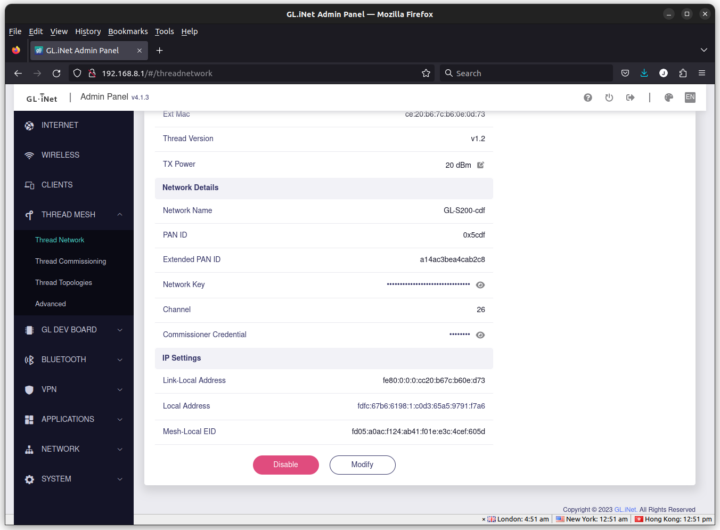
Once you click on Enable, you’ll get three IPv6 addresses:
- Link-Local Address – All interfaces reachable by a single radio transmission
- Local Address –
All interfaces reachable from outside a Thread network (It looks like it is called Global Address in OpenThread documentation)Update from GL-iNet: Accessing of global IPv6 internet is not supported by OT/OTBR yet.You can review Openthread’s official reply: https://github.com/openthread/openthread/discussions/8794The local address is an OMR(off-mesh-routable) address, using which you can access Thread devices from the wifi/ethernet side. - Mesh-Local EID – All interfaces reachable within the same Thread network
If you have your own Thread devices, you can switch to the Thread Commissioning menu and input the EUI64 of your devices and the pre-shared key, but GL.iNet made a simpler section in the web interface to handle their Thread Dev Boards, or TBD for shorts.
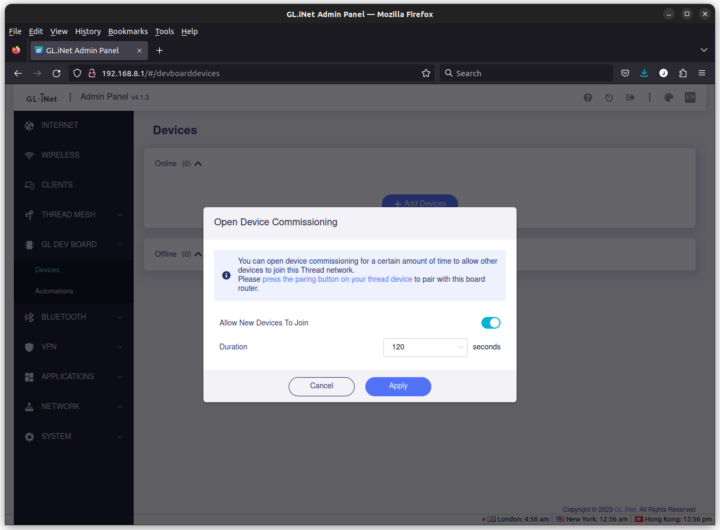
In the GL DEV BOARD->Devices section, we can click on the Add Devices button, and then Apply. If we press the SW2 switch on one board it will then be automatically added to the GL-S200 Thread Border Router.
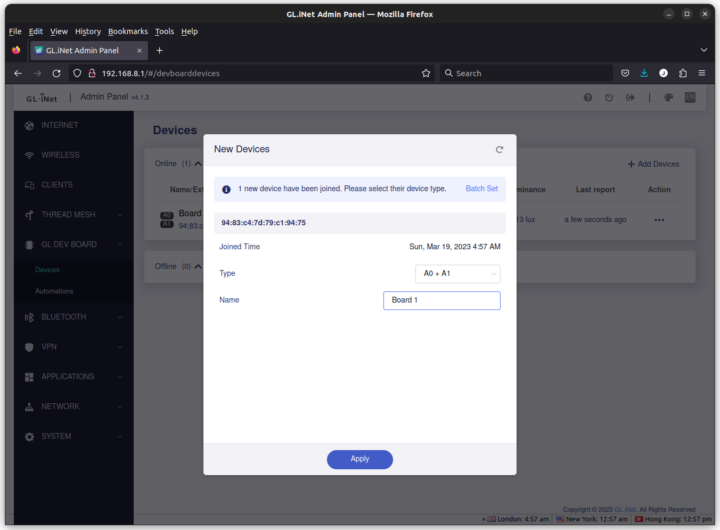
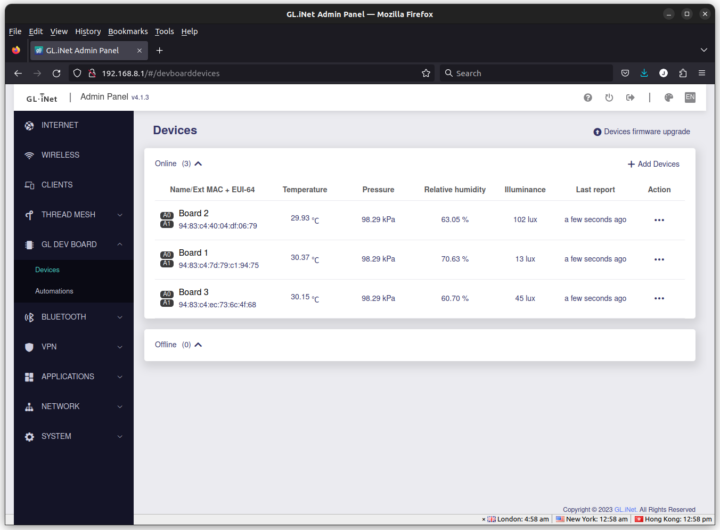
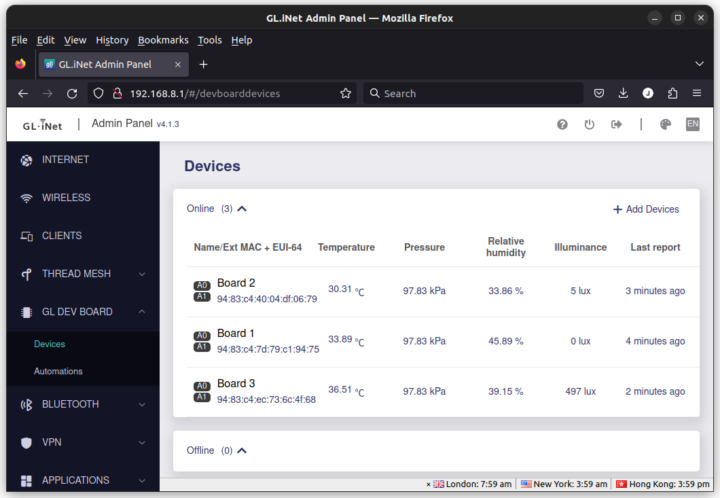
We should select the A0+A1 type and name the board. We can repeat the same for the other two boards and we’ll get the temperature, pressure, humidity, and illuminance values for all three boards showing up in the Admin Panel.
GL-S200 firmware update
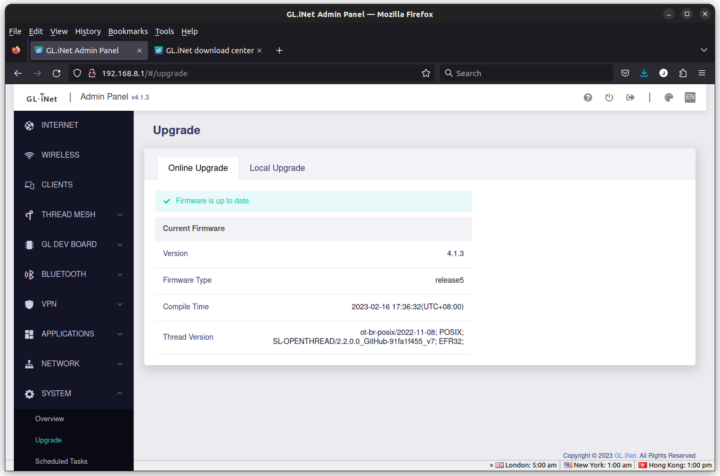
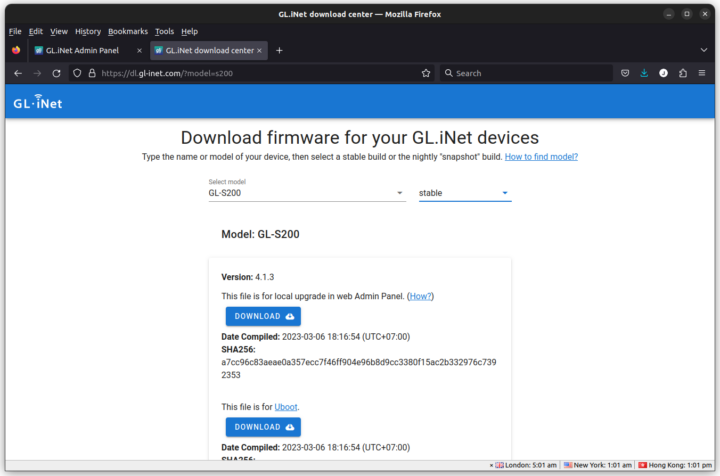
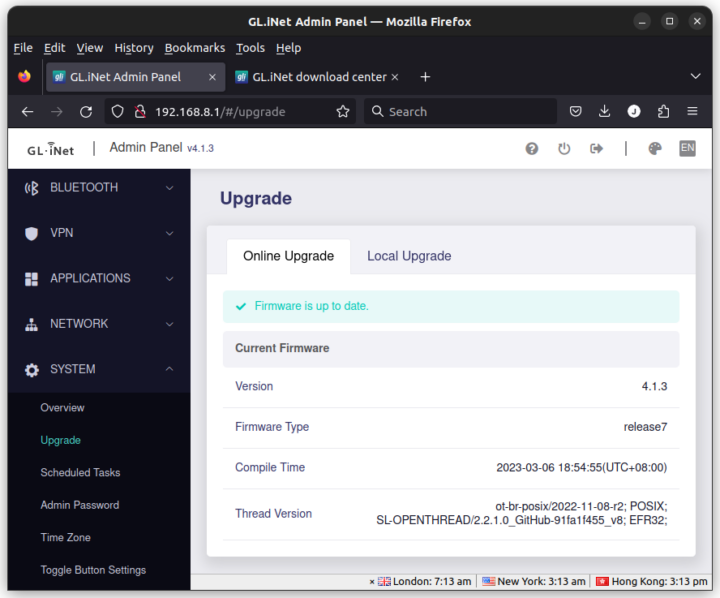
At that point, I remember forgot something… GL.iNet informed me they have a new firmware for the GL-S200 that I should apply manually. So let’s do that now by going to “SYSTEM->Upgrade”.
The firmware shows the 4.1.3 release 5 firmware is up to date in the Admin Panel because the new firmware was not pushed to the OTA server. But I was given a download link with a newer firmware that was compiled on the 6th of March 2023.
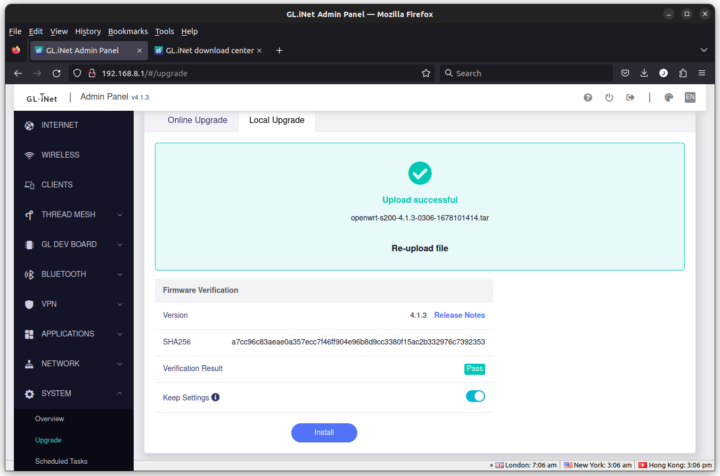
I downloaded the file, when to the Local Upgrade section, and uploaded the file to the GL-S200 Thread Border Router.
Verification was successful, so I clicked on Install, and eventually, I got Firmware 4.1.3 Release7 installed on my device.
Upgrading Thread Dev Boards firmware
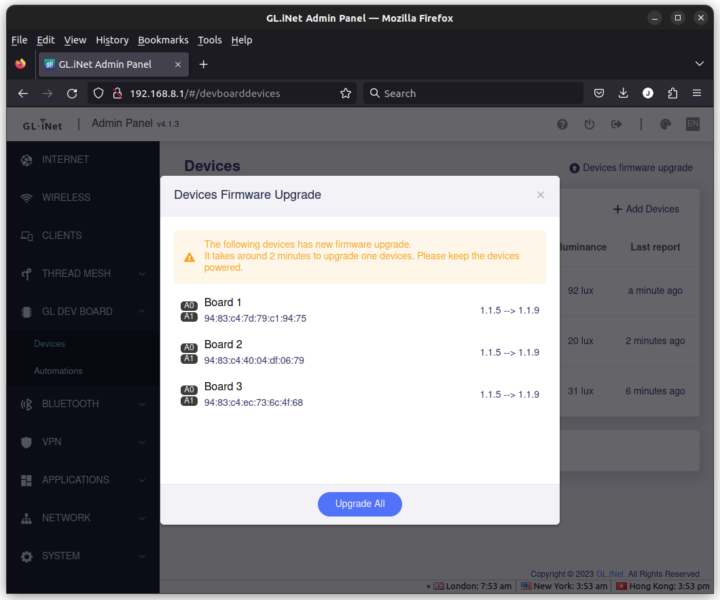
While I was going on with that firmware update business, I also noticed the Thread Dev Boards were also eligible for a firmware update from version 1.1.5 to 1.1.9, so I went ahead and it worked flawlessly.
Thread Topology
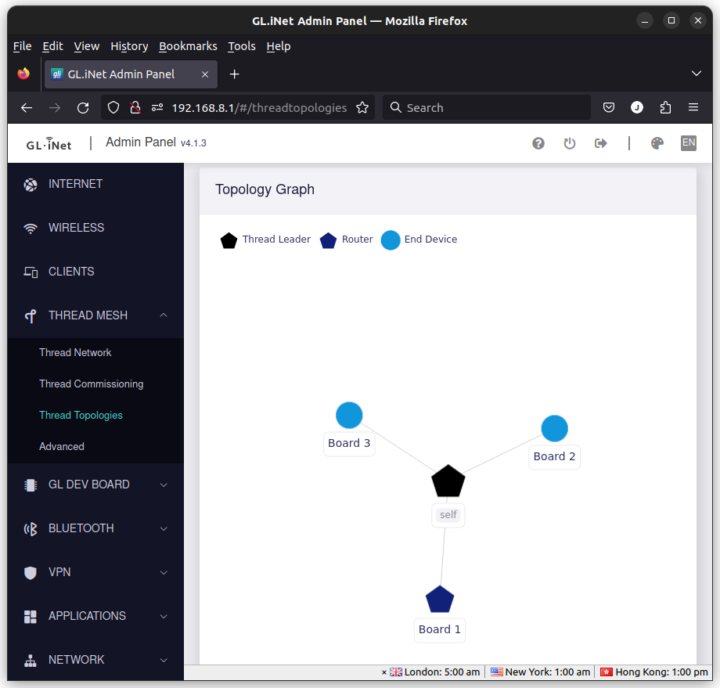
Thread relies on Mesh networking, so when nodes are close to the router they connect directly to the router, and when they are out of range or the signal is weak, they can act as routers themselves. With all devices on my desk…
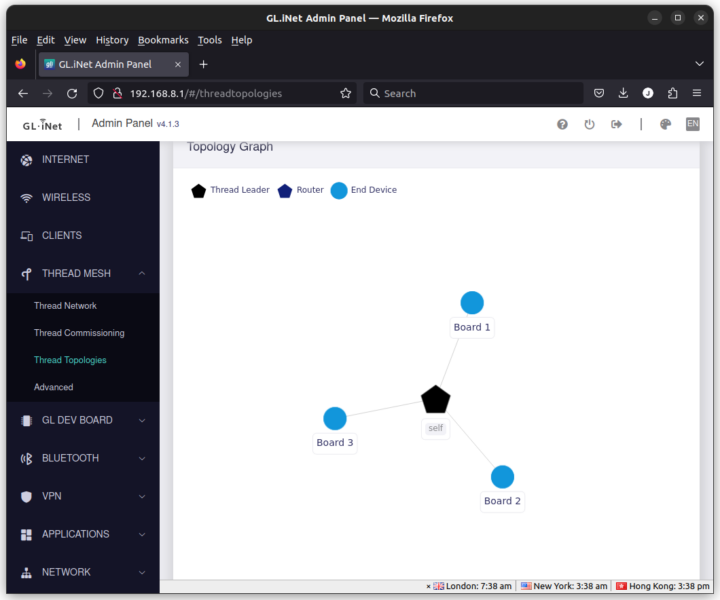
… the network had a star topology as expected.
So I tried to move the boards away from each other and arranged them in a straight line, even placing one outdoors.
We can easily spot the one outdoors with a higher temperature and illuminance.
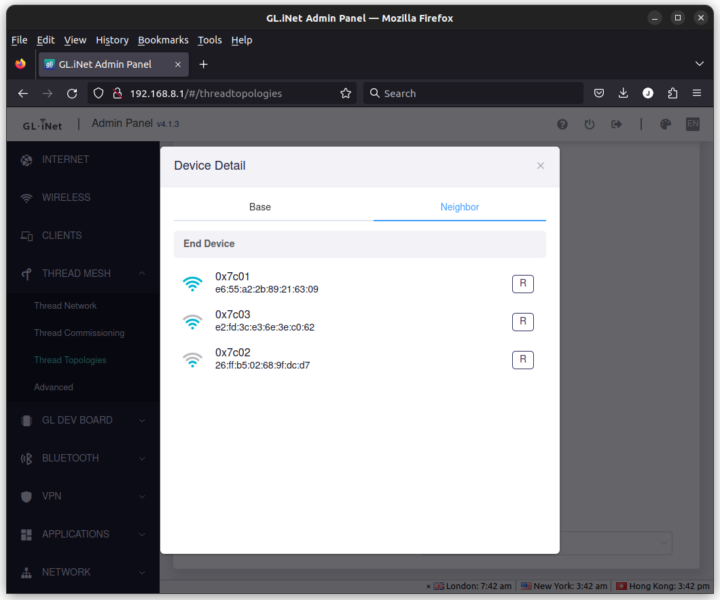
If we click on “Self” in the topology chart we can also see the signal strength of the node connected to the Thread Border Router. But at no point was I able to use the Thread Dev Board as a router. We even went to walk outside to try to get out of reach or at least a weaker signal, but Mesh networking would just not work the way I was expecting. So I asked GL.iNet engineers, and they replied a thread router firmware was required for this to work:
Currently our default TBD firmware is of the thread end device type and cannot be directly connected to each other. We will provide you with the thread router firmware and the corresponding TBD brushing guide later today.
|
1 2 3 4 |
$ bt -l port | age (sec) | device | driver | description ------+------------+------------+------------------+---------------------- * 0 | 1137 | ttyUSB0 | ch341-uart | USB Serial |
The serial port is detected, so I can run the command to check the current firmware status:
|
1 2 3 4 5 6 7 8 9 10 11 12 13 14 15 |
$ sudo ./mcumgr --conntype serial --connstring=/dev/ttyUSB0,baud=460800 image list Error: NMP timeout jaufranc@cnx-laptop-4:~/edev/GL-S200/TBD upgrade$ sudo ./mcumgr --conntype serial --connstring=/dev/ttyUSB0,baud=460800 image list Images: image=0 slot=0 version: 1.1.9 bootable: true flags: active confirmed hash: 88b4725af7975e0b60915c320a82082bb2dda923b736f0e31d2c7d4d67cac3d3 image=0 slot=1 version: 1.1.5 bootable: true flags: hash: 4d8548e6910e7214d8325a7d1a49a8390fb25cce983bdb0b15bfecc657f7860b Split status: N/A (0) |
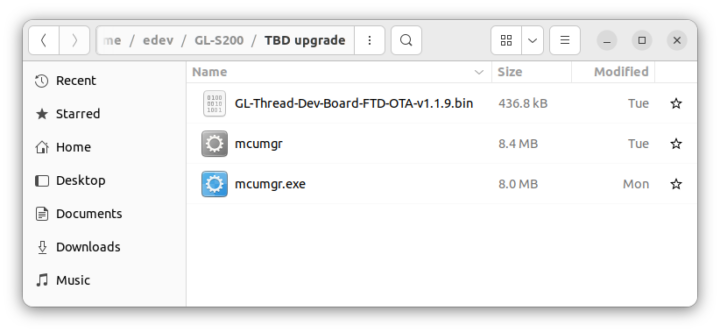
It failed the first time with “NMP timeout” error, but worked the second time. We can see the 1.1.9 firmware which I updated in the Admin Panel is in slot 0, and the earlier 1.1.5 firmware in slot 1. Now I can try to flash the Router firmware:
|
1 2 3 |
$ sudo ./mcumgr --conntype serial --connstring=/dev/ttyUSB0,baud=460800 image upload GL-Thread-Dev-Board-FTD-OTA-v1.1.9.bin 426.58 KiB / 426.58 KiB [========================] 100.00% 8.93 KiB/s 47s Done |
Let’s check it out again:
|
1 2 3 4 5 6 7 8 9 10 11 12 13 |
$ sudo ./mcumgr --conntype serial --connstring=/dev/ttyUSB0,baud=460800 image list Images: image=0 slot=0 version: 1.1.9 bootable: true flags: active confirmed hash: 88b4725af7975e0b60915c320a82082bb2dda923b736f0e31d2c7d4d67cac3d3 image=0 slot=1 version: 1.1.9 bootable: true flags: hash: 7dbb8a9867a000bb968099593bc1f6c2c7bb28ab458719f499364c4a77feca9f Split status: N/A (0) |
The firmware in slot 0 is the currently running firmware, while the firmware in slot 1 is the Router version we’ve just flashed. We can switch to the new firmware as follows:
|
1 |
sudo ./mcumgr --conntype serial --connstring=/dev/ttyUSB0,baud=460800 image test 7dbb8a9867a000bb968099593bc1f6c2c7bb28ab458719f499364c4a77feca9f |
We can then reboot the board and make sure the new firmware starting with 7dbb hash is in slot 0:
|
1 2 3 4 5 6 7 8 9 10 11 12 13 |
$ sudo ./mcumgr --conntype serial --connstring=/dev/ttyUSB0,baud=460800 image list Images: image=0 slot=0 version: 1.1.9 bootable: true flags: active confirmed hash: 7dbb8a9867a000bb968099593bc1f6c2c7bb28ab458719f499364c4a77feca9f image=0 slot=1 version: 1.1.9 bootable: true flags: hash: 88b4725af7975e0b60915c320a82082bb2dda923b736f0e31d2c7d4d67cac3d3 Split status: N/A (0) |
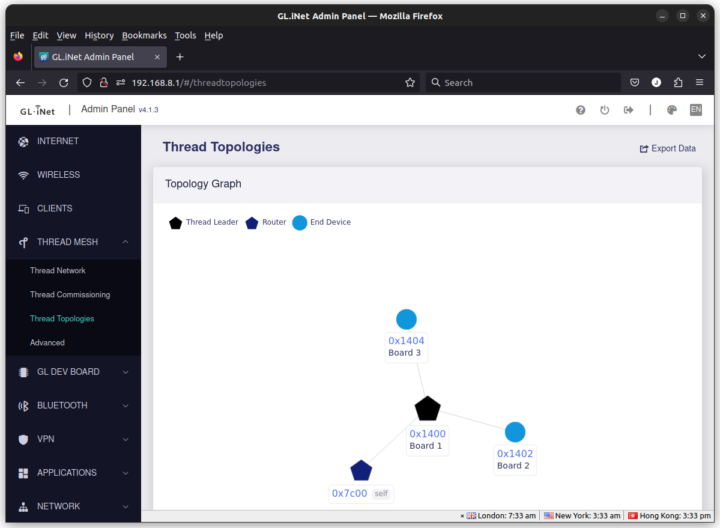
After adding the board again to the Admin Panel, we can see the Thread Leader (GL-S200), two End Devices, and a Router (the board we’ve just flashed with the Router firmware).
None of the End Devices are connected to the Board 1 router because all are on my desk and connected to the GL-S200. So I move Board 1 along with one of the End Devices into another room, 12 meters from the GL-S200 Thread Border Router. But the topology did not change. It looks like the connection is “sticky” and a Thread node will only reconnect to another Router if it is out of range, and not only based on the signal strength.
But when I turned off the GL-S200 and restarted it, the two End Devices had reconnected to the Board 1 router that was now the “Thread Leader” in the network.
So it does work. I did not expect it to work exactly like that because Board 2 is 10 centimeters from the GL-S200 Thread Border Router (self) and Board 1 is 12 meters away, but Board 2 did not reconnect to the GL-S200, even after a while. In other words, as long as the connection is alive, a Thread node is not going to reconnect to another router even if it is closer and with a stronger signal, and I suppose that makes sense for battery life.
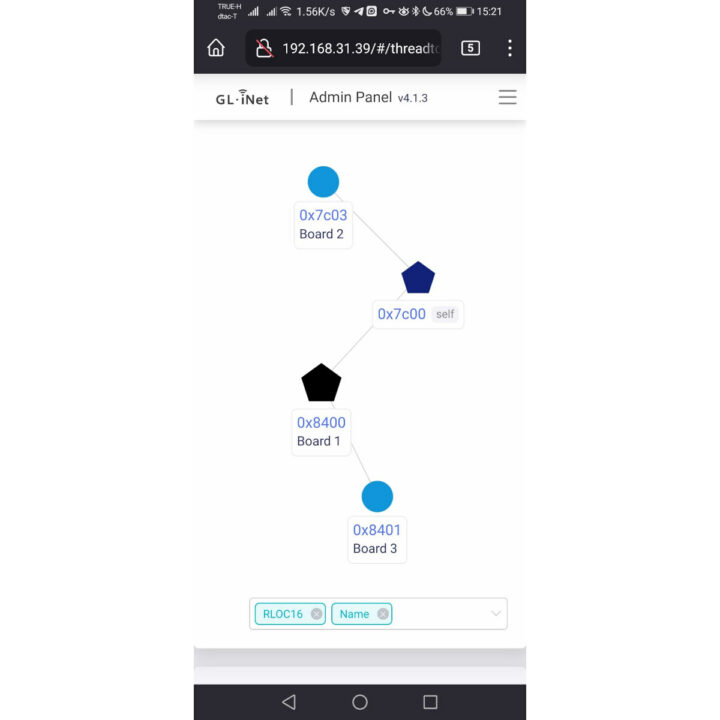
So I took Board 2 (End Device) and Board 1 (Router) for a short trip out of range of the GL-S200, then turned on Board 1, followed by Board 2 to make sure they associated, and walked back home. And it worked, as in the diagram above Board 2 connects to GL-200 “Thread Leader” through Board 1 acting as a router.
GL Thread Dev Board information
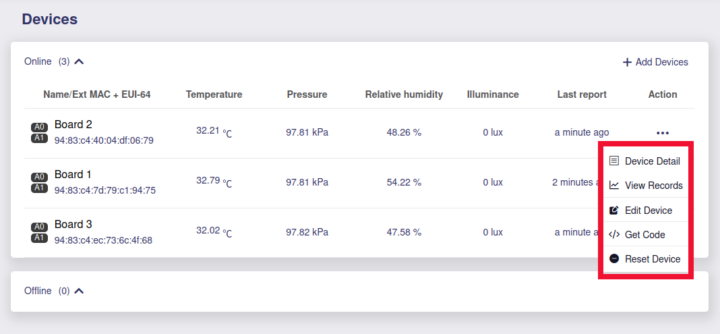
If we click on the three dots in the Action column for a specific device, we’ll get access to more options with Device Detail, View Records, Edit Device, Get Code, and Reset Device.
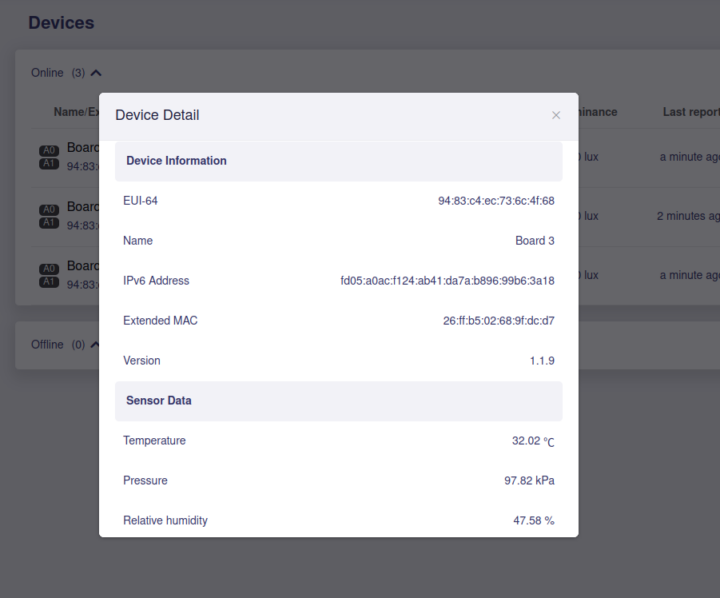
Device info
We’ll get the EUI-64, name, IPv6 address, Extended MAC address (64-bit instead of the usual 48-bit), firmware version, and sensor data.
View Records
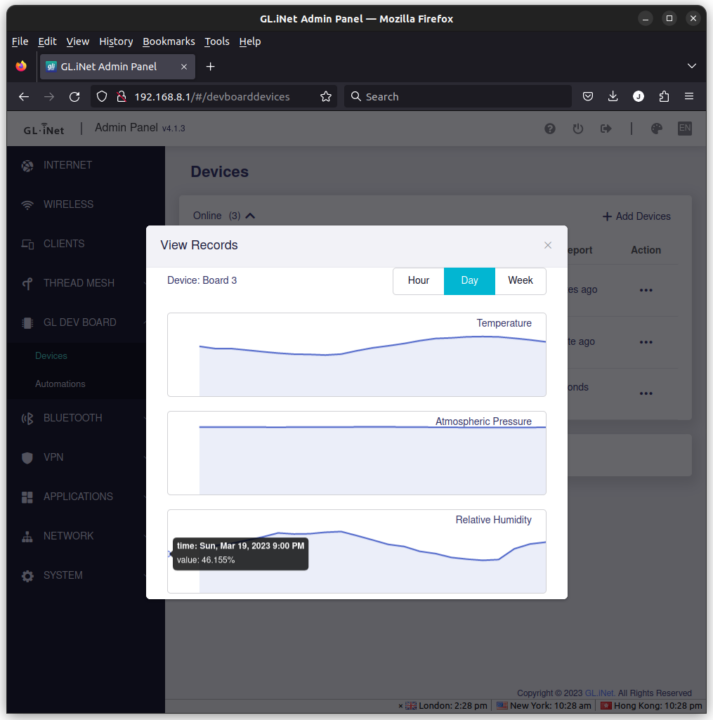
After leaving the boards running for over 24 hours, I went to check the “View Records” menu to see charts for the sensors’ values of a specific board.
It looks mostly fine, but as you can see on the bottom left, there are values at 9 pm and the chart only starts at 11 pm for some reason. It’s the same for all boards.
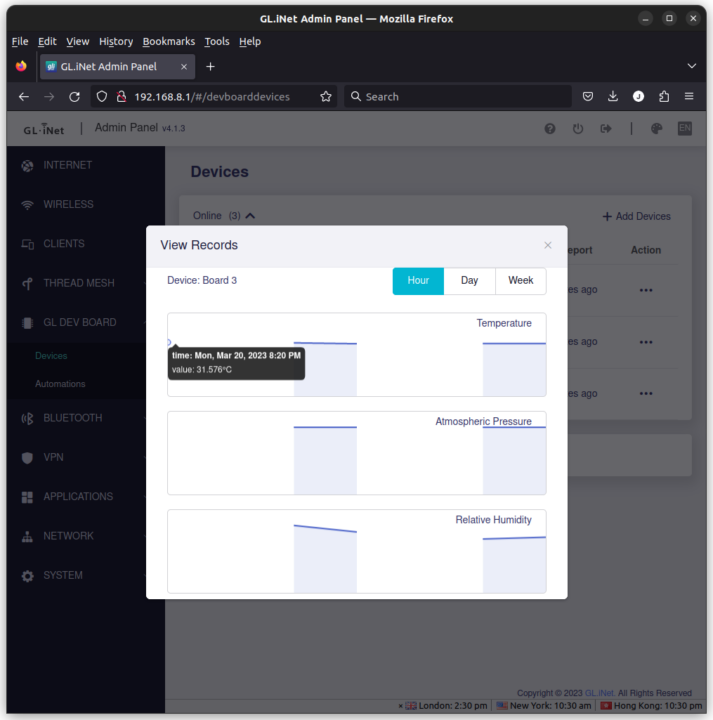
It looks even worse on the hourly chart. It looks like a display bug rather than missing data points since we can always get a data point on the left side.
Code examples
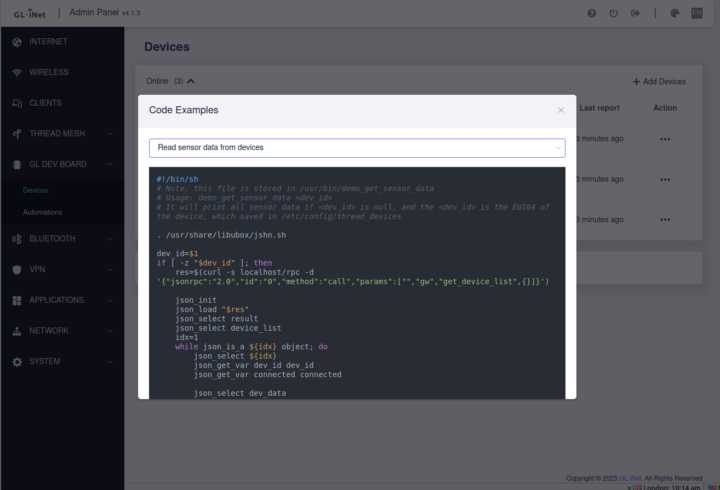
The “Get Code” section may be the most important part if you’re going to monitor and control your own Thread devices with five code examples provided.
We’ll need to connect to the GL-S200 Thread Border Router via SSH to run the samples. Let’s start with the code to read data from sensors.
|
1 2 3 4 |
root@GL-S200:~# /usr/bin/demo_get_sensor_data 1 dev_id=9483c44004df0679 connected=1 temperature=31.300811 humidity=43.409729 brightness=0 pressure=97.817392 2 dev_id=9483c47d79c19475 connected=1 temperature=32.742767 humidity=53.620910 brightness=0 pressure=97.814472 3 dev_id=9483c4ec736c4f68 connected=1 temperature=31.292800 humidity=42.652893 brightness=0 pressure=97.822056 |
We can also select a specific device using its EUI-64:
|
1 2 |
root@GL-S200:~# /usr/bin/demo_get_sensor_data 9483c44004df0679 dev_id=9483c44004df0679 connected=1 temperature=31.300811 humidity=43.409729 brightness=0 pressure=97.817392 |
Here’s the source code for reference:
|
1 2 3 4 5 6 7 8 9 10 11 12 13 14 15 16 17 18 19 20 21 22 23 24 25 26 27 28 29 30 31 32 33 34 35 36 37 38 39 40 41 42 43 44 45 46 47 48 |
#!/bin/sh # Note, this file is stored in /usr/bin/demo_get_sensor_data # Usage: demo_get_sensor_data <dev_id> # It will print all sensor data if <dev_id> is null, and the <dev_id> is the EUI64 of the device, which saved in /etc/config/thread_devices . /usr/share/libubox/jshn.sh dev_id=$1 if [ -z "$dev_id" ]; then res=$(curl -s localhost/rpc -d '{"jsonrpc":"2.0","id":"0","method":"call","params":["","gw","get_device_list",{}]}') json_init json_load "$res" json_select result json_select device_list idx=1 while json_is_a ${idx} object; do json_select ${idx} json_get_var dev_id dev_id json_get_var connected connected json_select dev_data json_get_var val_temp temperature json_get_var val_humi humidity json_get_var val_brightness brightness json_get_var val_pressure pressure echo "$idx dev_id=$dev_id connected=$connected temperature=$val_temp humidity=$val_humi brightness=$val_brightness pressure=$val_pressure" json_select .. json_select .. idx=$((idx + 1)) done else res=$(curl -s localhost/rpc -d "{\"jsonrpc\":\"2.0\",\"id\":\"0\",\"method\":\"call\",\"params\":[\"\",\"gw\",\"get_device_status\",{\"dev_id\":\"$dev_id\"}]}") json_init json_load "$res" json_select result json_get_var dev_id dev_id json_get_var connected connected json_select dev_data json_get_var val_temp temperature json_get_var val_humi humidity json_get_var val_brightness brightness json_get_var val_pressure pressure echo "dev_id=$dev_id connected=$connected temperature=$val_temp humidity=$val_humi brightness=$val_brightness pressure=$val_pressure" fi |
Let’s try the other samples.
|
1 2 3 4 |
ls /usr/bin/demo* /usr/bin/demo_control_gpio /usr/bin/demo_sensor_trigger /usr/bin/demo_control_led /usr/bin/demo_user_action_trigger /usr/bin/demo_get_sensor_data |
The second sample control the two RGB LEDs on the board selected by its EUI-64 device ID:
|
1 2 3 4 5 6 7 8 9 10 11 12 13 |
root@GL-S200:~# /usr/bin/demo_control_led 9483c44004df0679 LED OFF LED ON LED OFF LED TOGGLE Changle LED Color to Red light Changle LED Color to Orange light Changle LED Color to Yellow light Changle LED Color to Green light Changle LED Color to Blue light Changle LED Color to Indigo light Changle LED Color to Purple light Changle LED Color to White light |
Here’s a short video demo to show what it looks like.
The GPIO control sample set some I/O to output mode, the low and high, again for a specific board:
|
1 2 3 4 5 6 7 8 9 10 11 12 13 14 15 16 17 18 |
root@GL-S200:~# /usr/bin/demo_control_gpio 9483c44004df0679 Get GPIO Status GPIO 0.15: 0 GPIO 0.16: 0 GPIO 0.17: 0 GPIO 0.20: 0 Set GPIO 0.15/0.16/0.17/0.20 to output low level Get GPIO Status GPIO 0.15: 0 GPIO 0.16: 0 GPIO 0.17: 0 GPIO 0.20: 0 Set GPIO 0.15/0.16/0.17/0.20 to output high level Get GPIO Status GPIO 0.15: 1 GPIO 0.16: 1 GPIO 0.17: 1 GPIO 0.20: 1 |
The last two samples to control the LEDs and GPIOs use the coap_cli “small CoAP implementation” command, for example, to turn the LEDs off:
|
1 |
coap_cli -B 2 -N -e "$ctl_cmd_led_off" -m put coap://[$addr]/cmd 1>/dev/null 2>/ |
coap_cli usage:
|
1 2 3 4 5 6 7 8 9 10 11 12 13 14 15 16 17 18 19 20 21 22 23 24 25 26 27 28 29 30 31 32 33 34 35 36 37 38 39 40 41 42 43 44 45 46 47 48 49 50 51 52 53 54 55 56 57 58 59 60 61 62 63 64 65 66 67 68 69 70 71 72 73 74 75 76 77 78 79 |
root@GL-S200:~# coap_cli coap_cli v4.2.1 -- a small CoAP implementation Copyright (C) 2010-2019 Olaf Bergmann <bergmann@tzi.org> and others TLS Library: None Usage: coap_cli [-a addr] [-b [num,]size] [-e text] [-f file] [-l loss] [-m method] [-o file] [-p port] [-r] [-s duration] [-t type] [-v num] [-A type] [-B seconds] [-K interval] [-N] [-O num,text] [-P addr[:port]] [-T token] [-U] [[-k key] [-u user]] [[-c certfile] [-C cafile] [-R root_cafile]] URI URI can be an absolute URI or a URI prefixed with scheme and host General Options -a addr The local interface address to use -b [num,]size Block size to be used in GET/PUT/POST requests (value must be a multiple of 16 not larger than 1024) If num is present, the request chain will start at block num -e text Include text as payload (use percent-encoding for non-ASCII characters) -f file File to send with PUT/POST (use '-' for STDIN) -l list Fail to send some datagrams specified by a comma separated list of numbers or number ranges (for debugging only) -l loss% Randomly fail to send datagrams with the specified probability - 100% all datagrams, 0% no datagrams -m method Request method (get|put|post|delete|fetch|patch|ipatch), default is 'get' -o file Output received data to this file (use '-' for STDOUT) -p port Listen on specified port -r Use reliable protocol (TCP or TLS) -s duration Subscribe to / Observe resource for given duration in seconds -t type Content format for given resource for PUT/POST -v num Verbosity level (default 3, maximum is 9). Above 7, there is increased verbosity in GnuTLS logging -A type Accepted media type -B seconds Break operation after waiting given seconds (default is 90) -K interval send a ping after interval seconds of inactivity -N Send NON-confirmable message -O num,text Add option num with contents text to request. If the text begins with 0x, then the hex text is converted to binary data -P addr[:port] Use proxy (automatically adds Proxy-Uri option to request) -T token Include specified token -U Never include Uri-Host or Uri-Port options PSK Options (if supported by underlying (D)TLS library) -k key Pre-shared key for the specified user -u user User identity for pre-shared key mode PKI Options (if supported by underlying (D)TLS library) -c certfile PEM file containing both CERTIFICATE and PRIVATE KEY This argument requires (D)TLS with PKI to be available -C cafile PEM file containing the CA Certificate that was used to sign the certfile. This will trigger the validation of the server certificate. If certfile is self-signed (as defined by '-c certfile'), then you need to have on the command line the same filename for both the certfile and cafile (as in '-c certfile -C certfile') to trigger validation -R root_cafile PEM file containing the set of trusted root CAs that are to be used to validate the server certificate. The '-C cafile' does not have to be in this list and is 'trusted' for the verification. Alternatively, this can point to a directory containing a set of CA PEM files Examples: coap-client -m get coap://[::1]/ coap-client -m get coap://[::1]/.well-known/core coap-client -m get coap+tcp://[::1]/.well-known/core coap-client -m get coaps://[::1]/.well-known/core coap-client -m get coaps+tcp://[::1]/.well-known/core coap-client -m get -T cafe coap://[::1]/time echo -n 1000 | coap-client -m put -T cafe coap://[::1]/time -f - |
The action trigger demo reports the Knob status:
|
1 2 3 4 5 6 7 8 9 10 11 |
root@GL-S200:~# /usr/bin/demo_user_action_trigger 9483c44004df0679 2023/03/19 17:38:14 info (/usr/bin/demo_user_action_trigger:34) 9483c44004df0679: Press the knob. 2023/03/19 17:38:16 info (/usr/bin/demo_user_action_trigger:34) 9483c44004df0679: Press the knob. 2023/03/19 17:38:18 info (/usr/bin/demo_user_action_trigger:32) 9483c44004df0679: Turn the knob forward 2023/03/19 17:38:19 info (/usr/bin/demo_user_action_trigger:32) 9483c44004df0679: Turn the knob forward 2023/03/19 17:38:20 info (/usr/bin/demo_user_action_trigger:32) 9483c44004df0679: Turn the knob forward 2023/03/19 17:38:20 info (/usr/bin/demo_user_action_trigger:32) 9483c44004df0679: Turn the knob reverse 2023/03/19 17:38:21 info (/usr/bin/demo_user_action_trigger:32) 9483c44004df0679: Turn the knob reverse 2023/03/19 17:38:21 info (/usr/bin/demo_user_action_trigger:32) 9483c44004df0679: Turn the knob reverse 2023/03/19 17:38:23 info (/usr/bin/demo_user_action_trigger:34) 9483c44004df0679: Press the knob. 2023/03/19 17:38:25 info (/usr/bin/demo_user_action_trigger:32) 9483c44004df0679: Turn the knob reverse |
The code relies on /usr/bin/eco binary [Update: it looks like it’s the eco-lua Lua interpreter project, see comments section]:
|
1 2 3 4 5 6 7 8 9 10 11 12 13 14 15 16 17 18 19 20 21 22 23 24 25 26 27 28 29 30 31 32 33 34 35 36 37 38 39 |
#!/usr/bin/env eco -- Note, this file is stored in /usr/bin/demo_user_action_trigger, It listens for events reported when the user operates the knob. -- Usage: demo_sensor_trigger local ubus = require 'eco.ubus' local sys = require 'eco.sys' local cjson = require 'cjson' local log = require "glog" local OPT_TURNING_THE_KNOB = 1 local OPT_PRESS_THE_KNOB = 2 log.level(log.LOG_INFO) sys.signal(sys.SIGINT, function() print(' Got SIGINT, now quit') eco.unloop() end) local con, err = ubus.connect() if not con then error(err) end con:listen('user_active_trigger', function(ev, msg) local event_data = cjson.encode(msg) log.debug('Recievd user active trigger ' .. ev .. ' ' .. event_data) local trigger, operation, direction = msg.trigger, msg.operation, msg.direction if operation == OPT_TURNING_THE_KNOB then log.info(trigger .. ': Turn the knob ' .. direction) elseif operation == OPT_PRESS_THE_KNOB then log.info(trigger .. ': Press the knob.') else log.err('Unknown operation!') end end) |
It’s the same for the sensor trigger sample that monitors the PIR sensor for all Thread Dev Boards connected to the GL-S200 Thread Border Router:
|
1 2 3 4 5 6 |
root@GL-S200:~# /usr/bin/demo_sensor_trigger 2023/03/19 17:47:46 info (/usr/bin/demo_sensor_trigger:31) 9483c44004df0679: Human body detected. 2023/03/19 17:47:46 info (/usr/bin/demo_sensor_trigger:31) 9483c4ec736c4f68: Human body detected. 2023/03/19 17:47:49 info (/usr/bin/demo_sensor_trigger:31) 9483c4ec736c4f68: Human body detected. 2023/03/19 17:47:52 info (/usr/bin/demo_sensor_trigger:31) 9483c44004df0679: Human body detected. 2023/03/19 17:48:15 info (/usr/bin/demo_sensor_trigger:31) 9483c47d79c19475: Human body detected. |
All those samples could help you get started with your own scripts.
GL-S200 “Automations”
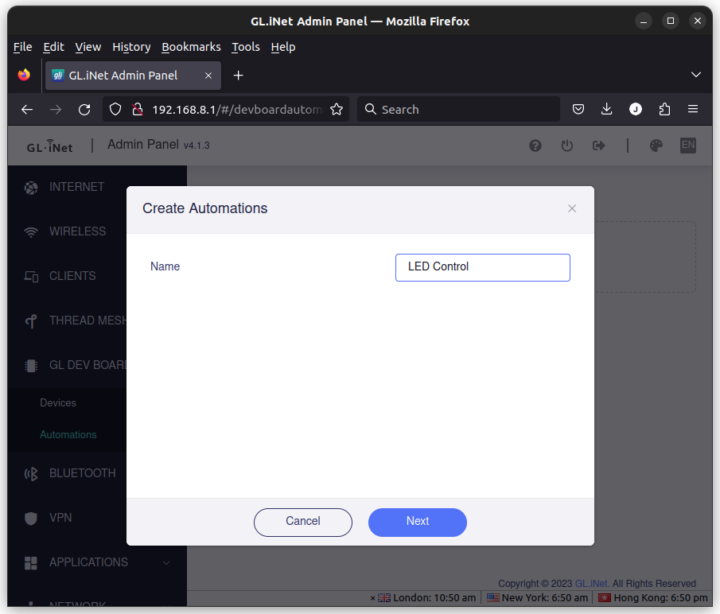
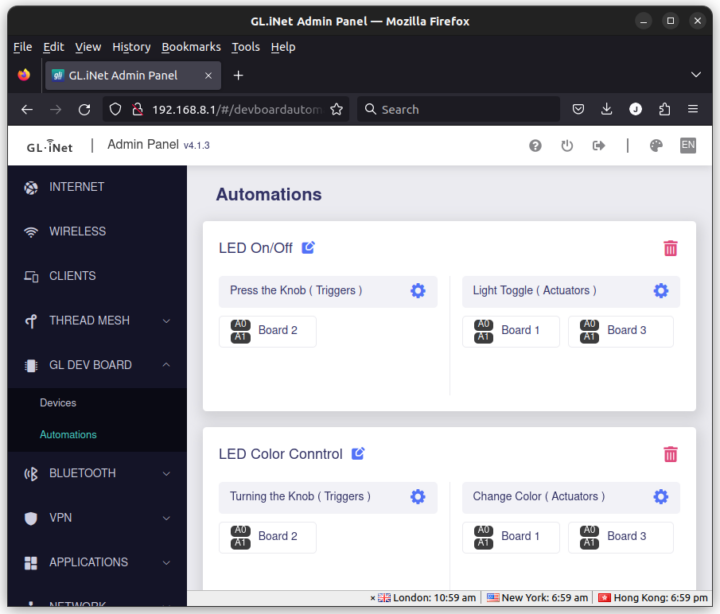
The GL DEV BOARDS section also includes an “Automations” section.
I’ll try to control the RGB LEDS on two Thread Dev Boards by using the knob on the remaining third board.
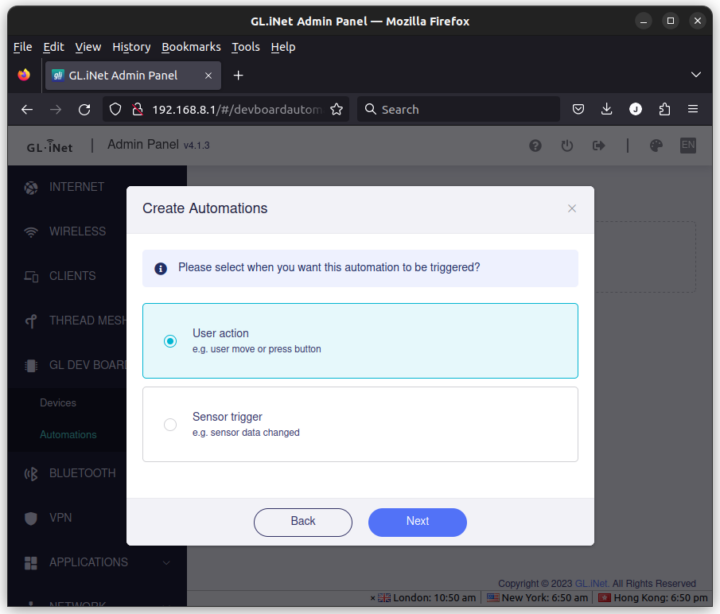
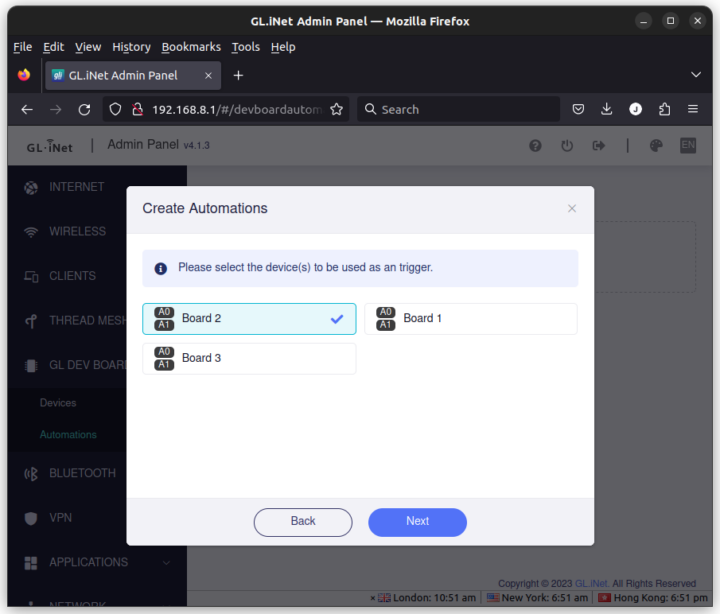
After we’ve given a name to the automation, we can select user action, and then the board we’ll use as the knob: “Board 2”.
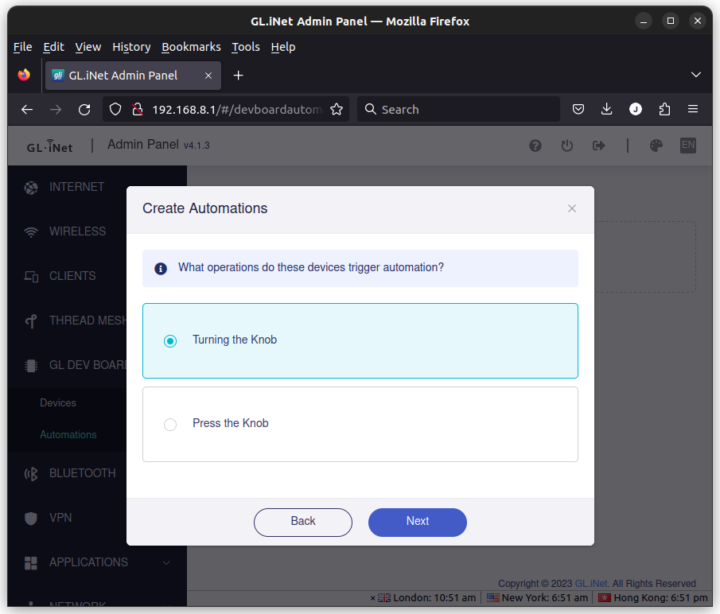
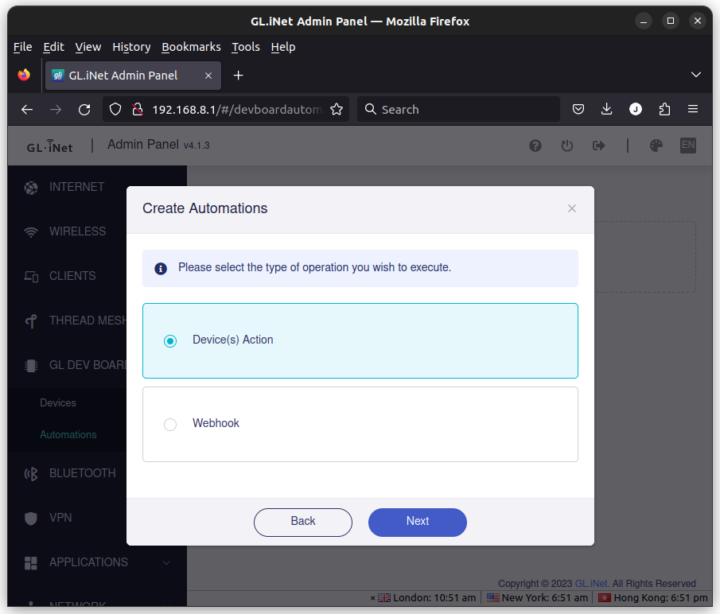
I selected “Turning the knob”, and then “Device(s) Action”.
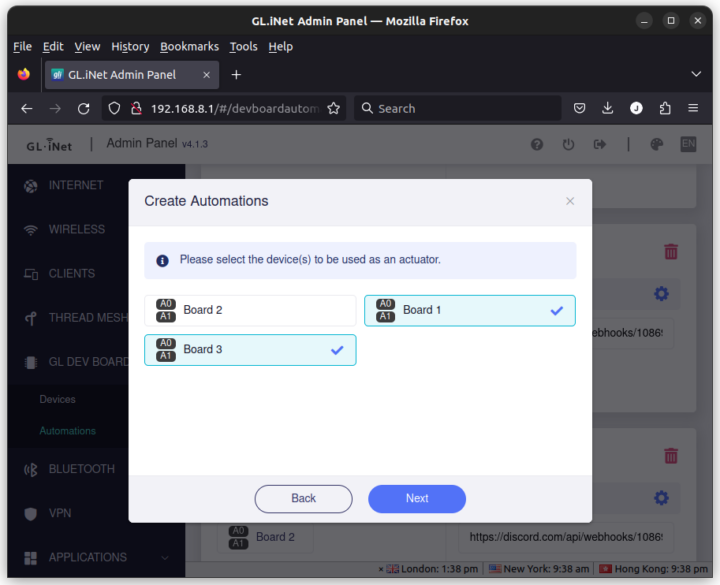
Since I want to control the other two boards, I selected “Board 1” and “Board 2”.
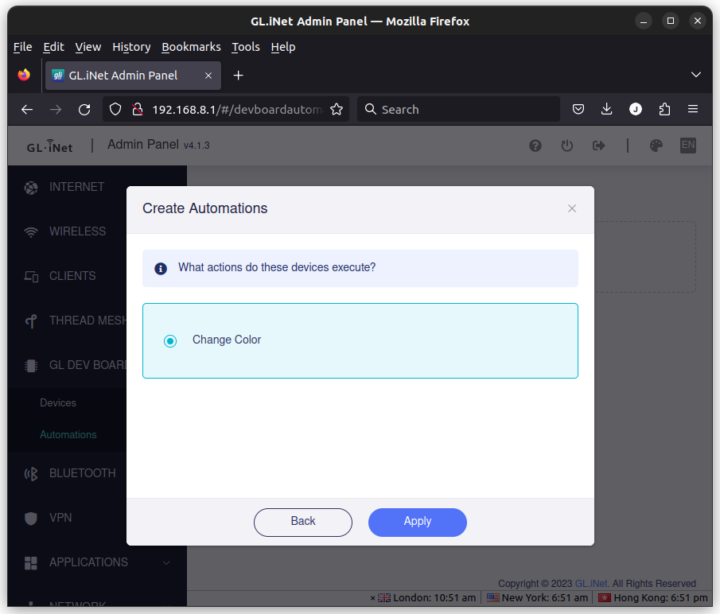
Then the only option is “Change Color”, so let’s select that, and click Apply.
But it’s not working, and the RGB LEDs remain turned off no matter in which direction I turn the know. I eventually found out the RGB LEDs had to be turned on before we could change the colors, so I created another automation to turn the LEDs on/off when pressing the knob.
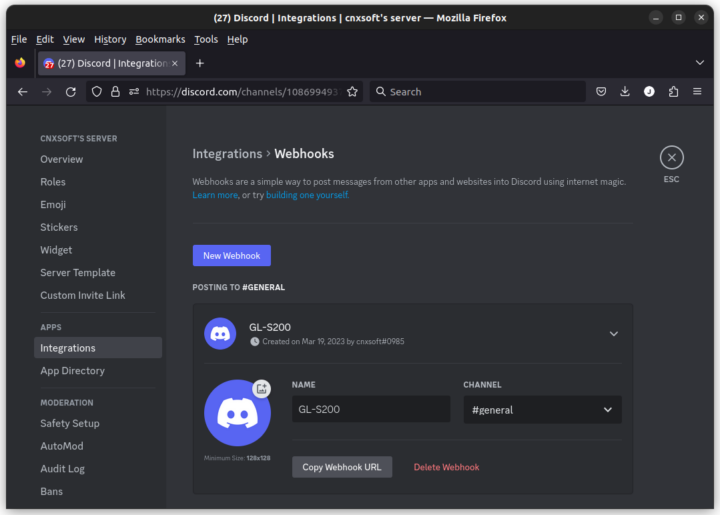
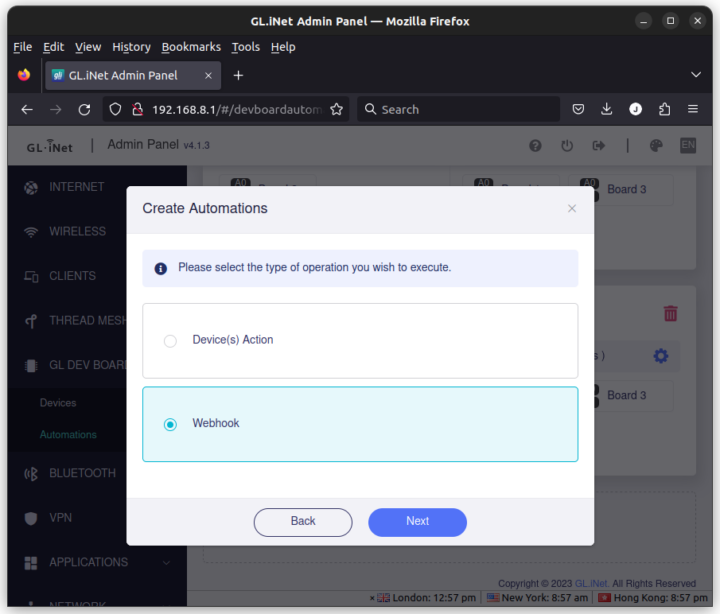
The Automation section also supports webhooks, so I decided to create an automation to alert me in Discord when motion is detected. For this purpose, I created a Discord server and got a Webhook URL(https://discord.com/api/webhooks/xxxx) following the instructions on Discord.
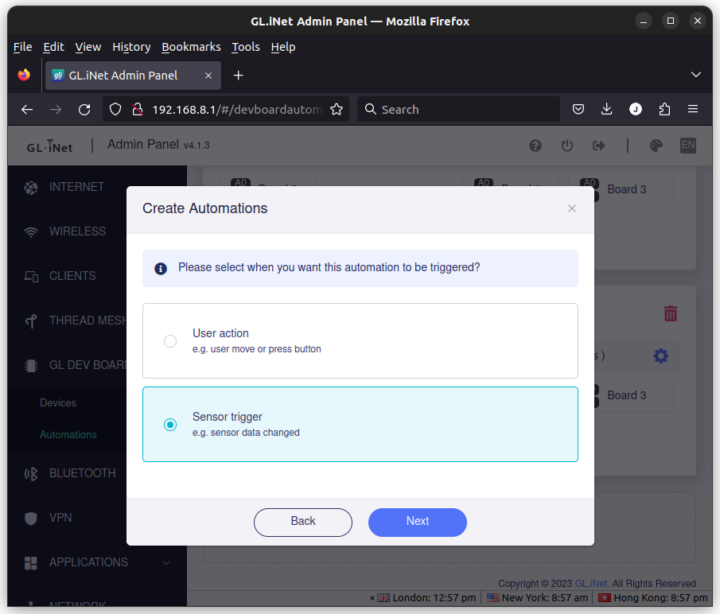
Then I created another automation selecting Sensor Trigger…
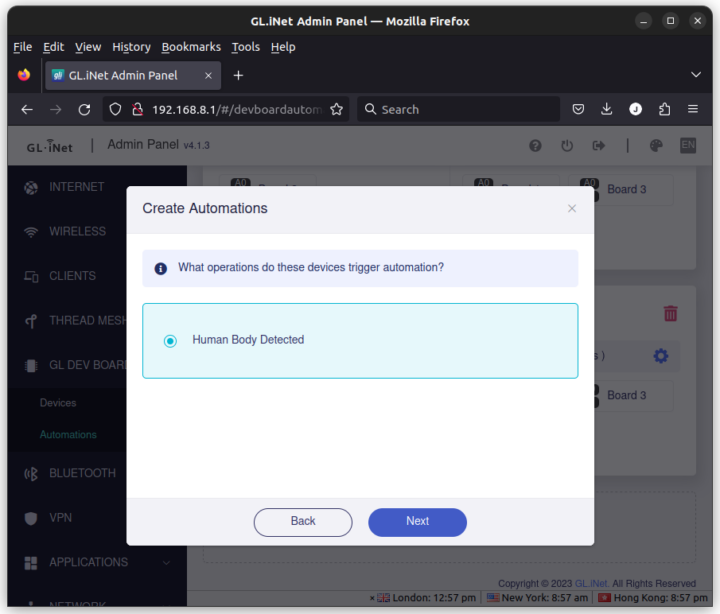
… “Human Body Detected” (which just means the PIR motion sensor has been triggered)
… and “Webhook”.
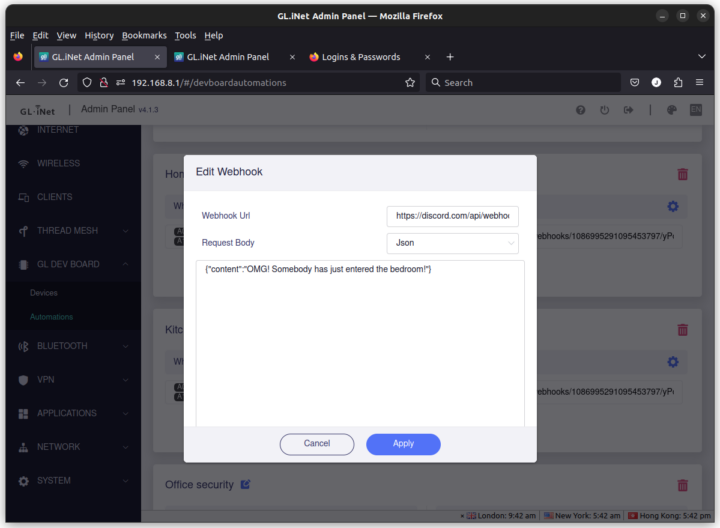
There I added my Webhook URL, selected Json, and added content like:
|
1 |
{"content":"OMG! Somebody has just entered the bedroom!"} |
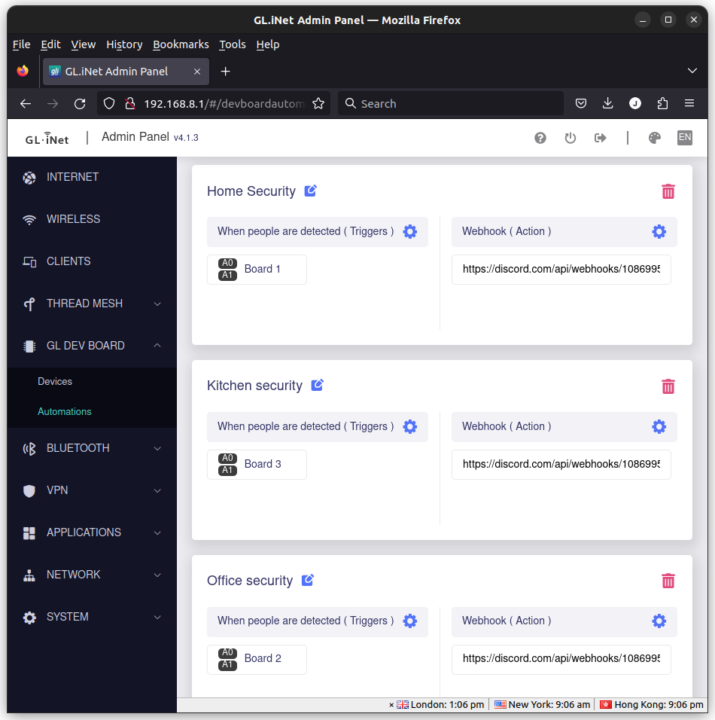
Finally, I clicked on Apply and repeated the same procedure to sense motion in the kitchen and office.
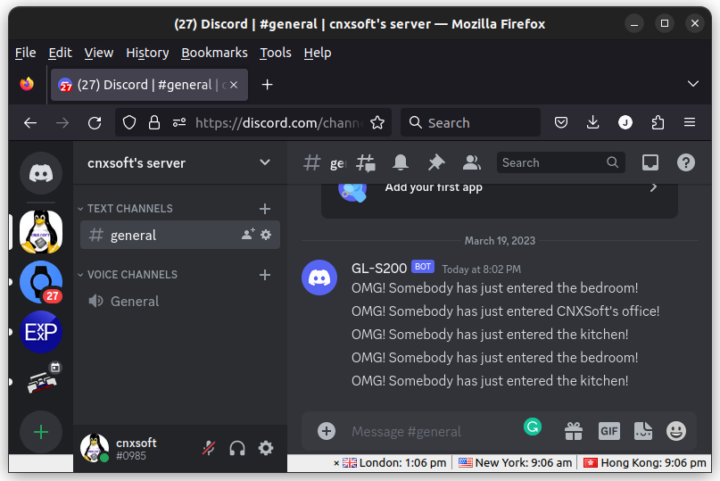
Now, I can go to Discord, and walk around the house to trigger the PIR motion sensors for all three boards.
Success! The automation section is pretty neat, but it looks like it works only with GL.iNet Thread Dev Boards. So I asked whether the source code would be shared for people to update the solution to work with their own Thread devices, but I did not get an answer to that specific question.
Misc
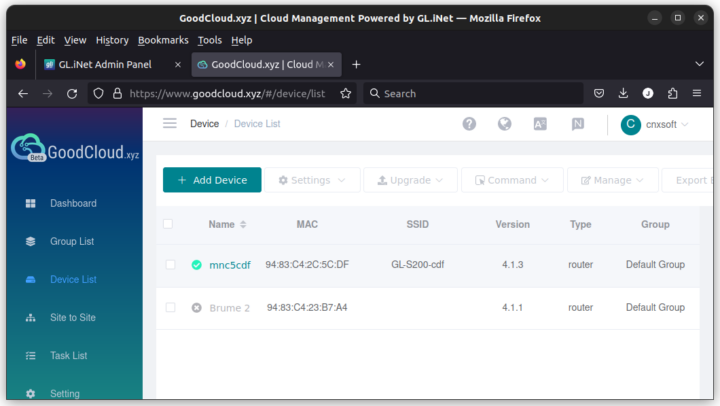
Just like other GL.iNet network devices, the GL-S200 supports GoodCloud for remote access, but it has limited use since it the Thread and Bluetooth parts are not supported.
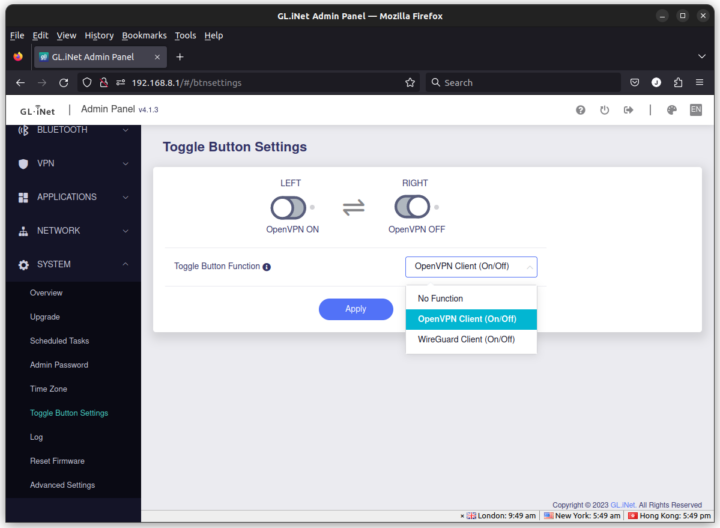
I initially thought the Mode Switch button might be used to switch between BLE and Thread, but just like in earlier routers, it can be set to switch on/off WireGuard or OpenVPN.
Due to time constraints, I have not tested the Bluetooth part, but I’d expect the interface and experience to be similar to the GL-S10 BLE to MQTT bridge I reviewed last year.
This was an interesting experience, and I’d like to thank GL.iNet for sending the GL-S200 Thread Border Router kit for evaluation/beta testing. The kit I’ve received is available for pre-order for $154.00 plus shipping, but if you already have your own Thread nodes, then the GL-S200 alone is sold for $79 during the pre-order period, after which it will be $99.

Jean-Luc started CNX Software in 2010 as a part-time endeavor, before quitting his job as a software engineering manager, and starting to write daily news, and reviews full time later in 2011.
Support CNX Software! Donate via cryptocurrencies, become a Patron on Patreon, or purchase goods on Amazon or Aliexpress






Interesting reading. I have two questions :
> what is this command bt -l
bootterm -> https://www.cnx-software.com/2020/12/14/bootterm-a-developer-friendly-serial-terminal-program/
Yeps, thx ! Just tried it and i like it. the -n is extremely useful.
I could not find any information about eco. It’s just a binary file (ELF) in the OpenWrt image.
Most probably this Lua interpreter: https://github.com/zhaojh329/lua-eco/
Yes, that looks right.
Indeed. I hadn’t even recognized lua code 🙁
I wonder why they implemented hardware on their own, instead of just supplying a docker image and a usb-connected module. World have been a lot more useful for most users
This kind of kit is screaming to be upgraded to use matter.