In this post, we’ll review the SONOFF Mini Extreme, also known as MINIR4, WiFi smart switch based on ESP32 wireless MCU by installing it into a wall-mounted light switch box and controlling it with both the eWelink mobile app for Android and the SONOFF R5 scene controller.
SONOFF MINIR4 Installation
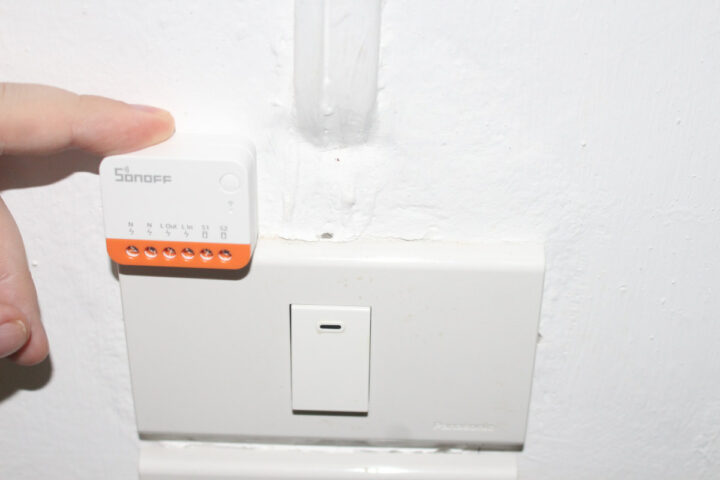
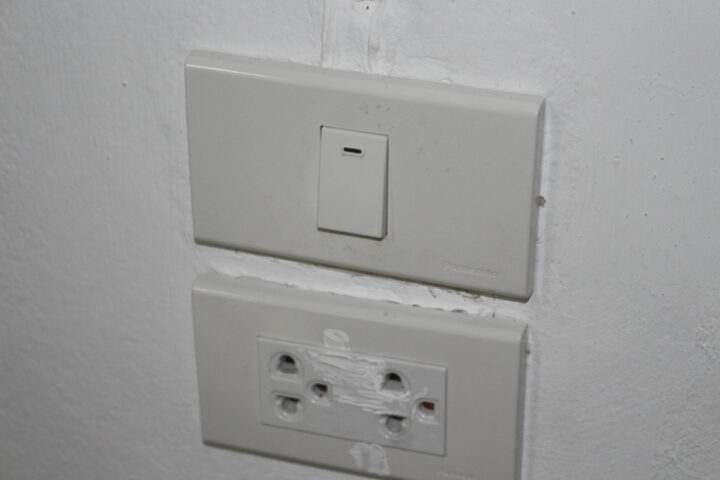
We’ve already gone through the specifications, unboxing, and teardown in the announcement, so I’ll get straight to the installation part. Note this review was done with a light switch “box” (about 11x6cm) in Thailand, so your mileage may vary.
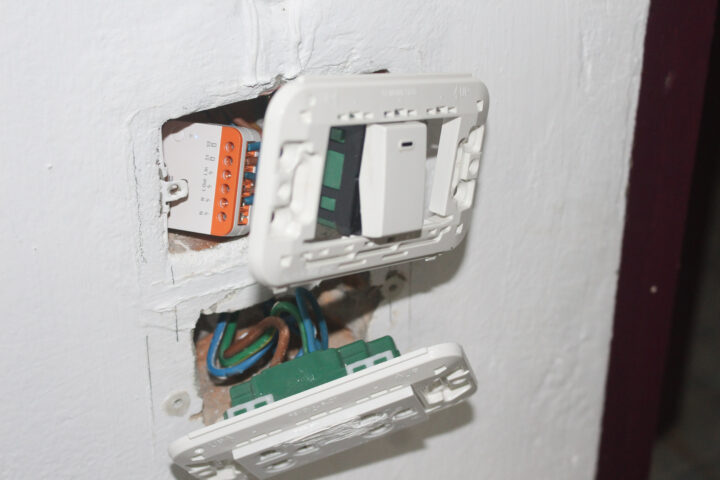
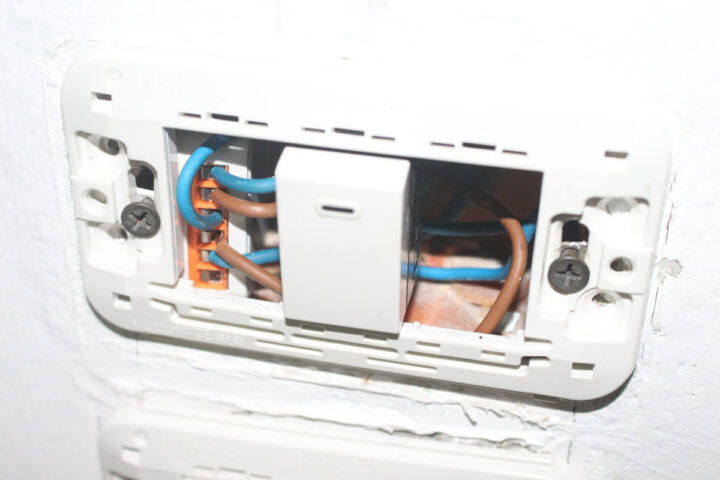
The first challenge is that contrary to the similarly-sized SONOFF ZBMINI Extreme Zigbee switch, the MINIR4 WiFi switch requires a neutral cable, and most lights in Thailand are wired without a neutral wire, so I had to get the neutral wire from the outlet switch box underneath.
When I call those “boxes” there are really holes in the wall here… Wiring is quite straightforward as I just had to connect the light switch to S1 and S2 using short wires, insert the live wire that was previously going to the light switch to Lin, the wire going out of the switch to Lout, and finally the Neutral wire to one of the N ports on the MINIR4.
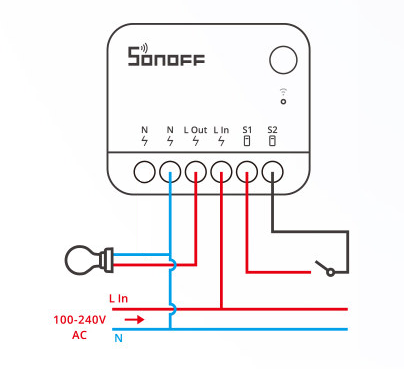 I did not use the N port on the left because the light is already connected to the Neutral wire from somewhere else in the house. The SONOFF MINIR4 switch fits in the “box” but it’s still quite tight. It’s still neater and/or easier than connecting a WiFi switch close to the light on the ceiling.
Remember that we are dealing with 110V or 220V here and for your and/or your family’s safety, if you don’t feel comfortable/knowledgeable enough to perform the installation yourself, get a qualified electrician to do it for you, and in some countries, it may even be a legal requirement.
Once the installation is complete, there’s no visual difference between our old “dumb” light switch and our new smart switch.
I could still turn the light on and off normally, even before installing any app, so all is good and the installation looks successful. The SONOFF MINIR4 introduces a small delay, however, but something well below 500ms.
Controlling MINIR4 with the eWelink app
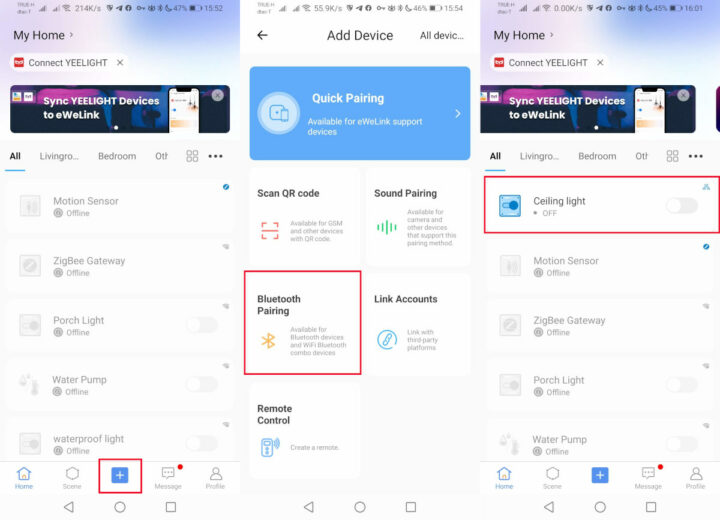
I’ve reviewed SONOFF devices with eWelink Android app several times already, and the app is fairly straightforward to use so I won’t go into the details of adding MINIR4 to eWelink, but the important points are that you should select Bluetooth pairing, select a 2.4 GHz WiFi access point, input its password, and give the device a name. I went with “Ceiling light”.
From there, I could easily switch on and off the lights. Note that for improved security and privacy, you’ll probably want to set up a Guest WiFi network/SSID in your router reserved for all your IoT/Smart Home devices, and separated from your computers and NAS which may store more valuable data. So if the company is hacked or you don’t trust their/your government not to spy on you, they’ll only have (easy) access to the guest network.
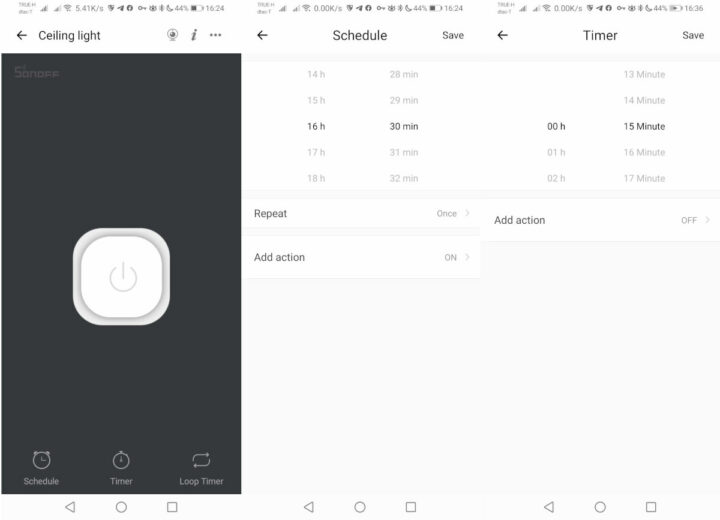
If we tap on the device name we have a few more options with Schedule, Timer, and Loop Timer, all of which work as expected.
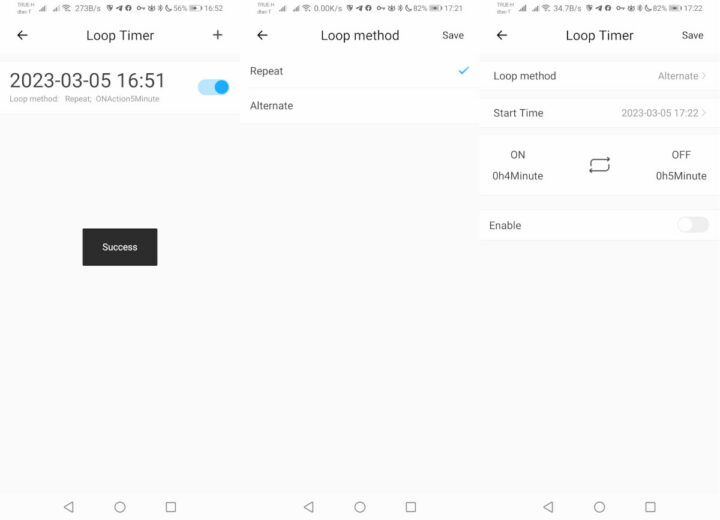
It’s important to select the “Alternate” Loop method for the loop timer mode, or it will just repeat ON or OFF all the time without ever switching to ON or OFF. With the Alternate method, you’ll be able to select timers for ON and OFF. I’m still not sure what use cases this is useful for, but I must not be thinking hard enough 🙂
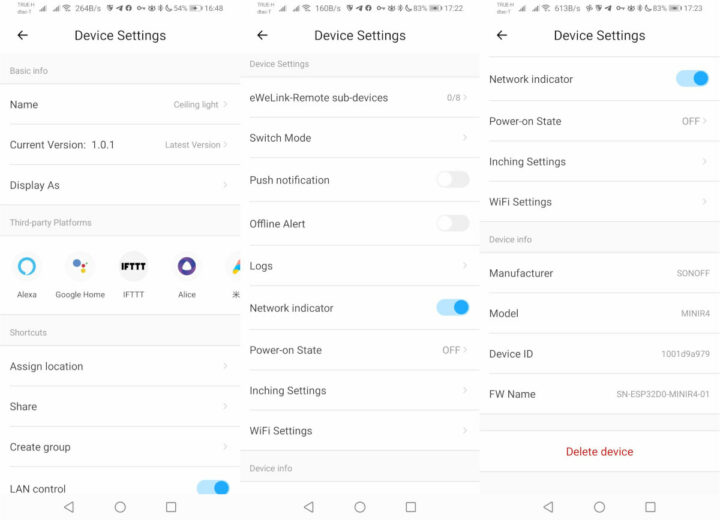
If we tap the … icon on the top right corner, we’ll have access to the Device Settings with some information, firmware updates, and support for third-party platforms such as Amazon Alexa, Google Home, IFTT, Alice, and other Chinese cloud services.
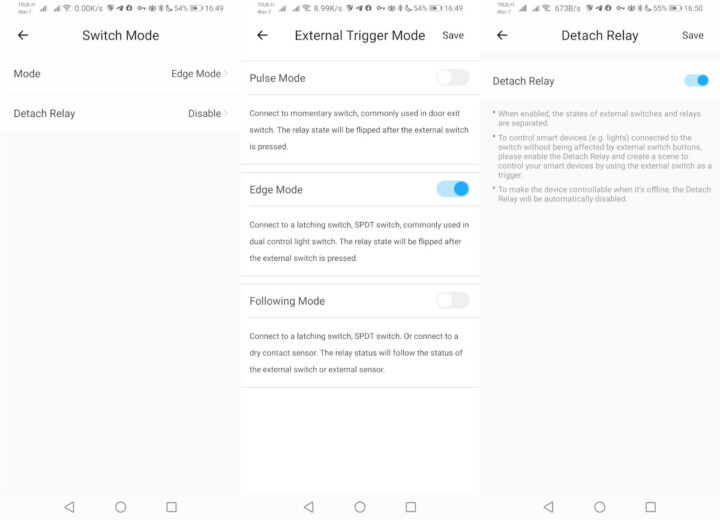
Other useful configuration options include the Switch Mode to select the behavior of the light switch from Pulse mode, Edge mode (default), or Following mode, each explained in the app and the screenshot above. There’s also the Detached Relay mode which completely ignores/disconnects the physical light switch, so the switch is fully controlled by the app or other “Smart” methods. It can potentially be useful in public places.
eWelink Web
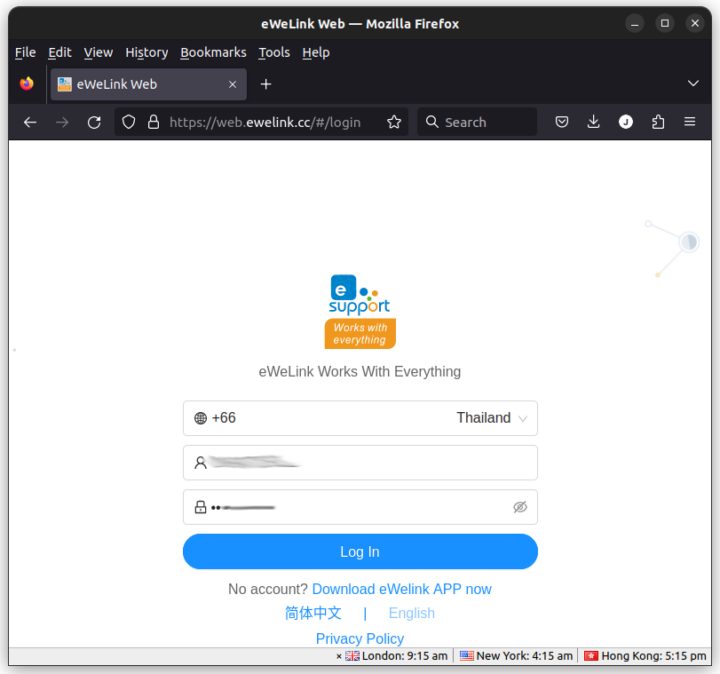
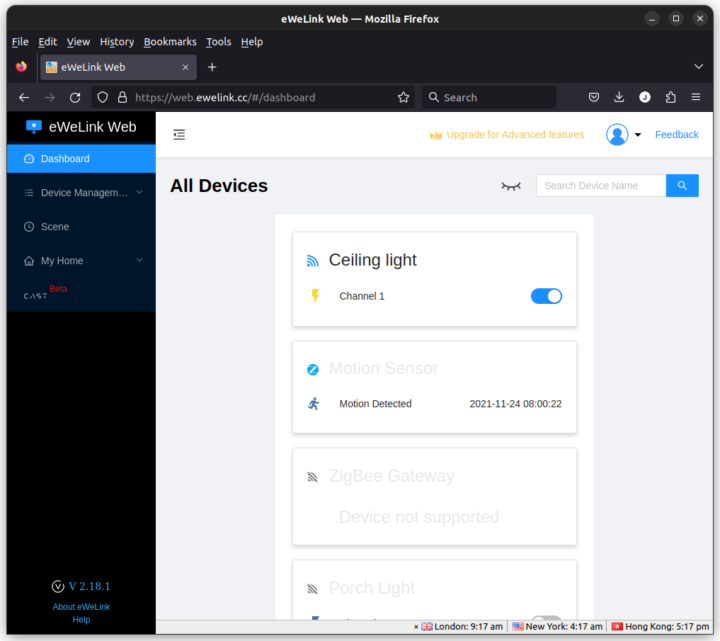
A somewhat new feature that I had never tried is eWelink Web which allows you to manage and control your SONFF device from a web browser. You’ll need to go to web.ewelink.cc and enter the eWelink credentials you’ve already used in the eWelink mobile app.
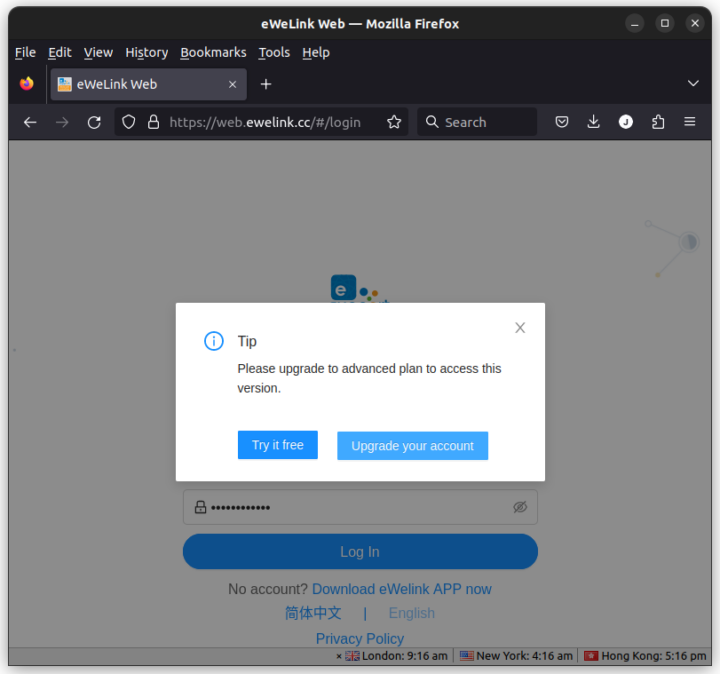
That’s a premium feature that requires the paid eWelink Advanced plan, but we can try it for free for 7 days.
The free trial requires you to answer a few questions about your home automation preferences, and the approval should be immediate. After logging in, I could see and turn on/off my “Ceiling light”, and other SONOFF devices I used in previous reviews are also there, and currently detected as offline.
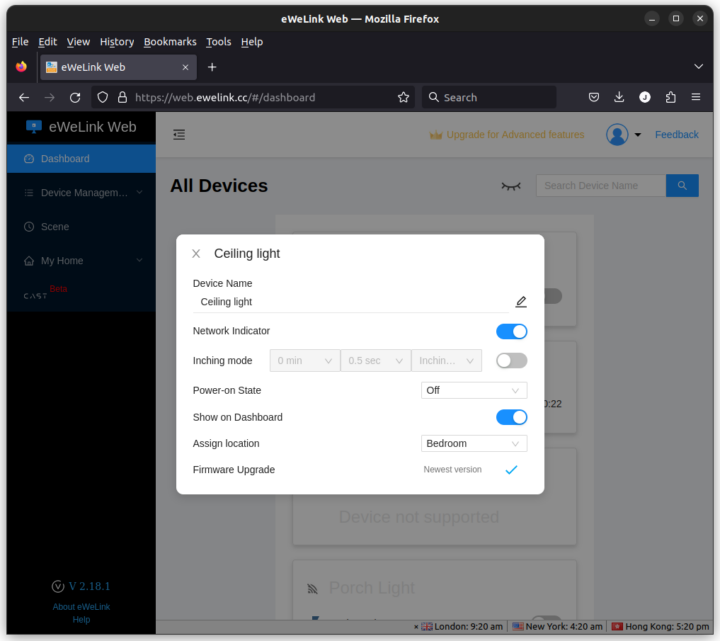
The interface also allows me to change the name, disable/enable the network indicator on the MINIR4, set up inching mode, specify the power state, and upgrade the firmware. I did the latter, and it worked well.
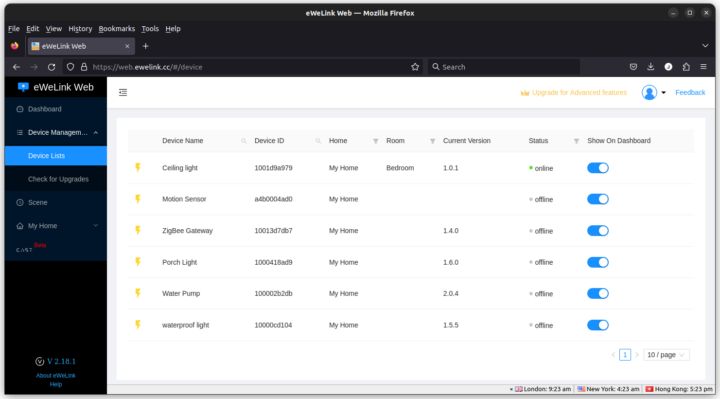
You can also check the full device list with the device ID, firmware version, online status, and whether you want to show them in the eWelink Web dashboard.
Finally, it’s possible to define scenes if you have other sensors like in the eWelink mobile app.
SONOFF R5 scene controller
Controlling the light with your smartphone is OK, and if you don’t want to open your smartphone and the app (it typically takes me 20 to 25 seconds to turn off the light from the time I pick up the phone) before turning on or off the light, and don’t use voice assistants, the SONOFF R5 scene controller is nice a MINIR4 companion as it provides a battery-powered switch that can be operated from anywhere with the Bluetooth LE range.
So I asked for one or two SONOFF R5 devices for review and eventually got one.
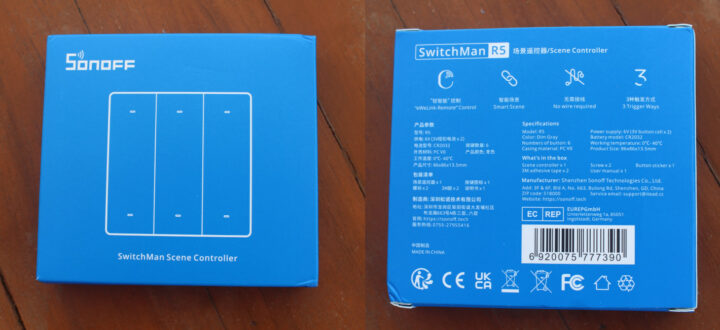
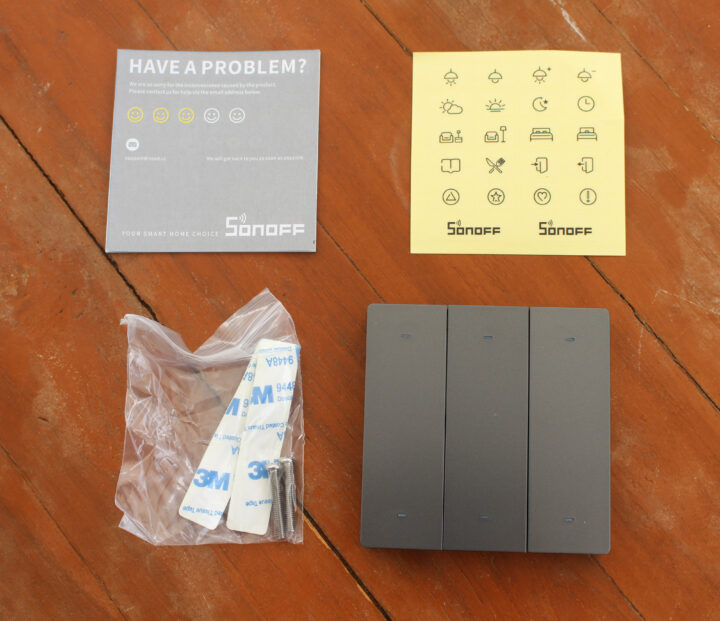
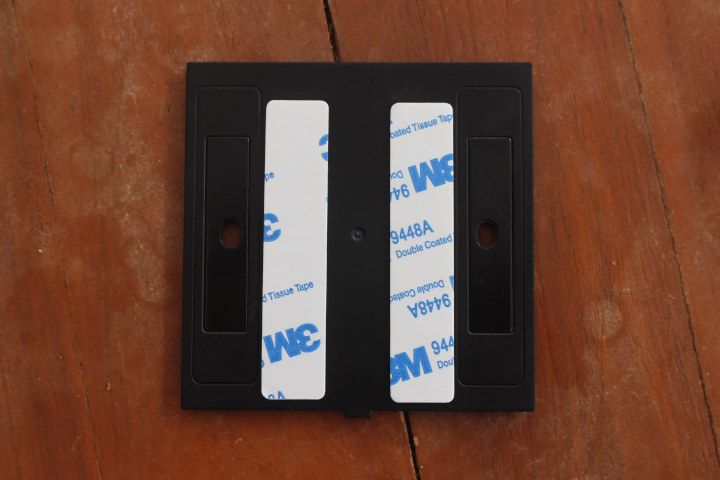
The SONOFF R5 6-key scene controller comes with a few stickers for the buttons, a user manual, two screws, and two 3M adhesive tape for mounting.
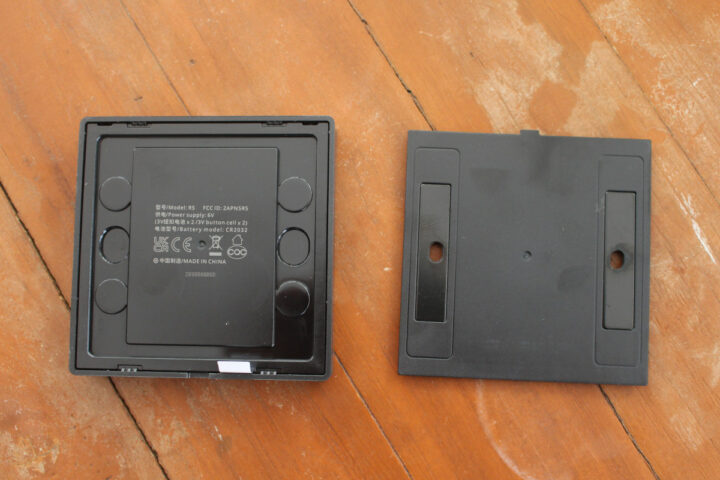
The back cover is attached to the main unit through magnets and can easily be removed in order to take out the paper preventing the draining of the CR2032 batteries during storage and/or transport.
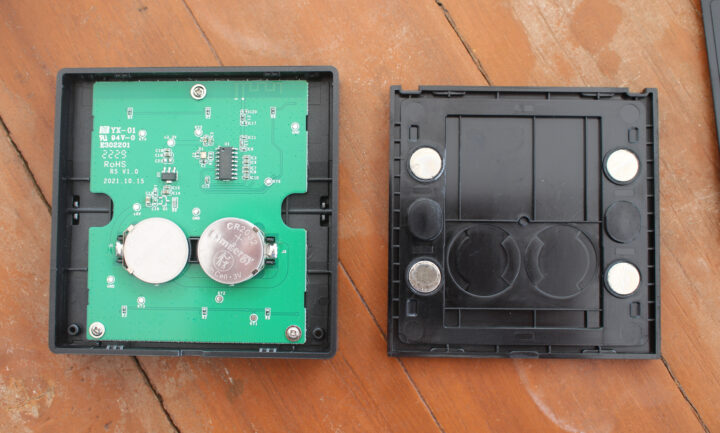
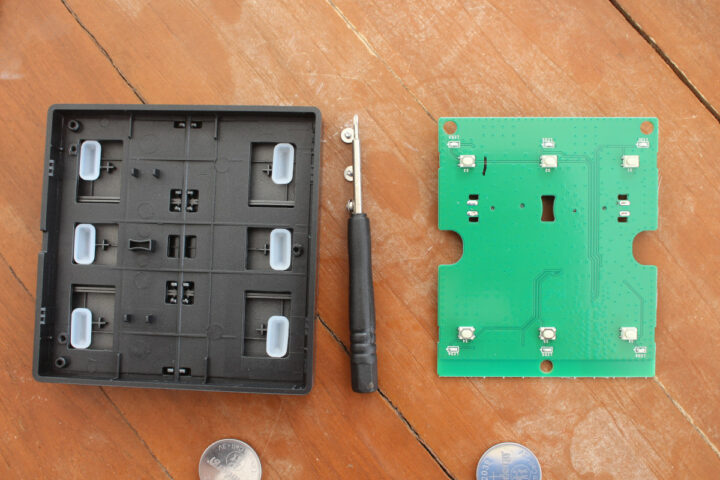
A teardown confirms the R5 controller is indeed powered by two CR2032 coin-cell batteries,
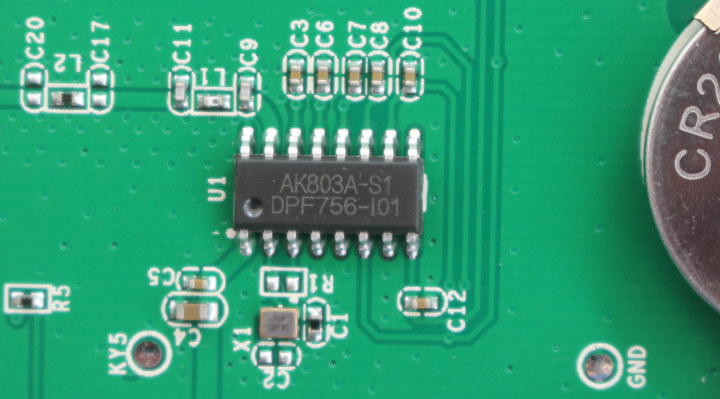
and the main chip is marked as AK803A-S1, which appears to be a “BLE iBeacon” chip from AllLink.
The other side of the board has nothing except for the buttons.
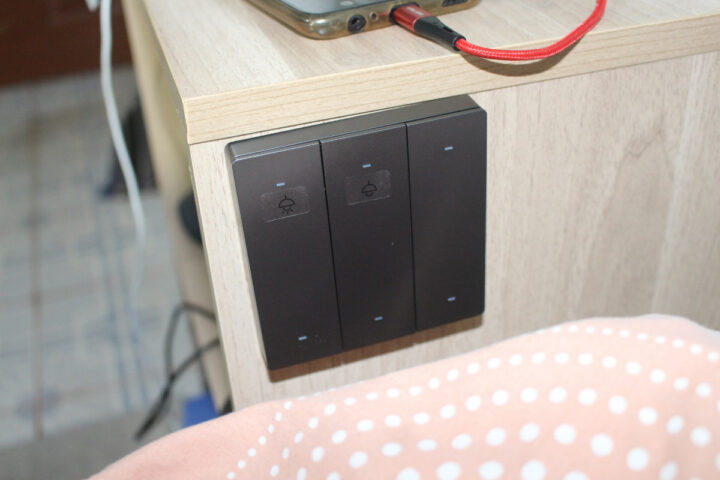
Let’s reassemble the device to install it. I first thought it might be able to attach the R5 to a fridge, but the built-in magnets are not powerful enough. I used some magnets with screws scavenged from an old ceiling LED light, but it works, but it was not practical to use. Anyway, I wanted to stick the R5 to my bedside cabinet, so I used the included 3M adhesive tapes…
… and added some of the stickers to channels 1 and 2, because installing the SONOFF R5 SwitchMan to my bedside cabinet.
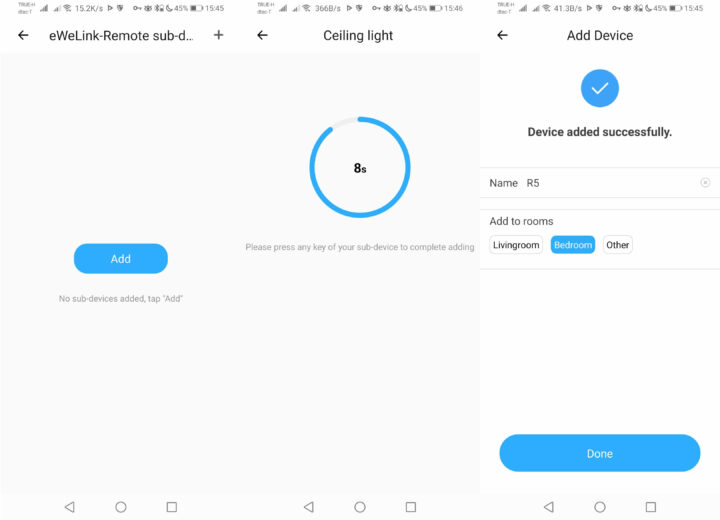
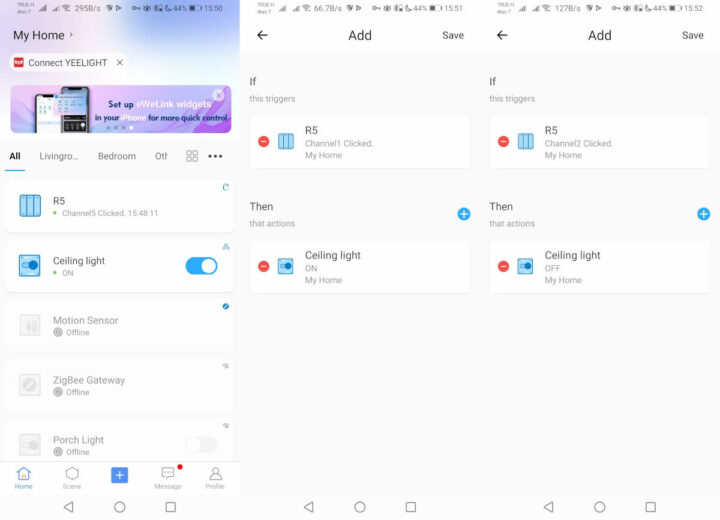
With the hardware installation out of the way, I went to the eWelink app to access the Device Settings and tapped on the eWelink-Remote sub-devices section to add the R5 controller.
That was very easy. I then went to the Scene section in the eWelink app to add a scene to turn on the ceiling light when Channel 1 (top left button) is pressed, and another scene to turn it off when Channel 2 (the button on the right of Channel 1) is pressed.
My lazy self was then very happy, as I could just control the ceiling light from the bed without having to get up or enter into tough, and potentially lengthy negotiations with the person lying next to me 🙂
One important point is that the buttons support short presses, long presses, and double press events, so if you press a button for too long, or press it multiple times, it will not detect a short press event. It’s also possible to assign a single button for this task, using the alternate mode to turn on the light when it is off and turn it off when it is on. We could also assign other scenes to the R5 controller to turn on the light after 8 hours as an alarm clock, control additional MINIR4 WiFi switches, or other SONOFF devices with eWelink Remote support.
Conclusion
The SONOFF MINIR4 is a tiny switch that’s fairly easy to install and that will fit into most switch boxes. Bear in mind that contrary to the ZBMINIL2, it requires a neutral wire, so that’s something to keep in mind. The SONOFF R5 SwitchMan scene controller is a nice companion to the MINIR4, especially if you have multiple switches installed throughout your house.
I’d like to thank ITEAD for sending samples for review. SONOFF is selling the MINI Extreme (MINIR4) for $9.90 with free shipping for orders over $89, and the R5 scene controller can be added for $12.49. You can also get a 10% discount on your order when using the coupon code CNXSOFTSONOFF.

Jean-Luc started CNX Software in 2010 as a part-time endeavor, before quitting his job as a software engineering manager, and starting to write daily news, and reviews full time later in 2011.
Support CNX Software! Donate via cryptocurrencies, become a Patron on Patreon, or purchase goods on Amazon or Aliexpress




You might want to point out that it’s against code to install these types of things in many countries and a licensed electrician has to install them.
I’ve already mentioned this in the review.
Ah, sorry, missed that part.
I’ve just highlighted that part in bold to make sure people notice it.
I guess most people are interessted in *not* running the stock firmware but prefer something open like esphome or tasmota.
Any information if this device supports OTA flashing/installing of a new/alternative firmware? I think sonoff called that something with “DIY” in the past and *some* (but not all) sonoff devices support that.
I’m assuming most people will run the stock firmware, but for those that want to run Tasmota or ESPHome, it’s also feasible. I mention this at the end of the MINIR4 announcement: https://www.cnx-software.com/2023/02/23/sonoff-mini-extreme-minir4-esp32-wifi-smart-switch-can-fit-in-most-gang-boxes/
Thanks for the reply. That it is technical possible was obvious to me as the thing runs on a esp.
Question was if it can be done wireless (OTA) with that device (aka as sonoff “diy mode”).
The answer is no regarding to this image:
https://itead.cc/wp-content/uploads/2022/12/mini-comparison-ins-1.jpg
Taking a neutral from a socket is massively against regs and dangerous. I’m sure it’s against regs in any developed country.
Hello, i just got a sample MINIR4 Switch, done the connections and I have it working fine manually. For some reasons it i am unable to pair/add it to my eWeLink App. Please help.
That’s probably because the switch is not in pairing mode or you have not been using Bluetooth pairing mode like in the review.
Hello,
I am trying to figure out something before I will buy it. I have a new wiring installation but with dumb switches and I already own some smart bulbs that I am planning to use. My concern about this relay is: if I can use it to control the smart bulbs from the dumb switch but also from the app? Until now seems that is not possible but I am not 100% sure and hopefully you can help me and clarify this point.
Yes, that’s what I do with normal light bulbs. I can turn on/off the light bulbs from the dum switch or the app.
If you throw smart light bulbs into the mix, you would need to make sure the switch is turned on to control the smart light bulb from the app. Or maybe I don’t understand what you’d like to do.
Well, I was hopping that i can control the smart bulb on off from both the switch and from the app.
It’s possible to control the SONOFF MiniR4 from the eWelink app and the dumb switch. So indirectly you can turn on/off the smart bulb that way. But if your meaning is to control the smart bulb from its own app while the MiniR4 is set to off then I don’t see how it would work.
I don’t necessarily want to trigger it from it’s own app. I am not sure if I can do everything from Google Home app where I have access to the control of the bulb.
“It’s possible to control the SONOFF MiniR4 from the eWelink app and the dumb switch. So indirectly you can turn on/off the smart bulb that way.” – Just to confirm, if I will turn on the MiniR4, also the smart bulb will become on? (I expect this to work only if i will manage to make a scene in google home, not without this scene)
Sorry for the dumb questions but i am trying to be sure that this will fit and to know if i have to do any wiring changes.
My purpose is to add this switch so I can turn on and off the smart bulb from the dumb switch but also to be able to turn on/off the smart bulb using any app.