e-con Systems e-CAM20_CURB is a 2.3 MP fixed focus global shutter color camera designed for the Raspberry Pi 4, and the company has sent us a sample for evaluation and review. We’ll start by providing specifications, before checking out the package content, connecting the camera to the Raspberry Pi 4 with a DIY LEGO mount, showing how to access the resources for the camera, and trying tools provided in the Raspberry Pi OS or Yocto Linux image.
e-CAM20_CURB specifications
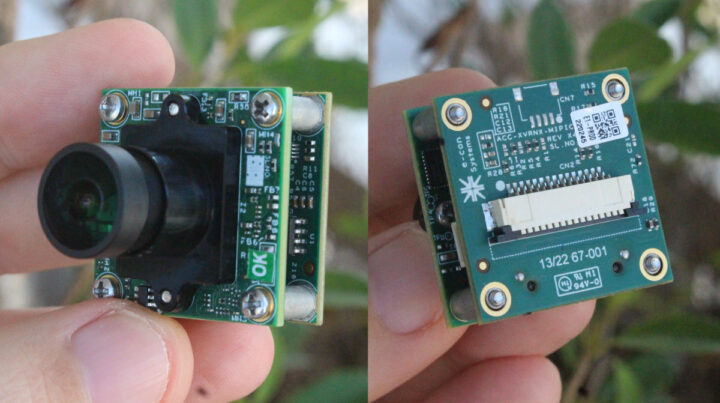
The camera is comprised of two boards with the following specifications:
- eCAM217_CUMI0234_MOD full HD color camera with 4-lane MIPI CSI-2 interface
- ON Semiconductor AR0234CS CMOS sensor with 1/2.6″ optical form-factor
- Global Shutter
- Onboard ISPimage sensor from ON Semiconductor
- Uncompressed UYVY streaming
- HD (1280 x 720) up to 120 fps
- Full HD (1920 x 1080) up to 65 fps
- 2.3 MP (1920 x 1200) up to 60 fps
- External Hardware Trigger Input
- ACC-XVRNX-MIPICAMERA adapter board with 15-pin FFC connector for connection to the Raspberry Pi
- Dimensions – 30 x 30 mm (height depends on the lens and focal adjustment)
- Temperature Range – -30°C to 70°C
- Compliance – FCC and RoHS
The company provides both Yocto and Raspbian / Raspberry Pi OS 32-bit images with a V4L2 Linux camera driver and Gstreamer tools.
e-CAM20_CURB camera unboxing
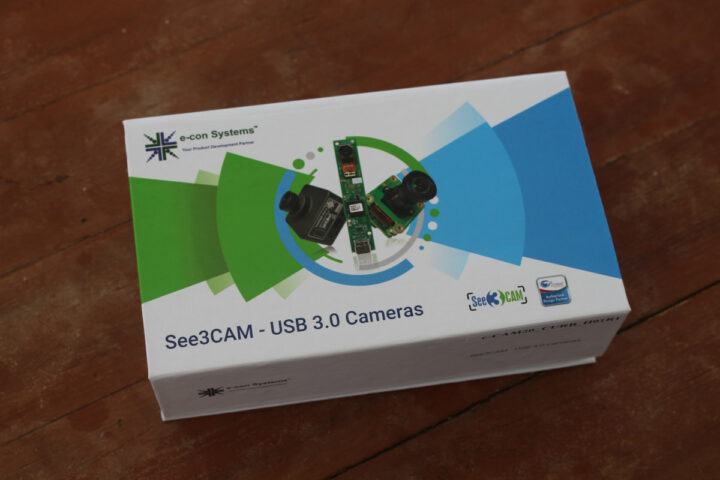
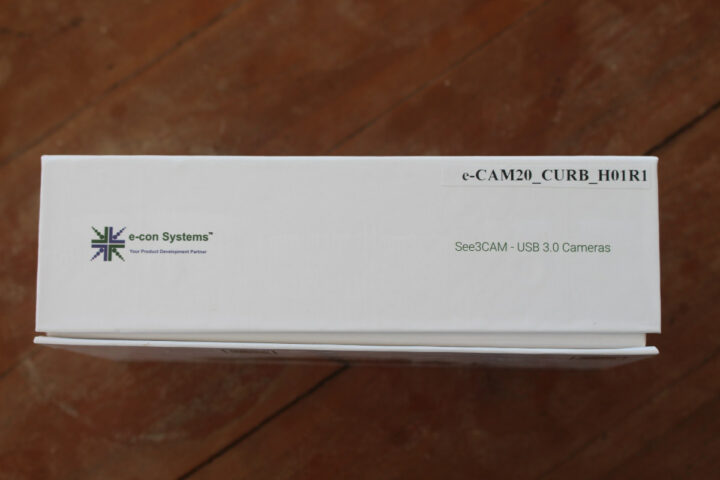
I first thought I had received the wrong package having been sent a See3CAM USB 3.0 camera from the company instead.
But not to worry as e-con Systems simply used a standard package with a sticker “e-CAM20_CURB_H01R1” confirming I was sent the right camera model.
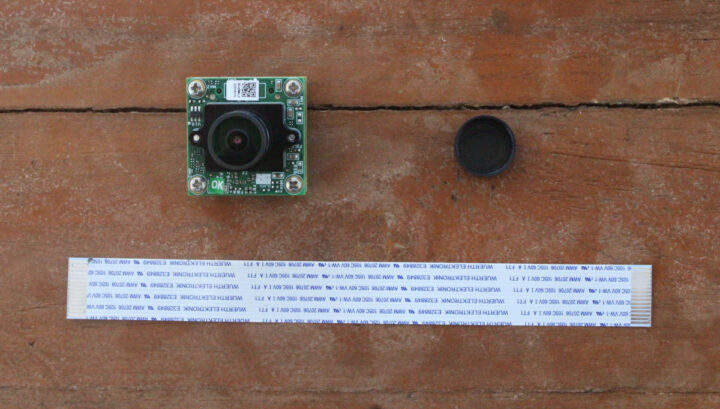
We’ll find the camera in an anti-static bag and a 15 cm FPC cable for connection to the Raspberry Pi. We’ll also find a red paper attached to the top with an SO (Sales Order) number that we’ll need to access the documentation and OS images.
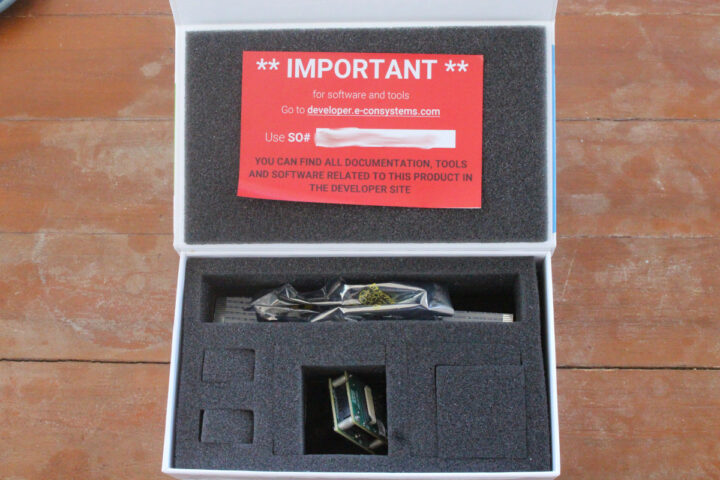
The lens is protected by a cover which I removed for the photos below.
Raspberry Pi connection and DIY LEGO mount
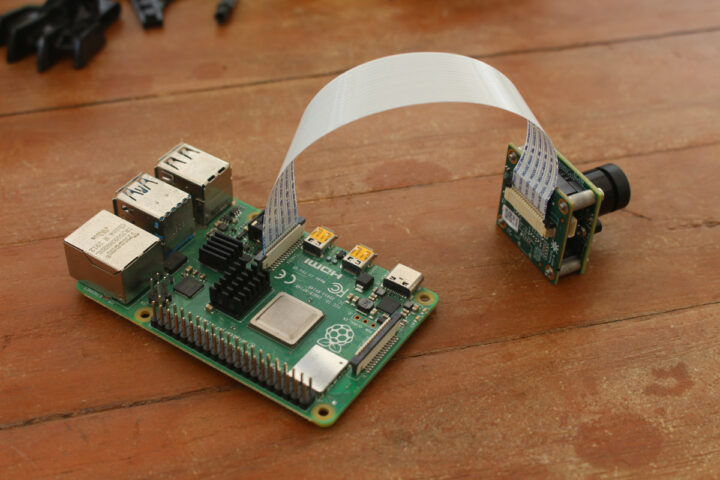
The connection is super easy and the only thing you need to be careful with is the orientation of the FPC cable. After gently pulling up the black plastic clip from the connectors on Raspberry Pi and the e-CAM20_CURB camera, you’ll need to insert the cable in a way that the blue side of the cable faces the black plastic clip. Once done push the plastic clip back into place.
In other words, the blue (non-conductor) side of the cable will face the Ethernet port of the Raspberry Pi board, and the conductor side (with text) will face the HDMI port.
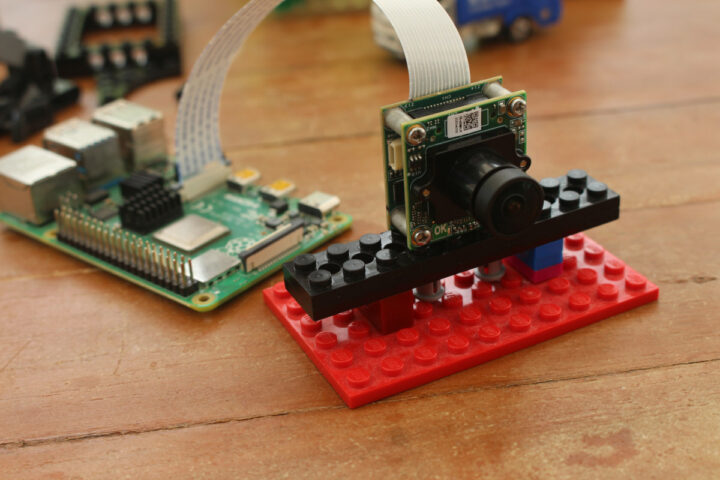
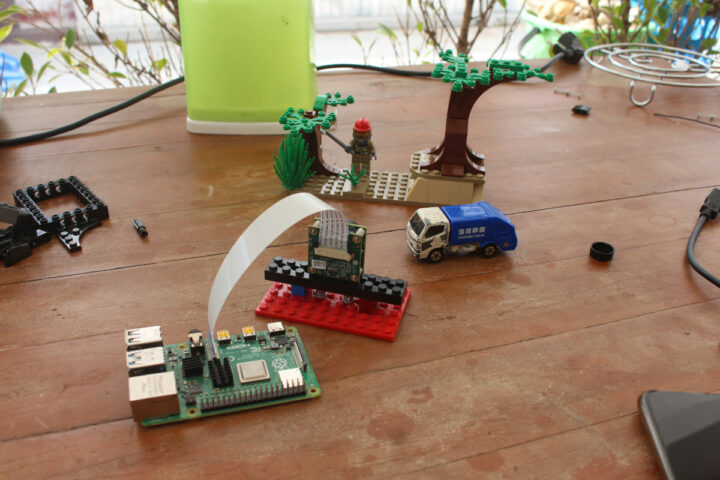
Since the camera would be too low when placed on the desk and holding the camera would not be convenient for testing, I had to find a DIY mounting solution. It turns out the distance between the spacers on the camera is perfect for LEGO connectors, so it’s easy to create your own mount and the camera is firmly attached to its base. For example, if I lift the camera as shown above the LEGO set with come together.
We also had to find some colorful subjects with more LEGO and a garbage truck…
Access to e-CAM20_CURB documentation, Raspberry Pi OS, and Yocto images
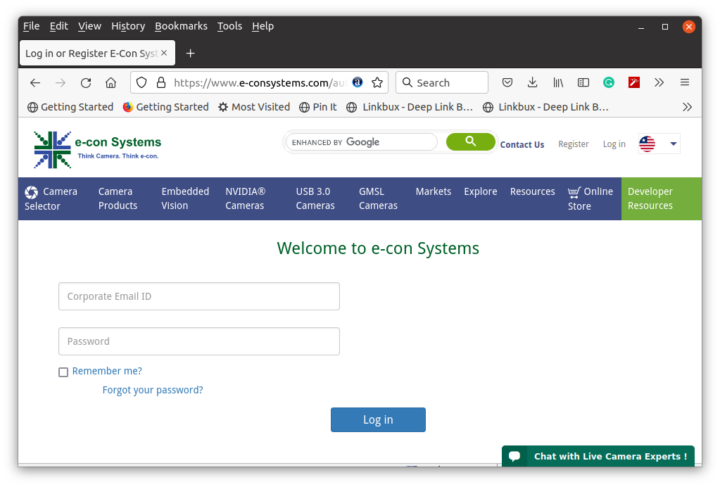
All resources to get started with the camera can be accessed through the developer’s website. You’ll first need to register and log in with your email address.
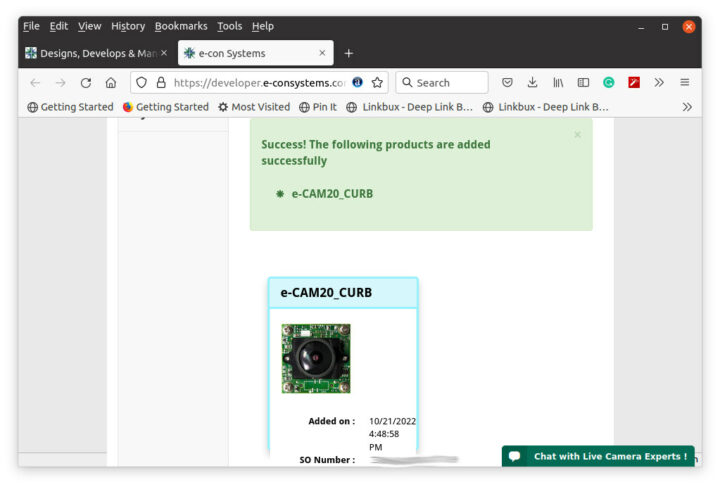
At this stage, we will need to input your SO# found inside the package as noted in the unboxing part,
and the product will be officially registered on e-Con Systems website.
 We will be given a FTP link with credentials (username and password). I first tried to go to the FTP server directly in a Firefox, but I was not asked for credentials and all I got was a blank page, so I used Filezilla to download the files instead.
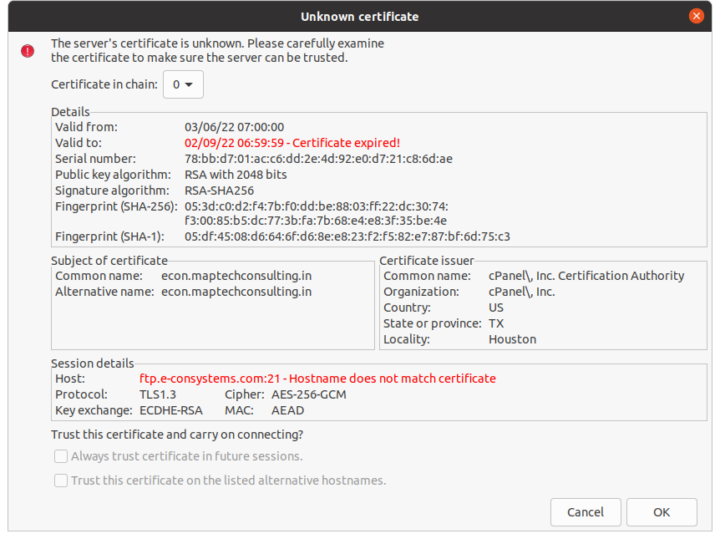
I was informed about some issues with the SSL certificate, but no problem I could still download all files for the camera:
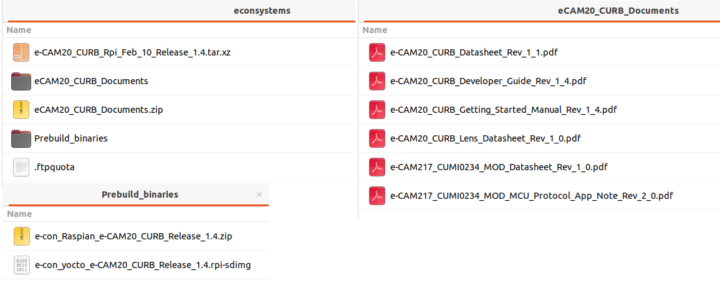
The company provided pre-built binaries with Yocto and Raspbian images, patchsets and the meta layer in case you want to build the images by yourself, as well as documentations that include datasheets for the camera and main components, a getting started guide, and a developer guide explaining how to build the code from source and customize the images.
Testing e-CAM20_CURB camera on Raspberry Pi 4 with Yocto
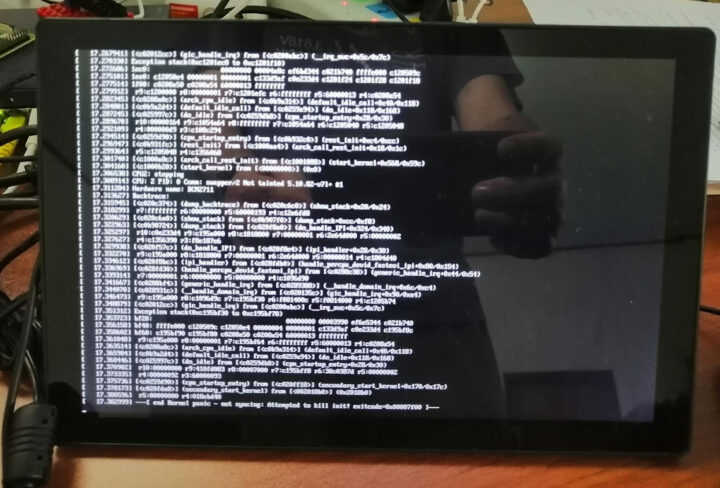
I’ll mostly use the information from the Getting Started Guide going forward. I initially decided to use the “Raspbian” image and flashed it with USBImager. But the boot did not work quite as expected with a kernel panic.
I tried to flash the OS image again, but the second time I only got a black screen. The company does not provide MD5 checksums for the images, so I could not easily check if there was a problem during the download or if instead, it was my microSD card having some issues (again). So instead I went with the smaller Yocto image which works fine and comes with all the same tools as the Raspbian image.
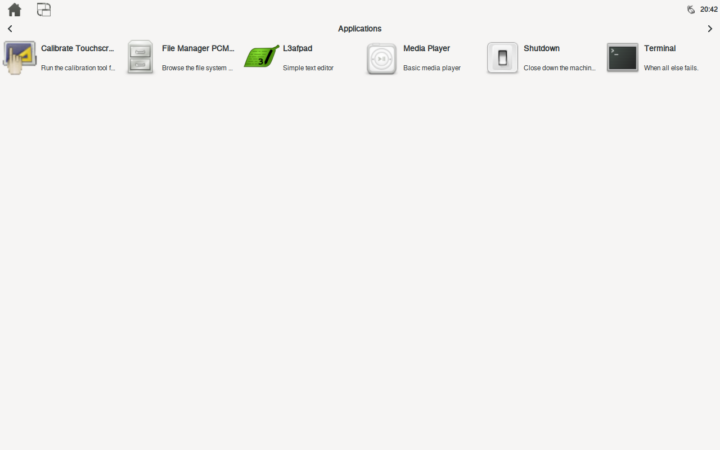
The dashboard has five icons with a touchscreen calibration app, a file manager, L3afpad text editor, a shutdown button, and a terminal where we’ll run all commands.
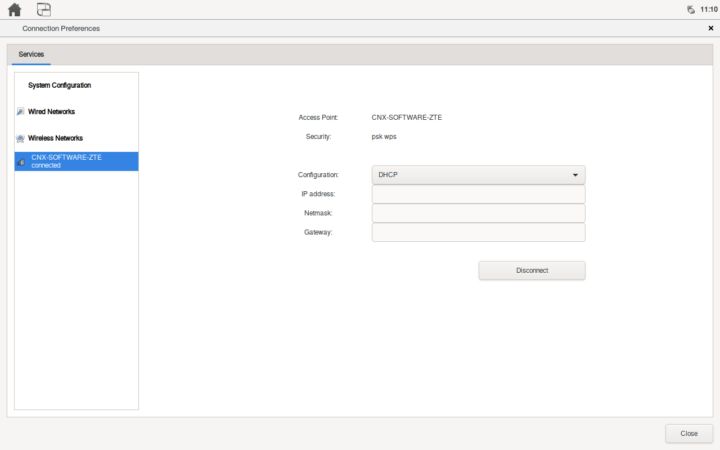
The top right icon allows you to access the preferences window which is mostly useful to configure WiFi if you are not using Ethernet with DHCP.
Small tip: you can take screenshots as shown above on Yocto as follows:
|
1 2 |
export DISPLAY=:0 screenshot test.png |
You’ll find two scripts in the root directory:
- gst_1080_stream.sh used to show the camera output at 1920×1080 on the display connected to the Raspberry Pi
- gst_1080_record.sh used to record a Full HD video into the microSD card.
Both call Gstreamers commands. Content of gst_1080_stream.sh:
|
1 |
gst-launch-1.0 v4l2src device=/dev/video0 ! video/x-raw ,width=1920,height=1080 ! videoconvert ! fpsdisplaysink video-sink=autovideosink text-overlay=false sync=false -v |
and of gst_1080_record.sh:
|
1 |
gst-launch-1.0 --gst-debug-level=3 -v v4l2src device=/dev/video0 ! capsfilter caps="video/x-raw, width=1920,height=1080,framerate=30/1" ! queue ! v4l2convert ! videorate ! queue ! v4l2h264enc ! queue ! avimux ! filesink location = 1080p_recording.h264 |
Let’s run gst_1080_stream.sh first.
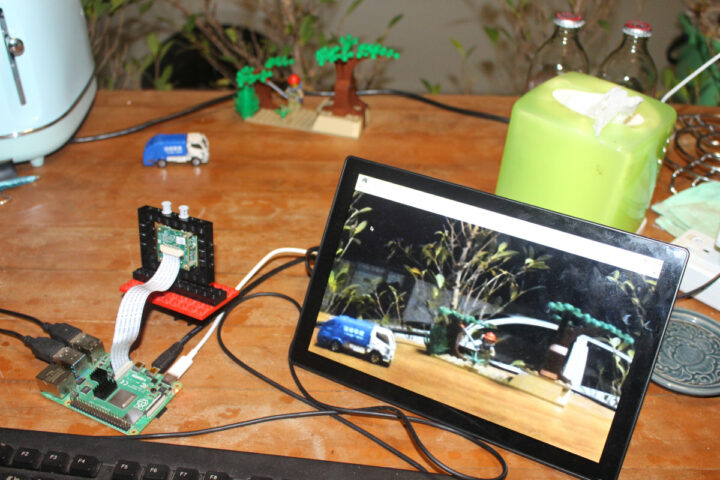
The camera output showed nearly immediately on my HDMI display. I just had to manually adjust the focus to have a somewhat clear image.
Note the documentation stipulates:
The above GStreamer pipeline execution should be executed from terminal in Raspberry pi GUI, not from UART terminal (picocom or minicom) of Host PC
So I did most of the review from the terminal in the display attached to the Raspberry Pi, but I eventually figured out that it’s possible to run all programs from an SSH terminal by simply exporting the display first:
|
1 |
export DISPLAY=:0 |
Output from the script for reference:
|
1 2 3 4 5 6 7 8 9 10 11 12 13 14 15 16 17 18 19 20 21 22 23 24 25 |
Setting pipeline to PAUSED ... Pipeline is live and does not need PREROLL ... /GstPipeline:pipeline0/GstFPSDisplaySink:fpsdisplaysink0/GstAutoVideoSink:autovideosink0/GstXvImageSink:autovideosink0-actual-sink-xvimage: sync = false Setting pipeline to PLAYING ... New clock: GstSystemClock /GstPipeline:pipeline0/GstV4l2Src:v4l2src0.GstPad:src: caps = video/x-raw, width=(int)1920, height=(int)1080, framerate=(fraction)120/1, format=(string)UYVY, colorimetry=(string)bt709, interlace-mode=(string)progressive /GstPipeline:pipeline0/GstCapsFilter:capsfilter0.GstPad:src: caps = video/x-raw, width=(int)1920, height=(int)1080, framerate=(fraction)120/1, format=(string)UYVY, colorimetry=(string)bt709, interlace-mode=(string)progressive /GstPipeline:pipeline0/GstVideoConvert:videoconvert0.GstPad:src: caps = video/x-raw, width=(int)1920, height=(int)1080, framerate=(fraction)120/1, interlace-mode=(string)progressive, format=(string)YV12 /GstPipeline:pipeline0/GstFPSDisplaySink:fpsdisplaysink0.GstGhostPad:sink.GstProxyPad:proxypad0: caps = video/x-raw, width=(int)1920, height=(int)1080, framerate=(fraction)120/1, interlace-mode=(string)progressive, format=(string)YV12 /GstPipeline:pipeline0/GstFPSDisplaySink:fpsdisplaysink0/GstAutoVideoSink:autovideosink0.GstGhostPad:sink.GstProxyPad:proxypad1: caps = video/x-raw, width=(int)1920, height=(int)1080, framerate=(fraction)120/1, interlace-mode=(string)progressive, format=(string)YV12 /GstPipeline:pipeline0/GstFPSDisplaySink:fpsdisplaysink0/GstAutoVideoSink:autovideosink0/GstXvImageSink:autovideosink0-actual-sink-xvimage.GstPad:sink: caps = video/x-raw, width=(int)1920, height=(int)1080, framerate=(fraction)120/1, interlace-mode=(string)progressive, format=(string)YV12 /GstPipeline:pipeline0/GstFPSDisplaySink:fpsdisplaysink0/GstAutoVideoSink:autovideosink0.GstGhostPad:sink: caps = video/x-raw, width=(int)1920, height=(int)1080, framerate=(fraction)120/1, interlace-mode=(string)progressive, format=(string)YV12 /GstPipeline:pipeline0/GstFPSDisplaySink:fpsdisplaysink0.GstGhostPad:sink: caps = video/x-raw, width=(int)1920, height=(int)1080, framerate=(fraction)120/1, interlace-mode=(string)progressive, format=(string)YV12 /GstPipeline:pipeline0/GstVideoConvert:videoconvert0.GstPad:sink: caps = video/x-raw, width=(int)1920, height=(int)1080, framerate=(fraction)120/1, format=(string)UYVY, colorimetry=(string)bt709, interlace-mode=(string)progressive /GstPipeline:pipeline0/GstCapsFilter:capsfilter0.GstPad:sink: caps = video/x-raw, width=(int)1920, height=(int)1080, framerate=(fraction)120/1, format=(string)UYVY, colorimetry=(string)bt709, interlace-mode=(string)progressive /GstPipeline:pipeline0/GstFPSDisplaySink:fpsdisplaysink0/GstAutoVideoSink:autovideosink0/GstXvImageSink:autovideosink0-actual-sink-xvimage: sync = false /GstPipeline:pipeline0/GstFPSDisplaySink:fpsdisplaysink0: last-message = rendered: 15, dropped: 0, current: 28.41, average: 28.41 /GstPipeline:pipeline0/GstFPSDisplaySink:fpsdisplaysink0: last-message = rendered: 33, dropped: 0, current: 34.53, average: 31.45 /GstPipeline:pipeline0/GstFPSDisplaySink:fpsdisplaysink0: last-message = rendered: 51, dropped: 0, current: 34.38, average: 32.42 /GstPipeline:pipeline0/GstFPSDisplaySink:fpsdisplaysink0: last-message = rendered: 69, dropped: 0, current: 34.51, average: 32.94 /GstPipeline:pipeline0/GstFPSDisplaySink:fpsdisplaysink0: last-message = rendered: 87, dropped: 0, current: 34.42, average: 33.24 /GstPipeline:pipeline0/GstFPSDisplaySink:fpsdisplaysink0: last-message = rendered: 105, dropped: 0, current: 34.47, average: 33.44 /GstPipeline:pipeline0/GstFPSDisplaySink:fpsdisplaysink0: last-message = rendered: 119, dropped: 0, current: 27.69, average: 32.65 /GstPipeline:pipeline0/GstFPSDisplaySink:fpsdisplaysink0: last-message = rendered: 135, dropped: 0, current: 31.24, average: 32.47 .... |
We can just press Control+C to stop the app in the terminal. Let’s do the same with the “record” script. This time the camera output does not show up on the display, and all we get is information in the terminal:
|
1 2 3 4 5 6 7 8 9 10 11 12 13 14 15 16 17 18 19 20 21 22 23 24 25 26 27 28 29 30 31 32 33 34 35 36 37 38 39 40 41 42 43 44 45 46 47 48 49 50 51 52 53 54 55 56 |
sh-5.0# ./gst_1080_record.sh Setting pipeline to PAUSED ... 0:00:00.150419981 877 0x90e300 WARN v4l2 gstv4l2object.c:4209:gst_v4l2_object_probe_caps:<v4l2h264enc0:src> Failed to probe pixel aspect ratio with VIDIOC_CROPCAP: Invalid argument Pipeline is live and does not need PREROLL ... Setting pipeline to PLAYING ... New clock: GstSystemClock /GstPipeline:pipeline0/GstV4l2Src:v4l2src0.GstPad:src: caps = video/x-raw, width=(int)1920, height=(int)1080, framerate=(fraction)30/1, format=(string)UYVY, interlace-mode=(string)progressive, colorimetry=(string)bt709 /GstPipeline:pipeline0/GstCapsFilter:capsfilter0.GstPad:src: caps = video/x-raw, width=(int)1920, height=(int)1080, framerate=(fraction)30/1, format=(string)UYVY, interlace-mode=(string)progressive, colorimetry=(string)bt709 /GstPipeline:pipeline0/GstQueue:queue0.GstPad:sink: caps = video/x-raw, width=(int)1920, height=(int)1080, framerate=(fraction)30/1, format=(string)UYVY, interlace-mode=(string)progressive, colorimetry=(string)bt709 /GstPipeline:pipeline0/GstCapsFilter:capsfilter0.GstPad:sink: caps = video/x-raw, width=(int)1920, height=(int)1080, framerate=(fraction)30/1, format=(string)UYVY, interlace-mode=(string)progressive, colorimetry=(string)bt709 /GstPipeline:pipeline0/GstQueue:queue0.GstPad:src: caps = video/x-raw, width=(int)1920, height=(int)1080, framerate=(fraction)30/1, format=(string)UYVY, interlace-mode=(string)progressive, colorimetry=(string)bt709 /GstPipeline:pipeline0/v4l2convert:v4l2convert0.GstPad:src: caps = video/x-raw, framerate=(fraction)30/1, interlace-mode=(string)progressive, format=(string)YUY2, width=(int)1920, height=(int)1080, colorimetry=(string)bt709 /GstPipeline:pipeline0/GstVideoRate:videorate0.GstPad:src: caps = video/x-raw, framerate=(fraction)30/1, interlace-mode=(string)progressive, format=(string)YUY2, width=(int)1920, height=(int)1080, colorimetry=(string)bt709 /GstPipeline:pipeline0/GstQueue:queue1.GstPad:sink: caps = video/x-raw, framerate=(fraction)30/1, interlace-mode=(string)progressive, format=(string)YUY2, width=(int)1920, height=(int)1080, colorimetry=(string)bt709 /GstPipeline:pipeline0/GstQueue:queue1.GstPad:src: caps = video/x-raw, framerate=(fraction)30/1, interlace-mode=(string)progressive, format=(string)YUY2, width=(int)1920, height=(int)1080, colorimetry=(string)bt709 /GstPipeline:pipeline0/GstQueue:queue1.GstPad:src: caps = video/x-raw, framerate=(fraction)30/1, interlace-mode=(string)progressive, format=(string)YUY2, width=(int)1920, height=(int)1080, colorimetry=(string)bt709 /GstPipeline:pipeline0/v4l2h264enc:v4l2h264enc0.GstPad:src: caps = video/x-h264, stream-format=(string)byte-stream, alignment=(string)au, profile=(string)high, level=(string)4, width=(int)1920, height=(int)1080, pixel-aspect-ratio=(fraction)1/1, framerate=(fraction)30/1, interlace-mode=(string)progressive, colorimetry=(string)bt709 /GstPipeline:pipeline0/GstQueue:queue2.GstPad:sink: caps = video/x-h264, stream-format=(string)byte-stream, alignment=(string)au, profile=(string)high, level=(string)4, width=(int)1920, height=(int)1080, pixel-aspect-ratio=(fraction)1/1, framerate=(fraction)30/1, interlace-mode=(string)progressive, colorimetry=(string)bt709 /GstPipeline:pipeline0/GstQueue:queue2.GstPad:src: caps = video/x-h264, stream-format=(string)byte-stream, alignment=(string)au, profile=(string)high, level=(string)4, width=(int)1920, height=(int)1080, pixel-aspect-ratio=(fraction)1/1, framerate=(fraction)30/1, interlace-mode=(string)progressive, colorimetry=(string)bt709 /GstPipeline:pipeline0/GstAviMux:avimux0.GstPad:video_0: caps = video/x-h264, stream-format=(string)byte-stream, alignment=(string)au, profile=(string)high, level=(string)4, width=(int)1920, height=(int)1080, pixel-aspect-ratio=(fraction)1/1, framerate=(fraction)30/1, interlace-mode=(string)progressive, colorimetry=(string)bt709 Redistribute latency... /GstPipeline:pipeline0/v4l2h264enc:v4l2h264enc0.GstPad:sink: caps = video/x-raw, framerate=(fraction)30/1, interlace-mode=(string)progressive, format=(string)YUY2, width=(int)1920, height=(int)1080, colorimetry=(string)bt709 /GstPipeline:pipeline0/v4l2convert:v4l2convert0.GstPad:sink: caps = video/x-raw, width=(int)1920, height=(int)1080, framerate=(fraction)30/1, format=(string)UYVY, interlace-mode=(string)progressive, colorimetry=(string)bt709 0:00:00.349330444 877 0x925c90 WARN v4l2bufferpool gstv4l2bufferpool.c:1278:gst_v4l2_buffer_pool_dqbuf:<v4l2convert0:pool:src> Driver should never set v4l2_buffer.field to ANY 0:00:00.375340000 877 0x925cc0 WARN v4l2src gstv4l2src.c:978:gst_v4l2src_create:<v4l2src0> lost frames detected: count = 1 - ts: 0:00:00.197980673 0:00:00.404324815 877 0x925c60 WARN v4l2bufferpool gstv4l2bufferpool.c:809:gst_v4l2_buffer_pool_start:<v4l2h264enc0:pool:src> Uncertain or not enough buffers, enabling copy threshold 0:00:00.448002981 877 0x925cc0 WARN v4l2src gstv4l2src.c:978:gst_v4l2src_create:<v4l2src0> lost frames detected: count = 1 - ts: 0:00:00.259520155 0:00:00.476415111 877 0xb4a02d50 WARN v4l2bufferpool gstv4l2bufferpool.c:1278:gst_v4l2_buffer_pool_dqbuf:<v4l2h264enc0:pool:src> Driver should never set v4l2_buffer.field to ANY 0:00:00.478420518 877 0x925c30 FIXME basesink gstbasesink.c:3246:gst_base_sink_default_event:<filesink0> stream-start event without group-id. Consider implementing group-id handling in the upstream elements /GstPipeline:pipeline0/GstAviMux:avimux0.GstPad:src: caps = video/x-msvideo /GstPipeline:pipeline0/GstFileSink:filesink0.GstPad:sink: caps = video/x-msvideo 0:00:00.547811481 877 0x925cc0 WARN v4l2src gstv4l2src.c:978:gst_v4l2src_create:<v4l2src0> lost frames detected: count = 4 - ts: 0:00:00.351835691 0:00:00.603347092 877 0x925cc0 WARN v4l2src gstv4l2src.c:978:gst_v4l2src_create:<v4l2src0> lost frames detected: count = 2 - ts: 0:00:00.397979932 0:00:00.647031518 877 0x925cc0 WARN v4l2src gstv4l2src.c:978:gst_v4l2src_create:<v4l2src0> lost frames detected: count = 3 - ts: 0:00:00.459522340 .... 0:00:04.943636775 877 0x925cc0 WARN v4l2src gstv4l2src.c:978:gst_v4l2src_create:<v4l2src0> lost frames detected: count = 2 - ts: 0:00:04.705614006 0:00:04.981039497 877 0x925cc0 WARN v4l2src gstv4l2src.c:978:gst_v4l2src_create:<v4l2src0> lost frames detected: count = 3 - ts: 0:00:04.767162043 0:00:05.046930127 877 0x925cc0 WARN v4l2src gstv4l2src.c:978:gst_v4l2src_create:<v4l2src0> lost frames detected: count = 3 - ts: 0:00:04.828688765 0:00:05.113381867 877 0x925cc0 WARN v4l2src gstv4l2src.c:978:gst_v4l2src_create:<v4l2src0> lost frames detected: count = 2 - ts: 0:00:04.874841950 0:00:05.151058627 877 0x925cc0 WARN v4l2src gstv4l2src.c:978:gst_v4l2src_create:<v4l2src0> lost frames detected: count = 3 - ts: 0:00:04.936382932 0:00:05.219209497 877 0x925cc0 WARN v4l2src gstv4l2src.c:978:gst_v4l2src_create:<v4l2src0> lost frames detected: count = 3 - ts: 0:00:04.997920784 ^Chandling interrupt. Interrupt: Stopping pipeline ... Execution ended after 0:00:05.086424645 Setting pipeline to NULL ... 0:00:05.285227515 877 0x925cc0 WARN v4l2src gstv4l2src.c:978:gst_v4l2src_create:<v4l2src0> lost frames detected: count = 2 - ts: 0:00:05.044071080 0:00:05.329868941 877 0x925cc0 WARN v4l2src gstv4l2src.c:978:gst_v4l2src_create:<v4l2src0> lost frames detected: count = 3 - ts: 0:00:05.105612154 .... 0:00:07.765494532 877 0x925cc0 WARN v4l2src gstv4l2src.c:978:gst_v4l2src_create:<v4l2src0> lost frames detected: count = 3 - ts: 0:00:07.520962284 0:00:07.832332643 877 0x925cc0 WARN v4l2src gstv4l2src.c:978:gst_v4l2src_create:<v4l2src0> lost frames detected: count = 4 - ts: 0:00:07.597885506 0:00:07.869181273 877 0x925c90 WARN v4l2allocator gstv4l2allocator.c:559:gst_v4l2_allocator_create_buf:<v4l2convert0:pool:src:allocator> error creating a new buffer: No buffer space available 0:00:07.869370347 877 0x925c90 ERROR v4l2bufferpool gstv4l2bufferpool.c:479:gst_v4l2_buffer_pool_alloc_buffer:<v4l2convert0:pool:src> failed to allocate buffer 0:00:07.869481421 877 0x925c90 WARN bufferpool gstbufferpool.c:305:do_alloc_buffer:<v4l2convert0:pool:src> alloc function failed 0:00:07.869961421 877 0x925cc0 WARN v4l2src gstv4l2src.c:978:gst_v4l2src_create:<v4l2src0> lost frames detected: count = 3 - ts: 0:00:07.659424987 0:00:08.471311773 877 0x925c90 WARN basetransform gstbasetransform.c:2167:default_generate_output:<v4l2convert0> could not get buffer from pool: flushing Freeing pipeline ... |
I pressed Control+C to stop the recording and got 1080p_recording.h264 file which I transferred to my PC over SSH to confirm it is an AVI file with a 1920×1080 video @ 30 fps encoded with H.264:
|
1 2 3 4 5 6 7 8 9 10 11 12 13 14 15 16 17 18 19 |
mediainfo 1080p_recording.h264 General Complete name : 1080p_recording.h264 Format : AVI Format/Info : Audio Video Interleave File size : 8.94 MiB FileExtension_Invalid : avi Video ID : 0 Format : AVC Format/Info : Advanced Video Codec Codec ID : H264 Width : 1 920 pixels Height : 1 080 pixels Display aspect ratio : 16:9 Frame rate : 30.000 FPS Color space : YUV Chroma subsampling : 4:2:0 |
I’ve uploaded the sample to YouTube for reference:
The video is fluid but grainy because it was shot at night.
Doing so during day time is much better, but the lighting is not ideal in the video above, so I tried again with some sunlight.
The gst-launch-1.0 tool is quite powerful and versatile, but if you ask me, the command line parameters are not exactly intuitive, and it takes some learning before fully understanding them all and there should be a file called “CAM20_CURB_GStreamer_Usage_Guide_<VER>.pdf” explaining this in detail that was not present in the FTP server, but could be asked from e-Con Systems. But luckily, the Yocto and Raspbian images also come with another Gstreamer tool – gst-capture – that will allow you to test a long list of parameters from the camera. We’ll first need to select the video0 device:
|
1 2 3 4 5 6 7 8 9 10 11 12 13 14 15 16 17 18 19 20 21 22 23 24 25 26 |
root@raspberrypi4:~# gst-capture APPVERSION - 1.2 SETTING DEFAULT RESOLUTION ==================== Video devices detected ==================== [1]:video14 [2]:video12 [3]:video1 [4]:video10 [5]:video13 [6]:video11 [7]:video0 [8]:v4l-subdev0 ================================================================ Select the video streaming device = 7 open device name = /dev/video0 open device name = /dev/video0 Streaming successful! +==================================================================================+ | V4L2 command line application - 1.2 | +==================================================================================+ [1] Still Capture Mode [2] Streaming Mode [3] Features [4] Exit from application |
After which we’ll be able to switch between still capture or streaming (video) modes, and more importantly access a long list of features for detailed control of the camera:
|
1 2 3 4 5 6 7 8 9 10 11 12 13 14 15 16 17 18 19 20 21 22 23 24 25 26 27 28 29 |
+==================================================================================+ | V4L2 command line application - 1.2 | +==================================================================================+ [1] Still Capture Mode [2] Streaming Mode [3] Features [4] Exit from application Enter the option: 3 [1] -- User Controls [2] -- Brightness [3] -- Contrast [4] -- Saturation [5] -- Gamma [6] -- Gain [7] -- Horizontal Flip [8] -- Vertical Flip [9] -- White Balance Temperature [10] -- Sharpness [11] -- Camera Controls [12] -- Exposure Auto [13] -- ROI Window Size [14] -- ROI Exposure [15] -- Denoise [16] -- Exposure Compensation [17] -- Image Processing Controls [18] -- Link Frequency [19] -- Pixel Rate [20] -- Frame rate message [21] -- Exit from Features Menu |
I’ve tried a few myself successfully, but going through all of those would be beyond the scope of this review/getting started guide, so I’ll just show how to adjust brightness as an example:
|
1 2 3 4 5 6 7 8 9 10 11 12 13 14 15 16 17 18 19 20 21 22 23 24 |
Enter the option: 2 =============================================================== Brightness Menu -- Range -15 to 15, Step Size = 1, Default Value = 0 =============================================================== [1] Choose Brightness level [2] Exit from Brightness menu Note: Current Brightness Value is 0 ======================================================== Please choose the option :1 Please enter the Brightness Value : 10 =============================================================== Brightness Menu -- Range -15 to 15, Step Size = 1, Default Value = 0 =============================================================== [1] Choose Brightness level [2] Exit from Brightness menu Note: Current Brightness Value is 10 ======================================================== Please choose the option : |
You can also watch the video below for a short demo with the scripts and gst-capture program:
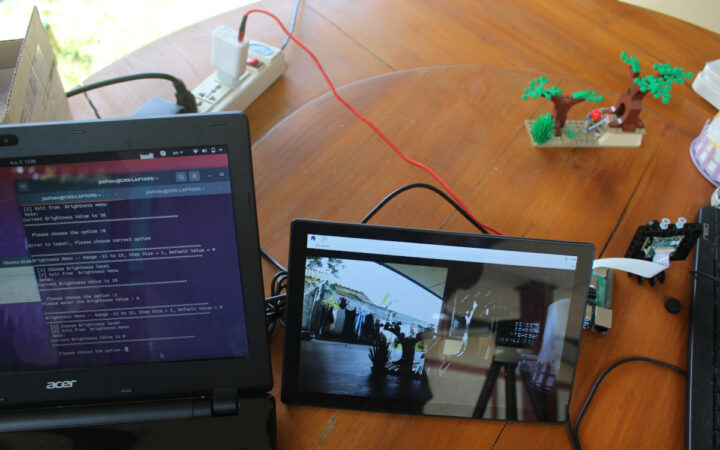
If you’ve watched the video, you’ll have noticed I had to switch between the terminal and the program after changing values. It’s not really convenient, so I’d really recommend either attaching a second screen or using a laptop with SSH, and exporting the display before running the commands:
|
1 |
export DISPLAY:=0 |
Sadly I only thought about this at the end of my review. It should probably be added to e-Con Systems documentation…
Apart from a few issues I had at the beginning with the OS image, I had a pretty good experience with the camera which works well with a high frame rate in all lighting conditions thanks to the global shutter. The camera is also fairly easy to use with decent documentation and the source code is available to those who want to customize the OS. I’d like to thank e-Con Systems for sending the e-CAM20_CURB global shutter camera for Raspberry Pi 4 for review. If you are interested, the company sells it for $99 plus shipping.

Jean-Luc started CNX Software in 2010 as a part-time endeavor, before quitting his job as a software engineering manager, and starting to write daily news, and reviews full time later in 2011.
Support CNX Software! Donate via cryptocurrencies, become a Patron on Patreon, or purchase goods on Amazon or Aliexpress







A word of warning. We based one of our products on an eCon Systems board, only to find the MOQ leapt from 1 to 100 boards. I assume it was made for another customer and they made some extras for stock.
If you are buying a one off then they are OK, but be wary for low volume products.
Dear Tim,
We allow to purchase 50+ cameras in our online store for some of the cameras. For Example: https://www.e-consystems.com/webstore.asp#5mpnxcamera
Based on demand, we restrict few products with MOQ. Please write to sales e-consystems.com with your needs so that we can assist you further.
Iran
Thank you