Espressif Systems ESP32 has many new interfaces over ESP8266, but still lacks a hardware camera interface like DVP or MIPI CSI. However, it’s still possible to connect a camera to the I2S interface. What? Isn’t I2S used for audio? It turns out there’s more to ESP32’s “I2S interface” as pointed out in the forums:
The I2S subsystem in the ESP32 also provides a high speed bus connected directly to RAM for Direct Memory Access. Putting it simply, you can configure the ESP32 I2S subsystem to send or receive parallel data under hardware control.
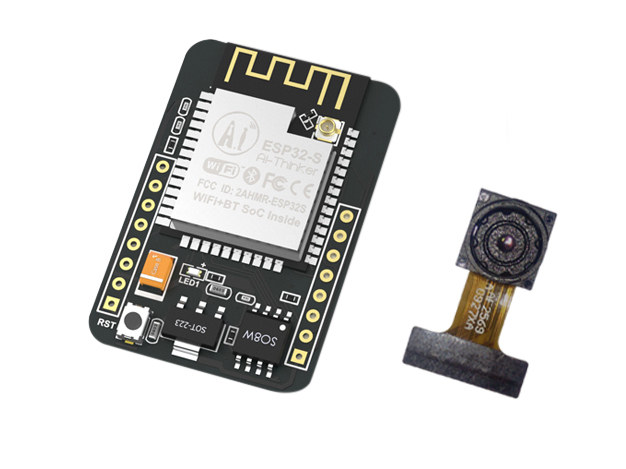
There were some ESP32 camera boards launched previously such as ESP32-PICO-tinyCAM, but most seem to have been phased out. However not is all lost, as Seeed Studio is now taking pre-orders for the new A.I. Thinker ESP32-CAM board with a 2MP camera for $9.90.
 ESP32-CAM board specifications:
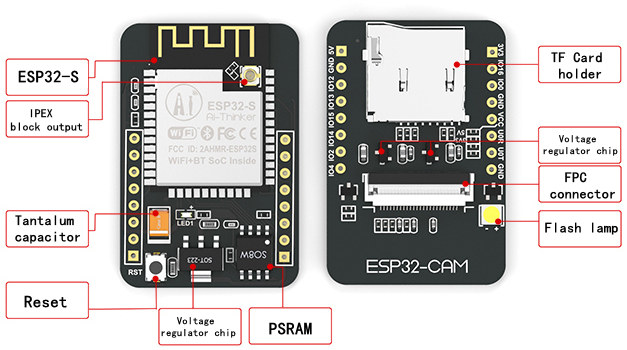
- Wireless Module- ESP32-S WiFi 802.11 b/g/n + Bluetooth 4.2 LE module with PCB antenna, u.FL connector, 32Mbit SPI flash, 4MBit PSRAM
- External Storage – micro SD card slot up to 4GB
- Camera
- FPC connector
- Support for OV2640 (sold with board) or OV7670 cameras
- Image Format – JPEG( OV2640 support only ), BMP, grayscale
- LED flash light
- Expansion – 16x through-holes with UART, SPI, I2C, PWM
- Misc – Reset button
- Power Supply – 5V via pin header
- Power Consumption
- Flash LED off – 180mA @ 5V
- Flash LED on to maximum brightness- 310mA @ 5V
- Deep-sleep – 6mA @ 5V min.
- Modem-sleep – 20mA @ 5V min.
- Light-sleep – 6.7mA @ 5V min.
- Dimensions – 40.5 x 27 x 4.5 mm
- Weight- 10 grams
- Temperature Range – Operating: -20 ~ 85 ; storage: -40 ~ 90 @ < 90%RH
 The board needs to be programmed with ESP-IDF as explained in details in Github, and there’s no Arduino IDE support. So if you’r not comfortable with using Espressif development framework better skip this board.
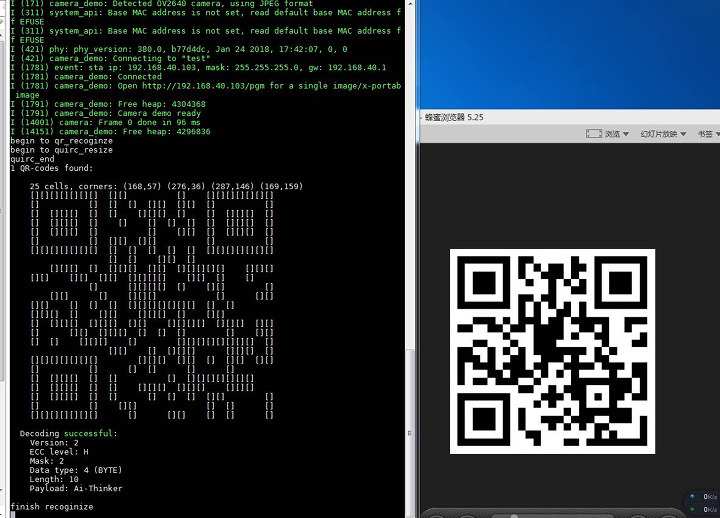
The demo code takes a QR code, and outputs it as ASCII code in the serial console.
While the board is still shown to be on pre-order, shipping is scheduled for today (September 30th). If the information in Github is not complete enough, Seeed Studio product page has more links to documentation in English, and A.I. Thinker also setup a wiki (in Chinese only).
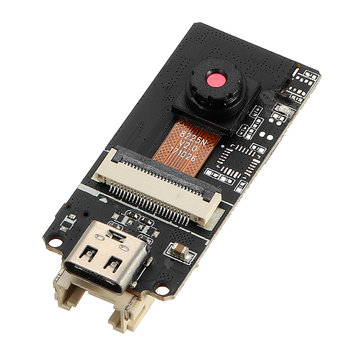
Another option is M5Stack ESP32 camera (ESP32CAM) board sold for $13.90 shipped on Banggood. The latter features the same OV2640 camera module, does not come with a micro SD card, but includes a USB port, and a grove connector, as well as pads for soldering MPU6050 & BME280 sensors. Another advantage is support LiPo battery via IP5306 charger chip.


Jean-Luc started CNX Software in 2010 as a part-time endeavor, before quitting his job as a software engineering manager, and starting to write daily news, and reviews full time later in 2011.
Support CNX Software! Donate via cryptocurrencies, become a Patron on Patreon, or purchase goods on Amazon or Aliexpress


Cool demo!
Interesting. Not sure that it is really better than xiaofang or wyse (20$ ip cam) if you use it only as camera but with an interesting algorithm it can be nice (I always dream about something that count cars driving in the street). If you add motion sensor it can be a nice person detector for home assistant.
This camera can only do stills. The ESP32 does not have video hardware.
I have 3 units up and running. They will stream 640×480 video.
do you have any tutorial of doing it?
i was not able to upload the code to esp32cam module.
can you help me out
Maybe this helps: https://moayom.blogspot.com/2019/02/ai-thinker-esp32s-cam-error-sketch-to.html
Only 4GB storage? It’s getting rather difficult to get cards that small these days.
Using I2S to implement high speed protocols reminds me of the hack for the ESP8266 where it was used it to control LED strips. There you had the persistent problem where the core was being shared between WIFI and whatever else you were doing – so if you tried to bitbang anything it’d randomly have interrupts/pauses which some protocols can’t tolerate (like the simpler ones in LED strips).
It’s a neat project: https://github.com/cnlohr/esp8266ws2812i2s
I receive it today. Just successfully trying the hello_world of ESP IDF
I want to leave a note here for everyone, especially myself 🙂
To flash, connect GPIO0 and GPIO2 to GND, remove the camera, power it with 3.3V, not 5V.
do anyone have any tutorial of doing it?
I was not able to upload the code to the esp32cam module.
can anyone help me out?
I think I’m not having the right USB to serial chip
Good description here: https://robotzero.one/esp32-cam-arduino-ide/
Watch the jumper next to the IPEX connector, mine was jumpered to use the IPEX connector and not the on board antenna.