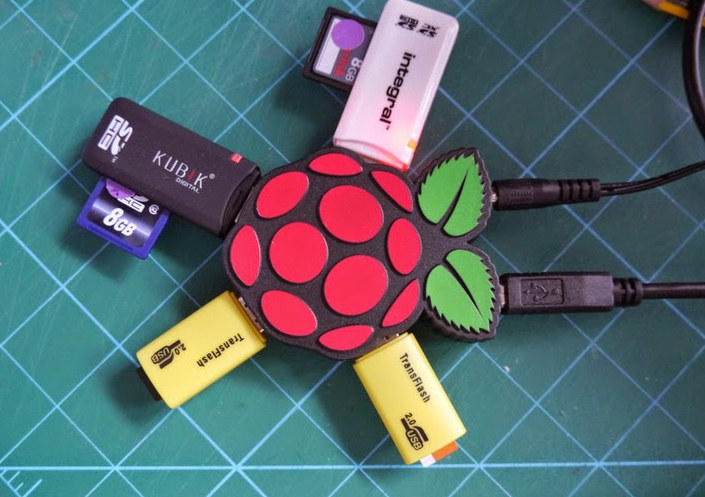
If you have to duplicate many SD cards for example to boot Raspbian on multiple Raspberry Pi board, one option is buy one of those SD card duplicators, but the problem is that they are not really cheap, for example the Systor 1-to-7 cards model sells for $540.
Bob Brown, a retired senior lecturer, is now teaching K-12 students how to get started with Raspberry Pi boards, and must prepare bootable SD cards for his class. In order to save time, a duplicator would have been nice, but the price is too high, so instead he went with a DIY solution.

You’ll first need some hardware, including a powered USB hub with the number of cards you want to duplicate, and corresponding SD card reader, and a larger micro SD card to hold Raspbian and/or other operating systems (optional, only for Raspberry Pi based duplicator). Mr. Brown made a 10-port SD card duplicator (1-to-9) for just under $100.
One the software side, he’s used to utilities. PiShrink used to reduce to size for the firmware image of the SD card you want to duplicate so that it can fit into SD card with a slightly smaller size, and dcfldd to handle dumping the firmware to multiple cards in one command.
Example for PiShrink:
|
1 |
sudo pishrink.sh my-rpi-os.img |
Example for dcfldd to copy the firmware to 4 SD cards in one go, after installation:
|
1 2 |
sudo apt install dcfldd sudo dcfldd bs=64k if=my-rpi-os.img of=/dev/sda of=/dev/sdb of=/dev/sdc of=/dev/sdd |
Mr. Brown used a Raspberry Pi to run the command, you could also use your Linux PC instead. It takes about eight minutes for one card, and up to 20 minutes for 10 cards with the Raspberry Pi board. You’ll find the full details about the setup on Kennesaw State University website.

Jean-Luc started CNX Software in 2010 as a part-time endeavor, before quitting his job as a software engineering manager, and starting to write daily news, and reviews full time later in 2011.
Support CNX Software! Donate via cryptocurrencies, become a Patron on Patreon, or purchase goods on Amazon or Aliexpress


Strange advices. While dcfldd is of course available on other distros than Debian (and even totally different platforms — on macOS for example it’s just a ‘brew install dcfldd’) of course it’s a horrible idea to use it to burn SD cards for the same reason dd sucks with this use case in general: no verify. Using dd or dcfldd is a great way to write garbage to the SD card without being notified.
If I have to write a bunch of SD cards I only use Etcher for the obvious reason that a verify is always needed. I insert the first, then check which disk device it is (diskutil list) and then use a simple while loop:
When using great performing SD cards (those better A1 rated ones) and a fast USB3 attached card read this is done faster in a sequential fashion compared to attaching USB hubs to an SBC that is only USB2 capable. SanDisk Extreme A1 in my MacBook’s card reader write/verify with constant 80 MB/s.
Just no, your method is good for a few cards, not for a batch. “dcfldd” is NOT “dd”, that program include a few options to verify data written, and it could output to multiple disks at the same time. This is the feature you missed.
Nobody really cares about write speed. With RPI and the hub many cards can be written in parallel.
Been done before, he just re-invented the wheel
http://blog.opensecurityresearch.com/2012/07/simple-usb-thumb-drive-duplicator-on.html
Using ‘dd’ to create a master image? Weird. I would use ‘ddrescue -d’ for this most important step.
There is also a Python based project again using a rpi and usb hubs, it is on Github.
Also came across this, has anyone tried it on PC?
Free for private use
https://www.osforensics.com/tools/write-usb-images.html
what about 9.99 $ ?
if you’re cheap and can wait up to 1 month you can get a 10-port usb hub + 10 uSD card reader for about 10 bucks shipping included from ebay or aliexspress
🙂
Isn’t there a way to do this over a network with something like PXE-Boot [Preboot Execution Environment – Boot]? Once up, each machine writes the new image received over the network to it’s own USB drive. No need for a big USB hub and plugging-unplugging nonsense.