We spotted the QBoat Sunny at QNAP’s booth back at CES in January and much has changed since then. Not only did QNAP change from an Intel based solution to an ARM based one, but the product seems to have shifted from being a development board to a strange kind of IoT server.
The QBoat Sunny sample that QNAP provided for us to look at is based on the Annapurna Labs AL-314 quad core ARM Cortex-A15 SoC which is clocked at 1.7GHz. This has been paired with 2GB of DDR3L RAM (non-expandable) and 512MB of NAND flash that isn’t user accessible, much as on their NAS products. This simply contains the core parts of the QTS Lite OS. As such, you need to install an M.2 SATA SSD to be able to get started with the QBoat Sunny.
QNAP provides a list of compatible SSDs on its website, although some are not “consumer” models and might not be available for individual purchase. We used a Crucial MX300 SSD which is on the supported list, however, any standard M.2 SATA SSD should work. Interestingly, QNAP supplies two very small heatsinks (about 15x15mm) that they suggest that you stick on the SSD controller. As the MX300 has a sticker over its controller, we presume it doesn’t get hot enough to warrant the use of the heatsinks.
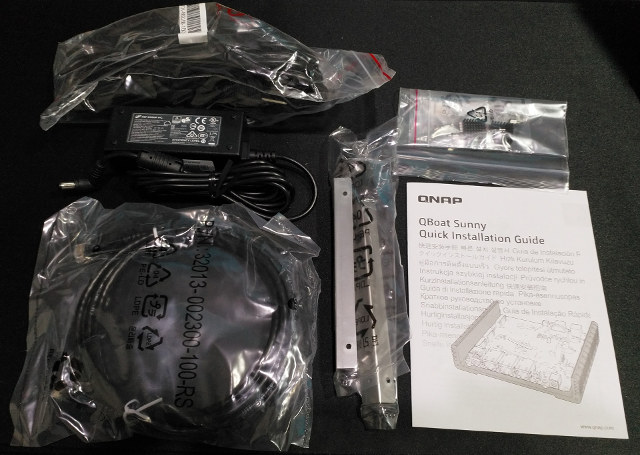
Also in the box is 12V/3A power brick from FSP that meets the latest power efficiency standards, a set of mountain rails, some screws, an Ethernet cable and a quick installation guide. The mounting rails don’t make a whole lot of sense, as they don’t seem to follow any standard. The mounting holes for the rails on the heatsink/housing for the QBoat Sunny have a distance between them of 100mm which suggests a VESA standard, but oddly enough the holes on the opposite end of the mountain rails have a center distance that just misses the VESA 75mm standard.
There are also rear mounting holes on the heatsink/housing, which are either 105x105mm using M4 screws (not supplied) or 100x75mm using M3 screws (also not supplied). The 105×105 mounting holes correspond perfectly to a 120mm PC cooling fan and the board has a fan header. However, the holes are on the bottom of the heatsink/housing only, so there’s no simple way to actively cool the SSDs for example.
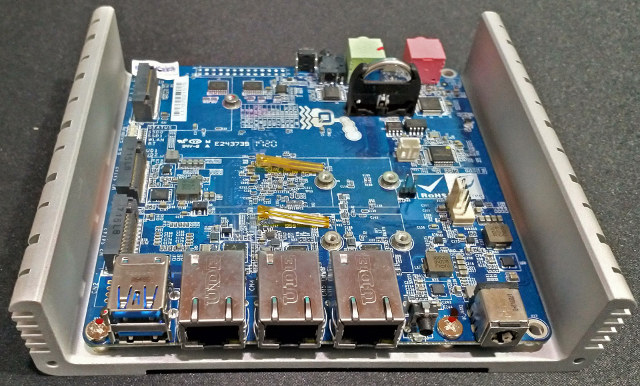
Connectivity wise the QBoat Sunny has a fair of mount of options, starting with two M.2 M-key slots (SATA only), one M.2 A key slot for things like Wi-Fi and Bluetooth cards – a bit more on the M.2 slots later – three Gigabit Ethernet ports – two AR8035 and one AR8033 – two USB 3.0 ports, a “maintenance” port via a 3.5mm jack (no cable supplied) and separate headphone and microphone 3.5mm jacks. There’s also the aforementioned 4-pin fan header and a two-pin battery connector, although we’re not sure what the later is for, as the QBoat Sunny has an RTC battery fitted in a vertical mount already, yet the battery header is supposed to be for an RTC battery.
There’s also space for a 26-pin header, but the holes have been filled by solder and the manual doesn’t mention anything about this header. However, the board still has a silk screen that points out what the different pins are for and although some of them aren’t clear such as PBS28 and HMM_TR1, some of them are for I2C, serial interface and power. There are also a couple of pins for monitoring external fans which seems to be tied to the Novoton NCT7802Y hardware monitoring IC. There are also a couple of TI LSF0108 octal bidirectional multi-Voltage translators here which seem to serve no purpose without the pin-header being populated.
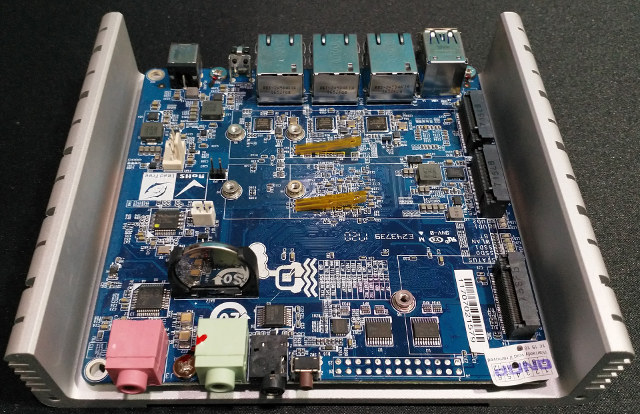
We also spotted a C-Media CM6533 USB 2.0 audio chip and a Weltrend WT61P803 which seems to be some kind of programmable logic IC, but we’re not entirely sure what purpose it serves, although it’s most likely used as some kind of general system controller.
Let’s quickly go back to the M.2 slots. The SATA drive slots both have a thermal sensor below them which is used by the QTS OS to monitor the temperature of the SSDs. We’re somewhat confused by QNAP’s choice of M.2 slots though, since in the case of the SSD slots, QNAP should have used B-key slots, as that way it wouldn’t be possible to try an insert a PCIe based SSD into the QBoat Sunny as it is today. The third M.2 is A-key and doesn’t work with E-key Wi-Fi cards, but A/E keyed cards should fit. That said, at this point in time, this slot seems to serve no purpose, as there are no officially supported Wi-Fi cards for it. As such, you’re limited to a handful of USB Wi-Fi options if you want to add Wi-Fi to the QBoat Sunny.
Setup was simple enough, pop in an SSD or two, plug in the power, press the power button and the system starts. Without and SSD, you’ll be greeted by a screen telling you to install at least one hard drive, although it should really say SSD in this case. Although external hard drives are supported, the QTS Lite OS has to be installed onto an SSD.
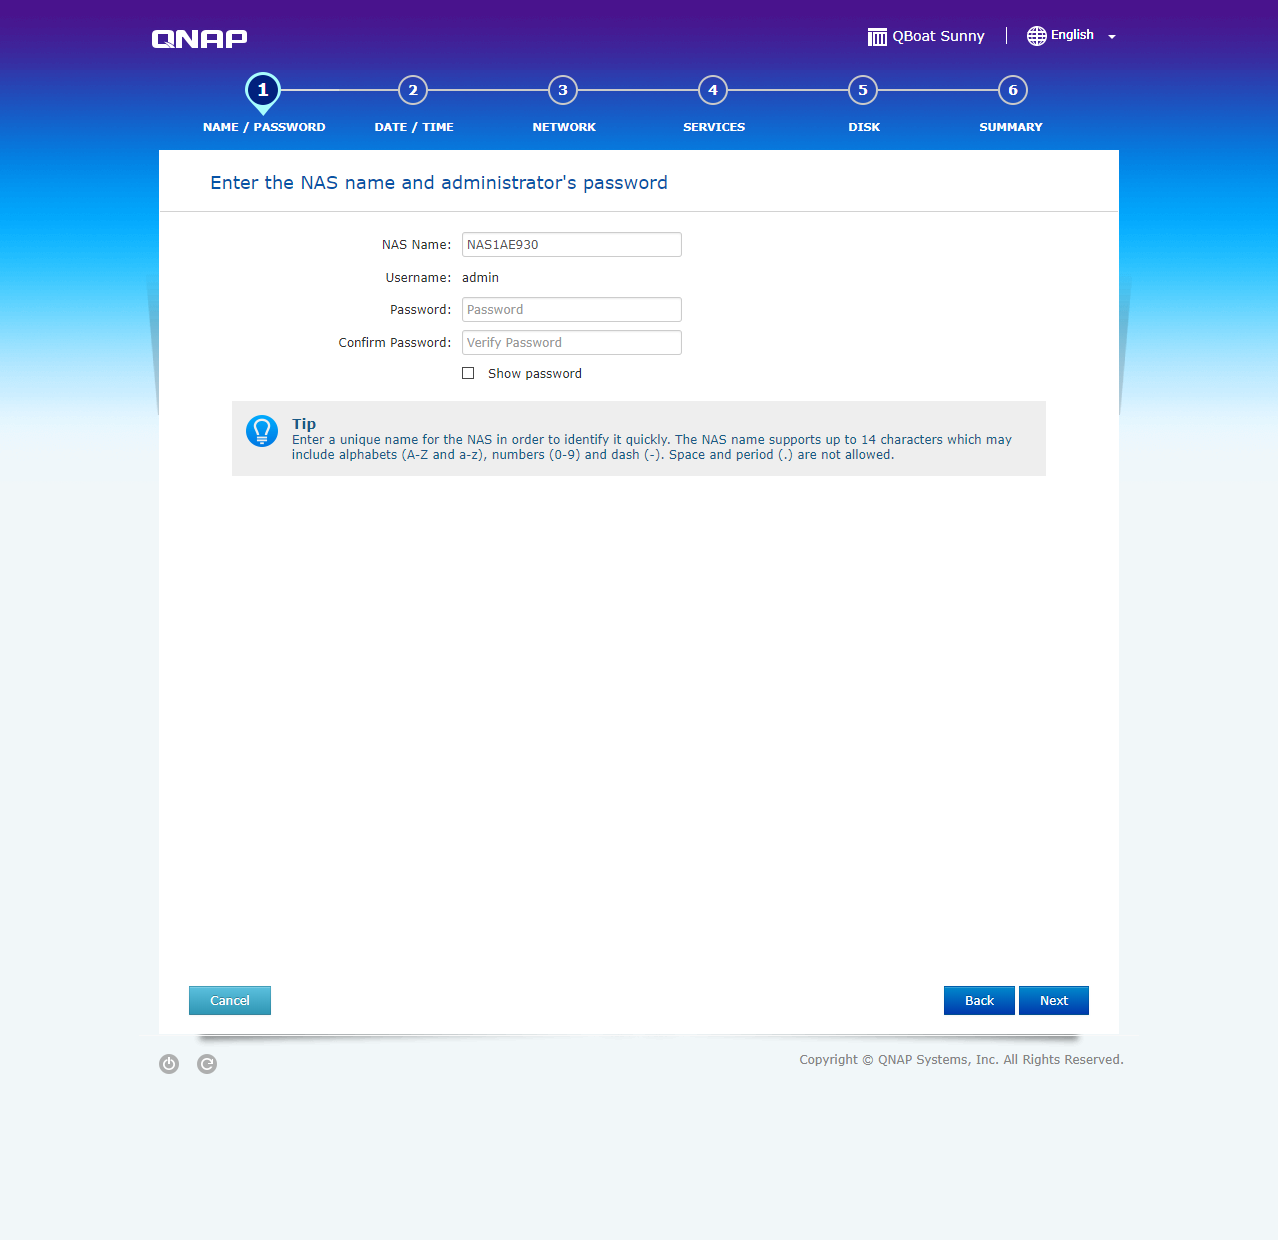
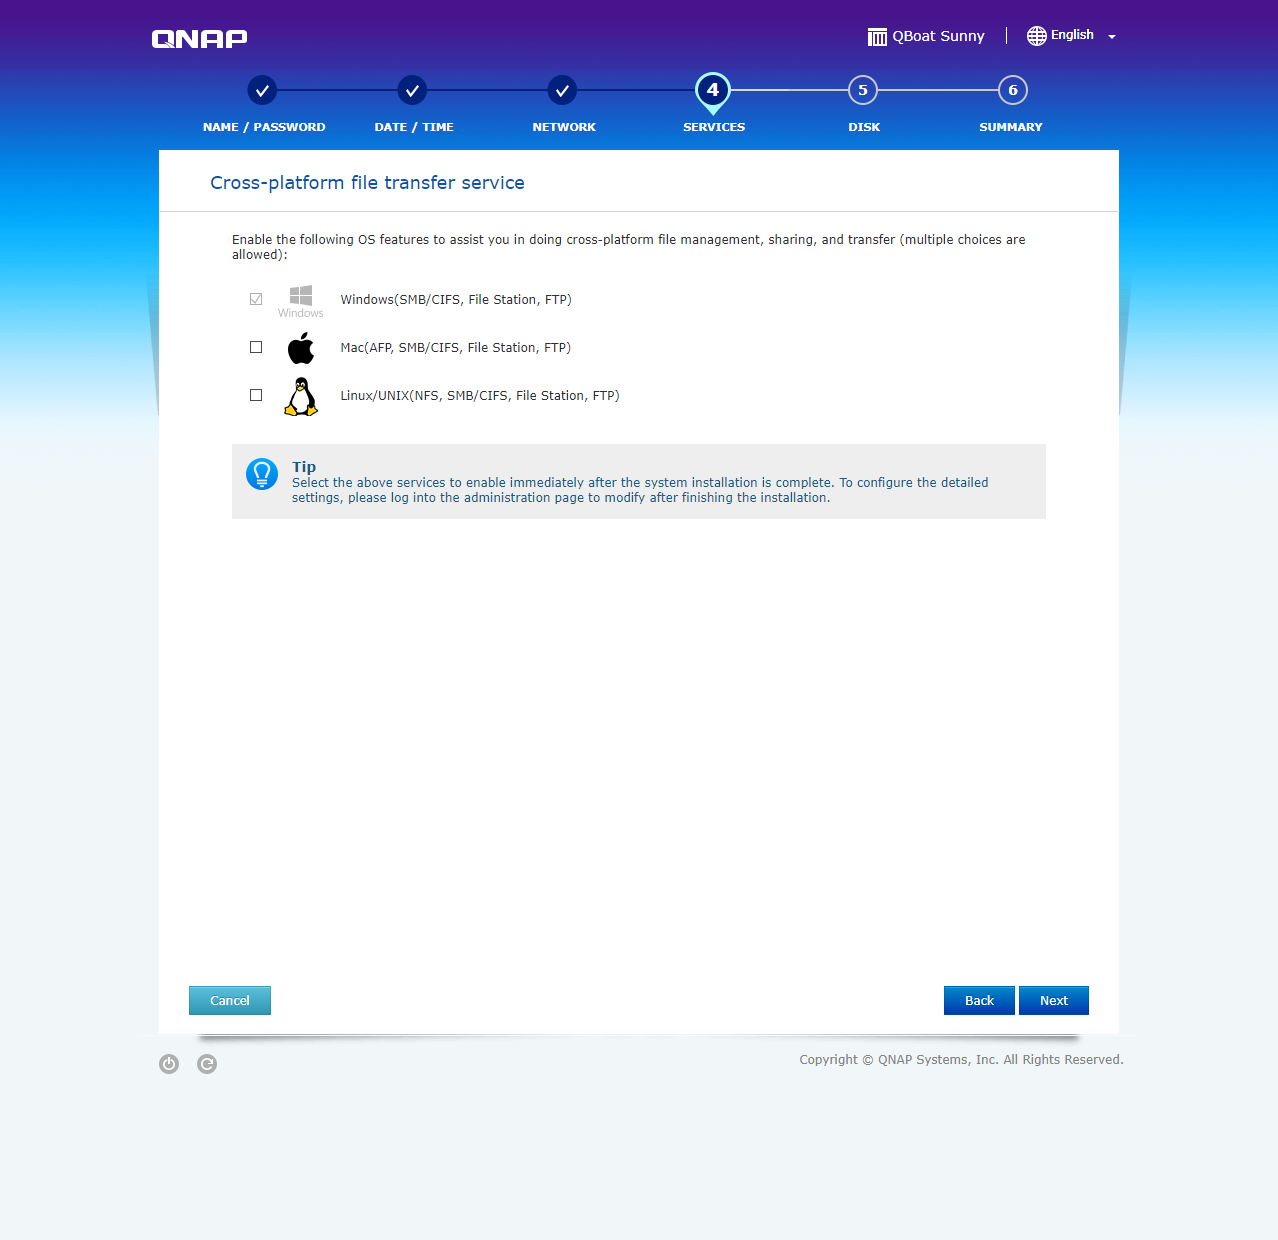
To find the QBoat Sunny on your network, you can use QNAP’s Qfinder Pro tool, which is available for a wide range of operating systems, including Android and iOS, but not Linux. As with QNAP’s range of NAS products, the setup is done via a guided wizard through a web browser. This is also when you’d enable the type of file server you’d want and all major options are supported, such as SAMBA, AFP, NFS, and FTP, as well as QNAP’s own File Station.
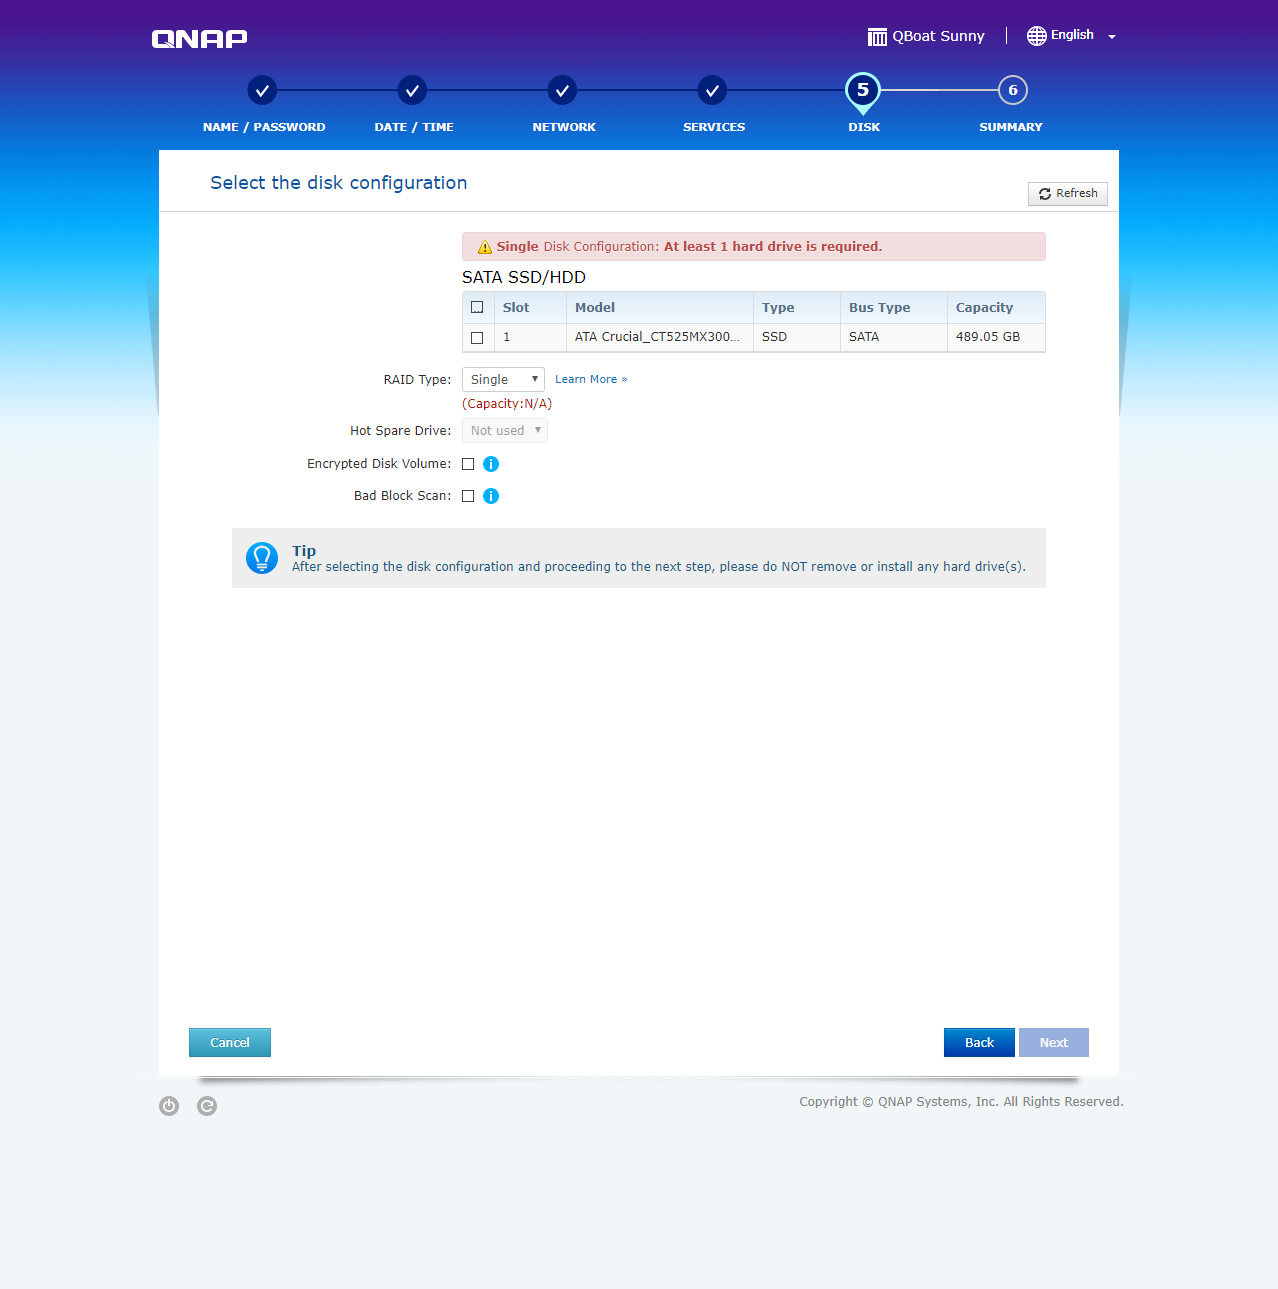
Once the basic steps are done, you need to format your drive(s) and in our case we only had a single drive, so we couldn’t set up any kind of RAID. The QBoat Sunny supports RAID-0 and RAID-1.
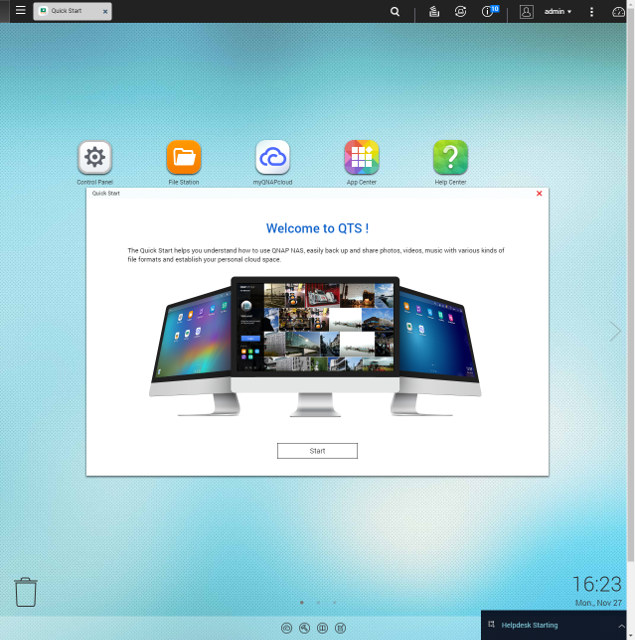
After the drive has been formatted, the QTS Lite will be installed from the NAND flash and the system will reboot before you get access to the OS. Once rebooted, we were told there was a system update which brought us to the latest build of the QTS Lite OS.
We’re still not quite sure what to make of the QBoat Sunny despite having had it for a couple of weeks now. Although the hardware itself isn’t bad, it seems like QNAP cut a few too many features from the Intel model that they announced at CES, as this seemed to be more of a developer platform. Now we’ve got something that appears to be more of an IoT server for storing data from various IoT devices. The higher price point of $169/€159 is also not that appealing, unless you have a specific use case for such a device, but more on that when we take a closer look at the software side of the QBoat Sunny after the holidays.
QNAP QBoat Sunny can currently be purchased on span.com for 158 GBP ex VAT ($210 / €179), but as more sellers list the device/board, price should eventually come down closer to the MSRP.
Support CNX Software! Donate via cryptocurrencies, become a Patron on Patreon, or purchase goods on Amazon or Aliexpress


why are chips from Annapurna Labs so attractive to NAS makers ?
@bantoto masabo sigola
You could also ask more generally ‘why are SoCs made for NAS use cases attractive to NAS makers?’. These NAS SoCs provide a bunch of native and fast SATA ports, in this case a couple of RGMII ports to connect Gigabit Ethernet PHYs and a bunch of PCIe lanes for the remaining stuff that needs fast interconnects. The bigger sibling AL-514 even supports 2 x 10GbE.
And the SoCs really perform here since they’re designed for high storage and network bandwidth and low latency: https://www.servethehome.com/exclusive-gigabyte-annapurna-labs-arm-storage-server-benchmarks/ (forget about the generic benchmark stuff, especially jokes like Dhrystone/Whetstone and scroll down to the storage numbers and please keep in mind that 8 SATA ports are bottlenecked here since 4 of them each behind a Marvell 88SE9230 that is connected with PCIe 2.x x2 to the SoC)
@bantoto masabo sigola
Because they have integrated SATA and PCIe connectivity. They also have a good range of Ethernet options, some models even has 10Gbps support.
Sadly there’s little to no details on these chips and the company doesn’t even seem to respond to emails, which makes them extremely hard to work with unless you’re already a huge company.
I wonder if that “maintenance port” actually is serial, is that asomething you can have a look at? Also if the boot loader is locked would be nice to know…
@diizzy
The manual doesn’t explain what the maintenance port is for, although there’s a component behind it which is a “Multichannel RS-232 Line Driver and Receiver” so one has to assume it’s a serial port. However, without knowing the pin configuration, it would be hard to use it. I’m also not sure if it’s supported/enabled in any way.
As for the boot loader, most likely locked, as it’s a QNAP appliance and they tend to lock down as much as they can on their systems. Which is why I find this an odd product from them to start with. It might have some niche uses, but for most people, this isn’t going to be interesting as a development platform.
This thing above? Looks like a product solely designed by marketing staff thinking about ‘NAS market is saturated, now let’s rehash stuff and enter IoT market even if we do not have any idea what this IoT thing is’. The above device combines the main disadvantage of their NAS boxes (as closed as possible) with some new ones like wrong M.2 slots. The only use case I could imagine is a small server with expensive but fast storage if you’re happy running software you do not control.
What happens here (NAS device maker trying his luck in an ‘IoT server’ market) reminds me a bit of WD’s PiDrive.
What to do with 2.5″ MyPassport disks with failed platters or insanely high amount of defective sectors coming from the factory? Throw them away or let marketing department handle this? They opted for the latter, invented WDLabs and their PiDrive product instead of sending those disks to the bin. Custom firmware to hide what’s inside the HDD (that’s where the strange 314GB capacity originated from), an USB-to-SATA bridge included and targeting a huge market of absolutely clueless Raspberry Pi users telling them the PiDrive would be something specially designed for the Pi.
But in WD’s case this also lead to a real invention: their great power cable allowing to power drive and Pi from the same power source without having to fear the usual voltage drops that make disk access with Raspberry Pis such a sh*t show.
With the QNAP thing above I fail to see such an innovation. To me this looks like a stripped down NAS that lacks the ability to add disks (you would need mechanical ‘M.2 to SATA’ adapters) targeting a market that maybe not even exists.