MeLE PCG35 Apo is a mini PC powered by Intel Pentium J3455, one of the most powerful Intel processors from Apollo Lake family, coupled with 4GB LPDDR3, 32GB eMMC flash and support for M.2 SSD and 2.5″ SATA HDD/SSD. The company sent me a sample for review, and I’ll start by taking photos of the device, accessories, and internal design, as well as showing how to install an M.2 SSD and 2.5″ SATA drive, before publishing the second part of the review with Windows 10 at the end of next month.
MeLE PCG35 Apo Unboxing
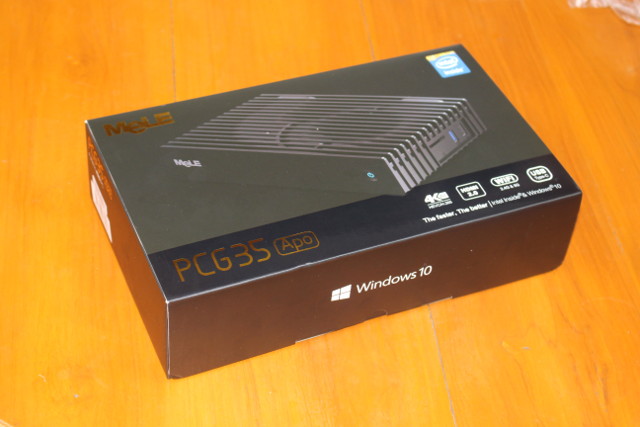
The mini PC comes with the usual black package with gold fonts the company has used us to.
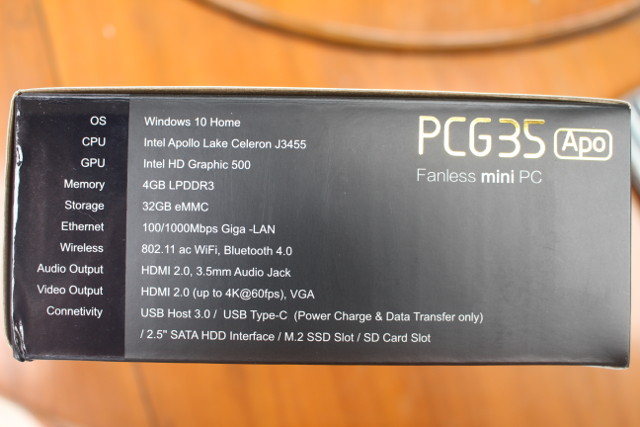
The side shows the main specifications of the fanless mini PC.
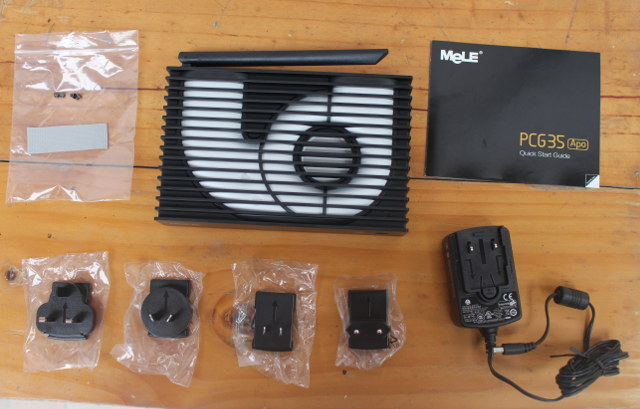
The mini PC, which comes with an aluminum heatsink shaped as number 6, ships with a 12V/2A power supply plus UK, AU, US, and EU plug adapter, a quick start guide, and a zip bag with 4 screws to install a 2.5″ SATA drive, as well as thermal pad for the M.2 SSD.
The case is not fully made of metal with the top part made of plastic, and the bottom and rear panel made of metal. The front panel include power button and LED, one of the side features a full sized SD card slot, a USB 3.0 ports, and a USB 2.0 ports…
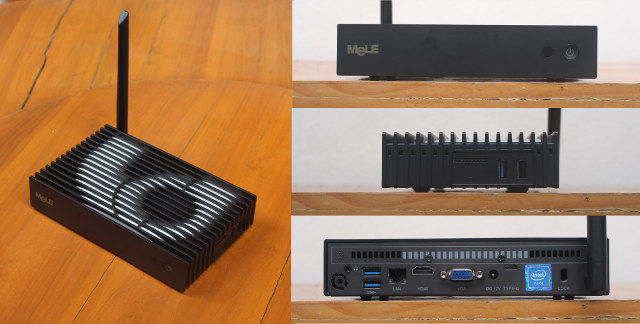
… and the rear panel is equipped with a 3.5mm audio jack, two more USB 3.0 ports, a Gigabit Ethernet port, HDMI 2.0 and VGA outputs, the power jack, a USB type C port for data and power only (no video/audio), a security lock, and an external WiFi antenna.
MeLE PCG35 Apo Teardown
If you plan to install an hard drive and/or SSD you’ll need to open the case. Four screws are located on the bottom, and four screws in the rear panel. I loosened all eight screws, but it should be possible to install the drives by only removing the bottom cover.
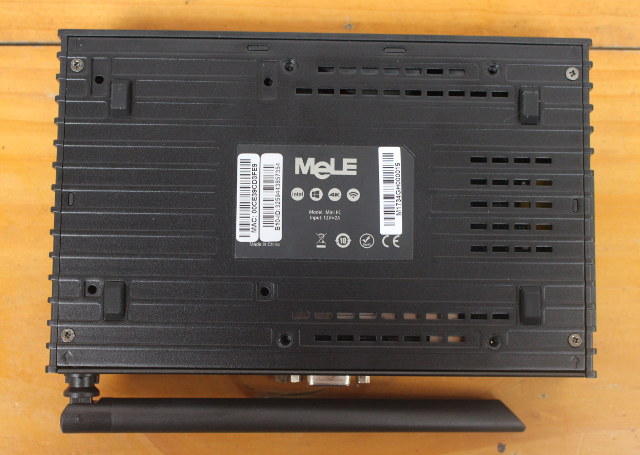
Note that the screws do not feel of good build quality, and I had to try with 4 different screw drivers/heads for fear of damaging them, as with the first screw driver I used I could see some metal going off of the first screws. You’ll need to find a screw head that fit perfectly to avoid any damage. Note that two screws are shorter than the other to make sure to check this when you open the box. The short ones are on the edges of the rear panel.
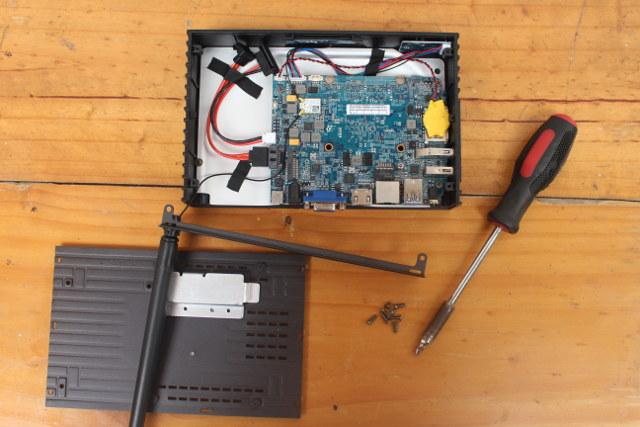
The bottom metal cover also include another aluminum piece that, as we’ll see later, is used to cool the M.2 SSD. We can also find the SATA cables, and 80mm M.2 slot inside the case as expected.
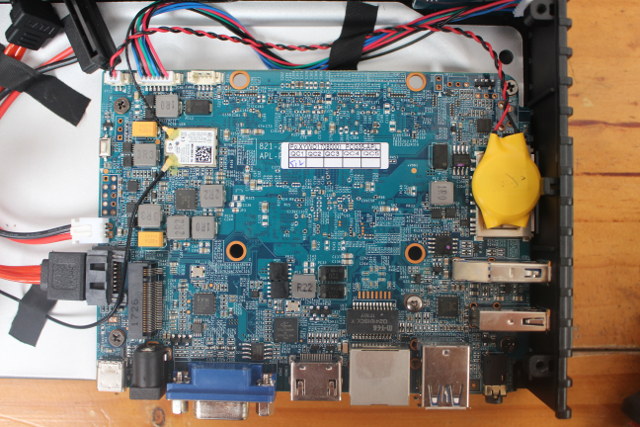
On the top of the main board we’ll get the RTC battery, and several chips including:
- Parade PS175HDM DisplayPort to HDMI 2.0a video interface converter
- ITE IT6513FN DisplayPort to VGA controller
- Richtek RT5074A power management IC?
- Realtek ALC269 audio coded for the headphone jack
- M-TEK G24101SCGX Gigabit Ethernet transformer
- Intel 3165D2W wireless module for 802.11 b/g/n/ac WiFi and Bluetooth 4.0 LE
- Realtek RTS5170 card reader controller driver
Unsurprisingly, those are exactly the same chips used in MeLE PCG03 Apo.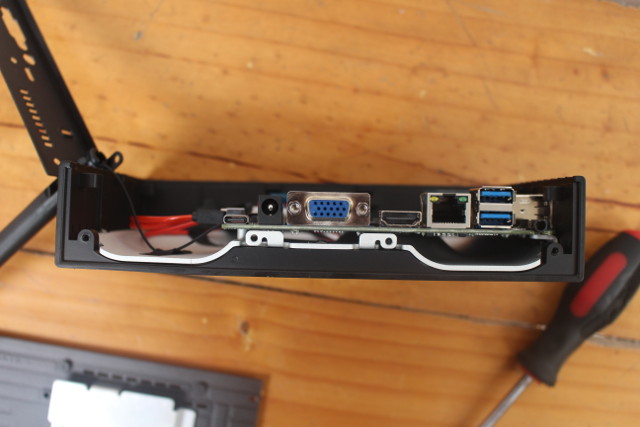
If we looks on the side, we’ll see more about the design of the aluminum heatsink. It actually looks like a heat spreader, but since it’s attached to plastic part of the case, it does not spread heat to another metal part. Most people should not do that, but I loosened for more screws to take out the board, and have a better looks at the design of the aluminum part. There’s a fair amount of thermal paste on the “volcano” like part of the heatsink that makes contact with the Intel Pentium J3455 processor.
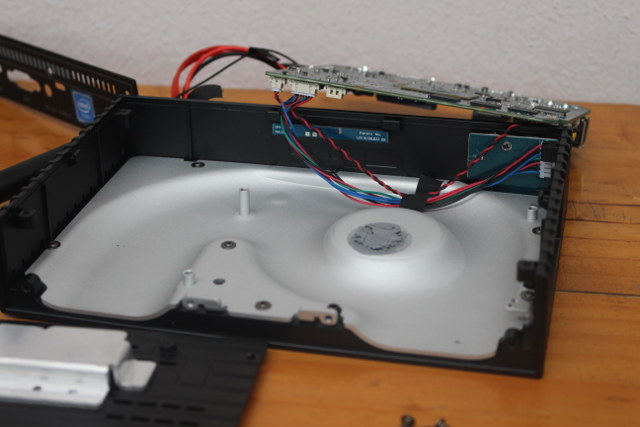
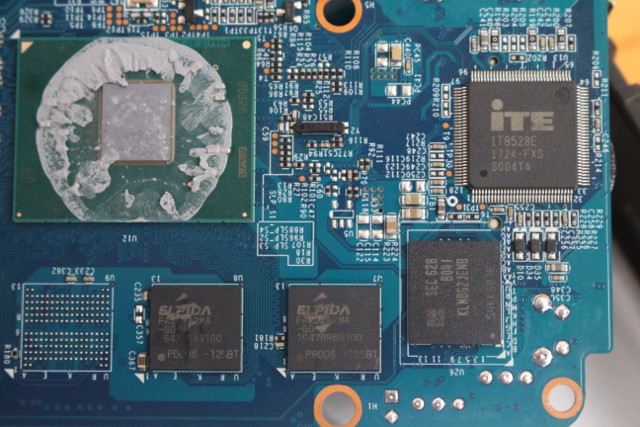
We can also see an internal WiFi/Bluetooth antenna in the background. That part of the PCB also includes the chips for RAM, storage, ITE IT8528E embedded controller, and Realtek RTL8111(AN) Gigabit Ethernet transceiver.
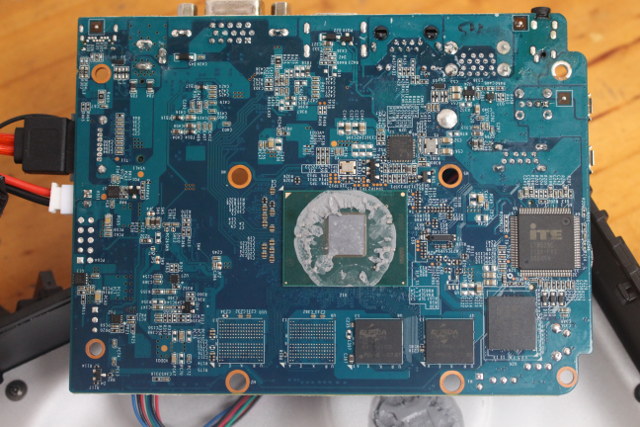
We have 32GB storage with Samsung KLM8G2JENB-B041 eMMC 5.1 flash with theoretical performance of up to 310MB/s read, 70MB/s write, and 13K/14K R/W IOPS, which differs from the Toshiba eMMC flash found in PCG03 Apo, and the best 32GB Samsung eMMC part available.
We also have two ELPIDA FAZ32A2MA RAM chips that should be 2GB each for a total of 4GB RAM, and there are two unpopulated footprints for two more, meaning there could be a 8GB RAM model on the way, or for OEM customers.
M.2 SSD and SATA HDD Installation in MeLE PCG35 Apo
The user manual does not explain at all how to install either M.2 SSD, nor SATA HDD, but it’s quite easy enough to figure out.
I used KingDian N480 M.2 SSD (80mm long), inserted it in the M.2 slot and kept it in place with the screw. You may also want to the the M.2 SSD thermal pad included in the package. Peel off the plastic sheet on the pad, and place it pad on the of the aluminum part attached to the bottom metal cover, before peeling off the second plastic sheet as shown in the photo below.
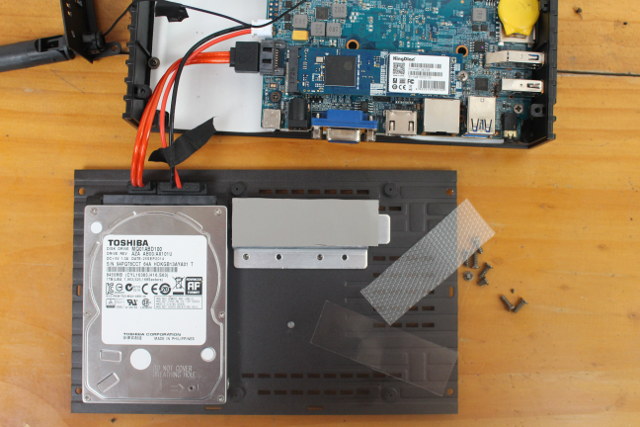
If you plan to use a 2.5″ drive too, use the four extra screws in the package to attach it to the bottom metal cover making sure the drive is oriented such as the SATA connector is placed close to the SATA marking on the cover, and connect the SATA cables accordingly. Now we can put everything back together, and we should be good to go. So I plan to use the eMMC flash for Windows 10, the M.2 SSD for program, cache, and email database, and the SATA hard drive for other data.
About those screws…
When I first started the teardown, I mentioned the screws could be damaged easily, and I managed to damage one on the bottom plate, enough so I can not screw it or loosen it with a screwdriver anymore. I’ll have to use another tool to take it once I want to get back my SSD and hard drive.
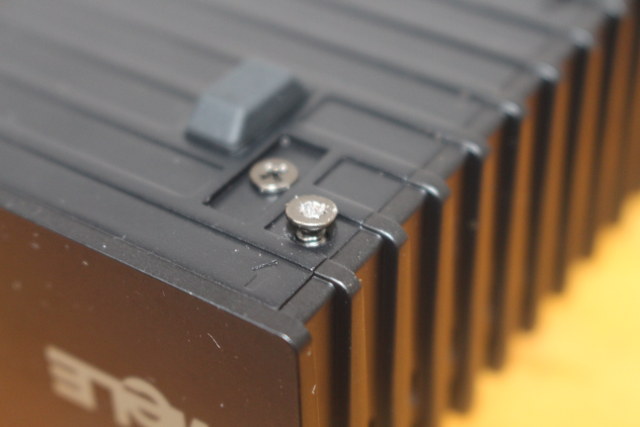
I also had another problem with another screw in the rear panel that would not go straight. I tried to loose the other screw around, and try again, and later mix the screws but no luck…
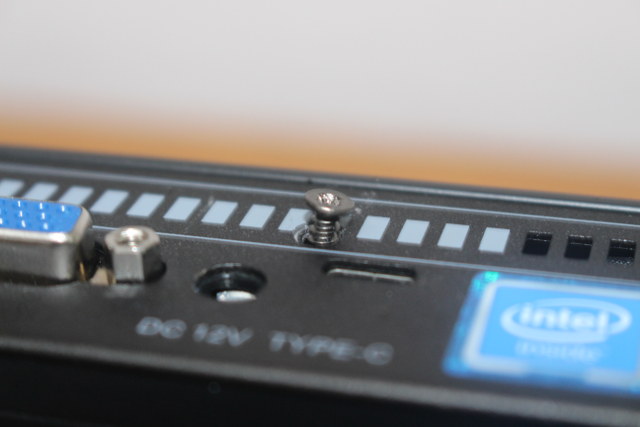 Since the mini PC is designed to be open, it would have been good if the company has found an easier way to open the device to insert an SSD/HDD, or sturdier screws.
[Update from MeLE:
As for the screws on the rear panel and bottom, we have realized the seriousness that it may bring uncomfortable experience to customers who install and uninstall frequently. Therefore, we have urged our R&D team to implement new screws (more stronger and more feasible) from next batch of massive production in end of this month by sending official ECN (engineering change notice) to our factory within this week.
I’d like to thank MeLE for sending their latest fanless mini PC for review, and if you are interested in the device, you can purchase it for $179.99 including shipping on Aliexpress. They also have options for a VESA mount, and a MeLE F10 air mouse. Please note that the company will often put the device back to $199.99, just wait a few days if this is the case, and I’ve also been told promotional prices are always on during week-ends.
[Udpate: Continue reading:
- MeLE PCG35 Apo Mini PC Review – Part 2: Windows 10 Home
- MeLE PCG35 Apo Apollo Lake Mini PC Review – Part 3: Ubuntu 17.10
]

Jean-Luc started CNX Software in 2010 as a part-time endeavor, before quitting his job as a software engineering manager, and starting to write daily news, and reviews full time later in 2011.
Support CNX Software! Donate via cryptocurrencies, become a Patron on Patreon, or purchase goods on Amazon or Aliexpress




J4205 is most powerful!
@ASM
CPU is a bit faster
GPU is a bit faster with more execution units
http://ark.intel.com/compare/95591,95594
quite a bit more expensive if you believe Intel’s price guide.
bad link text: “Unsurprisingly, those are exactly the same chips used in MeLE PCG35 Apo”.
” I mentioned the screws could be damaged easily”
Because the metal they are made from is of such low quality (the least expensive) that they are not strong but are soft and easily deformed?
Perhaps it would be wise to buy some better quality ones from the hardware store (they must surely be a standard size) and replace them.
As I can see, there are 2 metric screws and 6 others, I guess from these typical PC case screws (UNC). Didn’t you mix them?
Is that a IR-receiver next to the power button?
@roel
I’m pretty sure I did not mix them since I tried..
I first through it would just be an LED, but now that I look at the picture of the small board, I see 3-pin on the back of the board, so it could be an IR receiver. I can also see they have a footprint for an IR receiver on the main board.
@Michael Andersen
I think I’ll just ask MeLE to send me their new screws to check them out.
I appreciate they took thermal issues with M.2 SSDs into account. At least the one I’m playing with currently gets hot like hell (in a tiny USB3 enclosure thermal readouts exceeded 80°C and performance dropped from ~400MB/s down to below 30MB/s — obviously some form of self protection implemented as in many flash storage products)
Still no news about a linux version are a no OS version?
@roel
I’m not hopeful of getting Ubuntu version from them. If I ask they’ll probably say they are planning for it, but that’s what they already said a few month ago.
@roel
I recently installed Ubuntu 16.04 LTS and 17.04 server editions on it and those seem to work without an issue. You do have to set the BIOS to “Intel Linux” mode but after that it boots just fine.
I’m going to try and do a video about it soon, showing your the process!
What is actual eMMC speed from CrystaldiskMark?