After going through WRTnode Quick Start Guide, it’s now time to play with LinkIt ONE, the IoT development board from Mediatek designed by Seeed Studio. LinkIt ONE is the first Hardware Development Kit (HDK) for Mediatek LinkIt, so there may be a LinkIt TWO, and/or other hardware platforms in the future.
LinkIt ONE specifications
Let’s quickly go through the specifications first:
- Processor – Mediatek MT2502A (Aster) ARM7 EJ-STM processor @ 260 MHz
- System Memory – 4 MB
- Storage – 16MB Flash for firmware + micro SD slot shared with SIM slot for up to 32GB additional storage
- Connectivity:
- Wi-Fi – 802.11 b/g/n (MT5931) with external antenna
- Bluetooth – BR/EDR/BLE(Dual Mode)
- GPS – Mediatek MT3332 with external antenna
- GSM/GPRS – 850/900/1800/1900 MHz band, Class 12 GPS with external antenna
- Audio – 3.5mm headphone jack (including mic support) – Support for MP3, AAC, and AMR codecs.
- Serial – Software Serial (Serial), and Hardware Serial (Serial1, D0 & D1)
- Expansion Headers
- Arduino UNO headers including digital I/Os, 3x analog input, PWM, I2C, SPI, UART3 etc..
- UART and I2C Seeed Studio Grove interfaces
- Power
- 5V via micro USB
- I/O – DC Current Per I/O pin: 1mA
- Li-Po Battery Support
- Dimensions – 8.4 x 5.3 cm
LinkIt ONE Unboxing
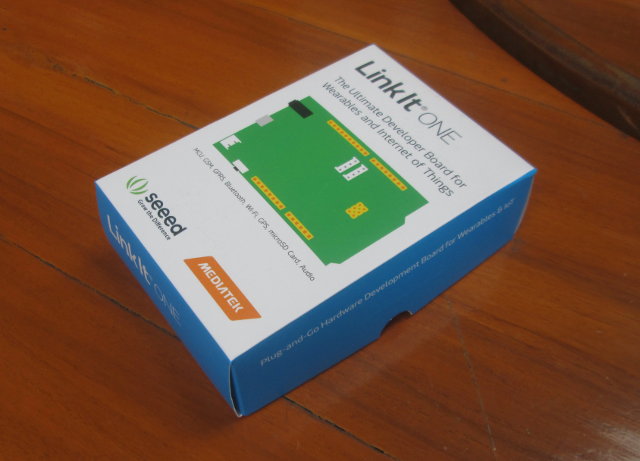
I’ve received the kit in a package reading “LinkIt ONE – The Ultimate Development Board for Wearables and Internet of Things”.
 The back of the package has some explanation about various features and capabilities of the board and two links:
- http://labs.mediatek.com/linkit for documentations and download links.
- http://www.seeedstudio.com/linkitone that redirects to the product page.
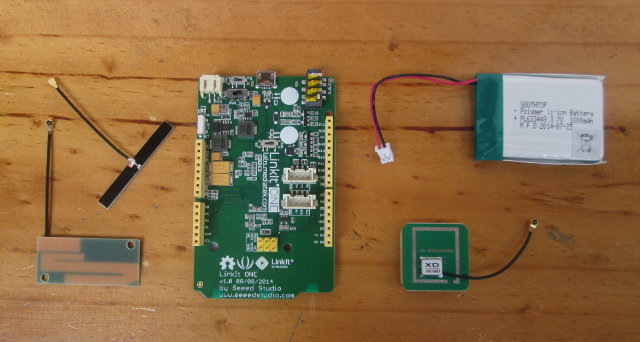
Beside LinkIt ONE board, the package comes with three antennas (Wi-Fi, GPS, and GPRS), as well as a 1000mAh Li-Po battery.
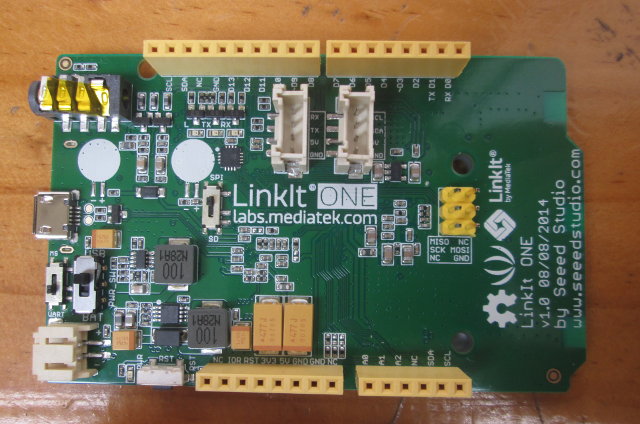
The Grove interface are the two headers just above LinkIt ONE marking with UART and I2C connectivity use to add modules made by Seeed Studio, but you can also connect Arduino shields using the Arduino UNO compatible headers. The board can be powered by the micro USB port on the left, or a battery connected to the connector on the bottom left. Power source is selected by a switch (USB / BAT). The headphone jack (stereo + mic) is located on the top right.
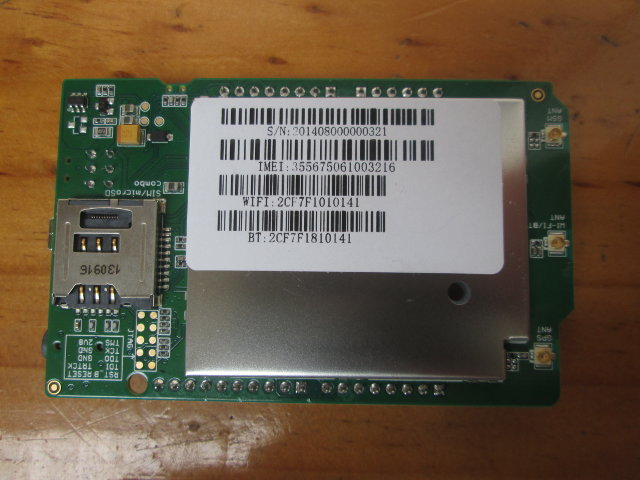
On the back of the board, there’s a SIM/ micro SD card slot combo, and a metallic shield (for EMI) covering the main components, mostly MT2502A, since the SoC integrates memory, MCU, Bluetooth, and the PMU into a single chip. You’ll find the three antenna connectors on the right of the picture.
LinkIt ONE Quick Start Guide
At first I went to http://labs.mediatek.com/linkit to download LinkIt SDK, after registering with Mediatek Labs. You can also optionally download the Hardware Reference Guide with the datasheets for Aster (MT2502A), Wi-Fi (MT5931), and GPS (MT3332) chips, as well as schematics and PCB layout in Eagle format, and high resolution pinout diagram which I reproduced below.
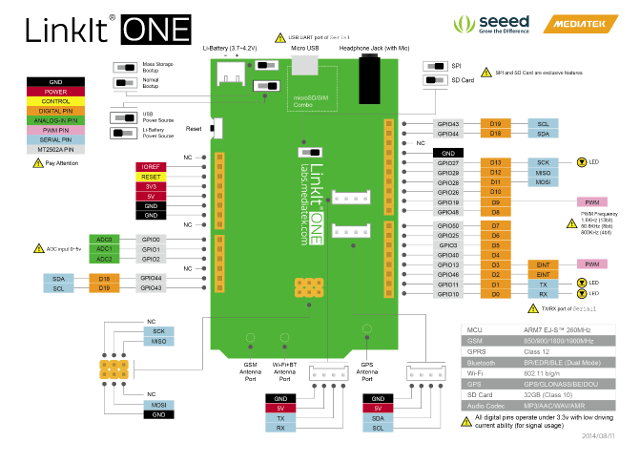
The SDK file is named Mediatek_Linkit_SDK_for_Arduino_1_0_34.zip that contains a file called Mediatek_Linkit_SDK_for_Arduino_1_0_34.exe. Alright, time to start a Windows 7 VM… The Wiki however states that “Arduino IDE for LinkIt ONE supports Windows only. Mac and Linux will be supported in the near future.”
At first I failed to install the SDK, but I found I’ve found better resources in LinkIt ONE Wiki, which also links to LinkIt Developer’s Guide, explaining you need to get the Arduino IDE.
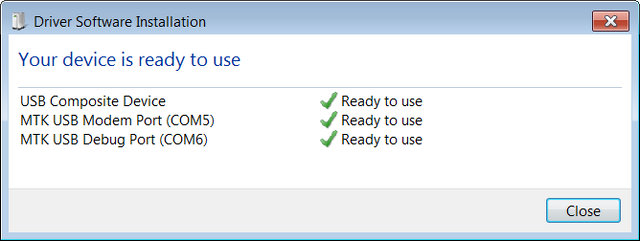
So first, you need to retrieve the LinkIt ONE IDE (modified version of Arduino IDE?) from github. There are several methods, but let’s just download the ZIP file (145MB), and extract it. Go to LinkIt-ONE-IDE-Master/drivers/mtk directory, and click on InstallDriver to install the drivers. Now connect the board to your PC with a micro USB to USB cable. If you use VirtualBox, you’ll also need the VirtualBox Extension Pack to access USB devices. In VirtualBox, LinkIt ONE is referred to as “Mediatek Inc Product [0100]” in Devices->USB Devices menu. The installation should complete as follows with two new COM ports.
So now, you can install the the LinkIt SDK, pointing the installation directory to LinkIt IDE directory (LinkIt-ONE-IDE-Master).
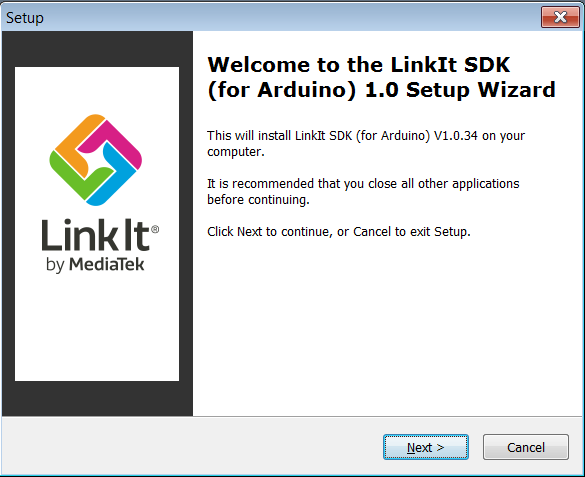 Click Next a few times to complete the installation,. We don’t really need to install Mediatek USB drivers (last step), as we’ve done that already.
Now start the Arduino IDE by clicking on Arduino(.exe) in LinkIt-ONE-IDE-Master folder, and configure it to use the board by selecting Tools->Board->LinkIt ONE.
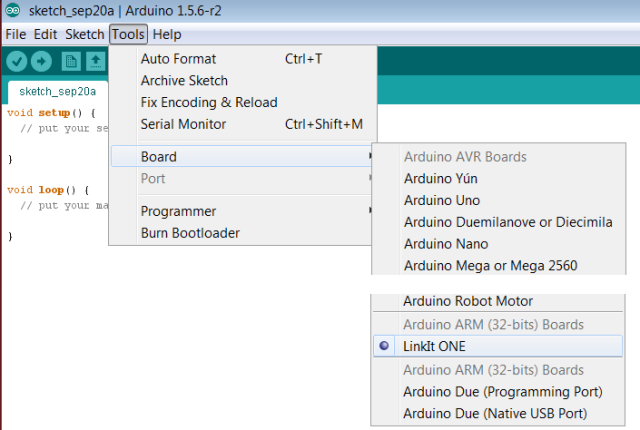 You’ll also need to select the COM port corresponding to MTK USB Debug Port (COM6 in my case) with Tools->Port. Port was grayed out at first, but resetting the board fixed the issue.
The first project you usually try is Blink, that simply blinks an LED on the board. So let’s do it. The procedure is exactly the same as the one followed for an Arduino board. To load the project, click on File->Examples->01. Basics->Blink. Make sure the switch on the left of LinkIt ONE marking on the board is set to SPI, and upload the program by selecting File->Upload or clicking directly on the Upload icon (->). The transfer should complete within a few seconds, and a green LED blink on the board shortly after.
Seeed Studio also sells “Sidekick Basic Kit for LinkIt ONE” with a breadboard, passive components (resistor, capacitor,…), sensors (thermistor Photo resistor ..), a servo, and a buzzer to interface with LinkIt ONE board, and provide a tutorial with 10 examples showing how to use the kit. I haven’t received it, but their “Hello World” tutorial just blinks an external LED, so I’ve tried it out as well with some off-the-shelf components.
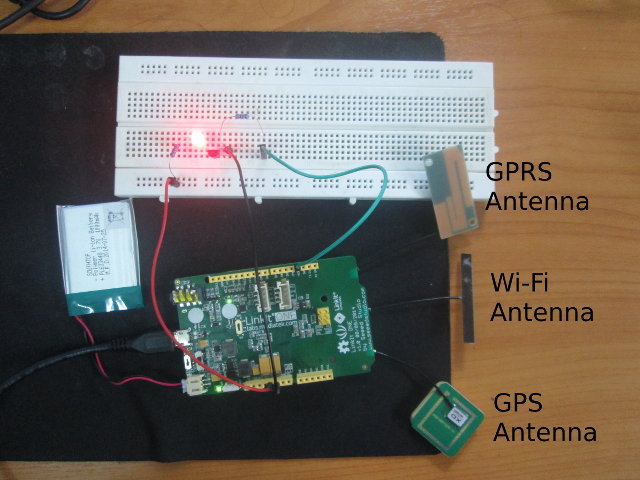
The wiki mentions you can load the program with File->Examples->Starter Kit for LinkIt->Basic->L2_Control_LED, but there’s no Starter Kit for LinkIt entry. Maybe I need to install something else, but I could not find any download links. Nevertheless, the code is included in the wiki, so I just created a new project with the code:
|
1 2 3 4 5 6 7 8 9 10 11 12 13 14 |
const int pinLED = 3; // LED connect to D13 void setup() { pinMode(pinLED, OUTPUT); // set direction of D13-OUTPUT } void loop() { digitalWrite(pinLED, HIGH); // LED on delay(3000); digitalWrite(pinLED, LOW); // LED off delay(100); } |
With I then uploaded to the board, and the LED is lit for 3 seconds, and off for a short time (100ms) as expected.
That’s all for the quick start guide. To go further, you can check the wiki, and developer’s guide mentioned above, and read the LinkIt API Reference for full details of the APIs for MediaTek LinkIt development platform.
LinkIt ONE is available now for $79 on Seeed Studio, and you may also consider pre-ordering “Sidekick Basic kit for LinkIt ONE” for $29.90 (Shipping on October 22) to have some fun interfacing LEDs, sensors, a servo, etc.. to the board, by following the related tutorials.

Jean-Luc started CNX Software in 2010 as a part-time endeavor, before quitting his job as a software engineering manager, and starting to write daily news, and reviews full time later in 2011.
Support CNX Software! Donate via cryptocurrencies, become a Patron on Patreon, or purchase goods on Amazon or Aliexpress


> Hardware Reference Guide with the datasheets for Aster (MT2502A), Wi-Fi (MT5931), and GPS (MT3332)
Of course, not datasheets, but “technical briefs”. And ARM7EJ doesn’t have MMU, so no real Linux.
SeeedStudio to giveaway 10 LinkIT ONE board to people with a good project for the board.
http://www.seeedstudio.com/blog/2014/10/31/let-s-make-linkit-one/
Tutorial to make a smart lamp demo: http://www.seeedstudio.com/recipe/index.php?controller=recipe&action=show&recipe_id=77
CNX, have you already posted that consumer devices on MTK2501/MTK2502/MTK2504 started to appear? E.g.: http://www.banggood.com/R5-1_54-Bluetooth-MTK2501-Smart-Phone-Watch-for-IOS-7_0-Above-Andriod-p-957208.html , http://www.gearbest.com/smart-watches/pp_114475.html . Note that those are said to have exactly MTK2501, and somewhere I saw mentioning MTK2504. As usual, unclear how these differ from LinkIt’s MTK2502.
@Paul
Thanks. I wished Mediatek actually published details about the chip. I can’t find any information about MT2501 / MT2504.
Hi,
i’m searching a SDK different to Arduino Plugin.
@Herrik
totally agreed. is there anything but arduino?