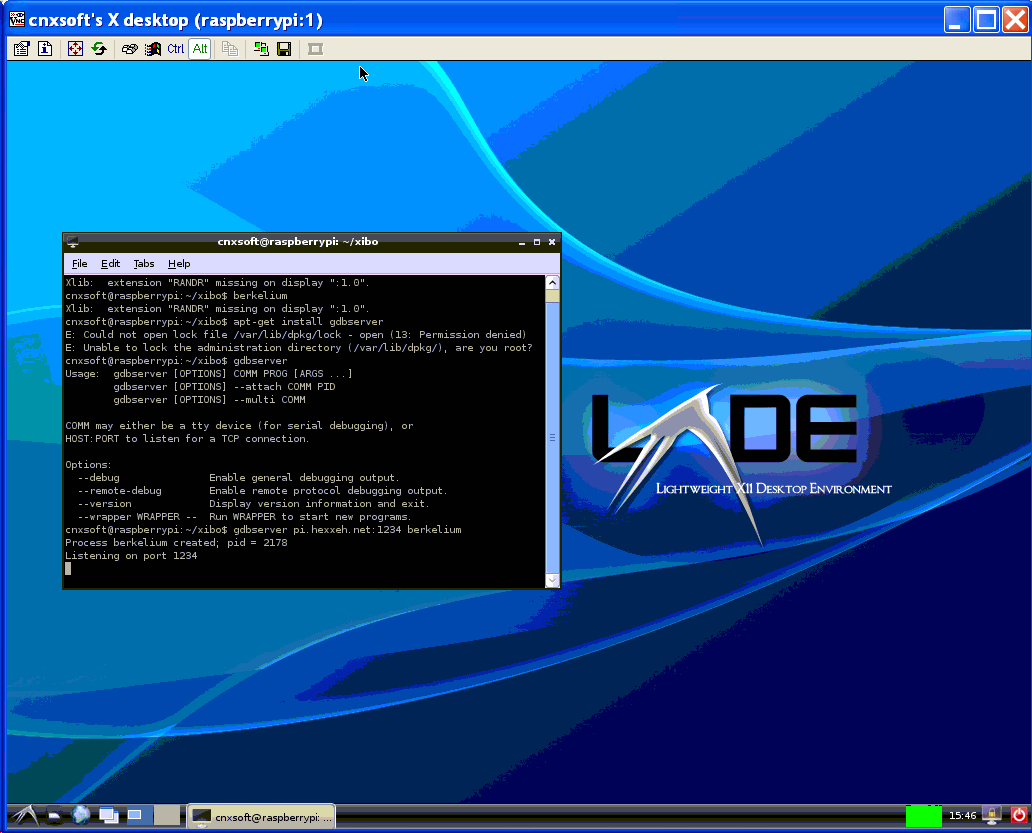
I don’t have a Raspberry Pi board, yet I’m using one right now remotely thanks to the VNC (Virtual Network Computing) protocol.
The Raspberry Pi I use runs the latest Debian-13-04-2012 image.
Here’s how to do to access the Raspberry Pi desktop in Windows XP. These instructions could also be followed to connect to any remote networked Linux device with minor modifications.
- Connect to the Raspberry Pi via SSH
- Install a VNC server (e.g. tightvncserver):
# sudo apt-get install tightvncserver
- Run startx in the background
# startx &
- Start the VNC server (it will ask a password of your choice):
# tightvncserver
New ‘X’ desktop is raspberrypi:1
Starting applications specified in /home/cnxsoft/.vnc/xstartup
Log file is /home/cnxsoft/.vnc/raspberrypi:1.log - Back to your computer. Install a VNC client such as TightVNC for Windows. You only need to select “TightVNC Viewer” during installation.
- Start TightVNC Viewer (In Windows XP, Start->All Programs->TightVNC->TightVNC Viewer)
- Enter the Raspberry Pi IP address and display number in “TightVNC Server:” field , e.g. 192.168.0.123:1, select your connection profile and click on Connect.

- It should now ask for the password you chose in step 4 and you should see LXDE desktop as shown below. The color depth of the display is 8-bit, since I chose “Low-bandwidth connection” connection profile because I access the board via Internet and to make the system more responsive.

Jean-Luc started CNX Software in 2010 as a part-time endeavor, before quitting his job as a software engineering manager, and starting to write daily news, and reviews full time later in 2011.
Support CNX Software! Donate via cryptocurrencies, become a Patron on Patreon, or purchase goods on Amazon or Aliexpress


It would not work on my PI as user pi
pi@raspberrypi:~$ startx &
[1] 1281
pi@raspberrypi:~$ xauth: (stdin):2: unknown command “c2d7e44cbb17978f166b1e4127
b81c1c”
X: user not authorized to run the X server, aborting.
giving up.
xinit: No such file or directory (errno 2): unable to connect to X server
xinit: No such process (errno 3): Server error.
[1]+ Exit 1 startx
it works fine as root !
pi@raspberrypi:~$ sudo startx &
[1] 1305
pi@raspberrypi:~$
X.Org X Server 1.7.7
Release Date: 2010-05-04
X Protocol Version 11, Revision 0
Build Operating System: Linux 2.6.32 armv5tel Debian
Current Operating System: Linux raspberrypi 3.1.9+ #90 Wed Apr 18 18:23:05 BST 2
012 armv6l
Kernel command line: dma.dmachans=0x3c bcm2708_fb.fbwidth=1184 bcm2708_fb.fbheig
ht=928 bcm2708.boardrev=0x2 bcm2708.serial=0x39b10fb3 smsc95xx.macaddr=B8:27:EB:
B1:0F:B3 dwc_otg.lpm_enable=0 console=ttyAMA0,115200 kgdboc=ttyAMA0,115200 conso
le=tty1 root=/dev/mmcblk0p2 rootfstype=ext4 rootwait
Build Date: 30 October 2011 09:07:45PM
xorg-server 2:1.7.7-14 (Julien Cristau )
Current version of pixman: 0.16.4
Before reporting problems, check http://wiki.x.org
to make sure that you have the latest version.
Markers: (–) probed, (**) from config file, (==) default setting,
(++) from command line, (!!) notice, (II) informational,
(WW) warning, (EE) error, (NI) not implemented, (??) unknown.
(==) Log file: “/var/log/Xorg.0.log”, Time: Thu May 31 20:41:56 2012
(==) Using system config directory “/usr/share/X11/xorg.conf.d”
Primary device is not PCI
(EE) FBDEV(0): FBIOBLANK: Operation not permitted
SELinux: Disabled on system, not enabling in X server
(EE) GASIA USB Keyboard: failed to initialize for relative axes.
(EE) FBDEV(0): FBIOBLANK: Operation not permitted
pi@raspberrypi:~$ sudo tightvncserver
You will require a password to access your desktops.
Password:
Verify:
Would you like to enter a view-only password (y/n)? n
New ‘X’ desktop is raspberrypi:1
Creating default startup script /root/.vnc/xstartup
Starting applications specified in /root/.vnc/xstartup
Log file is /root/.vnc/raspberrypi:1.log
@ MrF
Maybe there is something to change to make it work as normal user, but I can’t remember what.
Installing gdm may solve the issue. It will start startx automatically, and you should be able to login as user Pi and run tightvncserver
Works for me. I just have to use ipv4::5901.
If I don’t specify the “::5901” after the ip address, it won’t work.
Starting applications specified in /home/pi/.vnc/xstartup
Log file is /home/pi/.vnc/raspberrypi:4.log
getting this message when entering the input as ‘ # tightvncserver’ and thus not getting the login and verify block .
so what to do for this thing ??