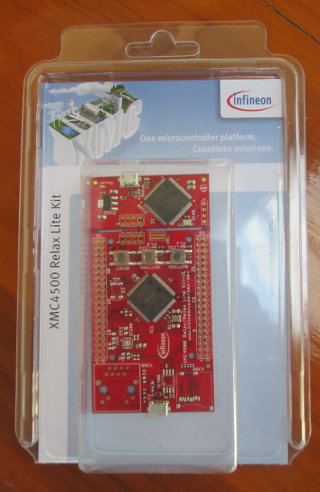
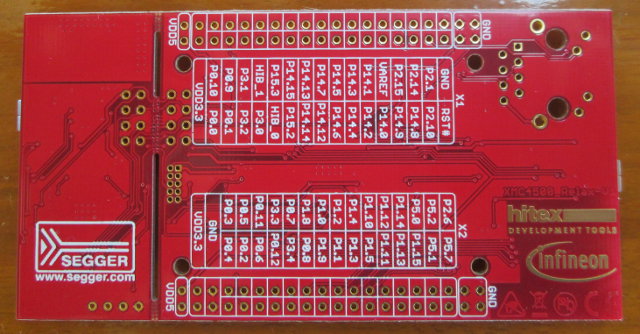
 Infineon Relax Lite Kit is a 10 Euros development kit based on Infineon XMC4500 Cortex M4 MCU with 160 KB SRAM and 1 MB flash, and featuring 2 USB OTG ports for debugging and powering up the board, 3 buttons (including reset), 2 LEDs, and 2 headers (through holes) giving access to the signals from the MCU such SPI, I2C, I2S, UART, CAN, ADC, DAC and PMW.
The kit if available online via Hitec, but unless you live in Germany, this is not an interesting option, as international shipping costs over 100 Euros. So you’d better check local distributors in your country.
The package only comes with the board, and you’ll need a USB to microUSB to power the board. To get started, simply connect the board via the USB cable to one of the USB OTG connectors, and to a Windows PC. The power LED (green) should lit up, the debug LED blink quickly, and the factory default program will blink a red LED (LED2). You can then turn on/off LED 1 and 2 with the respective buttons (BUTTON 1 & 2).
To really get started with development, you’ll need to visit http://www.infineon.com/xmc-dev, download the user manuals and install DAVE 3 toolchain.
But first let’s have a a closer look at the board itself.
The board is composed of 2 parts: the MCU board (right) and the on-board debugger by SEGGER (left). The on-board debugger is detachable, by pressing the board. I haven’t tried to detach it though.
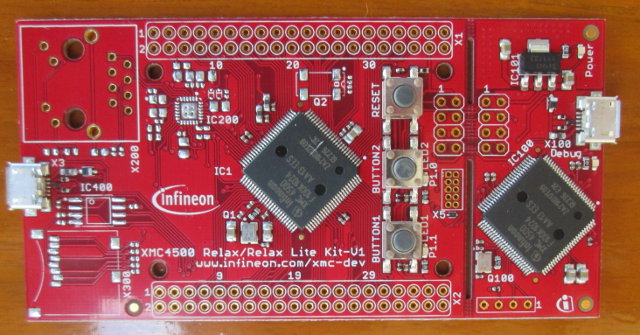
You can notice places for unsoldered components on the MCU board, this is for Ethernet, microSD socket, RTC, and QSPI flash on the XMC4500 Relax Kit.
Start Dave-3.1.4, select a workspace directory as requested, and install XMC4500 examples and libraries:
- Click on Help->Install DAVE Apps/Example Library
- In Dave Site section, click on Library Update sites.
- Go to General->Network Connection, and select Direct for Active Provider. I had to do this or I was unable to connect to infineon site to download the apps and libs below.
- Still in Library Update sites window, go to Dave->Library Manager->Library Update Sites and validate both entries: http://dave.infineon.com/Libraries/DAVEApps/XMC4500/v3.1/ and http://dave.infineon.com/Libraries/Examples/XMC4000/, and click OK.
- Select DAVE App Library Manager in Work Withmenu, and after a little while, you should see 2 entries:
- Library_DAVEApps
- Library_DAVEDeviceDescription
Select both, click Next, accept the terms, and click Finish to complete the download and installation of the libraries.
- To install apps, select DAVE Project Library Manager in Work With menu, and follow the same procedure as in step 5. You may want to only select the sample apps you want. I selected all of them (Around 60), and it took over 2 hours to download and import.
There are all sorts of demo apps from simple apps showing how to use peripherals (LED, UART, PWM, I2C, etc..) to more complex apps such as webserver and motor control apps.
Let’s take something easy with an app that controls LEDs and buttons. Right click on LEDTS001_Example1 in C/C++ Projects window on the right, and select Set Active Project.
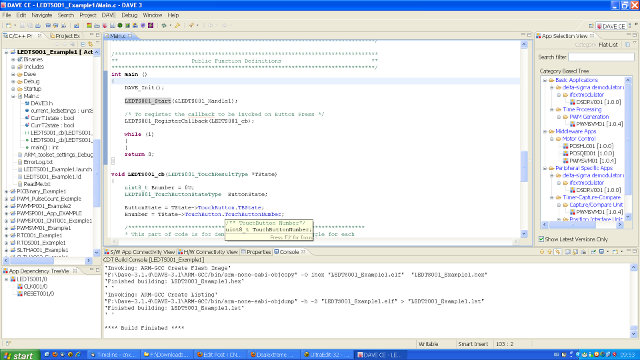
You can select other project within the C/C++ Projects windows, or with the App Selection View window of the left. However, for some reasons, the latter only shows 4 projects in my system…
Let’s check the source code of the selected application by clicking on main.c. There are just three function in the main:
- DAVE_Init – Initializes some “app” init functions
- LEDTS001_Start – Starts the LED-TS App based on User provided configuration
- LEDTS001_RegisterCallback – Registers the callback function (LEDTS001_cb) that will turn on/off the LEDs on button presses
Click on Project->Build Active Project in the top menu to build the sample app. The build output is shown in the console window at the bottom of the IDE.
Upon successful build, click on Debug->Debug or type F11 to start running on debugging the program on the platform.
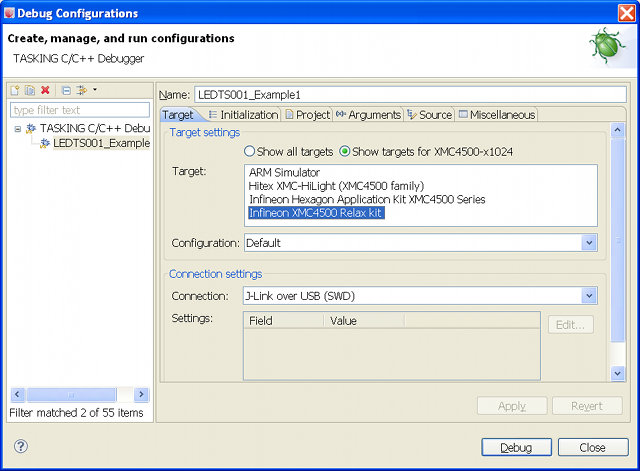
But first, you’ll have to configure the debugger to use Infineon XMC4500 Relax Kit with J-Link over USB (SWD) connection as shown in the screenshot above. Now click on Debug to launch the app and switch to TASKING Debug mode in the IDE, as see windows for the source code in C and Assembler, a console to the board, view register and memory, assign breakpoints and more…
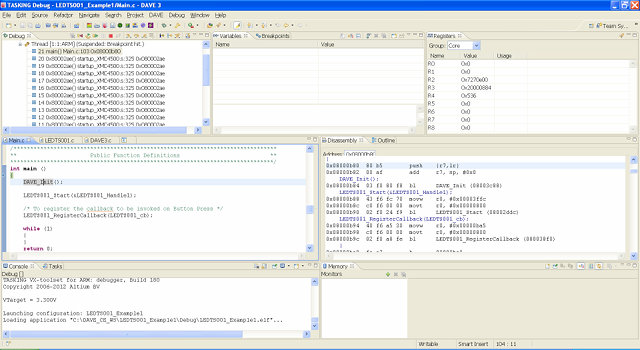
You can switch between TASKING Debug and other views such as DAVE CE and DAVE IDE by clicking on “>>” at the top right of the IDE.
The system will load the app and break at the main. To run the application, click on Debug->Resume. That’s it, the program you’ve just build now runs on the devkit.
Unfortunately, it seems this application does not work for the board, as pressing the buttons does not result in LED lighting up, and breakpoints inside the callback function are not hit… Maybe I did something incorrectly, but I suppose the source code may need to be changed. This defeats a bit the purpose of having sample apps…
DAVE 3 also does not like bad network connection and incorrect settings, so if those happen it may just hang there, and the Cancel button is virtually useless. DAVE 3.1.4 is a beta version which may explain it. But apart from those few shortcomings, DAVE 3 IDE appears to be a decent development IDE with lots of features, and the App Store for XMC4500 Relax Kit (lite) could also be an asset when learning about the platform, as long as available apps work.

Jean-Luc started CNX Software in 2010 as a part-time endeavor, before quitting his job as a software engineering manager, and starting to write daily news, and reviews full time later in 2011.
Support CNX Software! Donate via cryptocurrencies, become a Patron on Patreon, or purchase goods on Amazon or Aliexpress





would be nice to see comparison with STM32-F4DISCOVERY board, which seems to be more interesting 🙂
@renw0rp
I don’t have the STM32-F4DISCOVERY board, but many people are using it.
It does have more on-board features (e.g. sensors) than the Relax Lite Kit though.
http://www.cnx-software.com/2011/10/28/st-micro-15-usd-stm32f4-discovery-cortex-m-development-kit/
Mouser will have them for $15.63 (search for KIT_XMC45_RELAX_LITE_V1)
hai i downloaded dave 3 as i dont have internet in my home! i downloaded the apps file frok the website which is 120mb. i installed the apps but i cant find xmc4500 lite in the debug menu.
@arunmag
You can just use “XMC4500 Relax Kit” for working with the Lite version.
if this does not work you’d better ask Infineon via their forums or facebook: https://www.facebook.com/infineon.microcontroller?ref=ts&fref=ts
If you want to use the relax kit with linux, without DAVE, you can try this, it’s written in german, but google translation should work fine:
http://smogm.vh0st.me/blog/?p=14
greetings
smogm
@smogm
Thank you very much for the article! However Google Transate sometimes doesn’t correctly translates the sentences..
Could you please be so kind to translate the entire article to English?
If you have some spare time and patience of course 🙂
@smogm
Thank you! I worked nearly for me, I could not compile Summon ARM Toolchain.
Instead I downloaded this .deb package and it worked
https://launchpad.net/~terry.guo/+archive/gcc-arm-embedded
Patrick
btw: Please allow comments to your blog or give any contact details
Hi, I’m beginner in microcontrollers.
I bought a XMC4500 relax and relax lite. I’m using them with Dave 3. Unfortunatly I’m not able to build sample projects from infineon becouse during the buiding sequence appear a lot of time this message in the panel:
make: *** Access denied.
Any idea on how to solve this issue in Windows 7 x64?