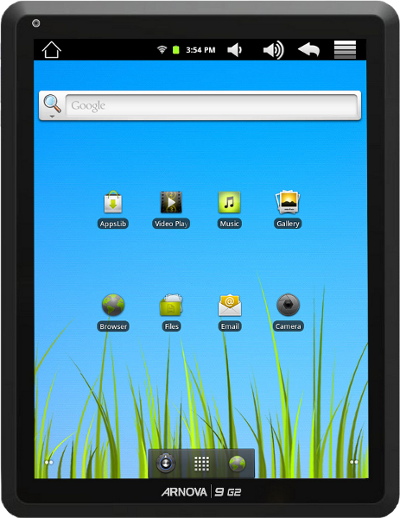
Archos has announced another low cost Arnova Android tablet, the Arnova 9 G2, featuring a 1GHz single core ARM Cortex A8 (most probably Rockchip RK2918) and a 9.7 inch capacitive touchscreen IPS display with a resolution of 1024 x 768 pixels (4:3 Aspect Ratio) that supports 5-point multi-touch. The display characteristics are almost exactly the same as the IPAD 2, luckily Apple has not filled a patent for screen size and resolution yet… 🙂 The device also features 8GB flash and a microSD card slot which can take up to 32GB cards. There is no mention of the RAM capacity of this tablet. Arnova 9 G2 includes a front facing camera for video chat, a pair of stereo speakers, a stereo audio jack, a microphone, a standard USB 2.0 port as well as a micro USB port and it comes with 802.11 b/g/n WiFi and is 3G ready thanks to […]
MIPS Releases Kernel 3.0.8, plans for Android 4.0
MIPS has just released Linux Kernel 3.0.8 port for MIPS SoC, the kernel version used by Android 4.0.1. The latest kernel is available on MIPS developer website at http://developer.mips.com/linux/. You can use Git to get the latest kernel source code for MIPS Technologies cores (with hardware fixes and improvements) as follows:
|
1 |
git clone git://git.linux-mips.org/pub/scm/linux-mti.git -b linux-mti-3.0.8 |
Although git is recommended to ensure you have the latest commit, you can also download a snapshot version from linux-mips FTP site.:
|
1 |
ftp://ftp.linux-mips.org/pub/linux/mips/mti-stable/v3.x/linux-mti-3.0.8-1.tar.bz2 |
Over the next several weeks, MIPS will be posting updates on the MIPS Developer website regarding Android 4.0 (ICS) with a release planned for mid-december 2011.
Technologies and Techniques to Accelerate Embedded Development
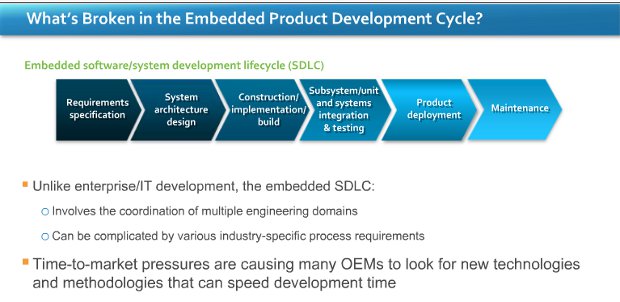
I’ve recently attended a webinar entitled “Accelerate Your Next Embedded Development Project: Essential Tools and Techniques for Every Phase of Your Project Lifecycle” presented by Wind river and VDC Research. The two speakers were: Marc Brown, Wind River VP, Tools and Marketing Operation. Christopher Rommel, Senior Analyst at VDC Research. The webinar was composed of three sections: Industry Challenges. (Wind River) Embedded Development: Data and Trends. (VDC Research) New ways to accelerate development (Wind River) Industry challenges Marc describes the new challenges for device software drivers: Increased security, safety and quality requirements for connectivity Performance scalability: multi-cores, many cores and SoC support. Pressure to lower OPEX (Operating Expenses) Companies are now pushed to increase performance, become more cost effective and provide a better connectivity while at the same time decrease time to market, project risks and security issues. Data and Trends Christopher first present a slide showing there are still […]
Qualcomm Announced 8 New Snapdragon S4 Processors
During an investor conference, Qualcomm announced eight new Snapdragon S4 mobile processors: MSM8660A, MSM8260A, MSM8630, MSM8230, MSM8627, MSM8227, APQ8060A and APQ8030. All are using Qualcomm’s Krait CPU architecture. Here’s an excerpt of the press release: NEW YORK – November 16, 2011 – Qualcomm Incorporated announced today the expansion of its Snapdragon S4 class of next-generation mobile processors… The addition of new Snapdragon S4 processors, which are aimed at lowering design, engineering and inventory costs while bringing leading-edge 3G and 4G Internet connection speeds, will allow OEMs to introduce S4-based devices with next-generation mobile architecture throughout their respective device roadmaps-from basic smartphones to high-end smartphones and tablets. The enhanced S4 processors are also optimized for use with a suite of software solutions available from Qualcomm that help enable OEMs to deliver industry-leading feature sets for multimedia, connectivity, camera, display, security, power management, browsing and natural user interface design. The Krait CPU […]
Amazon Kindle Fire Source Code Available
After Android 4.0 source code release, it’s a good week for open source, as Amazon has also opened Kindle Fire source code as it had to comply with Android Open Source Project (AOSP) license has some point. Source code for other Kindle products is also available. The source code for the Kindle Fire is tarred in a file named Kindle_src_6.2_11185402.tar.gz which is quite a large download (809 MB). The file contains 4 directories with the source code for the Linux kernel (2.6.35), a modified version of Android 2.2, the bootloader (u-boot) and x-loader, first-level bootloader for OMAP SoC. I’m not sure many people will work on this version, as Android 4.0 source code for OMAP4 (The processor used in Kindle Fire) is available and has been ported to Galaxy Nexus and TI OMAP4 low cost development board (Pandaboard). So we could see Android 4.0 (ICS) running on Kindle Fire in […]
Beyond NFC Payment: Other NFC Use Cases
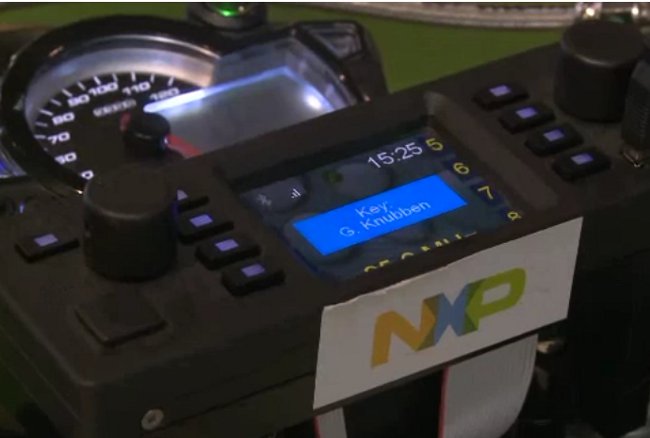
During CarteS event, NXP has uploaded a video on YouTube showing several NFC applications that are not directly used for payment. In the video below, you’ll see several such applications including: Smart Advertizement: shopping advice, movie promotion, travel info and game Smart Meter for meter reading and real-time power consumption monitoring via an Android device e-Passport with NFC Technology for faster immigration procedure. Secure Online Authentication NFC-Enable motorcycle to prevent theft NFC-enabled figurines to interact with video games. Authentication to unlock door, laptop and more. Gesture enabled smart card where you can use gesture to sign your own card and enable/disable it.
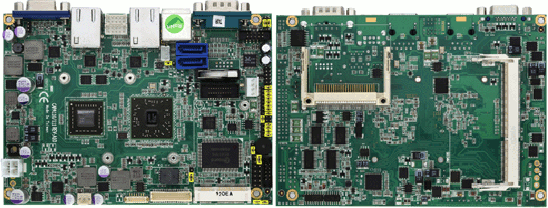
Axiomtek CAPA111: AMD G-Series Single Board Computer
Axiomtek announced the CAPA111, a single board computer powered by AMD G-Series processors T40R (single core @ 1Ghz) or T40E (dual core @ 1Ghz) with up to 4GB of DDR3 memory, LVDS & VGA video output, two gigabit Ethernet, 6 USB 2.0 ports, 2 SATA ports, 2 COM ports and more. Here are the board specifications: CPU: AMD G-Series APU single core T40R (1.0 GHz) and dual core T40E (1.0 GHz) Chipset: AMD Fusion Controller Hub A50M chipset System Memory: 1 x 204-pin DDR3-1066 SO-DIMM max. up to 4 GB SSD: 1 x CompactFlash Watchdog Timer: 255 levels, 1~255 sec. Expansion Interface: 1 x PCI Express Mini Card Battery: Lithium 3V/220mAH Size: 146 x 104mm Board thickness: 1.6 mm Temperature 0°C ~ +60°C, operation Operation Humidity: 10% ~ 95% relative humidity, non-condensing I/O: MIO: 1 x RS-232/422/485 (COM 1); with +5V/+12V powered 3 x RS-232 (COM 2/3/4) ; with +5V/+12V […]
Embedded Hardware & Systems Trends for 2012 and Beyond
VDC Research currently has a research program called “STRATEGIC INSIGHTS 2012: EMBEDDED HARDWARE & SYSTEMS” where they analyze potential opportunities and give forecasts for embedded systems market through 2016. Some recent insights from their ongoing coverage of the Embedded Hardware & Systems market include: The Communications / Networking market is engaged in a period of dynamic change that is redefining the sector’s processing requirements. FPGAs & Linux are redefining embedded market growth requirements. The smart grid is creating new opportunities for embedded processors. Single board computers are enabling next-generation computing for military / aerospace applications. The Institute for Supply Management’s PMI index continues to demonstrate isolated pockets of regional growth, suggesting that new project starts and sustained unit shipments will maintain embedded market growth in 2012. The final reports should be available in 2012 as follows: TRACK 1: FASTFORWARD: INSIGHT FOR LEADERS Volume Number Volume Title Publication Date 1 Generating […]


