Linaro has just released version 11.12 based on Linux Kernel 3.1.5 and further support for Android 4.0 including graphics hardware acceleration on Snowball and Origen development boards. Here are the highlights of the release: Android Linaro ICS is built with the Linaro toolchain. Linaro ICS is running on all supported boards. DS-5 with Gator is supported in all Linaro Andoid ICS builds. The latest version of libpng (1.5.7) has been integrated in Linaro ICS. An AOSP master build is now available from linaro. ARM® Mali™ Hardware Accelerated Graphics is supported on Origen and Snowball. libjpeg-turbo has been integrated into all Andoid ICS builds. Developer Platform The linux-linaro and lt-panda kernel packages are now automatically generated by the CI build scripts DS-5 with Gator is supported in all Ubuntu LEB builds. XBMC packages, with Gstreamer and OpenGLES support, are now available at the Ubuntu Overlay (supporting only Panda initially) U-Boot-Linaro is […]
Android 4.0 on Archos 70 G8 Tablet
“LeTama” has ported Android ICS to Archos G8 Tablet based on OMAP3630. The video below shows Android 4.0 running on Archos G8 70S. The user interface seems a bit sluggish at times, but this is an alpha version with only 3D/Touchscreen working and more work needs to be done to have a fully functional release.
Graphics Hardware Acceleration for Android 4.0 on Origen and Snowball Development Boards
Last week, Linaro Android team announced that graphics hardware acceleration (2D and 3D) was coming to Android 4.0 for ST Ericsson Nova A9500 Snowball and Samsung Exynos 4210 Origen development boards. They have now release 2 videos to show the progress on the implementation. The first video (around 5 minutes) showcases Samsung Origen development board running Linaro’s build of Android ICS with 2D and 3D demo. The second video (1:21) shows 2D hardware acceleration on ST Ericsson Snowball board. Snowball Android 4.0 daily snapshots and instructions are available at https://android-build.linaro.org/builds/~linaro-android/staging-snowball/ and Origen builds at https://android-build.linaro.org/builds/~linaro-android/staging-origen/ The official December 2011 releases should also come pretty soon are available at http://releases.linaro.org/11.12/android/.
Special Developer Edition (SDE) for Archos G9 Tablets
Back in October, Archos released the GPL source code for Archos G9 Tablets and at the time the Special Developer Edition (SDE) was not released even though it is available for G8 devices. Now the SDE has still not been officially released, but I found a forum post on XDA Developers Forum explaining how the SDE Menu could be enabled by following the instructions below. Root your device with Paul O’Brien’s root here. (it won’t work if the device is not rooted) Unzip the content of gen9_enable_sde.zip to a directory. Launch the script enable_sde. Reboot into recovery mode, you should have the SDE menu now, you can flash your own kernel+initrd the same way it was done on previous generation. One trick: the initramfs should be still named initramfs.cpio.gz, but it should be compressed with lzma with current kernel. Another trick: to get rid of paul’s root as it messes up […]
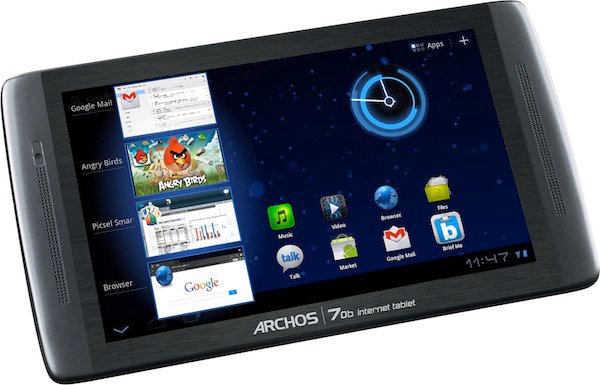
Archos 70b Internet Tablet: 199 USD Android 3.2 Tablet
Archos announced the 199 USD Archos 70b Internet Tablet (Archos 70b IT) , a 7″ Android 3.2 (Honeycomb) based on a 1.2GHz processor (probably OMAP3630) with 512 MB RAM, and offers a 1024 x 600 capacitive touchscreen, 8GB of storage, HDMI output, and support for Google apps and Android Marketplace. Archos product naming is rather confusing, as they also have an Archos 70b running Android 2.1. So if you go shopping for the new device, make sure it reads Archos 70b Internet Tablet and not just Archos 70b. The Archos 70b IT is an enhanced version of the Archos 70 G8(Generation 8). The CPU (OMAP3630 Cortex-A8 processor) clock rate has been boosted from 1GHz to 1.2GHz, RAM has doubled to 512MB, the resolution resolution has increased to 1024×600 (was 800×480) and the price has dropped to 199 USD from 275 USD. Other features remain the same, as the tablet features […]
Dual Monitor Setup with ATI Graphics Cards in Ubuntu
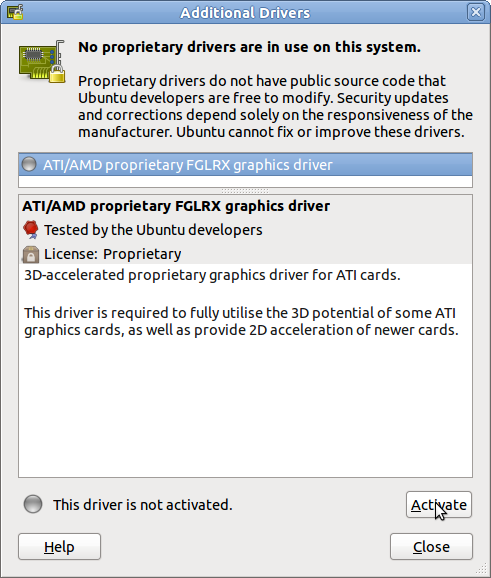
I’ve recently bought an ATI Radeon HD5450 in order to be able to use multiple displays in Windows XP and Ubuntu 11.04. I’ll explain how to install and configure the ATI drivers in order to use multiple displays and extend the desktop on two monitors. The first thing to do is to install the proprietary ATI drivers and Catalyst Control Center. Click on the icon at the top right of the screen and select “System Settings” in the drop down menu. Then click on “Additional Drivers”, Ubuntu should detect your ATI graphics card automatically and show the following: Click on “Activate” to download and install ATI/AMD proprietary FGLRX graphics driver and Catalyst Control Center (CCC). Alternatively, you could also download the latest linux ATI driver (version 11.12) on ATI website and run ./ati-driver-installer-11-12-x86.x86_64.run After installation, you may have to restart you computer. Once the drivers are installed, if you use […]
Nvidia Announces CARMA Tegra 3 CUDA Development Kit
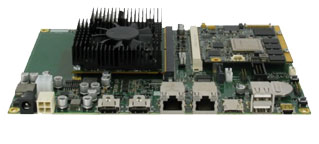
Nvidia has just unveiled its Tegra 3 development kit, the Nvidia CARMA. The development kit codename has been crowdsourced as Nvidia asked its followers to propose a name and vote for the best name. This development kit particularly targets CUDA, Nvidia parallel computing platform and programming model that enables dramatic increases in computing performance by harnessing the power of the graphics processing unit (GPU). The CARMA hardware has been designed by Seco and features an NVIDIA Tegra 3 ARM Cortex A9 Quad-Core CPU and NVIDIA CUDA GPU QuatroTM. Here are the technical specs for the development kit: CPU NVIDIA Tegra 3 Quad-Core ARM A9 GPU NVIDIA QuadroTM 1000M with 96 CUDA Cores Memory • CPU Memory: 2 GB • GPU Memory: 2 GB Peak Performance 270 Single Precision GFlops CPU – GPU Interface PCIe x4 Gen1 link Network 1x Gigabit Ethernet Storage 1x SATA Connector USB 3x USB 2.0 Display […]
Copy/Paste Text between Windows XP Host and Ubuntu Guest in VirtualBox
I’ve recently upgraded the amount of memory and graphics card in my computer to order to be able to smoothly run virtual machines and support 2 monitors. So instead of using dual boot for Windows XP and Ubuntu, I’m now running Ubuntu in VirtualBox. One thing, I wanted to do is to copy text from the right screen (e.g. Instructions in Web Browser in Windows XP) to the left screen where I have Ubuntu 11.10 running in VirtualBox. This does not work right out of the (virtual)box however. The procedure to enable “Shared Clipboard” is straightforward. First, you need to install the guest additions. While Ubuntu is running, click on “Devices->Install Guest Additions” in VirtualBox top menu, this will start the installation in Ubuntu, simply enter you root password until the installation completes. Restart Ubuntu and you should now be able to copy/paste text between the host and guest machines. […]


