A couple of week ago Geniatech released the source for XBMC for Android, and today I’ve been informed they’ve released an XBMC Linux image for their media players based on AMLogic AML8726-MX dual core Cortex A9 SoC, just a few days after the release of MX Linux v1.00 RC1 working for MX2REF, G18REF and g02refDongle (These are not product names, but board codes that can also be found in ro.product.device or ro.product.board in build.prop of Android firmware). You can download MX_BOX-Linux_XBMC20131205.zip which is said to contain the XBMC Linux image for ATV1200, ATV520, ATV400, ATV360, etc… However, it’s said not to work for HDMI dongles such as ATV120, contrary to MX Linux. I haven’t been able to download the file within a reasonable amount of time, so I haven’t been able to check the content, and installation instructions. An anonymous source told me it was likely Geniatech just took the community […]
Opus Open Source and License-free Audio Codec Decreases Latency over VoIP Codecs, (Slightly) Betters MP3 and AAC Quality
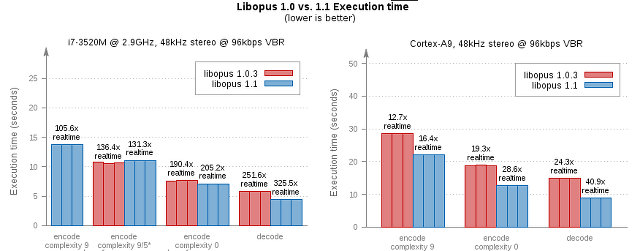
I’ve just stumbled upon Opus, a relatively new audio codec, with the release of version 1.1 implementation which improves encoding quality for VBR audio, automatically detect audio or speech to select the best encoding mode, and improved 5.1 surround quality/compression ratio. The new release also bring speed improvements for all architectures, and specifically for ARM, where decoding uses around 40% less CPU and encoding uses around 30% less CPU thanks to the use of NEON compared to an earlier version. You can go to the online demo page to find more about the latest released, and try some of the latest improvements. This all looks fun, but I wanted to know more about Opus, and especially how it compares against MP3 or AAC. It turns out Opus was not originally designed to compete against MP3/AAC which are used to store audio, but instead it was meant to be used for […]
How-to Install and “Hack” Linux on T428 or MK802 IV mini PCs
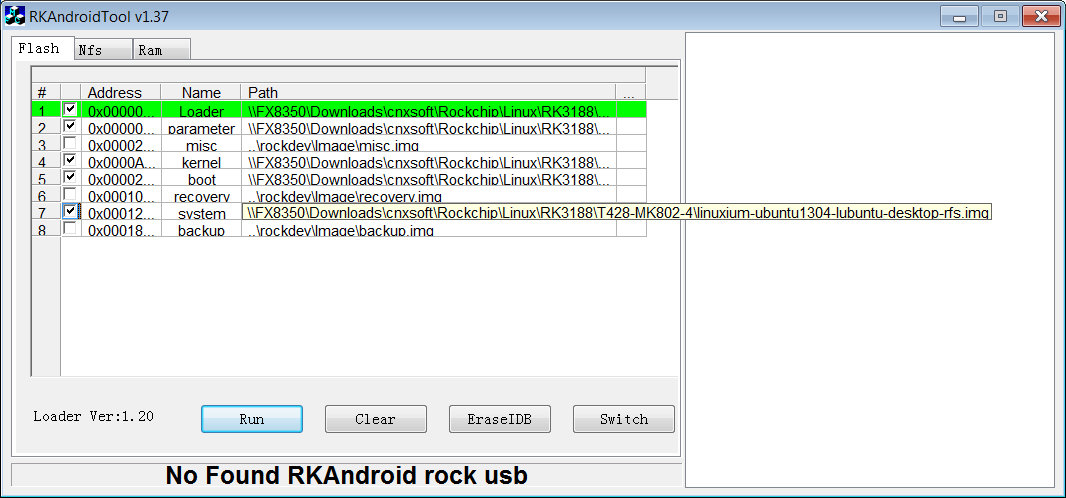
PicUntu 4.5 installer is probably the easiest method to install Ubuntu on a Rockchip RK3188 based mini PC, but if you want a little more flexibility I’ll provide another method to install Linux on T428, MK802 IV or compatible devices, as well as links to go further: dual boot Android / Linux, create your own official distro, status of Mali-400 GPU support in RK3188… The method below is not new, as it was posted by Linuxium (Ian Morrison) in Freaktab in September, but this is the first time I’ve taken the time and managed to run Linux on Rockchip RK3188, and I’ll provide some more detailed steps. Prerequisites Even though in some cases it’s possible to install Rockchip firmware from Linux, AFAIK the tools available in Linux lack supports for the parameter and loader files, so ironically, you’ll need a Windows XP/7/8 machine to install Linux in your mini PC. […]
Google Chromecast Gets a Custom ROM: PwnedCast
If you’ve got a ChromeCast, and are disappointed by its limited features, XDA member ddggttff3 has released a custom ROM for the device based on the 13300 stock image. It is rooted, has its own OTA system, and features a dedicated recovery and a custom kernel in order to enhance the user experience. Main features: Root SSH/Telnet Access Uses DHCP DNS Servers Google OTA’s Disabled Custom Boot Image PwnedCast OTA Update Engine! PwnedCast Recovery Image, based on FlashCast V1.1.1 KyoCast Built In! Currently the most interesting feature is the addition of KyoCast which provides access to services like AOL, HBO, Post, Rev3, and Songza. But more work and features are certainly on the way. If you want to give it a try, download the image, and flash it as follows: Setup and Install FlashCast V1.1.1 on a USB Drive in Windows or Linux. Don’t use another FlashCast version, or it […]
XBMC MX Linux v1.00 RC1 for AMLogic AML8726-MX Devices
Developer “croniccorey” has recently announced the release of MX Linux v1.00 RC1, an XBMC Linux image for media players based on AMLogic AML8726-MX, on XDA Developers’ Forums. This release supports G18REF and MX2REF devices (See build.prop in Android) such as Matricom G-Box Midnight MX2, and a test image has also been released for g02refDongle devices such as Droid Stick A2. Checking the MTD layout Before starting the installation, you may want to check your flash partitions in order to avoid bricking your device: Install and run Terminal Emulator Run the command below to make sure your partition table is compatible with the image:
|
1 2 3 4 5 6 7 8 9 10 11 |
[root@amlogic /]# cat /proc/mtd dev: size erasesize name mtd0: 00400000 00200000 "ubootenv" or "bootloader" mtd1: 00800000 00200000 "logo" mtd2: 00800000 00200000 "aml_logo" mtd3: 00800000 00200000 "recovery" mtd4: 00800000 00200000 "boot" mtd5: 40400000 00200000 "system" mtd6: 20000000 00200000 "cache" mtd7: 10000000 00200000 "backup" mtd8: 18c800000 00200000 "userdata" |
If your partition table is different, do not install the default image for MX2REF / G18REF. However, If you’ve got Matricom Android firmware version 1.1.6 or greater or WJB’s Linux builds from November 21 2013 onwards, the MTD layout will be different, and you’ll need to […]
How to Fix Slow GPS Lock on Mediatek MT65xx based Smartphones
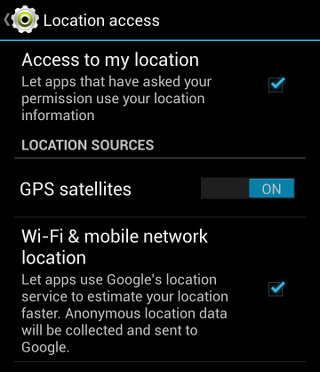
I’ve recently purchased ThL W200, an Android 4.2 smartphone powered by Mediatek MT6589T quad core processor, and I’m trying to test a few things including GPS. I’ve enabled access to my location, GPS, and Google’s location service using Wi-Fi and mobile network. In Google Maps, I could get a somewhat accurate position thanks to mobile network location, but it was clear it could not lock GPS. I’ve also tried Nike+ Running, an application that keeps track of your running sessions with GPS, gives you some audio feedback as you run (distance, time and speed), and compares your performance to the average, and your social network friends. When I wanted to start running, the app complained about weak GPS signal, and tried to lock GPS for about 10 minutes, until I decided to give up. So I tried to find a solution, and Google pointed me to an article on Gizchina […]
How to Flash Rockchip RK3066 / RK3188 Firmware in Linux
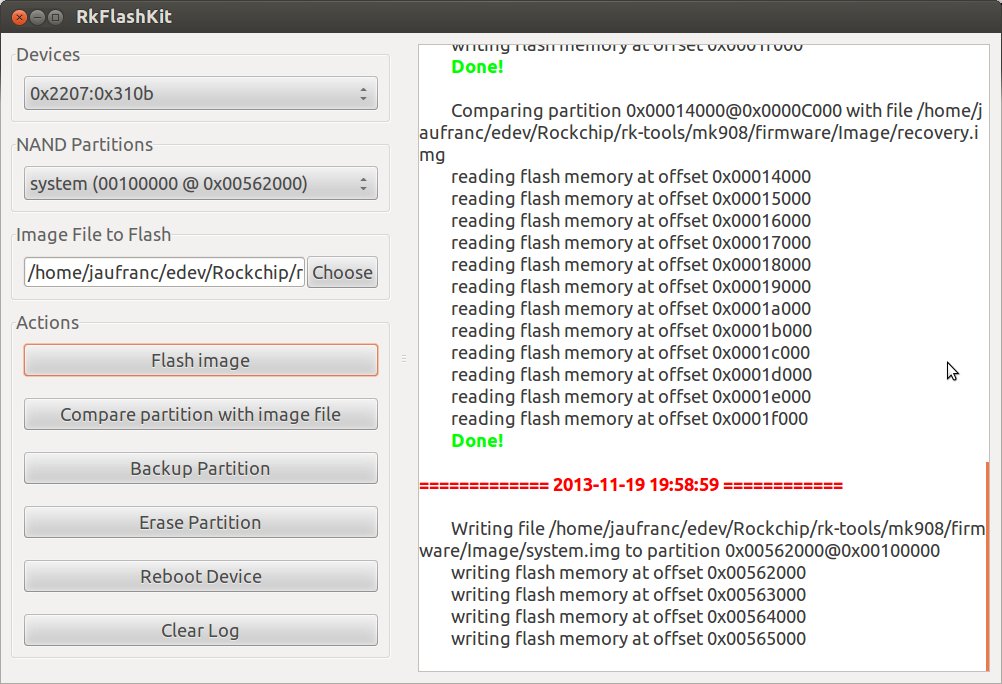
Rockchip provides 2 tools to update the flash: RkBatchTool – Used to upgrade firmware with a single file RkAndroidTool – Used to flash the NAND flash with image corresponding to particular partition, e.g. system.img. kernel.img, boot.img. recovery.img. etc… One problem is that the company only provides these tools for Windows, so if you’re using a Linux based operating systems, you’d have to run a Windows XP or 7 virtual machine in VirtualBox or VMWare, which is an inconvenience, and requires a license in theory. To work around this issue, I’ve tried to use ReactOS, an open source operating systems compatible with Windows XP, but although the USB drivers appeared to install properly, RKAndroidTool failed to recognized my device (MK908). But a member of Mini PCs community informed me about a tool called RkFlashKit, written in Python and using GTK, that can flash firmware to Rockchip RK3066 and RK3188 devices in […]
DriverAssistant – Simplified Method to Install Rockchip USB Drivers in Windows XP/7/8/10
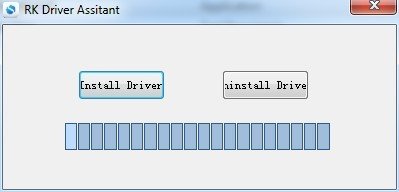
When you need to root or upgrade Rockchip RK3066 or RK3188 devices, you’ll usually have to connect your device to your computer via USB, and in Windows, installing specific drivers (ADB drivers) is usually needed. However, many people seem to have problems with installing the proper driver, and their device may not be recognized properly. To simplify the task for Windows users, Rockchip has written a tool called RK Driver Assistant to automatically install the correct drivers on different Windows versions. Here’s how to install the drivers with this tools.There’s no need to connect your Rockchip device during this procedure. Download and extract RK_DriverAssitant.zip [Update: More recent versions of the tools can be found in Rockchip-Linux account in Github] Double click on DriverInstall.exe in Release_DriverAssitant directory to start the utility If you’ve already tried to install USB drivers for Rockchip devices, make sure to click “Uninstall Driver” first Then click “Install […]


