
Khadas VIM4 is a compact Amlogic A311D2 octa-core Cortex-A73/A53 SBC with 8GB RAM, HDMI input and output, WiFI 6 connectivity, and more. You can check our earlier post for the full specifications. The good news is that it will officially launch on May 10.
I’ve also just received a Khadas VIM4 review sample today together with accessories. Today, I’ll start by checking out the board, assembling the kit, and trying out OOWOW services to boot OS from the cloud, before testing available operating systems in more detail in the second part of Khadas VIM4 review a little later.
Khadas VIM4 kit unboxing
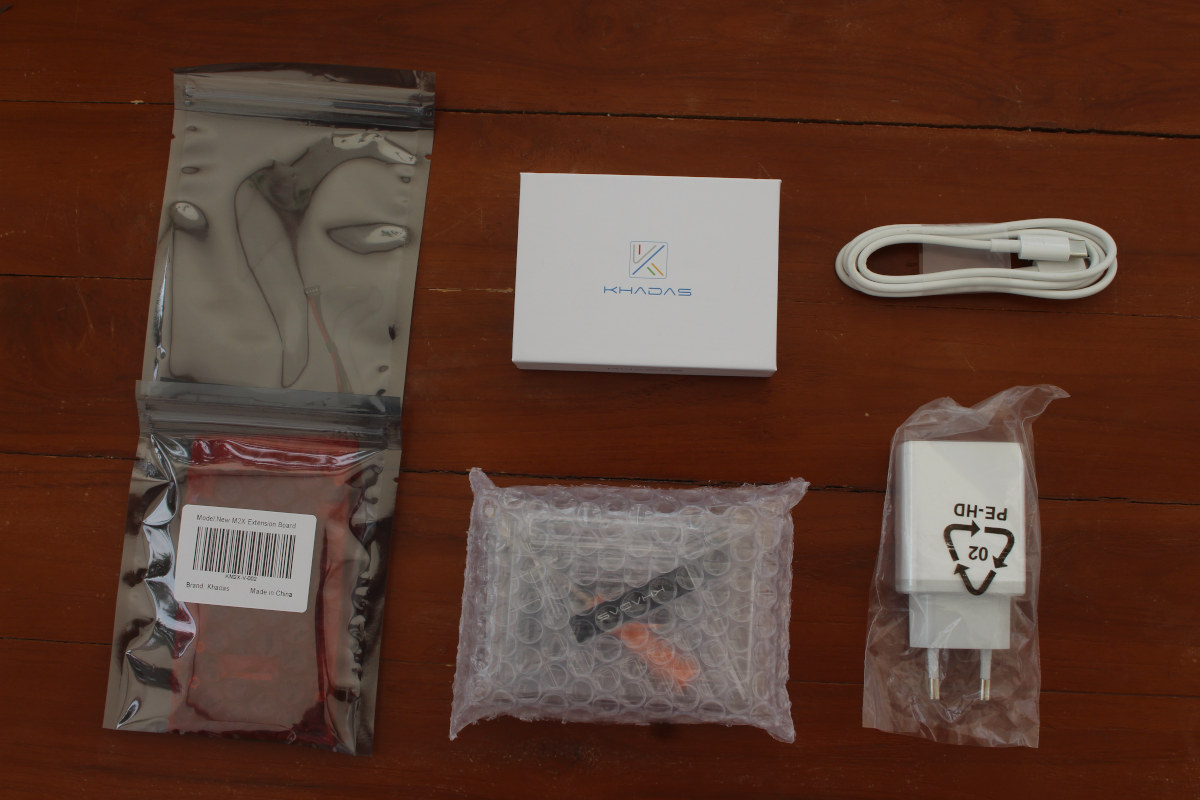
I received everything in a blank cardboard package with several small packages inside.
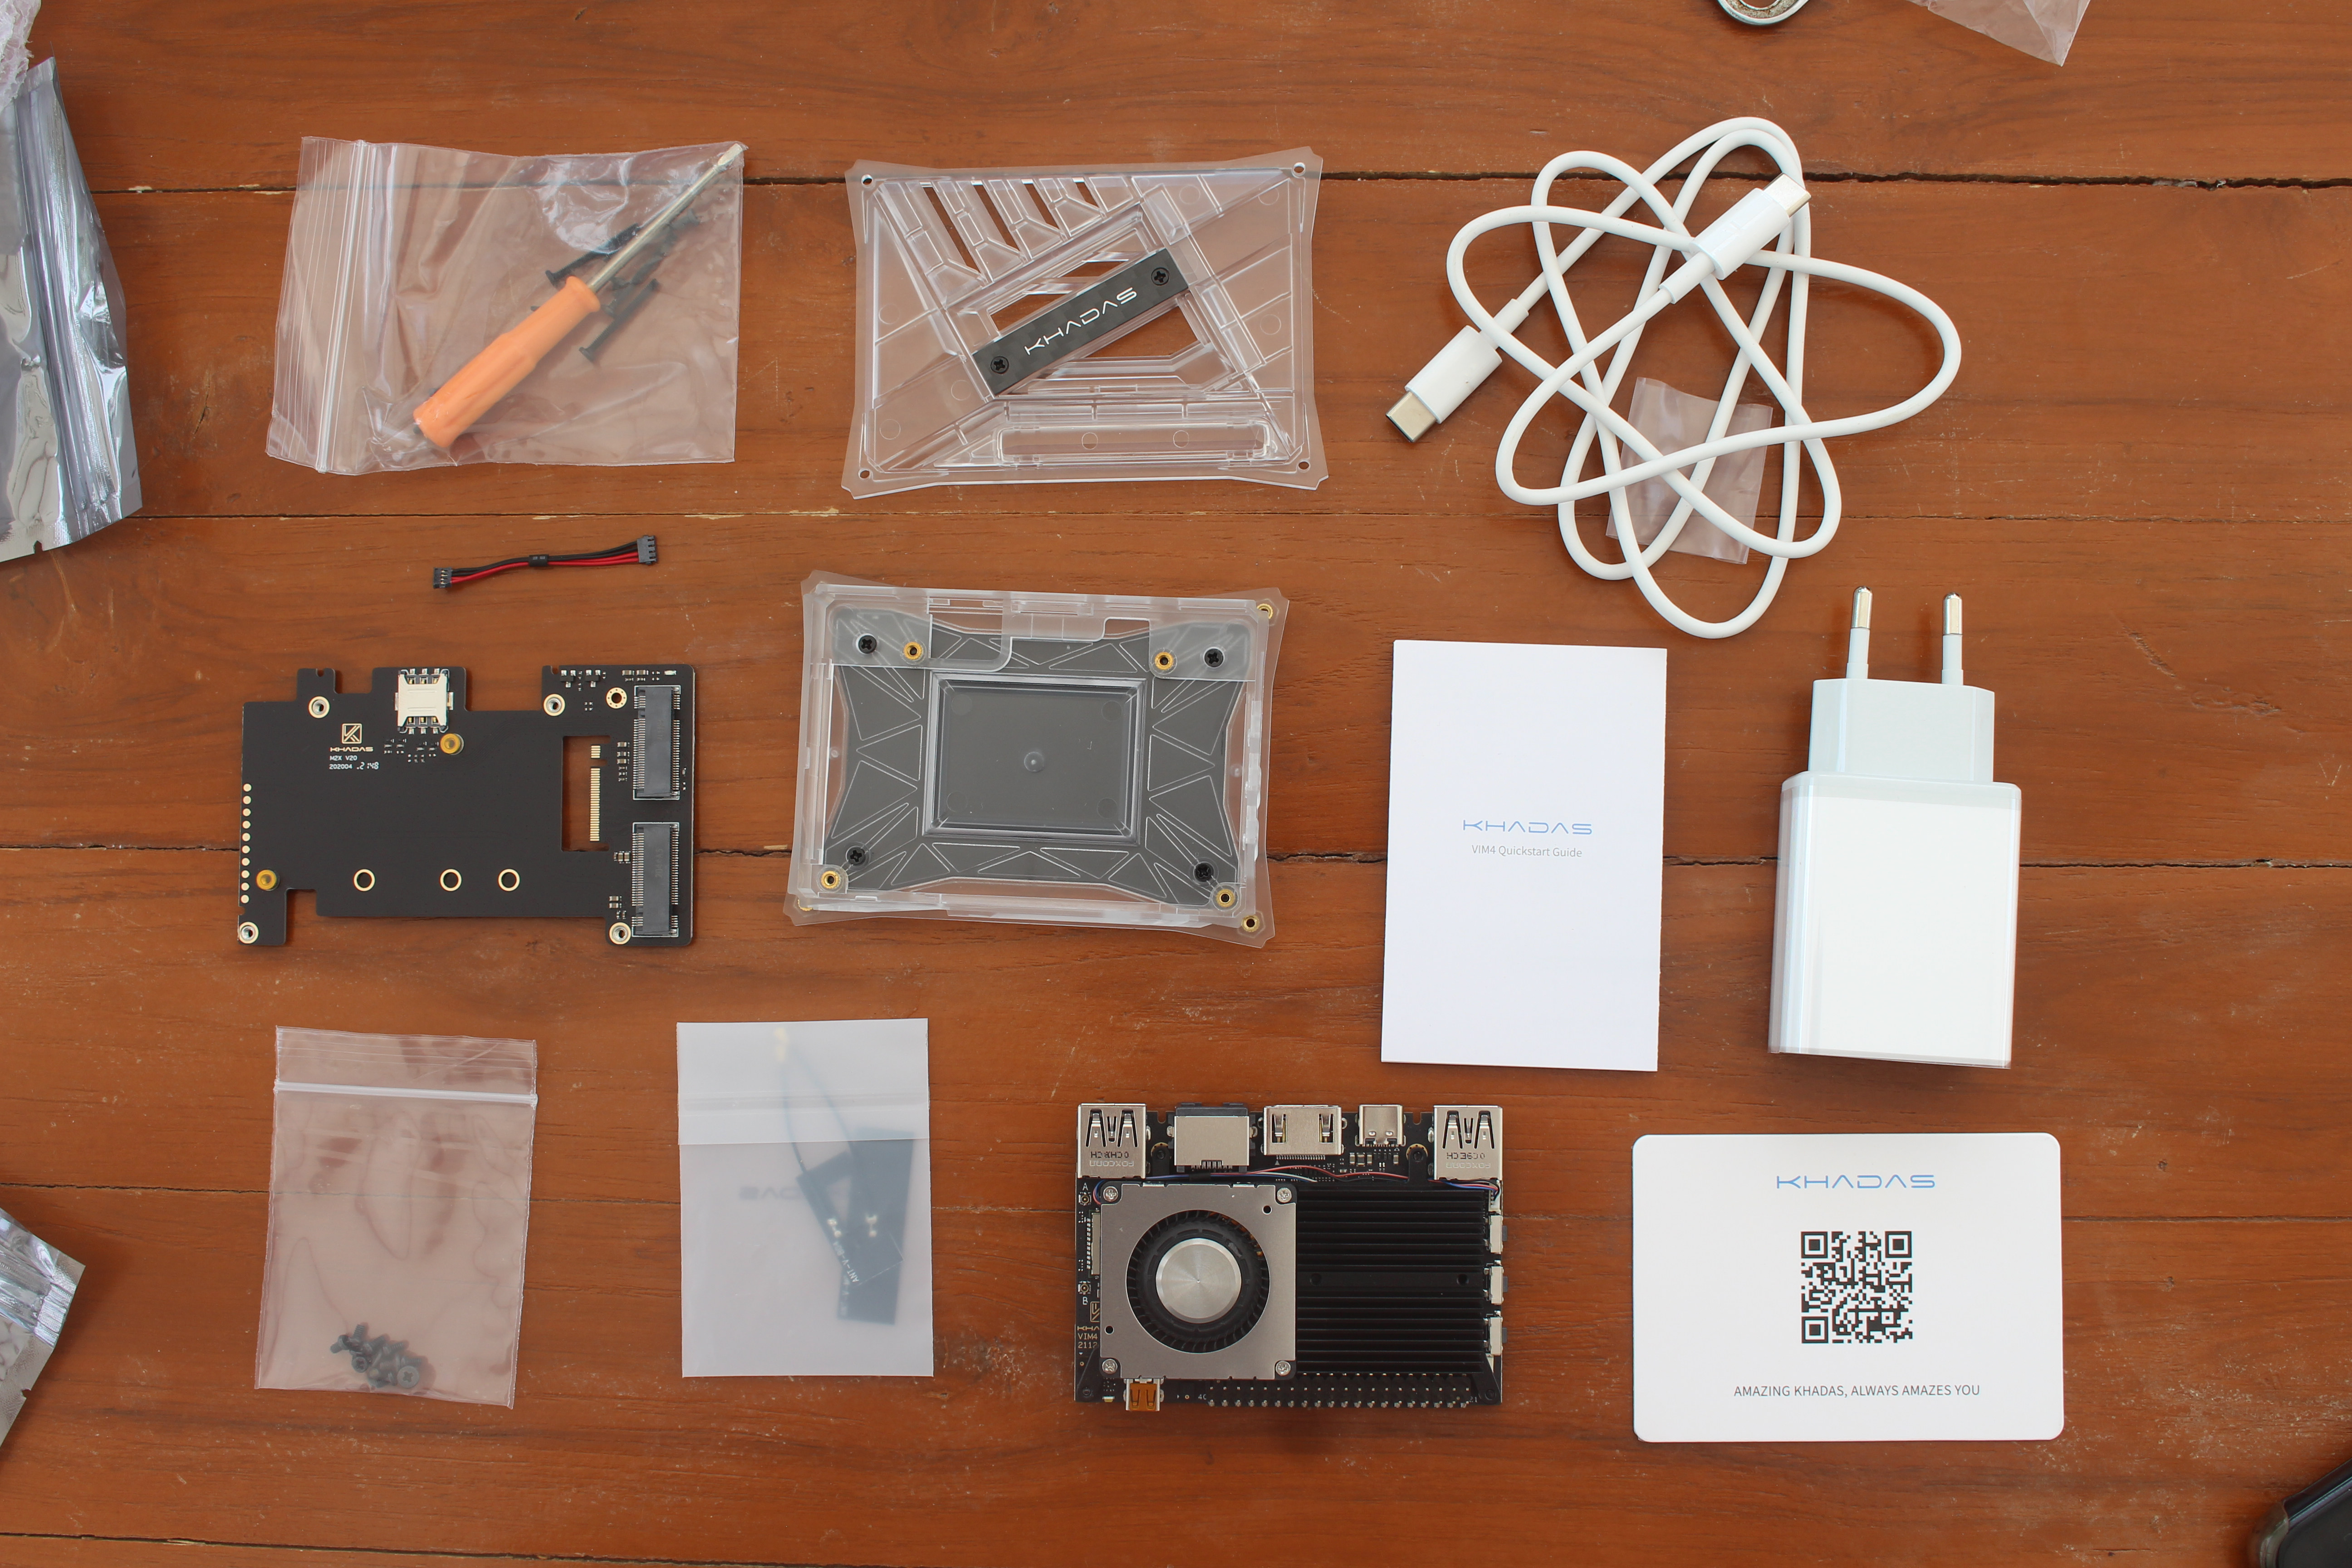
Besides Khadas VIM4 SBC, we’ve got a plastic + metal enclosure with screws and screwdriver, two antennas for WiFi and Bluetooth, a USB Type-C power supply, a USB-C cable, an M.2 expansion board, a short 4-wire cable for power (optional), and a Quick Start Guide.
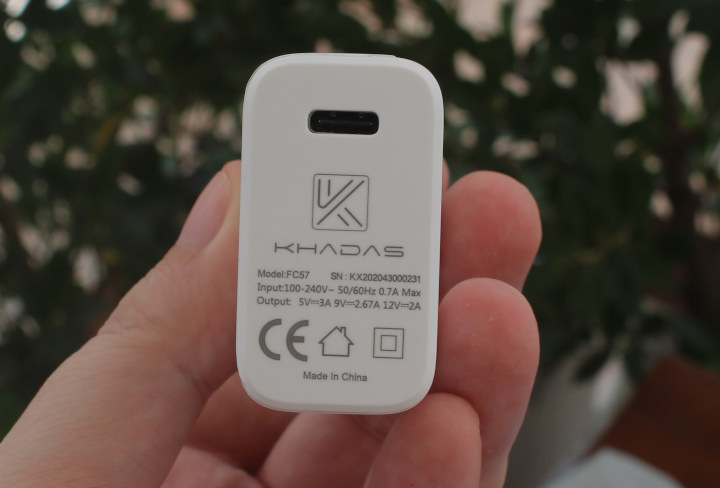
Contrary to some other SBCs limited to 5V input, Khadas FC57 is a proper USB PD power supply with 5V/3A, 9V/2.67A, and 12V/2A charging.
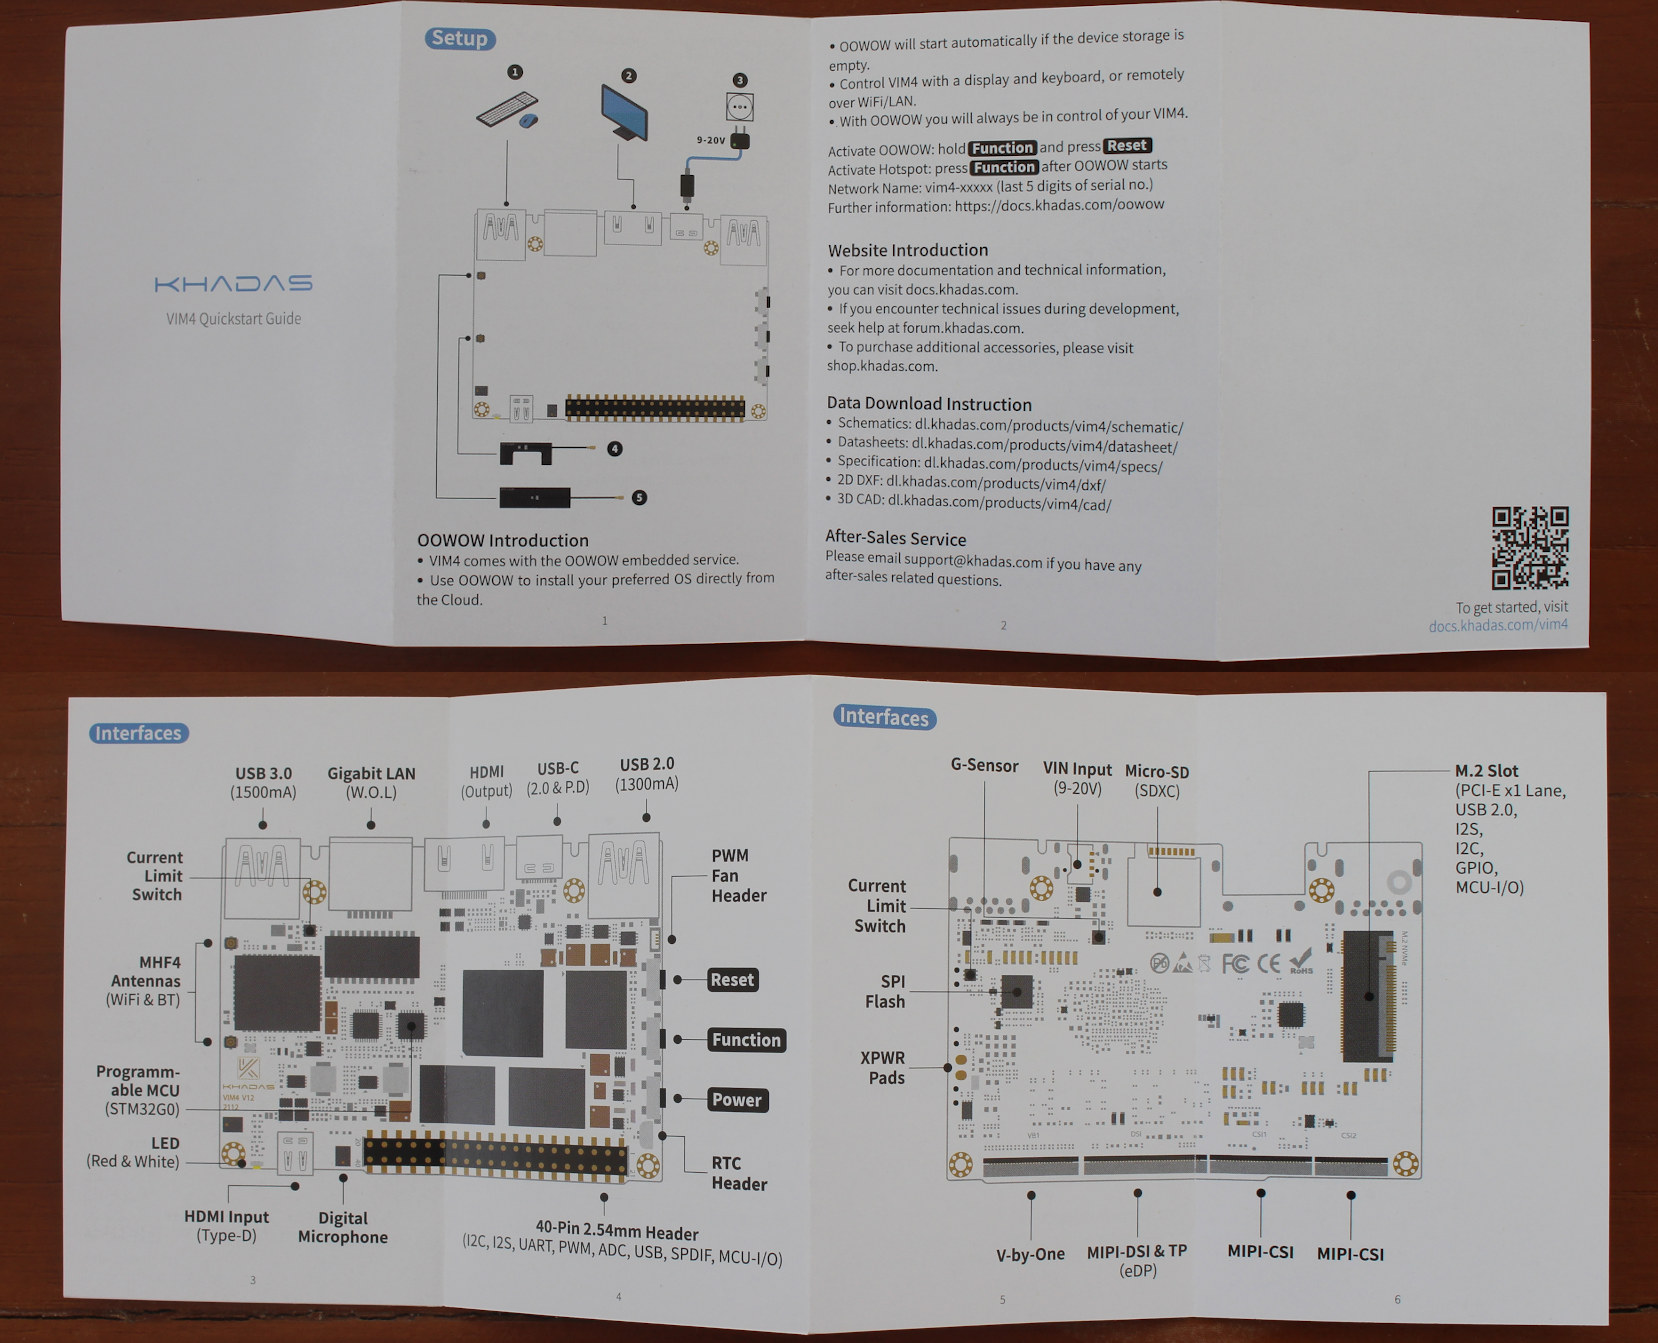
The Quick Start Guide provides a description of the board, instructions to assemble the antennas and connect peripherals, as well as instructions to get started with OOWOW embedded services to install operating systems from the Cloud, and links to hardware documentation and firmware.
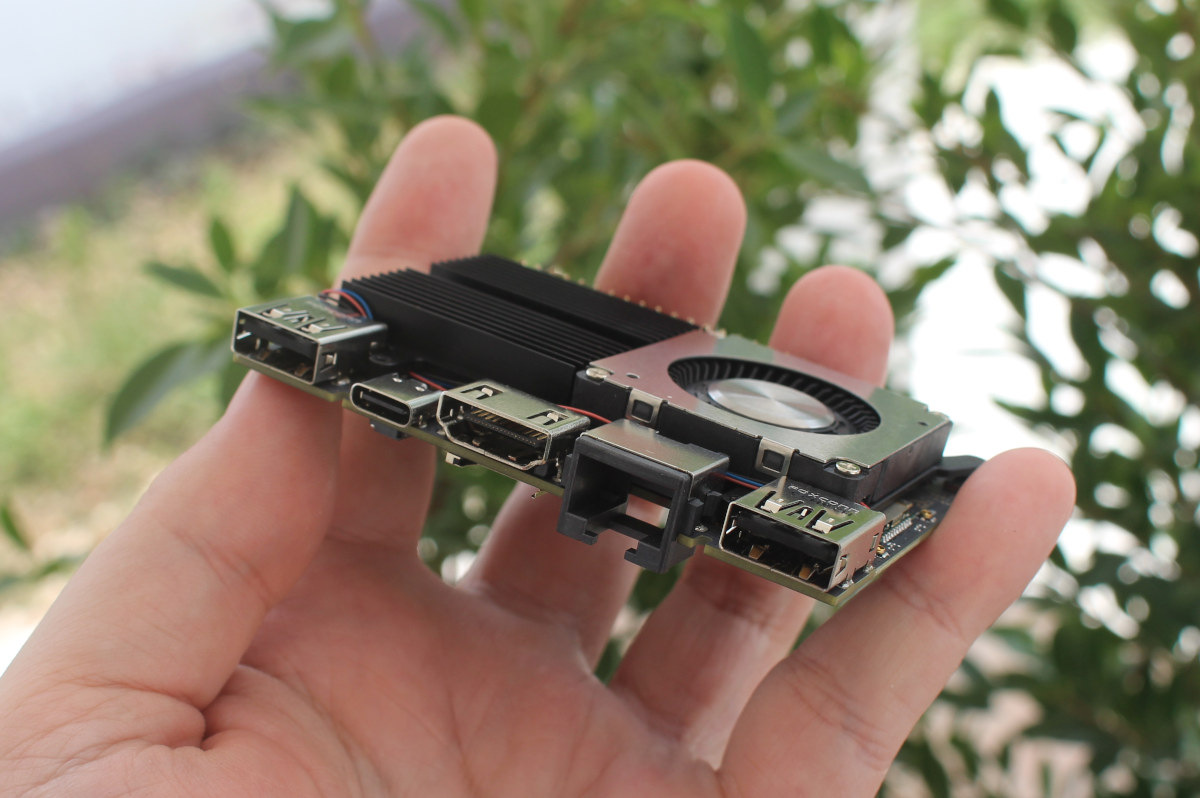
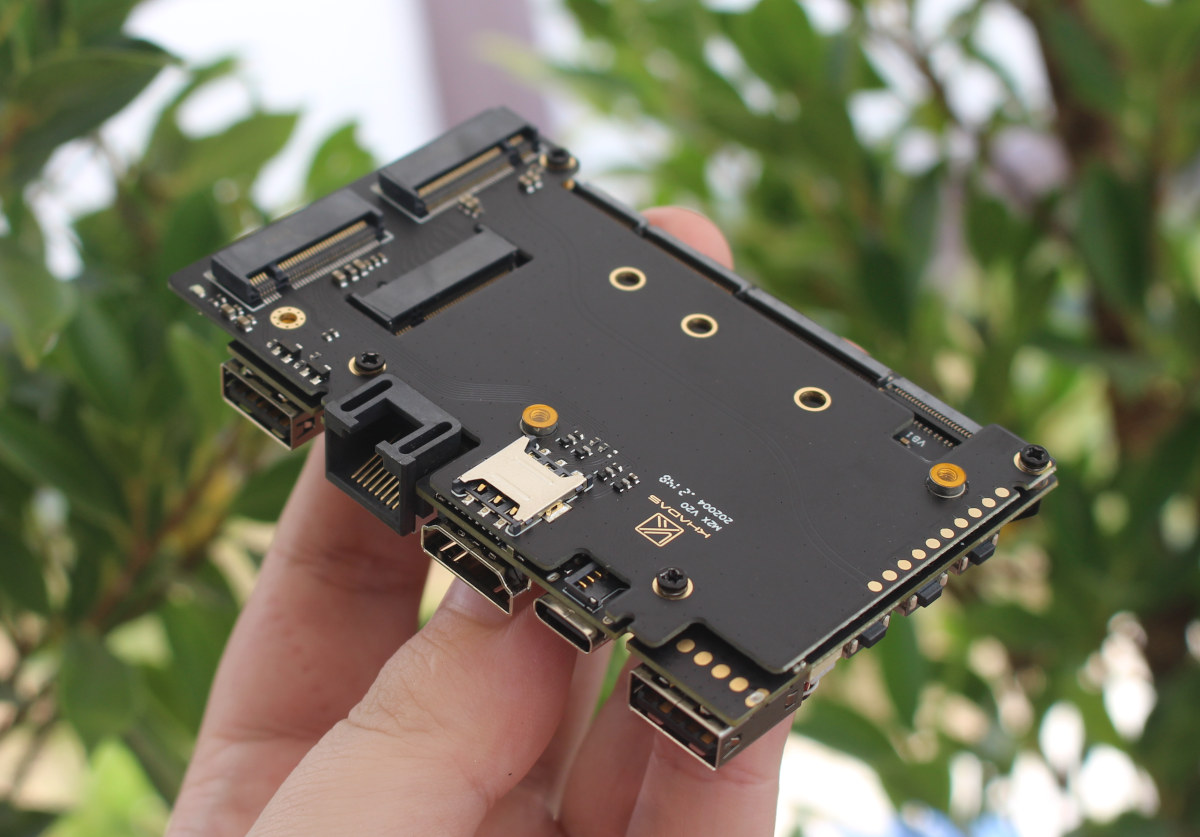
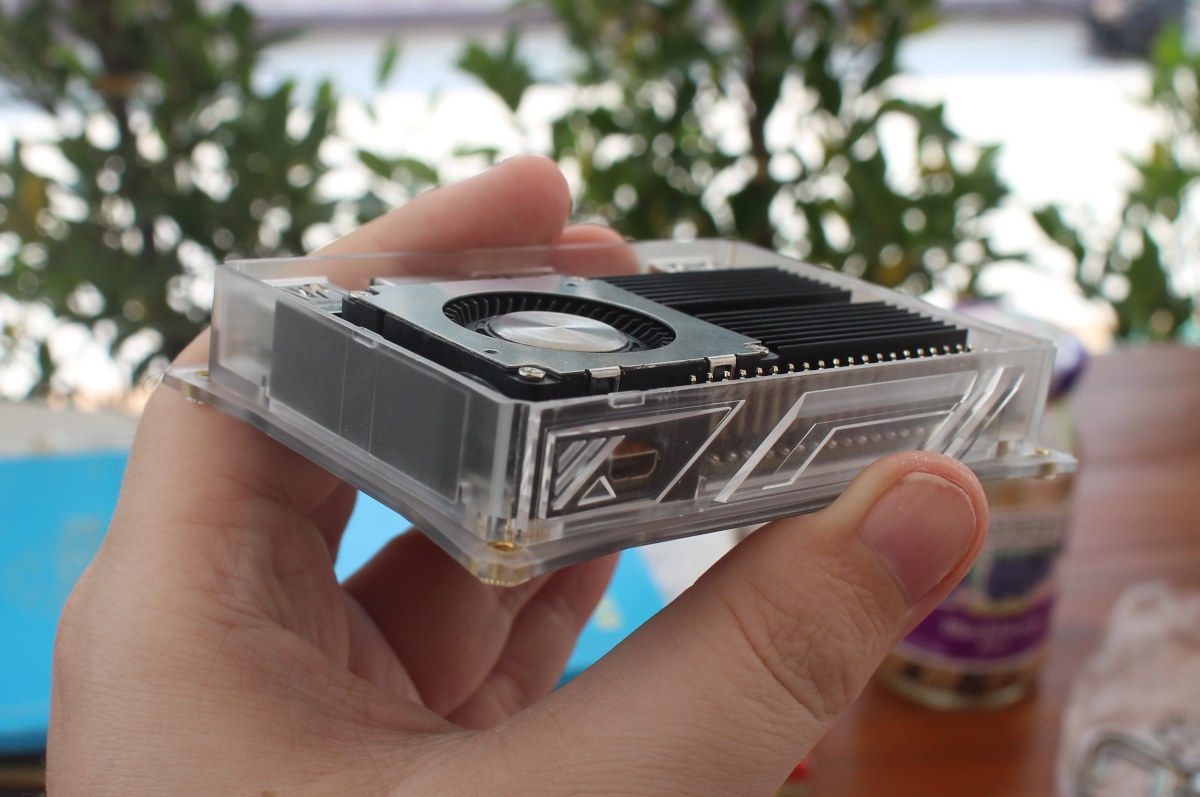
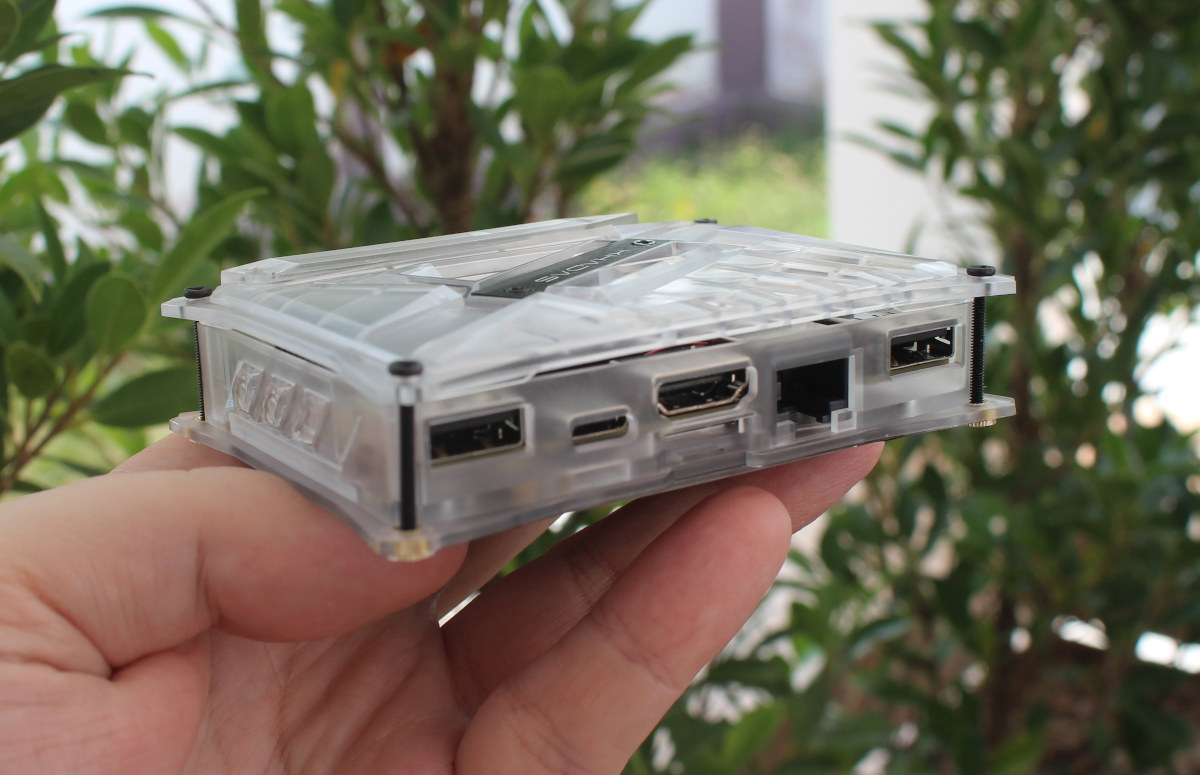
Just like the previous generation Khadas VIM3, VIM4 adopts a low profile RJ45 jack for Ethernet, USB 3.0 ports, HDMI, and a USB Type-C port. It is cooled by a large, yet, thin, heatsink and fan combo that came pre-installed, and covers all main components.
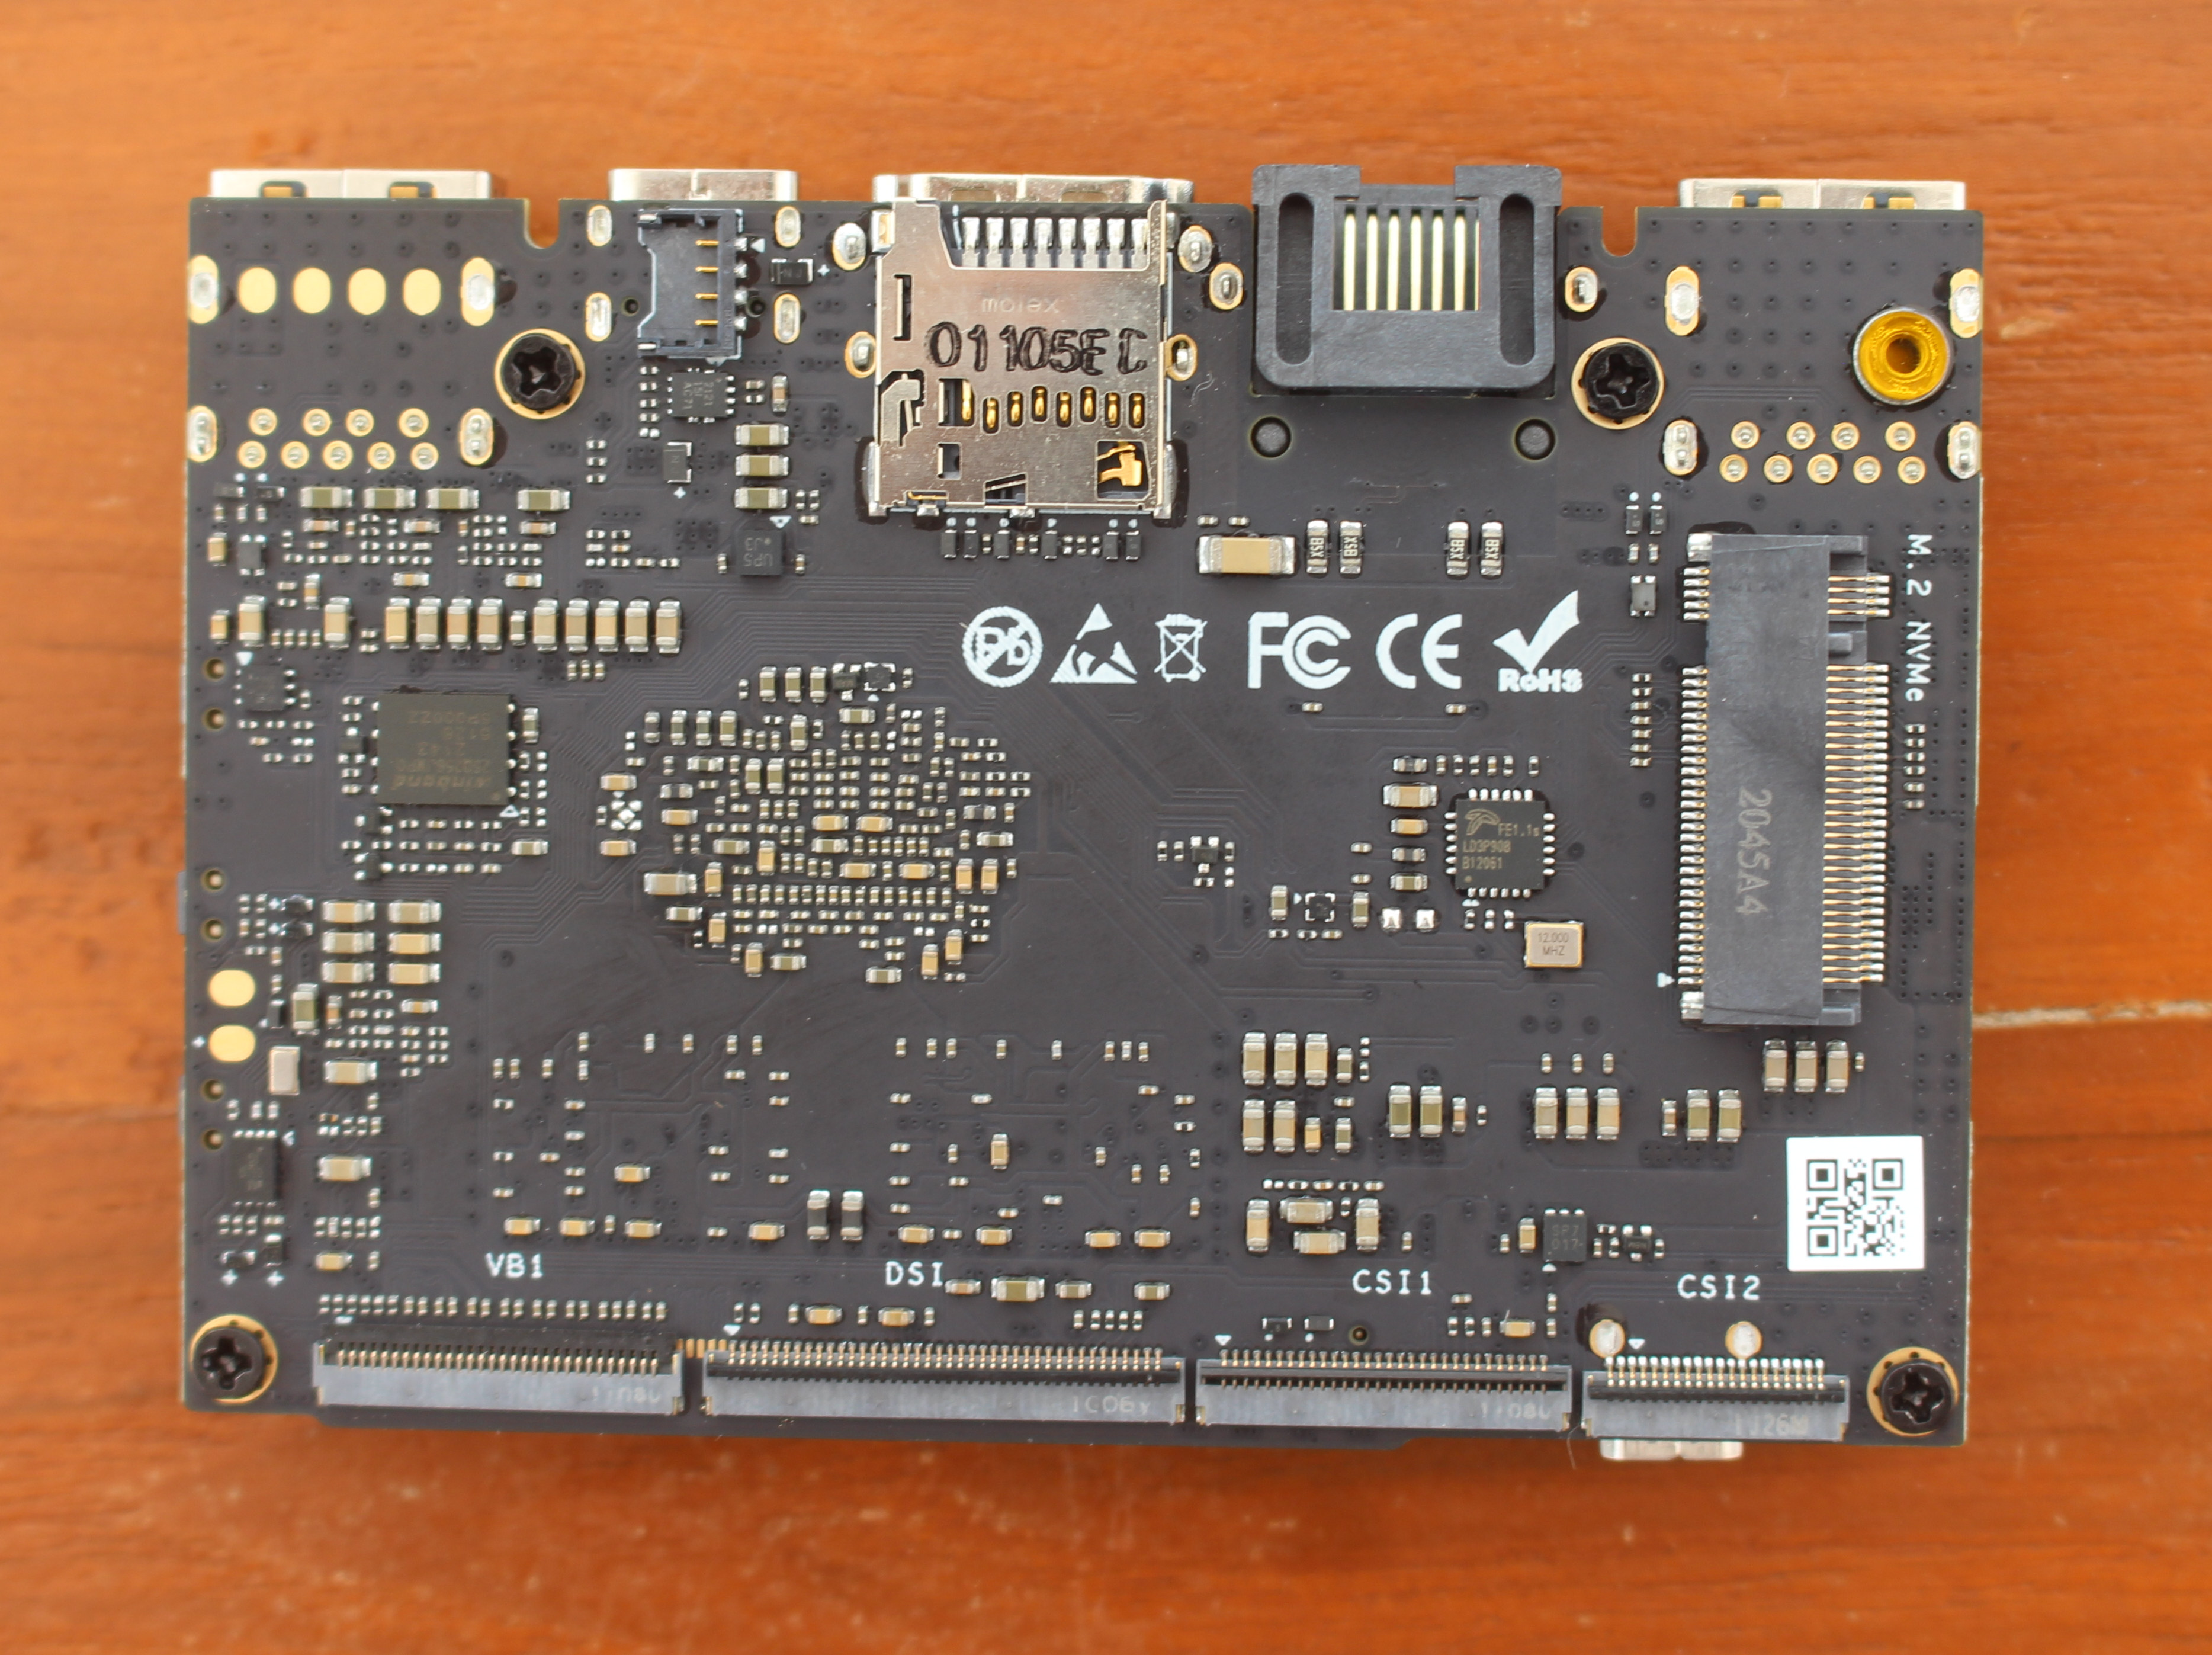
On the back of the board, we can see the 4-pin connector for 9V-20V DC input next to the microSD card socket. The bottom comes with display connectors (VByOne and MIPI DSI), and two MIPI CSI connectors for cameras. There’s also an M.2 NVMe socket, but no mounting thread.
M.2 Expansion board assembly
That’s when the M.2 expansion board becomes useful.
I first had to loosen the screws holding the heatsink in place, before insertion the expansion board, and putting the screws back in place. It provides two M.2 sockets. one for an M.2 NVMe 2280 SSD, and the other for an M.2 2242 modem together with a nano-SIM card slot.
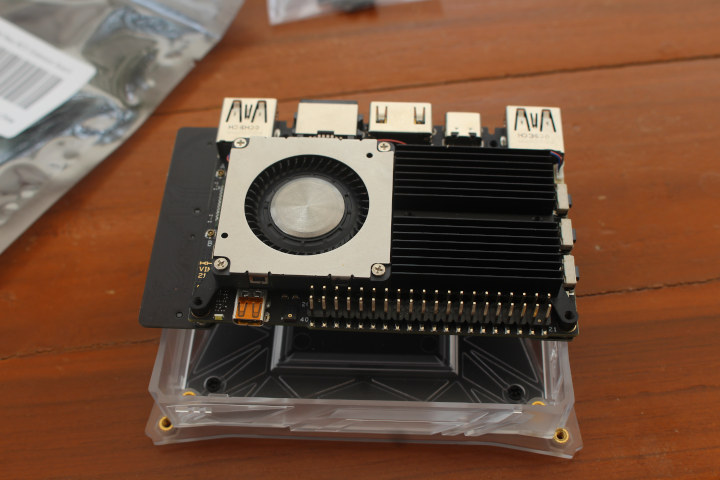
That’s all nice, but it won’t fit in the case I have received.
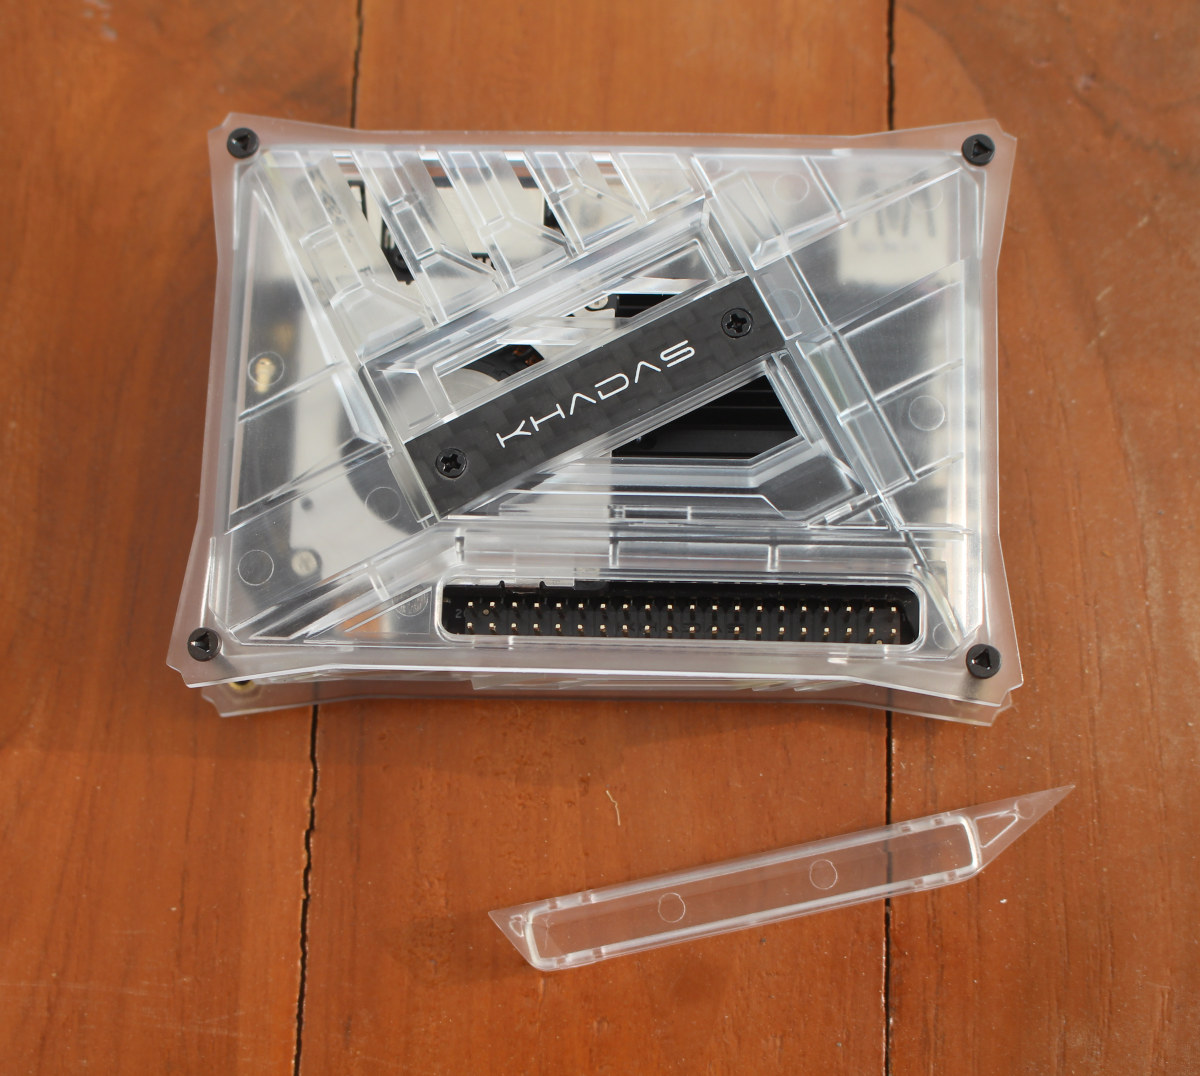
Khadas VIM4 enclosure assembly
So let’s remove it, and install the antennas as described in the Quick Start Guide. The long antenna to connector A, and the short “U” antenna to connector B.

We can now somewhat easily insert the board into the enclosure which does not appear to be made for VIM4, since there’s no opening for the micro HDMI input port, and I had to trim the small antenna to lock it into place against the enclosure side as shown below. [Update: Khadas confirmed the “DIY Case Gen1” does not fit VIM4 that well, and they are working on a “DIY Case 2: for VIM4, but it won’t be ready for the May 10 launch”]
Sadly, I think I damaged the connector from the small antenna, and it won’t go into connector B anymore. It got detached several times while trying to clip the antenna to the plastic enclosure. The last step was to tighten the four long screws provided with the enclosure.
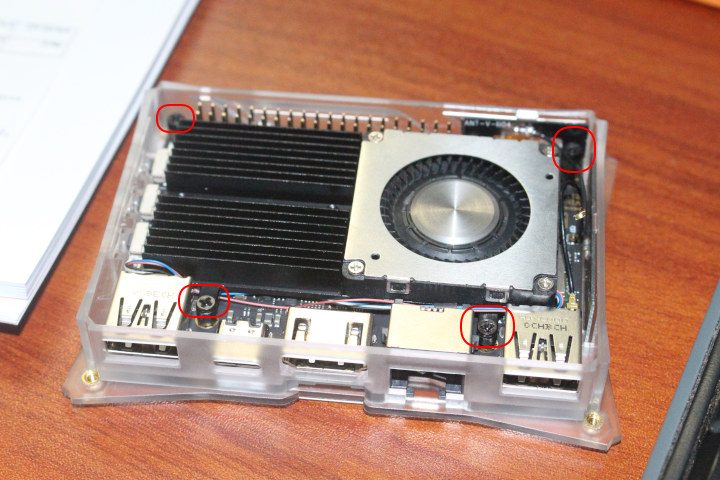
As you may see from the photo above, it does not seem to fit perfectly with some gaps at the top and the top cover is “curved”. More worryingly, I was unable to insert the USB-C cable… So I disassembled it and realized I had made a mistake. I should have removed the four screws from the bottom holding the heatsink, like we did when installing the M.2 expansion, placed the board inside the enclosure, and attached the board to it from the top using the same screws.
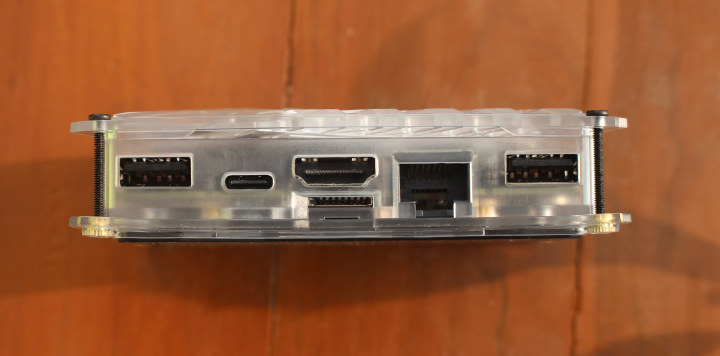
Now, everything is properly aligned.
As a side note, it’s possible to access the GPIO header by removing a cover on the top. It can be put back into place once you’re done.
First boot with OOWOW
Let’s connect the power supply, USB RF dongles for a mouse and a keyboard, as well as HDMI to see what happens upon the first boot:
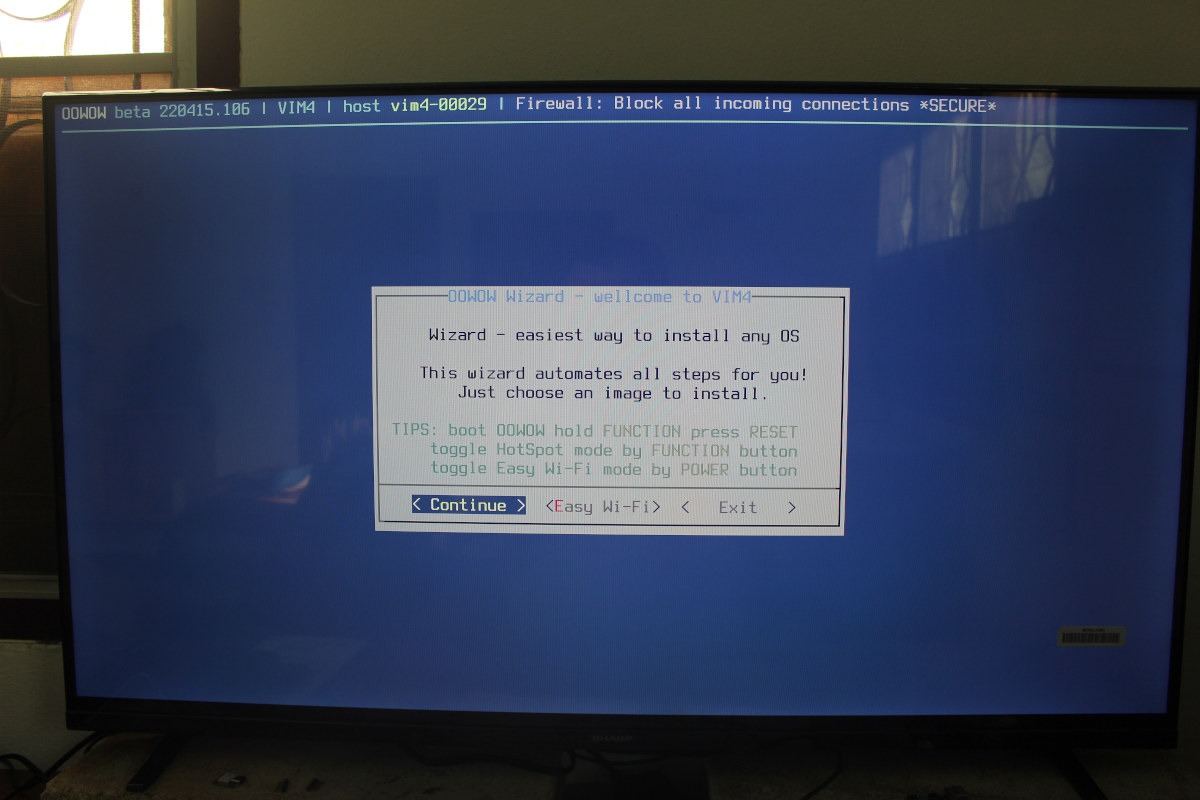
That’s the OOWOW wizard to install OS from the cloud. I set up WiFi since I don’t have easy access to Ethernet right now, and then selected “Continue”.
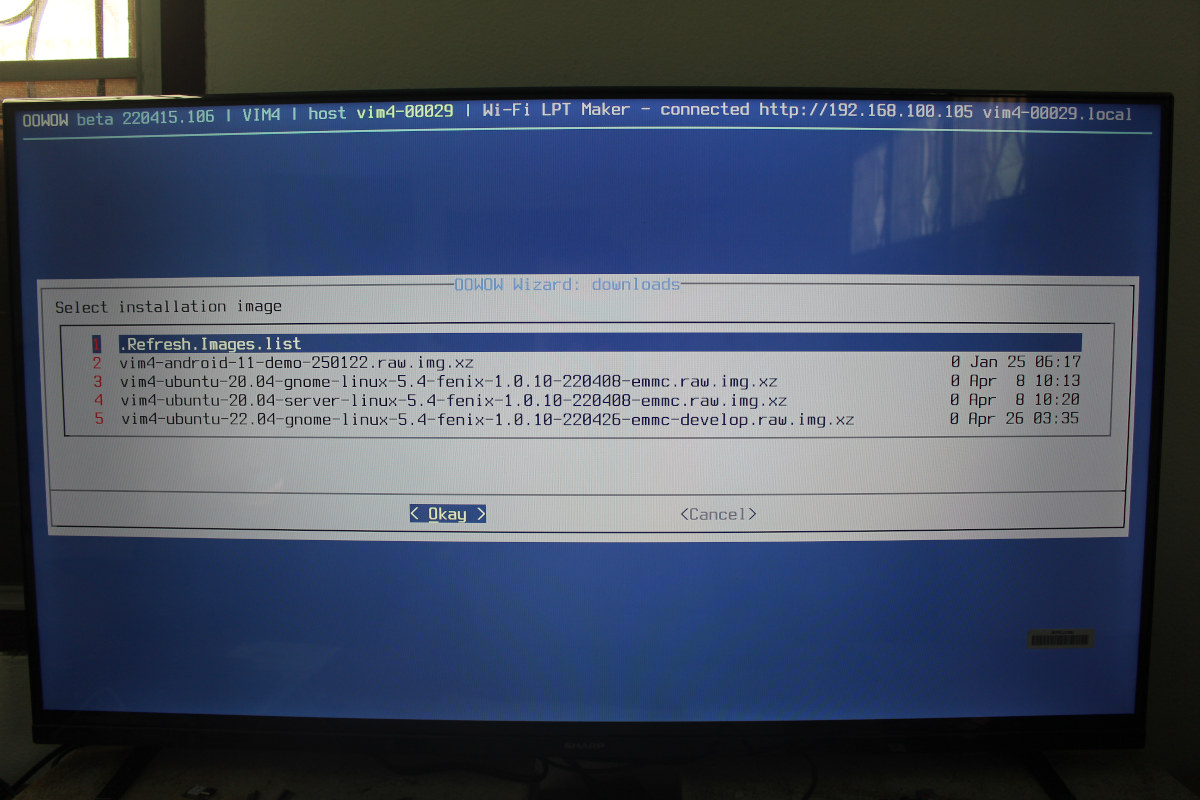
We can select Android 11, Ubuntu 20.04 GNOME, Ubuntu 20.04 Server, or Ubuntu 22.04 GNOME, all to be installed to the eMMC flash. Since I’m on a cellular data plan with limited speed, I selected the server image to try it out.
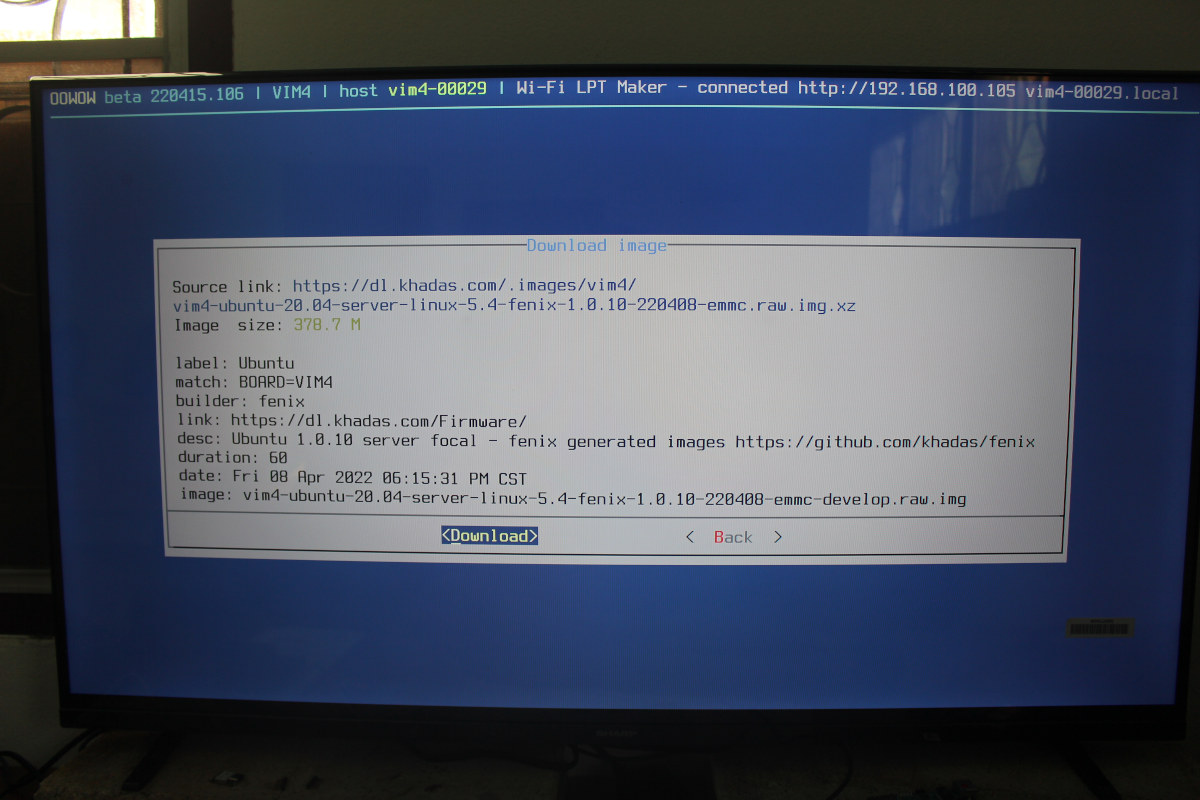
The download started fine… That’s a good start.
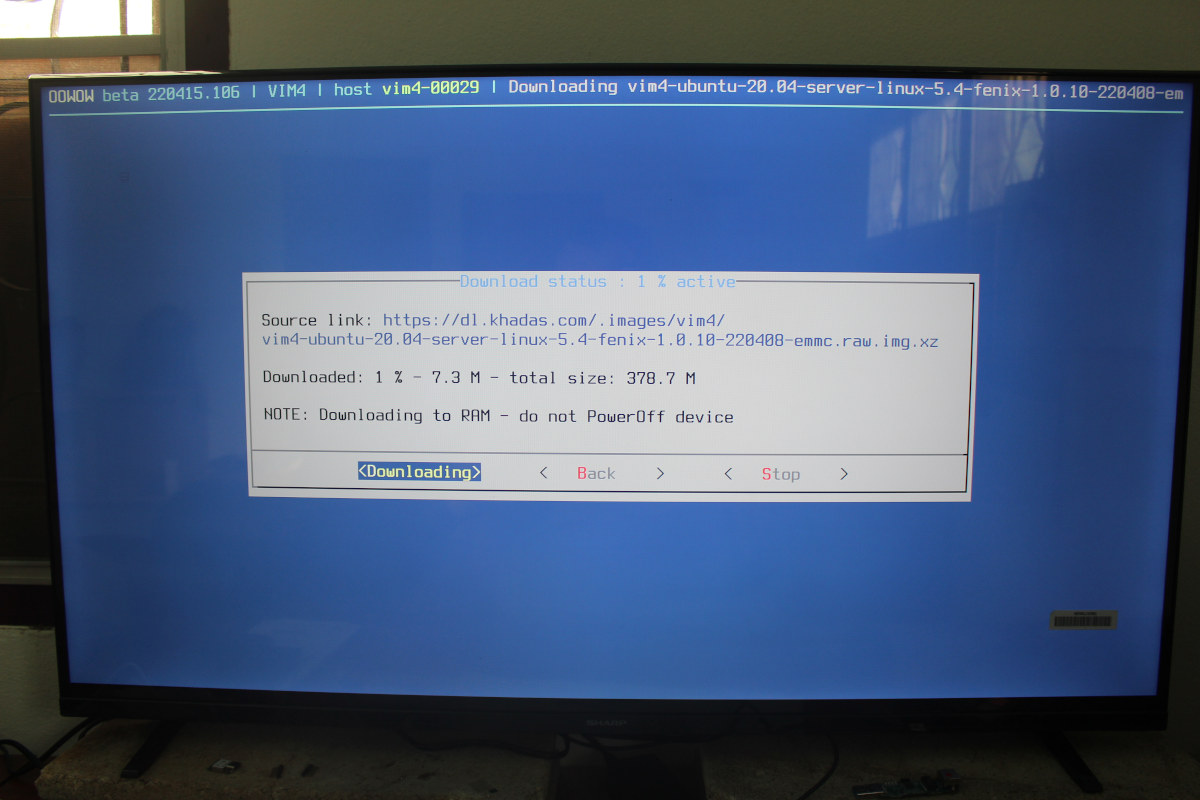
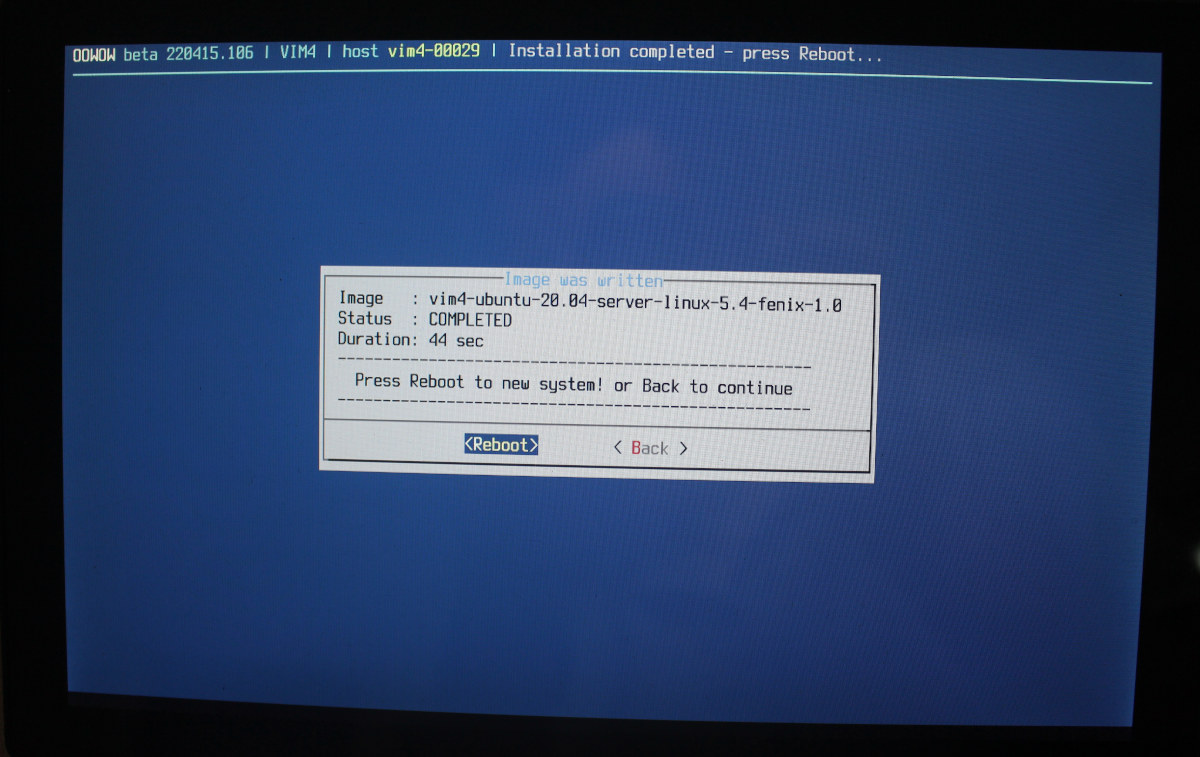
After several minutes the download was complete, so I selected “Install”.

Now we can reboot to launch Ubuntu 20.04 server…
That ‘s really convenient, easy, and similar to Raspberry Pi Network Install. There are just a few problems. The server image does not output anything to HDMI, and OOWOW does not copy the WiFi configuration data to the image, so I have no network access either. I’ll have to set up a local network and/or use a serial console, but I’ll do that a little later since time is running out for today.
I’d like to thank Khadas for sending the Khadas VIM4 board for review. The launch is scheduled for May 10, at which point the price will also be revealed, and you can register your interest on Khadas website.
Continue reading
- Khadas VIM4 Review – Part 2: Android 11 preview and benchmarks.
- Khadas VIM4 SBC review – Part 3: Ubuntu 22.04

Jean-Luc started CNX Software in 2010 as a part-time endeavor, before quitting his job as a software engineering manager, and starting to write daily news, and reviews full time later in 2011.
Support CNX Software! Donate via cryptocurrencies, become a Patron on Patreon, or purchase goods on Amazon or Aliexpress


