I’ve just received a 10.1-inch touchscreen display designed for Raspberry Pi model B boards with 1200×800 resolution from the EVICIV store on Amazon that also offers models with 1366×378 and 1920x1200 resolutions, and allows users to create an All-in-One computer based on the popular SBC.
The product can also be used as a standalone display connected to an HDMI or USB-C (via DisplayPort Alt mode) source, so it could be interesting for all sorts of projects and not only ones relying on Raspberry Pi boards. In the first part of the review, I’ll check out the hardware, install a Raspberry Pi 4, and boot it to check out whether it works, before going into more details in the second part of the review.
RPI All-in-One Touchscreen Display Unboxing
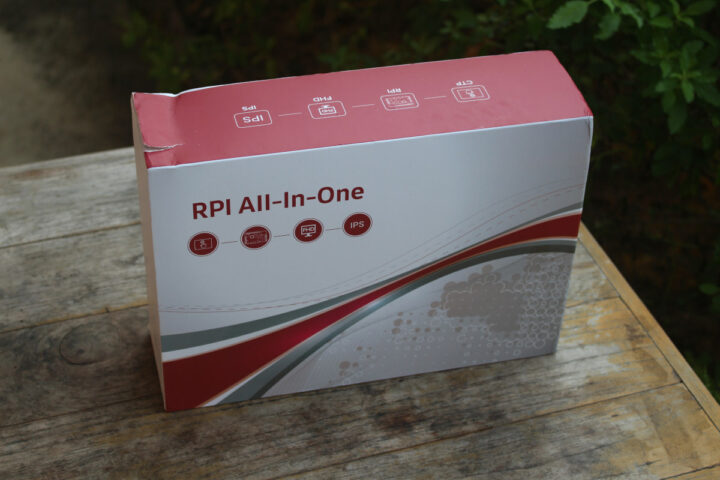
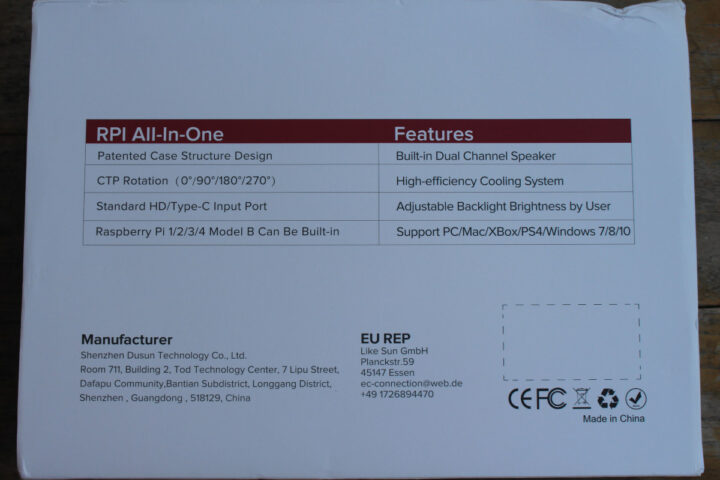
The package lists some of the specs and highlights features of the device with a built-in stereo speaker, support for older and new Raspberry Pi Model B single board computers, a cooling system, HDMI and USB-C input ports, adjustable backlight, rotation support, and so on.
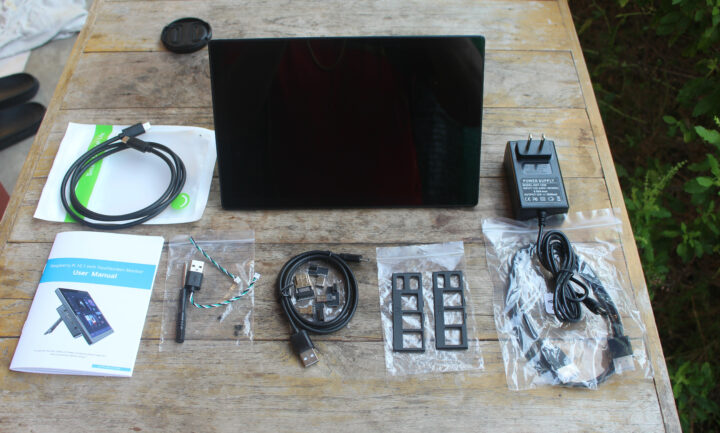
The package includes the display itself, two USB-C cables, an HDMI cable, a 12V/2A power supply, plates for Raspberry Pi 4 and Raspberry Pi 3 boards, HDMI and USB adapters, USB cables for the touchscreen function, some screws plus a screwdriver for assembly, as well as a user manual in English only.
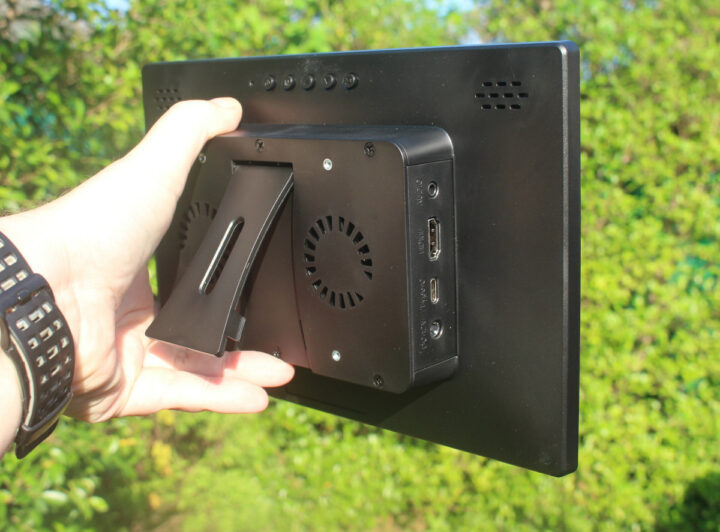
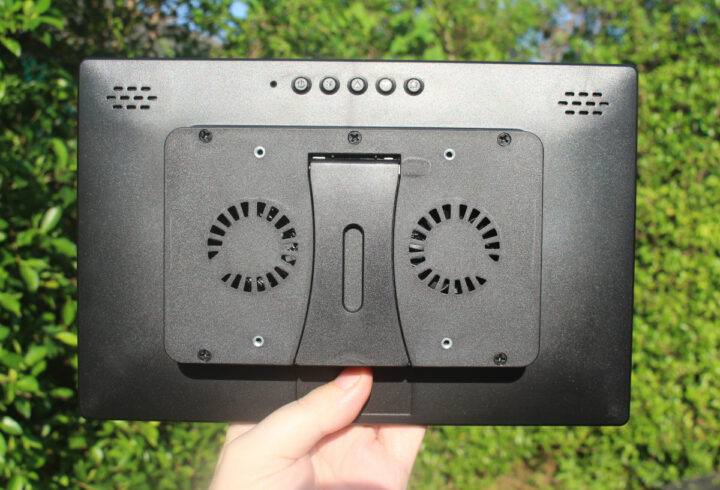
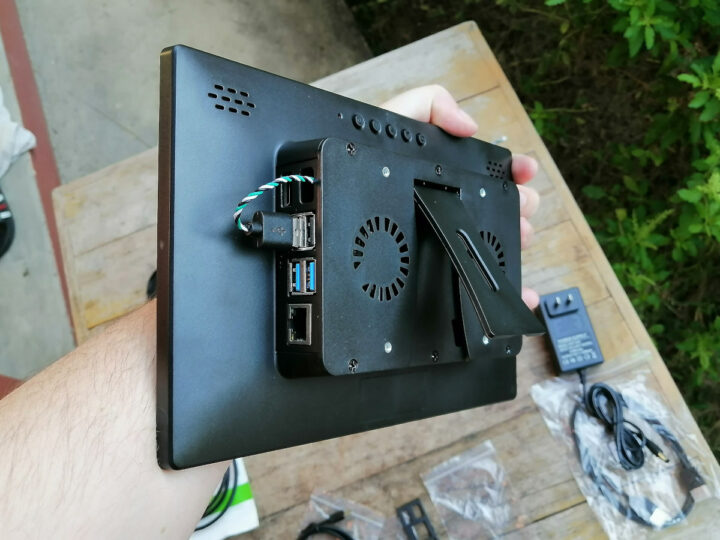
We’ll find a stand on the back, buttons (Power, Menu, Up/Down, and Exit), HDMI and USB-C input ports, a 3.5mm audio output jack, as well as the DC jack, plus an air inlet (left) and outlet (right) equipped with a fan.
Openings for the speakers and mounting threads for 75×75 mm VESA mounts are also be seen at the back either to mount behind a display or wall-mount in portrait or landscape modes.
Raspberry Pi touchscreen display installation
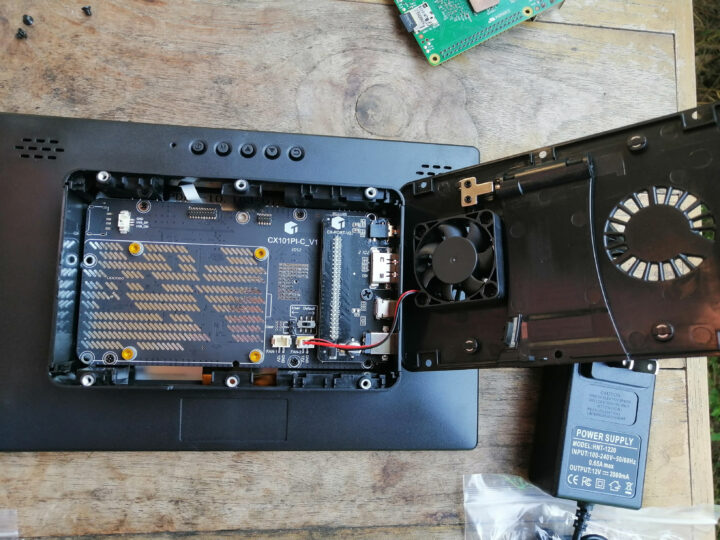
We’ll need to remove the six screws at the back (including the one under the stand) to take out the cover. Remember to peel off the four golden sticker on top of the threads, or you won’t be able to fasten the board with the provided screws.
Since a Raspberry Pi board is not included, I took a Raspberry Pi 4 and Raspberry Pi 2 from my collection to show the steps to be taken.
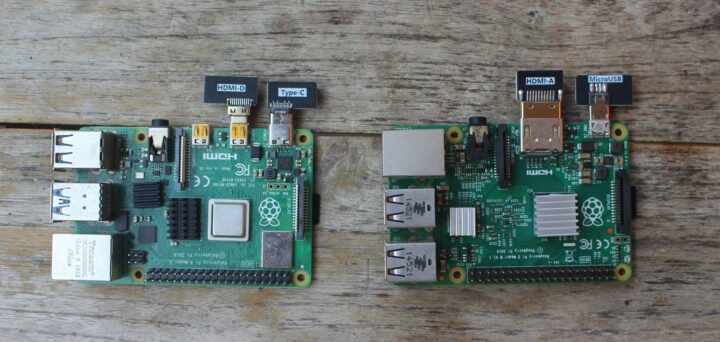 You’d need to connect the micro HDMI and USB-C adapters to the Raspberry Pi 4, and the HDMI and micro USB adapters to the previous generation Raspberry Pi model B boards.
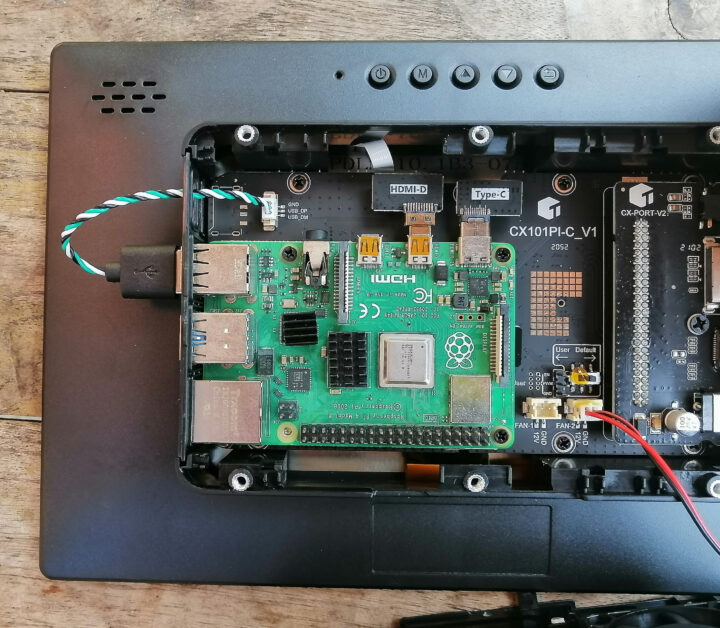
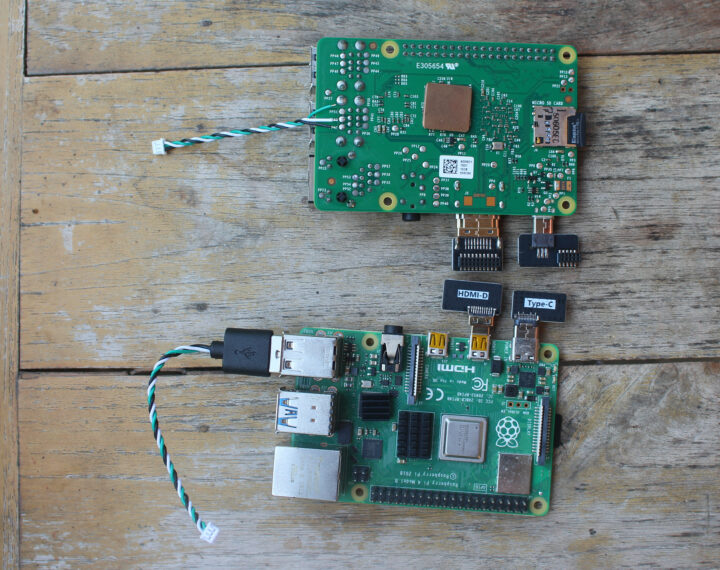 There are two options for the 10-point USB touch panel. The neater one requires the user to solder 3 wires to the board, while the simpler alternative is to connect a cable to one of the USB ports. In any case, you’d lose a USB port, but the wiring does not show from the outside with the first solution. The company does not provide anything to close the used USB port after soldering the wire, so you’d have to remember which one it is, put some tape, or get a USB port locker.
Now we can install our Raspberry Pi 4 inside the display. The important part is to make sure the headers from HDMI and USB-C adapter are properly aligned. It took me two or three tries to get it right, as it’s quite easy to insert them with only one row or shifted by one pin. I also had to connect the touch panel cable making sure it went through on the openings of the chassis, and finally secure the board with four screws, which ended up being just three in my case, as I lose one in the process. I usually like when companies provide at least one extra screw, but it was not the case for this kit.
First boot
We can now put the back cover, connect the 12V power adapter, and press the power button to boot it up.
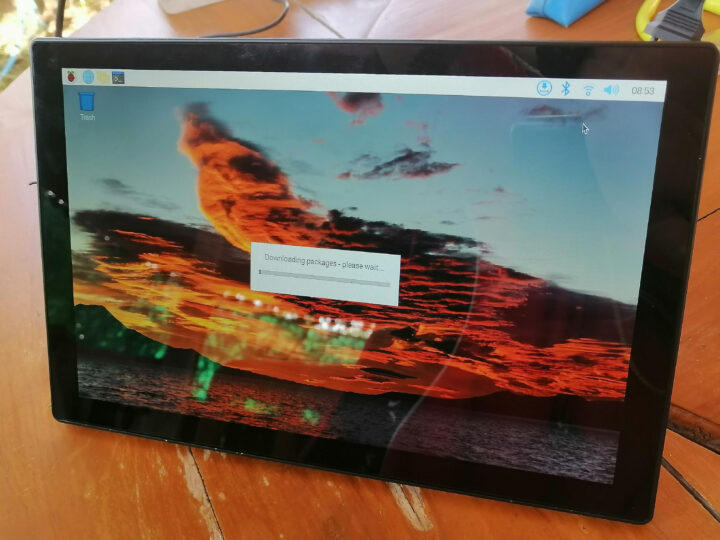
The good news is that it works without issues, and I could start an update with the touchscreen without a keyboard or mouse attached. Note that I used the microSD with the Raspberry Pi OS “BullsEye” image I tested on Raspberry Pi Zero 2 W with modifications, which explains why I already had WiFi all set up. The less nice thing is the fan is really noisy, and there’s no software keyboard by default, but I’m sure it’s just a matter of configuring the OS.
In the next part of the review, I plan to test the All-in-One display by checking out Raspberry Pi 4 performance both with and without the fan, check portrait and landscape modes, try out web browsing with the touch function, test USB-C and HDMI input ports, and see if some other Raspberry Pi compatible SBCs like NanoPi M4V2 could work with the display, enough though I doubt it, as the ports may not be perfectly aligned, and a different selection of ports, for instance, USB-C and full HDMI in M4V2.
I’d like to thank EVICIV for sending a review sample. If you are interested you can purchase the 10.1-inch 1200×800 model for $159.99 on Amazon, or even 10% less as there’s a coupon option at this time. The 10.1-inch touchscreen display can also be purchased for $169.99 and $179.99, again before the 10% discount, with 1366×768 and 1920×1200 resolutions respectively. [Update: It has been brought to my attention the kit is also sold on Aliexpress, possibly at a cheaper price depending on the destination country]
Continue reading:
- 10.1-inch RPI All-in-One PC review with Raspberry Pi 4
- Building a NanoPi M4V2 based All-in-One Linux PC running Armbian (Ubuntu/Debian)

Jean-Luc started CNX Software in 2010 as a part-time endeavor, before quitting his job as a software engineering manager, and starting to write daily news, and reviews full time later in 2011.
Support CNX Software! Donate via cryptocurrencies, become a Patron on Patreon, or purchase goods on Amazon or Aliexpress


