If your Raspberry Pi project runs on battery, but may not need to be turned on 24/7 in order to lower power consumption, you’d have to find a way to schedule on and off times, and power off the board cleanly either when the battery is almost depleted, or your timer requires it
There’s no built-in support for this in any of the Raspberry Pi boards, but Waveshare Power Management HAT can help you do just that since it adds an RTC, and enables software-controlled power timers and battery monitoring via an Arduino compatible ATmega328 MCU.
 Power Management HAT specifications:
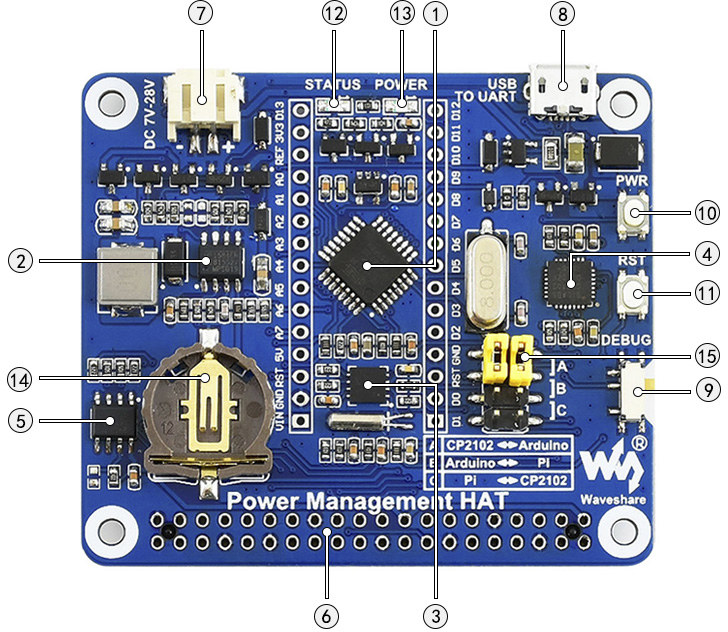
- MCU – Microchip ATmega328P-AU MCU
- Storage – CAT24C32 EEPROM
- USB – 1x micro USB port for serial communication via CP2102 UART to TTL chip
- RPi Interface – 40-pin Raspberry Pi GPIO header
- Misc
- NXP PCF8523 RTC & calendar chip + CR1220 battery holder
- DEBUG switch (9) to either:
- Power directly Raspberry Pi board
- Let the “Arduino” MCU manage the power supply
- UART selection (15)
- A – Access Arduino via USB to UART
- B – Control the Raspberry Pi by Arduino
- C – Access Raspberry Pi via USB to UART
- Power/User and Reset buttons
- Status and Power LEDs
- Power Supply
- PH2.0 connector for 7~28V regulated power supply or lithium battery
- Monolithic Power MP1584 switching regulator
- Protection circuits such as reverse-polarity, overcurrent, etc…
- Voltage/current monitoring circuits
- Dimensions – 65 x 56.5 mm (Raspberry Pi HAT)

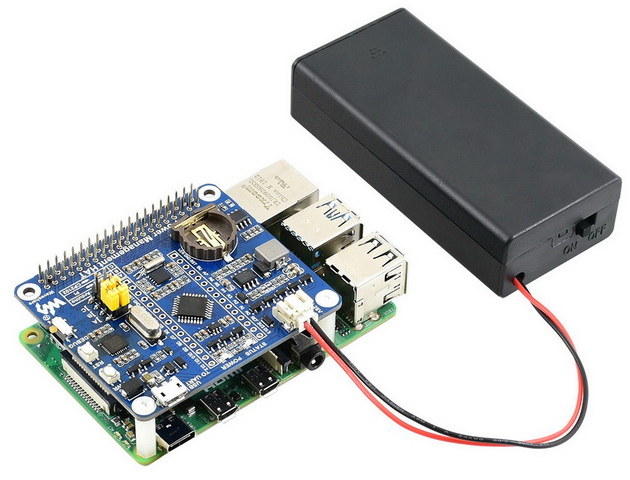
The Power Management HAT ships with a 18650 battery case (for two batteries), a USB-A to USB micro B cable, a 40-pin female header, and screws to attach it to the Raspberry Pi board. Once you’ve added your own 18650 batteries and connected the HAT to your Raspberry Pi 3/4, you’ll need to install and run a script (Power-Management-HAT-Setup.sh) in the board, and flash one of the code samples (ButtonBoot, MeasureCurrent, MeasureVoltage_ShutdownInLowVoltage, etc..) from the Arduino IDE as explained in the Wiki.
Waveshare Power Management HAT can be purchased for $19.99 and up on Amazon, Seeed Studio or directly from Waveshare.

Jean-Luc started CNX Software in 2010 as a part-time endeavor, before quitting his job as a software engineering manager, and starting to write daily news, and reviews full time later in 2011.
Support CNX Software! Donate via cryptocurrencies, become a Patron on Patreon, or purchase goods on Amazon or Aliexpress


