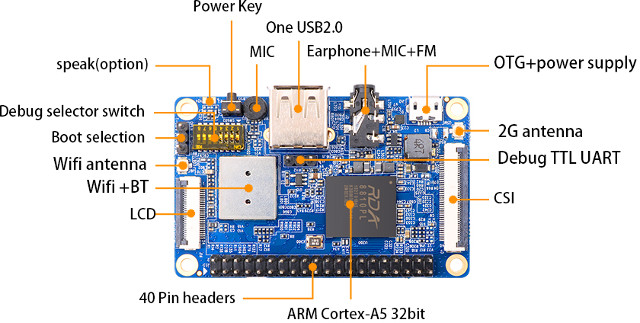
Orange Pi 2G IoT is a $10 development board with a 2G cellular modem that was launched last March. The board is based on RDA Micro RDA8810PL processor designed for cheap Android phones, but Linux support was also promoted, and an RDA8810 Android SDK was released in April. It was the first time RDA8810 was used in a development board, and unsurprisingly it was, and still is, a challenge to use such board, as software support is on-going… So people who purchased the board has troubles with controlling GPIOs, or booting Linux from the SoC’s built-in NAND flash, instead reverting to booting from a micro SD card. Luckily, Orange Pi forum’s user surfero75 worked on the latter, found a solution, and posted instructions in Spanish.
He wrote those instructions leveraging the work done by Aib user, and I summarized the main steps below explaining how install and boot from NAND flash (Warning: This could potentially brick your board if something goes wrong):
- Get opi2g-utils tools
- Set the boot selection to NAND flash/ Android boot, and put the board in USB-OTG mode with the switches set as follows: 1-4 ON and 5-8 OFF
- Use opi2g_bin_read.py serves to extract the files from Android NAND package in case you want to restore Android?
- Build u-boot with OrangePiIoT2GBuildSystem utility
- Flash the resulting u-boot.rda file to the board:
1./opi2g_nand_write.py -v bootloader: u-boot.rda - If you boot Linux from a micro SD card, it should now find the NAND flash:
12dmesg | grep NAND0.661437] NAND device: Manufacturer ID: 0x98, Chip ID: 0xAC (Toshiba TC58NYG2S0H 4G 1.8V 8-bit), 512MiB , page size: 4,096, OOB size: 256 - Edit boot.cmd file to force boot from NAND flash:
1setenv bootargs "mtdparts=rda_nand:64M@0(bootloader),-(nandrootfs) root=${rootdev} rootwait rootfstype=${rootfstype} console=ttyS0,921600 panic=10 consoleblank=0 loglevel=${verbosity} ${extraargs} ${extraboardargs}" - Compile the boot.cmd to create boot.scr binary to copy to the root of the micro SD card:
1mkimage -C none -A arm -T script -d boot.cmd boot.scr - Prepare, format, and mount the NAND flash
12345ubiformat /dev/mtd0ubiattach /dev/ubi_ctrl -m 0ubimkvol /dev/ubi0 -N bootloader -s 64MiBubimkvol /dev/ubi0 -N rootfs -mmount -t ubifs ubi0:rootfs /mnt/flash - There should be an extra step to copy the bootloader and rootfs content, but this step is not detailed in the blog post. I may have missed something…
Anyway, you can also ask question on Orange Pi Forum or on his blog post, if you have question. The video below shows Orange Pi 2G IoT booting DietPi from the NAND flash.
[Update: Surfero75 has now provided an image to try it out without having to go through all instructions above]

Jean-Luc started CNX Software in 2010 as a part-time endeavor, before quitting his job as a software engineering manager, and starting to write daily news, and reviews full time later in 2011.
Support CNX Software! Donate via cryptocurrencies, become a Patron on Patreon, or purchase goods on Amazon or Aliexpress


