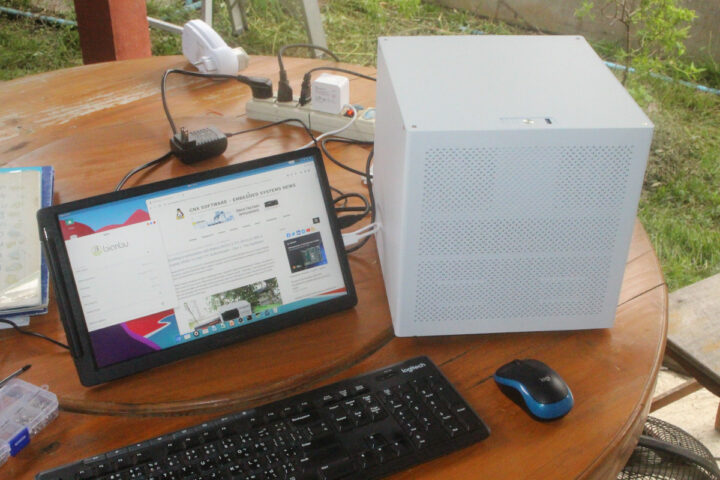
In this review or preview of the the Shenzhen Milk-V Jupiter RISC-V mini-ITX motherboard, I’ll assemble the motherboard into a mini-ITX chassis, before installing the Ubuntu 23.10 Mantic-based Bianbu OS optimized for RISC-V platforms, and testing the device to see how much progress has been done on RISC-V since I tested the StarFive VisionFive 2 SBC with Debian 12 about 18 months ago.
In the first part of the review, we checked out the Radxa ROCK 5 ITX (Rockchip RK3588 Arm) and Jupiter (SpacemIT K1 RISC-V) mini-ITX motherboards with specifications and unboxing, and the Auriga 6-Bay NAS mini-ITX chassis used in this review. I planned to start with the Radxa ROCK 5 ITX, but due to logistics and technical issues, I went ahead testing the RISC-V motherboard first.
Installing Bianbu OS to the Jupiter RISC-V motherboard
The board does not come with storage, so no operating system is installed. So I will install an M.2 SSD on the board and follow the instructions on the wiki to flash the Ubuntu-based Bianbu OS. SpacemIT provides the Titanflasher utility for both Windows and Linux operating systems, and at the time of the review the user interface was only available in Chinese, but an English version will eventually be released.
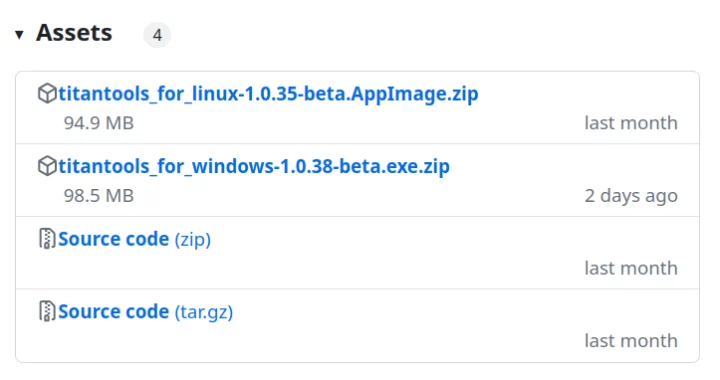 Since my laptop runs Ubuntu 22.04, I downloaded titantools_for_linux-1.0.35-beta-AppImage.zip and when we run the utility after unzipped it, the interface is indeed in Chinese.
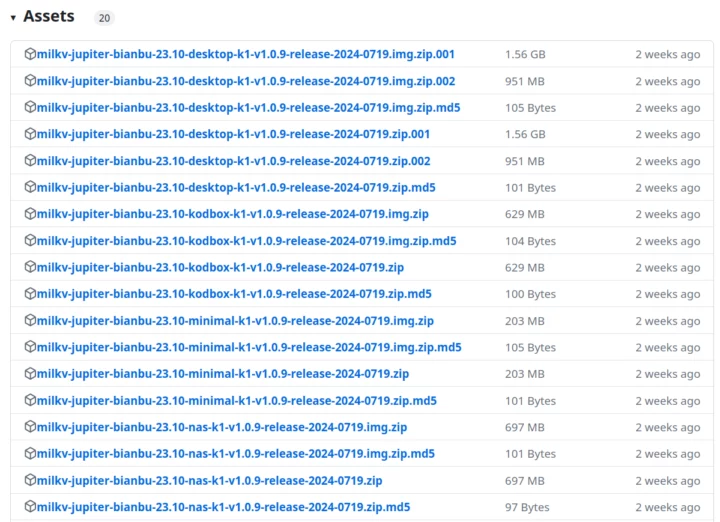
We now need to download BianBu OS as noted in the wiki with the release files available on GitHub.
It was very confusing at first because there are multiple files out of four releases (Desktop, Kodbox, Minimal, or NAS). I eventually noted the sentence “go to the resource download page to download the system image package with the suffix .zip (not .img.zip)”
The documentation is relatively poor, and it ends up we have to download two files: milkv-jupiter-bianbu-23.10-desktop-k1-v1.0.9-release-2024-0719.zip.001 and milkv-jupiter-bianbu-23.10-desktop-k1-v1.0.9-release-2024-0719.zip.002 if we want to install the desktop version of the OS.
I also have to install 7zip-full and uncompress the files:
|
1 2 |
sudo apt install p7zip-full 7za x milkv-jupiter-bianbu-23.10-desktop-k1-v1.0.9-release-2024-0719.zip.001 |
After this command, we are left with the “milkv-jupiter-bianbu-23.10-desktop-k1-v1.0.9-release-2024-0719.zip” file that is 2.5GB in size.
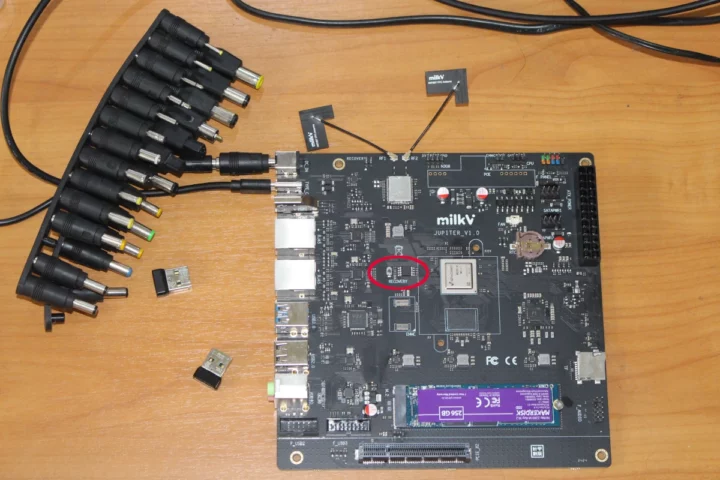
We have all the files we need to flash Bianbu OS, so we can prepare the Jupiter mini-iTX board, by inserting the two WiFi antennas provided with the kit, and our own 256GB M.2 NVMe SSD. We’ll also need to find a 12V power and a 5.5/2.5mm jack adapter that I got from a laptop DC jack kit I purchased years ago.
Now we need to press the recovery button as shown in the red circle above, connect the power, and release the recovery button to enter bootloader/flashing mode. The kernel log should show a DFU device.
|
1 2 3 4 5 6 |
[106399.664718] usb 1-4: new high-speed USB device number 12 using xhci_hcd [106399.827853] usb 1-4: New USB device found, idVendor=361c, idProduct=1001, bcdDevice= 0.01 [106399.827858] usb 1-4: New USB device strings: Mfr=1, Product=2, SerialNumber=10 [106399.827860] usb 1-4: Product: USB download gadget [106399.827861] usb 1-4: Manufacturer: DFU [106399.827862] usb 1-4: SerialNumber: dfu-device |
We can now go back to the Titanflasher utility, click on the second item in the left menu, and click on the “scan device” button. The “1-4 VIPLPID=0x361c:0x1001” board should show up.
After I clicked on the second button to select the zip file, I got the following message:
Not being able to read Chinese, I first thought it was complaining about the file being over 1.5GB, but Google Translate revealed it was actually complaining that my laptop’s drive was almost full. I clicked on the left button (meaning Cancel), deleted a few larger files on my computer, and could load the file properly.
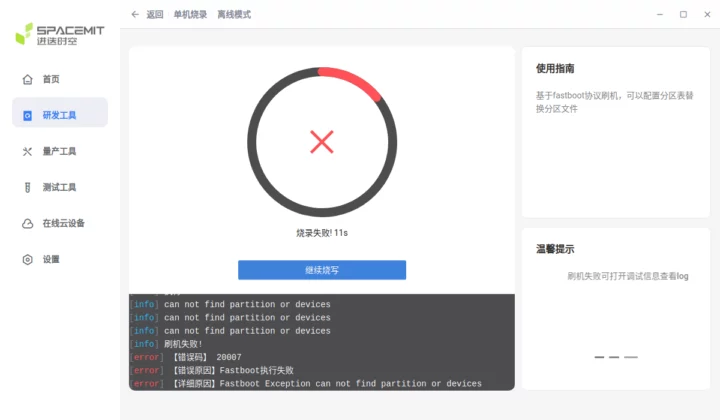
So I clicked on the wide blue button to start the flashing process and it started well…
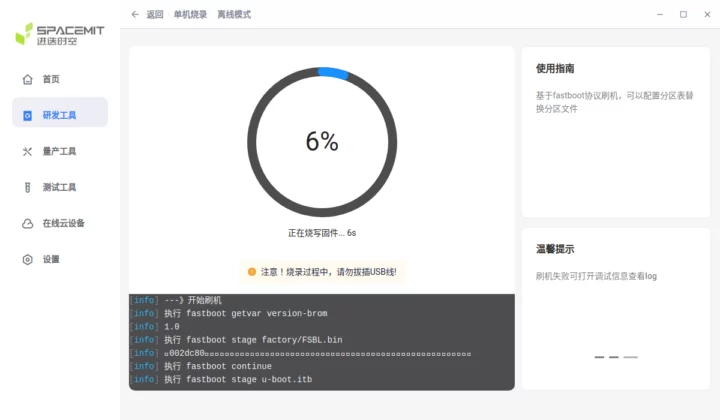 … but quickly failed after a few seconds:
After several trials and errors, I moved the slider icon and selected all partitions.
I attempted flashing again, and it was successful this time around… But I’m not sure if it was what I just did above, or just pure luck…
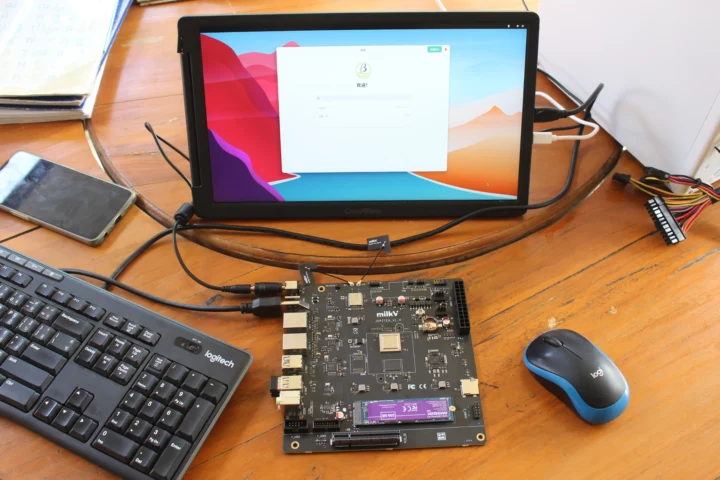
We can now connect the RISC-V mini-ITX motherboard to a display, wireless mouse and wireless keyboard to get started, and Bianbu 1.0.9 boots fine.
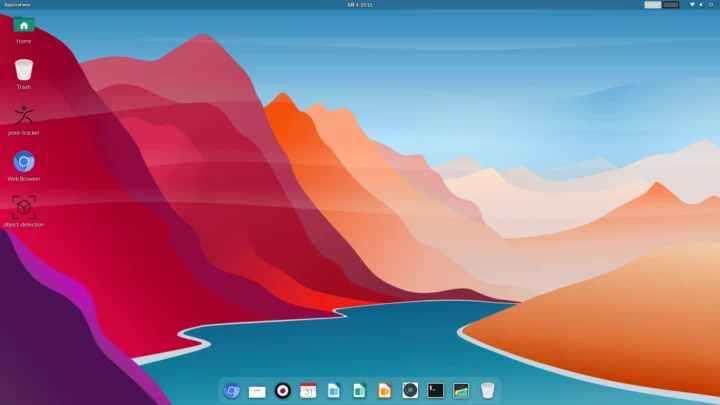
Here’s what Bianbu’s desktop environment looks like:
I had no problem connecting to 5GHz WiFi 6 and browsing the web.
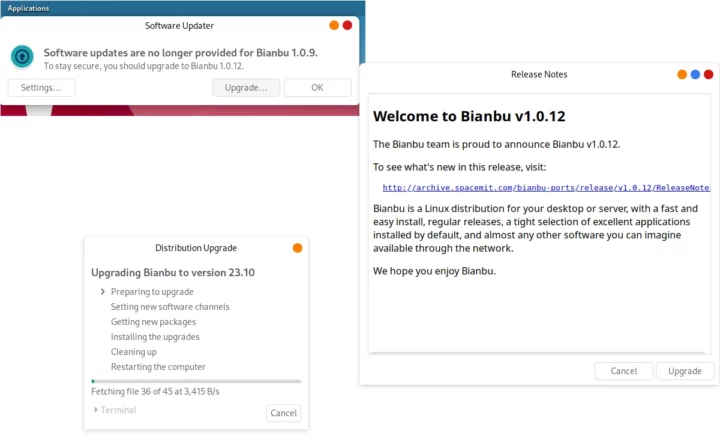
I was soon offered an update to Bianbu 1.0.12 that must have been released after I downloaded Bianbu 1.0.9 and installed it.
It started well, but after a while, I saw the Distribution Upgrade window revert to Bianbu 1.0.9. I gave it another try, but I got the same results. The company eventually told me:
We are still verifying the automatic upgrade function of the system. We recommend that you do not upgrade automatically for now.
I’m not going through the flashing process again and will review the system with Bianbu 1.0.9.
RISC-V computer assembly with Jupiter mini-ITX board and Auriga chassis
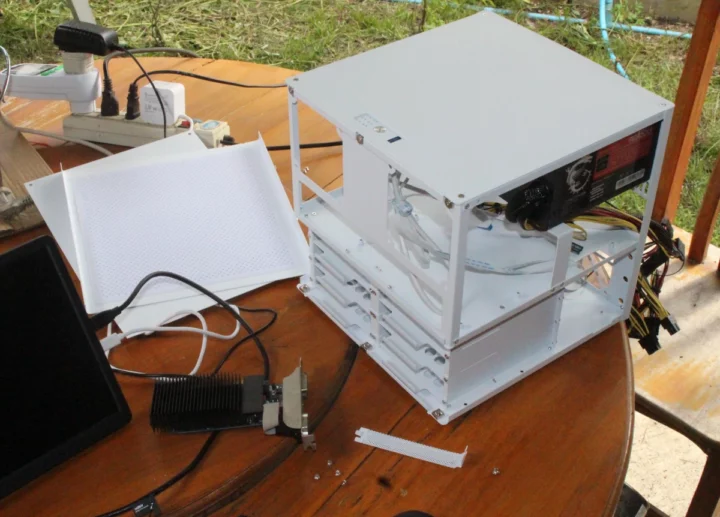
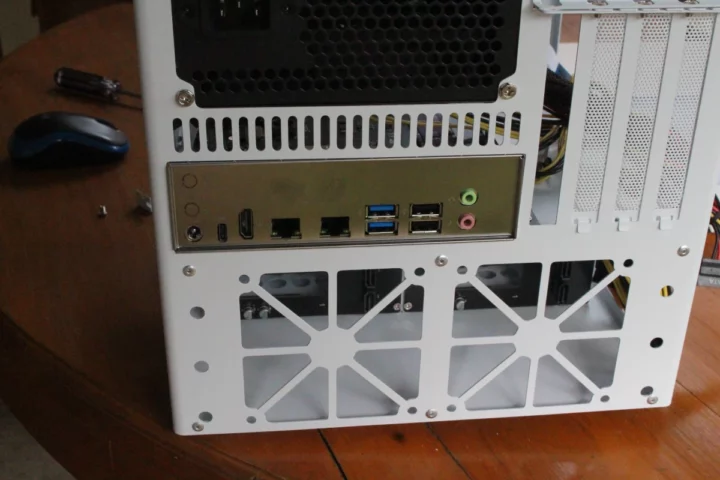
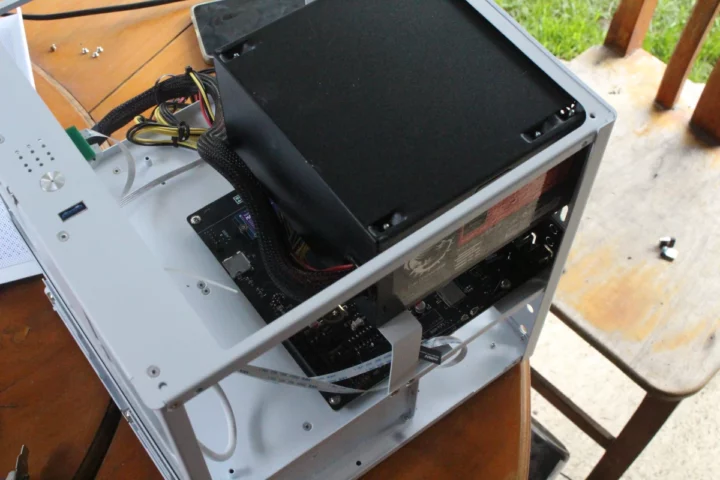
Now that we’ve made sure the RISC-V mini-ITX motherboard can run Linux, it’s time for assembly. I thought I would have to skip testing the PCIe slot, but I remembered I have an old PC with an equally old NVIDIA GeForce GT210 graphics card. The first step is to remove all four panels from the enclosure for easy access to the cables and mounting threads.
We can install the mini-ITX board with its rear panel plate. Note the two precut holes on the left side designed for SMA antennas. More on that later. I also removed the cover for the PCIe slot.
We can secure the motherboard for four of the screws provided with the mini-ITX chassis.
You can see the signal from the WiFi antennas on the side of the motherboard will be blocked, or at least the signal strength diminished, once we install the metal plate. So that’s obviously not the right to install WiFi in this enclosure, and SMA antennas should be attached to the rear panel with IPEX cables connected to the motherboard.
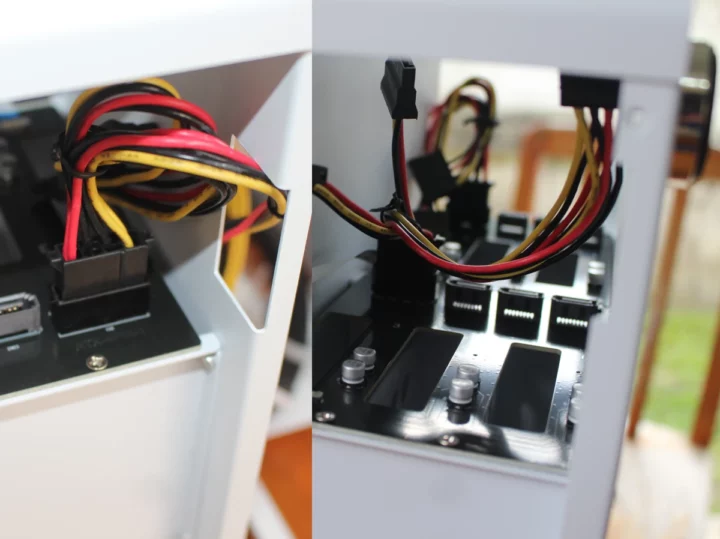
The next steps will involve connecting several cables. The Jupiter mini-ITX does not directly support SATA drives, but it has SATA power connectors and could support a PCIe card with SATA connectors. So I won’t use SATA drives at all here, but I still connected the two SATA port cables to the two boards – with 3 SATA ports each – inside the chassis.
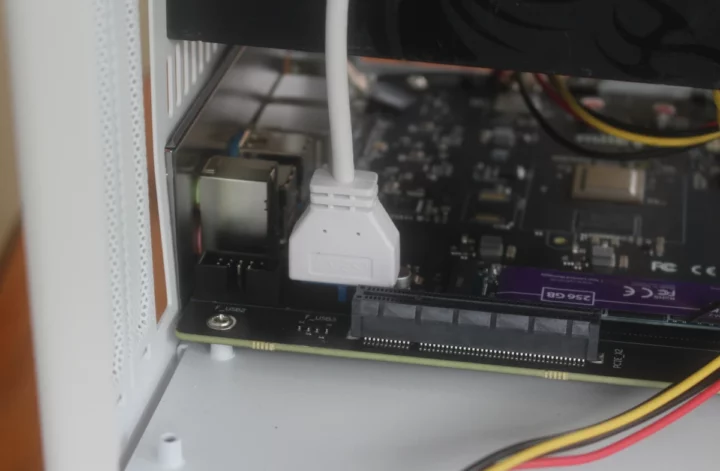
I then connected the internal USB 3.0 cable (white with a blue connector) to the motherboard.
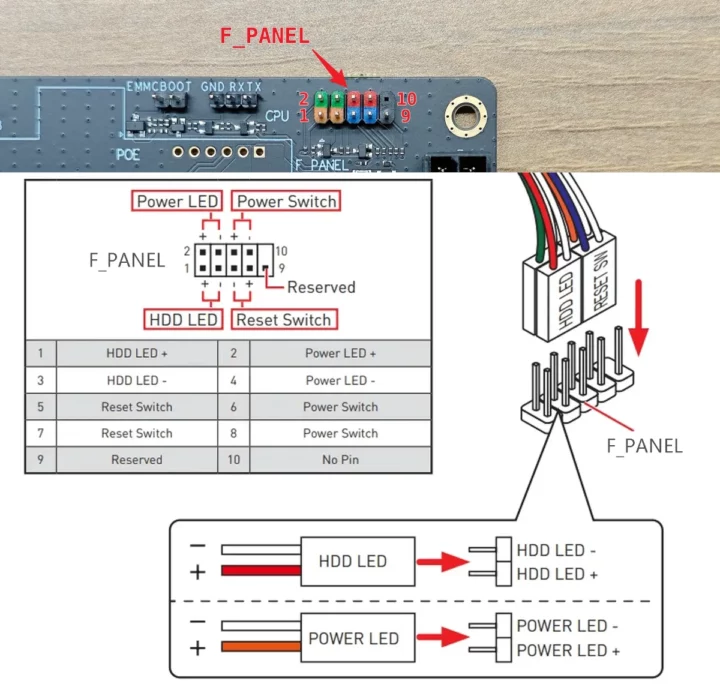
Next up was the 24-pin ATX cable, the power switch, and the power LED -/+ signals.
I followed the instructions and pinout diagram from the wiki as shown below.
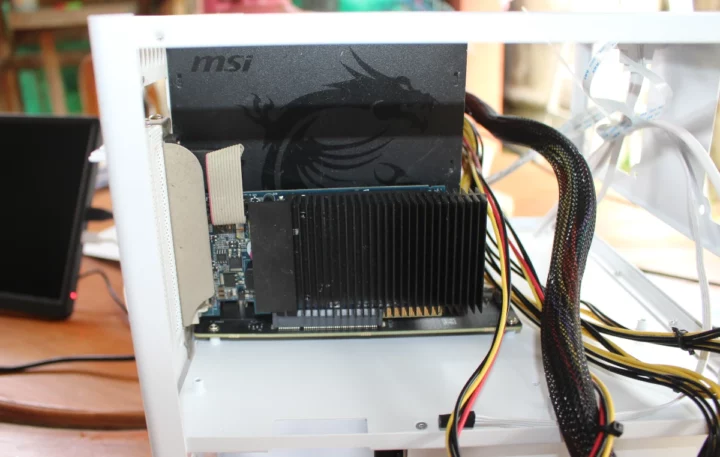
 The two remaining cables are for the GPU. My graphics card does not need this, so I could just insert it into the PCIe slot as shown below. (Note the photo below was taken before connecting the other cables, but I quickly realized I should have connected the USB 3.0 cable before connecting the graphics card…)
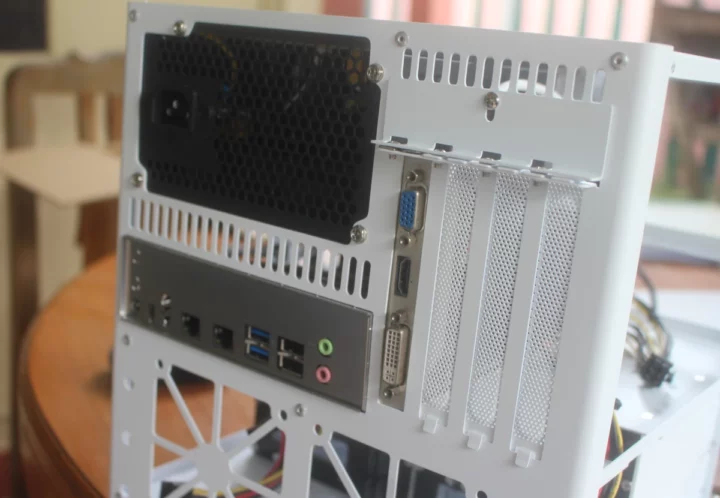
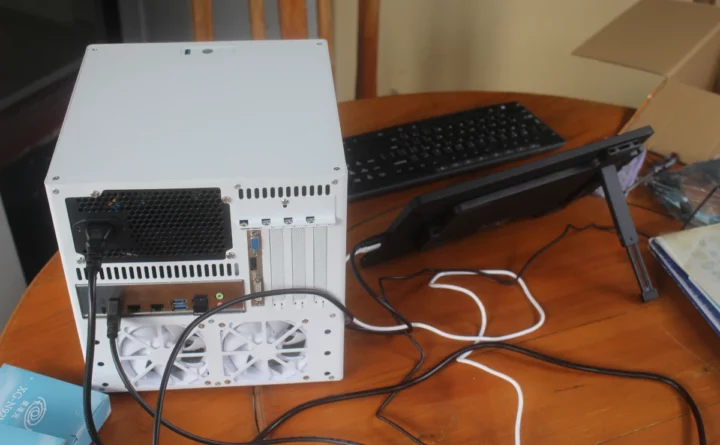
This is what the rear panel looks like after securing the PCIe card.
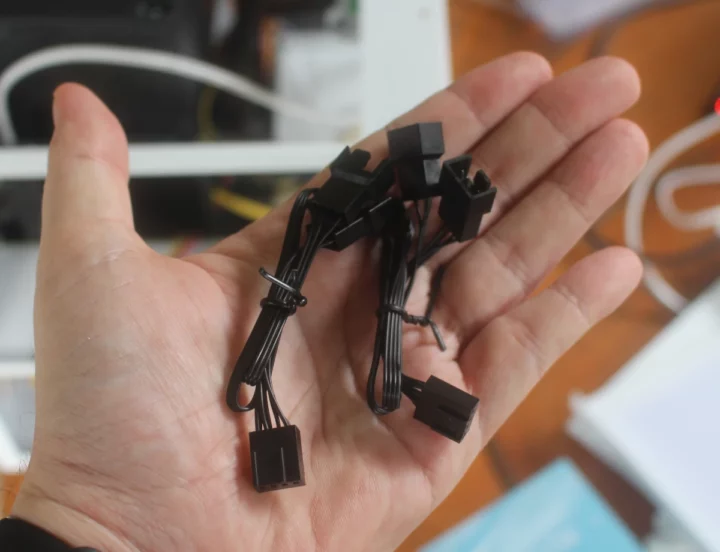
We have some more cable designed for the four fans… The Jupiter does not have any fan connectors, but I still installed the fans for future reviews.
That also means if you were to create a NAS with hard drives using the Jupiter with this case, the cooling fans would not work, or you’d have to hack something for cooling such as connecting them to a 12V source.
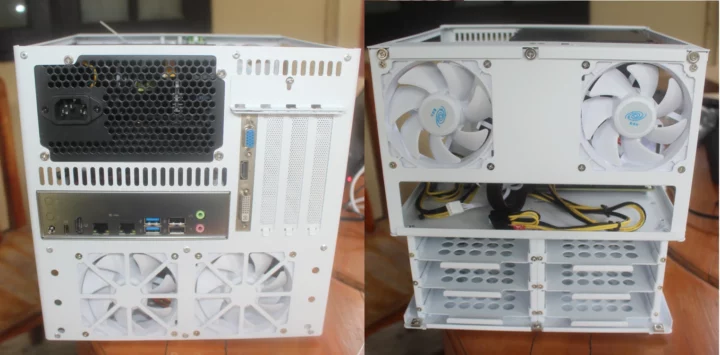
The assembly is not complete. I gave it a try to confirm the system could be powered normally, before putting the four panels into place and completing the assembly.
That’s it. Our RISC-V computer is now up and running. Finally!
Bianbu system information
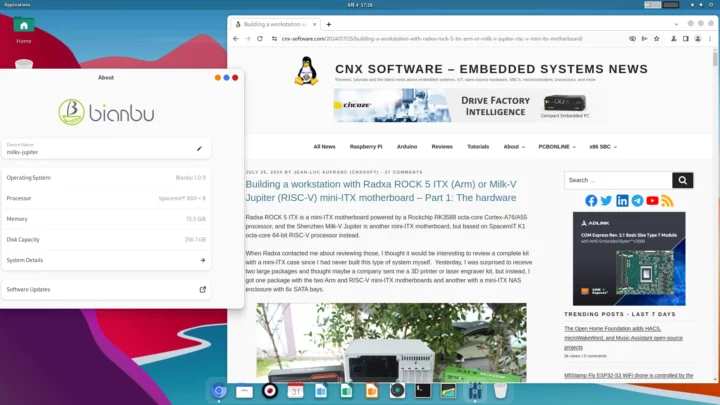
Let’s have a quick look at the system information. That’s what we get on the desktop.
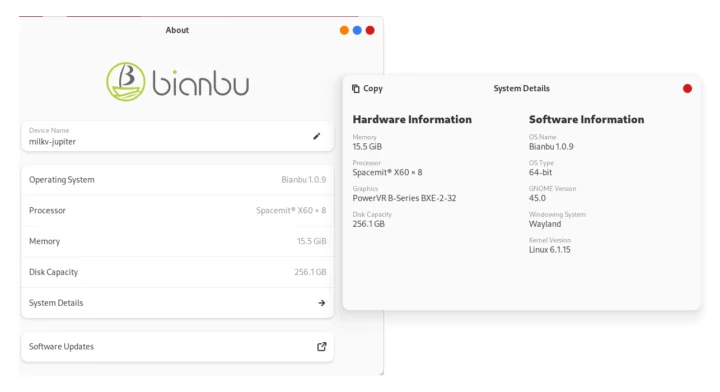 The system features an octa-core SpacemIT X60 SoC with PowerVR B-Series BXE-2-32 GPU, 15.5 GB RAM (available to Linux), 256.1 GB storage, and Bianby 1.0.9 64-bit with Wayland windowing system and Linux 6.1.15.
But we can find out more in the terminal:
|
1 2 3 4 5 6 7 8 9 10 11 12 13 14 15 16 17 18 19 20 |
jaufranc@milkv-jupiter:~$ cat /etc/lsb-release DISTRIB_ID=Bianbu DISTRIB_RELEASE=1.0.9 DISTRIB_CODENAME=mantic DISTRIB_DESCRIPTION="Bianbu 1.0.9" jaufranc@milkv-jupiter:~$ uname -a Linux milkv-jupiter 6.1.15 #1.0.12 SMP PREEMPT Fri Aug 2 08:53:21 UTC 2024 riscv64 riscv64 riscv64 GNU/Linux jaufranc@milkv-jupiter:~$ df -h Filesystem Size Used Avail Use% Mounted on tmpfs 1.6G 3.3M 1.6G 1% /run /dev/nvme0n1p6 235G 6.8G 216G 4% / tmpfs 7.8G 0 7.8G 0% /dev/shm tmpfs 5.0M 12K 5.0M 1% /run/lock /dev/nvme0n1p5 224M 27M 180M 13% /boot tmpfs 1.6G 88K 1.6G 1% /run/user/120 tmpfs 1.6G 76K 1.6G 1% /run/user/1000 jaufranc@milkv-jupiter:~$ free -h total used free shared buff/cache available Mem: 15Gi 928Mi 14Gi 9.1Mi 465Mi 14Gi Swap: 0B 0B 0B |
|
1 2 3 4 5 6 7 8 9 10 11 12 13 14 15 16 17 18 19 20 21 22 23 24 25 26 27 28 29 30 31 32 33 34 35 36 37 38 39 40 41 42 43 44 45 46 47 48 49 50 51 52 53 |
jaufranc@milkv-jupiter:~$ sudo inxi -Fc0 System: Host: milkv-jupiter Kernel: 6.1.15 arch: riscv64 bits: 64 Console: pty pts/1 Distro: Bianbu 1.0.9 (Mantic Minotaur) Machine: Type: RISCV System: Milk-V(M1) Jupiter details: N/A serial: 0123456789ABCDEF CPU: Info: quad core model: Spacemit X60 variant: riscv bits: 64 type: MT MCP cache: L2: 1024 KiB Speed (MHz): avg: 1800 min/max: 614/1800 cores: 1: 1800 2: 1800 3: 1800 4: 1800 5: 1800 6: 1800 7: 1800 8: 1800 Graphics: Device-1: NVIDIA GT218 [GeForce 210] driver: N/A Device-2: saturn-le driver: spacemit_drm_drv v: N/A Device-3: hdmi driver: spacemit_hdmi_drv v: N/A Device-4: saturn-hdmi driver: spacemit_drm_drv v: N/A Display: server: X.org v: 1.21.1.7 with: Xwayland v: 23.2.0 driver: N/A tty: 80x24 resolution: 1920x1080 API: OpenGL Message: GL data unavailable in console for root. Audio: Device-1: NVIDIA High Definition Audio driver: N/A Device-2: hdmi driver: spacemit_hdmi_drv Device-3: spacemit-snd-sspa driver: spacemit_snd_sspa Device-4: spacemit-snd-dma-hdmi driver: spacemit_snd_dma Device-5: spacemit-i2s0 driver: spacemit_snd_i2s Device-6: simple-audio-card driver: spacemit_audio_card Device-7: simple-audio-card driver: spacemit_audio_card Device-8: spacemit-snd-dma0 driver: spacemit_snd_dma Device-9: spacemit-snd-dma1 driver: spacemit_snd_dma API: ALSA v: k6.1.15 status: kernel-api Network: Device-1: k1x-emac driver: k1x_emac IF: end0 state: down mac: fe:fe:fe:0b:30:60 Device-2: k1x-emac driver: k1x_emac IF: end1 state: up speed: 1000 Mbps duplex: full mac: fe:fe:fe:0b:30:61 IF-ID-1: sit0 state: down mac: 00:00:00:00 IF-ID-2: wlan0 state: down mac: cc:64:1a:32:8d:04 Drives: Local Storage: total: 238.47 GiB used: 6.82 GiB (2.9%) ID-1: /dev/nvme0n1 model: PCIe SSD size: 238.47 GiB Partition: ID-1: / size: 234.36 GiB used: 6.79 GiB (2.9%) fs: ext4 dev: /dev/nvme0n1p6 ID-2: /boot size: 223.7 MiB used: 26.6 MiB (11.9%) fs: ext4 dev: /dev/nvme0n1p5 Swap: Alert: No swap data was found. Sensors: Src: lm-sensors+/sys Message: No sensor data found using /sys/class/hwmon or lm-sensors. Info: Processes: 251 Uptime: 37m Memory: total: 16 GiB available: 15.51 GiB used: 964.8 MiB (6.1%) Init: systemd target: graphical (5) Shell: Sudo inxi: 3.3.29 |
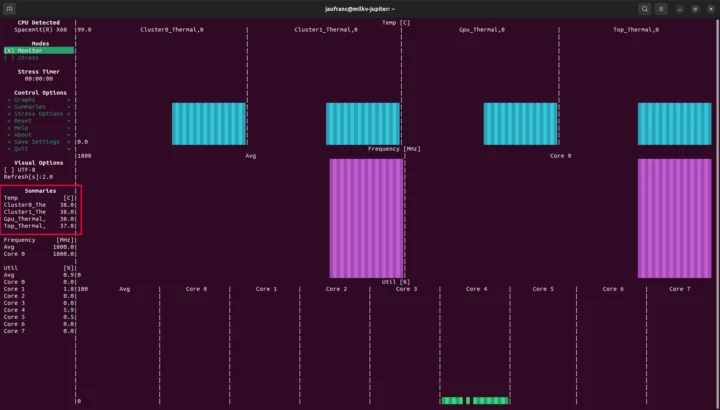
My system is actually using the M1 instead of the K1 processor. Both are the same, but the M1 is supposed to run at a higher 1.8 GHz frequency. A lot of peripherals are detected, so it’s good news, including my NVIDIA Geforce 210 graphics card. But sadly, after testing its HDMI output, I discovered it’s not working, and you’ll notice no drivers have been selected. The company also told me that “The graphics card part needs some patches, we still need some time to test”. CPU temperature is not reported either. Shenzhen Milk-V told me to use s-tui, but unsurprisingly, it does not help and 0C is shown there.
[Update: I should have enlarged the window, as the temperature indeed shows on the left panel
]
Jupiter Mini-ITX motherboard features testing in Bianbu/Ubuntu
When I tested the StarFive VisionFive 2 last year, I had to test it as a headless system, but the OS would crash when I connected a display… The good news, as we can see from the photo above is that Jupiter’s HDMI output is working fine. I’ve tested other features to see how much progress has been made in the last 18 months when it comes to RISC-V hardware running Linux.
I’ll share the details of the tests below, but here are the results first. I highlighted things that look pretty bad in red and the items that can be improved in orange :
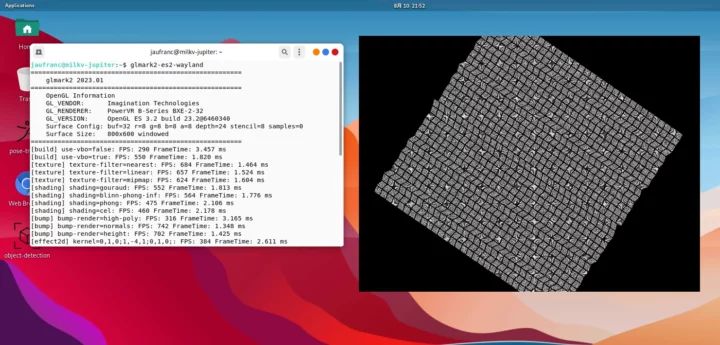
- GPU – OK. Tested with glmark2-es2-wayland – Score: 453 points
- Video Playback
- YouTube Full HD @ 60 FPS in Chromium (VP9) – Unwatchable. Frequently stuck in loading mode despite buffer with 30 seconds of data.
- YouTube 480p (854×480) @ 60 FPS Chromium (VP9) – OK. At higher resolutions, the video will pause to load from time to time, again unrelated to buffer health.
- Big Buck Bunny 1080p60 (H.264) with ffplay (FFMpeg) – White image for 30 seconds with audio, then the video play in slow motion, and audio and video are out of sync
- Storage – SSD – OK. Speed: 708MB/s reads; 731MB/s writes; Note: SSD rating: R: 2,050 MB/s; W: 1,000 MB/s, but that’s fine since it’s over a PCIe 2.0 x2 interface;
- HDMI
- Video – OK. Test at 1920×1080 resolution
- Audio – OK. Tested with YouTube video and ffplay
- Audio jack
- Output – OK. Tested with YouTube video and Bluetooth.
- Input – Not Tested, but it shows up as “Analog Input – snd-es8316” in the Settings.
- Networking
- Ethernet #1 – OK – iperf3 results: DL: 942 Mbps; UL: 942 Mbps; Full duplex: 727 Mbps/694 Mbps
- Ethernet #2 – OK – iperf3 results: DL: 942 Mbps; UL: 941 Mbps; Full duplex: 671 Mbps/729 Mbps
- WiFi 6 – OK. iperf3 results: DL: 499 Mbps; UL: 462 Mbps.
- Bluetooth – OK. Tested with Bluetooth audio through speakers connected to the audio jack.
- USB
- USB 2.0 ports: OK – Tested with RF dongles for keyboard and mouse
- USB 3.0 ports (Top USB 3.0 port connected via internal USB 3.0 cable, and 2x USB 3.0 ports on rear panel)
- ORICO NVMe enclosure – Fail (Green LED on, but the drive does not show up in kernel log or lsblk command)
- SEAGATE USB 3.0 hard drive – Fail (the drive does not show up in kernel log or lsblk command)
- RF dongle for keyboard or mouse – OK
- USB 2.0 OTG port – OK tested when flashing firmware at the beginning of the review.
- PCIe slot – NVIDIA GeForce 210 graphics card detected for both audio and video
123jaufranc@milkv-jupiter:~$ lspci | grep -i nvidia0002:01:00.0 VGA compatible controller: NVIDIA Corporation GT218 [GeForce 210] (rev a2)0002:01:00.1 Audio device: NVIDIA Corporation High Definition Audio Controller (rev a1)- But no compatible driver loaded/found. (patch needed)
- Misc
- Power button – Yes. The board will first start automatically when applying power, but pressing the power button once will bring the Power Off popup, and if the system is turned off, we can power it on again
- LED on chassis – Not working (always off). Not colored, because I’m not sure where my case has an issue or the board…
I did not expect 3D accelerated graphics to work, but that’s indeed the case. A lot of improvements have been made, but it still can’t be used as a daily driver, with video playback issues, the PCIe graphics card not working, and the two USB storage devices I tested were not detected at all. Networking is fine, although gigabit Ethernet full-duplex connectivity could be improved. I was surprised by the WiFi results considering the antennas are trapped in a metal case. But the router is just about 1 meter away and the wifi signal can probably “leak” through the openings for cooling on the rear panel too…
Here are the results from the tests for reference.
GPU testing with glmark2-es2-wayland
|
1 2 3 4 5 6 7 8 9 10 11 12 13 14 15 16 17 18 19 20 21 22 23 24 25 26 27 28 29 30 31 32 33 34 35 36 37 38 39 40 41 42 43 44 45 46 47 48 49 |
jaufranc@milkv-jupiter:~$ glmark2-es2-wayland ======================================================= glmark2 2023.01 ======================================================= OpenGL Information GL_VENDOR: Imagination Technologies GL_RENDERER: PowerVR B-Series BXE-2-32 GL_VERSION: OpenGL ES 3.2 build 23.2@6460340 Surface Config: buf=32 r=8 g=8 b=8 a=8 depth=24 stencil=8 samples=0 Surface Size: 800x600 windowed ======================================================= [build] use-vbo=false: FPS: 290 FrameTime: 3.457 ms [build] use-vbo=true: FPS: 550 FrameTime: 1.820 ms [texture] texture-filter=nearest: FPS: 684 FrameTime: 1.464 ms [texture] texture-filter=linear: FPS: 657 FrameTime: 1.524 ms [texture] texture-filter=mipmap: FPS: 624 FrameTime: 1.604 ms [shading] shading=gouraud: FPS: 552 FrameTime: 1.813 ms [shading] shading=blinn-phong-inf: FPS: 564 FrameTime: 1.776 ms [shading] shading=phong: FPS: 475 FrameTime: 2.106 ms [shading] shading=cel: FPS: 460 FrameTime: 2.178 ms [bump] bump-render=high-poly: FPS: 316 FrameTime: 3.165 ms [bump] bump-render=normals: FPS: 742 FrameTime: 1.348 ms [bump] bump-render=height: FPS: 702 FrameTime: 1.425 ms [effect2d] kernel=0,1,0;1,-4,1;0,1,0;: FPS: 384 FrameTime: 2.611 ms [effect2d] kernel=1,1,1,1,1;1,1,1,1,1;1,1,1,1,1;: FPS: 140 FrameTime: 7.158 ms [pulsar] light=false:quads=5:texture=false: FPS: 840 FrameTime: 1.191 ms [desktop] blur-radius=5:effect=blur:passes=1:separable=true:windows=4: FPS: 143 FrameTime: 7.003 ms [desktop] effect=shadow:windows=4: FPS: 443 FrameTime: 2.259 ms [buffer] columns=200:interleave=false:update-dispersion=0.9:update-fraction=0.5:update-method=map: FPS: 151 FrameTime: 6.625 ms [buffer] columns=200:interleave=false:update-dispersion=0.9:update-fraction=0.5:update-method=subdata: FPS: 150 FrameTime: 6.672 ms [buffer] columns=200:interleave=true:update-dispersion=0.9:update-fraction=0.5:update-method=map: FPS: 204 FrameTime: 4.919 ms [ideas] speed=duration: FPS: 348 FrameTime: 2.877 ms [jellyfish] <default>: FPS: 267 FrameTime: 3.754 ms [terrain] <default>: FPS: 19 FrameTime: 53.146 ms [shadow] <default>: FPS: 335 FrameTime: 2.993 ms [refract] <default>: FPS: 41 FrameTime: 24.529 ms [conditionals] fragment-steps=0:vertex-steps=0: FPS: 775 FrameTime: 1.290 ms [conditionals] fragment-steps=5:vertex-steps=0: FPS: 536 FrameTime: 1.867 ms [conditionals] fragment-steps=0:vertex-steps=5: FPS: 789 FrameTime: 1.268 ms [function] fragment-complexity=low:fragment-steps=5: FPS: 604 FrameTime: 1.658 ms [function] fragment-complexity=medium:fragment-steps=5: FPS: 242 FrameTime: 4.143 ms [loop] fragment-loop=false:fragment-steps=5:vertex-steps=5: FPS: 641 FrameTime: 1.562 ms [loop] fragment-steps=5:fragment-uniform=false:vertex-steps=5: FPS: 680 FrameTime: 1.471 ms [loop] fragment-steps=5:fragment-uniform=true:vertex-steps=5: FPS: 654 FrameTime: 1.529 ms ======================================================= glmark2 Score: 453 ======================================================= warning: queue 0x2ae70c7240 destroyed while proxies still attached: wl_display@1 still attached |
Note the iozone3 RISC-V package is supposed to be in the multiverse repo on Ubuntu, but somehow it can’t be installed on Ubuntu, so I built it from source.
iozone3 test results for the SSD:
|
1 2 3 4 5 6 7 8 9 10 11 12 13 14 15 |
jaufranc@milkv-jupiter:~$ sudo iozone -e -I -a -s 100M -r 4k -r 16k -r 512k -r 1024k -r 16384k -i 0 -i 1 -i 2 Iozone: Performance Test of File I/O Version $Revision: 3.506 $ Compiled for 64 bit mode. Build: linux-arm random random bkwd record stride kB reclen write rewrite read reread read write read rewrite read fwrite frewrite fread freread 102400 4 52525 125278 19555 19580 48093 130922 102400 16 167320 304285 67648 67552 134340 302666 102400 512 632286 663143 477102 476316 477093 638264 102400 1024 655691 643179 568294 568699 565905 673773 102400 16384 731995 727859 708685 708860 707722 725903 iozone test complete. |
Networking results.
Here’s the iperf3 full duplex on the first Ethernet port for reference:
|
1 2 3 4 5 6 7 8 9 10 11 12 13 14 15 16 17 18 19 20 21 22 23 24 25 |
jaufranc@milkv-jupiter:~$ iperf3 -t 60 -c 192.168.31.12 -i 10 --bidir Connecting to host 192.168.31.12, port 5201 [ 5] local 192.168.31.74 port 55990 connected to 192.168.31.12 port 5201 [ 7] local 192.168.31.74 port 55992 connected to 192.168.31.12 port 5201 [ ID][Role] Interval Transfer Bitrate Retr Cwnd [ 5][TX-C] 0.00-10.00 sec 812 MBytes 681 Mbits/sec 0 1.44 MBytes [ 7][RX-C] 0.00-10.00 sec 895 MBytes 751 Mbits/sec [ 5][TX-C] 10.00-20.00 sec 806 MBytes 676 Mbits/sec 0 1.54 MBytes [ 7][RX-C] 10.00-20.00 sec 863 MBytes 724 Mbits/sec [ 5][TX-C] 20.00-30.00 sec 855 MBytes 717 Mbits/sec 0 2.17 MBytes [ 7][RX-C] 20.00-30.00 sec 829 MBytes 695 Mbits/sec [ 5][TX-C] 30.00-40.00 sec 884 MBytes 741 Mbits/sec 0 2.17 MBytes [ 7][RX-C] 30.00-40.00 sec 794 MBytes 666 Mbits/sec [ 5][TX-C] 40.00-50.00 sec 914 MBytes 766 Mbits/sec 0 2.17 MBytes [ 7][RX-C] 40.00-50.00 sec 785 MBytes 659 Mbits/sec [ 5][TX-C] 50.00-60.00 sec 929 MBytes 779 Mbits/sec 0 2.17 MBytes [ 7][RX-C] 50.00-60.00 sec 802 MBytes 673 Mbits/sec - - - - - - - - - - - - - - - - - - - - - - - - - [ ID][Role] Interval Transfer Bitrate Retr [ 5][TX-C] 0.00-60.00 sec 5.08 GBytes 727 Mbits/sec 0 sender [ 5][TX-C] 0.00-60.04 sec 5.08 GBytes 726 Mbits/sec receiver [ 7][RX-C] 0.00-60.00 sec 4.86 GBytes 695 Mbits/sec 148 sender [ 7][RX-C] 0.00-60.04 sec 4.85 GBytes 694 Mbits/sec receiver iperf Done. |
WiFi 6 tested with iperf3
- Download:
|
1 2 3 4 5 6 7 8 9 10 11 12 13 14 15 16 17 |
jaufranc@milkv-jupiter:~$ iperf3 -t 60 -c 192.168.31.12 -i 10 -R Connecting to host 192.168.31.12, port 5201 Reverse mode, remote host 192.168.31.12 is sending [ 5] local 192.168.31.162 port 41292 connected to 192.168.31.12 port 5201 [ ID] Interval Transfer Bitrate [ 5] 0.00-10.00 sec 583 MBytes 489 Mbits/sec [ 5] 10.00-20.00 sec 601 MBytes 504 Mbits/sec [ 5] 20.00-30.00 sec 599 MBytes 502 Mbits/sec [ 5] 30.00-40.00 sec 595 MBytes 499 Mbits/sec [ 5] 40.00-50.00 sec 599 MBytes 503 Mbits/sec [ 5] 50.00-60.00 sec 596 MBytes 500 Mbits/sec - - - - - - - - - - - - - - - - - - - - - - - - - [ ID] Interval Transfer Bitrate Retr [ 5] 0.00-60.09 sec 3.49 GBytes 499 Mbits/sec 24 sender [ 5] 0.00-60.00 sec 3.49 GBytes 500 Mbits/sec receiver iperf Done. |
- Upload:
|
1 2 3 4 5 6 7 8 9 10 11 12 13 14 15 16 |
jaufranc@milkv-jupiter:~$ iperf3 -t 60 -c 192.168.31.12 -i 10 Connecting to host 192.168.31.12, port 5201 [ 5] local 192.168.31.162 port 43912 connected to 192.168.31.12 port 5201 [ ID] Interval Transfer Bitrate Retr Cwnd [ 5] 0.00-10.00 sec 466 MBytes 391 Mbits/sec 87 844 KBytes [ 5] 10.00-20.00 sec 549 MBytes 460 Mbits/sec 0 1.59 MBytes [ 5] 20.00-30.00 sec 590 MBytes 495 Mbits/sec 0 4.16 MBytes [ 5] 30.00-40.00 sec 585 MBytes 491 Mbits/sec 0 4.16 MBytes [ 5] 40.00-50.00 sec 556 MBytes 467 Mbits/sec 0 4.16 MBytes [ 5] 50.00-60.00 sec 561 MBytes 471 Mbits/sec 0 4.16 MBytes - - - - - - - - - - - - - - - - - - - - - - - - - [ ID] Interval Transfer Bitrate Retr [ 5] 0.00-60.00 sec 3.23 GBytes 462 Mbits/sec 87 sender [ 5] 0.00-60.09 sec 3.23 GBytes 461 Mbits/sec receiver iperf Done. |
SpacemIT K1/M1 benchmarks
I’m not going to run many extra benchmarks considering the software status of the board, but let’s go with Thomas Kaiser’s sbc-bench.sh script:
|
1 2 3 4 5 6 7 8 9 10 11 12 13 14 15 16 17 18 19 20 21 22 23 24 25 26 27 28 29 30 31 32 33 34 35 36 37 38 39 40 41 42 43 44 45 46 47 48 49 50 51 52 53 54 55 56 57 58 59 60 61 62 63 64 65 66 67 68 69 70 71 72 73 74 75 76 77 78 79 80 81 82 83 84 85 86 87 88 89 90 91 92 93 94 95 96 97 98 99 100 101 102 103 104 105 106 107 108 109 110 111 112 113 114 115 116 117 |
jaufranc@milkv-jupiter:~$ sudo ./sbc-bench.sh -r Starting to examine hardware/software for review purposes... sbc-bench v0.9.67 Installing needed tools: ./sbc-bench.sh: line 2857: [: 1.0: integer expression expected apt-get -f -qq -y install curl git sysstat links mmc-utils smartmontools stress-ng..../sbc-bench.sh: line 2898: [: 1.0: integer expression expected , p7zip 16.02... , tinymembench, ramlat, mhz, cpufetch (can't build cpuminer) Done. Checking cpufreq OPP. Done. Executing tinymembench. Done. Executing RAM latency tester. Done. Executing OpenSSL benchmark. Done. Executing 7-zip benchmark. Done. Throttling test: heating up the device, 5 more minutes to wait. Done. Checking cpufreq OPP again. Done (18 minutes elapsed). Results validation: * Measured clockspeed not lower than advertised max CPU clockspeed * Too much background activity (%system): 1% avg, 7% max -> https://tinyurl.com/mr2wy5uv * Too much other background activity: 5% avg, 40% max -> https://tinyurl.com/mr2wy5uv Full results uploaded to https://0x0.st/XWqm.bin # Milk-V(M1) Jupiter Tested with sbc-bench v0.9.67 on Sat, 10 Aug 2024 15:09:16 +0700. Full info: [https://0x0.st/XWqm.bin](http://0x0.st/XWqm.bin) ### General information: spacemit socs M1-8571 rev C, SpacemiT K1, Kernel: riscv64, Userland: riscv64 CPU sysfs topology (clusters, cpufreq members, clockspeeds) cpufreq min max CPU cluster policy speed speed core type 0 0 0 614 1800 rv64imafdcv_sscofpmf_sstc_svpbmt_zicbom_zicboz_zicbop_zihintpause 1 0 0 614 1800 rv64imafdcv_sscofpmf_sstc_svpbmt_zicbom_zicboz_zicbop_zihintpause 2 0 0 614 1800 rv64imafdcv_sscofpmf_sstc_svpbmt_zicbom_zicboz_zicbop_zihintpause 3 0 0 614 1800 rv64imafdcv_sscofpmf_sstc_svpbmt_zicbom_zicboz_zicbop_zihintpause 4 0 0 614 1800 rv64imafdcv_sscofpmf_sstc_svpbmt_zicbom_zicboz_zicbop_zihintpause 5 0 0 614 1800 rv64imafdcv_sscofpmf_sstc_svpbmt_zicbom_zicboz_zicbop_zihintpause 6 0 0 614 1800 rv64imafdcv_sscofpmf_sstc_svpbmt_zicbom_zicboz_zicbop_zihintpause 7 0 0 614 1800 rv64imafdcv_sscofpmf_sstc_svpbmt_zicbom_zicboz_zicbop_zihintpause 15883 KB available RAM ### Governors/policies (performance vs. idle consumption): Original governor settings: cpufreq-policy0: performance / 1800 MHz (conservative ondemand userspace powersave performance schedutil / 614 819 1000 1229 1600 1800) Tuned governor settings: cpufreq-policy0: performance / 1800 MHz Status of performance related policies found below /sys: /sys/module/pcie_aspm/parameters/policy: default [performance] powersave powersupersave ### Clockspeeds (idle vs. heated up): Before: cpu0 (rv64imafdcv_sscofpmf_sstc_svpbmt_zicbom_zicboz_zicbop_zihintpause): OPP: 1800, Measured: 1797 After: cpu0 (rv64imafdcv_sscofpmf_sstc_svpbmt_zicbom_zicboz_zicbop_zihintpause): OPP: 1800, Measured: 1797 ### Performance baseline * memcpy: 2636.1 MB/s, memchr: 2297.6 MB/s, memset: 7230.6 MB/s * 16M latency: 240.7 249.8 239.5 249.3 238.5 247.7 255.3 523.6 * 128M latency: 259.0 266.7 276.2 267.8 258.5 266.3 286.5 521.1 * 7-zip MIPS (3 consecutive runs): 7267, 7230, 7326 (7270 avg), single-threaded: 1090 * `aes-256-cbc 25112.86k 29120.83k 30254.17k 30437.97k 30649.00k 30525.41k` * `aes-256-cbc 25418.46k 29242.35k 30219.31k 30666.75k 30656.04k 29807.96k` ### PCIe and storage devices: * NVIDIA GT218 [GeForce 210]: Speed 2.5GT/s, Width x2 (downgraded), driver in use: , ASPM Disabled * 238.5GB "PCIe SSD" SSD as /dev/nvme0: Speed 5GT/s (downgraded), Width x2 (downgraded), 0% worn out, drive temp: 35°C, ASPM Disabled * Gigadevice GD25Q64 8MB SPI NOR flash, drivers in use: spi-nor/k1x-qspi/simple-pm-bus ### Software versions: * Bianbu 1.0.9 (mantic) * Compiler: /usr/bin/gcc (Ubuntu 13.2.0-4ubuntu3-bb2) 13.2.0 / riscv64-linux-gnu * OpenSSL 3.0.10, built on 1 Aug 2023 (Library: OpenSSL 3.0.10 1 Aug 2023) ### Kernel info: * `/proc/cmdline: earlycon=sbi earlyprintk console=tty1 console=ttyS0,115200 loglevel=8 clk_ignore_unused swiotlb=65536 rdinit=/init workqueue.default_affinity_scope=system mtdparts=spi-nor:64K@0(bootinfo),64K@64K(private),256K@128K(fsbl),64K@384K(env),192K@448K(opensbi),-@640K(uboot) root=/dev/nvme0n1p6 rootfstype=ext4` * Kernel 6.1.15 / CONFIG_HZ=250 Kernel 6.1.15 is not latest 6.1.103 LTS that was released on 2024-08-03. See https://endoflife.date/linux for details. It is somewhat likely that a lot of exploitable vulnerabilities exist for this kernel as well as many unfixed bugs. But this version string doesn't matter since this is not an official LTS Linux from kernel.org. This device runs a SpacemiT vendor/BSP kernel. All known settings adjusted for performance. Device now ready for benchmarking. Once finished stop with [ctrl]-[c] to get info about throttling, frequency cap and too high background activity all potentially invalidating benchmark scores. All changes with storage and PCIe devices as well as suspicious dmesg contents will be reported too. Time CPU load %cpu %sys %usr %nice %io %irq Temp 15:09:18: 1800MHz 8.25 22% 0% 20% 0% 0% 0% °C 15:10:18: 1800MHz 4.37 0% 0% 0% 0% 0% 0% °C 15:11:18: 1800MHz 2.91 0% 0% 0% 0% 0% 0% °C ^C |
A score of 7270 MIPS is fairly higher than a Raspberry Pi 4 (about 5400), but quite lower than a Raspberry Pi 5 (10930) at stock frequencies. At 29807.96k hash per second, AES is clearly not implemented, as it’s even slower than in the Raspberry Pi 4 which lacks the necessary instructions.
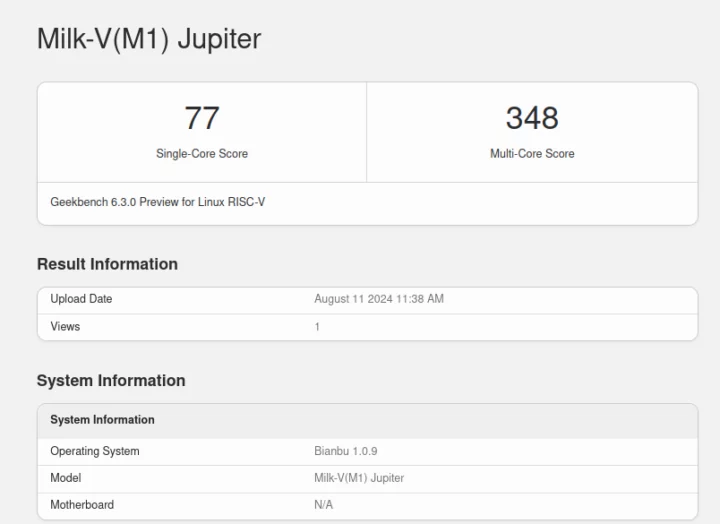
The latest official benchmarks will be the preview version of Geekbench 6.3.0 for the RISC-V architecture:
|
1 2 3 4 5 6 7 8 9 10 11 12 13 14 15 16 17 18 19 20 21 22 23 |
wget https://cdn.geekbench.com/Geekbench-6.3.0-LinuxRISCVPreview.tar.gz tar xvf Geekbench-6.3.0-LinuxRISCVPreview.tar.gz cd Geekbench-6.3.0-LinuxRISCVPreview/ jaufranc@milkv-jupiter:~/Geekbench-6.3.0-LinuxRISCVPreview$ ./geekbench6 Geekbench 6.3.0 Preview : https://www.geekbench.com/ Geekbench 6 for Linux/RISC-V is a preview build. Preview builds require an active Internet connection and automatically upload benchmark results to the Geekbench Browser. System Information Operating System Bianbu 1.0.9 Kernel Linux 6.1.15 riscv64 Model Milk-V(M1) Jupiter Motherboard N/A CPU Information Name rv64imafdcv_sscofpmf_sstc_svpbmt_zicbom_zicboz_zicbop_zihintpause Topology 1 Processor, 1 Core, 8 Threads Base Frequency 1.80 GHz Memory Information Size 15.5 GB |
The full results can be found on the Geekbench website. Note those numbers can’t be used to compare the performance against other systems due to the current software situation. But they may help idendigy which parts need to be optimized.
I’d also like to share a final test, because the system still feels sluggish, especially when launching programs even though we’re using an NVMe SSD. For example, Chromium takes 8 to 10 seconds to open. So it feels more like a Raspberry Pi 2 with a microSD card than a Raspberry Pi 4 with a fast SSD with the current Bianbu software. I’m sure it will improve over time, as the hardware is more capable than that.
Power consumption
I’ll also through some idle power consumption numbers. First with the motherboard powered through its 12V DC jack (with HDMI, and 2x USB for keyboard and mouse):
- Idle after first boot – 4.5 Watts
- Idle after WiFi connected – 4.7 Watts
Getting the board into a chassis with a standard PSU and graphics card will increase the power consumption quite a bit:
- Power off – 4.6 – 4.7 Watts
- Idle (HDMI, Ethernet, USB mouse/keyboard/GPU) – 17.8 – 18.4 Watts
- Idle (HDMI, Ethernet, USB mouse/keyboard/no GPU) – 8.9 Watts
Conclusion
It was an interesting experience building my first mini-ITX-based computer. The Milk-V Jupiter is a relatively powerful RISC-V mini-ITX motherboard, and there’s been some good progress on the software side compared to other systems I reviewed a while ago. HDMI output and audio are working fine, 3D accelerated graphics support is properly implemented, and many of the features of the board are working without issues.
But it still can’t be used as a daily driver, because Bianbu 1.0.9 is still sluggish on the RISC-V motherboard, hardware video decoding is not working, and I could only play YouTube videos reliably at 480p resolution, the two USB storage devices I tried failed to be recognized by the system, my PCIe graphics card was detected, but can’t be used as the software is not implemented yet. There are also a few smaller issues like CPU temperature not being reported, automatic package upgrade is not enabled, support for the AES crypto engine is not implemented, and probably other problems I missed in this review.
I’d like to thank Shenzhen Milk-V and Radxa for sending the Jupiter RISC-V mini-ITX motherboard and the Auriga 6-bay NAS chassis for review. The Jupiter RISC-V motherboard can be found on Arace for $59.99 and up (but out of stock right now), the Auriga chassis goes for about $100 on Aliexpress, and the 350W PSU used in this review for about $100 on Aliexpress.

Jean-Luc started CNX Software in 2010 as a part-time endeavor, before quitting his job as a software engineering manager, and starting to write daily news, and reviews full time later in 2011.
Support CNX Software! Donate via cryptocurrencies, become a Patron on Patreon, or purchase goods on Amazon or Aliexpress


