I received the BIGTREETECH Pad 7 7-inch Klipper pad and tablet PC for review earlier this month. I’ve already tested it with a Raspberry Pi CM4 as a Linux tablet PC with touchscreen, and I’ve now reinstalled the BTT CB1 Allwinner H616 system-on-module to run the pre-install Klipper OS and connect the Pad 7 to a Creality Ender-3 Pro S1 3D printer.
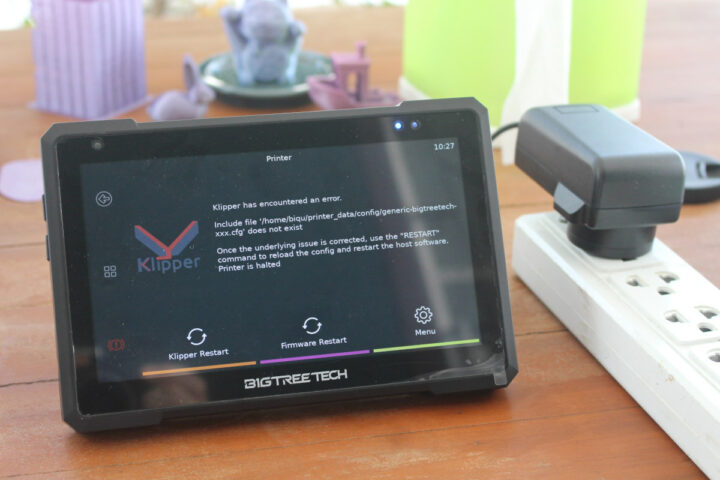
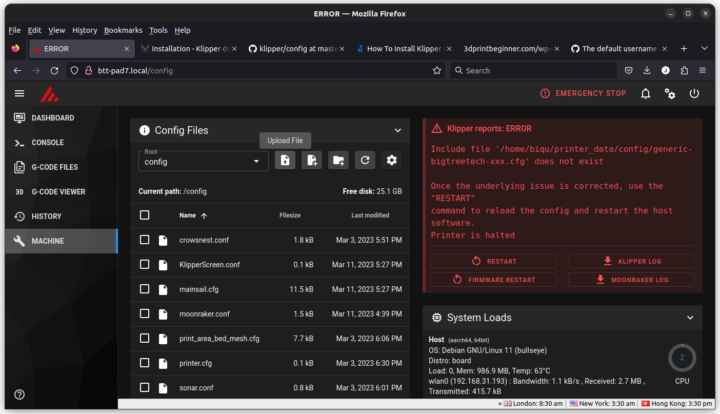
When I first booted the Pad 7 it ended up with an error message from Klipper complaining about a missing configuration file. I connected to WiFi and update all software packages, but it didn’t help.
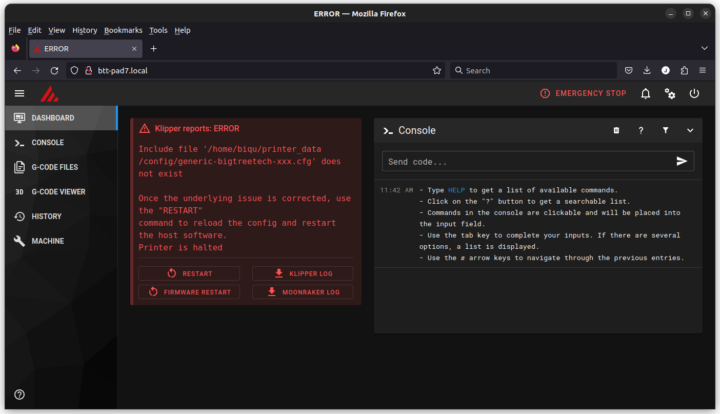
It’s just because the Pad 7 needs to be configured for a specific printer. We can do so through the web dashboard accessible through a web browser going to http://btt-pad7.local (unless you’d changed the hostname in the system)
We’ve got the same error shown in the web interface as Klipper needs to be configured to work with the selected printer, in our case: Creality Ender-3 S1 Pro. BIGTREETECH provides a guide to set up the OS image, but no detailed instructions to set up Klipper since it depends on the specific 3D printer model selected. Luckily I found a guide on 3D Print Beginner website to set up Klipper on a Raspberry Pi SBC to work the Ender 3 S1 Pro. It can easily be adapted to work with the BTT Pad 7, and it’s even simpler since we can skip many of the installation steps.
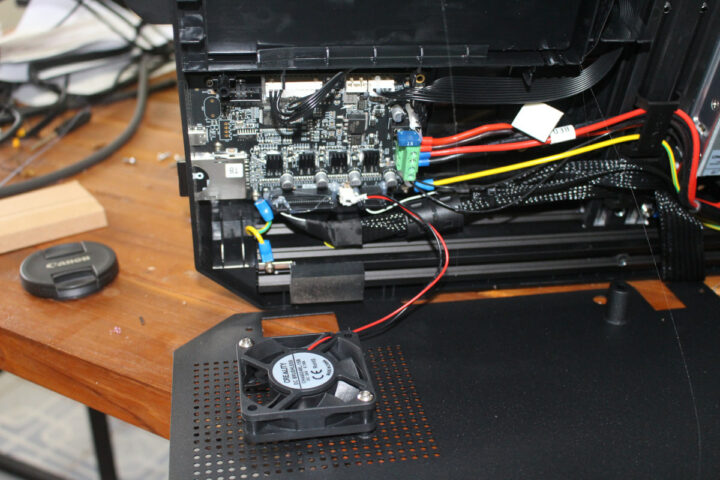
I’m not sure it’s still necessary in 2023, but the first step was to check our Ender-3 S1 Pro is indeed using an STM32F401-based controller board. To do so, I had to remove the cover underneath the 3D printer (see video for instructions).
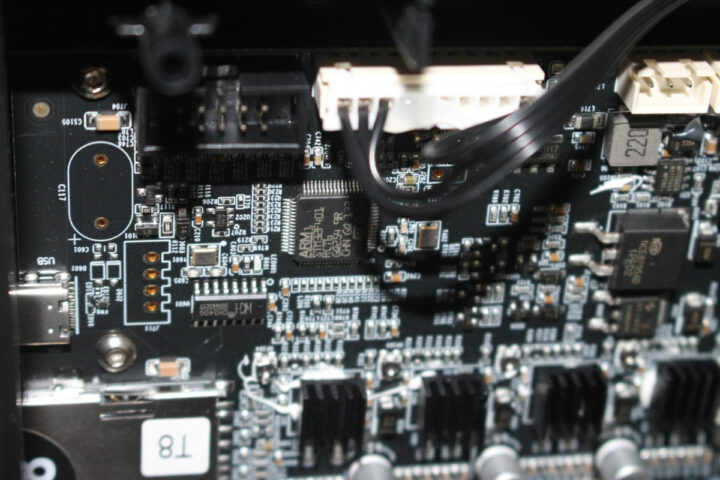
Now that we know the control board is based on STM32F401 we can log into the Pad 7 over SSH to build the firmware. In Windows, people would probably use tools like Putty, but in Ubuntu, I just used a terminal window:
|
1 |
ssh biqu@btt-pad7.local |
The default username and password for BIGTREETECH Pad 7 are both biqu. Here’s just some system information for curious minds.
|
1 2 3 4 5 6 7 8 9 10 11 12 13 14 15 16 17 18 19 20 21 22 23 24 25 26 27 28 29 30 31 32 33 34 35 36 37 38 39 40 41 42 43 44 45 46 47 48 49 50 51 52 |
biqu@BTT-Pad7:~$ uname -a Linux BTT-Pad7 5.16.17-sun50iw9 #2.3.2 SMP Fri Mar 3 17:05:59 HKT 2023 aarch64 GNU/Linux biqu@BTT-Pad7:~$ cat /etc/issue BTT-CB1 2.3.2 Bullseye \l biqu@BTT-Pad7:~$ sudo inxi -Fc0 System: Host: BTT-Pad7 Kernel: 5.16.17-sun50iw9 aarch64 bits: 64 Console: tty 2 Distro: Debian GNU/Linux 11 (bullseye) Machine: Type: ARM Device System: BQ-H616 details: N/A serial: 32c0500066deacde CPU: Info: Quad Core model: N/A variant: cortex-a53 bits: 64 type: MCP Speed: N/A min/max: N/A Core speeds (MHz): No speed data found for 4 cores. Graphics: Device-1: sun50i-h616-mali driver: N/A Device-2: sun50i-h616-dw-hdmi driver: sun8i_dw_hdmi v: N/A Device-3: sun50i-h616-display-engine driver: sun4i_drm v: N/A Display: server: X.org 1.20.11 driver: loaded: modesetting unloaded: fbdev tty: 80x24 Message: Unable to show advanced data. Required tool glxinfo missing. Audio: Device-1: sunxi-ahub-daudio driver: sunxi_ahub_daudio Device-2: sun50i-h616-dw-hdmi driver: sun8i_dw_hdmi Device-3: sunxi-ahub-machine driver: sndahub Sound Server: ALSA v: k5.16.17-sun50iw9 Network: Device-1: sunxi-gmac driver: sunxi_gmac IF: eth0 state: down mac: 76:bc:ec:a1:09:53 Device-2: regulator-fixed driver: reg_fixed_voltage Device-3: regulator-fixed driver: reg_fixed_voltage Device-4: mmc-pwrseq-simple driver: pwrseq_simple Device-5: sun50i-a64-emac driver: N/A IF: eth0 state: down mac: 76:bc:ec:a1:09:53 IF-ID-1: wlan0 state: up mac: 94:a4:08:f7:76:0d Drives: Local Storage: total: 29.73 GiB used: 3.89 GiB (13.1%) ID-1: /dev/mmcblk1 model: SD32G size: 29.73 GiB Partition: ID-1: / size: 28.95 GiB used: 3.83 GiB (13.2%) fs: ext4 dev: /dev/mmcblk1p2 ID-2: /boot size: 255.7 MiB used: 62.5 MiB (24.4%) fs: vfat dev: /dev/mmcblk1p1 Swap: ID-1: swap-1 type: zram size: 493.5 MiB used: 0 KiB (0.0%) dev: /dev/zram0 Sensors: System Temperatures: cpu: 58.1 C mobo: N/A Fan Speeds (RPM): N/A Info: Processes: 138 Uptime: 11m Memory: 986.9 MiB used: 306.7 MiB (31.1%) Init: systemd runlevel: 5 Shell: Bash inxi: 3.3.01 |
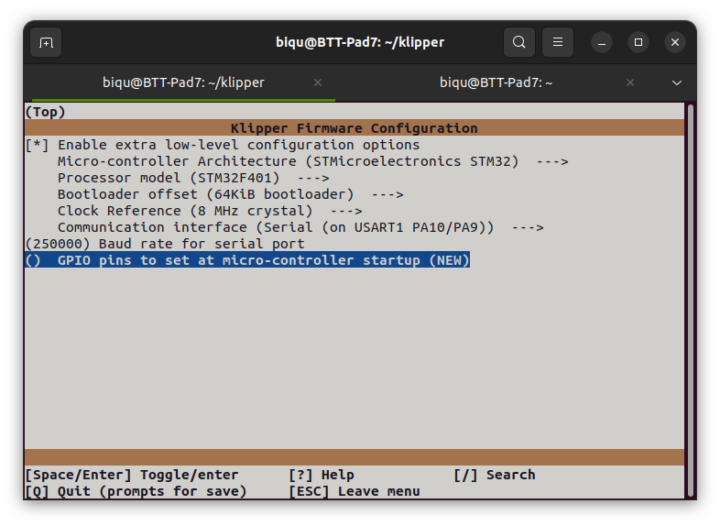
Let’s now configure the Klipper firmware build:
|
1 2 |
cd klipper make menuconfig |
Make sure all parameters are set as above with an STM32F401, or 64KB bootloader, serial on USART1 PA10/PA9 and a 250000 baud rate.
Now let’s build the firmware:
|
1 |
make -j4 |
This should end as follows:
|
1 2 3 |
Version: v0.11.0-205-g5f0d252b Linking out/klipper.elf Creating hex file out/klipper.bin |
Now create STM32F4_UPDATE directory in your 3D printer’s SD card and copy the klipper.bin firmware file to it. I did this from a Ubuntu laptop using SSH to copy the firmware from the Pad 7 to my laptop:
|
1 2 3 4 5 6 7 |
jaufranc@cnx-laptop-4:~$ lsblk | grep mmc mmcblk0 179:0 0 7.4G 0 disk └─mmcblk0p1 179:1 0 7.4G 0 part /media/jaufranc/0C25-2751 jaufranc@cnx-laptop-4:~$ cd /media/jaufranc/0C25-2751/STM32F4_UPDATE/ jaufranc@cnx-laptop-4:/media/jaufranc/0C25-2751/STM32F4_UPDATE$ scp biqu@btt-pad7.local:~/klipper/out/klipper.bin . biqu@btt-pad7.local's password: klipper.bin 100% 25KB 199.0KB/s 00:00 |
The next step will wipe out the firmware from the control board and render the Ender-3 S1 Pro display unusable. Insert the SD card into the Ender-3 S1 Pro 3D printer and power it up to automatically start the firmware update.
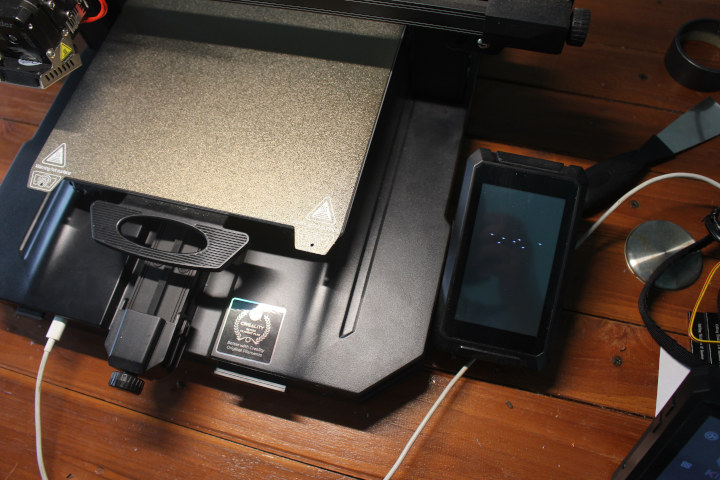
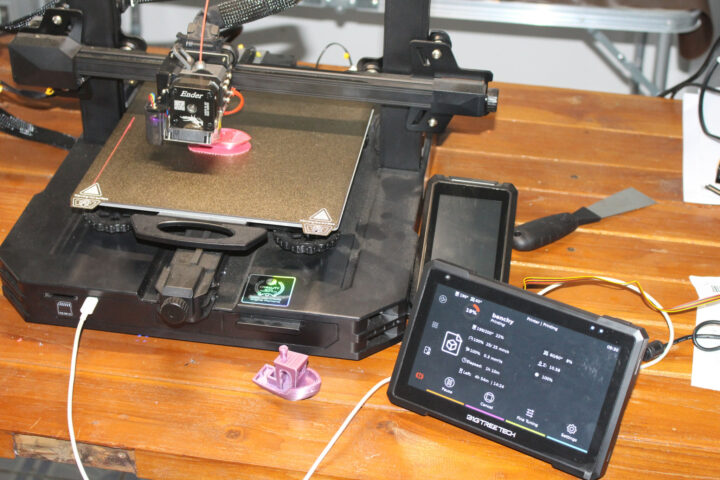
I now just have some dots on the built-in display. If you want to revert to the stock firmware, you’ll find it on the Creality website. We also want to make sure we connect a USB Type-C cable between the Pad 7 and the 3D printer as shown above.
We’ll now have to upload the Ender-3 S1 Pro configuration file to the Pad 7. I initially could not find any configuration file for the Ender-3 S1 Pro on the main Klipper repository, so I went with the one provided by 3D printer Beginner for the review, but I eventually found out printer-creality-ender3-s1-2021.cfg also works for the S1 Pro model.
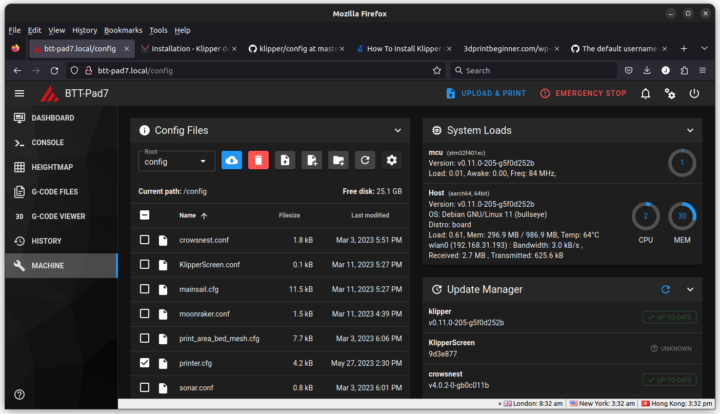
We can go to the MACHINE section and click on “Upload File”, and select the printer.cfg file, after which Klipper and the firmware will be restarted and we can see the MCU (stm32f401ec) control board with the firmware version in the dashboard.
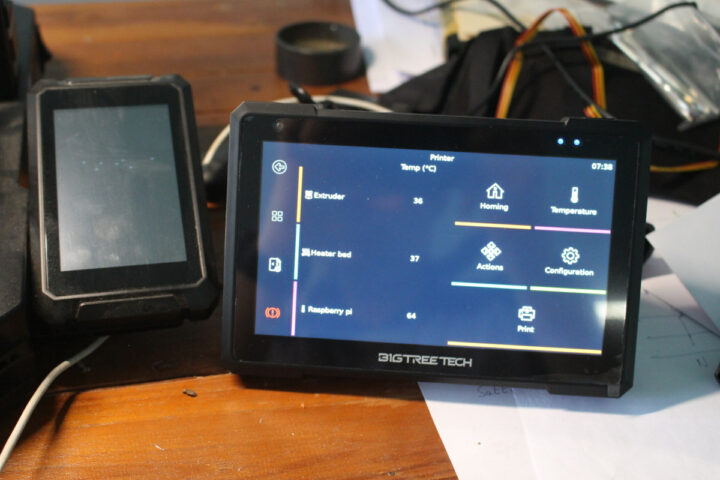
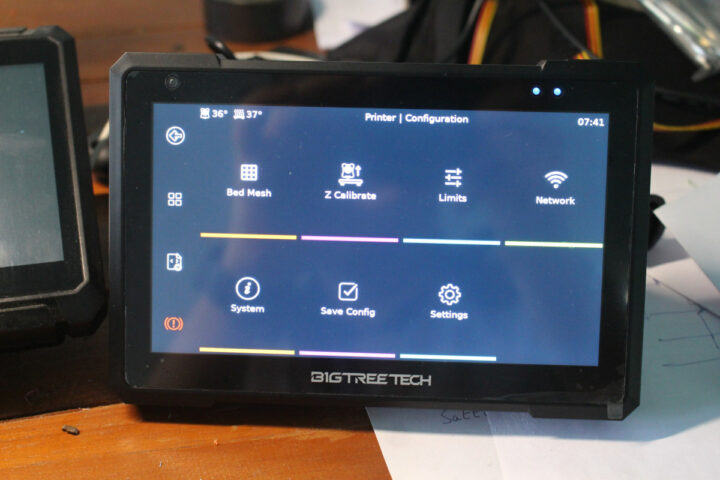
The Pad 7 Klipper pad will show information about the printer including the extruder, heater bed, and “Raspberry Pi” temperatures as well as an icon to control the printer and configure it.
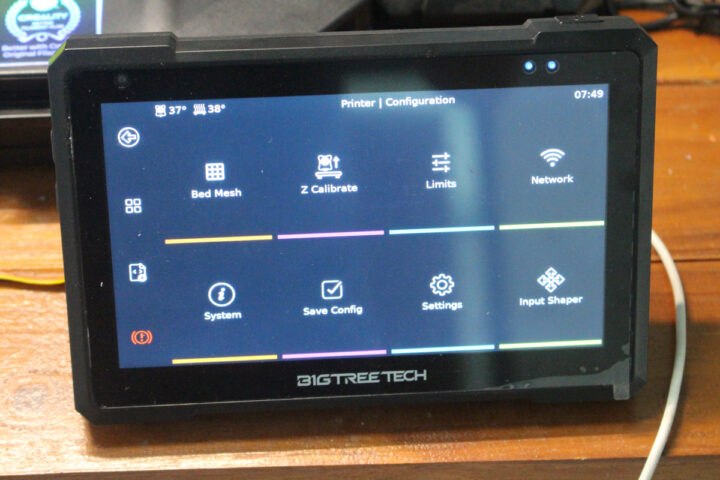
I first tap on Homing and it worked fine. You may also want to check whether extruder and heater bed temperature adjustments work, but I skipped that part, and I went to the Configuration menu…
… to go through the “Bed Mesh” (aka auto-leveling) and “Z Calibrate” (aka Z-adjustment with a paper test) sections as we did in our Creality Ender-3 S1 Pro review.
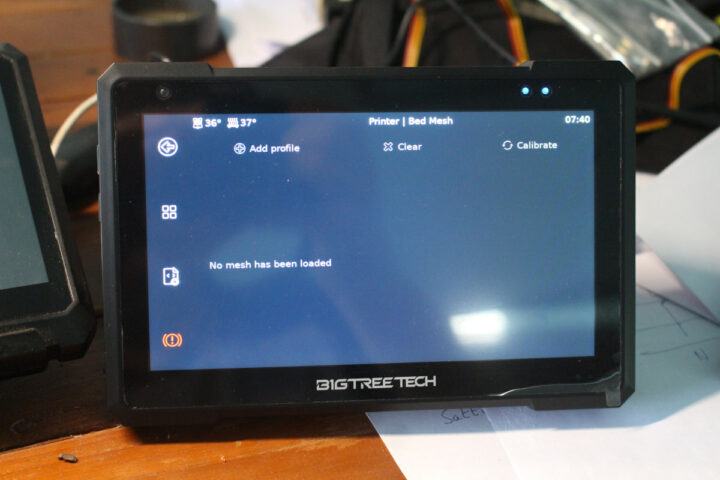
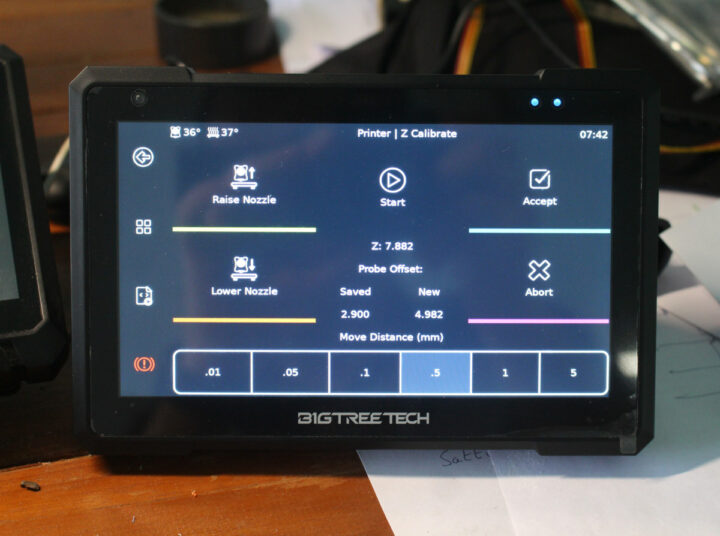
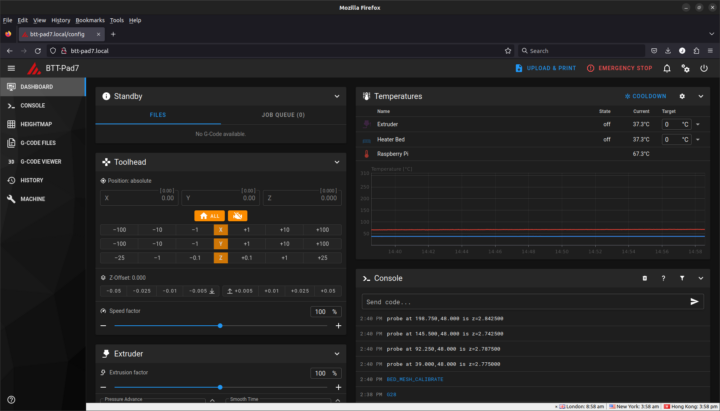
We can also access the same parameter from the web interface.
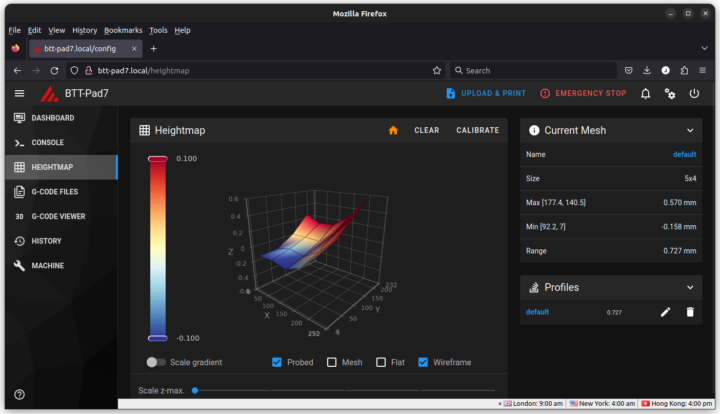
and even load the heightmap from the auto-leveling we’ve just done with the Pad 7.
That’s why some people may just be happy with a Raspberry Pi 4 or a BIGTREETECH Pi v1.2 SBC without connecting a display. The latter supports all the same features as the Pad 7 minus the touchscreen display.
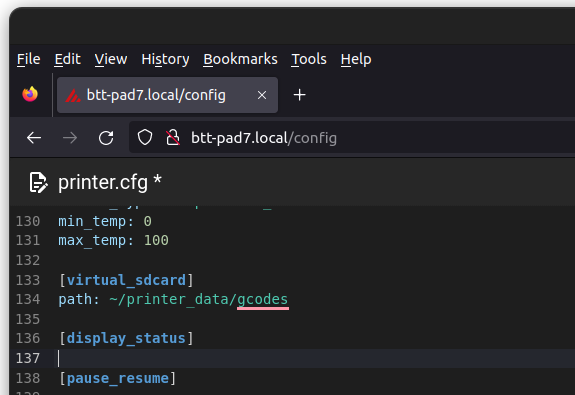
I then went to the G-CODE FILES section to load Benchy.gcode to try my first print with Klipper, but a notification popped up in red at the bottom right of the screen saying “unable to open file”. After looking at the Klipper and Moonraker log files from the dashboard, I quickly figured out the default path defined in printer.cfg:
|
1 2 |
[virtual_sdcard] path: ~/gcode_files |
had to be changed to
|
1 2 |
[virtual_sdcard] path: ~/printer_data/gcodes |
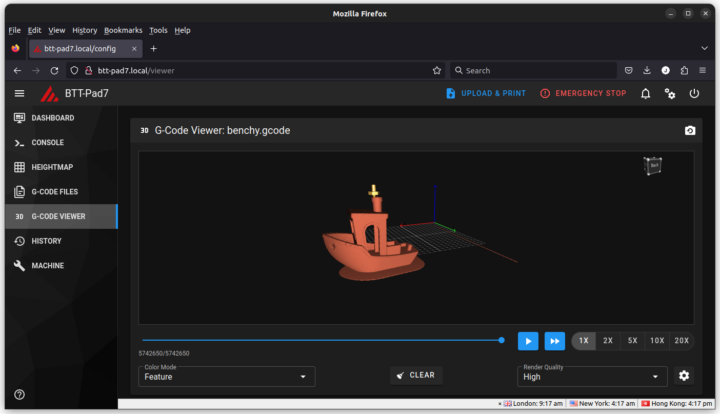
Klipper is made of many different packages, and they may expect things to be in different places if not configured correctly. As a side note, Klipper’s web interface comes with 3D G-Code viewer that allows us to check out the design, or even remotely check the real-time progress of a print without connecting a camera.
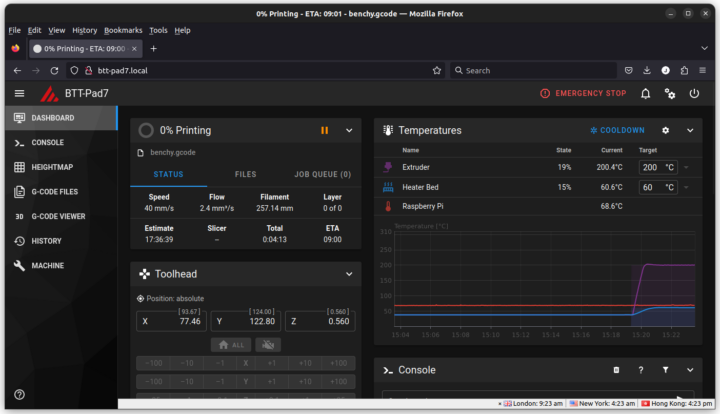
But anyway, after correcting the path in printer.cfg, I could start the print from the web interface:
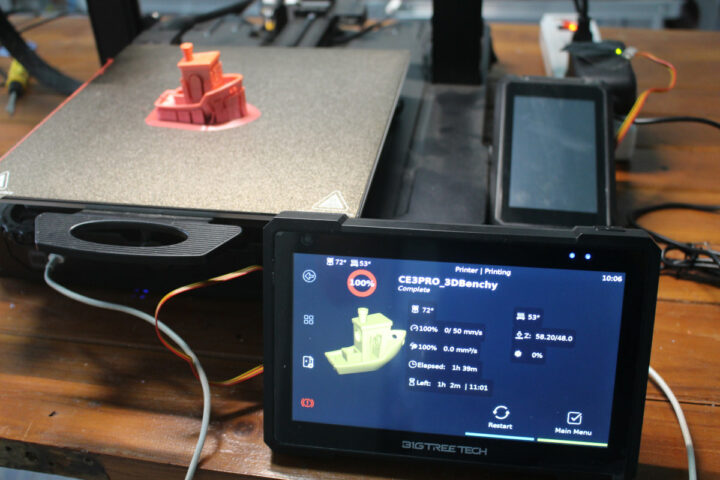
It will also show up on the 7-inch display. I’ve noticed the estimated time of arrival is all over the place at the beginning (it showed over 2 days), but somewhat improves as the print progresses.
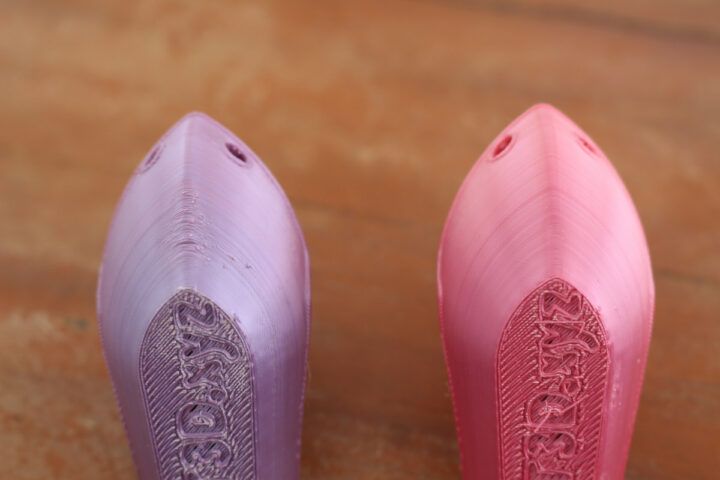
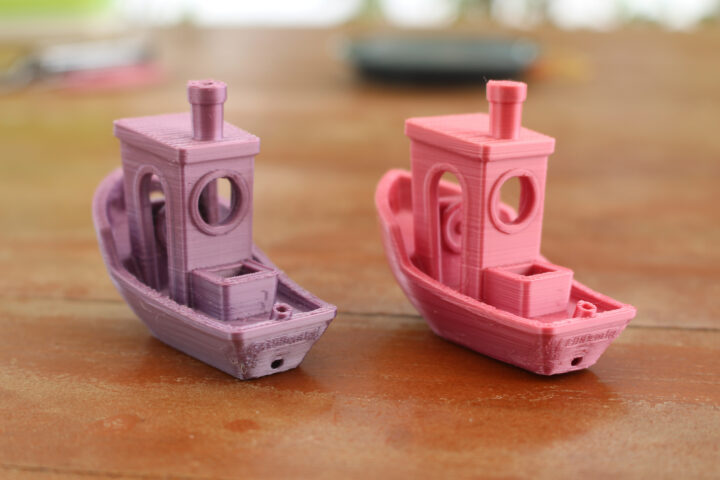
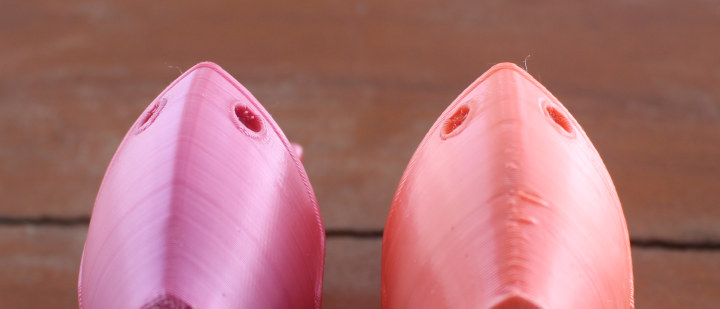
The print was successfully completed in 2h56, that’s about the same time as it took with the stock firmware, but it should be expected since I haven’t changed the G-code. A first quick look at the samples shows both are similar, but a closer inspection shows the Klipper print looks to be cleaner.
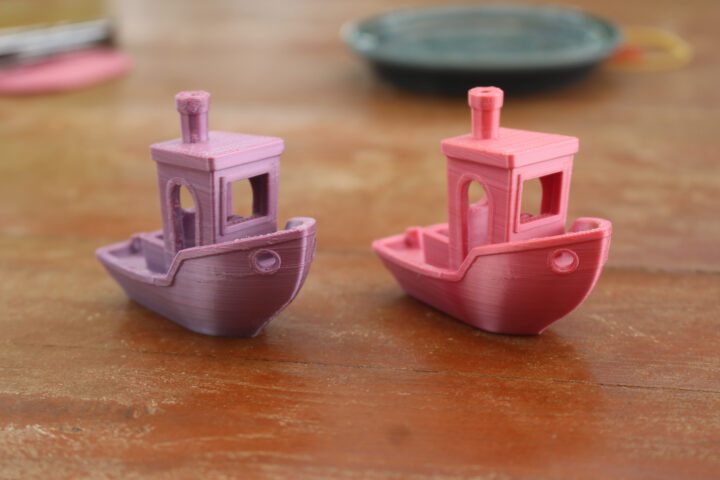
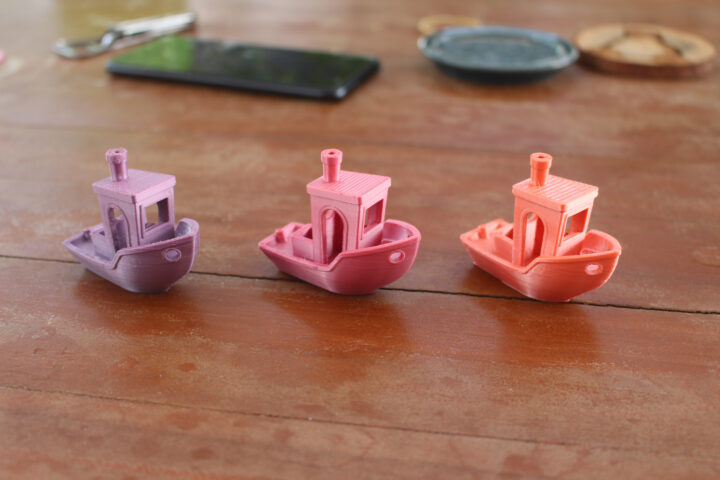
The purple one was printed with the stock firmware, and the orange-pink one with the Klipper firmware, both with Creality “rainbow” PLA filament. The environmental conditions (ambient temperature and humidity) may be slightly different, but I’d suppose the improved quality may not only come from luck.
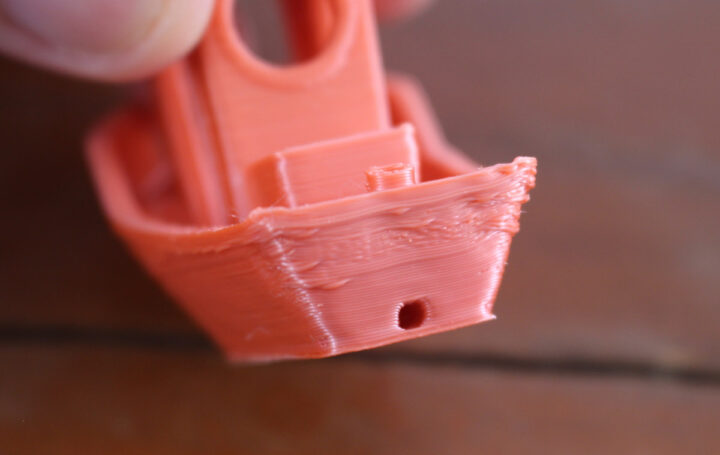
Some parts could still be improved upon, notably the rear side of the boat.
BIGTREETECH Pad 7 and ADXL345 accelerometer Klipper’s input shaping
BIGTREETECH sells the Pad 7 with an ADXL345 accelerometer module. Why is that? It’s to configure Input Shaping that is used to compensate for the vibrations from the 3D printer to enable faster printing and reduce the ringing effect. There are two ways of configuring the parameters: either by printing a ringing tower and measuring the size of the “rings”, or using an accelerometer. The latter is simpler and Klipper supports it with detailed instructions available:
Klipper has built-in support for the ADXL345 and MPU-9250 compatible accelerometers which can be used to measure resonance frequencies of the printer for different axes, and auto-tune input shapers to compensate for resonances.
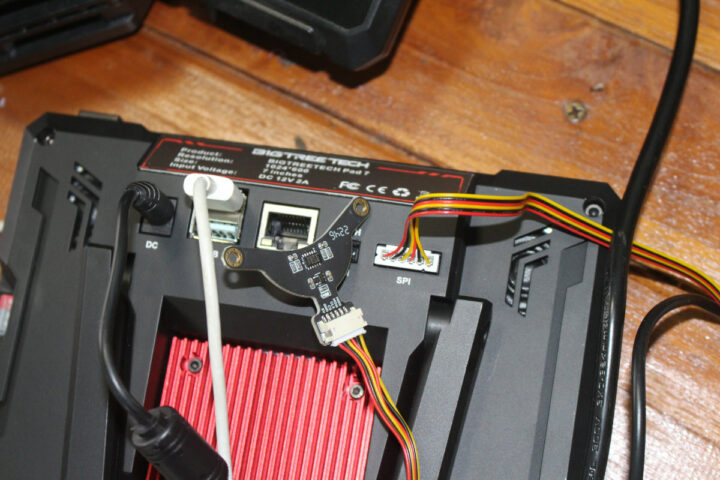
Let’s connect the ADXL345 module to the back of the Pad 7.
We’ll also need to enable ADXL345 in the printer.cfg file:
|
1 2 3 4 5 6 7 |
[mcu CB1] serial: /tmp/klipper_host_mcu [adxl345] cs_pin: CB1:None spi_bus: spidev1.1 axes_map: x,y,z # Modify according to the actual orientation of the ADXL345 installed on the printer. |
We also need to enable the resonance tester in the file in the center of the build plate. The hotbed from the Ender-3 S1 Pro measures 235 x 235mm, so the center would be 117.5×117.5mm:
|
1 2 3 4 5 |
[resonance_tester] accel_chip: adxl345 probe_points: # Somewhere slightly above the middle of your print bed 117.5, 117.5, 20 |
Klipper’s documentation mentions we need to differentiate between two main types of printers:
For “non bed-slingers” (e.g. one accelerometer), in Octoprint, enter ACCELEROMETER_QUERY
For “bed-slingers” (e.g. more than one accelerometer), enter ACCELEROMETER_QUERY CHIP=<chip> where <chip> is the name of the chip as-entered, e.g. CHIP=bed (see: bed-slinger) for all installed accelerometer chips.
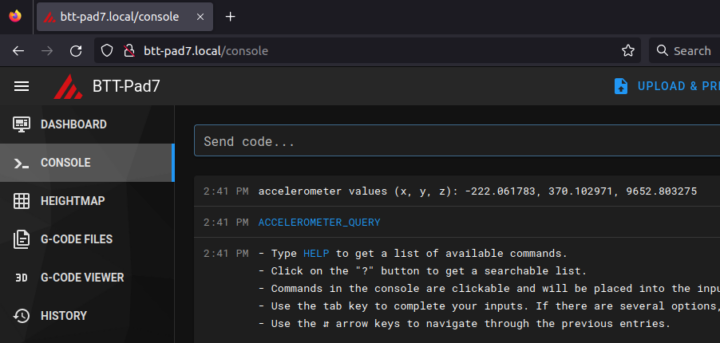
Creality Ender-3 S1 Pro is a bed-slinger, but we’ll only use one accelerometer by doing the X-axis on the working head, and the Y-axis on the build plate. We’ll first make sure the accelerometer is working by sending the ACCELEROMETER_QUERY in the CONSOLE.
All good. We could carry on manually configuring input shaping from the console, but if we add the following line in printer.cfg:
|
1 |
[input_shaper] |
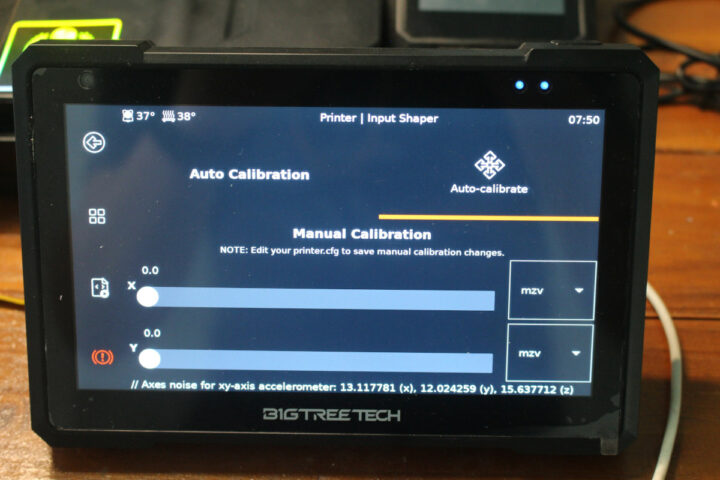
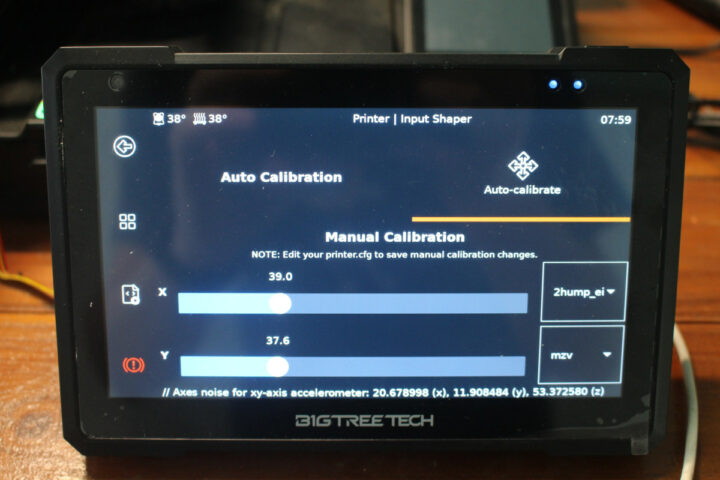
A new Input Shaping option appears on the Pad 7’s configuration menu.
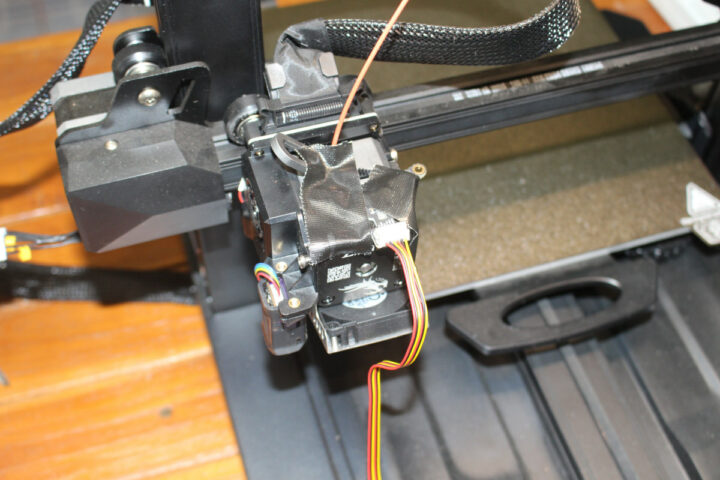
We need to attach the accelerometer to the working head. Some will design and print an attachment, but I just used some strong black tape.
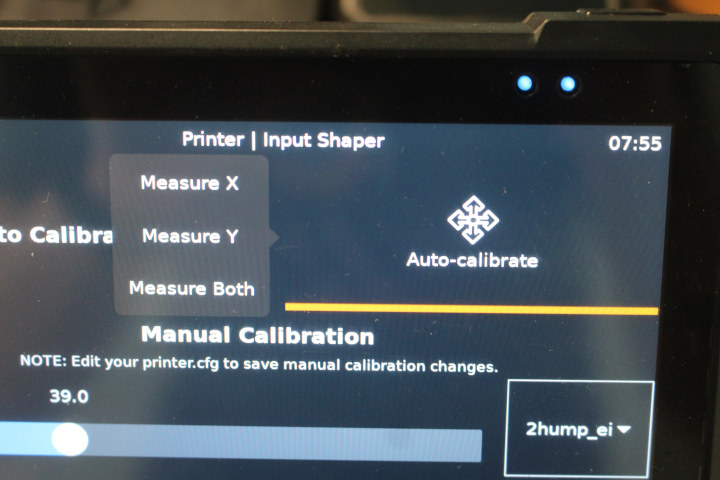
We can now start the X-axis calibration.
The hotend will vibrate from 8 Hz to 150 Hz.
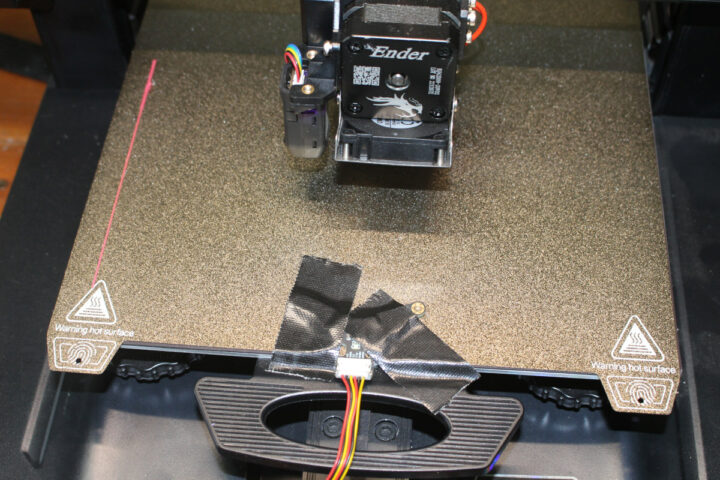
and once the system determines the value it will save it in printer.cfg file and restart the machine. But we now move the accelerometer to the build plate and repeat the test for the Y-axis.
Once the test is complete, we are asked to restart the printer, and we now have both X and Y axis calibrated.
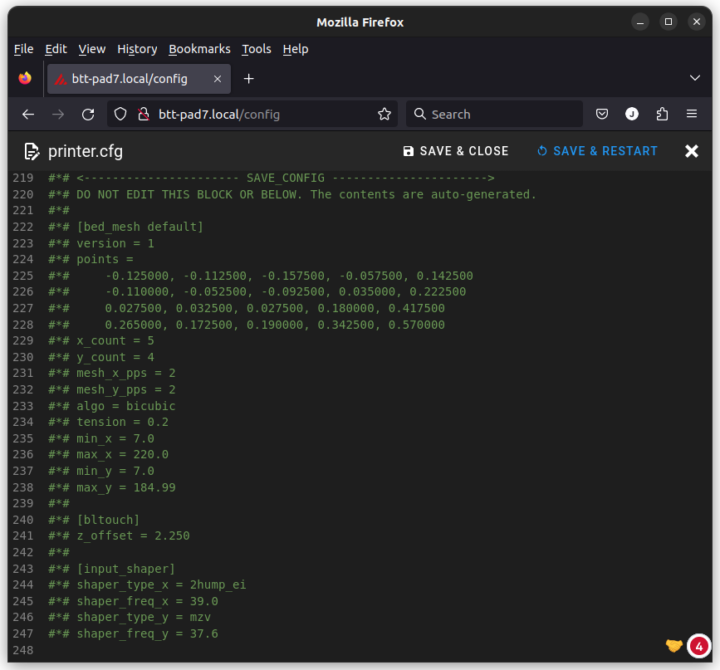
I can also see the values set at the end of printer.cfg in the autogenerated section.
Those may look like comments, but they are actually used by Klipper.
Testing a faster print with Klipper
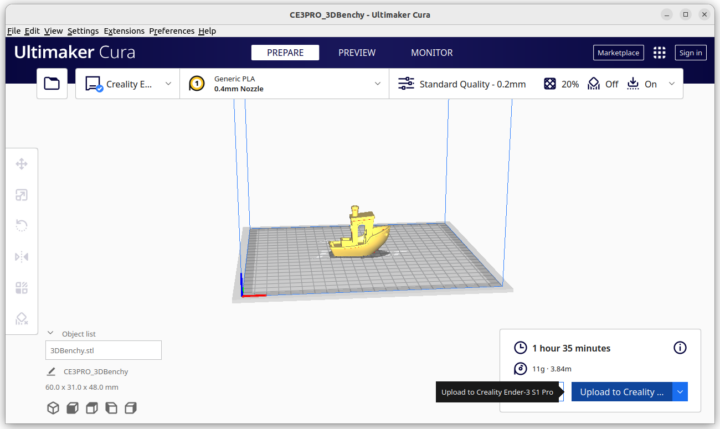
I then decided to print Benchy again, but since we have calibrated the input shaper, I wanted to print faster. The first time I generate G-code with Creality Print, but it has limited features, so instead I went with the Ultimaker Cura program.
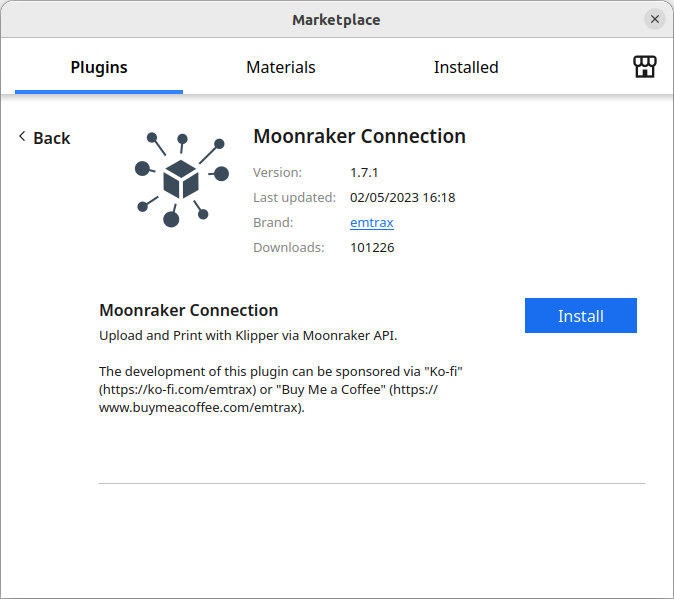
We’ll first want to go to the Marketplace to install the Moonraker Connection plugin which will allow us to upload the file to the 3D printer directly from Cura.
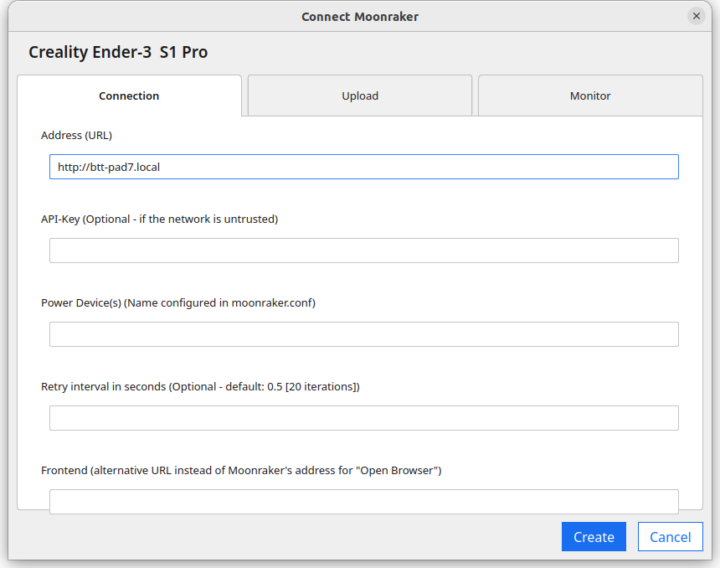
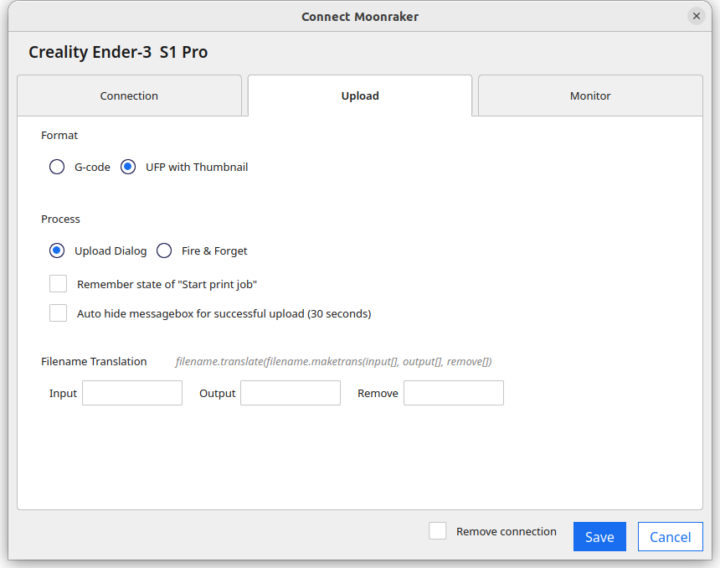
We need to configure with the Address (URL): http://btt-pad7.local
and we can configure the Upload part to select UFP with Thumbnail format as it will show a render of the model on the Pad 7 while printing.
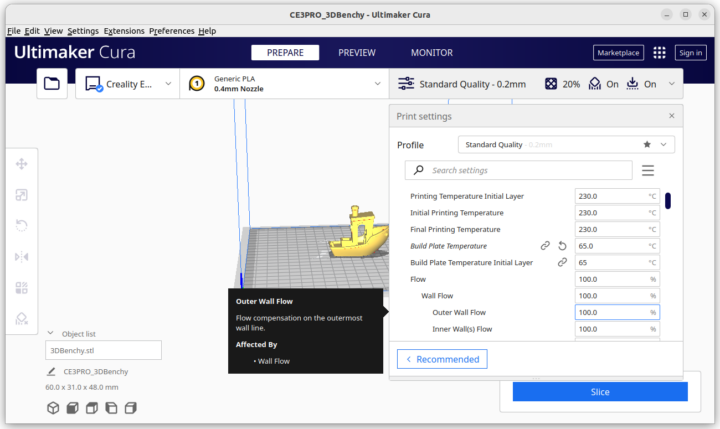
I knew I want to print faster, but I was not sure about the parameters to use. I eventually found that Aurora Tech uploaded a video showing how to print Benchy with Klipper at 250mm/s on a Creality Ender-3. My PLA filament supports up to 230°C, so I went with that temperature, and set the build plate to 65°C.
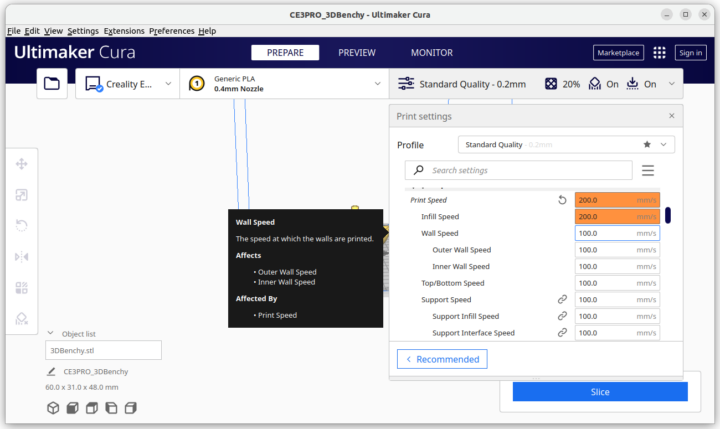
The video uses a 250mm/s printing speed, but I’ve read the Ender 3 can print a bit faster than the Ender 3 S1 Pro, so I set it to 200 mm/s even though the specifications say the maximum speed is 150mm/s.
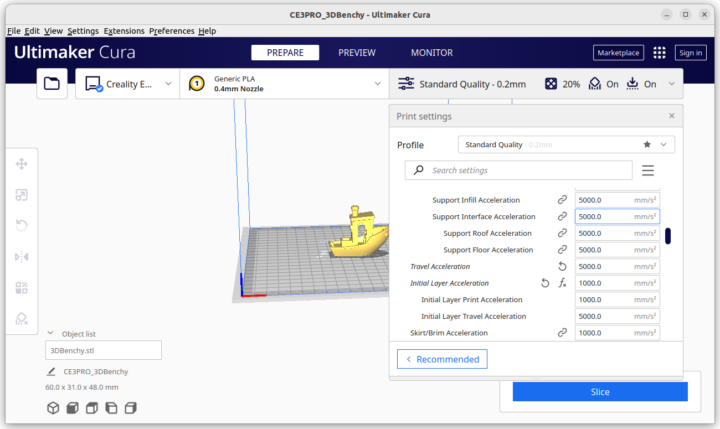
The travel acceleration requires showing all parameters (selectable from the three lines icon) and I set it to 5000mm/s2, except for the first layer set to 1000mm/s2.
After slicing, Cura estimated the print should take over 2 hours, longer than expected, but knowing ETAs are not always accurate, I decided to upload it to the 3D printer over the local network away to give it a try. I quickly found out why it would take longer than expected: I forgot to disable the creation of supports in Cura. Those are not necessary and the ones in the boat’s cabinet are almost impossible to remove.
But we learn from mistakes… That print took 1h39m to complete. I went back to Cura to re-slice the model without support this time around. ETA: 1h39. It’s more like it.
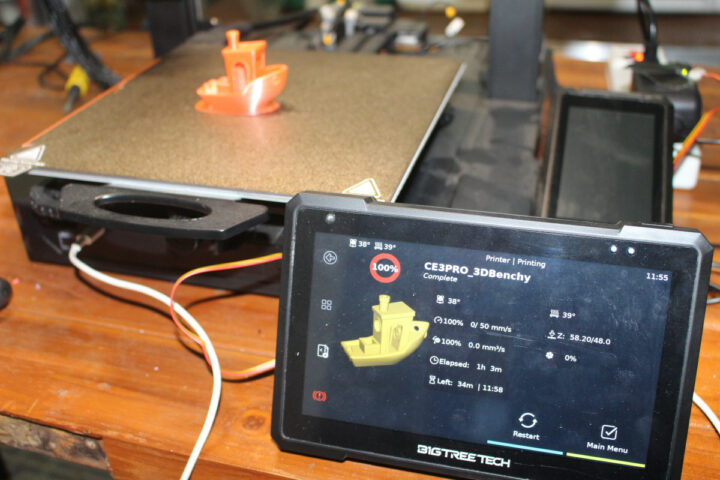
The actual print took 1h03m this time around. My “working table” consists of a wooden door placed on top of two chairs, and while it looks stable at 60mm/s, but it shakes quite a bit during faster printing.
But the final result is not too bad. We can compare the prints with the stock firmware (purple), Klipper at 60mm/s (pink-orange), and Klipper at 200mm/s (orange).
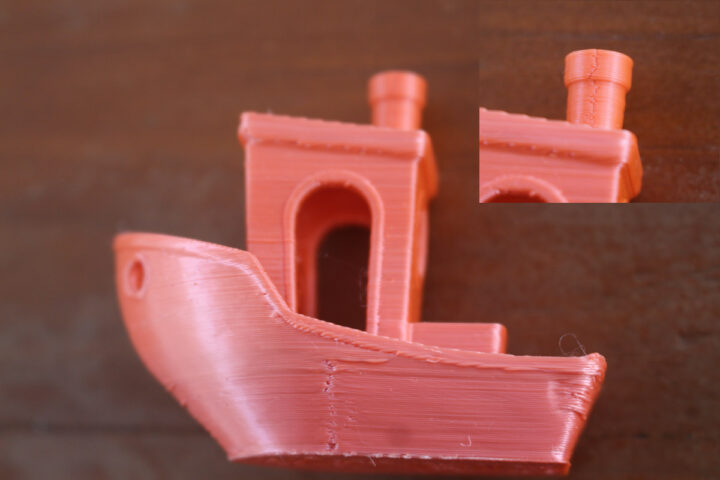
However, we can clearly see some defects in the faster print compared to the other one performed slower with Klipper. However, not that the ringing around the hole on the left sample is gone on the right sample.
The rear of the boat looks uglier than the other two samples. From what I’ve read it might be due to the filament temperature being too high, but it remains to be determined.
and there are some “cracks” (there must be a better word to describe what I see) on one side and the chimney. The door still looks better than on the purple sample with the stock firmware.
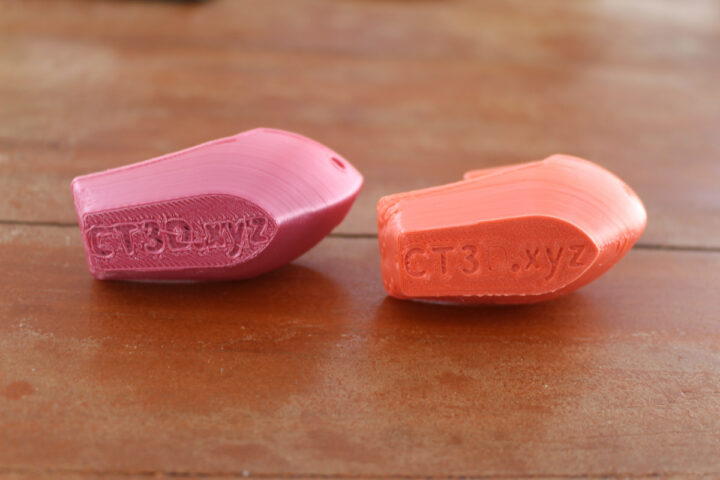
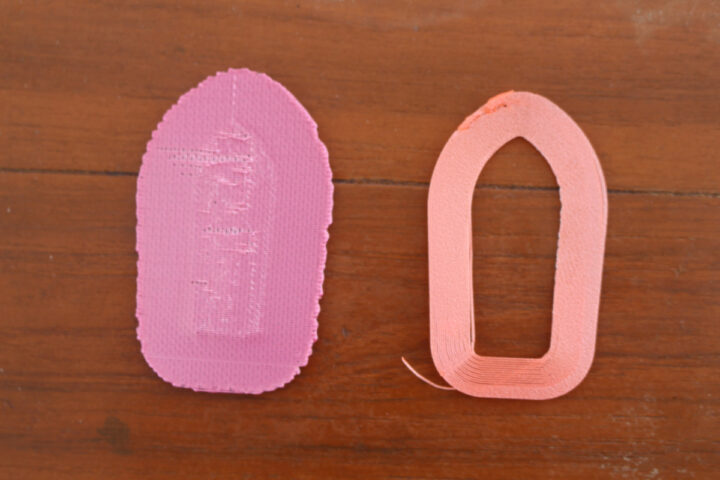
I noticed the text on the bottom was much clearer on the new model (except the D letter),
but that’s because Creality Print and Ultimaker Cura slicers handle the brim/raft in a different way, and it has nothing to do with the firmware used or printing speed.
Fast printing should be good to quickly test designs or where aesthetics may not be critical, and otherwise keep using more conservative settings for higher quality prints.
Conclusion
Upgrading Creality Ender-3 S1 Pro 3D printer from the stock firmware to Klipper firmware yield improvements in print quality and a better user experience since we don’t need to use a microSD card, and can easily upload the files over the web interface or Cura slicer, and access range of features unavailable with the stock firmware from Stock Shaping to access to real-time 3D viewing while printing, camera connection, and the list goes on.
While you can reproduce a similar DIY setup with a Raspberry Pi SBC, the BIGTREETECH Pad 7 makes the transition much smoother as you don’t need to handle Klipper installation and configuration, soldering of the accelerometer module, etc… So it can save a lot of time in that regards. It’s also nicely packaged and ready to use out of the box. People who don’t think they need the display can use the BIGTREETECH Pi v1.2 SBC instead that’s easier to use than a Raspberry Pi SBC in the context of 3D printing since it comes with an AXDL345 connector and other useful interfaces for 3D printers.
The Pad 7 can be purchased for $129.90 with all accessories as shown in this review. Alternatively, the software-compatible BIGTREETECH Pi V1.2 board is sold on Aliexpress for $33.68 including shipping, on Amazon ($45.99), as well as on biqu.equipment, but does not include a power supply, an accelerometer, and a touchscreen display. The Pad 7 will work with most 3D printers, but for reference, the model used in this review – the Creality Ender-3 S1 Pro – can be purchased for $389 on the company’s store or Amazon.

Jean-Luc started CNX Software in 2010 as a part-time endeavor, before quitting his job as a software engineering manager, and starting to write daily news, and reviews full time later in 2011.
Support CNX Software! Donate via cryptocurrencies, become a Patron on Patreon, or purchase goods on Amazon or Aliexpress


