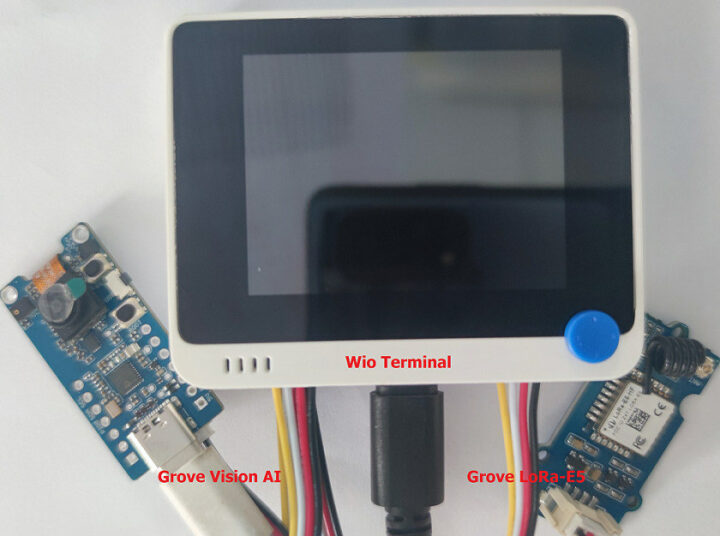
CNXSoft: This is another tutorial using SenseCAP K1100 sensor prototype kit translated from CNX Software Thai. This post shows how computer vision/AI vision can be combined with LoRaWAN using the Arduino-programmable Wio Terminal, a Grove camera module, and LoRa-E5 module connecting to a private LoRaWAN network using open-source tools such as Node-RED and InfluxDB.
In the first part of SenseCAP K1100 review/tutorial we connected various sensors to the Wio Terminal board and transmitted the data wirelessly through the LoRa-E5 LoRaWAN module after setting the frequency band for Thailand (AS923). In the second part, we’ll connect the Grove Vision AI module part of the SenseCAP K1100 sensor prototype kit to the Wio Terminal in order to train models to capture faces and display the results from the camera on the computer. and evaluate the results of how accurate the Face detection Model is. Finally, we’ll send the data (e.g. confidence) using the LoRa-E5 module to a private LoRaWAN IoT Platform system.
In order to understand what artificial intelligence is, and how it can benefit your business and organization, we should first define a few terms.
- Artificial Intelligence (AI) is the introduction of human-like intelligence into computers. The goal is to make computers as intelligent as humans by enabling the computer to process specific information (e.g. images, audio), and each time the data is processed, the computer will figure out which outcome is the most likely.
- Machine Learning (ML) is a sub-category of AI that uses algorithms to automatically learn insights and recognize patterns from data. An algorithm is used together with a model data set (training set) comprised of a number of samples in order to have a ready-to-use result.
- Deep Learning (DL) goes a step further than machine learning by mimicking the functioning of the human nervous system. It leverages large neural network systems overlapping several layers and learning the sample data. This information can be used to find patterns or categorize the data with the ability to remember faces, customer behavior, etc.
Grove Vision AI module
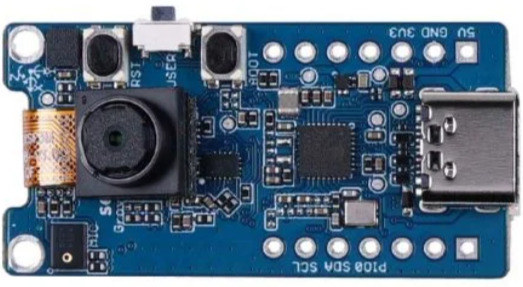
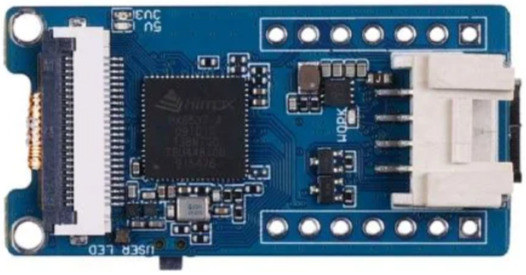
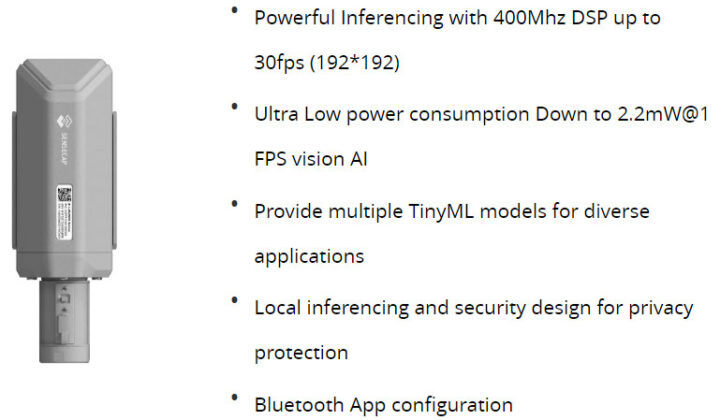
The Grove AI Vision module comes with a small AI camera supporting TinyML (Tiny Machine Learning) algorithms. It can perform various AI functions provided by Seeed Studio such as person detection, pet detection, people counting, object recognition, etc.. or you could even generate your own model through a training tool for machine learning and take that model. It’s easy to deploy and get results in minutes. The solution does so at ultra-low power with a 2.5mW/frame camera and low-power LoRaWAN connectivity (19.5mW).
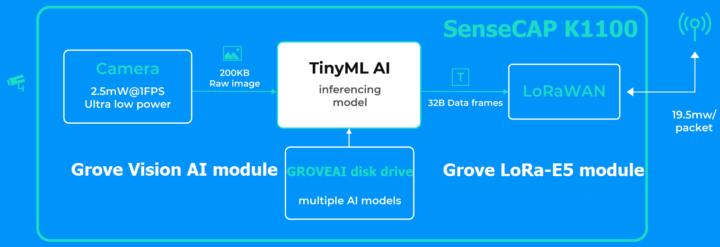
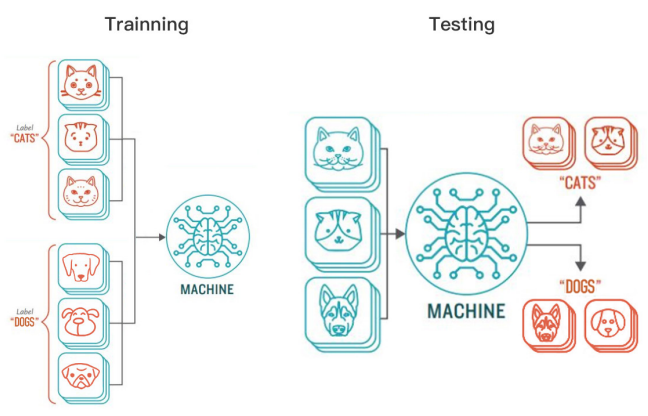
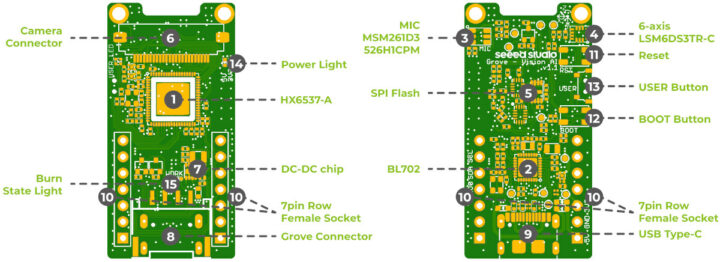
The module also comes with a microphone and a 6-axis motion sensor, so it can be used for more than just AI Vision.
Hardware requirements
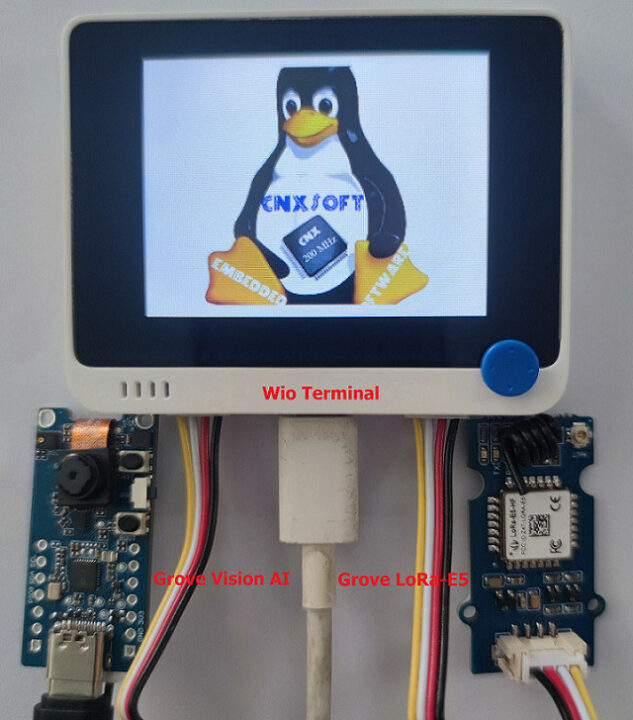
We’ll need the following items for our AI vision and LoRaWAN project (items in bold are part of the SenseCAP K1100 kit):
- Wio Terminal
- Grove Vision AI Module
- Grove LoRa-E5 Module
- 2x USB Type-C cables
- Computer
Deploy the pre-trained AI Vision model and Arduino sketch
Seeed Studio provides pre-trained models that we can use to speed up our learning experience about the Vision AI camera module, including face detection and face & body detection. Let’s see how we can use those.
- Step 1 – Connect a USB Type-C cable between the Grove Vision AI Module and your computer

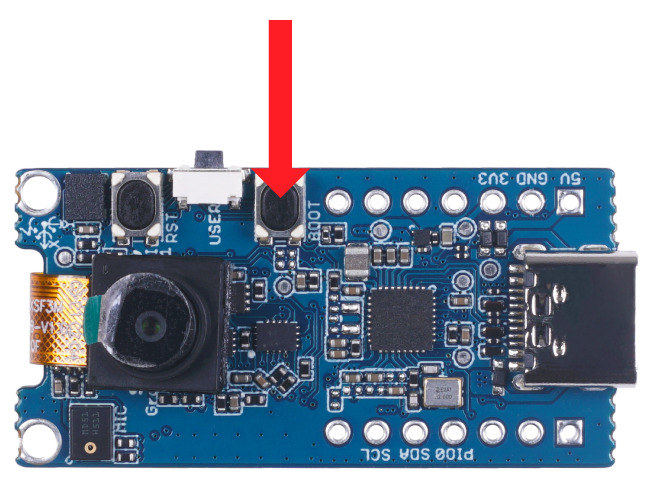
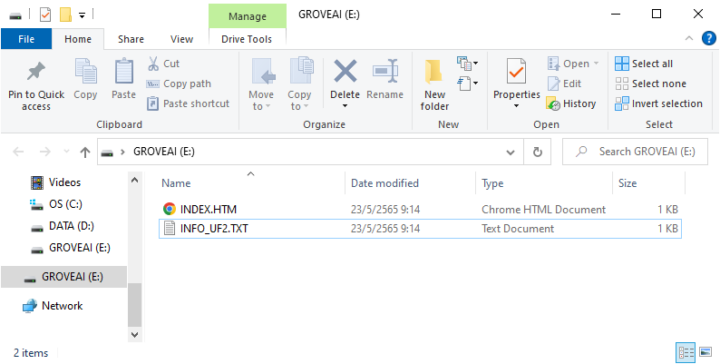
- Step 2. Press the BOOT button twice on the Vision AI module to enter Boot mode and it should then appears as the “GROVEAI” drive in your computer with 2 files: INDEX.HTM and INFO_UF2.TXT


- Step 3. We will now select the UF2 firmware (grove_ai_camera_v01-00-0x10000000.uf2) with a pre-trained “People Face Detection” model. Copy the UF2 firmware to the GROVEAI drive, and you should see a blinking light on the Vision AI module indicating it is performing the firmware update.
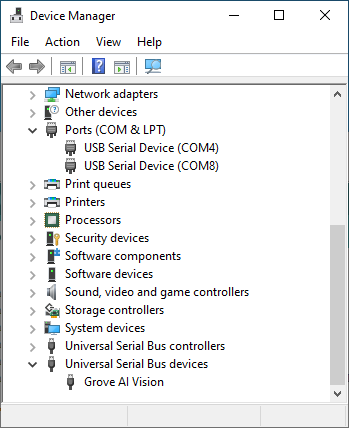
Note: If the pre-trained model comes with multiple files, copy one file at a time. Start with the first file, wait until the flashing light goes out, then enter Bootloader mode again and copy the next sequence of files until all are complete. - Step 4. While the Vision AI module is still connected to the computer, connect it to the Wio Terminal with a Grove I2C cable, and connect a USB type-C cable to the Wio Terminal controller.

The COM4 is the Wio Terminal, and COM8 is the Grove Vision AI module - Step 5. Add the Vision AI module Arduino library by downloading Seeed-Grove-Vision-AI-Moudle.zip. Now go to the Arduino IDE’s top menu and select Sketch -> Include Library -> Add .ZIP Library, and select Seeed-Grove-Vision-AI-Moudle
- Step 6. Add the LoRa-E5 module Arduino library by downloading Disk91_LoRaE5.zip. Then select Include Library -> Add .ZIP Library, and select Disk91_LoRaE5
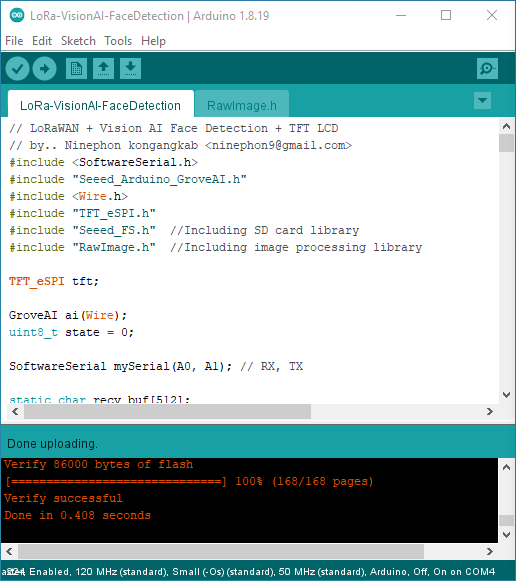
- Step 7. Copy the LoRa-VisionAI-FaceDetection.ino sketch into the Arduino IDE:
123456789101112131415161718192021222324252627282930313233343536373839404142434445464748495051525354555657585960616263646566676869707172737475767778798081828384858687888990919293949596979899100101102103104105106107108109110111112113114115116117118119120121122123124125126127128129130131132133134135136137138139140141142143144145146147148149150151152153154155156157158159160161162163164165166167168169170171172173174175176177178179180181182183184185186187188189190191192193194195196197198199200201202203204205206207208209210211212213214215216217218219220221222223224225226227228229// LoRaWAN + Vision AI Face Detection + TFT LCD// by.. Ninephon kongangkab <[email protected]>#include <SoftwareSerial.h>#include "Seeed_Arduino_GroveAI.h"#include <Wire.h>#include "TFT_eSPI.h"#include "Seeed_FS.h" //Including SD card library#include "RawImage.h" //Including image processing libraryTFT_eSPI tft;GroveAI ai(Wire);uint8_t state = 0;SoftwareSerial mySerial(A0, A1); // RX, TXstatic char recv_buf[512];static bool is_exist = false;static bool is_join = false;static int at_send_check_response(char *p_ack, int timeout_ms, char *p_cmd, ...){int ch;int num = 0;int index = 0;int startMillis = 0;va_list args;memset(recv_buf, 0, sizeof(recv_buf));va_start(args, p_cmd);mySerial.printf(p_cmd, args);Serial.printf(p_cmd, args);va_end(args);delay(200);startMillis = millis();if (p_ack == NULL){return 0;}do{while (mySerial.available() > 0){ch = mySerial.read();recv_buf[index++] = ch;Serial.print((char)ch);delay(2);}if (strstr(recv_buf, p_ack) != NULL){return 1;}} while (millis() - startMillis < timeout_ms);return 0;}static void recv_prase(char *p_msg){if (p_msg == NULL){return;}char *p_start = NULL;int data = 0;int rssi = 0;int snr = 0;p_start = strstr(p_msg, "RX");if (p_start && (1 == sscanf(p_start, "RX: \"%d\"\r\n", &data))){Serial.println(data);}p_start = strstr(p_msg, "RSSI");if (p_start && (1 == sscanf(p_start, "RSSI %d,", &rssi))){Serial.println(rssi);}p_start = strstr(p_msg, "SNR");if (p_start && (1 == sscanf(p_start, "SNR %d", &snr))){Serial.println(snr);}}void setup(void){//Initialise SD cardif (!SD.begin(SDCARD_SS_PIN, SDCARD_SPI)) {while (1);}tft.begin();tft.setRotation(3);drawImage<uint16_t>("cnxsoftware.bmp", 0, 0); //Display this 16-bit image in sd cardWire.begin();Serial.begin(115200);mySerial.begin(9600);delay(5000);Serial.print("E5 LORAWAN TEST\r\n");if (ai.begin(ALGO_OBJECT_DETECTION, MODEL_EXT_INDEX_1)) // Object detection and pre-trained model 1{Serial.print("Version: ");Serial.println(ai.version());Serial.print("ID: ");Serial.println( ai.id());Serial.print("Algo: ");Serial.println( ai.algo());Serial.print("Model: ");Serial.println(ai.model());Serial.print("Confidence: ");Serial.println(ai.confidence());state = 1;}else{Serial.println("Algo begin failed.");}if (at_send_check_response("+AT: OK", 100, "AT\r\n")){is_exist = true;at_send_check_response("+ID: DevEui", 1000, "AT+ID=DevEui,\"2CF7xxxxxxxx034F\"\r\n");at_send_check_response("+ID: AppEui", 1000, "AT+ID=AppEui,\"8000xxxxxxxx0009\"\r\n");at_send_check_response("+MODE: LWOTAA", 1000, "AT+MODE=LWOTAA\r\n");at_send_check_response("+DR: AS923", 1000, "AT+DR=AS923\r\n");at_send_check_response("+CH: NUM", 1000, "AT+CH=NUM,0-2\r\n");at_send_check_response("+KEY: APPKEY", 1000, "AT+KEY=APPKEY,\"8B91xxxxxxxxxxxxxxxxxxxxxxxx6545\"\r\n");at_send_check_response("+CLASS: A", 1000, "AT+CLASS=A\r\n");at_send_check_response("+PORT: 8", 1000, "AT+PORT=8\r\n");delay(200);is_join = true;}else{is_exist = false;Serial.print("No E5 module found.\r\n");}}void loop(void){if (is_exist){int ret = 0;char cmd[128];if (is_join){ret = at_send_check_response("+JOIN: Network joined", 12000, "AT+JOIN\r\n");if (ret){is_join = false;}else{Serial.println("");Serial.print("JOIN failed!\r\n\r\n");delay(5000);}}else{if (state == 1){if (ai.invoke()) // begin invoke{while (1) // wait for invoking finished{CMD_STATE_T ret = ai.state();if (ret == CMD_STATE_IDLE){break;}delay(20);}uint8_t len = ai.get_result_len(); // receive how many people detectif(len){Serial.print("Number of people: ");Serial.println(len);object_detection_t data; //get datafor (int i = 0; i < len; i++){Serial.println("result:detected");Serial.print("Detecting and calculating: ");Serial.println(i+1);ai.get_result(i, (uint8_t*)&data, sizeof(object_detection_t)); //get resultSerial.print("confidence:");Serial.print(data.confidence);Serial.println();sprintf(cmd, "AT+CMSGHEX=\"%04X %04X\"\r\n", len, data.confidence);ret = at_send_check_response("Done", 10000, cmd);if(!ret){break;Serial.print("Send failed!\r\n\r\n");}else{recv_prase(recv_buf);}}}else{Serial.println("No identification");}}else{delay(1000);Serial.println("Invoke Failed.");}}}}else{delay(1000);}delay(500);} - Step 8. Make sure to edit the program for LoRaWAN configuration:
- 8 bytes DevEui number
- 8 bytes AppvEui number
- 16 bytes APPKEY number
- Set up an OTAA (Over-The-Air Activation) connection.
- Set the frequency band for your country For example, I used AS923 in Thailand.
- Step 9. Upload the program to the Wio Terminal

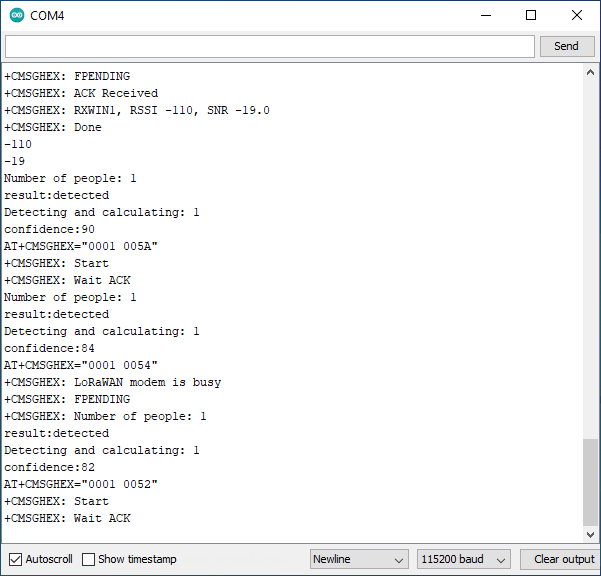
- Step 10. Open the Serial Monitor to monitor the output from the face detection algorithm, notably two parameters:
- “Number of people”: the number of people, or technically faces, detected.
- “Confidence”: the confidence of the face detection algorithm in percentage.
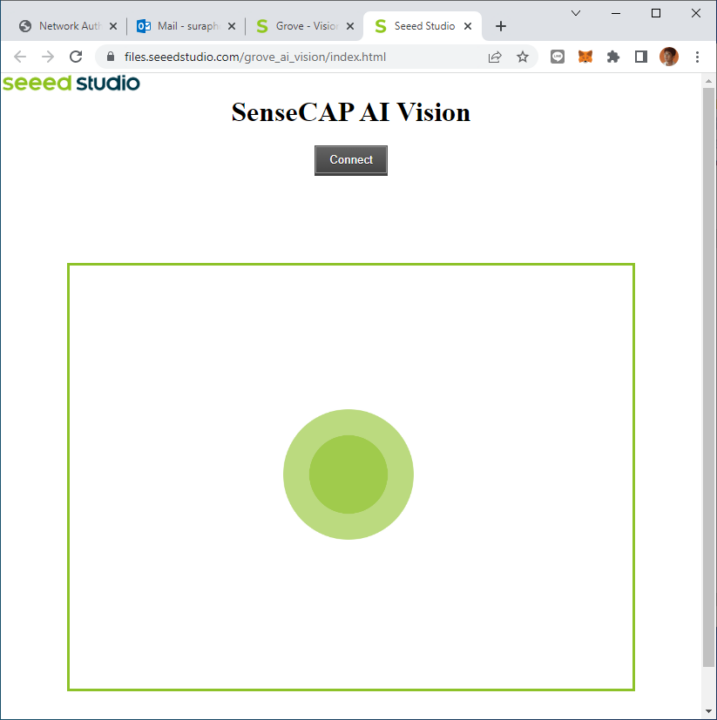
- Step 11. Visit https://files.seeedstudio.com/grove_ai_vision/index.html with either Google Chrome or Microsoft Edge browser to check the output from the camera

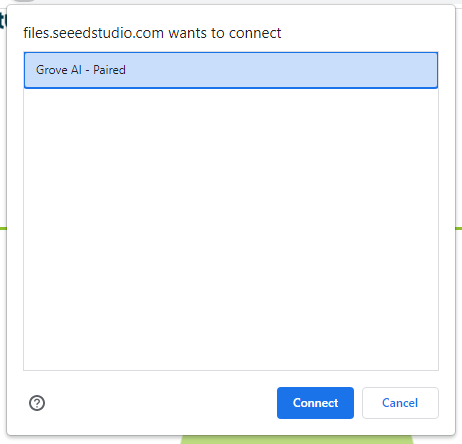
- Step 12. Click on the Connect button in the SenseCAP AI Vision web page, select Grove AI-Paired, and click Connect.

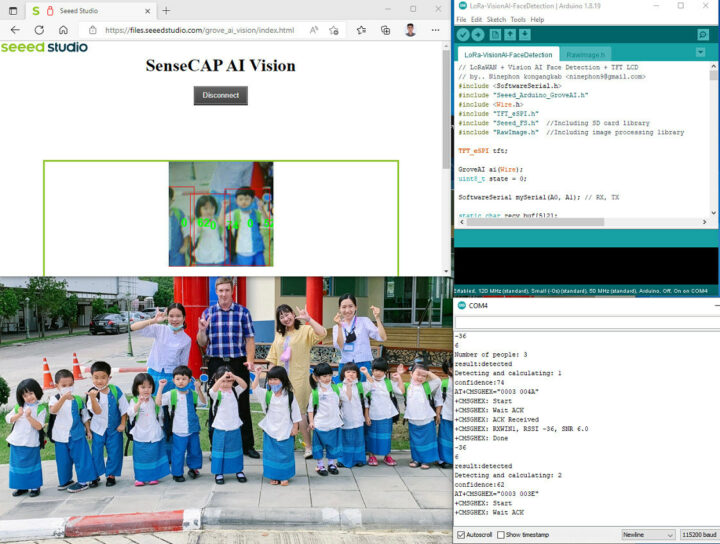
- Step 13. Hold the Grove Vision AI module and point the camera at the people or an image with people. The recognized faces/persons will show up in the web browser in a read box together with a confidence level in percent.

Screenshot showing the camera can detect the faces of 3 children with a confidence level of over 74%. 
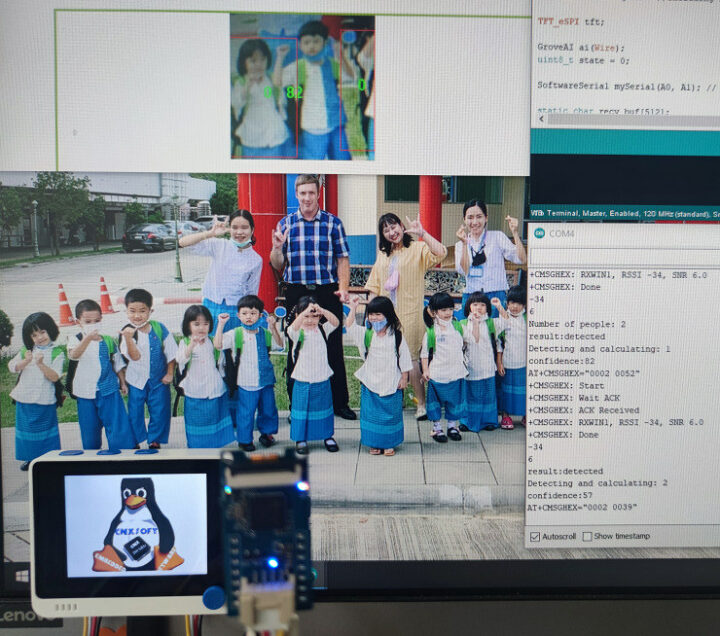
Wio terminal, Vision AI module, LoRa-E5, Arduino serial monitor, and SenseCAP AI Vision website.
Here’s a short demo showing the Grove Vision AI module in action.
Private LoRaWAN IoT On-Premise Platform
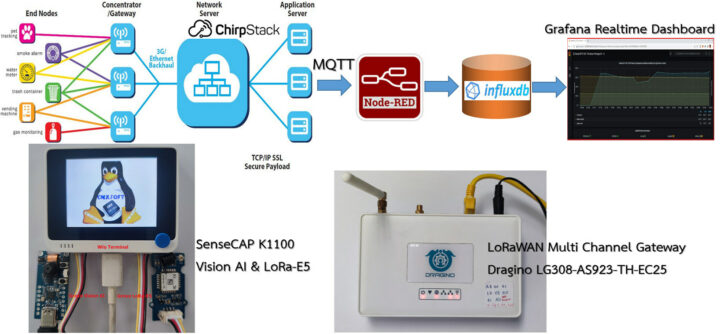
So far, we’ve only demonstrated computer vision, but we’ve yet to make use of the LoRa-E5 module. We’ll rely on the same “open-source-powered” private LoRaWAN IoT platform as in the first part of our review, except the environmental sensor is replaced with the Grove Vision AI module.
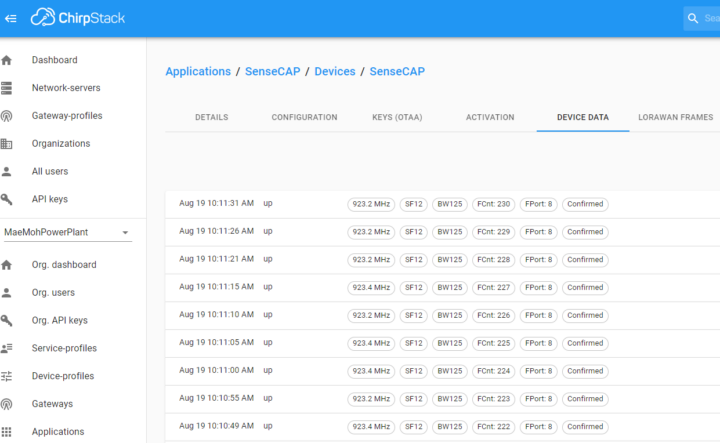
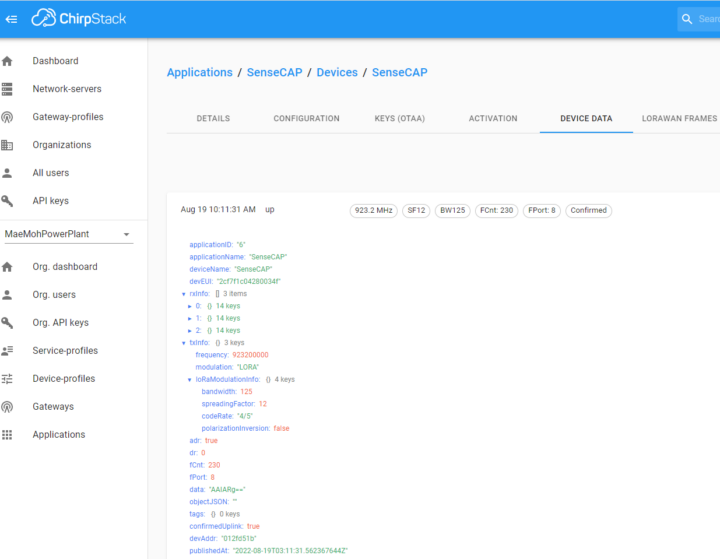
- ChirpStack open-source LoRaWAN network and application server that registers the LoRaWAN IoT device number and decrypts the received data in AES128 format through an MQTT broker acting as the sender (publish).

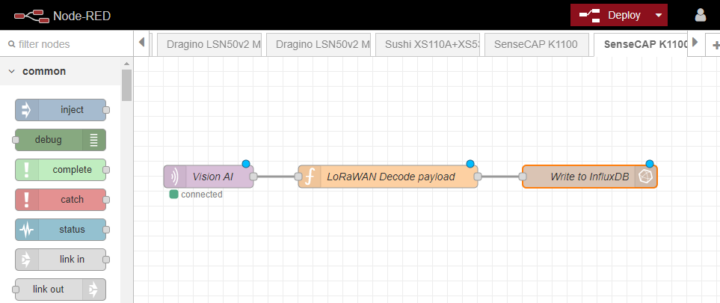
Received packets - Node-RED flow-based development tool for programming. It is a recipient (subscribe) from ChirpStack via the MQTT protocol and takes the data from the payload and decodes it according to the BASE64 format. It will store the sensor data in an InfluxDB database.

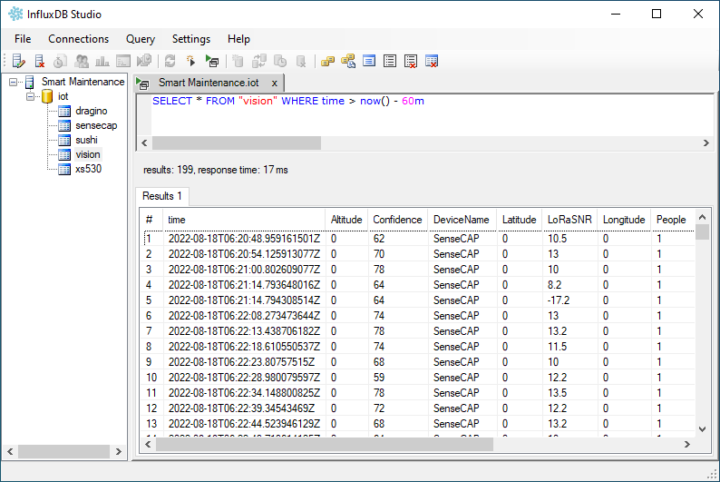
- InfluxDB open-source time series database is used to store the sensor and LoRaWAN gateway data, and automatically sorts it by time series allowing us to analyze the data for any period of time.

-
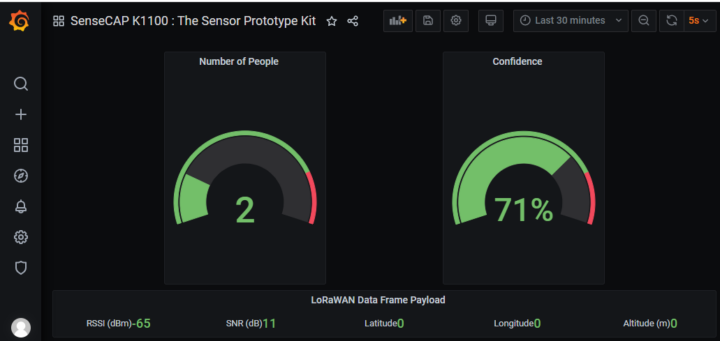
Grafana real-time dashboard allows the user to visualize the data from the InfluxDB database, this time the number of people and inference confidence.

Final words
- I’ve now made myself familiar with the SenseCAP K1100 sensor prototype both with the Grove sensors, the Arduino-programmable Wio Terminal, as well as the LoRa-E5 module to send the sensor data to the LoRaWAN Gateway. The more I play with it, the more fun I have, as there are many analog or digital sensors you can use through the 40-pin GPIO header or ready-made sensor modules using I2C or SPI.
- The Wio Terminal board can be programmed automatically from the Arduino IDE without pressing any buttons. And there are issues entering the Automatic Bootloader mode, Seeed Studio has designed the firmware to also support a Manual Bootloader mode that can be entered by sliding the switch twice quickly. Instructions to enter the manual bootloader mode can be found in the first part of the review.
- I had to rely on my knowledge and experience with LoRaWAN to transmit data wirelessly over long distances. That’s because LoRaWAN has a more complicated connection process than Wi-Fi or Bluetooth. It would be great if Seeed Studio could develop a new firmware that can connect without any coding
- The SenseCAP K1100 is a highly capable and reliable kit. It can be especially useful for primary, secondary, and tertiary education and can be integrated into teaching materials in a STEM (Science, Technology, Engineering, and Mathematics) curriculum.
While the SenseCAP K1100 prototype sensor kit can be used to combine AI/computer vision with LoRaWAN, and it is great for education and prototyping, if you plan to deploy such a solution in the field, an industrial-grade sensor should be selected instead. It should be able to withstand the elements such as rain, heat, and dust, and be much more reliable. One example is the industrial-grade SenseCAP A1101 LoRaWAN Vision AI Sensor ($79 on Seeed Studio).
I would like to thank Seeed Studio for sending the SenseCAP K1100 sensor prototype kit for this review. It is available for $99.00 plus shipping.

Jean-Luc started CNX Software in 2010 as a part-time endeavor, before quitting his job as a software engineering manager, and starting to write daily news, and reviews full time later in 2011.
Support CNX Software! Donate via cryptocurrencies, become a Patron on Patreon, or purchase goods on Amazon or Aliexpress


