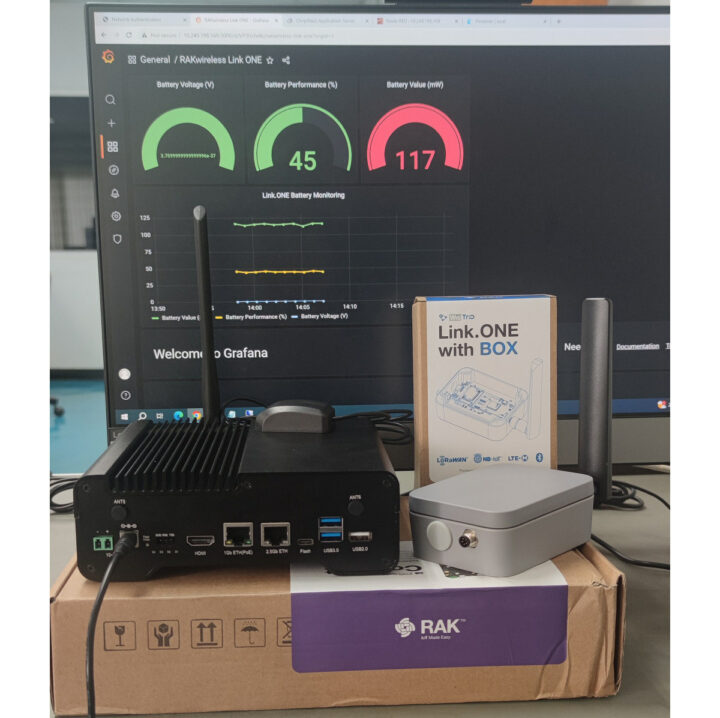
In this guide, we’ll explain how to set up a private LoRaWAN network using the Raspberry Pi CM4-based RAKwireless’ WisGate Connect gateway and Docker or Portainer to install NodeRED, InfluxDB, Grafana, and other packages required to configure our gateway.
The WisGate Connect is quite a versatile gateway with Gigabit and 2.5Gbps Ethernet plus several optional wireless connectivity options such as LoRaWAN, 4G LTE, 5G, WiFi 6, Zigbee, WiFi HaLoW, and more that can be added through Mini PCIe or M.2 sockets, expansion through WisBlock IO connectors and a 40-pin Raspberry Pi HAT connector. We’ll start by looking at the gateway features in detail, but if you already know all that, you can jump to the private LoRaWAN network configuration section.
WisGate Connect unboxing, specifications, and teardown
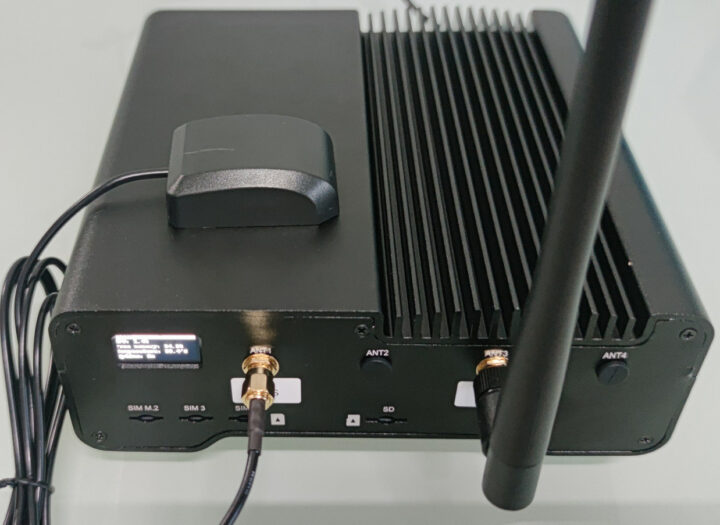
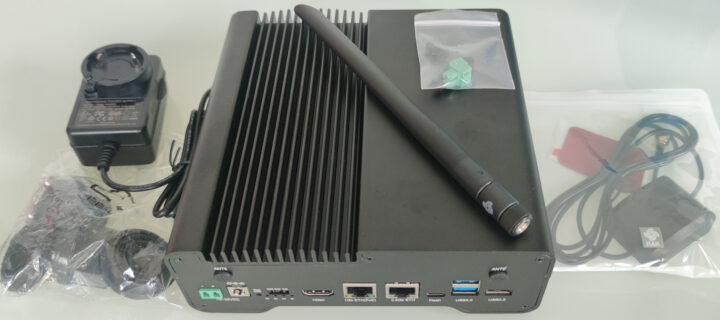
RAKwireless sent us a model with a Raspberry Pi CM4 equipped with 4 GB of RAM and 32 GB of eMMC memory, GPS and LoRa antennas, as well as an indoor metal enclosure.
The kit also includes a power supply and various cables.
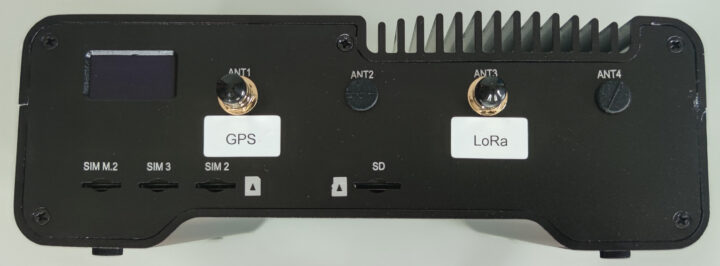
The front panel of the gateway comes with an OLED display. three SIM card slots, GPS and LoRa antenna connectors, and a microSD card slot. They are also two more antenna holes that are not used in our model configuration.
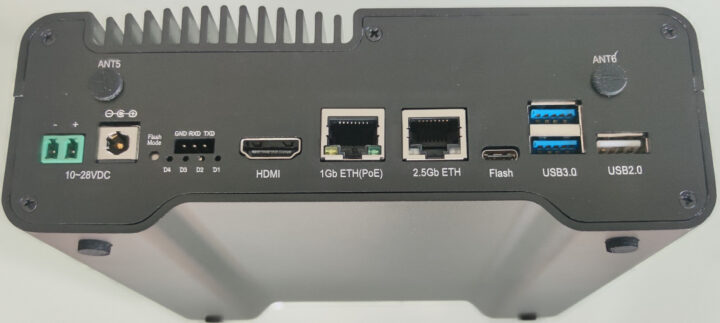
The rear panel features two power input ports (a 2-pin terminal block and DC jack), a UART header, some LEDs, HDMI video output, Gigabit Ethernet and 2.5GbE ports, a USB-C port for flashing the firmware to the Raspberry Pi CM4 module, and three USB 3.0 ports, plus two more antenna holes that are not used here.
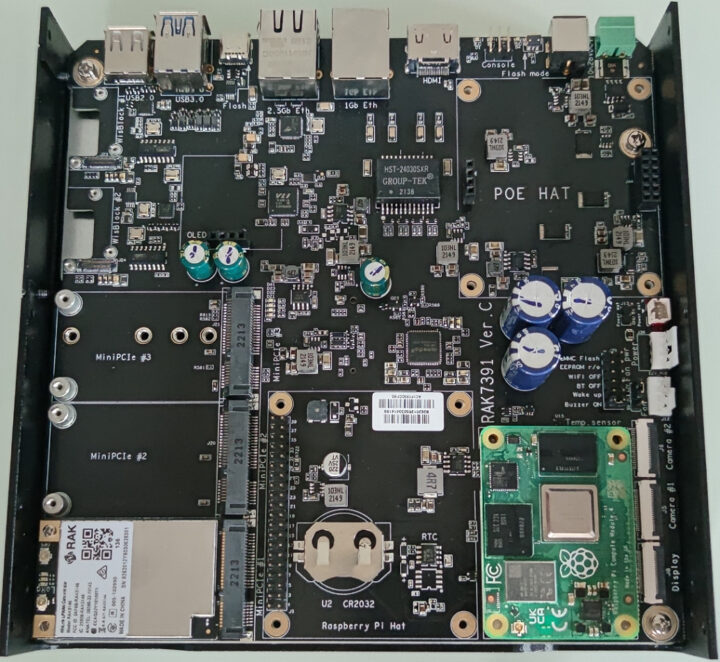
A teardown of the gateway shows the Raspberry Pi CM4 and LoRa module, plus all the expansion options with two extra mini PCIe sockets, two WisBlock slots, some space for an internal Raspberry Pi HAT, optional PoE HAT support, and more.
Here’s a reminder of WisGate Connect (RAK7391) main board specifications:
- SoM – Raspberry Pi CM4 with Broadcom BCM2711 quad-core Cortex-A72 processor @ 1.5GHz, 1 to 8Gb DDR4, optional 8 to 32GB eMMC flash, optional WiFi 5 and Bluetooth 5.0 LE
- Storage – MicroSD card socket for CM4 Lite modules only
- Video Output – HDMI 2.0 up to 4Kp60, 22-pin MIPI DSI connector
- Camera I/F – 2x 22-pin MIPI CSI connectors
- Networking
- Wired – Gigabit Ethernet RJ45 port with PoE support, 2.5GbE RJ45 port
- Optional 802.11 b/g/n/ac/ax WiFi 6 and BLE 5.0 on RPi CM4 module
- Optional LoRaWAN, 4G LTE, 5G, WiFi 6, Zigbee, WiFi HaLoW, etc… via mini PCIe sockets, M.2 socket, and/or Raspberry Pi header
- USB – 2x USB 3.0 ports, 1x USB 2.0 port, 1x USB Type-C port for updating RPi CM4 firmware
- Expansion
- 40-pin Raspberry Pi-compatible header
- 3x Mini PCIe sockets
- 1x M.2 B-key sockets
- 2x WisBlock IO connectors
- Misc – Onboard RTC with battery socket, temperature monitor, buzzer, 12V/5V fan controller, voltage monitor, jumpers for configuration
- Power Supply
- Input
- 10-28V DC via Phoenix connector)
- IEEE 802.3at/bt active PoE
- 5V/12V power out for peripherals
- Input
- Dimensions – PCB: 170 x 170 mm (Mini-ITX standard form factor)
- Weight – 212 grams
- Temperature Range – -20ºC to 85ºC (except for USB 3.0 and buzzer which are rated 0ºC-70ºC)
Hardware compatibility and software architecture
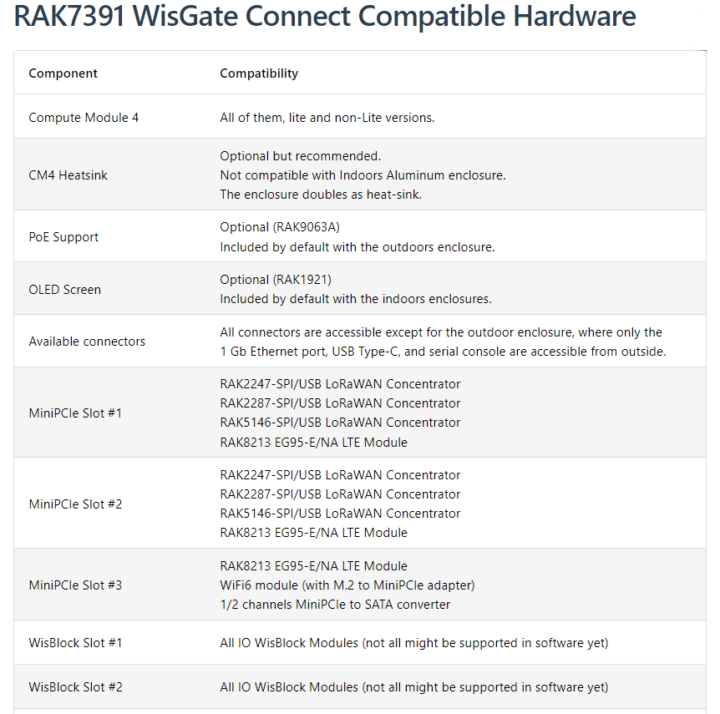
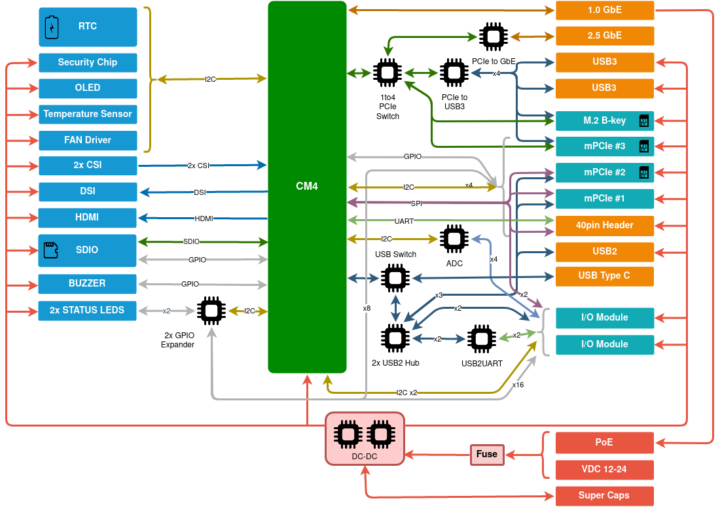
RAKwirelss installed a RAK5146 LoRaWAN module, an OLED display, and a Raspberry Pi Compute Module 4 in the model we received, but the gateway can be extended with any of the hardware modules and accessories shown in the table below.
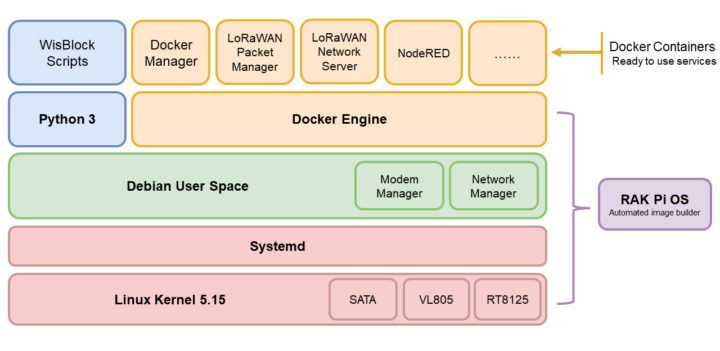
The software architecture of the gateway shows docker support, and that’s what we’ll use to set up a private LoRaWAN network.
Connecting to WisGate Connect RAKPiOS with Secure Shell (SSH)
There are two ways to connect to the WisGate Connect gateway:
- Via one of its RJ45 Ethernet port
- Via a WiFi access point
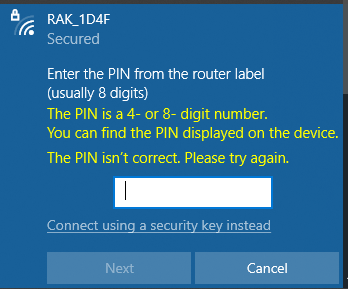
We’ll go with the second option. Connect to the “RAK_1D4F“ access point from your host with the password “rakwireless”. In Windows, you’ll have to click on “Connect using a security key instead” first before enting the password.
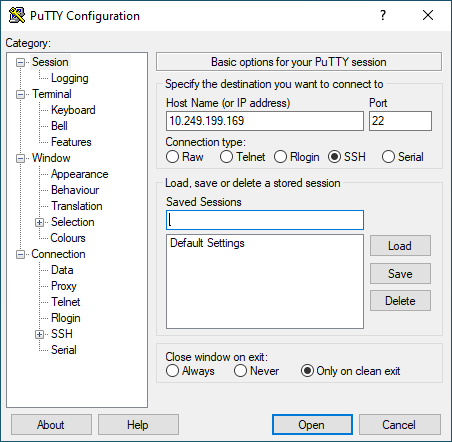
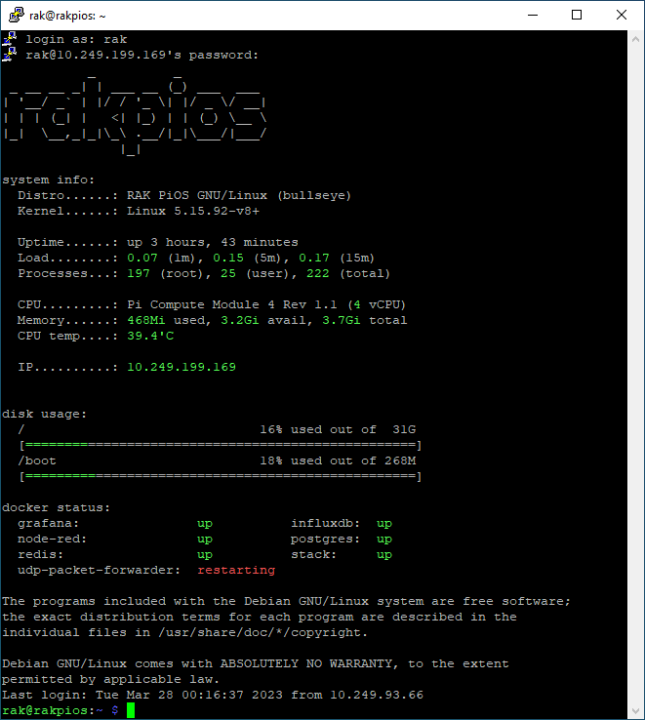
The IP address for the vlan0 interface should now show on the gateway’s OLED screen. We can use this IP address to connect to the gateway via SSH using port 22. We ran Putty in Windows, but you can select other SSH-capable programs as well.
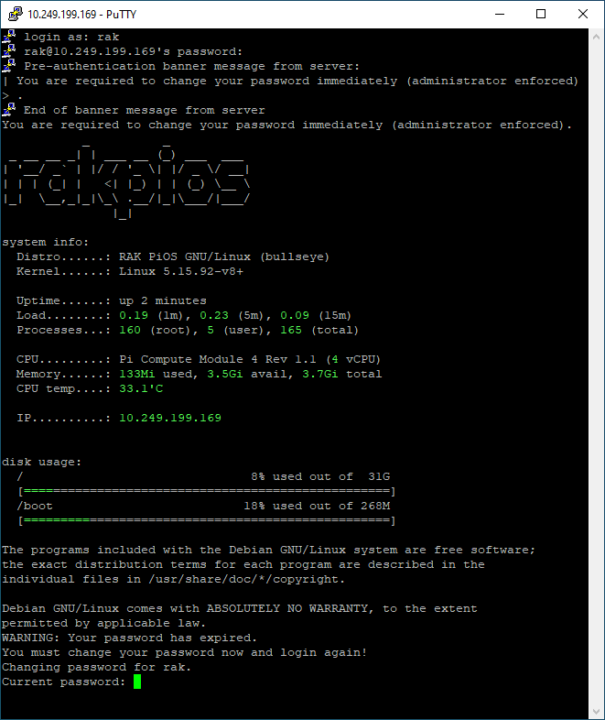
We can now access the shell from RAKPiOS using username “rak” and password “changeme”, which we will be asked to change the first time we connect.
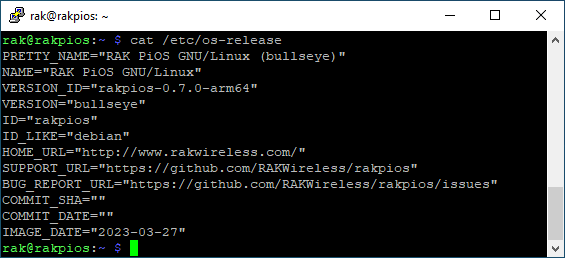
We can find some more details about RAKPiOS with the command:
|
1 |
rak@rakpios:~ $ cat /etc/os-release |
If you want to have a close look at the code for the OS you can do so on GitHub.
Setting up a Private LoRaWAN network with Wisgate Connect
Method 1: Command line installation with Docker
RAKwireless provides six Docker compose examples for deployment on the WisGate Connect RAK7391 gateway.
- Dual_Band_LoRaWAN_Gateway – A fully standalone gateway with support for sub-GHz and 2.4 GHz LoRaWAN concentrators, TailScale for remote access, and The Things Stack LNS.
- MQTT_to_ModBUS_bridge – ModBUS to MQTT bridge using RAK8802 WisBlock RS485 module, and Node-RED.
- Node-RED – Custom Node-RED service with support for all WisBlock modules
- Standalone_LoRaWAN_Gateway – Standalone LoRaWAN gateway with UDP packet forwarder, The Things Stack LNS, Node-RED, InfluxDB, and Grafana.
- Standalone_LoRaWAN_Gateway_TagoCore – Standalone LoRaWAN gateway with UDP packet forwarder, The Things Stack LNS and TagoCore.
- WiFi-HaLow – Gateway with support for AHPI7292S Wi-Fi HaLow module.
We’ll use the Standalone_LoRaWAN_Gateway example in this example since it must closely matches our requirements.
|
1 2 3 |
rak@rakpios:~ $ git clone https://github.com/RAKWireless/rak7391-examples.git rak@rakpios:~ $ cd rak7391-examples rak@rakpios:~ $ cd Standalone_LoRaWAN_Gateway |
We will need to modify “docker-compose.yml” and modify it to match our gateway settings (e.g. EUI) and options (e.g. RAK5146 module).
|
1 2 3 4 5 6 7 8 9 10 11 12 13 14 15 16 17 18 19 20 21 22 23 24 25 26 27 28 29 30 31 32 33 34 35 36 37 38 39 40 41 42 43 44 45 46 47 48 49 50 51 52 53 54 55 56 57 58 59 60 61 62 63 64 65 66 67 68 69 70 71 72 73 74 75 76 77 78 79 80 81 82 83 84 85 86 87 88 89 90 91 92 93 94 95 96 97 98 99 100 101 102 103 104 105 106 107 108 109 110 111 112 113 114 115 116 117 118 119 120 121 122 123 124 125 126 127 128 129 130 131 132 133 134 135 136 137 138 139 140 141 142 143 144 145 146 147 148 149 |
version: '2' services: udp-packet-forwarder: image: rakwireless/udp-packet-forwarder:latest container_name: udp-packet-forwarder restart: unless-stopped networks: - bridge devices: - /dev/ttyACM0 volumes: - /sys:/sys environment: MODEL: "RAK5146" INTERFACE: "USB" RADIO_DEV: "/dev/ttyACM0" GATEWAY_EUI: "D83ADDFFFE061D4F" SERVER_HOST: stack SERVER_PORT: 1700 postgres: image: postgres:14.3-alpine3.15 container_name: postgres restart: unless-stopped environment: - POSTGRES_PASSWORD=root - POSTGRES_USER=root - POSTGRES_DB=ttn_lorawan networks: - bridge volumes: - 'postgres:/var/lib/postgresql/data' ports: - "5432:5432" redis: image: redis:7.0.0-alpine3.15 container_name: redis command: redis-server --appendonly yes restart: unless-stopped networks: - bridge volumes: - 'redis:/data' ports: - "6379:6379" stack: image: xoseperez/the-things-stack:latest container_name: stack restart: unless-stopped depends_on: - redis - postgres networks: - bridge volumes: - 'stack-blob:/srv/ttn-lorawan/public/blob' - 'stack-data:/srv/data' environment: TTS_DOMAIN: 10.249.197.175 CLI_AUTO_LOGIN: "true" TTN_LW_BLOB_LOCAL_DIRECTORY: /srv/ttn-lorawan/public/blob TTN_LW_REDIS_ADDRESS: redis:6379 TTN_LW_IS_DATABASE_URI: postgres://root:root@postgres:5432/ttn_lorawan?sslmode=disable WAIT_HOSTS: redis:6379, postgres:5432 WAIT_HOSTS_TIMEOUT: 300 WAIT_SLEEP_INTERVAL: 30 WAIT_HOST_CONNECT_TIMEOUT: 30 ports: - "80:1885" - "443:8885" - "1881:1881" - "1882:1882" - "1883:1883" - "1884:1884" - "1885:1885" - "1887:1887" - "8881:8881" - "8882:8882" - "8883:8883" - "8884:8884" - "8885:8885" - "8887:8887" - "1700:1700/udp" influxdb: image: influxdb:1.8 container_name: influxdb restart: unless-stopped ports: - '8086:8086' networks: - bridge volumes: - influxdb-storage:/var/lib/influxdb environment: - INFLUXDB_DB=sensors - INFLUXDB_HTTP_AUTH_ENABLED=true - INFLUXDB_ADMIN_USER=admin - INFLUXDB_ADMIN_PASSWORD=changeme grafana: image: grafana/grafana:latest container_name: grafana restart: unless-stopped ports: - '3000:3000' networks: - bridge depends_on: - influxdb volumes: - grafana-storage:/var/lib/grafana - ./volume/grafana/provisioning/:/etc/grafana/provisioning environment: - GF_SECURITY_ADMIN_USER=admin - GF_SECURITY_ADMIN_PASSWORD=changeme node-red: image: nodered/node-red:latest container_name: node-red restart: unless-stopped entrypoint: /data/entrypoint.sh environment: - TZ=Europe/Amsterdam ports: - "1880:1880" networks: - bridge depends_on: - influxdb - stack volumes: - ./volume/node-red/data:/data volumes: influxdb-storage: grafana-storage: node-red-data: redis: postgres: stack-blob: stack-data: networks: bridge: |
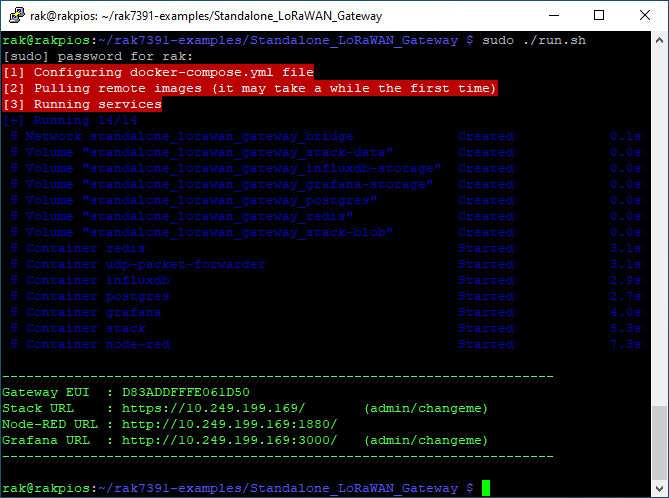
We can now deploy our containers with Docker:
|
1 |
rak@rakpios:~ $ sudo ./run.sh |
We now have 7 containers running on the gateway:
- dp-packet-forwarder – Interacts with the LoRa chip to receive and transfer LoRa packets.
- Stack – A LoRaWAN Network Server provided by The Things Stack and used in conjunction with Redis and Postgres services in order to enable connectivity, management, and monitoring of end-user devices, gateways, and applications.
- Redis – Primary storage for the Network Server, Application Server, and Join Server. It is also used by the Identity Server and event systems.
- Postgres – Another database needed by The Things Stack.
- Node-RED with an initial flow that subscribes to uplink data from The Things Stack with the MQTT protocol and stores data into an InfluxDB database called Sensors.
- InfluxDB – Time-series database for Node-RED to record data obtained from sensors.
- Grafana – Visualize data from the InfluxDB database in various formats such as graphs, gauges, and charts.
This method is mainly suitable for people familiar with Docker’s command line (docker compose) and YAML configuration.
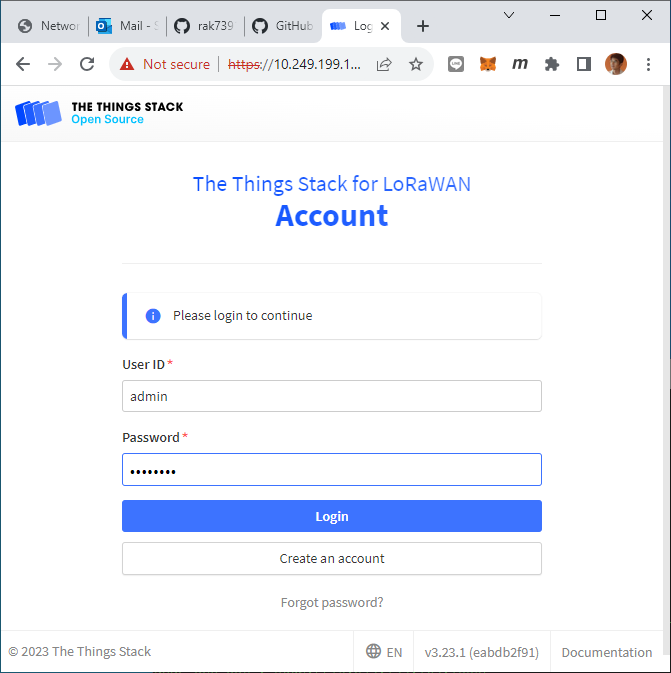
Here’s an example of using our private LoRaWAN Network Server with The Things Stack which we can access with the IP address of the gateway.
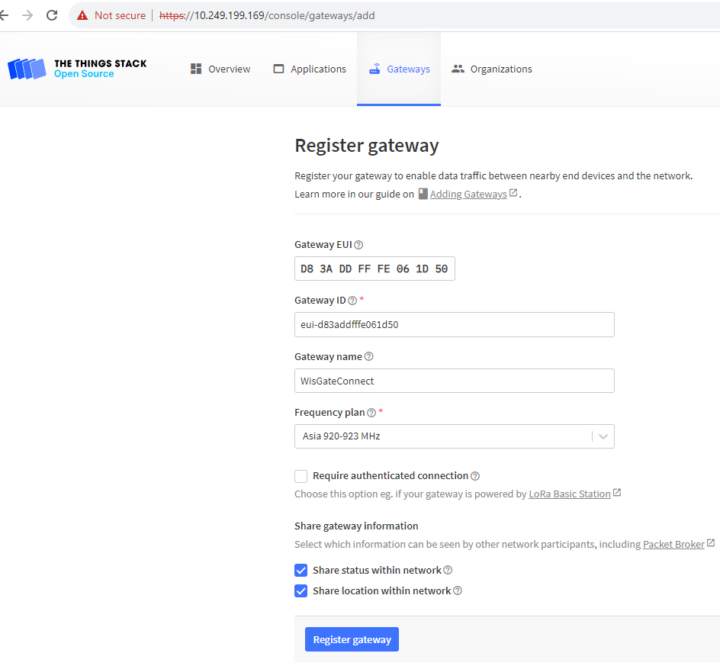
After logging to the interface, we can register the gateway with The Things Network and share it with others if we wish to.
Method 2 – Installation via Portainer Local
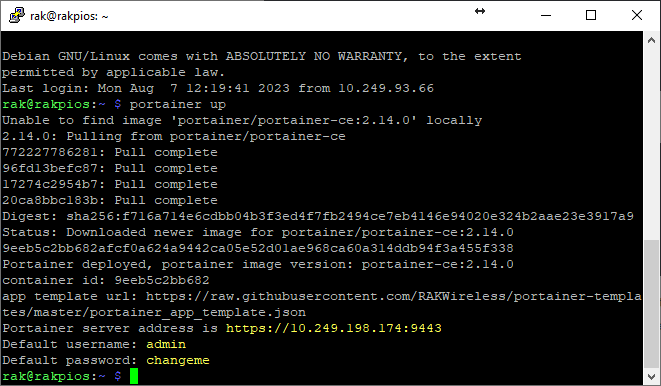
If using the command line is not your cup of tea, RAKwirless provides a web page interface to enable containers through the Portainer template for RAK7391. You’ll still need to access the gateway through SSH, but only one command is needed:
|
1 |
rak@rakpios:~ $ portainer up |
From there, we can copy the URL provided in the shell (e.g. https://10.249.198.174:9443) and paste it into our favorite browser. Our testing was done in Chrome on Windows.
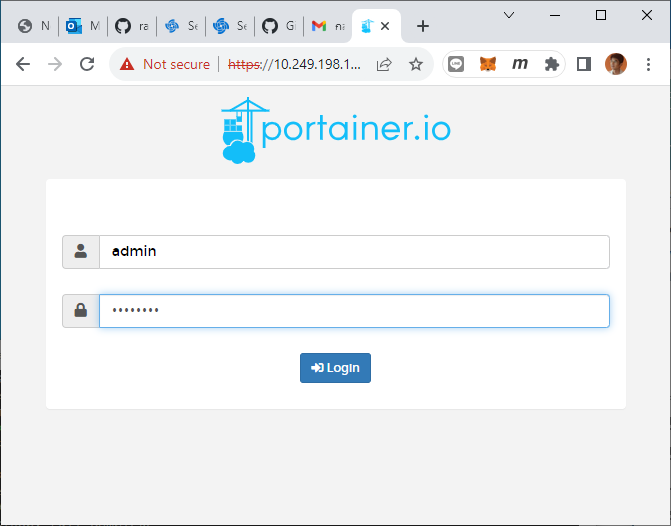
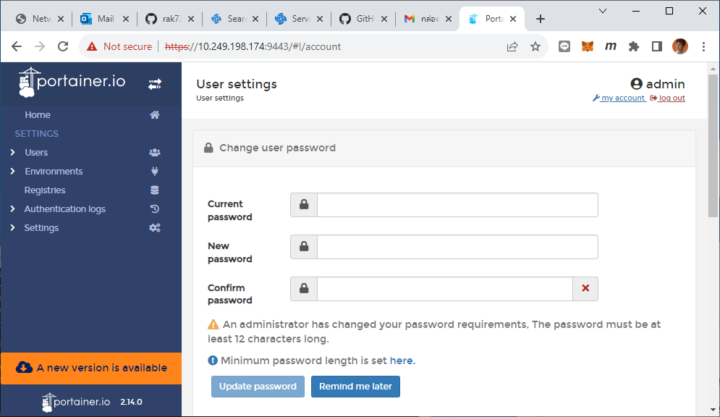
We can log in with the “admin” username and “changeme” password which we’ll be asked to change to one with at least 12 characters.
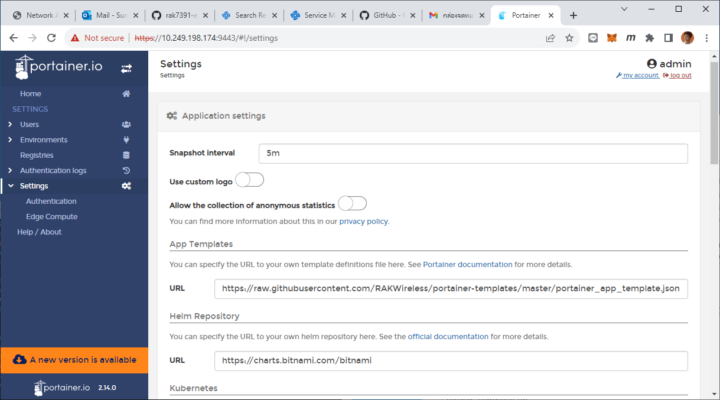
Now we can go to the Settings page to add the URL “https://raw.githubusercontent.com/RAKWireless/portainer-templates/master/portainer_app_template.json” to the “App Template” field.
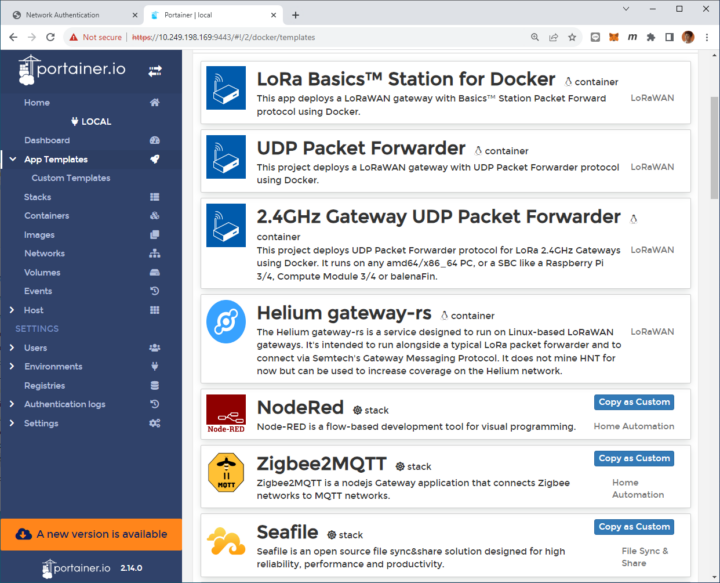
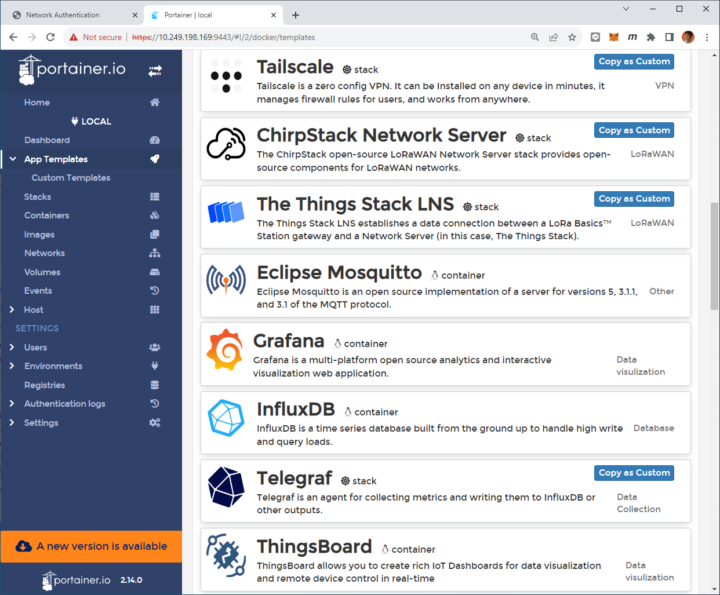
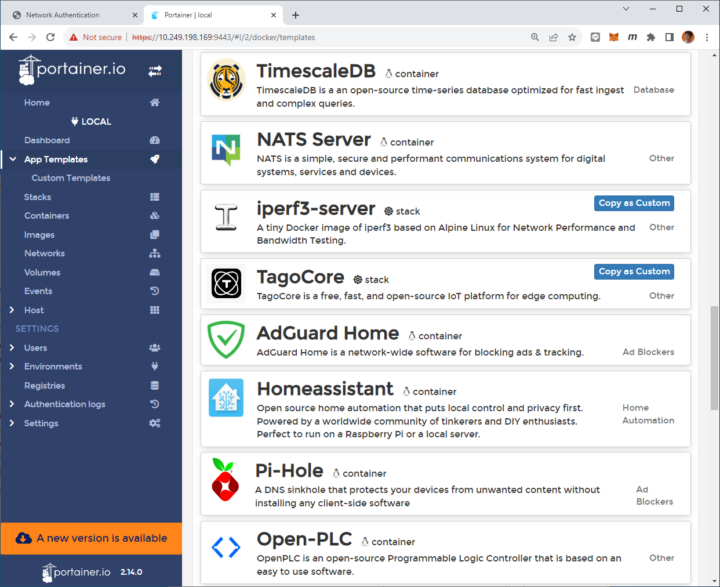
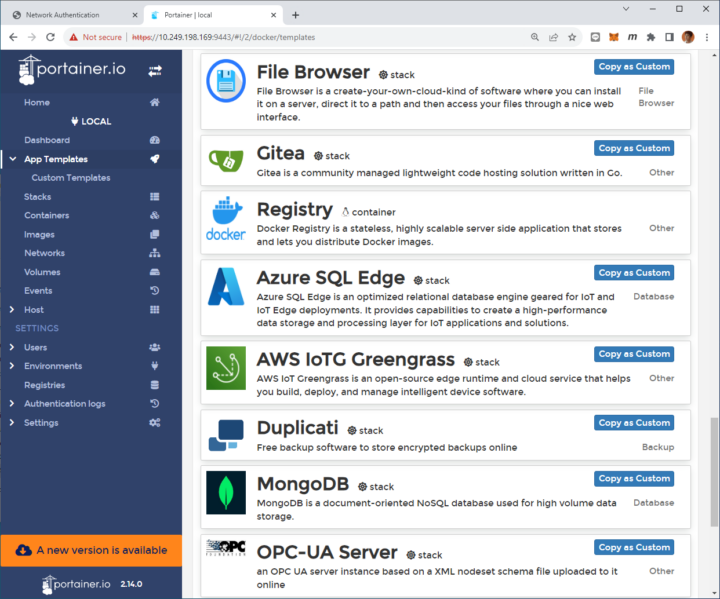
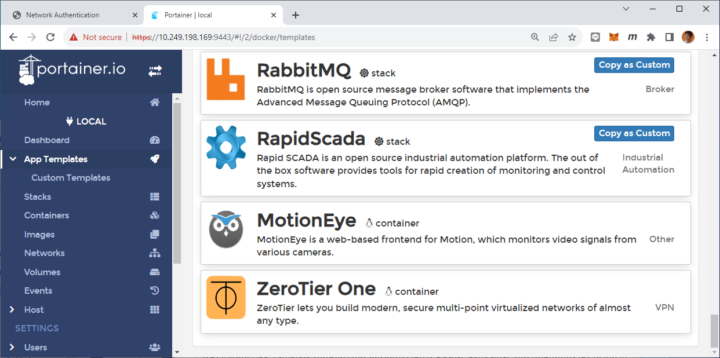
A new App Template menu will appear and show a list of Docker Containers with 35 Application Templates such as LoRaWAN Network Server, Scada, OPC-UA Server, PLC, Home Assistant, Zigbee, Database, Dashboards, and more, as shown in the picture below.
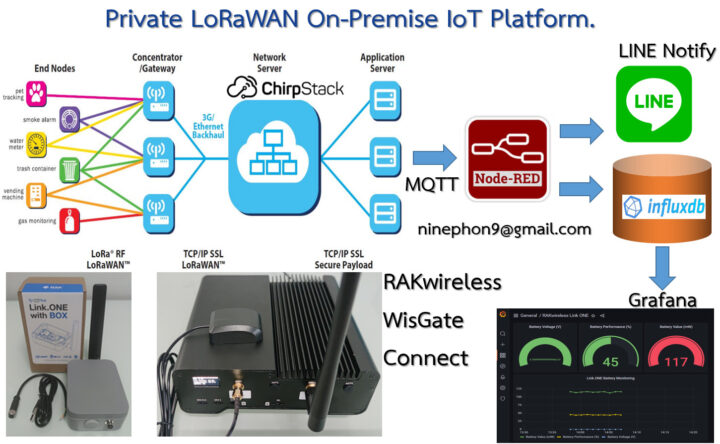
In the following steps, we use Portainer to build a Private LoRaWAN platform running on the WisGate Connect gateway with UDP Packet Forwarder, ChirpStack, Node-RED, InfluxDB, and Grafana.
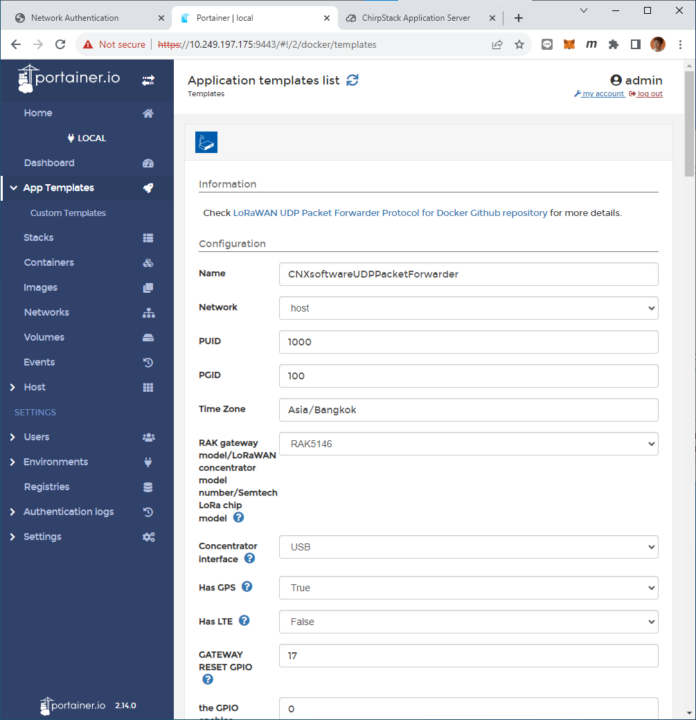
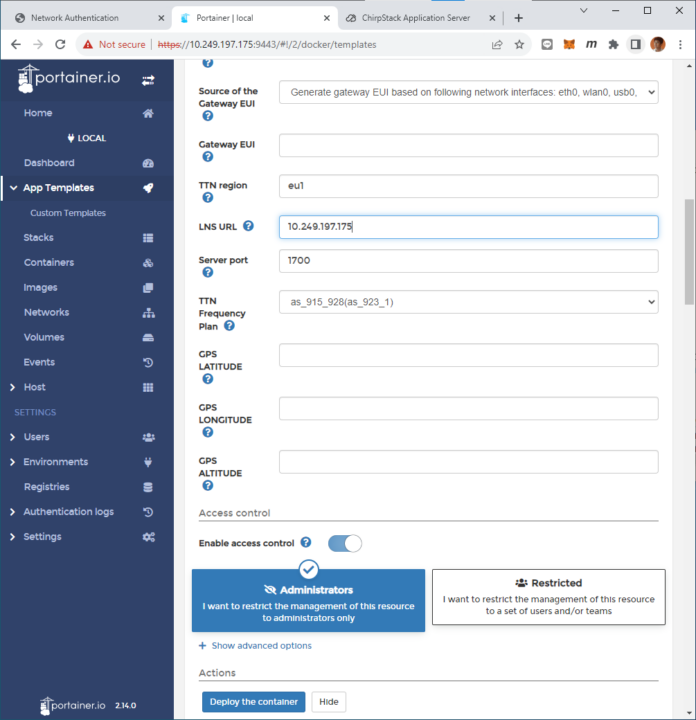
Installation and configuration of the UDP Packet Forwarder container
The udp-packet-forwarder interacts with the LoRa chip to receive and transfer LoRa packets. You can find more details on GitHub.
|
1 2 3 4 5 6 7 8 9 10 11 12 13 |
Name: CNXsoftwareUDPPacketForwarder Network: host Time Zone: Asia/Bangkok RAK gateway model: RAK5146 Concentrator interface: USB Has GPS: True Has LTE: False Where the concentrator is connected to: /dev/ttyACM0 Where the GPS is connected to: /dev/ttyAMA0 Source of the Gateway EUI: Generate gateway EUI based on folllowing network interfaces: eth0, wlan0, usb0, eth1, or most used NIC LNS URL or Server_Host: <IP.address> Server port: 1700 TTN Frequency Plan: as_915_928(as_923_1) |
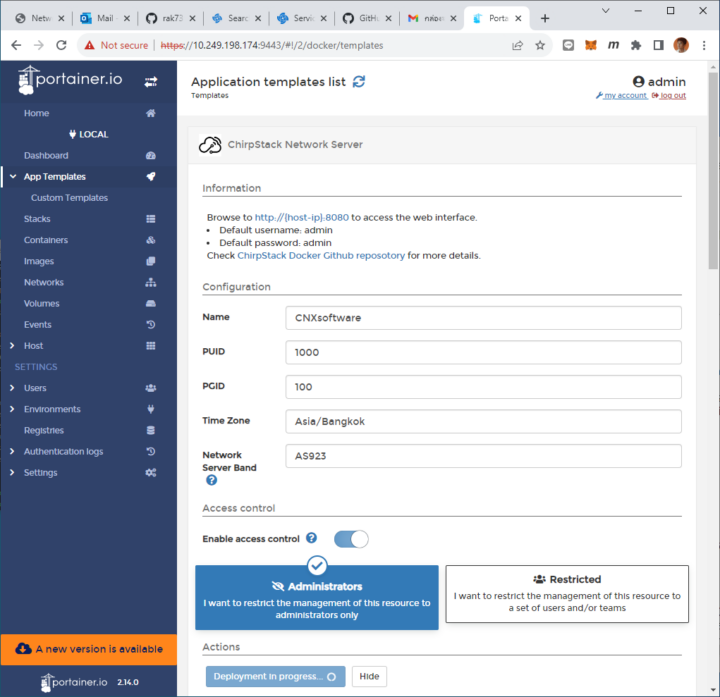
ChirpStack Network Server deployment
ChirpStack LoRaWAN Network Server will be used in conjunction with MQTT Mosquitto, Redis, and Postgres services to enable connectivity, management, and monitoring of end-user devices, gateways, and applications.
|
1 2 3 |
Name: CNXsoftware Time Zone: Asia/Bangkok Network Server Band: AS923 |
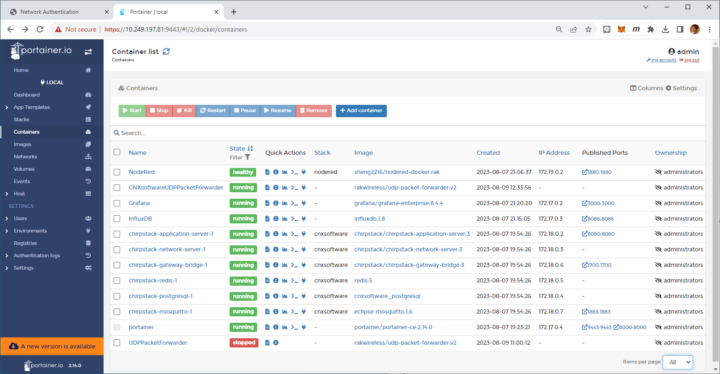
ChirpStack’s default username and password are both “admin”. A total of 6 Docker container stacks will be installed in the following order:
- chirpstack-gateway-bridge-1
- chirpstack-network-server-1
- chirpstack-application-server-1
- chirpstack-mosquitto-1
- chirpstack-redis-1
- chirpstack-postgresql-1
Node-Red installation and deployment
Node-RED will be configured to subscribe to the uplink data from ChirpStack using the MQTT protocol and decrypt the data in the payload (Base64 algorithm), and store it into the InfluxDB database or validate the data to alert via LINE Notify.
|
1 |
Application Time Zone: Asia/Bangkok |
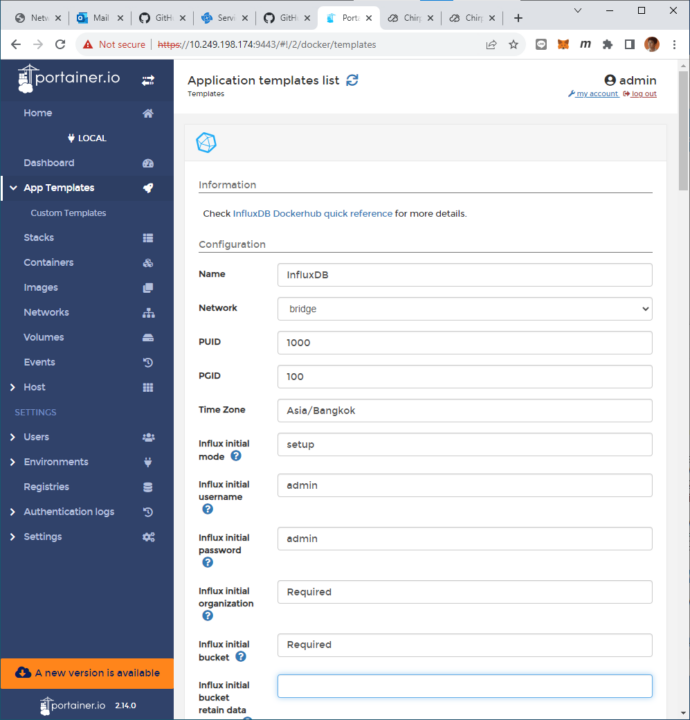
InfluxDB configuration
InfluxDB time-series database enables Node-RED to record data obtained from sensors. Again, only the time zone needs to be modified.
|
1 |
Time Zone: Asia/Bangkok |
Before using InfluxDB, you’ll need to open the container console to create a database as follows:
|
1 2 3 4 |
connect user: root influx create database iot quit |
Grafana installation
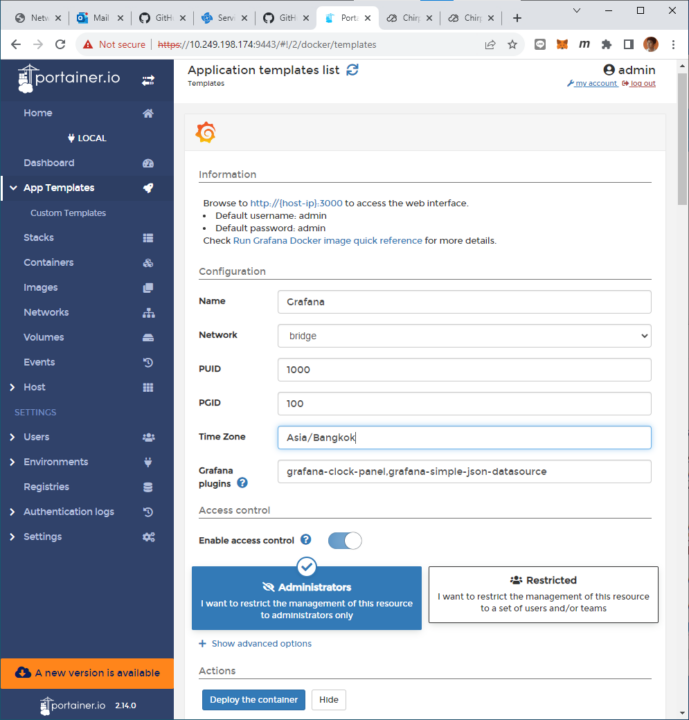
Grafana will visualize the data from the InfluxDB in various formats such as graphs, gauges, charts, etc. There’s only one parameter to change in Portainer before deploying the container:
|
1 |
Time Zone: Asia/Bangkok |
We now have the following Docker Containers and Stacks installed and up and running at all times.
Private LoRaWAN network IoT platform test
We now have the same private LoRaWAN IoT platform that Ninephon used in previous reviews, except the gateway is a more powerful Wisgate Connect from RAKWireless that replaces a Dragino LG308 with a 400 MHz MIPS processor. The Link.ONE development kit will be used as a LoRa node for testing our private LoRaWAN network.
ChirkStack configuration
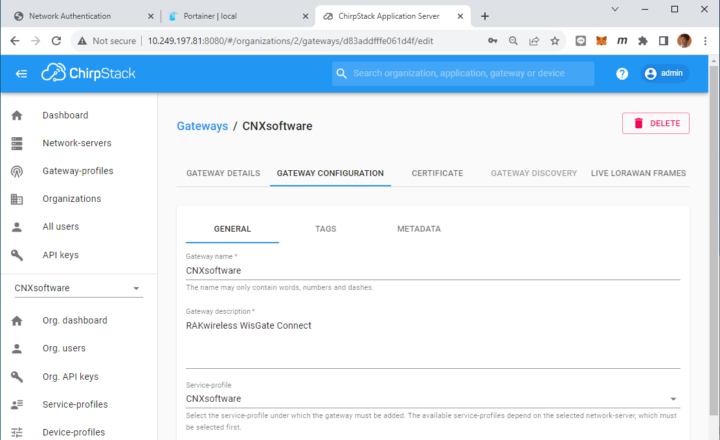
We’ll now need to access the ChirpStack Network Server by going to http://<IP.address>:8080 and log in with admin/admin default username and password, and change the password after the first login.
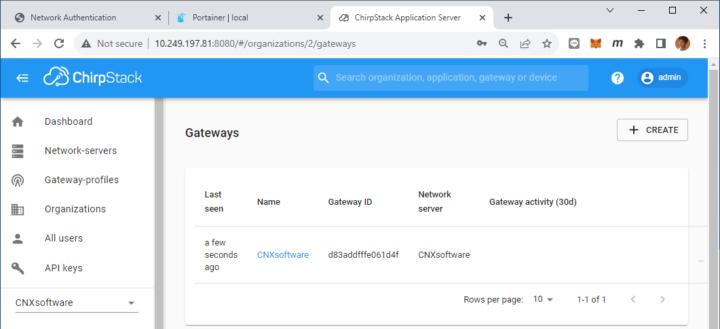
We can now go to the Gateways section and add RAKwireless RAK7391 WisGate Connect to ChirpStack.
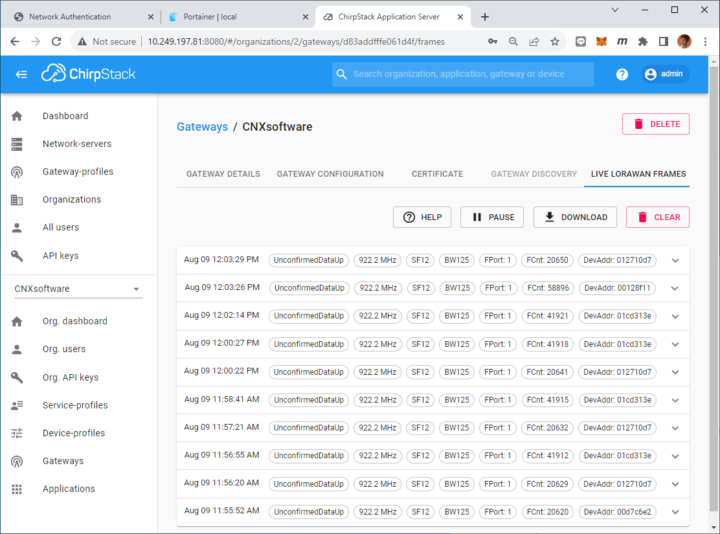
We can see the list of received packets within the radius of the gateway in the “LIVE LORAWAN FRAMES” tab.
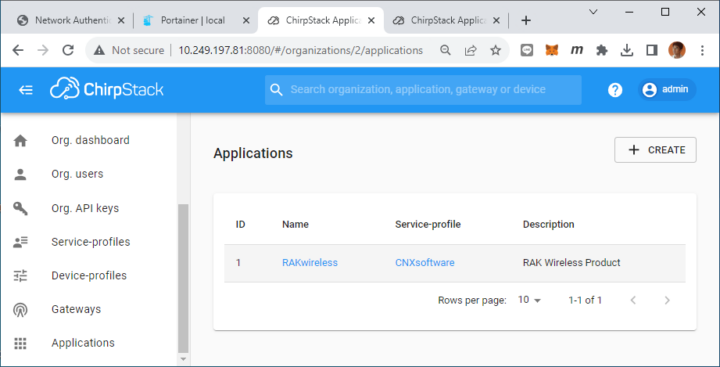
Let’s now create an application called “RAKWireless” in the Applications menu.
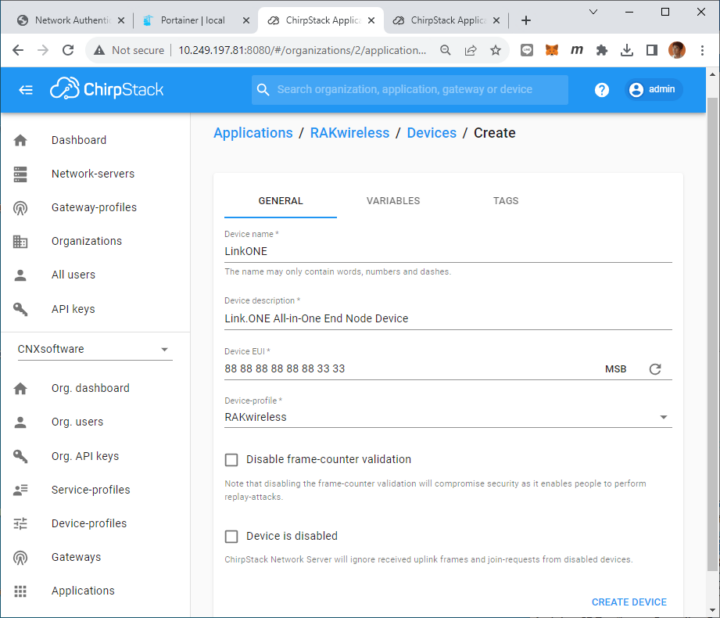
We will now create a new device named LinkONE within the “RAKwireless” application using the Device EUI 88 88 88 88 88 88 33 33.
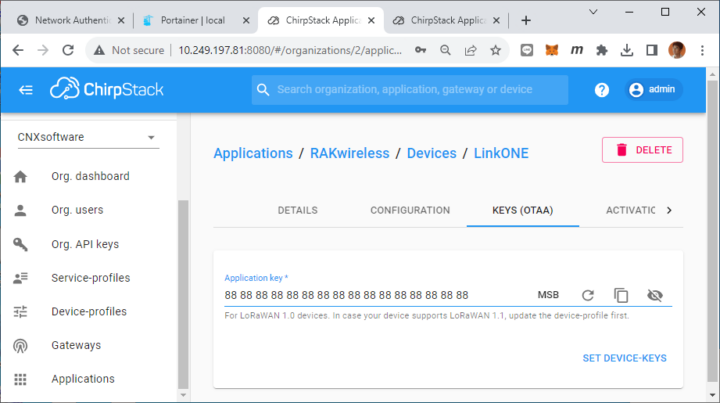
We’ll use an OTAA (Over The Air Activation) key entering 88 88 88 88 88 88 88 88 88 88 88 88 88 88 88 88 in the Application key field before clicking on the SET DEVICE-KEYS button.
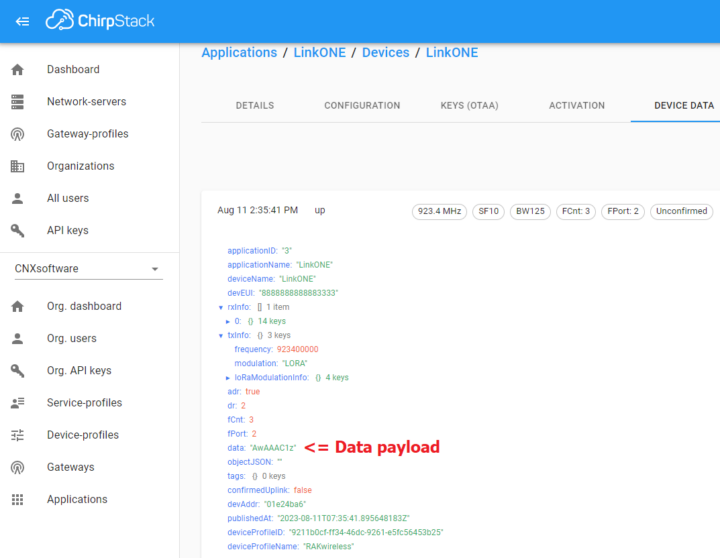
The Link.ONE LoRaWAN Sensor Node Device was programmed in the Arduino IDE to read battery status every minute and encode the data with Base64 before sending a packet to the LoRaWAN gateway.
If you are interested in finding out more about the Link.ONE devkit, you can read our review “Using Link.ONE all-in-one LPWAN development kit with ChipStark, Node-Red, InfluxDB, and Grafana” for details.
Node-RED configuration
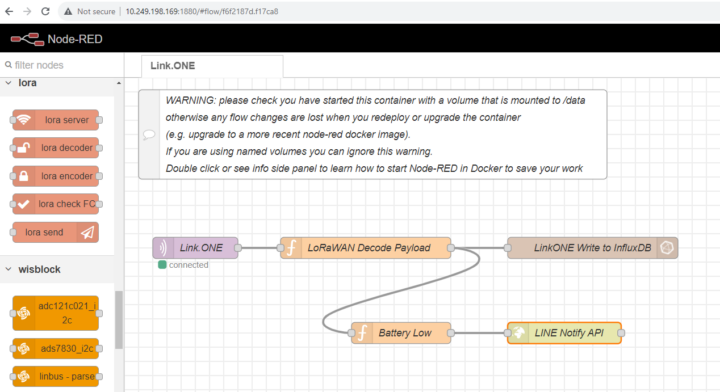
The Node-RED web interface can be accessed by going to http://<IP.address>:1880 and we’ll use Flow Nodes such as MQTT in, Function, InfluxDB out, HTTP Request and others that RAKwireless has installed to support devices such as WisBlock Module, ModBus, etc…
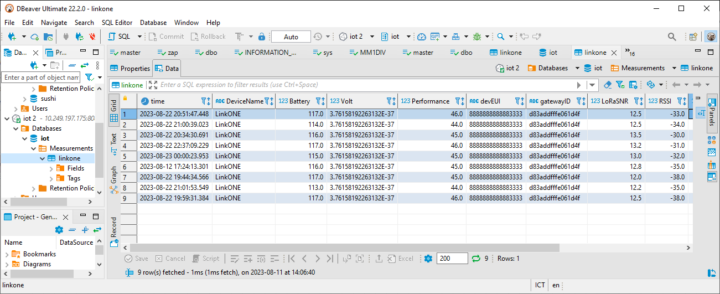
Node-RED will automatically store sensor and LoRaWAN system data into the InfluxDB time-series database, and if the battery level is low (< 3.3V) send a notification to our smartphone through the LINE Notify API.
Setting up Grafana for visualization of the data
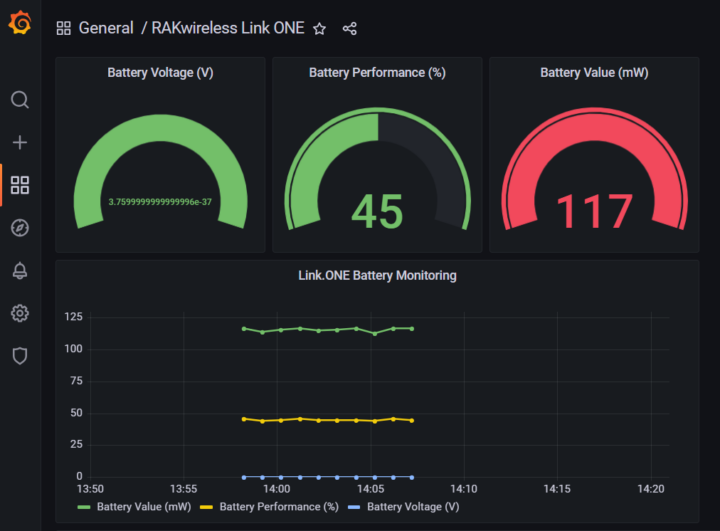
You can access the Grafana dashboard by opening the web page at http://<IP.address>:3000 using admin/admin to log in the first time. We’ll be asked to change to a better password, but you can skip it if you don’t need to change the password just yet The Grafana Dashboard reads the data from the InfluxDB time series database to display Battery voltage (V), battery percentage (%), and power consumption while transmitting data (mW).
The WisGate Connect gateway was turned off 24/7 and functioned normally at all times during the review. The enclosure feels warm to the touch because it acts as a heatsink to cool the Raspberry Pi CM4 module and this makes sure the gateway can operate without a cooling fan.
Conclusion
RAKwireless WisGate Connect gateway is suitable for developers wanting to implement various wireless communication networks such as LoRaWAN, 4G LTE, 5G, WiFi 6, Zigbee, WiFi HaLoW, and more. It can save on costs with a single machine acting as a gateway, network server, and application server, and you don’t need a separate server. You just need to configure it yourself which should be relatively easy by following the steps described above. However, if all you need is a LoRaWAN gateway, we would recommend one or the cheaper RAKwireless Wisgate Edge since it is also easier to use, or another similar model from the market.
We would like to thank RAKwireless for sending us the WisGate Connect kit for review. Pricing starts at $149 for the RAK7391 Compute Module 4 (CM4) Carrier Board only, and up to $531 for a complete system with Raspberry Pi CM4 (4GB, 32GB, WiFi), a 16-channel LoRaWAN concentrator module, and an outdoor enclosure. The model reviewed in this tutorial sells for $381. You can also add various WisBlock modules if you require extra sensors or wireless options for the gateway.
CNXSoft: This tutorial is a translation of the original review on CNX Software Thailand by Ninephon Kongangkab.

Jean-Luc started CNX Software in 2010 as a part-time endeavor, before quitting his job as a software engineering manager, and starting to write daily news, and reviews full time later in 2011.
Support CNX Software! Donate via cryptocurrencies, become a Patron on Patreon, or purchase goods on Amazon or Aliexpress


