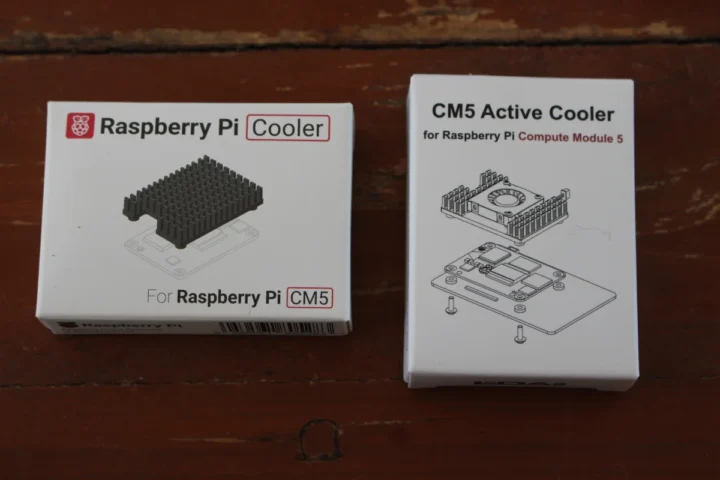
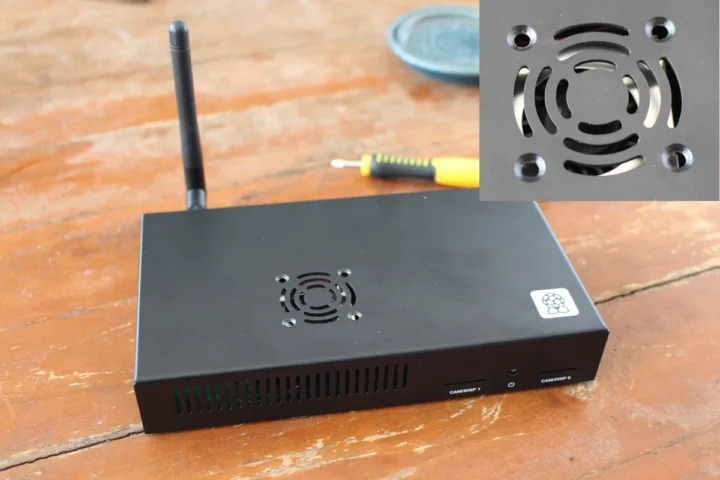
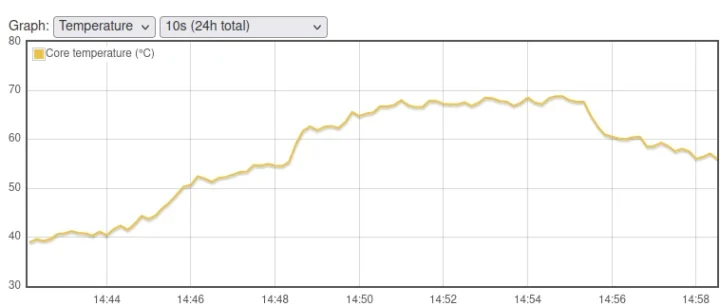
The day of Raspberry Pi CM5 release, I published a mini review of the Raspberry Pi Development Kit for CM5 showing how to assemble the kit and boot Raspberry Pi OS, and I also ran sbc-bench benchmark to evaluate the performance. Sadly, the Broadcom BCM2712 CPU did throttle during the test meaning cooling was not optimal when the CM5 IO board was inside the IO Case and the Compute Module 5 was only cooled by the fan. So today, I’ll repeat the same test with other cooling solutions namely the official Raspberry Pi Cooler for CM5 (that’s a heatsink only), and EDATEC’s CM5 active cooler similar to the active cooler for the Raspberry Pi 5, but designed for the CPU module.
But before that, I’ll do some house cleaning so to speak since last time, I booted Raspberry Pi OS from an NVMe SSD and I noticed the camera did not work. So I’ll report my experience installing Raspberry Pi OS on the eMMC flash and getting the camera to work since none of which went perfectly smoothly.
Installing Raspberry Pi OS to the CM5’s eMMC flash
In theory, it should be easy to install Raspberry Pi OS to the eMMC flash of the CM5 module since it’s documented.
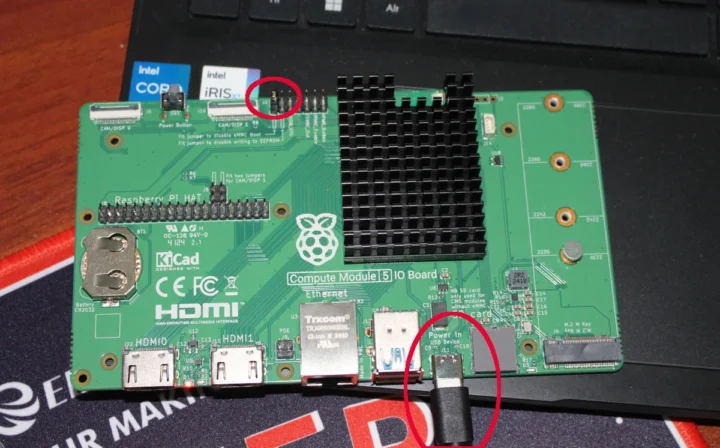
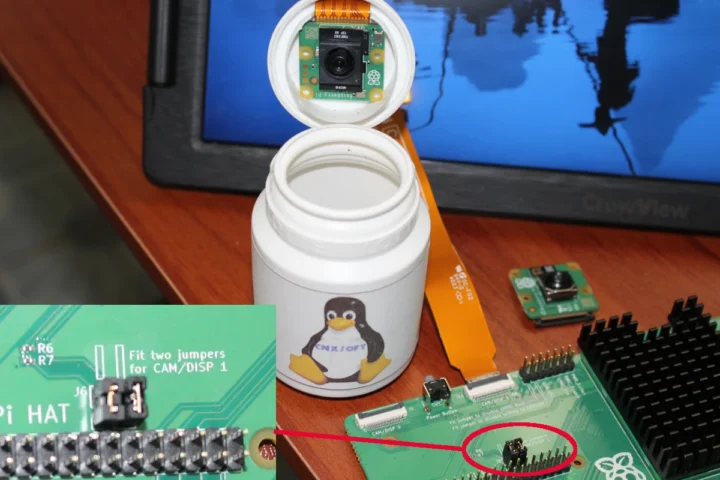
We need to insert a jumper to the left side of the J6 header marked “Fit jumper to disable eMMC boot” and connect a USB-C cable between the IO board and the host as shown in the photo below.
We then need to install and run rpiboot so that the eMMC flash appears as a USB storage device on the host.
|
1 2 |
sudo apt install rpiboot sudo rpiboot |
The utility was stuck waiting for the board… and I could not see anything indicating a new USB device in the system.
|
1 2 |
RPIBOOT: build-date Jan 31 2022 version 0~20220315+git6fa2ec0+nowin-0ubuntu1 Waiting for BCM2835/6/7/2711... |
After several tries, I thought maybe the rpiboot version in Ubuntu 22.04 repository was too old. So I removed it, and built the utility from source:
|
1 2 3 4 5 6 |
sudo apt remove rpiboot sudo apt install git libusb-1.0-0-dev pkg-config build-essential git clone --recurse-submodules --shallow-submodules --depth=1 https://github.com/raspberrypi/usbboot cd usbboot make sudo make install |
The output of the command now looks much better…
|
1 2 3 4 5 6 7 8 9 10 11 12 13 14 15 16 17 18 19 20 |
jaufranc@CNX-LAPTOP-5:~/usbboot$ sudo rpiboot RPIBOOT: build-date Dec 20 2024 version 20240422~085300 ef721cda If the device fails to connect then please see https://rpltd.co/rpiboot for debugging tips. Waiting for BCM2835/6/7/2711/2712... 2712: Directory not specified using default /usr/share/rpiboot/mass-storage-gadget64/ Sending bootcode.bin Successful read 4 bytes Waiting for BCM2835/6/7/2711/2712... Second stage boot server File read: mcb.bin File read: memsys00.bin File read: memsys01.bin File read: memsys02.bin File read: memsys03.bin File read: bootmain Loading: /usr/share/rpiboot/mass-storage-gadget64//config.txt File read: config.txt Loading: /usr/share/rpiboot/mass-storage-gadget64//boot.img File read: boot.img Second stage boot server done |
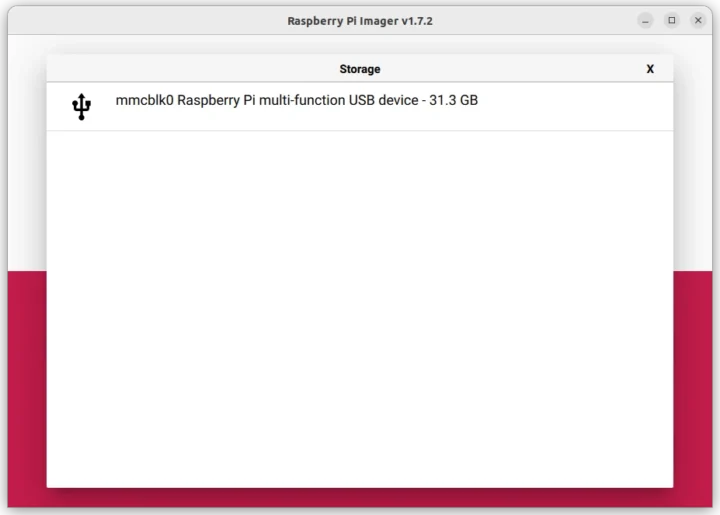
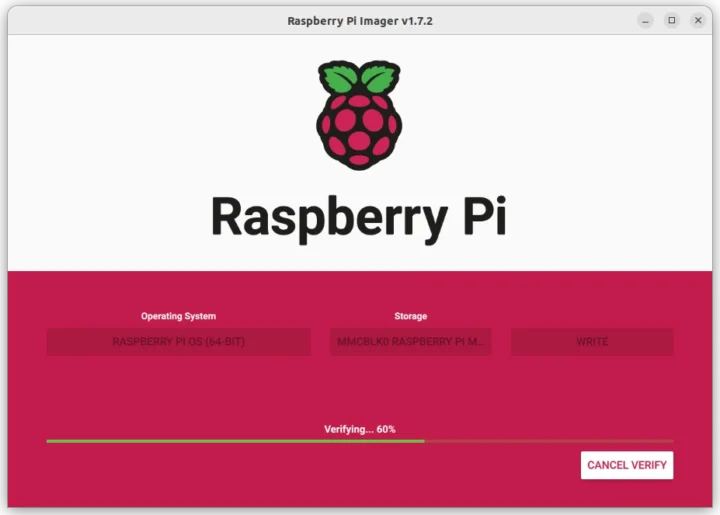
So I started Raspberry Pi Image, selected Raspberry Pi OS 64-bit and the storage device called “Raspberry Pi multi-function USB device” with 31.3 GB capacity that corresponds to the 32GB eMMC flash on my module.
I could flash the image to the Raspberry Pi CM5 as I would do on a microSD card.
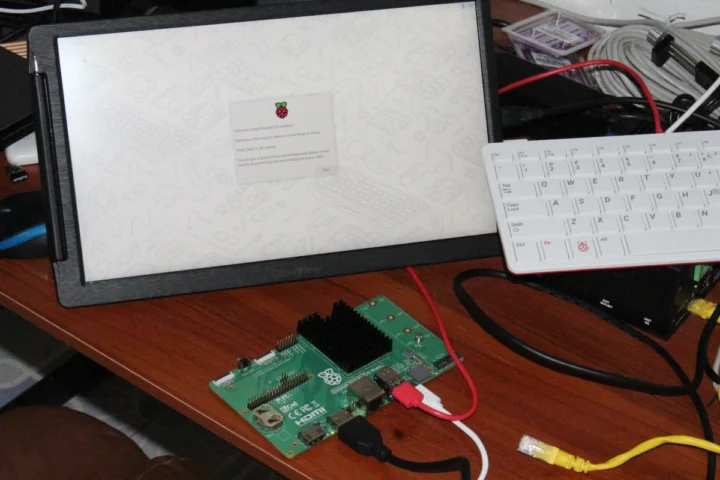
Once done, the OS booted properly from the eMMC flash.
We can also check the eMMC flash partitions with lsblk:
|
1 2 3 4 5 6 7 |
pi@raspberrypi:~ $ lsblk NAME MAJ:MIN RM SIZE RO TYPE MOUNTPOINTS mmcblk0 179:0 0 29.1G 0 disk ├─mmcblk0p1 179:1 0 512M 0 part /boot/firmware └─mmcblk0p2 179:2 0 28.6G 0 part / mmcblk0boot0 179:32 0 4M 1 disk mmcblk0boot1 179:64 0 4M 1 disk |
Raspberry Pi CM5 camera support
As noted in the introduction, the Raspberry Pi Camera Module 3 did not work out of the box when connected to the CAM/DISP 0 connector.
|
1 2 |
pi@raspberrypi:~ $ rpicam-hello --list No cameras available! |
There’s documentation to enable the camera on both CAM/DISP 0 and CAM DISP 1, but it’s somewhat incomplete and a few parts are wrong.
I followed the instructions and edited /boot/firmware/config.txt to comment out the camera_auto_detect line and add the overlay for the Raspberry Pi Camera Module 3:
|
1 2 3 |
# Automatically load overlays for detected cameras #camera_auto_detect=1 dtoverlay=imx708,cam0 |
A reboot solved the issue.
|
1 2 3 4 5 6 7 |
pi@raspberrypi:~ $ rpicam-hello --list Available cameras ----------------- 0 : imx708 [4608x2592 10-bit RGGB] (/base/axi/pcie@120000/rp1/i2c@88000/imx708@1a) Modes: 'SRGGB10_CSI2P' : 1536x864 [120.13 fps - (768, 432)/3072x1728 crop] 2304x1296 [56.03 fps - (0, 0)/4608x2592 crop] 4608x2592 [14.35 fps - (0, 0)/4608x2592 crop] |
That was easy and no issue there.
Using a second camera is similar, but the CAM/DISP 1 interface requires us to add two jumpers on J6.
I decided to use the Raspberry Pi AI camera for this test. I only have one Raspberry Pi Zero camera cable, so I could not try both cameras at the same time. The AI camera is not listed in the Compute Module documentation, but we can find the required overlay on GitHub:
|
1 2 3 4 |
# Automatically load overlays for detected cameras #camera_auto_detect=1 dtoverlay=imx708,cam0 dtoverlay=imx500-pi5,cam1 |
I also installed the imx500 package just in case and rebooted the system:
|
1 2 |
sudo apt install imx500-all sudo reboot |
But the camera was not detected, so I tried to connect the Raspberry Pi Camera Module 3 to CAM/DISP 1 and changed the config.txt files as follows:
|
1 2 3 4 |
# Automatically load overlays for detected cameras #camera_auto_detect=1 #dtoverlay=imx708,cam0 dtoverlay=imx708,cam1 |
Same as before:
|
1 2 |
pi@raspberrypi:~ $ rpicam-hello --list No cameras available! |
So finally, I just tested the Raspberry Pi AI camera on CAM/DISP 0 using the imx500-pi5 device tree overlay, and it could be detected.
|
1 2 3 4 5 6 |
pi@raspberrypi:~ $ rpicam-hello --list Available cameras ----------------- 0 : imx500 [4056x3040 10-bit RGGB] (/base/axi/pcie@120000/rp1/i2c@88000/imx500@1a) Modes: 'SRGGB10_CSI2P' : 2028x1520 [30.02 fps - (0, 0)/4056x3040 crop] 4056x3040 [10.00 fps - (0, 0)/4056x3040 crop] |
So I’m unable to use the CAM/DISP 1 connector. Either I’ve missed something, or it’s just the second connector will only work when two cameras are attached to the CM5 IO board, and won’t work with a single camera. So just in case, I connected a Raspberry Pi Touch Display 2 to CAM/DISP 0 and the AI camera to CAM/DISP 1 with the following config:
|
1 2 3 4 5 6 7 8 |
# Automatically load overlays for detected cameras #camera_auto_detect=1 #dtoverlay=imx708,cam0 dtoverlay=vc4-kms-dsi-ili9881-7inch,dsi0 dtoverlay=imx500-pi5,cam1 # Automatically load overlays for detected DSI displays #display_auto_detect=1 |
The display works fine, but the AI camera is still not working on the second connector, although the imx500 sensor does show in the kernel log…
|
1 2 3 4 5 6 7 8 9 10 11 12 |
pi@raspberrypi:~ $ dmesg | grep csi [ 0.958143] platform 1f00128000.csi: Fixed dependency cycle(s) with /axi/pcie@120000/rp1/i2c@88000/imx500@1a [ 0.964771] platform 1f00128000.csi: bcm2712_iommu_probe_device: MMU 1000005280.iommu [ 0.964774] platform 1f00128000.csi: bcm2712_iommu_device_group: MMU 1000005280.iommu [ 0.964778] platform 1f00128000.csi: Adding to iommu group 2 [ 0.964795] platform 1f00128000.csi: bcm2712_iommu_attach_dev: MMU 1000005280.iommu [ 2.484827] rp1-cfe 1f00128000.csi: bcm2712_iommu_of_xlate: MMU 1000005280.iommu [ 2.485163] rp1-cfe 1f00128000.csi: DW dphy Host HW v1.20 [ 2.485175] rp1-cfe 1f00128000.csi: PiSP FE HW v0.1 [ 2.487088] rp1-cfe 1f00128000.csi: found subdevice /axi/pcie@120000/rp1/i2c@88000/imx500@1a pi@raspberrypi:~ $ rpicam-hello --list No cameras available! |
I’ll give up for now…
Raspberry Pi Cooler and CM5 active cooler installation
Let’s go back to the main topic, and install the coolers on the Raspberry Pi CM5.
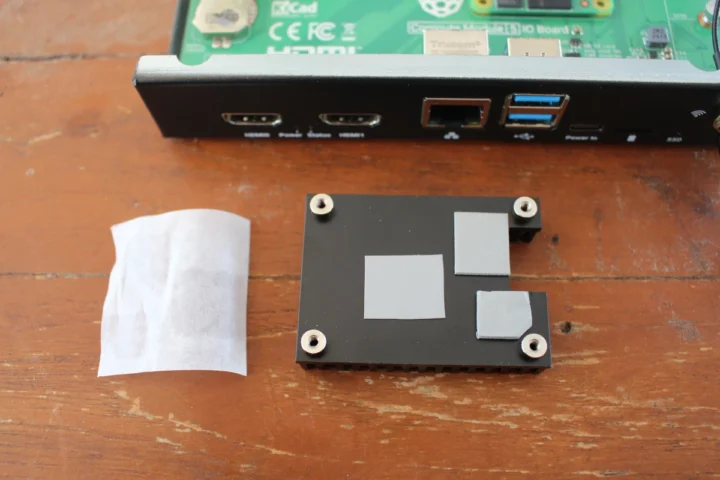
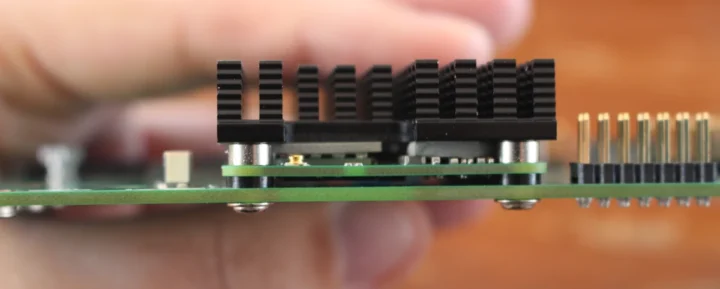
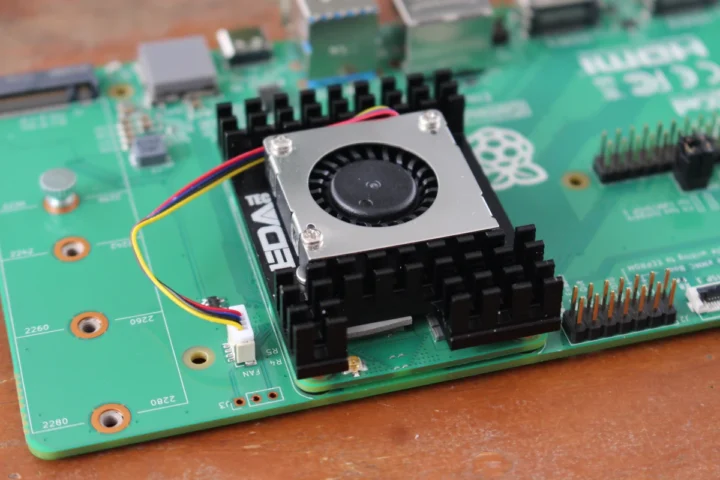
Both the official Raspberry Pi Cooler and EDATEC CM5 active cooler come in a similar package and basically the same accessories namely some screws and thick washers and three thermal pads fitted to the bottom of the heatsink.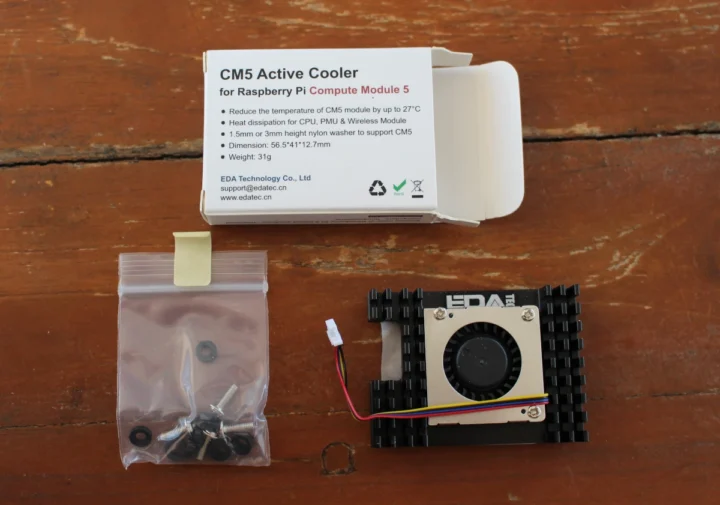
The EDATEC cooler just adds a cooling fan. Let’s start with the official cooler. First, I had to peel the film protecting the thermal pad…
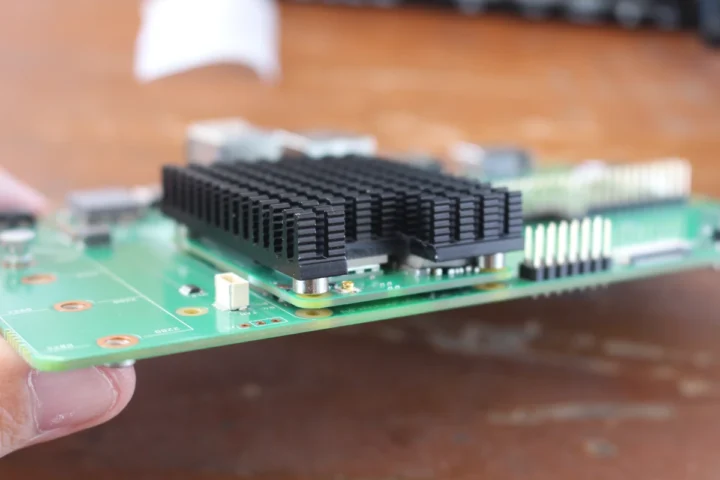
before placing it on the CM5 module making sure it’s oriented in a way that does not interfere with the built-in antenna on the CPU module.
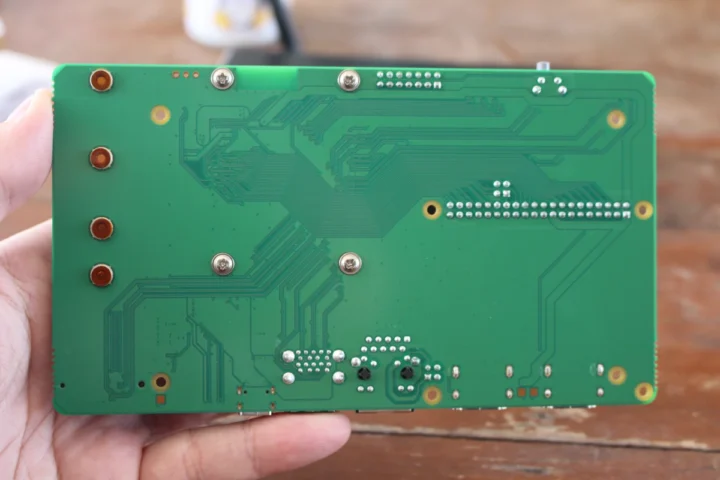
I then placed four washers between the IO board and CM5 module and secured everything with four screws.
The procedure to install the EDATEC active cooler is exactly the same, except we also need to connect the fan’s wire.
Benchmark and CPU temperature with Raspberry Pi Cooler for CM5
Let’s run sbc-bench.sh benchmark while monitoring the CPU temperature with rpi-monitor in the fanless configuration with the Pi Cooler:
|
1 2 3 4 5 6 7 8 9 10 11 12 13 14 15 16 17 18 19 20 21 22 23 24 25 26 27 28 29 30 31 32 33 34 35 36 37 38 39 40 41 42 43 44 45 46 47 48 49 50 51 52 53 54 55 56 57 58 59 60 61 62 63 64 65 66 67 68 69 70 71 72 73 74 75 76 77 78 79 80 81 82 83 84 85 86 87 88 89 90 91 92 93 94 95 96 97 98 99 100 101 102 103 104 105 106 107 108 109 110 111 112 113 114 115 116 117 118 119 120 121 122 123 124 125 126 127 128 129 130 131 |
pi@raspberrypi:~ $ sudo ./sbc-bench.sh -r Starting to examine hardware/software for review purposes... sbc-bench v0.9.68 Installing needed tools: distro packages already installed, mhz, cpufetch, cpuminer. Done. Checking cpufreq OPP. Done. Executing tinymembench. Done. Executing RAM latency tester. Done. Executing OpenSSL benchmark. Done. Executing 7-zip benchmark. Done. Throttling test: heating up the device, 5 more minutes to wait. Done. Checking cpufreq OPP again. Done (11 minutes elapsed). Results validation: * Measured clockspeed not lower than advertised max CPU clockspeed * No swapping * Background activity (%system) OK * No throttling Full results uploaded to https://0x0.st/XCd-.txt # Raspberry Pi Compute Module 5 Rev 1.0 Tested with sbc-bench v0.9.68 on Sat, 21 Dec 2024 14:35:20 +0700. Full info: [https://0x0.st/XCd-.txt](http://0x0.st/XCd-.txt) ### General information: Information courtesy of cpufetch: SoC: Broadcom BCM2712 Technology: 16nm Microarchitecture: Cortex-A76 Max Frequency: 2.400 GHz Cores: 4 cores Features: NEON,SHA1,SHA2,AES,CRC32 BCM2712, Kernel: aarch64, Userland: arm64 CPU sysfs topology (clusters, cpufreq members, clockspeeds) cpufreq min max CPU cluster policy speed speed core type 0 0 0 1500 2400 Cortex-A76 / r4p1 1 0 0 1500 2400 Cortex-A76 / r4p1 2 0 0 1500 2400 Cortex-A76 / r4p1 3 0 0 1500 2400 Cortex-A76 / r4p1 4041 KB available RAM ### Governors/policies (performance vs. idle consumption): Original governor settings: cpufreq-policy0: performance / 2400 MHz (conservative ondemand userspace powersave performance schedutil / 1500 1600 1700 1800 1900 2000 2100 2200 2300 2400) Tuned governor settings: cpufreq-policy0: performance / 2400 MHz Status of performance related policies found below /sys: /sys/module/pcie_aspm/parameters/policy: default [performance] powersave powersupersave ### Clockspeeds (idle vs. heated up): Before at 52.9°C: cpu0 (Cortex-A76): OPP: 2400, ThreadX: 2400, Measured: 2399 After at 79.3°C: cpu0 (Cortex-A76): OPP: 2400, ThreadX: 2400, Measured: 2399 ### Performance baseline * memcpy: 5607.4 MB/s, memchr: 14150.3 MB/s, memset: 12426.6 MB/s * 16M latency: 117.8 118.8 118.3 118.0 119.6 119.6 141.0 135.3 * 128M latency: 133.8 132.8 134.0 144.3 133.9 132.6 133.3 134.4 * 7-zip MIPS (3 consecutive runs): 11145, 10906, 11012 (11020 avg), single-threaded: 3203 * `aes-256-cbc 540078.51k 1003701.74k 1256093.44k 1332879.02k 1365472.60k 1367829.16k` * `aes-256-cbc 540615.20k 1003659.80k 1255990.53k 1332837.72k 1365235.03k 1368178.69k` ### PCIe and storage devices: * Raspberry RP1 PCIe 2.0 South Bridge: Speed 5GT/s, Width x4, driver in use: rp1, * 29.1GB "Samsung BJTD4R" HS400 Enhanced strobe eMMC 5.1 card as /dev/mmcblk0: date 07/2024, manfid/oemid: 0x000015/0x0100, hw/fw rev: 0x0/0x0300000000000000 ### Swap configuration: * /var/swap on /dev/mmcblk0p2: 512.0M (0K used) on MMC storage ### Software versions: * Debian GNU/Linux 12 (bookworm) * Build scripts: http://archive.raspberrypi.com/debian/ bookworm main * Compiler: /usr/bin/gcc (Debian 12.2.0-14) 12.2.0 / aarch64-linux-gnu * OpenSSL 3.0.15, built on 3 Sep 2024 (Library: OpenSSL 3.0.15 3 Sep 2024) * ThreadX: 26826259 / 2024/09/23 14:02:56 ### Kernel info: * `/proc/cmdline: reboot=w coherent_pool=1M 8250.nr_uarts=1 pci=pcie_bus_safe cgroup_disable=memory numa_policy=interleave smsc95xx.macaddr=2C:CF:67:B2:8D:E8 vc_mem.mem_base=0x3fc00000 vc_mem.mem_size=0x40000000 console=ttyAMA10,115200 console=tty1 root=PARTUUID=4825a0d7-02 rootfstype=ext4 fsck.repair=yes rootwait quiet splash plymouth.ignore-serial-consoles cfg80211.ieee80211_regdom=TH` * Vulnerability Spec store bypass: Mitigation; Speculative Store Bypass disabled via prctl * Vulnerability Spectre v1: Mitigation; __user pointer sanitization * Vulnerability Spectre v2: Mitigation; CSV2, BHB * Kernel 6.6.62+rpt-rpi-2712 / CONFIG_HZ=250 All known settings adjusted for performance. Device now ready for benchmarking. Once finished stop with [ctrl]-[c] to get info about throttling, frequency cap and too high background activity all potentially invalidating benchmark scores. All changes with storage and PCIe devices as well as suspicious dmesg contents will be reported too. Time fake/real load %cpu %sys %usr %nice %io %irq Temp VCore PMIC DC(V) 14:35:21: 2400/2400MHz 3.51 2% 0% 2% 0% 0% 0% 73.8°C 0.8945V 2.9W 5.13V ^C Cleaning up. Done. Checking cpufreq OPP again. Done. Clockspeeds now at 72.7°C: cpu0 (Cortex-A76): OPP: 2400, ThreadX: 2400, Measured: 2399 Results validation: * Measured clockspeed not lower than advertised max CPU clockspeed * No swapping * Background activity (%system) OK * No throttling |
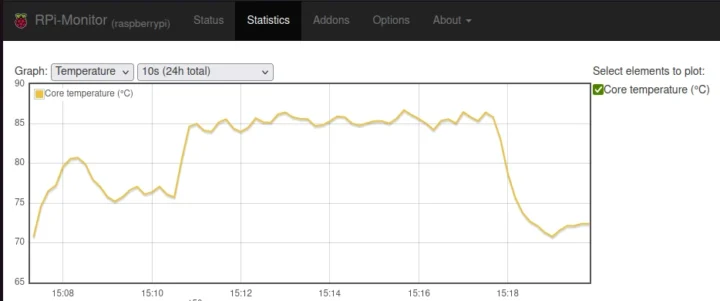
The ambient temperature was around 26°C during the test, and no throttling was detected. However, the CPU temperature was still fairly high under load at up to 79.3°C during CPUminer. It never went above 68.8°C during 7-zip multi-core.
See how it compares to the Raspberry Pi CM5 IO case with a built-in fan and no heatsink (ambient temperature: 32°C).
The Raspberry Pi Cooler for CM5 should be an appropriate cooling system for most people, but if you want to operate the device at higher temperatures (35°C+) or inside an enclosure trapping heat, it might not be enough.
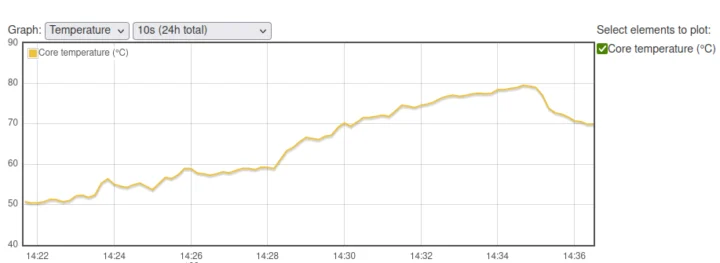
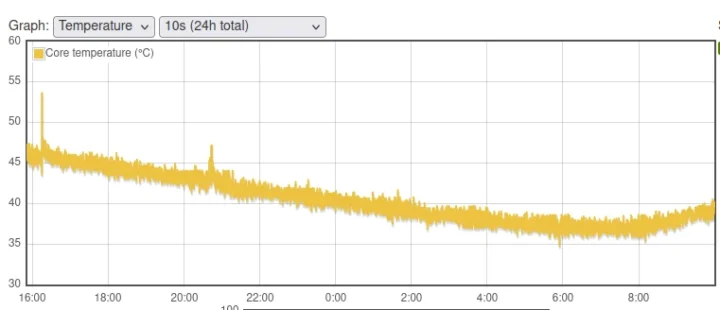
As a side note, I left the CM5 kit to run overnight, and the chart below shows how the ambient temperature impacts idle CPU temperature.
It went from 46°C at 16:00 to 38°C at 6:00 with the room temperature decreasing from 27°C to 19°C (estimated based on the weather report).
Benchmark and CPU temperature with EDATEC CM5 Active cooler
Let’s now run the benchmark with the active cooler:
|
1 2 3 4 5 6 7 8 9 10 11 12 13 14 15 16 17 18 19 20 21 22 23 24 25 26 27 28 29 30 31 32 33 34 35 36 37 38 39 40 41 42 43 44 45 46 47 48 49 50 51 52 53 54 55 56 57 58 59 60 61 62 63 64 65 66 67 68 69 70 71 72 73 74 75 76 77 78 79 80 81 82 83 84 85 86 87 88 89 90 91 92 93 94 95 96 97 98 99 100 101 102 103 104 105 106 107 108 109 110 111 112 113 114 115 116 117 118 119 120 121 122 123 124 125 126 127 128 129 130 131 132 |
pi@raspberrypi:~ $ sudo ./sbc-bench.sh -r Starting to examine hardware/software for review purposes... sbc-bench v0.9.68 Installing needed tools: distro packages already installed. Done. Checking cpufreq OPP. Done. Executing tinymembench. Done. Executing RAM latency tester. Done. Executing OpenSSL benchmark. Done. Executing 7-zip benchmark. Done. Throttling test: heating up the device, 5 more minutes to wait. Done. Checking cpufreq OPP again. Done (11 minutes elapsed). Results validation: * Measured clockspeed not lower than advertised max CPU clockspeed * No swapping * Background activity (%system) OK * No throttling Full results uploaded to https://0x0.st/8rH_.txt # Raspberry Pi Compute Module 5 Rev 1.0 Tested with sbc-bench v0.9.68 on Sun, 22 Dec 2024 14:18:35 +0700. Full info: [https://0x0.st/8rH_.txt](http://0x0.st/8rH_.txt) ### General information: Information courtesy of cpufetch: SoC: Broadcom BCM2712 Technology: 16nm Microarchitecture: Cortex-A76 Max Frequency: 2.400 GHz Cores: 4 cores Features: NEON,SHA1,SHA2,AES,CRC32 BCM2712, Kernel: aarch64, Userland: arm64 CPU sysfs topology (clusters, cpufreq members, clockspeeds) cpufreq min max CPU cluster policy speed speed core type 0 0 0 1500 2400 Cortex-A76 / r4p1 1 0 0 1500 2400 Cortex-A76 / r4p1 2 0 0 1500 2400 Cortex-A76 / r4p1 3 0 0 1500 2400 Cortex-A76 / r4p1 4040 KB available RAM ### Governors/policies (performance vs. idle consumption): Original governor settings: cpufreq-policy0: ondemand / 2400 MHz (conservative ondemand userspace powersave performance schedutil / 1500 1600 1700 1800 1900 2000 2100 2200 2300 2400) Tuned governor settings: cpufreq-policy0: performance / 2400 MHz Status of performance related policies found below /sys: /sys/module/pcie_aspm/parameters/policy: default [performance] powersave powersupersave ### Clockspeeds (idle vs. heated up): Before at 43.0°C: cpu0 (Cortex-A76): OPP: 2400, ThreadX: 2400, Measured: 2398 After at 65.5°C: cpu0 (Cortex-A76): OPP: 2400, ThreadX: 2400, Measured: 2399 ### Performance baseline * memcpy: 5707.8 MB/s, memchr: 14187.6 MB/s, memset: 12935.3 MB/s * 16M latency: 118.9 117.1 119.8 117.9 120.3 118.9 141.0 136.2 * 128M latency: 133.6 132.5 133.7 142.7 134.3 132.3 133.1 134.4 * 7-zip MIPS (3 consecutive runs): 11154, 11152, 11174 (11160 avg), single-threaded: 3209 * `aes-256-cbc 540286.17k 1003793.09k 1255994.45k 1332805.63k 1365428.91k 1367692.63k` * `aes-256-cbc 540545.85k 1003955.39k 1256114.35k 1332834.30k 1364443.14k 1367905.62k` ### PCIe and storage devices: * Raspberry RP1 PCIe 2.0 South Bridge: Speed 5GT/s, Width x4, driver in use: rp1, * 29.1GB "Samsung BJTD4R" HS400 Enhanced strobe eMMC 5.1 card as /dev/mmcblk0: date 07/2024, manfid/oemid: 0x000015/0x0100, hw/fw rev: 0x0/0x0300000000000000 ### Swap configuration: * /var/swap on /dev/mmcblk0p2: 512.0M (0K used) on MMC storage ### Software versions: * Debian GNU/Linux 12 (bookworm) * Build scripts: http://archive.raspberrypi.com/debian/ bookworm main * Compiler: /usr/bin/gcc (Debian 12.2.0-14) 12.2.0 / aarch64-linux-gnu * OpenSSL 3.0.15, built on 3 Sep 2024 (Library: OpenSSL 3.0.15 3 Sep 2024) * ThreadX: 26826259 / 2024/09/23 14:02:56 ### Kernel info: * `/proc/cmdline: reboot=w coherent_pool=1M 8250.nr_uarts=1 pci=pcie_bus_safe cgroup_disable=memory numa_policy=interleave smsc95xx.macaddr=2C:CF:67:B2:8D:E8 vc_mem.mem_base=0x3fc00000 vc_mem.mem_size=0x40000000 console=ttyAMA10,115200 console=tty1 root=PARTUUID=4825a0d7-02 rootfstype=ext4 fsck.repair=yes rootwait quiet splash plymouth.ignore-serial-consoles cfg80211.ieee80211_regdom=TH` * Vulnerability Spec store bypass: Mitigation; Speculative Store Bypass disabled via prctl * Vulnerability Spectre v1: Mitigation; __user pointer sanitization * Vulnerability Spectre v2: Mitigation; CSV2, BHB * Kernel 6.6.62+rpt-rpi-2712 / CONFIG_HZ=250 All known settings adjusted for performance. Device now ready for benchmarking. Once finished stop with [ctrl]-[c] to get info about throttling, frequency cap and too high background activity all potentially invalidating benchmark scores. All changes with storage and PCIe devices as well as suspicious dmesg contents will be reported too. Time fake/real load %cpu %sys %usr %nice %io %irq Temp VCore PMIC DC(V) 14:18:36: 2400/2400MHz 3.78 39% 0% 39% 0% 0% 0% 60.6°C 0.8942V 2.6W 5.13V ^C Cleaning up. Done. Checking cpufreq OPP again. Done. Clockspeeds now at 58.4°C: cpu0 (Cortex-A76): OPP: 2400, ThreadX: 2400, Measured: 2399 Results validation: * Measured clockspeed not lower than advertised max CPU clockspeed * No swapping * Background activity (%system) OK * No throttling * ondemand cpufreq governor used by distro but io_is_busy not set to 1 on all cores -> http://tinyurl.com/44pbmw79 |
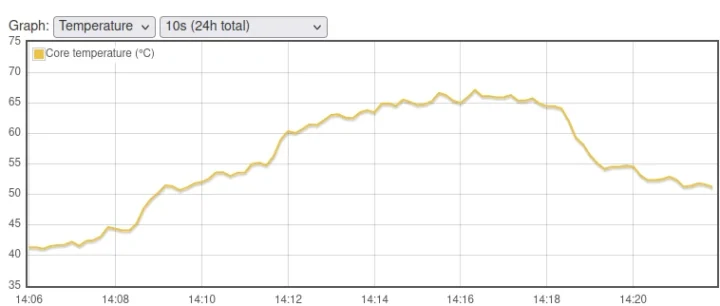
The ambient temperature was about 25°C. No throttling occurred, and the CPU temperature maxed out at 67.2°C in CPUminer and 63.9°C in 7-zip.
It looks nice although an issue is that the fan turns at full speed when I power off the system, and there’s a 2.3 Watts power consumption at the wall…
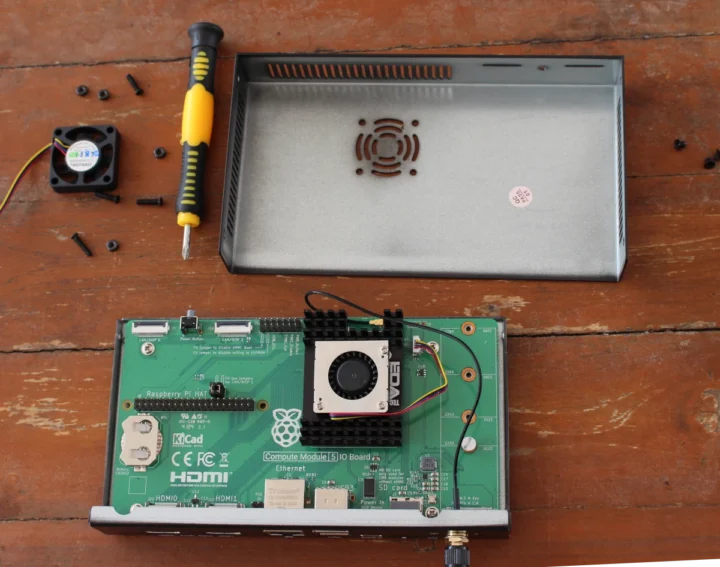
The final test will be with the CM5 Active cooler inside the IO case. After securing the board on the bottom part with four screws, I connected the external WiFi antenna. I also removed the fan from the top part of the case.
We end with a complete system with an enclosure. The fan is not perfectly centered, but it’s good enough to get an air intake for cooling.
Time for a file run of sbc-bench.sh:
|
1 2 3 4 5 6 7 8 9 10 11 12 13 14 15 16 17 18 19 20 21 22 23 24 25 26 27 28 29 30 31 32 33 34 35 36 37 38 39 40 41 42 43 44 45 46 47 48 49 50 51 52 53 54 55 56 57 58 59 60 61 62 63 64 65 66 67 68 69 70 71 72 73 74 75 76 77 78 79 80 81 82 83 84 85 86 87 88 89 90 91 92 93 94 95 96 97 98 99 100 101 102 103 104 105 106 107 108 109 110 111 112 113 114 115 116 117 118 119 120 121 122 123 124 125 126 127 128 129 130 131 132 133 134 |
pi@raspberrypi:~ $ sudo ./sbc-bench.sh -r Starting to examine hardware/software for review purposes... sbc-bench v0.9.68 Installing needed tools: distro packages already installed. Done. Checking cpufreq OPP. Done. Executing tinymembench. Done. Executing RAM latency tester. Done. Executing OpenSSL benchmark. Done. Executing 7-zip benchmark. Done. Throttling test: heating up the device, 5 more minutes to wait. Done. Checking cpufreq OPP again. Done (11 minutes elapsed). Results validation: * Measured clockspeed not lower than advertised max CPU clockspeed * No swapping * Background activity (%system) OK * No throttling Full results uploaded to https://0x0.st/8rHy.txt # Raspberry Pi Compute Module 5 Rev 1.0 Tested with sbc-bench v0.9.68 on Sun, 22 Dec 2024 14:55:29 +0700. Full info: [https://0x0.st/8rHy.txt](http://0x0.st/8rHy.txt) ### General information: Information courtesy of cpufetch: SoC: Broadcom BCM2712 Technology: 16nm Microarchitecture: Cortex-A76 Max Frequency: 2.400 GHz Cores: 4 cores Features: NEON,SHA1,SHA2,AES,CRC32 BCM2712, Kernel: aarch64, Userland: arm64 CPU sysfs topology (clusters, cpufreq members, clockspeeds) cpufreq min max CPU cluster policy speed speed core type 0 0 0 1500 2400 Cortex-A76 / r4p1 1 0 0 1500 2400 Cortex-A76 / r4p1 2 0 0 1500 2400 Cortex-A76 / r4p1 3 0 0 1500 2400 Cortex-A76 / r4p1 4044 KB available RAM ### Governors/policies (performance vs. idle consumption): Original governor settings: cpufreq-policy0: ondemand / 2400 MHz (conservative ondemand userspace powersave performance schedutil / 1500 1600 1700 1800 1900 2000 2100 2200 2300 2400) Tuned governor settings: cpufreq-policy0: performance / 2400 MHz Status of performance related policies found below /sys: /sys/module/pcie_aspm/parameters/policy: default [performance] powersave powersupersave ### Clockspeeds (idle vs. heated up): Before at 44.1°C: cpu0 (Cortex-A76): OPP: 2400, ThreadX: 2400, Measured: 2399 After at 68.8°C: cpu0 (Cortex-A76): OPP: 2400, ThreadX: 2400, Measured: 2399 ### Performance baseline * memcpy: 5704.2 MB/s, memchr: 14175.1 MB/s, memset: 12902.3 MB/s * 16M latency: 117.0 116.9 120.3 123.1 120.1 118.7 140.4 133.6 * 128M latency: 133.6 132.6 133.9 143.8 133.9 132.2 132.9 134.0 * 7-zip MIPS (3 consecutive runs): 11056, 10937, 11060 (11020 avg), single-threaded: 3201 * `aes-256-cbc 540240.68k 1003708.86k 1256076.37k 1332945.24k 1365475.33k 1367780.01k` * `aes-256-cbc 540632.86k 1003822.31k 1256136.02k 1332974.93k 1365194.07k 1368216.92k` ### PCIe and storage devices: * Raspberry RP1 PCIe 2.0 South Bridge: Speed 5GT/s, Width x4, driver in use: rp1, * 29.1GB "Samsung BJTD4R" HS400 Enhanced strobe eMMC 5.1 card as /dev/mmcblk0: date 07/2024, manfid/oemid: 0x000015/0x0100, hw/fw rev: 0x0/0x0300000000000000 ### Swap configuration: * /var/swap on /dev/mmcblk0p2: 512.0M (0K used) on MMC storage ### Software versions: * Debian GNU/Linux 12 (bookworm) * Build scripts: http://archive.raspberrypi.com/debian/ bookworm main * Compiler: /usr/bin/gcc (Debian 12.2.0-14) 12.2.0 / aarch64-linux-gnu * OpenSSL 3.0.15, built on 3 Sep 2024 (Library: OpenSSL 3.0.15 3 Sep 2024) * ThreadX: 26826259 / 2024/09/23 14:02:56 ### Kernel info: * `/proc/cmdline: reboot=w coherent_pool=1M 8250.nr_uarts=1 pci=pcie_bus_safe cgroup_disable=memory numa_policy=interleave smsc95xx.macaddr=2C:CF:67:B2:8D:E8 vc_mem.mem_base=0x3fc00000 vc_mem.mem_size=0x40000000 console=ttyAMA10,115200 console=tty1 root=PARTUUID=4825a0d7-02 rootfstype=ext4 fsck.repair=yes rootwait quiet splash plymouth.ignore-serial-consoles cfg80211.ieee80211_regdom=TH` * Vulnerability Spec store bypass: Mitigation; Speculative Store Bypass disabled via prctl * Vulnerability Spectre v1: Mitigation; __user pointer sanitization * Vulnerability Spectre v2: Mitigation; CSV2, BHB * Kernel 6.6.62+rpt-rpi-2712 / CONFIG_HZ=250 All known settings adjusted for performance. Device now ready for benchmarking. Once finished stop with [ctrl]-[c] to get info about throttling, frequency cap and too high background activity all potentially invalidating benchmark scores. All changes with storage and PCIe devices as well as suspicious dmesg contents will be reported too. Time fake/real load %cpu %sys %usr %nice %io %irq Temp VCore PMIC DC(V) 14:55:29: 2400/2400MHz 3.60 49% 0% 49% 0% 0% 0% 63.4°C 0.8948V 2.8W 5.13V 14:56:29: 2400/2400MHz 1.32 0% 0% 0% 0% 0% 0% 60.0°C 0.8948V 2.3W 5.13V 14:57:29: 2400/2400MHz 0.48 0% 0% 0% 0% 0% 0% 59.5°C 0.8953V 2.7W 5.13V ^C Cleaning up. Done. Checking cpufreq OPP again. Done. Clockspeeds now at 60.0°C: cpu0 (Cortex-A76): OPP: 2400, ThreadX: 2400, Measured: 2399 Results validation: * Measured clockspeed not lower than advertised max CPU clockspeed * No swapping * Background activity (%system) OK * No throttling * ondemand cpufreq governor used by distro but io_is_busy not set to 1 on all cores -> http://tinyurl.com/44pbmw79 |
The ambient temperature was still around 25°C. The CPU temperature went up to 68.3°C in CPUminer and 65.5°C in 7-zip. or only a couple of degrees higher than when the board is not in the enclosure.
Raspberry Pi CM5 cooling solutions comparison
Let’s compare the four cooling solutions we’ve tested with the Raspberry Pi CM5.
| IO case with fan | Raspberry Pi Cooler | EDATEC active cooler | EDATEC active cooler in IO case | |
|---|---|---|---|---|
| 7-zip bechmark (MIPS) | 9300 | 11020 | 11160 | 11020 |
| Max CPU temp (7-zip) | 85.9°C | 68.8°C | 63.9°C | 65.5°C |
| Max CPU temp (CPUminer) | 86.5°C | 79.3°C | 67.2°C | 68.3°C |
| CPU throttling | Yes | No | No | No |
| Power consumption (off) | 2.5W | 1.6W | 2.3W | 2.3W |
| Power consumption (idle) | 2.3W | 2.3W | 2.4W | 2.4W |
CPU throttling only occurred with the IO case with a fan (and not heatsink), and it does not occur with either the Raspberry Pi Cooler for CM5 or the EDATEC CM5 active cooler with an ambient temperature of 25-26°C. Most people will do fine with passive cooling, but if your system is designed to run at higher ambient temperatures (35°C+) or you want to overclock your CM5, the active cooler may bring some benefits.
Turning off the fan when the CM5 IO board is turned off
You’ll also notice a crazy high power off consumption for actively-cooled systems, and that’s because the fan is rotating at full speed when the system is shut down. Raspberry Pi first explained that “Setting the EEPROM “POWER_OFF_ON_HALT=0″ setting should fix the fan at the expense of a bit of power consumption”. I was about to try, but after reading more of that thread, it does not work. Raspberry Pi released a fix on December 19. The new pieeprom firmware is not available through apt yet, so we’ll have to download it from Github and install it as follows:
|
1 2 |
wget https://github.com/timg236/rpi-eeprom/raw/927596fc312b6c2ddcf33f7b7608938241403586/firmware-2712/latest/pieeprom-2024-12-19.bin sudo rpi-eeprom-update -d -f ./pieeprom-2024-12-19.bin |
Here’s the output from the command:
|
1 2 3 4 5 6 7 8 9 10 11 12 13 14 15 16 17 18 |
*** CREATED UPDATE ./pieeprom-2024-12-19.bin *** CURRENT: Sun Dec 15 12:16:50 AM UTC 2024 (1734221810) UPDATE: Thu Dec 19 11:57:13 AM UTC 2024 (1734609433) BOOTFS: /boot/firmware '/tmp/tmp.4SKLxJWPj1' -> '/boot/firmware/pieeprom.upd' UPDATING bootloader. This could take up to a minute. Please wait *** Do not disconnect the power until the update is complete *** If a problem occurs then the Raspberry Pi Imager may be used to create a bootloader rescue SD card image which restores the default bootloader image. flashrom -p linux_spi:dev=/dev/spidev10.0,spispeed=16000 -w /boot/firmware/pieeprom.upd Verifying update VERIFY: SUCCESS UPDATE SUCCESSFUL |
I had planned to change the EEPROM configuration too, but no need, since POWER_OFF_ON_HALT was already set to zero:
|
1 2 3 4 5 6 7 8 |
pi@raspberrypi:~ $ sudo rpi-eeprom-config [all] BOOT_UART=1 POWER_OFF_ON_HALT=0 # Default BOOT_ORDER for provisioning # SD -> NVMe -> USB -> Network BOOT_ORDER=0xf2461 |
I did not work. While the new firmware version is used, it turns out it’s because the command I used to flash the firmware used the config from the firmware…
|
1 2 3 4 5 6 7 8 9 10 11 |
pi@raspberrypi:~ $ sudo rpi-eeprom-update BOOTLOADER: up to date CURRENT: Thu Dec 19 11:57:13 AM UTC 2024 (1734609433) LATEST: Sun Dec 15 12:16:50 AM UTC 2024 (1734221810) RELEASE: latest (/lib/firmware/raspberrypi/bootloader-2712/latest) Use raspi-config to change the release. pi@raspberrypi:~ $ sudo rpi-eeprom-config [all] BOOT_UART=1 BOOT_ORDER=0xf461 NET_INSTALL_AT_POWER_ON=1 |
So I had to change the config with the following command line and add “POWER_OFF_ON_HALT=0”:
|
1 |
sudo rpi-eeprom-config --edit |
We need one more reboot. Let’s check the bootloader version and config file once last time:
|
1 2 3 4 5 6 7 8 9 10 11 12 |
pi@raspberrypi:~ $ sudo rpi-eeprom-config [all] BOOT_UART=1 BOOT_ORDER=0xf461 NET_INSTALL_AT_POWER_ON=1 POWER_OFF_ON_HALT=0 pi@raspberrypi:~ $ sudo rpi-eeprom-update BOOTLOADER: up to date CURRENT: Sun Dec 15 12:16:50 AM UTC 2024 (1734221810) LATEST: Sun Dec 15 12:16:50 AM UTC 2024 (1734221810) RELEASE: latest (/lib/firmware/raspberrypi/bootloader-2712/latest) Use raspi-config to change the release. |
What’s going on here? It looks like the firmware reverted to the old one. It’s usually because there’s a problem with the new bootloader, so it’s using the recovery image, but it looks to be random here… So I flashed the image again (without using its config), and rebooted. This time everything fell in place, so we are ready for a shutdown:
|
1 2 3 4 5 6 7 8 9 10 11 12 13 |
pi@raspberrypi:~ $ sudo rpi-eeprom-update BOOTLOADER: up to date CURRENT: Thu Dec 19 11:57:13 AM UTC 2024 (1734609433) LATEST: Sun Dec 15 12:16:50 AM UTC 2024 (1734221810) RELEASE: latest (/lib/firmware/raspberrypi/bootloader-2712/latest) Use raspi-config to change the release. pi@raspberrypi:~ $ sudo rpi-eeprom-config [all] BOOT_UART=1 BOOT_ORDER=0xf461 NET_INSTALL_AT_POWER_ON=1 POWER_OFF_ON_HALT=0 pi@raspberrypi:~ $ sudo shutdown now |
The fan did turn off, and the power consumption is 1.6 Watts when the system is turned off. If you want to further lower the power consumption when powered off you’ll need to set WAKE_ON_GPIO=0 like I did with the Raspberry Pi 5 2GB. A few HAT may be incompatible with that change…
I’d like to thank Raspberry Pi for sending the Raspberry Pi Development Kit for CM5 for review, and EDATEC for sending the CM5 active cooler providing a better cooling solution. The devkit can be purchased for $130 from your favorite distributor, and the CM5 active cooler is listed on Digikey for less than $7, but is currently out of stock.

Jean-Luc started CNX Software in 2010 as a part-time endeavor, before quitting his job as a software engineering manager, and starting to write daily news, and reviews full time later in 2011.
Support CNX Software! Donate via cryptocurrencies, become a Patron on Patreon, or purchase goods on Amazon or Aliexpress


