I’ve already checked out iKOOLCORE R2 Max hardware in the first part of the review with an unboxing and a teardown of the Intel N100 system with two 10GbE ports and two 2.5GbE ports. I’ve now had more time to test it with an OpenWrt fork, Proxmox VE, Ubuntu 24.04, and pfSense, so I’ll report my experience in the second and final part of the review.
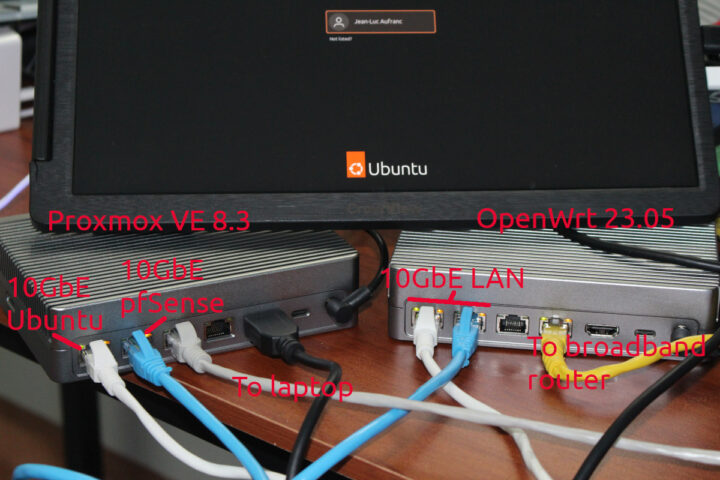
As a reminder, since I didn’t have any 10GbE gear so far, iKOOLCORE sent me two R2 Max devices, a fanless model and an actively-cooled model. I was told the fanless one was based on Intel N100 SoC, and the actively-cooled one was powered by an Intel Core i3-N305 CPU, but I ended up with two Intel N100 devices. The fanless model will be an OpenWrt 23.05 (QWRT) server, and the actively cooled variant be the device under test/client with Proxmox VE 8.3 server virtualization management platform running virtual machines with Ubuntu 24.04 and pfSense 24.11.
The review is quite long, so here are some shortcuts to the main sections:
- OpenWrt (QRWT) installation and configuration on iKOOLCORE R2 Max
- Proxmox VE installation and configuration
- iKOOLCORE R2 Max 10GbE testing with iperf3 (using OpenWrt and Proxmox VE without virtualization)
- Ubuntu 24.04 and pfSense CE 2.7.2 installation in Proxmox VE
- Intel N100 10GbE testing in Proxmox VE with Ubuntu and pfSense
- Conclusion (and purchase link)
OpenWrt (QRWT) installation and configuration on iKOOLCORE R2 Max
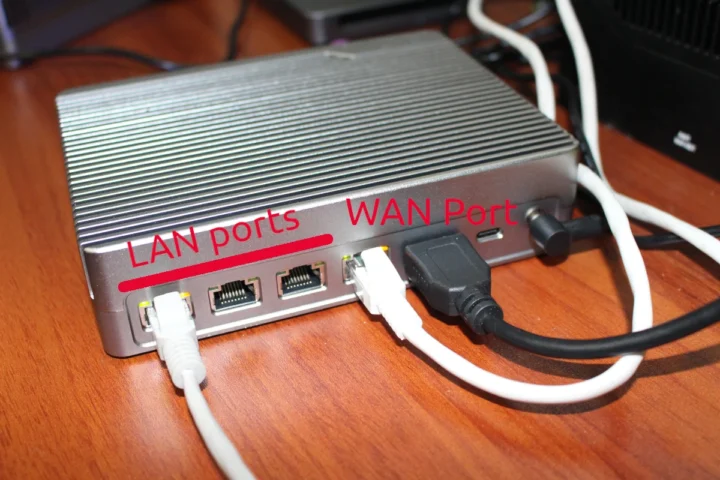
By default, OpenWrt will not have the drivers for the AQC113C-B1-C 10GbE network card, so IKOOLCORE prepared an “OpenWrt 23.05” image, or rather an image based on a fork called QWRT with all necessary drivers. It’s also configured to have the WAN port on the 2.5GbE port as shown in the photo below, and the other 2.5GbE port and two 10GbE ports on a LAN with 192.168.1.0 subnet and DHCP server enabled.
So I connected the WAN port to a 2.5GbE switch to have Internet connectivity, and the 10GbE LAN port on the right to my laptop to access the web interface for configuration. I also connected an HDMI monitor to check for potential warnings and/or error messages.
I downloaded QWRT-R24.11.18-x86-64-generic-squashfs-combined-efi.img.gz and flashed it to a USB flash drive:
|
1 2 3 |
gunzip QWRT-*.img.gz sudo dd if=QWRT-R24.11.18-x86-64-generic-squashfs-combined-efi.img bs=1M of=/dev/sda sync |
Time to insert the USB flash drive into one of the USB 3.0 ports of the iKOOLCORE R2 Max, and apply power. The boot was a bit slow, but after a while, we could see some messages from the monitor.
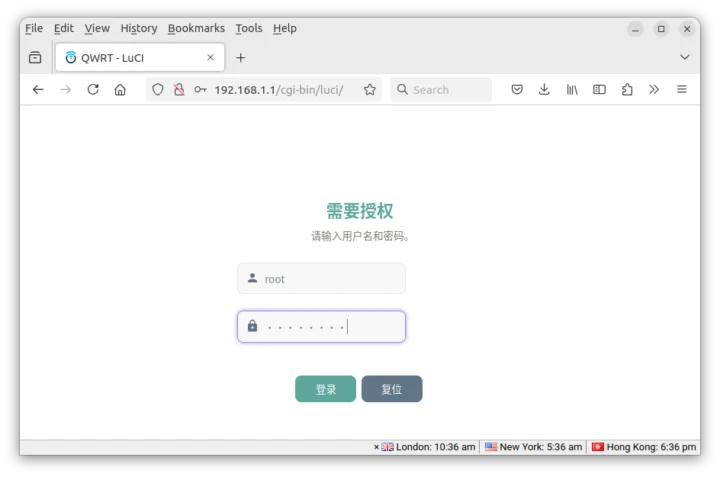
Since my broadband router is also using 192.168.1.1, I temporarily disconnected the WAN port to configure OpenWrt/QRT through the LuCI web interface at http://192.168.1.1. The default username is “root”, and the default password is “Password”
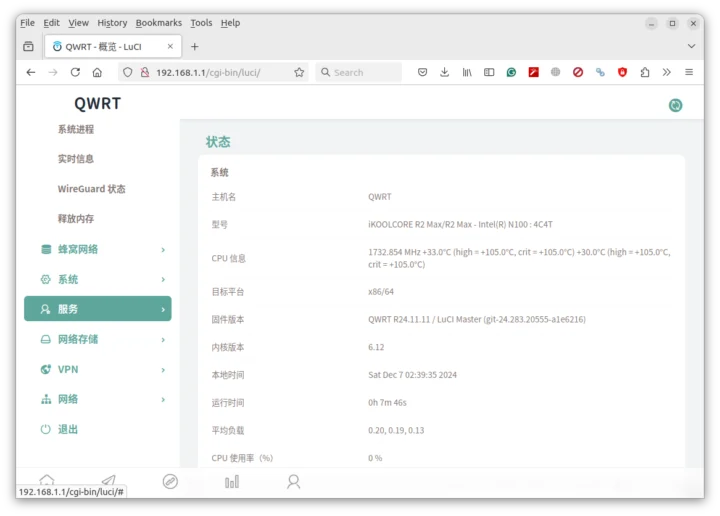
All good, except it’s a little difficult to navigate if you can’t read Chinese…
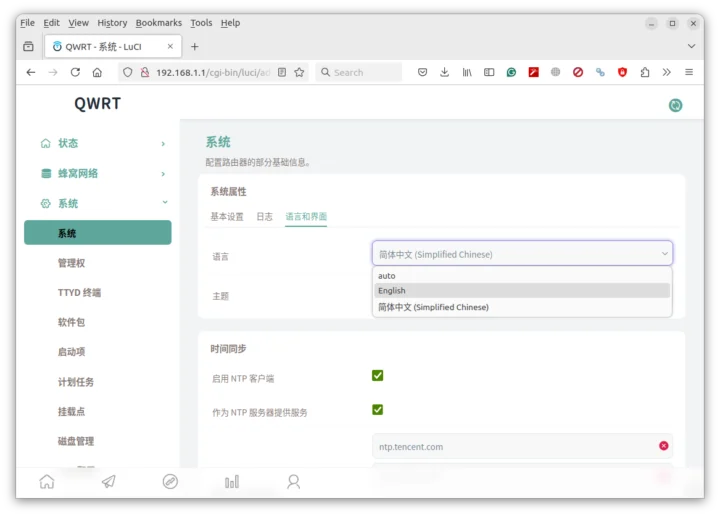
So let’s change that to English by going to “”, then selecting the tab “”, and finally selecting English in the “” dropdown list.
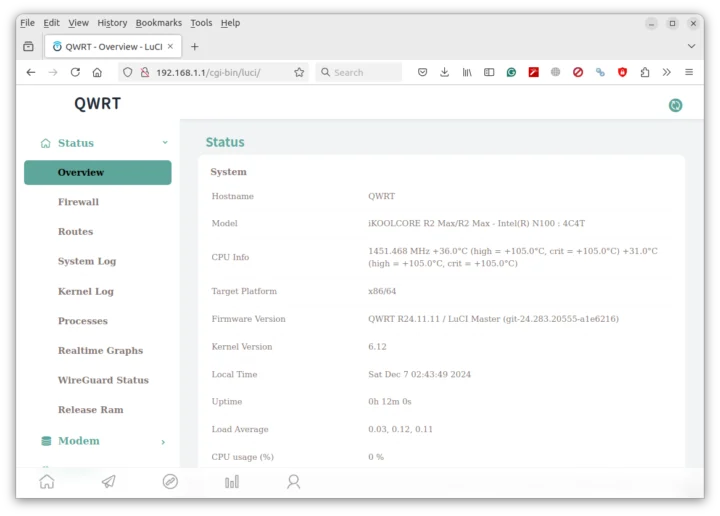
Click on Save. It will still be in Chinese, but if you navigate to another page, the interface will switch to English. The overview section confirms we have an R2 Max with an Intel N100 CPU running QWRT R24.11 on top of the latest Linux 6.12.
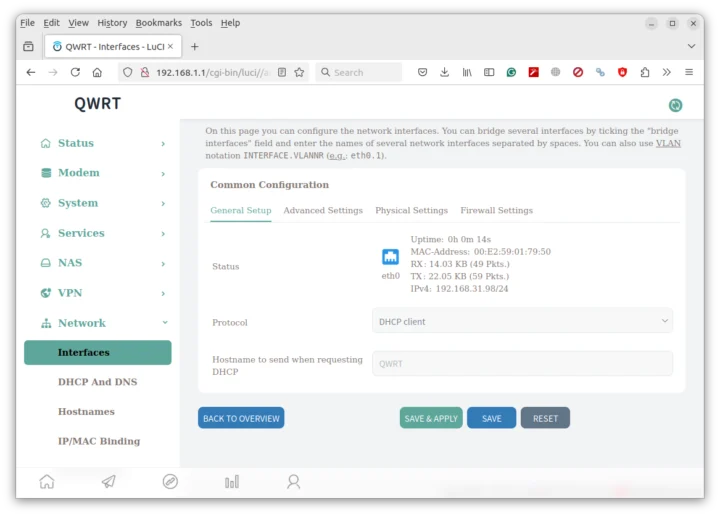
Let’s change the LAN subnet because it conflicts with my broadband router. To do this, I went to Network->Interfaces…
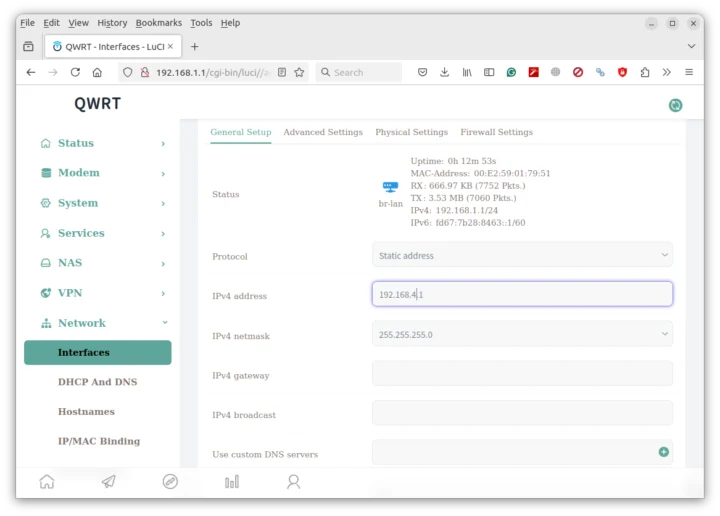
Selected the LAN tab before scrolling down to set the IPv4 address to 192.168.4.1 instead of 192.168.1.1.
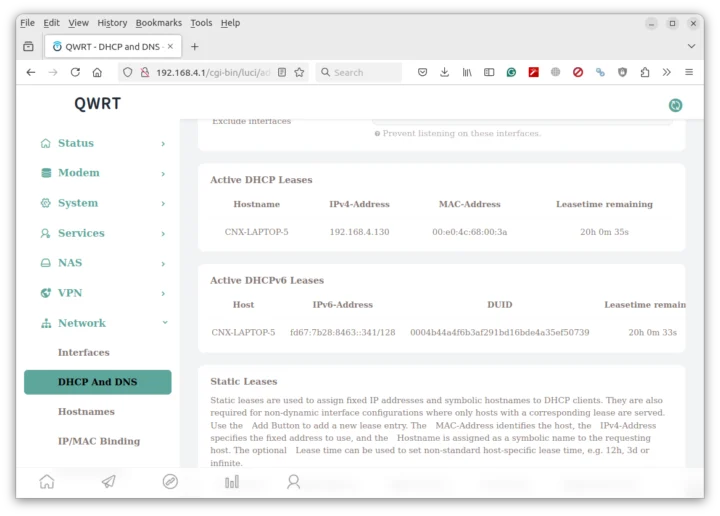
After clicking on Save, we need to wait a little bit before reconnecting to the web dashboard using http://192.168.4.1, and here I can see my laptop got an updated IP address in the new subnet. I can also reconnect the WAN cable at this stage.
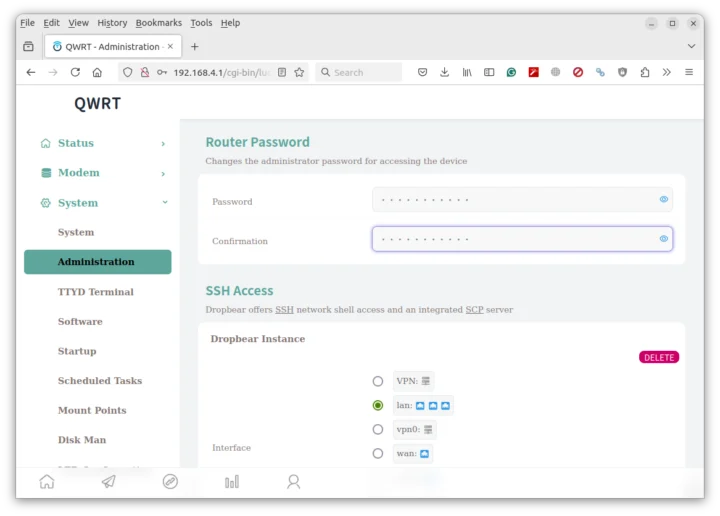
A final change is to update the router password to something more secure than “Password”.
That’s great, but all the changes I’ve made are on the USB flash drive. I’d like to install QWRT to the internal SSD. I did that by following the instructions on OpenWrt’s documentation website. First I access the system through SSH with the password I’ve just set:
|
1 2 3 4 5 6 7 8 9 10 11 12 13 14 15 16 |
BusyBox v1.35.0 (2024-11-15 04:01:28 UTC) built-in shell (ash) _______ ___ _________________ __ __ \ __ | / /__ __ \__ __/ _ / / /________ | /| / /__ /_/ /_ / / /_/ /_/_____/_ |/ |/ / _ _, _/_ / \___\_\ ____/|__/ /_/ |_| /_/ http://www.q-wrt.com The core of SmartRouters ----------------------------------------------------------- OpenWrt 23.05.0, r6103-b0cebefb0 ----------------------------------------------------------- root@QWRT:~# |
From here, we need to install and run lsblk:
|
1 2 3 |
opkg update opkg install lsblk lsblk |
output from the last command:
|
1 2 3 4 5 6 7 8 |
root@QWRT:~# lsblk NAME MAJ:MIN RM SIZE RO TYPE MOUNTPOINT loop0 7:0 0 788.9M 0 loop /overlay sda 8:0 1 58.6G 0 disk ├─sda1 8:1 1 64M 0 part /boot ├─sda2 8:2 1 896M 0 part /rom └─sda128 259:1 1 239K 0 part nvme0n1 259:0 0 119.2G 0 disk |
OpenWrt is installed on /dev/sda, and the SSD is located at /dev/nvme0n1. So let’s dump the content of the former on the latter.
|
1 2 3 4 |
root@QWRT:~# dd if=/dev/sda bs=1M of=/dev/nvme0n1 60017+1 records in 60017+1 records out root@QWRT:~# sync |
I can shut down the system, remove the USB drive, and boot the system again. Everything works as before, but booting from the internal SSD.
Proxmox VE installation and configuration
Now that we’re done with the “OpenWrt” server installation and configuration, let’s install Proxmox VE on our actively cooled iKOOLCORE R2 Max acting as the DUT/client.
The latest version is currently Proxmox VE 8.3, so I downloaded the ISO and dumped it to a USB flash drive with dd, since it’s not recognized in Startup Disk Creator on Ubuntu:
|
1 |
sudo dd bs=1M conv=fdatasync if=./proxmox-ve_8.3-1.iso of=/dev/sda |
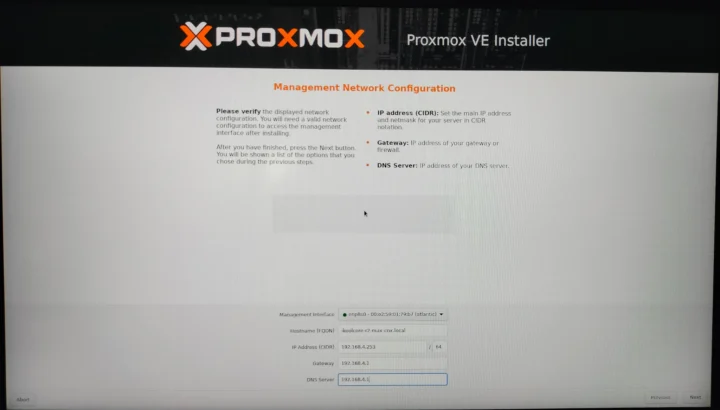
The installation is the same as when I installed Proxmox VE 8.1 on the iKOOLCORE R2 last year. Most of the time we just need to click on the Next button, but the important part is in the Management Network Configuration where we need to enter a hostname using a fully-qualified domain name (ikoolcore-r2-max-cnx.local), the IP address (192.168.4.253), gateway IP address (192.168.4.1), and DNS server (192.168.4.1).
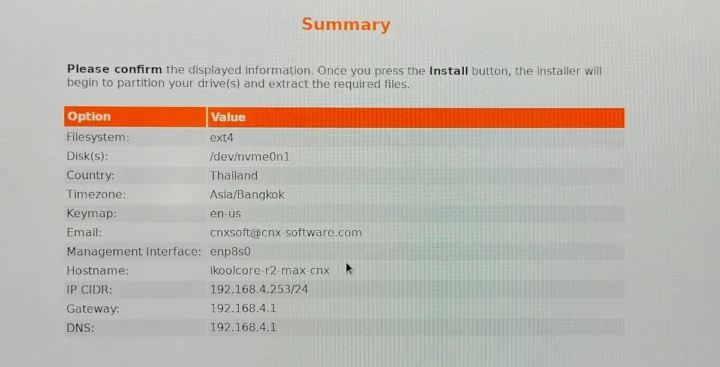
We can double-check all those parameters and the installation drive (/dev/nvme0n1) before completing the installation.
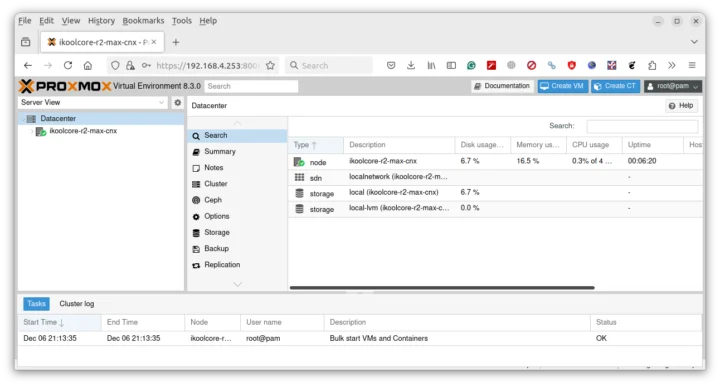
We can now go to 192.168.4.253:8006 or ikoolcore-r2-max-cnx.local:8006 in a web browser to access the Proxmox VE dashboard using the username and password specified during the installation.
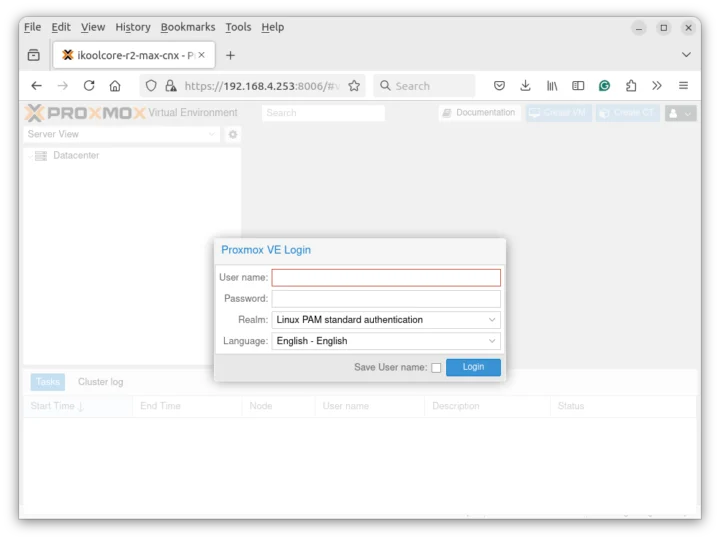
Everything looks good, and we’ll eventually need to add some guest operating systems, but first let’s test 10GbE performance using OpenWrt in the fanless model, and Proxmox VE in the other model. The main reason is to test the interfaces without adding any virtualization layer.
iKOOLCORE R2 Max 10GbE testing with iperf3
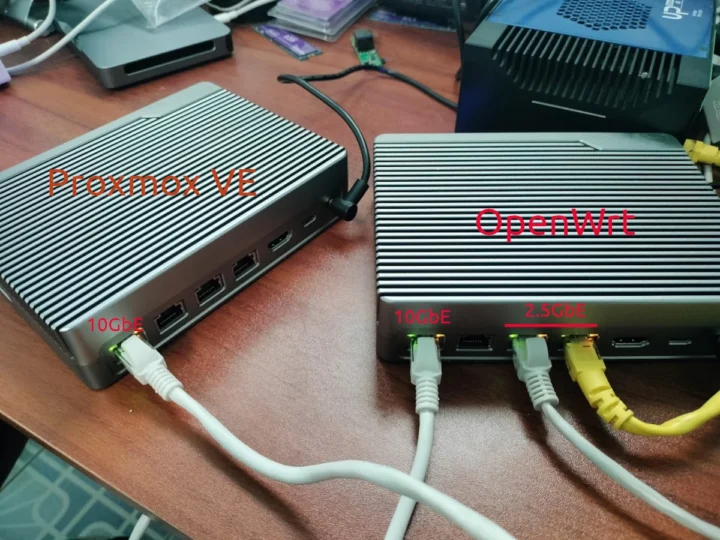
I connected the left 10GbE ports of each device with a one-meter Ethernet cable (probably Cat 5), while the OpenWrt machine’s 2.5GbE ports were connected to my Laptop, and the other to a 2.5GbE switch for Internet connectivity.
Let’s SSH to the Proxmox VE machine to check the link speed:
|
1 2 3 4 5 6 7 |
root@ikoolcore-r2-max-cnx:~# ip link | grep UP 1: lo: <LOOPBACK,UP,LOWER_UP> mtu 65536 qdisc noqueue state UNKNOWN mode DEFAULT group default qlen 1000 5: enp8s0: <BROADCAST,MULTICAST,UP,LOWER_UP> mtu 1500 qdisc mq master vmbr0 state UP mode DEFAULT group default qlen 1000 6: vmbr0: <BROADCAST,MULTICAST,UP,LOWER_UP> mtu 1500 qdisc noqueue state UP mode DEFAULT group default qlen 1000 root@ikoolcore-r2-max-cnx:~# ethtool enp8s0 | grep Speed Speed: 10000Mb/s |
All good. Let’s now run iperf3 on the QWRT server, and on the PVE client to test:
- Upload from the client:
|
1 2 3 4 5 6 7 8 9 10 11 12 13 14 15 16 |
root@ikoolcore-r2-max-cnx:~# iperf3 -t 60 -c 192.168.4.1 -i 10 Connecting to host 192.168.4.1, port 5201 [ 5] local 192.168.4.253 port 57738 connected to 192.168.4.1 port 5201 [ ID] Interval Transfer Bitrate Retr Cwnd [ 5] 0.00-10.00 sec 11.0 GBytes 9.41 Gbits/sec 0 2.67 MBytes [ 5] 10.00-20.00 sec 11.0 GBytes 9.41 Gbits/sec 0 2.83 MBytes [ 5] 20.00-30.00 sec 11.0 GBytes 9.41 Gbits/sec 0 4.56 MBytes [ 5] 30.00-40.00 sec 11.0 GBytes 9.41 Gbits/sec 1 4.56 MBytes [ 5] 40.00-50.00 sec 11.0 GBytes 9.42 Gbits/sec 0 4.56 MBytes [ 5] 50.00-60.00 sec 11.0 GBytes 9.41 Gbits/sec 1 4.56 MBytes - - - - - - - - - - - - - - - - - - - - - - - - - [ ID] Interval Transfer Bitrate Retr [ 5] 0.00-60.00 sec 65.7 GBytes 9.41 Gbits/sec 2 sender [ 5] 0.00-60.00 sec 65.7 GBytes 9.41 Gbits/sec receiver iperf Done. |
- Download from the server:
|
1 2 3 4 5 6 7 8 9 10 11 12 13 14 15 16 17 |
root@ikoolcore-r2-max-cnx:~# iperf3 -t 60 -c 192.168.4.1 -i 10 -R Connecting to host 192.168.4.1, port 5201 Reverse mode, remote host 192.168.4.1 is sending [ 5] local 192.168.4.253 port 53646 connected to 192.168.4.1 port 5201 [ ID] Interval Transfer Bitrate [ 5] 0.00-10.00 sec 9.99 GBytes 8.58 Gbits/sec [ 5] 10.00-20.00 sec 9.88 GBytes 8.48 Gbits/sec [ 5] 20.00-30.00 sec 9.96 GBytes 8.55 Gbits/sec [ 5] 30.00-40.00 sec 9.91 GBytes 8.51 Gbits/sec [ 5] 40.00-50.00 sec 9.96 GBytes 8.55 Gbits/sec [ 5] 50.00-60.00 sec 9.90 GBytes 8.50 Gbits/sec - - - - - - - - - - - - - - - - - - - - - - - - - [ ID] Interval Transfer Bitrate Retr [ 5] 0.00-60.00 sec 59.6 GBytes 8.53 Gbits/sec 0 sender [ 5] 0.00-60.00 sec 59.6 GBytes 8.53 Gbits/sec receiver iperf Done. |
Upload is fine at 9.41 Gbps, but download could be better at 8.53 Gbps.
Let’s try full-duplex (bidirectional transfer) to see what happens:
|
1 2 3 4 5 6 7 8 9 10 11 12 13 14 15 16 17 18 19 20 21 22 23 24 25 |
root@ikoolcore-r2-max-cnx:~# iperf3 -t 60 -c 192.168.4.1 -i 10 --bidir Connecting to host 192.168.4.1, port 5201 [ 5] local 192.168.4.253 port 36356 connected to 192.168.4.1 port 5201 [ 7] local 192.168.4.253 port 36372 connected to 192.168.4.1 port 5201 [ ID][Role] Interval Transfer Bitrate Retr Cwnd [ 5][TX-C] 0.00-10.00 sec 10.9 GBytes 9.38 Gbits/sec 0 3.83 MBytes [ 7][RX-C] 0.00-10.00 sec 6.76 GBytes 5.81 Gbits/sec [ 5][TX-C] 10.00-20.00 sec 11.0 GBytes 9.41 Gbits/sec 0 3.83 MBytes [ 7][RX-C] 10.00-20.00 sec 5.58 GBytes 4.79 Gbits/sec [ 5][TX-C] 20.00-30.00 sec 10.9 GBytes 9.33 Gbits/sec 0 3.83 MBytes [ 7][RX-C] 20.00-30.00 sec 9.21 GBytes 7.92 Gbits/sec [ 5][TX-C] 30.00-40.00 sec 10.8 GBytes 9.31 Gbits/sec 0 3.83 MBytes [ 7][RX-C] 30.00-40.00 sec 10.7 GBytes 9.18 Gbits/sec [ 5][TX-C] 40.00-50.00 sec 10.8 GBytes 9.31 Gbits/sec 0 3.83 MBytes [ 7][RX-C] 40.00-50.00 sec 10.7 GBytes 9.15 Gbits/sec [ 5][TX-C] 50.00-60.00 sec 10.8 GBytes 9.27 Gbits/sec 0 3.83 MBytes [ 7][RX-C] 50.00-60.00 sec 10.6 GBytes 9.07 Gbits/sec - - - - - - - - - - - - - - - - - - - - - - - - - [ ID][Role] Interval Transfer Bitrate Retr [ 5][TX-C] 0.00-60.00 sec 65.2 GBytes 9.33 Gbits/sec 0 sender [ 5][TX-C] 0.00-60.00 sec 65.2 GBytes 9.33 Gbits/sec receiver [ 7][RX-C] 0.00-60.00 sec 53.5 GBytes 7.65 Gbits/sec 1 sender [ 7][RX-C] 0.00-60.00 sec 53.5 GBytes 7.65 Gbits/sec receiver iperf Done. |
It’s not too bad, but not optimal. Since I don’t have a Cat6 cable, I read that I may need a shorter Cat 5/5E cable, so I installed a 20cm cable, and repeated the test:
|
1 2 3 4 5 6 7 8 9 10 11 12 13 14 15 16 17 18 19 20 21 22 23 24 25 |
root@ikoolcore-r2-max-cnx:~# iperf3 -t 60 -c 192.168.4.1 -i 10 --bidir Connecting to host 192.168.4.1, port 5201 [ 5] local 192.168.4.253 port 54282 connected to 192.168.4.1 port 5201 [ 7] local 192.168.4.253 port 54296 connected to 192.168.4.1 port 5201 [ ID][Role] Interval Transfer Bitrate Retr Cwnd [ 5][TX-C] 0.00-10.00 sec 10.9 GBytes 9.41 Gbits/sec 0 2.93 MBytes [ 7][RX-C] 0.00-10.00 sec 7.64 GBytes 6.56 Gbits/sec [ 5][TX-C] 10.00-20.00 sec 11.0 GBytes 9.41 Gbits/sec 0 2.93 MBytes [ 7][RX-C] 10.00-20.00 sec 7.45 GBytes 6.40 Gbits/sec [ 5][TX-C] 20.00-30.00 sec 11.0 GBytes 9.41 Gbits/sec 0 2.93 MBytes [ 7][RX-C] 20.00-30.00 sec 7.41 GBytes 6.36 Gbits/sec [ 5][TX-C] 30.00-40.00 sec 11.0 GBytes 9.41 Gbits/sec 0 2.93 MBytes [ 7][RX-C] 30.00-40.00 sec 7.39 GBytes 6.35 Gbits/sec [ 5][TX-C] 40.00-50.00 sec 11.0 GBytes 9.41 Gbits/sec 0 2.93 MBytes [ 7][RX-C] 40.00-50.00 sec 7.38 GBytes 6.34 Gbits/sec [ 5][TX-C] 50.00-60.00 sec 11.0 GBytes 9.41 Gbits/sec 1 2.93 MBytes [ 7][RX-C] 50.00-60.00 sec 7.36 GBytes 6.33 Gbits/sec - - - - - - - - - - - - - - - - - - - - - - - - - [ ID][Role] Interval Transfer Bitrate Retr [ 5][TX-C] 0.00-60.00 sec 65.7 GBytes 9.41 Gbits/sec 1 sender [ 5][TX-C] 0.00-60.00 sec 65.7 GBytes 9.41 Gbits/sec receiver [ 7][RX-C] 0.00-60.00 sec 44.6 GBytes 6.39 Gbits/sec 0 sender [ 7][RX-C] 0.00-60.00 sec 44.6 GBytes 6.39 Gbits/sec receiver iperf Done. |
It did not help. IKOOLCORE also provides a script to monitor CPU usage and temperature as well as network card temperature which I ran in Proxmox VE (Debian-based), and the network card does not get too hot under an iperf3 test (for one minute), we may try later.
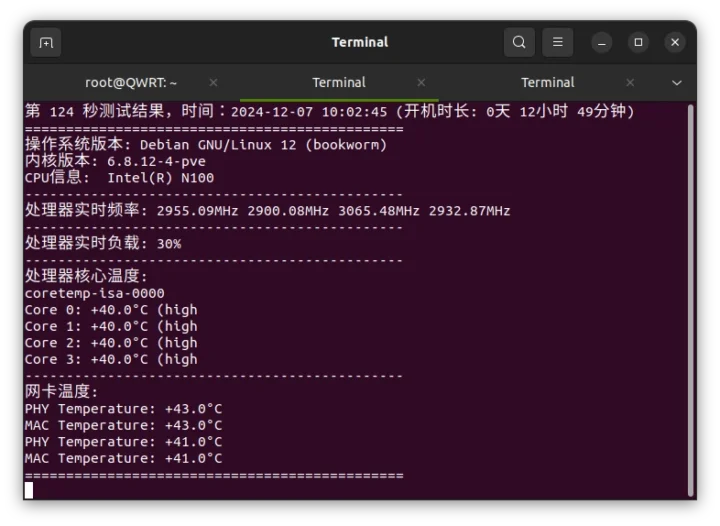 I also noticed lots of variability in each test with sometimes faster speeds.
|
1 2 3 4 5 6 7 8 |
- - - - - - - - - - - - - - - - - - - - - - - - - [ ID][Role] Interval Transfer Bitrate Retr [ 5][TX-C] 0.00-60.00 sec 64.8 GBytes 9.27 Gbits/sec 0 sender [ 5][TX-C] 0.00-60.00 sec 64.8 GBytes 9.27 Gbits/sec receiver [ 7][RX-C] 0.00-60.00 sec 60.1 GBytes 8.61 Gbits/sec 0 sender [ 7][RX-C] 0.00-60.00 sec 60.1 GBytes 8.61 Gbits/sec receiver iperf Done. |
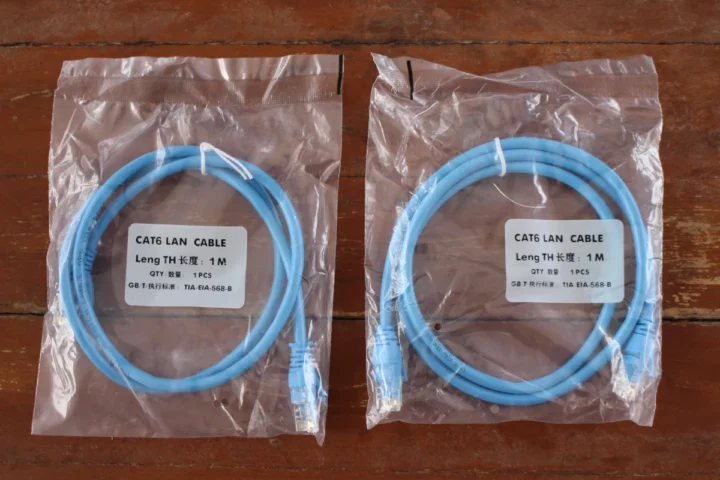
After discussing with the company, they told me the bidirectional speed would not reach close to 10Gbps on the N100 model, but it would work with the Core i3-N305. In any case, 10Gbps Rx or Tx could be reached with Windows 11 on Proxmox VE on an R2 Max N100 and a Synology DS1821+ 10GbE NAS on the other side. So I also decided to buy 1-meter Cat6 Ethernet cables to make sure the cable was not the culprit.
Let’s try the test again with one of the Cat6 cables:
- Upload:
|
1 2 3 4 5 6 7 8 9 10 11 12 13 14 15 16 |
root@ikoolcore-r2-max-cnx:~# iperf3 -t 60 -c 192.168.4.1 -i 10 Connecting to host 192.168.4.1, port 5201 [ 5] local 192.168.4.253 port 42386 connected to 192.168.4.1 port 5201 [ ID] Interval Transfer Bitrate Retr Cwnd [ 5] 0.00-10.00 sec 11.0 GBytes 9.42 Gbits/sec 0 2.76 MBytes [ 5] 10.00-20.00 sec 11.0 GBytes 9.41 Gbits/sec 0 2.76 MBytes [ 5] 20.00-30.00 sec 11.0 GBytes 9.42 Gbits/sec 0 4.19 MBytes [ 5] 30.00-40.00 sec 11.0 GBytes 9.42 Gbits/sec 0 4.19 MBytes [ 5] 40.00-50.00 sec 11.0 GBytes 9.42 Gbits/sec 0 4.19 MBytes [ 5] 50.00-60.00 sec 11.0 GBytes 9.42 Gbits/sec 0 4.19 MBytes - - - - - - - - - - - - - - - - - - - - - - - - - [ ID] Interval Transfer Bitrate Retr [ 5] 0.00-60.00 sec 65.8 GBytes 9.42 Gbits/sec 0 sender [ 5] 0.00-60.00 sec 65.8 GBytes 9.41 Gbits/sec receiver iperf Done. |
- Download
|
1 2 3 4 5 6 7 8 9 10 11 12 13 14 15 16 17 |
root@ikoolcore-r2-max-cnx:~# iperf3 -t 60 -c 192.168.4.1 -i 10 -R Connecting to host 192.168.4.1, port 5201 Reverse mode, remote host 192.168.4.1 is sending [ 5] local 192.168.4.253 port 38444 connected to 192.168.4.1 port 5201 [ ID] Interval Transfer Bitrate [ 5] 0.00-10.00 sec 10.1 GBytes 8.70 Gbits/sec [ 5] 10.00-20.00 sec 9.86 GBytes 8.47 Gbits/sec [ 5] 20.00-30.00 sec 10.1 GBytes 8.65 Gbits/sec [ 5] 30.00-40.00 sec 9.98 GBytes 8.58 Gbits/sec [ 5] 40.00-50.00 sec 9.93 GBytes 8.53 Gbits/sec [ 5] 50.00-60.00 sec 10.0 GBytes 8.63 Gbits/sec - - - - - - - - - - - - - - - - - - - - - - - - - [ ID] Interval Transfer Bitrate Retr [ 5] 0.00-60.00 sec 60.0 GBytes 8.59 Gbits/sec 0 sender [ 5] 0.00-60.00 sec 60.0 GBytes 8.59 Gbits/sec receiver iperf Done. |
- Full duplex
|
1 2 3 4 5 6 7 8 9 10 11 12 13 14 15 16 17 18 19 20 21 22 23 24 25 |
root@ikoolcore-r2-max-cnx:~# iperf3 -t 60 -c 192.168.4.1 -i 10 --bidir Connecting to host 192.168.4.1, port 5201 [ 5] local 192.168.4.253 port 44438 connected to 192.168.4.1 port 5201 [ 7] local 192.168.4.253 port 44444 connected to 192.168.4.1 port 5201 [ ID][Role] Interval Transfer Bitrate Retr Cwnd [ 5][TX-C] 0.00-10.00 sec 10.9 GBytes 9.40 Gbits/sec 0 3.15 MBytes [ 7][RX-C] 0.00-10.00 sec 7.56 GBytes 6.49 Gbits/sec [ 5][TX-C] 10.00-20.00 sec 10.9 GBytes 9.37 Gbits/sec 0 3.91 MBytes [ 7][RX-C] 10.00-20.00 sec 7.38 GBytes 6.33 Gbits/sec [ 5][TX-C] 20.00-30.00 sec 11.0 GBytes 9.41 Gbits/sec 0 3.91 MBytes [ 7][RX-C] 20.00-30.00 sec 7.57 GBytes 6.51 Gbits/sec [ 5][TX-C] 30.00-40.00 sec 10.9 GBytes 9.41 Gbits/sec 0 3.91 MBytes [ 7][RX-C] 30.00-40.00 sec 7.39 GBytes 6.35 Gbits/sec [ 5][TX-C] 40.00-50.00 sec 10.9 GBytes 9.40 Gbits/sec 0 3.91 MBytes [ 7][RX-C] 40.00-50.00 sec 7.86 GBytes 6.75 Gbits/sec [ 5][TX-C] 50.00-60.00 sec 10.9 GBytes 9.41 Gbits/sec 0 3.91 MBytes [ 7][RX-C] 50.00-60.00 sec 7.70 GBytes 6.61 Gbits/sec - - - - - - - - - - - - - - - - - - - - - - - - - [ ID][Role] Interval Transfer Bitrate Retr [ 5][TX-C] 0.00-60.00 sec 65.7 GBytes 9.40 Gbits/sec 0 sender [ 5][TX-C] 0.00-60.00 sec 65.7 GBytes 9.40 Gbits/sec receiver [ 7][RX-C] 0.00-60.00 sec 45.5 GBytes 6.51 Gbits/sec 0 sender [ 7][RX-C] 0.00-60.00 sec 45.5 GBytes 6.51 Gbits/sec receiver iperf Done. |
It did not help at all. But then, I noticed 100% CPU usage on a single core during the iperf3 bidirectional test.
So I looked for a way to run iperf3 on all four cores and eventually found out that iperf 3.16 now supports multi-threading and documented my experience. The QWRT image already had iperf 3.17.1, but the Proxmox VE was using iperf 3.12. So I built it iperf 3.18 from source, to run the test. I will not reproduce this here, so let’s go directly to the results.
Since we can now try parallel streams using all four cores with “-P 4”, let’s try the download test again:
|
1 2 3 4 5 6 7 8 9 10 11 12 13 14 15 16 17 18 19 20 21 22 23 24 25 26 27 28 29 30 31 32 33 34 35 36 37 38 39 40 41 42 43 44 45 46 47 48 49 50 51 52 53 54 55 56 57 58 |
root@ikoolcore-r2-max-cnx:~/iperf-3.18/src# ./iperf3 -t 60 -c 192.168.4.1 -P 4 -i 10 -R Connecting to host 192.168.4.1, port 5201 Reverse mode, remote host 192.168.4.1 is sending [ 5] local 192.168.4.253 port 42850 connected to 192.168.4.1 port 5201 [ 7] local 192.168.4.253 port 42856 connected to 192.168.4.1 port 5201 [ 9] local 192.168.4.253 port 42866 connected to 192.168.4.1 port 5201 [ 11] local 192.168.4.253 port 42870 connected to 192.168.4.1 port 5201 [ ID] Interval Transfer Bitrate [ 5] 0.00-10.01 sec 1.86 GBytes 1.60 Gbits/sec [ 7] 0.00-10.01 sec 3.66 GBytes 3.14 Gbits/sec [ 9] 0.00-10.01 sec 3.66 GBytes 3.14 Gbits/sec [ 11] 0.00-10.01 sec 1.79 GBytes 1.54 Gbits/sec [SUM] 0.00-10.01 sec 11.0 GBytes 9.41 Gbits/sec - - - - - - - - - - - - - - - - - - - - - - - - - [ 5] 10.01-20.01 sec 1.57 GBytes 1.35 Gbits/sec [ 7] 10.01-20.01 sec 3.65 GBytes 3.14 Gbits/sec [ 9] 10.01-20.01 sec 3.65 GBytes 3.14 Gbits/sec [ 11] 10.01-20.01 sec 2.08 GBytes 1.79 Gbits/sec [SUM] 10.01-20.01 sec 11.0 GBytes 9.41 Gbits/sec - - - - - - - - - - - - - - - - - - - - - - - - - [ 5] 20.01-30.01 sec 1.67 GBytes 1.44 Gbits/sec [ 7] 20.01-30.01 sec 3.65 GBytes 3.14 Gbits/sec [ 9] 20.01-30.01 sec 3.65 GBytes 3.14 Gbits/sec [ 11] 20.01-30.01 sec 1.98 GBytes 1.70 Gbits/sec [SUM] 20.01-30.01 sec 11.0 GBytes 9.41 Gbits/sec - - - - - - - - - - - - - - - - - - - - - - - - - [ 5] 30.01-40.01 sec 1.84 GBytes 1.58 Gbits/sec [ 7] 30.01-40.01 sec 3.65 GBytes 3.14 Gbits/sec [ 9] 30.01-40.01 sec 3.65 GBytes 3.14 Gbits/sec [ 11] 30.01-40.01 sec 1.82 GBytes 1.56 Gbits/sec [SUM] 30.01-40.01 sec 11.0 GBytes 9.41 Gbits/sec - - - - - - - - - - - - - - - - - - - - - - - - - [ 5] 40.01-50.01 sec 1.84 GBytes 1.58 Gbits/sec [ 7] 40.01-50.01 sec 3.65 GBytes 3.14 Gbits/sec [ 9] 40.01-50.01 sec 3.65 GBytes 3.14 Gbits/sec [ 11] 40.01-50.01 sec 1.82 GBytes 1.56 Gbits/sec [SUM] 40.01-50.01 sec 11.0 GBytes 9.41 Gbits/sec - - - - - - - - - - - - - - - - - - - - - - - - - [ 5] 50.01-60.01 sec 1.84 GBytes 1.58 Gbits/sec [ 7] 50.01-60.01 sec 3.65 GBytes 3.14 Gbits/sec [ 9] 50.01-60.01 sec 3.65 GBytes 3.14 Gbits/sec [ 11] 50.01-60.01 sec 1.82 GBytes 1.56 Gbits/sec [SUM] 50.01-60.01 sec 11.0 GBytes 9.42 Gbits/sec - - - - - - - - - - - - - - - - - - - - - - - - - [ ID] Interval Transfer Bitrate Retr [ 5] 0.00-60.01 sec 10.6 GBytes 1.52 Gbits/sec 0 sender [ 5] 0.00-60.01 sec 10.6 GBytes 1.52 Gbits/sec receiver [ 7] 0.00-60.01 sec 21.9 GBytes 3.14 Gbits/sec 0 sender [ 7] 0.00-60.01 sec 21.9 GBytes 3.14 Gbits/sec receiver [ 9] 0.00-60.01 sec 21.9 GBytes 3.14 Gbits/sec 0 sender [ 9] 0.00-60.01 sec 21.9 GBytes 3.14 Gbits/sec receiver [ 11] 0.00-60.01 sec 11.3 GBytes 1.62 Gbits/sec 0 sender [ 11] 0.00-60.01 sec 11.3 GBytes 1.62 Gbits/sec receiver [SUM] 0.00-60.01 sec 65.8 GBytes 9.42 Gbits/sec 0 sender [SUM] 0.00-60.01 sec 65.8 GBytes 9.41 Gbits/sec receiver iperf Done. root@ikoolcore-r2-max-cnx:~/iperf-3.18/src# |
9.41 Gbps is all good. And now, bidirectional test with -P 2 since it’s enough and less verbose:
|
1 2 3 4 5 6 7 8 9 10 11 12 13 14 15 16 17 18 19 20 21 22 23 24 25 26 27 28 29 30 31 32 33 34 35 36 37 38 39 40 41 42 43 44 45 46 47 48 49 50 51 52 53 54 55 56 57 58 59 60 61 62 63 64 |
root@ikoolcore-r2-max-cnx:~/iperf-3.18/src# ./iperf3 -t 60 -c 192.168.4.1 -P 2 -i 10 --bidir Connecting to host 192.168.4.1, port 5201 [ 5] local 192.168.4.253 port 32996 connected to 192.168.4.1 port 5201 [ 7] local 192.168.4.253 port 33000 connected to 192.168.4.1 port 5201 [ 9] local 192.168.4.253 port 33014 connected to 192.168.4.1 port 5201 [ 11] local 192.168.4.253 port 33022 connected to 192.168.4.1 port 5201 [ ID][Role] Interval Transfer Bitrate Retr Cwnd [ 5][TX-C] 0.00-10.01 sec 5.59 GBytes 4.79 Gbits/sec 0 3.64 MBytes [ 7][TX-C] 0.00-10.01 sec 5.36 GBytes 4.60 Gbits/sec 0 3.50 MBytes [SUM][TX-C] 0.00-10.01 sec 10.9 GBytes 9.40 Gbits/sec 0 [ 9][RX-C] 0.00-10.01 sec 5.48 GBytes 4.70 Gbits/sec [ 11][RX-C] 0.00-10.01 sec 5.48 GBytes 4.70 Gbits/sec [SUM][RX-C] 0.00-10.01 sec 11.0 GBytes 9.41 Gbits/sec - - - - - - - - - - - - - - - - - - - - - - - - - [ 5][TX-C] 10.01-20.01 sec 5.58 GBytes 4.79 Gbits/sec 0 3.64 MBytes [ 7][TX-C] 10.01-20.01 sec 5.36 GBytes 4.60 Gbits/sec 0 3.50 MBytes [SUM][TX-C] 10.01-20.01 sec 10.9 GBytes 9.39 Gbits/sec 0 [ 9][RX-C] 10.01-20.01 sec 5.48 GBytes 4.70 Gbits/sec [ 11][RX-C] 10.01-20.01 sec 5.47 GBytes 4.70 Gbits/sec [SUM][RX-C] 10.01-20.01 sec 11.0 GBytes 9.41 Gbits/sec - - - - - - - - - - - - - - - - - - - - - - - - - [ 5][TX-C] 20.01-30.01 sec 5.58 GBytes 4.79 Gbits/sec 0 3.64 MBytes [ 7][TX-C] 20.01-30.01 sec 5.35 GBytes 4.60 Gbits/sec 0 3.50 MBytes [SUM][TX-C] 20.01-30.01 sec 10.9 GBytes 9.39 Gbits/sec 0 [ 9][RX-C] 20.01-30.01 sec 5.48 GBytes 4.70 Gbits/sec [ 11][RX-C] 20.01-30.01 sec 5.47 GBytes 4.70 Gbits/sec [SUM][RX-C] 20.01-30.01 sec 10.9 GBytes 9.41 Gbits/sec - - - - - - - - - - - - - - - - - - - - - - - - - [ 5][TX-C] 30.01-40.01 sec 5.58 GBytes 4.79 Gbits/sec 0 3.64 MBytes [ 7][TX-C] 30.01-40.01 sec 5.35 GBytes 4.60 Gbits/sec 0 3.50 MBytes [SUM][TX-C] 30.01-40.01 sec 10.9 GBytes 9.39 Gbits/sec 0 [ 9][RX-C] 30.01-40.01 sec 5.48 GBytes 4.70 Gbits/sec [ 11][RX-C] 30.01-40.01 sec 5.47 GBytes 4.70 Gbits/sec [SUM][RX-C] 30.01-40.01 sec 11.0 GBytes 9.41 Gbits/sec - - - - - - - - - - - - - - - - - - - - - - - - - [ 5][TX-C] 40.01-50.01 sec 5.58 GBytes 4.80 Gbits/sec 0 3.64 MBytes [ 7][TX-C] 40.01-50.01 sec 5.35 GBytes 4.60 Gbits/sec 0 3.50 MBytes [SUM][TX-C] 40.01-50.01 sec 10.9 GBytes 9.39 Gbits/sec 0 [ 9][RX-C] 40.01-50.01 sec 5.48 GBytes 4.70 Gbits/sec [ 11][RX-C] 40.01-50.01 sec 5.47 GBytes 4.70 Gbits/sec [SUM][RX-C] 40.01-50.01 sec 11.0 GBytes 9.41 Gbits/sec - - - - - - - - - - - - - - - - - - - - - - - - - [ 5][TX-C] 50.01-60.01 sec 5.58 GBytes 4.79 Gbits/sec 0 3.64 MBytes [ 7][TX-C] 50.01-60.01 sec 5.35 GBytes 4.60 Gbits/sec 0 3.50 MBytes [SUM][TX-C] 50.01-60.01 sec 10.9 GBytes 9.39 Gbits/sec 0 [ 9][RX-C] 50.01-60.01 sec 5.48 GBytes 4.70 Gbits/sec [ 11][RX-C] 50.01-60.01 sec 5.47 GBytes 4.70 Gbits/sec [SUM][RX-C] 50.01-60.01 sec 11.0 GBytes 9.41 Gbits/sec - - - - - - - - - - - - - - - - - - - - - - - - - [ ID][Role] Interval Transfer Bitrate Retr [ 5][TX-C] 0.00-60.01 sec 33.5 GBytes 4.79 Gbits/sec 0 sender [ 5][TX-C] 0.00-60.01 sec 33.5 GBytes 4.79 Gbits/sec receiver [ 7][TX-C] 0.00-60.01 sec 32.1 GBytes 4.60 Gbits/sec 0 sender [ 7][TX-C] 0.00-60.01 sec 32.1 GBytes 4.60 Gbits/sec receiver [SUM][TX-C] 0.00-60.01 sec 65.6 GBytes 9.39 Gbits/sec 0 sender [SUM][TX-C] 0.00-60.01 sec 65.6 GBytes 9.39 Gbits/sec receiver [ 9][RX-C] 0.00-60.01 sec 32.9 GBytes 4.70 Gbits/sec 0 sender [ 9][RX-C] 0.00-60.01 sec 32.9 GBytes 4.70 Gbits/sec receiver [ 11][RX-C] 0.00-60.01 sec 32.9 GBytes 4.70 Gbits/sec 0 sender [ 11][RX-C] 0.00-60.01 sec 32.9 GBytes 4.70 Gbits/sec receiver [SUM][RX-C] 0.00-60.01 sec 65.7 GBytes 9.41 Gbits/sec 0 sender [SUM][RX-C] 0.00-60.01 sec 65.7 GBytes 9.41 Gbits/sec receiver iperf Done. |
The output is quite noisy, but we can see the final results with the [SUM] [TX-C] at 9.39 Gbps and [SUM] [TX-C] at 9.41 Gbps. The good news is that the 10GbE interface can be saturated but we need at least two cores since a single core is a bottleneck.
I also moved the cable to the second 10GbE interface on the fanless router, and it yielded the similar results:
|
1 2 3 4 5 6 7 8 9 10 11 12 13 14 15 16 17 18 19 20 21 22 23 |
root@ikoolcore-r2-max-cnx:~/iperf-3.18/src# ./iperf3 -t 60 -c 192.168.4.1 -P 2 -i 10 --bidir Connecting to host 192.168.4.1, port 5201 [ 5] local 192.168.4.253 port 53376 connected to 192.168.4.1 port 5201 [ 7] local 192.168.4.253 port 53378 connected to 192.168.4.1 port 5201 [ 9] local 192.168.4.253 port 53388 connected to 192.168.4.1 port 5201 [ 11] local 192.168.4.253 port 53390 connected to 192.168.4.1 port 5201 ... - - - - - - - - - - - - - - - - - - - - - - - - - [ ID][Role] Interval Transfer Bitrate Retr [ 5][TX-C] 0.00-60.01 sec 32.9 GBytes 4.71 Gbits/sec 0 sender [ 5][TX-C] 0.00-60.01 sec 32.9 GBytes 4.71 Gbits/sec receiver [ 7][TX-C] 0.00-60.01 sec 32.7 GBytes 4.68 Gbits/sec 0 sender [ 7][TX-C] 0.00-60.01 sec 32.7 GBytes 4.68 Gbits/sec receiver [SUM][TX-C] 0.00-60.01 sec 65.6 GBytes 9.39 Gbits/sec 0 sender [SUM][TX-C] 0.00-60.01 sec 65.6 GBytes 9.39 Gbits/sec receiver [ 9][RX-C] 0.00-60.01 sec 31.8 GBytes 4.55 Gbits/sec 0 sender [ 9][RX-C] 0.00-60.01 sec 31.8 GBytes 4.55 Gbits/sec receiver [ 11][RX-C] 0.00-60.01 sec 33.9 GBytes 4.85 Gbits/sec 0 sender [ 11][RX-C] 0.00-60.01 sec 33.9 GBytes 4.85 Gbits/sec receiver [SUM][RX-C] 0.00-60.01 sec 65.6 GBytes 9.39 Gbits/sec 0 sender [SUM][RX-C] 0.00-60.01 sec 65.6 GBytes 9.39 Gbits/sec receiver iperf Done. |
So we know the hardware is perfectly capable of handling 10GbE in either or even both directions when multiple cores are used.
Ubuntu 24.04 and pfSense CE 2.7.2 installation in Proxmox VE
We’ll now need to find what happens when virtualization needs to be taken into account. First, I enable hardware passthrough in Proxmox VE as I did with the iKOOLCORE R2 last year:
|
1 2 3 4 5 6 |
export LC_ALL=en_US.UTF-8 apt update apt -y install git git clone https://github.com/KoolCore/Proxmox_VE_Status.git cd Proxmox_VE_Status bash ./passthrough.sh |
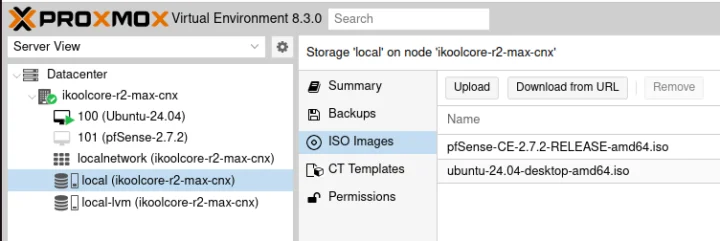
We need to download the Ubuntu 24.04 and pfSense CE 2.7.2 ISO files and upload them to our ProxmoxVE instance. pfSense now requires registration and makes you download a “netgateinstaller” image, but you can get the pfSense-CE-2.7.2-RELEASE-amd64.iso file from a mirror if you prefer.
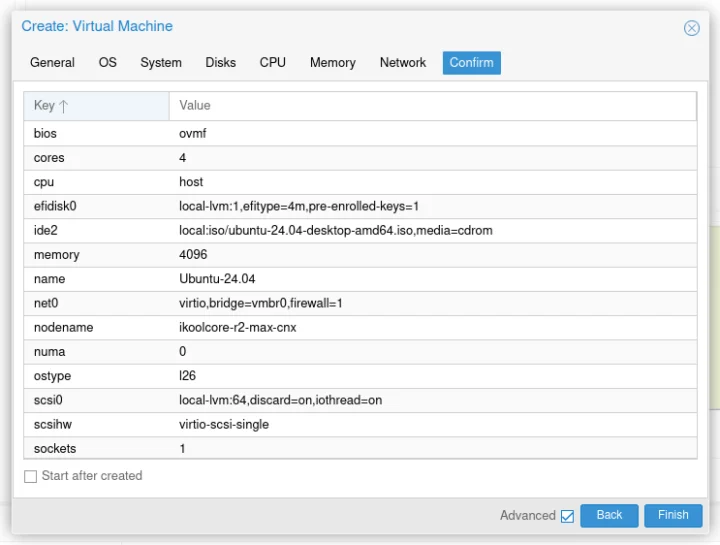
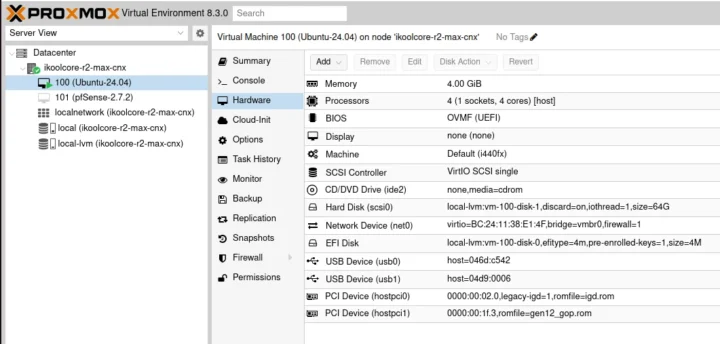
For the Ubuntu 24.04 installation, I mostly followed the instructions to install Ubuntu 22.04 on Proxmox with video and USB passthrough so that I could also use the HDMI port, USB mouse, and USB keyboard connected to the device. I won’t go through all the steps again but just provide a summary instead. I created a Virtual Machine with the following parameters (quad-core, 4MB RAM, 64GB HDD).
After clicking on Start, I went through the Ubuntu 24.04 installation, and removed the ISO file from the VM, to boot the OS from its HDD.
At this point, Ubuntu would show in the Proxmox VE’s console, so I still had more work to do to directly use an HDMI monitor and USB peripherals with the iKOOLCORE R2 Max. So I also added two PCIe and two USB devices for GPU and keyboard/mouse passthrough, downloaded and copied the file gen12_gop.rom and gen12_igd.rom (renamed to igd.rom) to /usr/share/kvm, and edited the /etc/pve/qemu-server/100.conf configuration file accordingly. I ended up with the following configuration for Ubuntu 24.04.
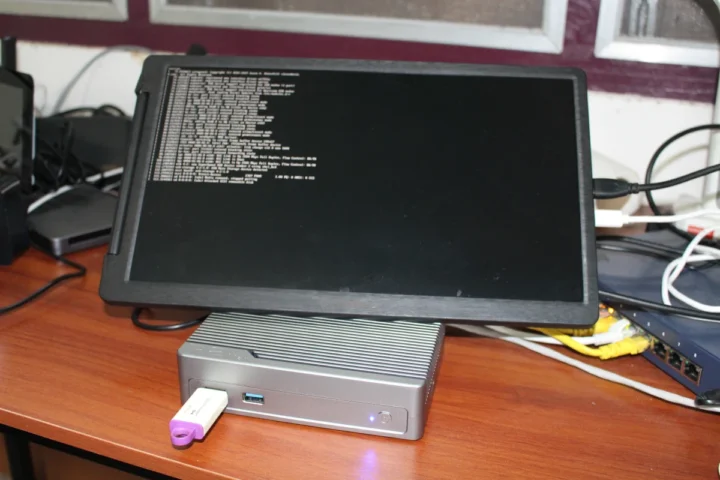
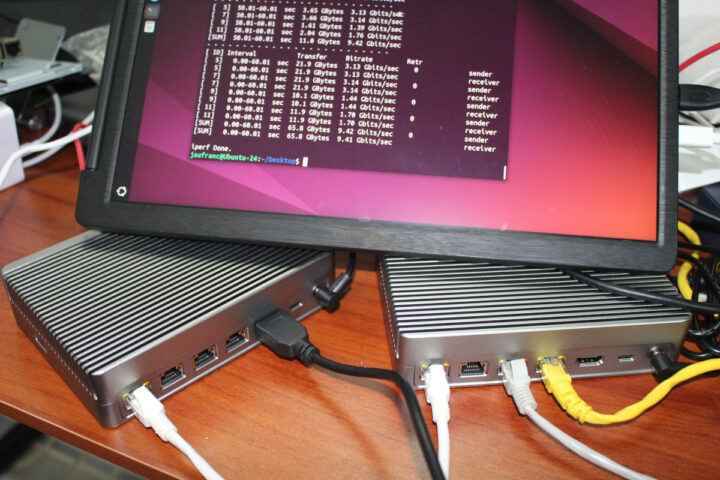
After restarting the machine, I could have Ubuntu 24.04 running with HDMI output, a USB keyboard, and a USB mouse without having to use the Proxmox VE web interface. We’ll do 10GbE testing, but as you can see from the photo below, the first results look good.
Let’s now try pfSense, but I’m not confident here since a reader commented:
In a normal setup, you’d probably want the two 10GbE ports for the pfSense firewall and use one of the two 2.5GbE ports for the desktop OS like Ubuntu 24.04. But for testing purposes, I wanted to have one 10GbE port in Ubuntu 24.04 and the other 10GbE port in pfSense so I added two Linux bridges for pfSense so we got the following network interfaces configured in Proxmox VE:
- vmbr0 – enp8s0 (10GbE via Marvell AQC113C-B1-C) with IP address: 192.168.4.253 for Proxmox VE (already configured)
- vmbr1 – enp7s0 (10GbE via Marvell AQC113C-B1-C) with IP address: 192.168.4.252 for pfSense WAN
- vmbr2 – enp2s0 (2.5GbE via Intel i226-V) with IP address: 192.168.4.1 for pfSense LAN
Remember to click on “Apply Configuration” here, or Proxmox VE will complain the vmbr1 interface does not exist when starting the VM.
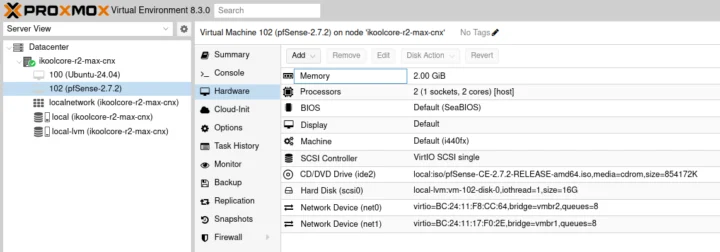
Here’s the configuration for pfSense 2.7.2 in Proxmox VE after I added vmbr1 and vmbr2. One important part is selecting the Default (SeaBIOS) for the BIOS, not UEFI, or the boot will fail.
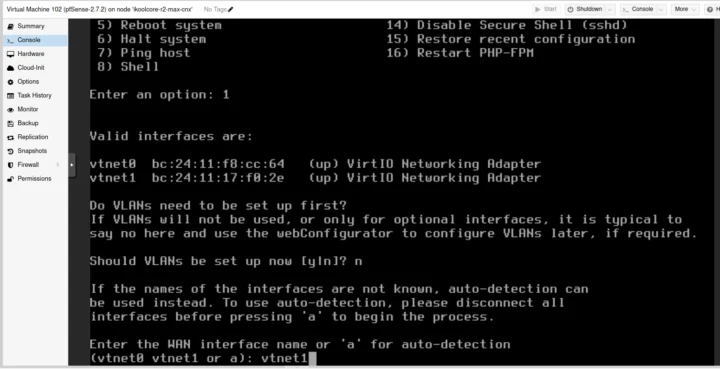
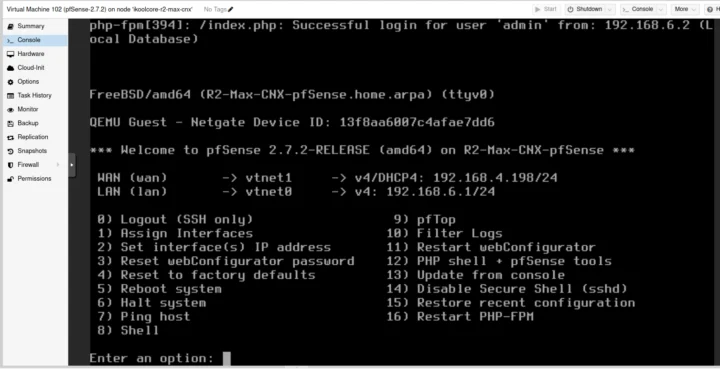
I installed pfSense in Proxmox using the same instructions I followed for the iKOOLCORE R2 last year. The WAN was set to use DHCP from the OpenWrt server, and LAN to 192.168.6.1. Note that vmbr1 (10GbE) needs to be assigned to vtnet1 and vmbr2 (2.5GbE) to vtnet0.
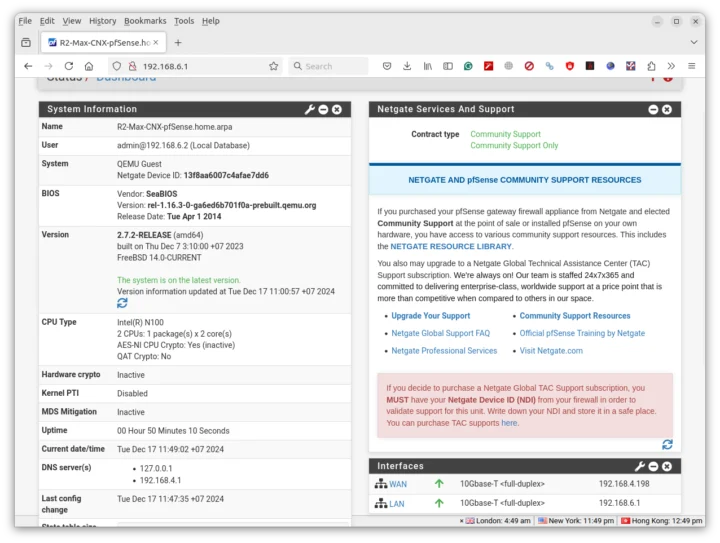
So now, I’ll move the Ethernet cable from my laptop to the 2.5GbE to complete the pfSense configuration through 192.168.6.1. Note the default admin username and pfsense password must be used for the initial setup. I’ll be asked to change the admin password at the end of the wizard. Those steps are also covered in the previous pfSense instructions, so I won’t go into details here. At the end I had pfSense up and running on my machine.
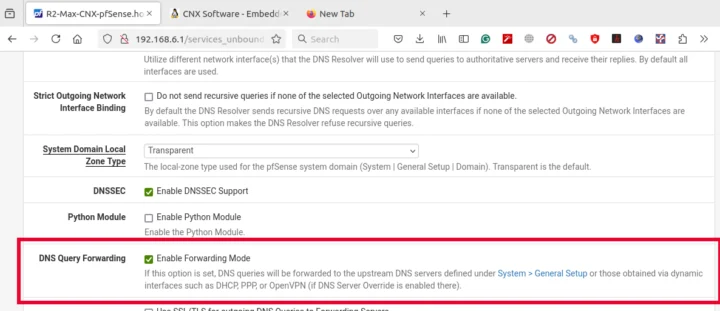
I could not access the Internet though, because of a DND resolution issue. I went to Services->DNS Resolver and enabled “DNS Query Forwarding” to solve the issue.
So now that I can browse the web from the 192.168.6.0 subnet and also access 192.168.4.0 for testing 10GbE we can carry on with performance evaluation.
Intel N100 10GbE testing in Proxmox VE with Ubuntu and pfSense
Let’s stop the pfSense VM for now, and start the Ubuntu VM to test the 10GbE interface again with iperf3 (version 3.16) again:
- Upload
|
1 2 3 4 5 6 7 8 9 10 11 12 13 14 15 16 17 18 19 20 21 22 23 24 25 26 27 28 29 30 31 32 33 34 35 36 37 38 |
jaufranc@Ubuntu-24:~$ iperf3 -t 60 -c 192.168.4.1 -i 20 -P 4 Connecting to host 192.168.4.1, port 5201 [ 5] local 192.168.4.215 port 42570 connected to 192.168.4.1 port 5201 [ 7] local 192.168.4.215 port 42586 connected to 192.168.4.1 port 5201 [ 9] local 192.168.4.215 port 42596 connected to 192.168.4.1 port 5201 [ 11] local 192.168.4.215 port 42598 connected to 192.168.4.1 port 5201 [ ID] Interval Transfer Bitrate Retr Cwnd [ 5] 0.00-20.02 sec 3.63 GBytes 1.56 Gbits/sec 0 3.97 MBytes [ 7] 0.00-20.02 sec 7.31 GBytes 3.14 Gbits/sec 0 3.90 MBytes [ 9] 0.00-20.02 sec 7.31 GBytes 3.14 Gbits/sec 1 3.92 MBytes [ 11] 0.00-20.02 sec 3.70 GBytes 1.59 Gbits/sec 0 3.95 MBytes [SUM] 0.00-20.02 sec 21.9 GBytes 9.42 Gbits/sec 1 - - - - - - - - - - - - - - - - - - - - - - - - - [ 5] 20.02-40.02 sec 3.64 GBytes 1.56 Gbits/sec 0 3.97 MBytes [ 7] 20.02-40.02 sec 7.31 GBytes 3.14 Gbits/sec 0 3.90 MBytes [ 9] 20.02-40.02 sec 7.31 GBytes 3.14 Gbits/sec 0 3.92 MBytes [ 11] 20.02-40.02 sec 3.66 GBytes 1.57 Gbits/sec 0 3.95 MBytes [SUM] 20.02-40.02 sec 21.9 GBytes 9.41 Gbits/sec 0 - - - - - - - - - - - - - - - - - - - - - - - - - [ 5] 40.02-60.00 sec 3.65 GBytes 1.57 Gbits/sec 0 3.97 MBytes [ 7] 40.02-60.00 sec 7.30 GBytes 3.14 Gbits/sec 0 3.90 MBytes [ 9] 40.02-60.00 sec 7.30 GBytes 3.14 Gbits/sec 0 3.92 MBytes [ 11] 40.02-60.00 sec 3.65 GBytes 1.57 Gbits/sec 0 3.95 MBytes [SUM] 40.02-60.00 sec 21.9 GBytes 9.41 Gbits/sec 0 - - - - - - - - - - - - - - - - - - - - - - - - - [ ID] Interval Transfer Bitrate Retr [ 5] 0.00-60.00 sec 10.9 GBytes 1.56 Gbits/sec 0 sender [ 5] 0.00-60.01 sec 10.9 GBytes 1.56 Gbits/sec receiver [ 7] 0.00-60.00 sec 21.9 GBytes 3.14 Gbits/sec 0 sender [ 7] 0.00-60.01 sec 21.9 GBytes 3.14 Gbits/sec receiver [ 9] 0.00-60.00 sec 21.9 GBytes 3.14 Gbits/sec 1 sender [ 9] 0.00-60.01 sec 21.9 GBytes 3.14 Gbits/sec receiver [ 11] 0.00-60.00 sec 11.0 GBytes 1.58 Gbits/sec 0 sender [ 11] 0.00-60.01 sec 11.0 GBytes 1.58 Gbits/sec receiver [SUM] 0.00-60.00 sec 65.8 GBytes 9.42 Gbits/sec 1 sender [SUM] 0.00-60.01 sec 65.8 GBytes 9.41 Gbits/sec receiver iperf Done. |
- Download
|
1 2 3 4 5 6 7 8 9 10 11 12 13 14 15 16 17 18 19 20 21 22 23 24 25 26 27 28 29 30 31 32 33 34 35 36 37 38 39 |
jaufranc@Ubuntu-24:~$ iperf3 -t 60 -c 192.168.4.1 -i 20 -P 4 -R Connecting to host 192.168.4.1, port 5201 Reverse mode, remote host 192.168.4.1 is sending [ 5] local 192.168.4.215 port 43328 connected to 192.168.4.1 port 5201 [ 7] local 192.168.4.215 port 43332 connected to 192.168.4.1 port 5201 [ 9] local 192.168.4.215 port 43342 connected to 192.168.4.1 port 5201 [ 11] local 192.168.4.215 port 43350 connected to 192.168.4.1 port 5201 [ ID] Interval Transfer Bitrate [ 5] 0.00-20.02 sec 3.66 GBytes 1.57 Gbits/sec [ 7] 0.00-20.02 sec 7.32 GBytes 3.14 Gbits/sec [ 9] 0.00-20.02 sec 3.65 GBytes 1.57 Gbits/sec [ 11] 0.00-20.02 sec 7.31 GBytes 3.14 Gbits/sec [SUM] 0.00-20.02 sec 21.9 GBytes 9.41 Gbits/sec - - - - - - - - - - - - - - - - - - - - - - - - - [ 5] 20.02-40.02 sec 4.33 GBytes 1.86 Gbits/sec [ 7] 20.02-40.02 sec 7.31 GBytes 3.14 Gbits/sec [ 9] 20.02-40.02 sec 2.98 GBytes 1.28 Gbits/sec [ 11] 20.02-40.02 sec 7.31 GBytes 3.14 Gbits/sec [SUM] 20.02-40.02 sec 21.9 GBytes 9.41 Gbits/sec - - - - - - - - - - - - - - - - - - - - - - - - - [ 5] 40.02-60.01 sec 4.26 GBytes 1.83 Gbits/sec [ 7] 40.02-60.01 sec 7.30 GBytes 3.14 Gbits/sec [ 9] 40.02-60.01 sec 3.05 GBytes 1.31 Gbits/sec [ 11] 40.02-60.01 sec 7.30 GBytes 3.14 Gbits/sec [SUM] 40.02-60.01 sec 21.9 GBytes 9.41 Gbits/sec - - - - - - - - - - - - - - - - - - - - - - - - - [ ID] Interval Transfer Bitrate Retr [ 5] 0.00-60.02 sec 12.2 GBytes 1.75 Gbits/sec 0 sender [ 5] 0.00-60.01 sec 12.2 GBytes 1.75 Gbits/sec receiver [ 7] 0.00-60.02 sec 21.9 GBytes 3.14 Gbits/sec 0 sender [ 7] 0.00-60.01 sec 21.9 GBytes 3.14 Gbits/sec receiver [ 9] 0.00-60.02 sec 9.68 GBytes 1.39 Gbits/sec 0 sender [ 9] 0.00-60.01 sec 9.68 GBytes 1.39 Gbits/sec receiver [ 11] 0.00-60.02 sec 21.9 GBytes 3.14 Gbits/sec 0 sender [ 11] 0.00-60.01 sec 21.9 GBytes 3.14 Gbits/sec receiver [SUM] 0.00-60.02 sec 65.8 GBytes 9.42 Gbits/sec 0 sender [SUM] 0.00-60.01 sec 65.8 GBytes 9.41 Gbits/sec receiver iperf Done. |
Both upload and download tests can reach 9.41-9.42 Gbps. That’s promising. Let’s now try a full-duplex transfer:
|
1 2 3 4 5 6 7 8 9 10 11 12 13 14 15 16 17 18 19 20 21 22 23 24 25 26 27 28 29 30 31 32 33 34 35 36 37 38 39 40 41 42 43 44 45 46 47 48 49 50 51 52 53 54 55 56 57 58 59 60 61 62 63 64 65 66 67 |
jaufranc@Ubuntu-24:~$ iperf3 -t 60 -c 192.168.4.1 -i 20 -P 4 --bidir Connecting to host 192.168.4.1, port 5201 [ 5] local 192.168.4.215 port 47834 connected to 192.168.4.1 port 5201 [ 7] local 192.168.4.215 port 47846 connected to 192.168.4.1 port 5201 [ 9] local 192.168.4.215 port 47848 connected to 192.168.4.1 port 5201 [ 11] local 192.168.4.215 port 47856 connected to 192.168.4.1 port 5201 [ 13] local 192.168.4.215 port 47870 connected to 192.168.4.1 port 5201 [ 15] local 192.168.4.215 port 47872 connected to 192.168.4.1 port 5201 [ 17] local 192.168.4.215 port 47874 connected to 192.168.4.1 port 5201 [ 19] local 192.168.4.215 port 47878 connected to 192.168.4.1 port 5201 [ ID][Role] Interval Transfer Bitrate Retr Cwnd [ 5][TX-C] 0.00-20.02 sec 3.99 GBytes 1.71 Gbits/sec 0 3.81 MBytes [ 7][TX-C] 0.00-20.02 sec 4.04 GBytes 1.73 Gbits/sec 0 3.77 MBytes [ 9][TX-C] 0.00-20.02 sec 4.08 GBytes 1.75 Gbits/sec 0 3.78 MBytes [ 11][TX-C] 0.00-20.02 sec 4.08 GBytes 1.75 Gbits/sec 0 3.81 MBytes [SUM][TX-C] 0.00-20.02 sec 16.2 GBytes 6.95 Gbits/sec 0 [ 13][RX-C] 0.00-20.02 sec 4.37 GBytes 1.88 Gbits/sec [ 15][RX-C] 0.00-20.02 sec 4.39 GBytes 1.89 Gbits/sec [ 17][RX-C] 0.00-20.02 sec 4.33 GBytes 1.86 Gbits/sec [ 19][RX-C] 0.00-20.02 sec 4.35 GBytes 1.87 Gbits/sec [SUM][RX-C] 0.00-20.02 sec 17.4 GBytes 7.49 Gbits/sec - - - - - - - - - - - - - - - - - - - - - - - - - [ 5][TX-C] 20.02-40.02 sec 3.99 GBytes 1.71 Gbits/sec 0 3.81 MBytes [ 7][TX-C] 20.02-40.02 sec 3.98 GBytes 1.71 Gbits/sec 0 3.77 MBytes [ 9][TX-C] 20.02-40.02 sec 3.96 GBytes 1.70 Gbits/sec 0 3.78 MBytes [ 11][TX-C] 20.02-40.02 sec 3.97 GBytes 1.70 Gbits/sec 0 3.81 MBytes [SUM][TX-C] 20.02-40.02 sec 15.9 GBytes 6.83 Gbits/sec 0 [ 13][RX-C] 20.02-40.02 sec 4.33 GBytes 1.86 Gbits/sec [ 15][RX-C] 20.02-40.02 sec 4.31 GBytes 1.85 Gbits/sec [ 17][RX-C] 20.02-40.02 sec 4.33 GBytes 1.86 Gbits/sec [ 19][RX-C] 20.02-40.02 sec 4.33 GBytes 1.86 Gbits/sec [SUM][RX-C] 20.02-40.02 sec 17.3 GBytes 7.43 Gbits/sec - - - - - - - - - - - - - - - - - - - - - - - - - [ 5][TX-C] 40.02-60.02 sec 4.04 GBytes 1.74 Gbits/sec 0 3.81 MBytes [ 7][TX-C] 40.02-60.02 sec 4.04 GBytes 1.73 Gbits/sec 0 3.77 MBytes [ 9][TX-C] 40.02-60.02 sec 4.04 GBytes 1.74 Gbits/sec 0 3.78 MBytes [ 11][TX-C] 40.02-60.02 sec 4.05 GBytes 1.74 Gbits/sec 0 3.81 MBytes [SUM][TX-C] 40.02-60.02 sec 16.2 GBytes 6.95 Gbits/sec 0 [ 13][RX-C] 40.02-60.02 sec 4.38 GBytes 1.88 Gbits/sec [ 15][RX-C] 40.02-60.02 sec 4.38 GBytes 1.88 Gbits/sec [ 17][RX-C] 40.02-60.02 sec 4.35 GBytes 1.87 Gbits/sec [ 19][RX-C] 40.02-60.02 sec 4.40 GBytes 1.89 Gbits/sec [SUM][RX-C] 40.02-60.02 sec 17.5 GBytes 7.52 Gbits/sec - - - - - - - - - - - - - - - - - - - - - - - - - [ ID][Role] Interval Transfer Bitrate Retr [ 5][TX-C] 0.00-60.02 sec 12.0 GBytes 1.72 Gbits/sec 0 sender [ 5][TX-C] 0.00-60.02 sec 12.0 GBytes 1.72 Gbits/sec receiver [ 7][TX-C] 0.00-60.02 sec 12.1 GBytes 1.73 Gbits/sec 0 sender [ 7][TX-C] 0.00-60.02 sec 12.1 GBytes 1.73 Gbits/sec receiver [ 9][TX-C] 0.00-60.02 sec 12.1 GBytes 1.73 Gbits/sec 0 sender [ 9][TX-C] 0.00-60.02 sec 12.1 GBytes 1.73 Gbits/sec receiver [ 11][TX-C] 0.00-60.02 sec 12.1 GBytes 1.73 Gbits/sec 0 sender [ 11][TX-C] 0.00-60.02 sec 12.1 GBytes 1.73 Gbits/sec receiver [SUM][TX-C] 0.00-60.02 sec 48.3 GBytes 6.91 Gbits/sec 0 sender [SUM][TX-C] 0.00-60.02 sec 48.3 GBytes 6.91 Gbits/sec receiver [ 13][RX-C] 0.00-60.02 sec 13.1 GBytes 1.87 Gbits/sec 0 sender [ 13][RX-C] 0.00-60.02 sec 13.1 GBytes 1.87 Gbits/sec receiver [ 15][RX-C] 0.00-60.02 sec 13.1 GBytes 1.87 Gbits/sec 0 sender [ 15][RX-C] 0.00-60.02 sec 13.1 GBytes 1.87 Gbits/sec receiver [ 17][RX-C] 0.00-60.02 sec 13.0 GBytes 1.86 Gbits/sec 0 sender [ 17][RX-C] 0.00-60.02 sec 13.0 GBytes 1.86 Gbits/sec receiver [ 19][RX-C] 0.00-60.02 sec 13.1 GBytes 1.87 Gbits/sec 0 sender [ 19][RX-C] 0.00-60.02 sec 13.1 GBytes 1.87 Gbits/sec receiver [SUM][RX-C] 0.00-60.02 sec 52.3 GBytes 7.48 Gbits/sec 0 sender [SUM][RX-C] 0.00-60.02 sec 52.3 GBytes 7.48 Gbits/sec receiver iperf Done. |
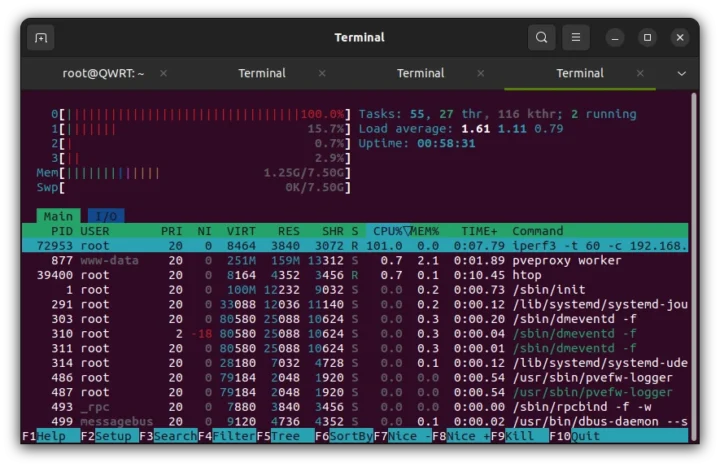
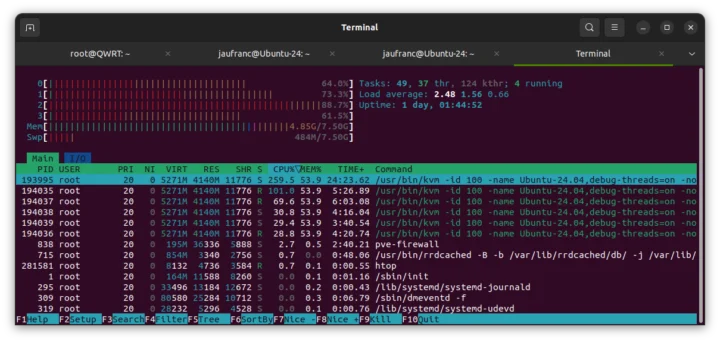
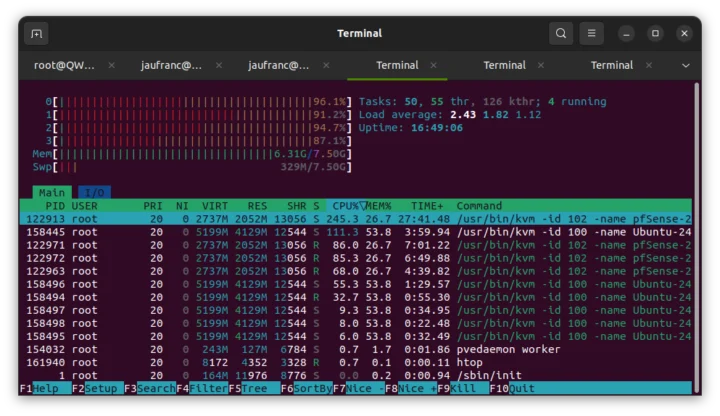
That is 7.48 Gbps and 6.91 Gbps when both Rx and Tx are used simultaneously. I monitored the CPU usage in Ubuntu and Promox VE (see htop below), and the CPU does not seem to be the bottleneck here.
So virtualization does introduce a bottleneck for bidirectional transfers, but I’m not quite sure what the source is. If you’re running a download-only HTTP/FTP server, it will not matter, but a torrent server might be impacted depending on the traffic, and it’s better to run the OS directly on the hardware rather than through Proxmox VE. If I missed an optimization let me know in the comments section.
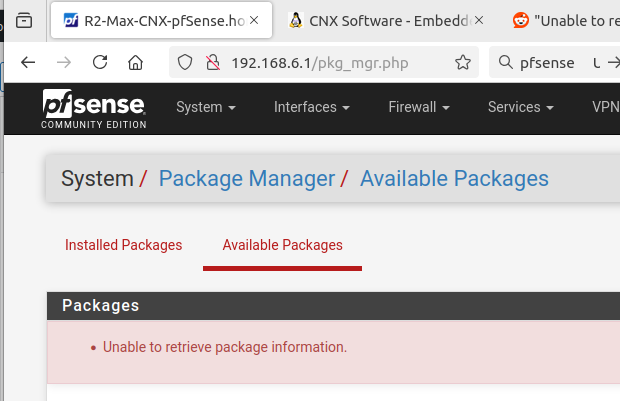
Time to turn off the Ubuntu VM, and start the pfSense VM. We’ll need iperf3 package. We can normally intall it from System->Package Manager, but this did not work… with the error “Unable to retrieve package information”.
Looking for help on the netgate forums is a pain from my side, since they block IP addresses from Thailand, but I found a solution on Reddit instead. Simply open an SSH terminal, and run the following command:
|
1 |
pkg-static install -fy pkg pfSense-repo pfSense-upgrade |
Now I can install iperf3 in the web interface…
 That would be iperf 3.15… It’s not ideal for our testing, since we would like at least iperf 3.16 to have multi-thread support… So I removed the package, and download and installed the iperf3.18 package from the command line:
|
1 2 |
fetch https://pkg.freebsd.org/FreeBSD:14:amd64/latest/All/iperf3-3.18.pkg pkg-static iperf3-3.18.pkg |
We can check the installation was successfull:
|
1 2 3 |
iperf3 -v iperf 3.18 (cJSON 1.7.15) FreeBSD R2-Max-CNX-pfSense.home.arpa 14.0-CURRENT FreeBSD 14.0-CURRENT amd64 1400094 #1 RELENG_2_7_2-n255948-8d2b56da39c: Wed Dec 6 20:45:47 UTC 2023 root@freebsd:/var/jenkins/workspace/pfSense-CE-snapshots-2_7_2-main/obj/amd64/StdASW5b/var/jenkins/workspace/pfSense-CE-snapshots-2_7_2-main/sources/F amd64 |
We can finally test 10GbE with pfSense.
- Upload
|
1 2 3 4 5 6 7 8 9 10 11 12 13 14 15 16 17 18 19 20 21 22 23 24 25 26 |
[2.7.2-RELEASE][admin@R2-Max-CNX-pfSense.home.arpa]/root: iperf3 -t 60 -c 192.168.4.1 -i 20 -P 2 Connecting to host 192.168.4.1, port 5201 [ 5] local 192.168.4.198 port 58597 connected to 192.168.4.1 port 5201 [ 7] local 192.168.4.198 port 37003 connected to 192.168.4.1 port 5201 [ ID] Interval Transfer Bitrate Retr Cwnd [ 5] 0.00-20.00 sec 3.39 GBytes 1.45 Gbits/sec 390 2.84 KBytes [ 7] 0.00-20.00 sec 13.2 GBytes 5.68 Gbits/sec 409 237 KBytes [SUM] 0.00-20.00 sec 16.6 GBytes 7.14 Gbits/sec 799 - - - - - - - - - - - - - - - - - - - - - - - - - [ 5] 20.00-40.01 sec 1.59 GBytes 681 Mbits/sec 177 1.43 KBytes [ 7] 20.00-40.01 sec 15.5 GBytes 6.66 Gbits/sec 227 219 KBytes [SUM] 20.00-40.01 sec 17.1 GBytes 7.35 Gbits/sec 404 - - - - - - - - - - - - - - - - - - - - - - - - - [ 5] 40.01-60.01 sec 1.55 GBytes 664 Mbits/sec 165 39.9 KBytes [ 7] 40.01-60.01 sec 15.4 GBytes 6.63 Gbits/sec 217 552 KBytes [SUM] 40.01-60.01 sec 17.0 GBytes 7.30 Gbits/sec 382 - - - - - - - - - - - - - - - - - - - - - - - - - [ ID] Interval Transfer Bitrate Retr [ 5] 0.00-60.01 sec 6.52 GBytes 934 Mbits/sec 732 sender [ 5] 0.00-60.01 sec 6.52 GBytes 933 Mbits/sec receiver [ 7] 0.00-60.01 sec 44.2 GBytes 6.33 Gbits/sec 853 sender [ 7] 0.00-60.01 sec 44.2 GBytes 6.33 Gbits/sec receiver [SUM] 0.00-60.01 sec 50.7 GBytes 7.26 Gbits/sec 1585 sender [SUM] 0.00-60.01 sec 50.7 GBytes 7.26 Gbits/sec receiver iperf Done. |
- Download
|
1 2 3 4 5 6 7 8 9 10 11 12 13 14 15 16 17 18 19 20 21 22 23 24 25 26 27 |
[2.7.2-RELEASE][admin@R2-Max-CNX-pfSense.home.arpa]/root: iperf3 -t 60 -c 192.168.4.1 -i 20 -P 2 -R Connecting to host 192.168.4.1, port 5201 Reverse mode, remote host 192.168.4.1 is sending [ 5] local 192.168.4.198 port 7779 connected to 192.168.4.1 port 5201 [ 7] local 192.168.4.198 port 58873 connected to 192.168.4.1 port 5201 [ ID] Interval Transfer Bitrate [ 5] 0.00-20.01 sec 3.65 GBytes 1.57 Gbits/sec [ 7] 0.00-20.01 sec 3.94 GBytes 1.69 Gbits/sec [SUM] 0.00-20.01 sec 7.58 GBytes 3.26 Gbits/sec - - - - - - - - - - - - - - - - - - - - - - - - - [ 5] 20.01-40.02 sec 2.55 GBytes 1.09 Gbits/sec [ 7] 20.01-40.02 sec 4.13 GBytes 1.77 Gbits/sec [SUM] 20.01-40.02 sec 6.68 GBytes 2.87 Gbits/sec - - - - - - - - - - - - - - - - - - - - - - - - - [ 5] 40.02-60.01 sec 3.66 GBytes 1.57 Gbits/sec [ 7] 40.02-60.01 sec 4.29 GBytes 1.84 Gbits/sec [SUM] 40.02-60.01 sec 7.95 GBytes 3.42 Gbits/sec - - - - - - - - - - - - - - - - - - - - - - - - - [ ID] Interval Transfer Bitrate Retr [ 5] 0.00-60.01 sec 9.86 GBytes 1.41 Gbits/sec 1799 sender [ 5] 0.00-60.01 sec 9.85 GBytes 1.41 Gbits/sec receiver [ 7] 0.00-60.01 sec 12.4 GBytes 1.77 Gbits/sec 2748 sender [ 7] 0.00-60.01 sec 12.4 GBytes 1.77 Gbits/sec receiver [SUM] 0.00-60.01 sec 22.2 GBytes 3.18 Gbits/sec 4547 sender [SUM] 0.00-60.01 sec 22.2 GBytes 3.18 Gbits/sec receiver iperf Done. |
- Full-duplex
|
1 2 3 4 5 6 7 8 9 10 11 12 13 14 15 16 17 18 19 20 21 22 23 24 25 26 27 28 29 30 31 32 33 34 35 36 37 38 39 40 41 42 43 |
[2.7.2-RELEASE][admin@R2-Max-CNX-pfSense.home.arpa]/root: iperf3 -t 60 -c 192.168.4.1 -i 20 -P 2 --bidir Connecting to host 192.168.4.1, port 5201 [ 5] local 192.168.4.198 port 26504 connected to 192.168.4.1 port 5201 [ 7] local 192.168.4.198 port 37717 connected to 192.168.4.1 port 5201 [ 9] local 192.168.4.198 port 62054 connected to 192.168.4.1 port 5201 [ 11] local 192.168.4.198 port 65466 connected to 192.168.4.1 port 5201 [ ID][Role] Interval Transfer Bitrate Retr Cwnd [ 5][TX-C] 0.00-20.01 sec 724 MBytes 303 Mbits/sec 98 89.6 KBytes [ 7][TX-C] 0.00-20.01 sec 5.45 GBytes 2.34 Gbits/sec 292 94.1 KBytes [SUM][TX-C] 0.00-20.01 sec 6.16 GBytes 2.64 Gbits/sec 390 [ 9][RX-C] 0.00-20.01 sec 4.13 GBytes 1.77 Gbits/sec [ 11][RX-C] 0.00-20.01 sec 3.12 GBytes 1.34 Gbits/sec [SUM][RX-C] 0.00-20.01 sec 7.25 GBytes 3.11 Gbits/sec - - - - - - - - - - - - - - - - - - - - - - - - - [ 5][TX-C] 20.01-40.01 sec 1.17 GBytes 504 Mbits/sec 31 515 KBytes [ 7][TX-C] 20.01-40.01 sec 5.56 GBytes 2.39 Gbits/sec 36 148 KBytes [SUM][TX-C] 20.01-40.01 sec 6.73 GBytes 2.89 Gbits/sec 67 [ 9][RX-C] 20.01-40.01 sec 2.32 GBytes 998 Mbits/sec [ 11][RX-C] 20.01-40.01 sec 3.54 GBytes 1.52 Gbits/sec [SUM][RX-C] 20.01-40.01 sec 5.86 GBytes 2.52 Gbits/sec - - - - - - - - - - - - - - - - - - - - - - - - - [ 5][TX-C] 40.01-60.01 sec 1.04 GBytes 448 Mbits/sec 17 784 KBytes [ 7][TX-C] 40.01-60.01 sec 9.36 GBytes 4.02 Gbits/sec 15 227 KBytes [SUM][TX-C] 40.01-60.01 sec 10.4 GBytes 4.47 Gbits/sec 32 [ 9][RX-C] 40.01-60.01 sec 1.87 GBytes 804 Mbits/sec [ 11][RX-C] 40.01-60.01 sec 1.49 GBytes 640 Mbits/sec [SUM][RX-C] 40.01-60.01 sec 3.36 GBytes 1.44 Gbits/sec - - - - - - - - - - - - - - - - - - - - - - - - - [ ID][Role] Interval Transfer Bitrate Retr [ 5][TX-C] 0.00-60.01 sec 2.92 GBytes 419 Mbits/sec 146 sender [ 5][TX-C] 0.00-60.01 sec 2.92 GBytes 418 Mbits/sec receiver [ 7][TX-C] 0.00-60.01 sec 20.4 GBytes 2.92 Gbits/sec 343 sender [ 7][TX-C] 0.00-60.01 sec 20.4 GBytes 2.92 Gbits/sec receiver [SUM][TX-C] 0.00-60.01 sec 23.3 GBytes 3.33 Gbits/sec 489 sender [SUM][TX-C] 0.00-60.01 sec 23.3 GBytes 3.33 Gbits/sec receiver [ 9][RX-C] 0.00-60.01 sec 8.32 GBytes 1.19 Gbits/sec 784 sender [ 9][RX-C] 0.00-60.01 sec 8.32 GBytes 1.19 Gbits/sec receiver [ 11][RX-C] 0.00-60.01 sec 8.15 GBytes 1.17 Gbits/sec 1239 sender [ 11][RX-C] 0.00-60.01 sec 8.15 GBytes 1.17 Gbits/sec receiver [SUM][RX-C] 0.00-60.01 sec 16.5 GBytes 2.36 Gbits/sec 2023 sender [SUM][RX-C] 0.00-60.01 sec 16.5 GBytes 2.36 Gbits/sec receiver iperf Done. |
We’re quite far from the 9.42 Gbps target. Upload is 7.26 Gbps, download is 3.18 Gbps, and full-duplex is 3.33/2.36 Gbps. There’s also a lot of variability during the test. Note that it’s in a dual-core pfSense VM running in Proxmox VE. I know nothing about FreeBSD, and there may be optimization that improves that. Without virtualization, results should be quite better, but I’ve already spent so much time on this review, that I’ll skip that test…
What I’ll do is fire up the Ubuntu 24.04 VM and run iperf3 tests from the Ubuntu server to the pfSense client (the other way around does not work with the default firewall configuration), in what should be the worst case scenario:
- pfSense to Ubuntu
|
1 2 3 4 5 6 7 8 9 10 11 12 13 14 15 16 17 18 19 20 21 22 23 24 25 26 27 28 29 30 31 32 33 34 35 36 37 38 |
[2.7.2-RELEASE][admin@R2-Max-CNX-pfSense.home.arpa]/root: iperf3 -t 60 -c 192.168.4.215 -i 10 -P 2 Connecting to host 192.168.4.215, port 5201 [ 5] local 192.168.4.198 port 62919 connected to 192.168.4.215 port 5201 [ 7] local 192.168.4.198 port 29848 connected to 192.168.4.215 port 5201 [ ID] Interval Transfer Bitrate Retr Cwnd [ 5] 0.00-10.01 sec 466 MBytes 390 Mbits/sec 83 172 KBytes [ 7] 0.00-10.01 sec 3.80 GBytes 3.26 Gbits/sec 88 791 KBytes [SUM] 0.00-10.01 sec 4.26 GBytes 3.65 Gbits/sec 171 - - - - - - - - - - - - - - - - - - - - - - - - - [ 5] 10.01-20.00 sec 429 MBytes 360 Mbits/sec 93 1.43 KBytes [ 7] 10.01-20.00 sec 3.63 GBytes 3.12 Gbits/sec 105 84.1 KBytes [SUM] 10.01-20.00 sec 4.05 GBytes 3.48 Gbits/sec 198 - - - - - - - - - - - - - - - - - - - - - - - - - [ 5] 20.00-30.00 sec 297 MBytes 249 Mbits/sec 87 1.43 KBytes [ 7] 20.00-30.00 sec 3.81 GBytes 3.28 Gbits/sec 94 2.35 MBytes [SUM] 20.00-30.00 sec 4.10 GBytes 3.53 Gbits/sec 181 - - - - - - - - - - - - - - - - - - - - - - - - - [ 5] 30.00-40.00 sec 454 MBytes 381 Mbits/sec 95 177 KBytes [ 7] 30.00-40.00 sec 3.70 GBytes 3.18 Gbits/sec 97 442 KBytes [SUM] 30.00-40.00 sec 4.14 GBytes 3.56 Gbits/sec 192 - - - - - - - - - - - - - - - - - - - - - - - - - [ 5] 40.00-50.03 sec 354 MBytes 296 Mbits/sec 96 1.43 KBytes [ 7] 40.00-50.03 sec 3.91 GBytes 3.35 Gbits/sec 92 1.10 MBytes [SUM] 40.00-50.03 sec 4.26 GBytes 3.64 Gbits/sec 188 - - - - - - - - - - - - - - - - - - - - - - - - - [ 5] 50.03-60.01 sec 250 MBytes 210 Mbits/sec 95 1.43 KBytes [ 7] 50.03-60.01 sec 3.92 GBytes 3.38 Gbits/sec 92 306 KBytes [SUM] 50.03-60.01 sec 4.17 GBytes 3.59 Gbits/sec 187 - - - - - - - - - - - - - - - - - - - - - - - - - [ ID] Interval Transfer Bitrate Retr [ 5] 0.00-60.01 sec 2.20 GBytes 314 Mbits/sec 549 sender [ 5] 0.00-60.01 sec 2.20 GBytes 314 Mbits/sec receiver [ 7] 0.00-60.01 sec 22.8 GBytes 3.26 Gbits/sec 568 sender [ 7] 0.00-60.01 sec 22.8 GBytes 3.26 Gbits/sec receiver [SUM] 0.00-60.01 sec 25.0 GBytes 3.58 Gbits/sec 1117 sender [SUM] 0.00-60.01 sec 25.0 GBytes 3.57 Gbits/sec receiver iperf Done. |
- Ubuntu to pfSense
|
1 2 3 4 5 6 7 8 9 10 11 12 13 14 15 16 17 18 19 20 21 22 23 24 25 26 27 28 29 30 31 32 33 34 35 36 37 38 39 |
[2.7.2-RELEASE][admin@R2-Max-CNX-pfSense.home.arpa]/root: iperf3 -t 60 -c 192.168.4.215 -i 10 -P 2 -R Connecting to host 192.168.4.215, port 5201 Reverse mode, remote host 192.168.4.215 is sending [ 5] local 192.168.4.198 port 52024 connected to 192.168.4.215 port 5201 [ 7] local 192.168.4.198 port 59762 connected to 192.168.4.215 port 5201 [ ID] Interval Transfer Bitrate [ 5] 0.00-10.02 sec 1.43 GBytes 1.22 Gbits/sec [ 7] 0.00-10.02 sec 1.49 GBytes 1.27 Gbits/sec [SUM] 0.00-10.02 sec 2.91 GBytes 2.50 Gbits/sec - - - - - - - - - - - - - - - - - - - - - - - - - [ 5] 10.02-20.00 sec 1.52 GBytes 1.31 Gbits/sec [ 7] 10.02-20.00 sec 1.52 GBytes 1.30 Gbits/sec [SUM] 10.02-20.00 sec 3.03 GBytes 2.61 Gbits/sec - - - - - - - - - - - - - - - - - - - - - - - - - [ 5] 20.00-30.01 sec 1.11 GBytes 949 Mbits/sec [ 7] 20.00-30.01 sec 1.94 GBytes 1.67 Gbits/sec [SUM] 20.00-30.01 sec 3.05 GBytes 2.62 Gbits/sec - - - - - - - - - - - - - - - - - - - - - - - - - [ 5] 30.01-40.02 sec 1.43 GBytes 1.23 Gbits/sec [ 7] 30.01-40.02 sec 1.60 GBytes 1.37 Gbits/sec [SUM] 30.01-40.02 sec 3.03 GBytes 2.60 Gbits/sec - - - - - - - - - - - - - - - - - - - - - - - - - [ 5] 40.02-50.01 sec 1.18 GBytes 1.02 Gbits/sec [ 7] 40.02-50.01 sec 1.82 GBytes 1.57 Gbits/sec [SUM] 40.02-50.01 sec 3.00 GBytes 2.58 Gbits/sec - - - - - - - - - - - - - - - - - - - - - - - - - [ 5] 50.01-60.02 sec 1.12 GBytes 959 Mbits/sec [ 7] 50.01-60.02 sec 1.93 GBytes 1.65 Gbits/sec [SUM] 50.01-60.02 sec 3.05 GBytes 2.61 Gbits/sec - - - - - - - - - - - - - - - - - - - - - - - - - [ ID] Interval Transfer Bitrate Retr [ 5] 0.00-60.02 sec 7.79 GBytes 1.11 Gbits/sec 1456 sender [ 5] 0.00-60.02 sec 7.78 GBytes 1.11 Gbits/sec receiver [ 7] 0.00-60.02 sec 10.3 GBytes 1.47 Gbits/sec 1615 sender [ 7] 0.00-60.02 sec 10.3 GBytes 1.47 Gbits/sec receiver [SUM] 0.00-60.02 sec 18.1 GBytes 2.59 Gbits/sec 3071 sender [SUM] 0.00-60.02 sec 18.1 GBytes 2.59 Gbits/sec receiver iperf Done. |
- Bidrectional (full-duplex)
|
1 2 3 4 5 6 7 8 9 10 11 12 13 14 15 16 17 18 19 20 21 22 23 24 25 26 27 28 29 30 31 32 33 34 35 36 37 38 39 40 41 42 43 44 45 46 47 48 49 50 51 52 53 54 55 56 57 58 59 60 61 62 63 64 |
[2.7.2-RELEASE][admin@R2-Max-CNX-pfSense.home.arpa]/root: iperf3 -t 60 -c 192.168.4.215 -i 10 -P 2 --bidir Connecting to host 192.168.4.215, port 5201 [ 5] local 192.168.4.198 port 16419 connected to 192.168.4.215 port 5201 [ 7] local 192.168.4.198 port 27335 connected to 192.168.4.215 port 5201 [ 9] local 192.168.4.198 port 13205 connected to 192.168.4.215 port 5201 [ 11] local 192.168.4.198 port 55600 connected to 192.168.4.215 port 5201 [ ID][Role] Interval Transfer Bitrate Retr Cwnd [ 5][TX-C] 0.00-10.01 sec 680 MBytes 570 Mbits/sec 61 139 KBytes [ 7][TX-C] 0.00-10.01 sec 194 MBytes 163 Mbits/sec 43 20.0 KBytes [SUM][TX-C] 0.00-10.01 sec 874 MBytes 733 Mbits/sec 104 [ 9][RX-C] 0.00-10.01 sec 1.28 GBytes 1.10 Gbits/sec [ 11][RX-C] 0.00-10.01 sec 1.03 GBytes 881 Mbits/sec [SUM][RX-C] 0.00-10.01 sec 2.31 GBytes 1.98 Gbits/sec - - - - - - - - - - - - - - - - - - - - - - - - - [ 5][TX-C] 10.01-20.02 sec 410 MBytes 343 Mbits/sec 31 129 KBytes [ 7][TX-C] 10.01-20.02 sec 214 MBytes 179 Mbits/sec 37 134 KBytes [SUM][TX-C] 10.01-20.02 sec 624 MBytes 523 Mbits/sec 68 [ 9][RX-C] 10.01-20.02 sec 1.36 GBytes 1.16 Gbits/sec [ 11][RX-C] 10.01-20.02 sec 1.09 GBytes 937 Mbits/sec [SUM][RX-C] 10.01-20.02 sec 2.45 GBytes 2.10 Gbits/sec - - - - - - - - - - - - - - - - - - - - - - - - - [ 5][TX-C] 20.02-30.02 sec 529 MBytes 444 Mbits/sec 35 189 KBytes [ 7][TX-C] 20.02-30.02 sec 196 MBytes 164 Mbits/sec 39 153 KBytes [SUM][TX-C] 20.02-30.02 sec 725 MBytes 608 Mbits/sec 74 [ 9][RX-C] 20.02-30.02 sec 1.34 GBytes 1.15 Gbits/sec [ 11][RX-C] 20.02-30.02 sec 1.00 GBytes 863 Mbits/sec [SUM][RX-C] 20.02-30.02 sec 2.34 GBytes 2.01 Gbits/sec - - - - - - - - - - - - - - - - - - - - - - - - - [ 5][TX-C] 30.02-40.02 sec 429 MBytes 360 Mbits/sec 40 229 KBytes [ 7][TX-C] 30.02-40.02 sec 240 MBytes 201 Mbits/sec 32 32.8 KBytes [SUM][TX-C] 30.02-40.02 sec 669 MBytes 561 Mbits/sec 72 [ 9][RX-C] 30.02-40.02 sec 982 MBytes 824 Mbits/sec [ 11][RX-C] 30.02-40.02 sec 1.41 GBytes 1.21 Gbits/sec [SUM][RX-C] 30.02-40.02 sec 2.37 GBytes 2.04 Gbits/sec - - - - - - - - - - - - - - - - - - - - - - - - - [ 5][TX-C] 40.02-50.02 sec 489 MBytes 410 Mbits/sec 44 308 KBytes [ 7][TX-C] 40.02-50.02 sec 270 MBytes 226 Mbits/sec 30 217 KBytes [SUM][TX-C] 40.02-50.02 sec 759 MBytes 636 Mbits/sec 74 [ 9][RX-C] 40.02-50.02 sec 1.12 GBytes 965 Mbits/sec [ 11][RX-C] 40.02-50.02 sec 1.19 GBytes 1.02 Gbits/sec [SUM][RX-C] 40.02-50.02 sec 2.31 GBytes 1.99 Gbits/sec - - - - - - - - - - - - - - - - - - - - - - - - - [ 5][TX-C] 50.02-60.02 sec 467 MBytes 391 Mbits/sec 53 1.43 KBytes [ 7][TX-C] 50.02-60.02 sec 182 MBytes 153 Mbits/sec 58 1.43 KBytes [SUM][TX-C] 50.02-60.02 sec 649 MBytes 544 Mbits/sec 111 [ 9][RX-C] 50.02-60.02 sec 1.31 GBytes 1.13 Gbits/sec [ 11][RX-C] 50.02-60.02 sec 1.10 GBytes 942 Mbits/sec [SUM][RX-C] 50.02-60.02 sec 2.41 GBytes 2.07 Gbits/sec - - - - - - - - - - - - - - - - - - - - - - - - - [ ID][Role] Interval Transfer Bitrate Retr [ 5][TX-C] 0.00-60.02 sec 2.93 GBytes 420 Mbits/sec 264 sender [ 5][TX-C] 0.00-60.02 sec 2.93 GBytes 420 Mbits/sec receiver [ 7][TX-C] 0.00-60.02 sec 1.27 GBytes 181 Mbits/sec 239 sender [ 7][TX-C] 0.00-60.02 sec 1.26 GBytes 181 Mbits/sec receiver [SUM][TX-C] 0.00-60.02 sec 4.20 GBytes 601 Mbits/sec 503 sender [SUM][TX-C] 0.00-60.02 sec 4.20 GBytes 601 Mbits/sec receiver [ 9][RX-C] 0.00-60.02 sec 7.37 GBytes 1.06 Gbits/sec 1015 sender [ 9][RX-C] 0.00-60.02 sec 7.37 GBytes 1.05 Gbits/sec receiver [ 11][RX-C] 0.00-60.02 sec 6.82 GBytes 976 Mbits/sec 1197 sender [ 11][RX-C] 0.00-60.02 sec 6.82 GBytes 976 Mbits/sec receiver [SUM][RX-C] 0.00-60.02 sec 14.2 GBytes 2.03 Gbits/sec 2212 sender [SUM][RX-C] 0.00-60.02 sec 14.2 GBytes 2.03 Gbits/sec receiver iperf Done. |
Here’s htop during the Ubuntu to pfSense test. Asking an Intel N100 to handle two virtual machines communcationg over 10GbE on the same machine is a bit too much to ask :).
Conclusion
The iKOOLCORE R2 Max can perfectly handle 10GbE networking with its Intel N100 quad-core CPU for unidirectional and bidirectional (full-duplex) transfers, but multiple cores may have to be used especially for bidirectional transfers. I could achieve 9.41 Gbps in all cases using iperf3 between an R2 Max with OpenWrt (server) and an R2 Max with Proxmox VE (Debian client) as long as multithreading is used.
When we introduced virtual machines in Proxmox VE, the results varied more and depended on the selected OS. For example, I got respectable 9.42 Gbps DL, 9.42 Gbps UL, and 7.48 Gbps/6.91 Gbps (full-duplex) with an Ubuntu 24.04 VM, but results dropped quite a bit in a pfSense 2.7.2 VM at 7.26 Gbps DL, 3.18 Gbps UL, and 3.33/2.36 Gbps (FD). The worst-case scenario was a full-duplex transfer with each 10GbE assigned to their own virtual machine, and here iperf3 reported just 2.03 Gbps/1.06 Gbps due to CPU (and likely other) bottlenecks. Better performance should be obtainable with the Core i3-N305 model in that case.
I’d like to thank iKOOLCORE for sending the R2 Max for review. The N100 and Core i3-N305 mini PCs sell for respectively $349 and $449 in the review configuration (8GB RAM, 128GB SSD), but you can get a barebone system for as low as $299. You can also get an extra 5% off with the CNXSOFT coupon code

Jean-Luc started CNX Software in 2010 as a part-time endeavor, before quitting his job as a software engineering manager, and starting to write daily news, and reviews full time later in 2011.
Support CNX Software! Donate via cryptocurrencies, become a Patron on Patreon, or purchase goods on Amazon or Aliexpress





I have the N305 model. The 10gbe chip isn’t supported in freebsd, so can’t passthrough to opnsense in proxmox…
Didn’t stop me from getting 6.2Gbit/s through opnsense after a bit of tuning though!