After I reviewed the NapCat smart video doorbell last June, the company asked me to review a wireless NVR with solar-powered security cameras and I understood I would receive a kit with four solar-powered cameras and an NVR with storage preinstalled.
In this review, I’ll go through an unboxing, a quick teardown of the NVR, the installation process, and my experience with the Napcat NVR user interfaces (connected to HDMI) and the Napcat Life Android app which I also used with the video doorbell.
Napcat wireless NVR N1S22 kit unboxing
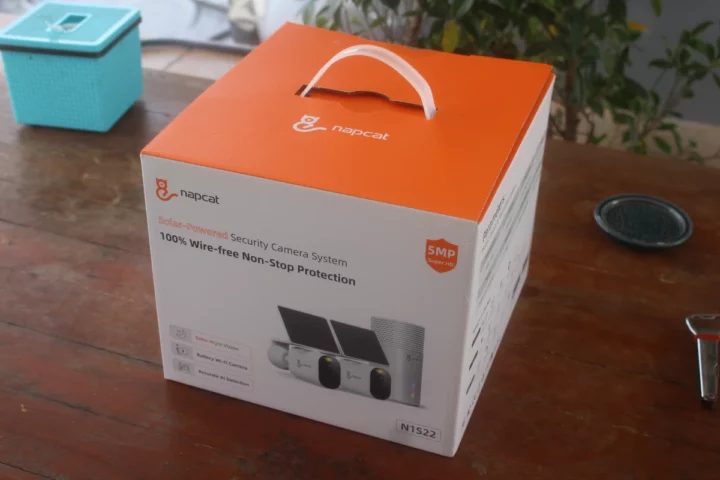
The package I’ve received reads “N1S22” model of a “Solar-powered Security Camera System” and is quite smaller than I expected.
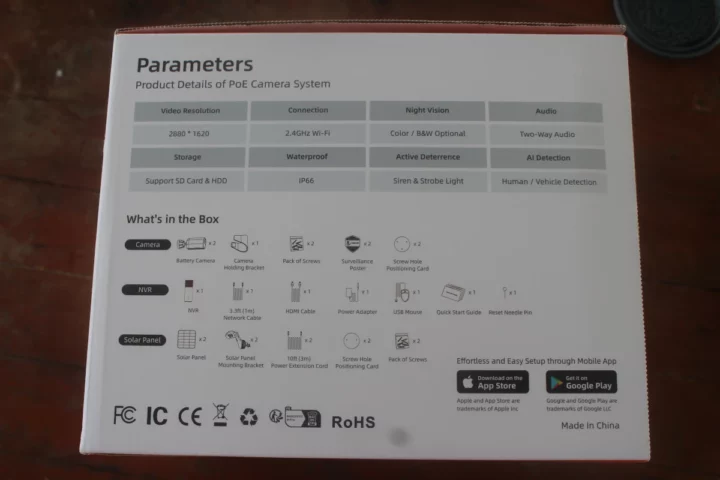
One reason for the small size is that my kit only comes with two cameras instead of four, and the company also did a good job of making everything take as little space as possible. On the net, you’ll see it advertised as a “4K security camera system”, but the included 2.4 GHz WiFi cameras only have a resolution of just 2680×1620 (5MP).
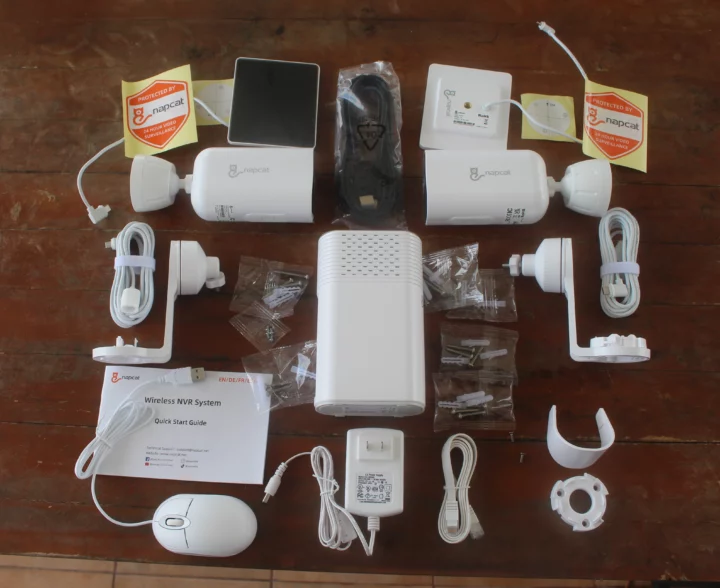
The kit features a compact wireless NVR (center in the photo below), a 12V/2A power adapter for the NVR, an Ethernet cable, an HDMI cable, a USB mouse, two battery-powered security cameras, two small solar panels each with a 3-meter USB-C expansion cord and a solar mounting bracket, as well as a pack of screws, a reset needle pin, some stickers, and a quick start guide.
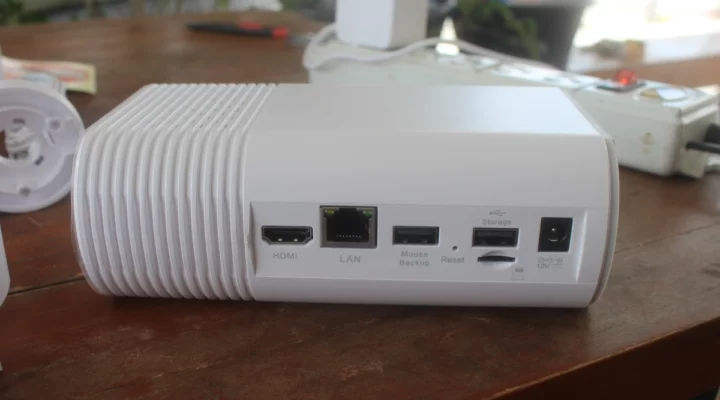
The NVR system features an HDMI port, an Ethernet RJ45 jack, a USB port for the mouse, a Reset pinhole, a USB port for storage, a microSD card slot (fitted with a 64GB microSD card), and a 12V DC jack.
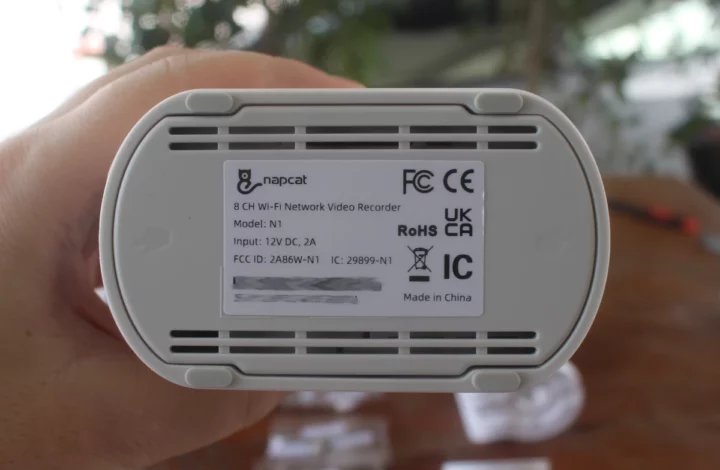
The bottom side says the Napcat N1 is an 8-channel WiFi network video recorder.
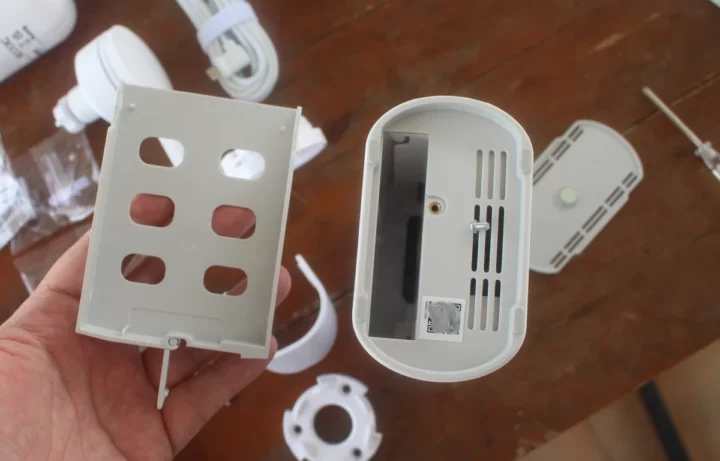
The bottom cover is attached to the main unit through a magnet. You can press on the left or right side to take it out. From there you’ll find the QR code to add the NVR to the Napcat Life app, as well as a SATA tray secured by a screw and suitable for 2.5-inch SATA drives. I’ll just be using the provided microSD card for this review.
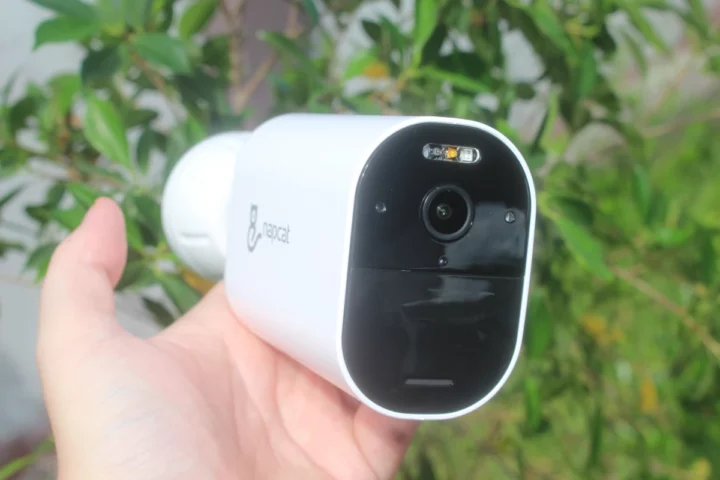
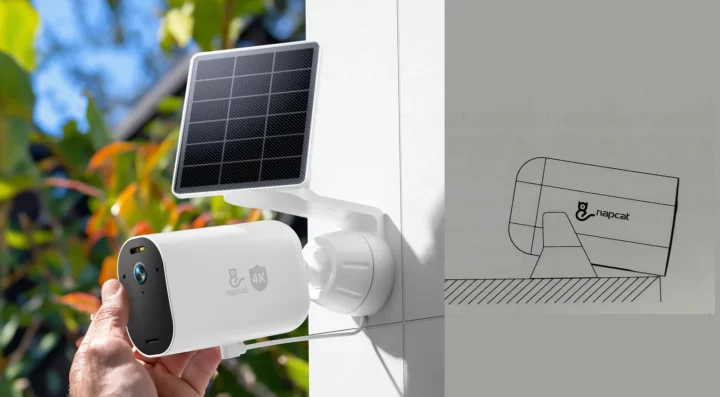
The front of the camera has some infrared LEDs, a spotlight (yellow), two indicator lights (red and green), a photosensitive sensor, a hole for a microphone, a PIR motion sensor, and a hole for the speakers on the bottom.
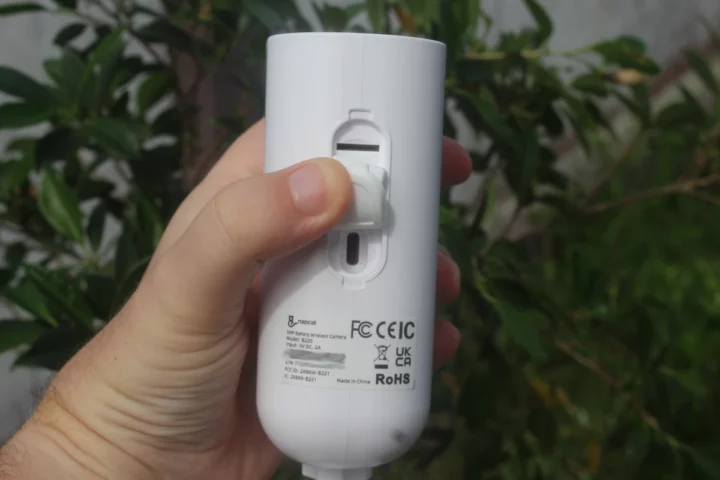
The bottom side of the “B220” camera has waterproof covers for a microSD card slot and a USB-C port for power. Since the videos will be recorded to the NVR, I did not add a microSD card to the cameras. I precharge the cameras with a USB power adapter before installation and connection to the solar panels.
Napcat N1 teardown
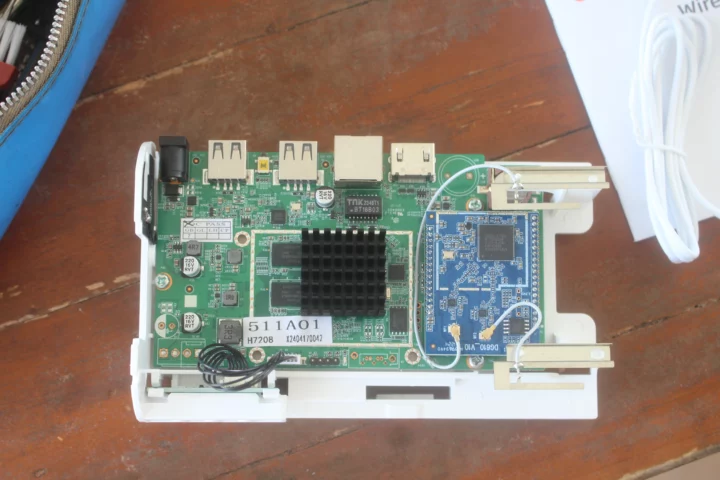
The NVR is easy to teardown, so I went ahead and we can see it’s based on a MediaTek MT7628DAN MIPS processor on a module attached to two interesting metal antennas… The main processor is under a heatsink, but it did come off easily, so I left that alone.
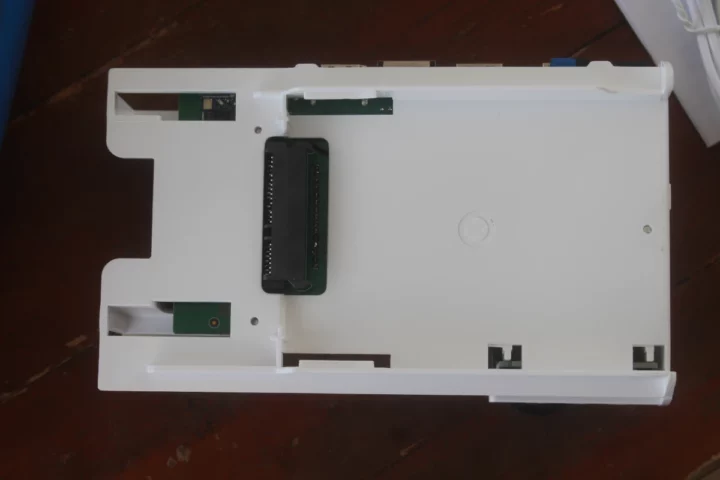
The bottom side features the SATA connector for a 2.5-inch hard drive.
Napcat wireless NVR setup
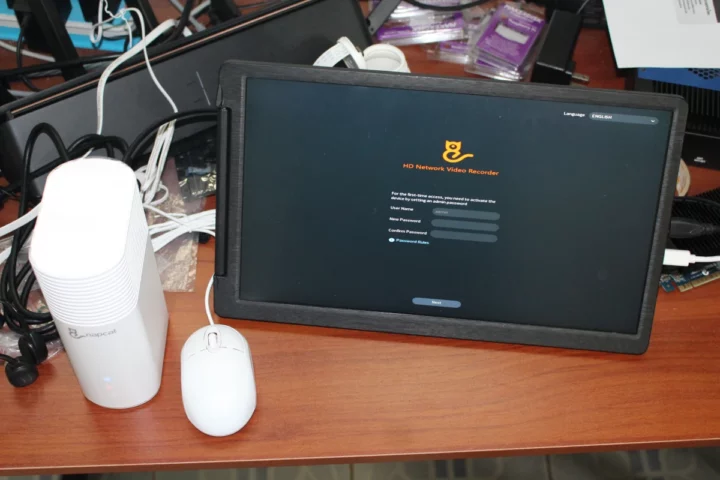
Before installing the cameras, we should make sure everything works first. So I connected the NVR to my router through Ethernet, added the mouse and an HDMI monitor, and connected the power supply.
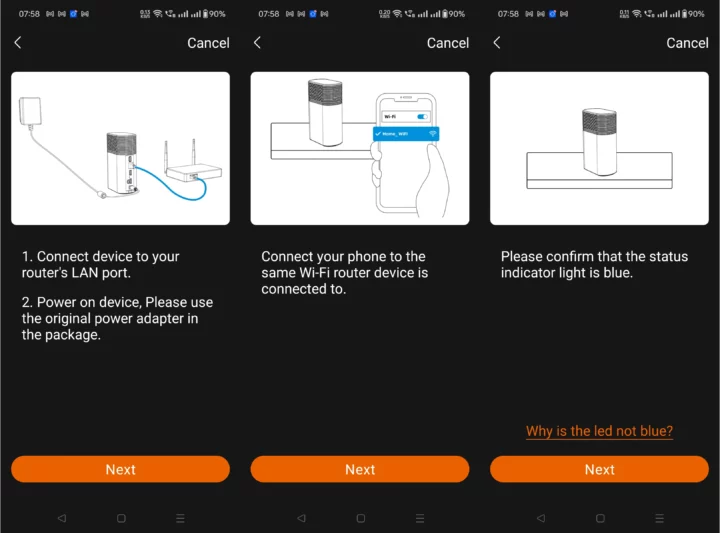
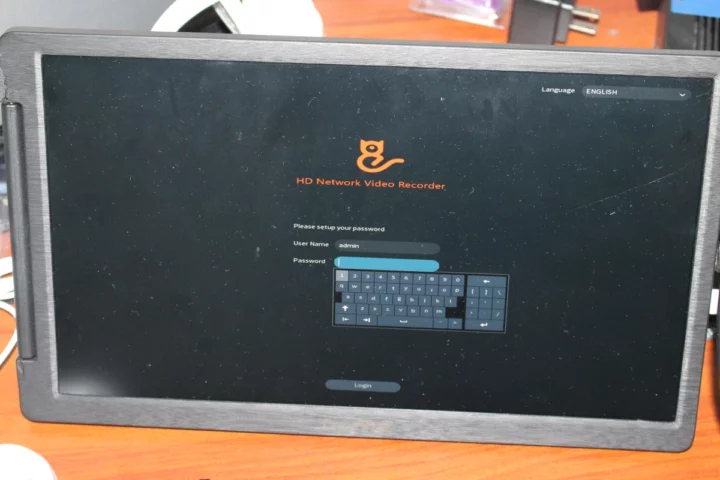
We are asked to set up a password as the first configuration step. But this needs to be done with the mouse and a software keyboard that pops up. Not ideal. I tried to connect a USB keyboard to the storage port, but it did not work. I was too lazy to type a password with the software keyboard using the mouse, so I went to the Napcat Life mobile app for configuration. I first scanned the QR code under the device after tapping on “+ Add Device” in the app, and went through the configuration wizard.
After the NVR is properly detected, we’re asked to enter a device name, select the time zone, and we’re good to go… Just make sure to disable any VPN including Adblockers you may have when adding the device or it will fail (based on my experience with the video doorbell).
Now that the configuration is done, I went back to the display connected to the NVR and was just asked to input the password I had set in the mobile app.
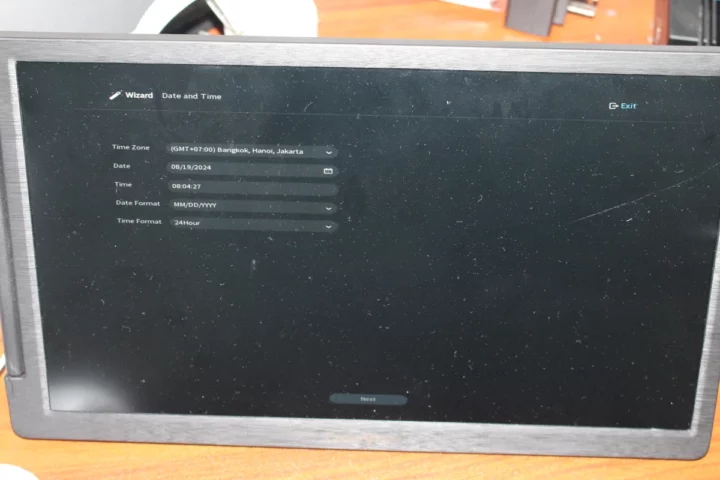
Somehow, I had to confirm the time zone and date/time formats again…
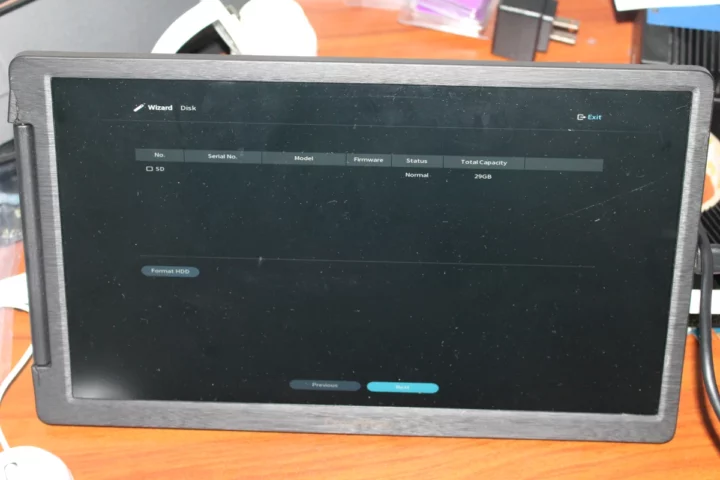
… before selecting the storage device.
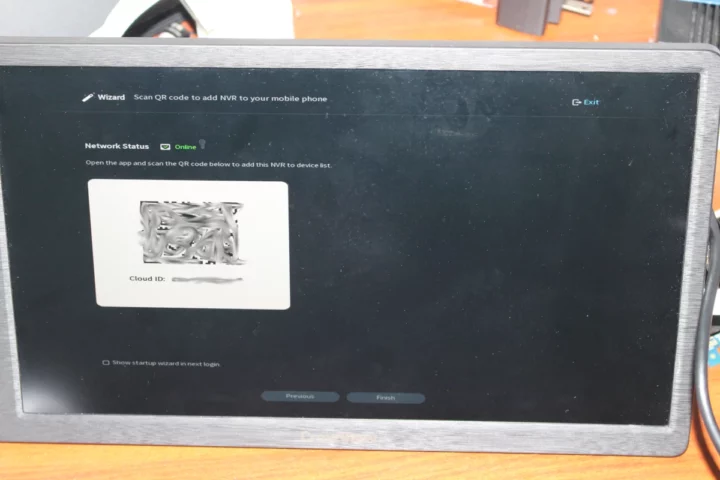
Finally, I was presented with the QR code, but I didn’t need it at this point, so I clicked on “Finish”.
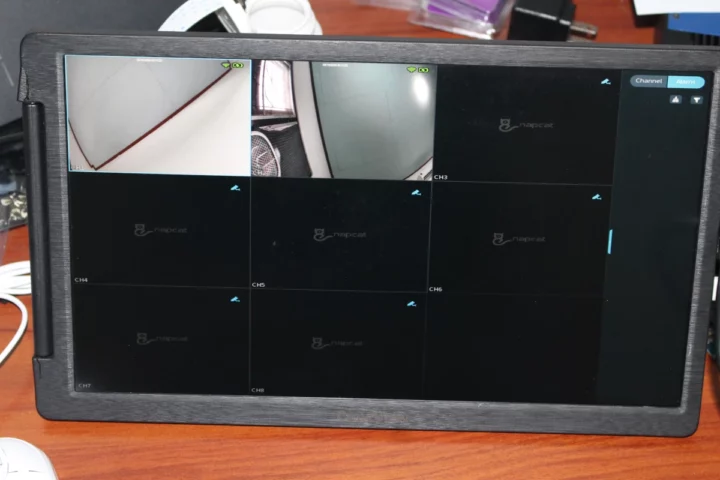
Our two cameras can be seen in a 3×3 Mozaic for eight cameras, so everything is working, and it’s time to install the cameras in strategic locations.
Napcat B220 solar-powered security cameras installation
There are various ways to install the cameras. I installed the first camera on the wall directly, and since I don’t have a ladder that would allow me to safely place the solar panel on the roof, I attached it to the cover of an old water pump in an area that gets sun a few hours a day. I did not use the solar panel bracket at all.
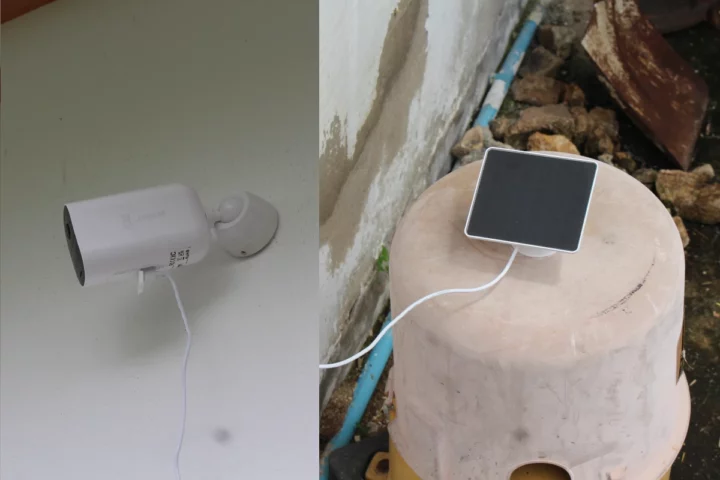
I install the second camera the same way but used the solar panel bracket to install the second solar panel in a location that gets sun a couple of hours a day.
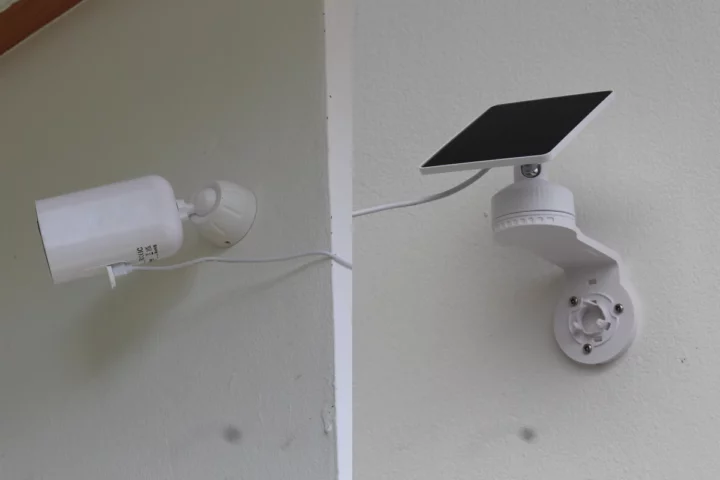
At first, I felt the camera holder for the camera was insecure and a bird or strong winds could potentially bring it down, but then I noticed there was also a thread to insert a screw and keep it properly secured.
One other method is placing the camera directly into the solar panel bracket, but this would not have worked in my case due to the locations of the cameras not getting any sun at all. It’s also possible to mount it on the holding bracket provided with the kit, but that is probably not suitable for outdoor use since the holding bracket is simply placed on the surface and there aren’t any screws to secure it.
Napcat wireless NVR user interface
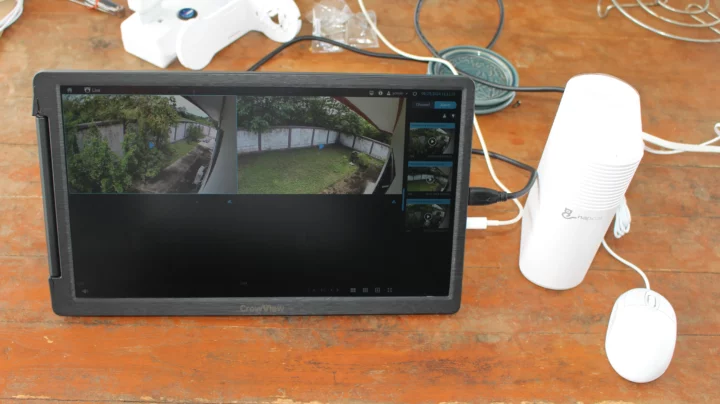
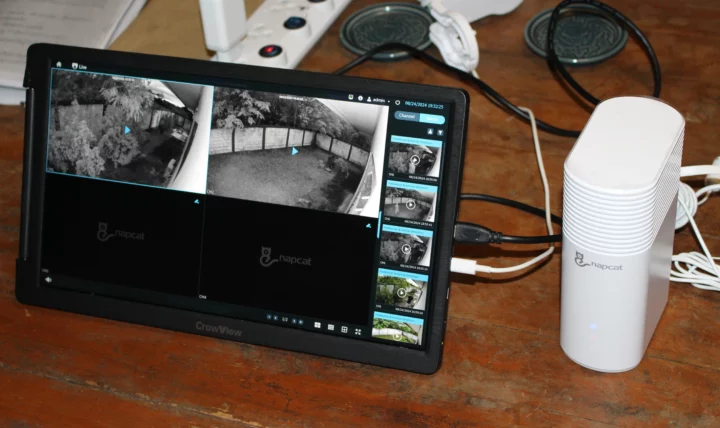
Once the installation is complete, we can go back to the NVR and check out the interface. Our two cameras are properly shown, but the live window shows paused videos because the cameras are only active when a person, vehicle, or motion is detected in order to save power and extend the battery life.
We can manually start each stream by clicking the blue play button with the mouse. We are asked to enter the NVR password each time we want to start using the device after a period of inactivity. I tried to disable it in the configuration menu but was unable to find a suitable option.
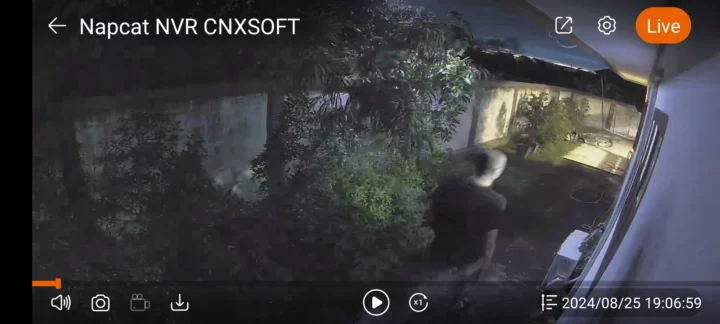
Nighttime capture also works well in black and white. The camera also has a color night vision option, but the spotlight is rather weak, so colors are not as good as a product like the Foscam SPC.
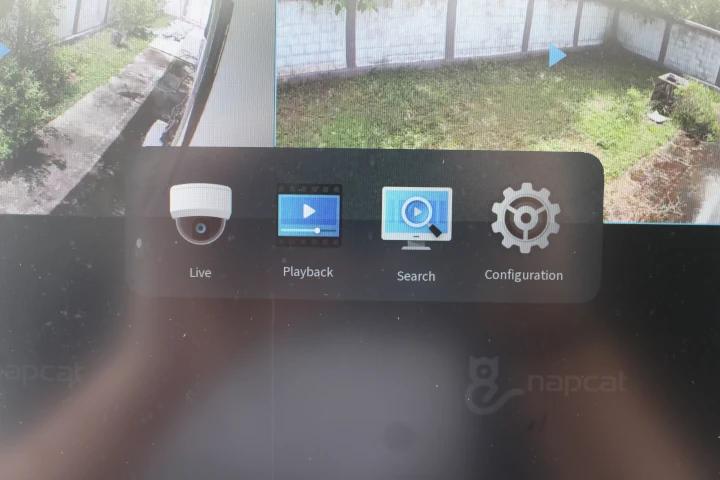
Besides the “Live” window, we can access other menus by clicking the Home icon on the top left corner of the display.
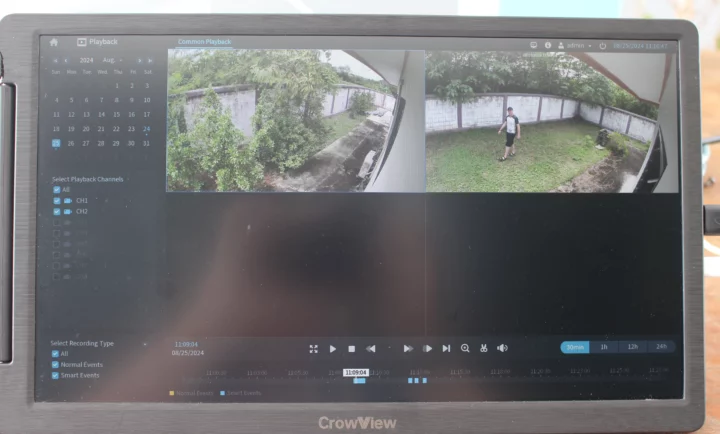
The Playback menu enables the other to check videos by day, watch them, and edit them as needed.
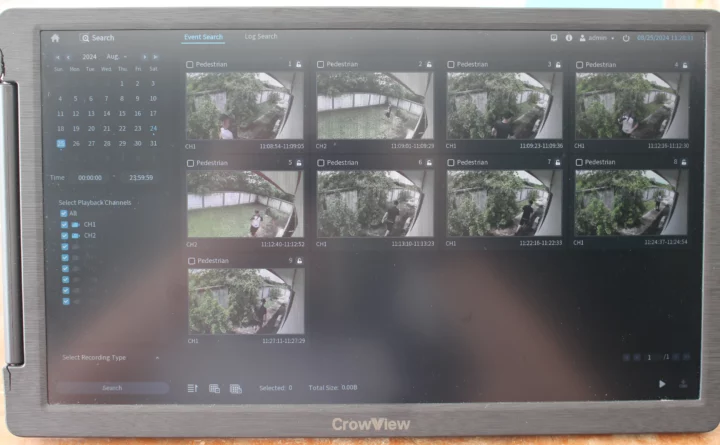
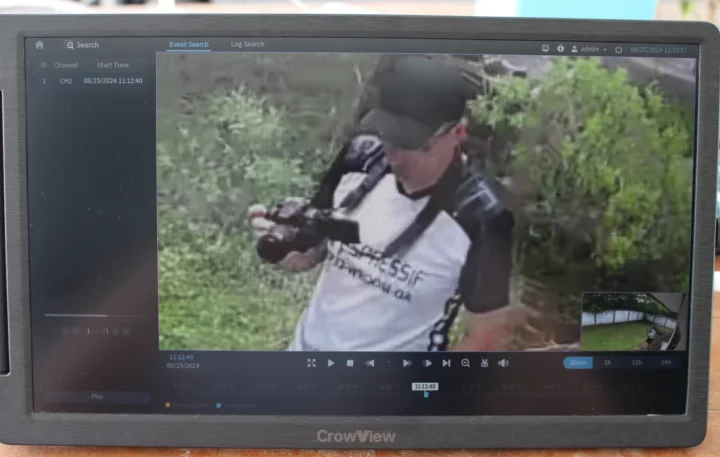
The Search menu is similar, but more useful, as it will show the more recent videos each with a thumbnail showing the person that was detected.
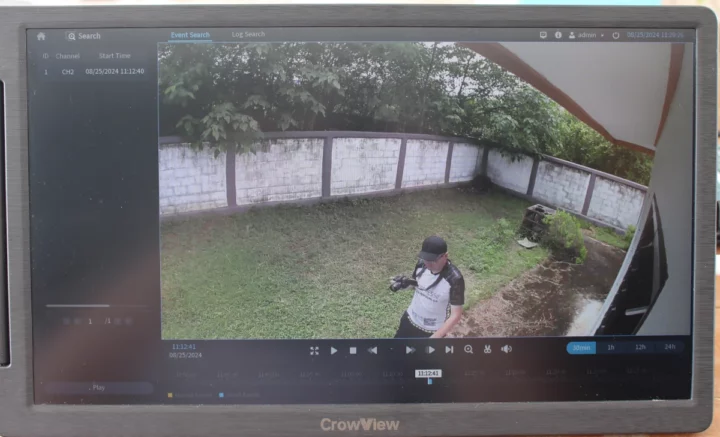
Clicking a video will enlarge the video and we can perform the same operations as in the Playback window…
… including zooming in on suspect individuals…
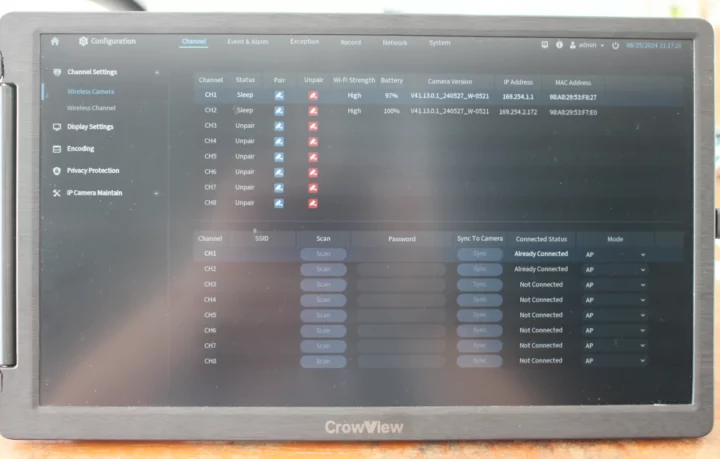
The Configuration section has various options for channel settings, display settings, encoding, privacy protection to define those where recording should be hidden, and camera maintenance.
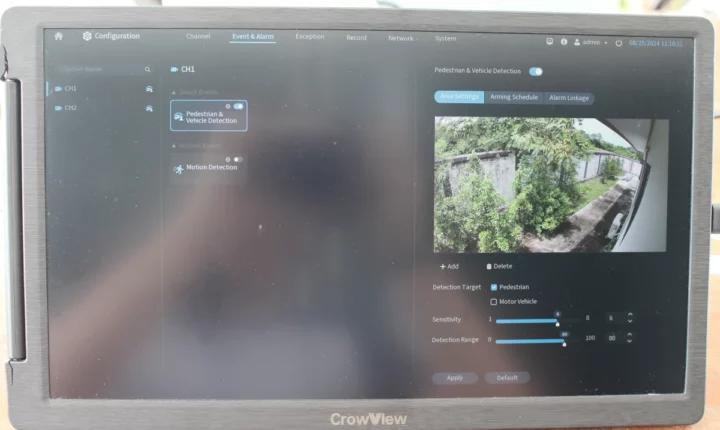
The Events and Alarm option should that only pedestrian detection is enabled by default. Vehicle detection and motion detection are both turned off, but that’s fine in the current location of the cameras since car can’t access those locations or disabling motion detection extends the battery life.
I haven’t shown all configuration menus here, but everything is pretty standard. The NVR can be connected to WiFi instead of Ethernet if indeed, as in all battery-powered WiFi cameras I’ve tested so far ONVIF and RTSP are not supported since they are better suited to cameras operating 24/7.
I still did a quick test to see what would happen if I turned off my broadband router, meaning the NVR would exclusively operate in the LAN without access to the Internet. Everything worked like before. I could play the live videos, and human detection is working fine. Since it rained at the time, I also used an umbrella in a way that prevented the camera from seeing my face and upper body, but a pedestrian was still detected properly.
Napcat Life app
I connected the broadband router and went to the Napcat Life app. The settings are pretty common except for a few items.
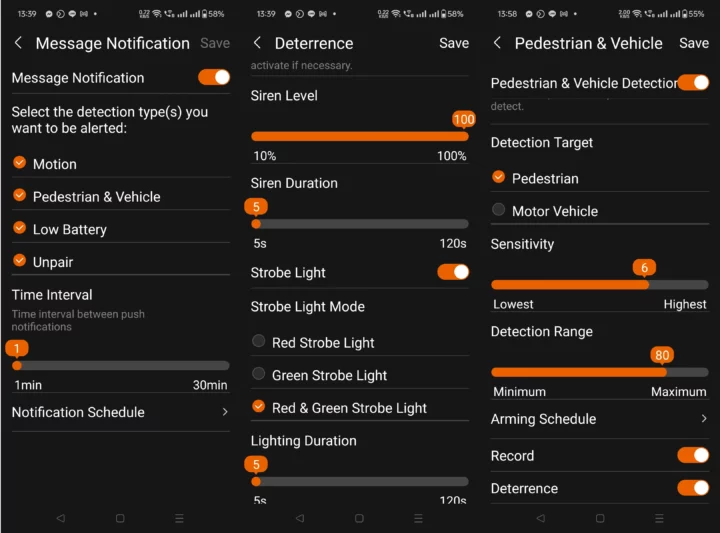
I first went to the message notification section because I would not receive any notifications on my phone, but everything seems fine, and I’m unable to make that work. I can only manually check notifications when I get inside the app.
The Deterrence section also intrigued me… It’s used to enable the siren and strobe lights, but it did not work until I went to the Smart Event->Pedestrian & Vehicle Detection, and manually set Deterrence to ON there. The siren is quite loud, you can listen to it in the video below.
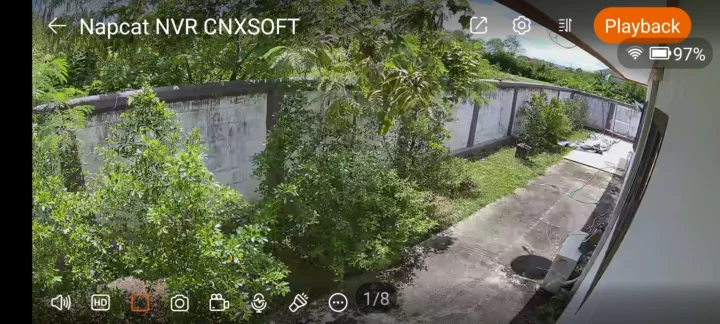
The rest of the app is pretty much standard and similar to the NVR interface with a Live and a Playback section…
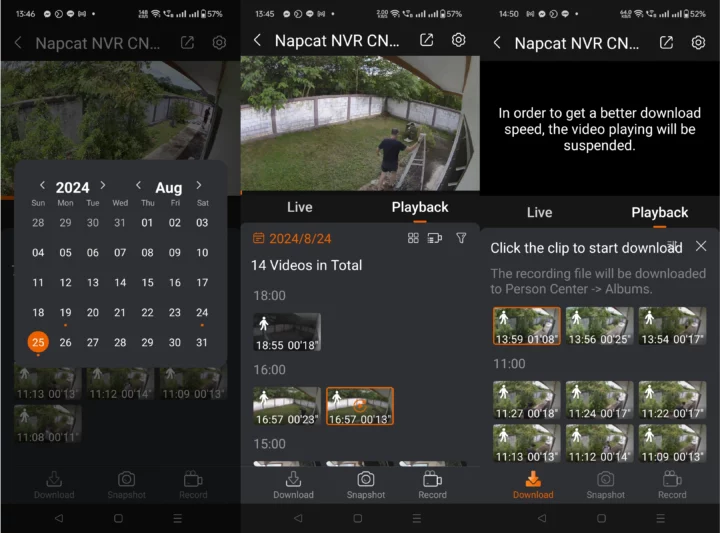
You can select from some of the latest videos, or filter the videos for a given day.
Sadly, Download does not seem to work properly as it’s telling me the file will be downloaded to “Person Center->Albums”, but I’m unable to find any videos after download. It’s the exact same issue as in the Napcat smart video doorbell review two months ago… It’s disappointing.
Conclusion
The Napcat wireless NVR works reasonably well and is easy to install with solar-powered security cameras so no cabling is required through the house. Like most/all? recent security cameras, it supports AI features such as pedestrian and vehicle detection greatly reducing the number of false positives.
The camera outputs can be visualized through the NVR connected to an HDMI display and mouse, or through the Napcat Life mobile app for Android or iOS. The system works offline without access to the internet when visualizing the cameras from the NVR’s display.
Like other battery-powered WiFi cameras, I’ve tested the Napcat cameras do not support standard streaming protocols such as ONVIF or RTSP which means you are dependent on the company staying in business, at least when using the mobile app. I understand that ONVIF may not be suitable for battery-powered cameras, but I’ve tested cameras from five different vendors, and each requires its own app. I wish some standard like Matter could be more widespread. Another very disappointing issue is the download feature does not work from the mobile app, so it’s unclear how people can save important videos if needed.
I’d like to thank Napcap for sending the N1S22 wireless NVR kit for review. The kit can be purchased on Amazon for $299.99 after ticking on the $70 discount, and kits with four and six cameras go for $479.99 (with $100 discount) and $759.99 (no discount) on the same page.

Jean-Luc started CNX Software in 2010 as a part-time endeavor, before quitting his job as a software engineering manager, and starting to write daily news, and reviews full time later in 2011.
Support CNX Software! Donate via cryptocurrencies, become a Patron on Patreon, or purchase goods on Amazon or Aliexpress


