NapCat R112 is a 5MP video doorbell with dual-band 2.4/5GHz WiFi, AI features such as human and package detection, 2-way audio, and no subscription. It’s waterproof – rated IP65 – so it can be used outdoors, and powered by either a built-in battery or traditional wires.
The company sent me a sample of the Napcat R112 for review. I’ll check out the camera in battery-powered mode only in this review, install it on the wall close to the gate of my house, and use the Napcast Android app to access the camera and answer calls.
Napcat video doorbell unboxing
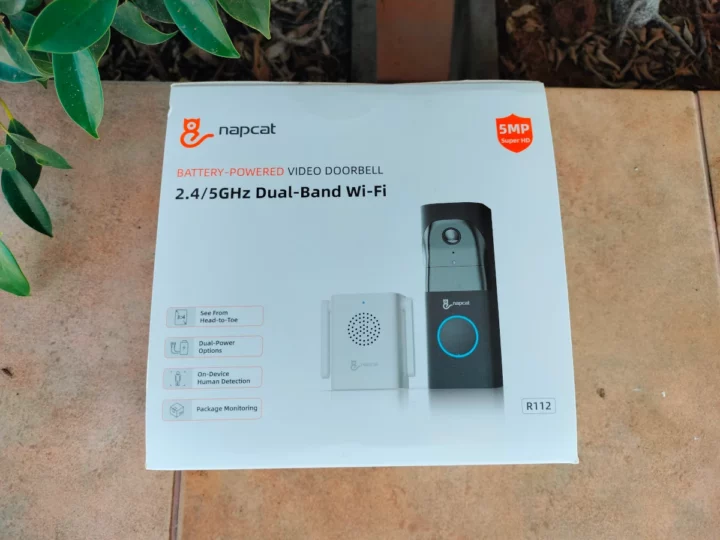
The retail package shows a photo of the (white) base station and (black) camera and lists some of the main features such as a wide-angle camera, dual-power option, on-device human detection and package monitoring, and dual-band WiFi. There’s no monthly fee to pay to use the device after purchasing it.
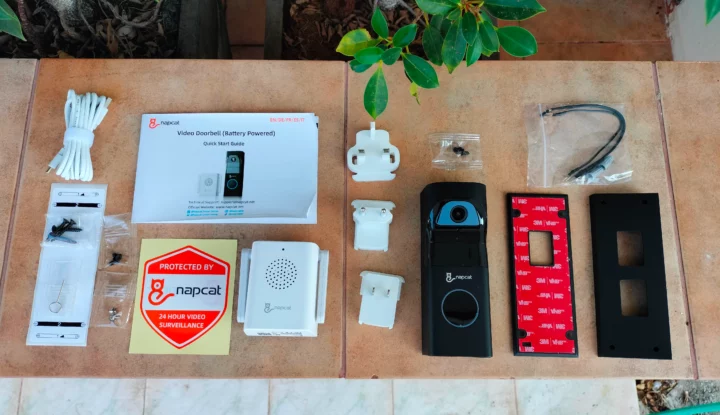
The package contains the Napcat S1 base station, the Napcat R1 video camera, a mounting bracket, a 15° mounting wedge to install the camera at an angle, a screw hole positioning card, a USB-A to USB-C cable to charge the camera, US/EU/UK plug adapter for the base station, some wires and wire nets to power the camera (for those no using the battery), a surveillance sticker, and various screws.
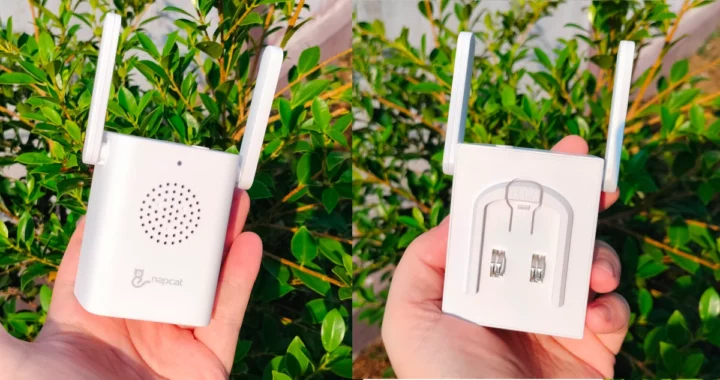
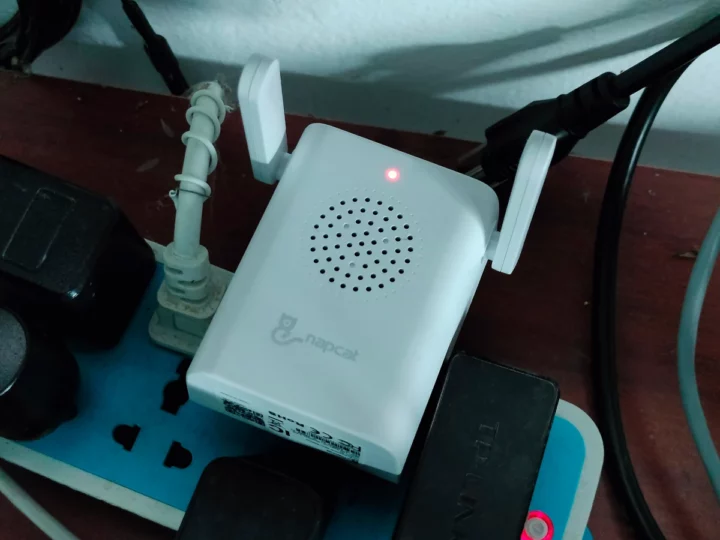
The Napcat S1 WiFi base station/chime comes with two antennas, the top side features a speaker, and an LED, and the bottom side has an attachment mechanism for the power plug adapters.
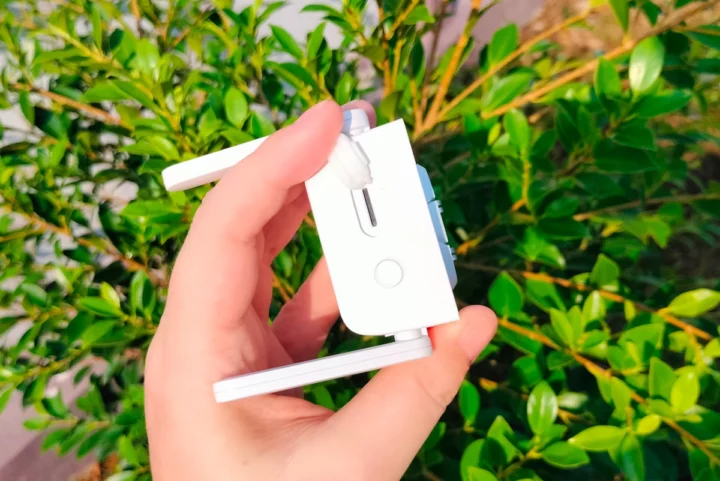
The device is already fitted with a microSD card to record the videos and a Reset button can be found on the side of the microSD card slot.
I’ll use the EU plug adapter for the review. Note that the plug adapter can be detached easily, so it’s better to plug the base station into a socket that is out of reach for children. Later on, I switched to the US plug adapter and it clips better, so maybe I was just unlucky with my EU plug adapter…
The Napcat R1 video doorbell comes with a 5MP camera, a microphone, an ambient light sensor, a motion sensor, a button with an LED ring, a speaker, and a release hole to take it out of its mount using a pin.
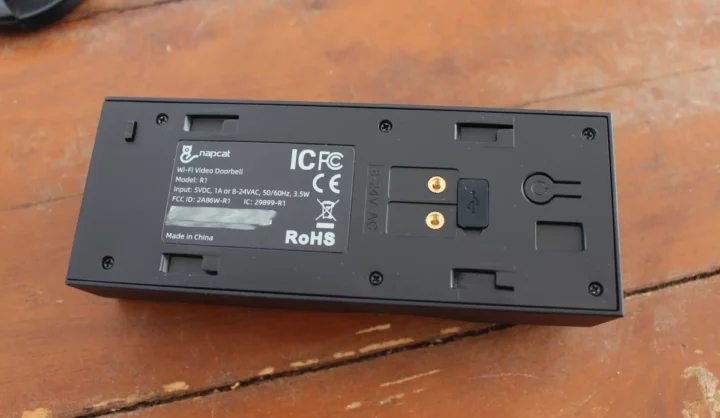
The bottom side features four bracket installation slots, a power terminal for existing doorbell wires, a USB-C connector for charging, and a power button.
Napcat R1 teardown
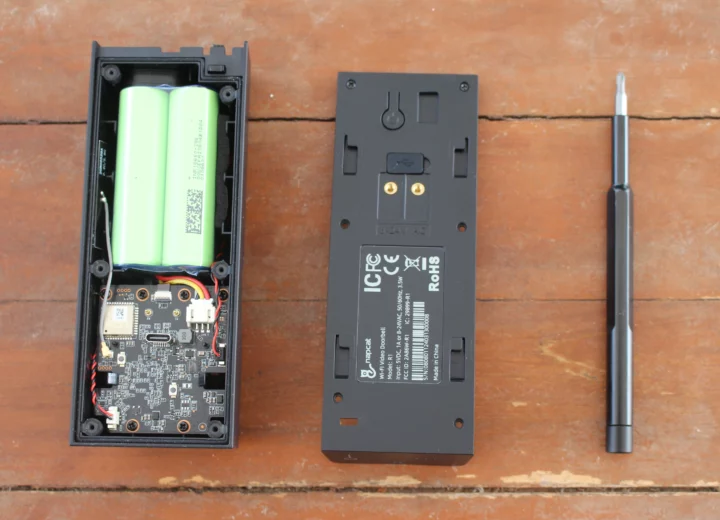
The Napcat S1 base station does not seem that straightforward to open, but I think I heard the Napcat R1 Wi-Fi video doorbell tell me to “please open me” after I saw the screws. So I loosen those six screws to have a look inside.
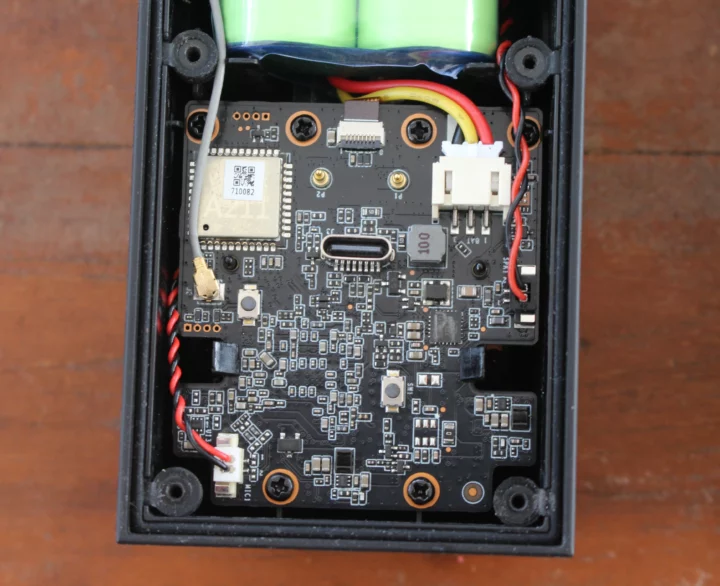
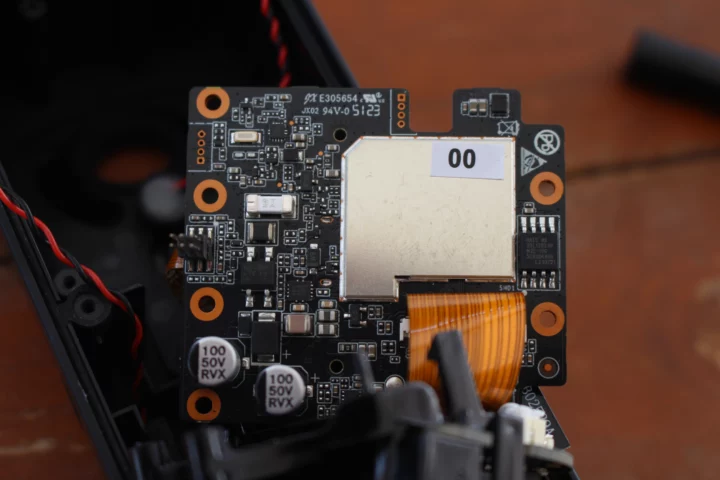
Wireless communication with the base station is handled by an “A211” module for which I was unable to find any details.
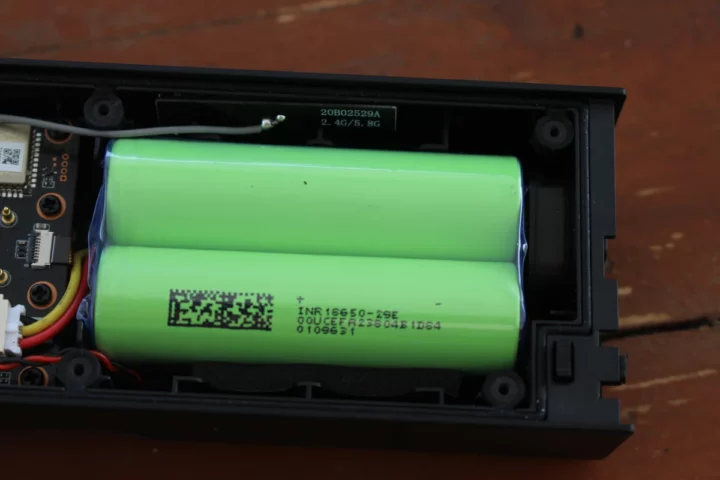
The Napcat S1 is powered by two rechargeable 18650 batteries.
Removing the batteries and loosening a few more screws give us access to the other side of the board, but there’s not much to see here besides an EMI shield that does not look to be easy to remove.
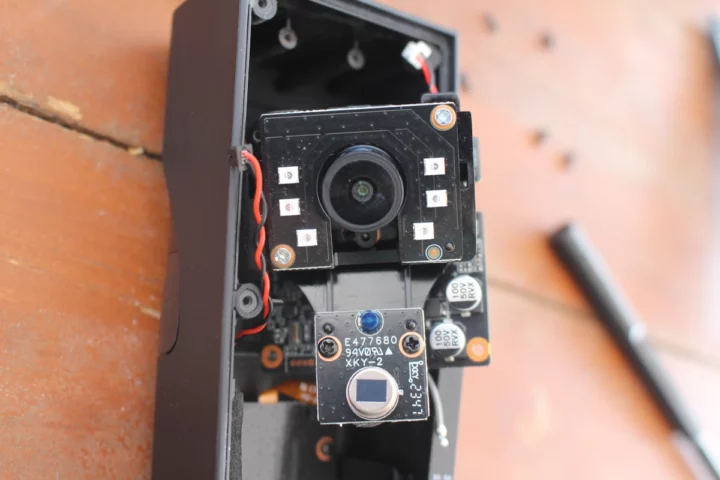
Finally, we’ll find the camera board with six LEDs and another small board with an ambient light sensor and a motion sensor.
Reassembly was not 100% straightforward, but I did manage, and it’s now time to test whether the WiFi video doorbell works as expected. At this point, I also charge the camera through its USB-C port.
Adding the S1 base station to the NapCat Life Android app
We’ll now need to install the NapCat Life mobile app on an Android or iOS smartphone. I used an Android 14 smartphone for this review.
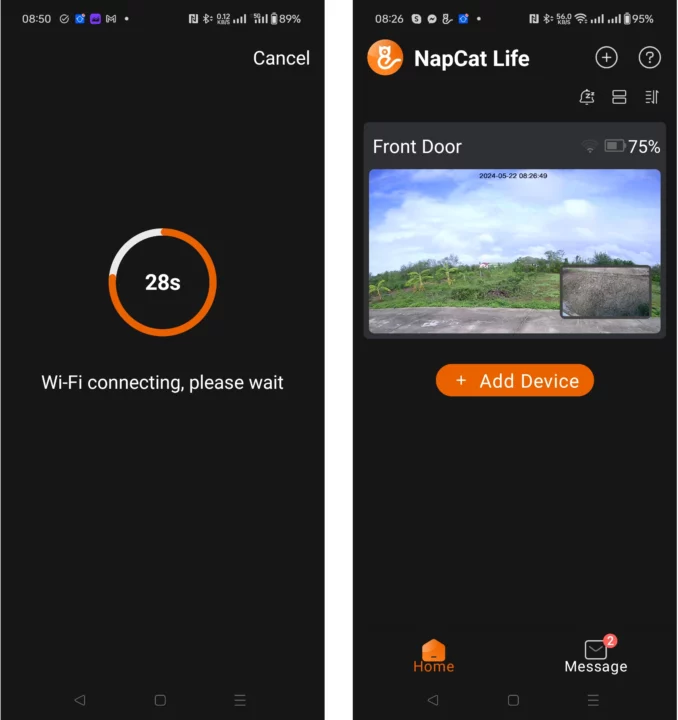
After registering an account with your email, you can tap on Add Device, scan the QR code on the Napcat S1 Wi-Fi doorbell base station, and go through the setup process.
This involves connecting the S1 to a wall socket and waiting for a voice prompt that indicates the device is ready for configuration.
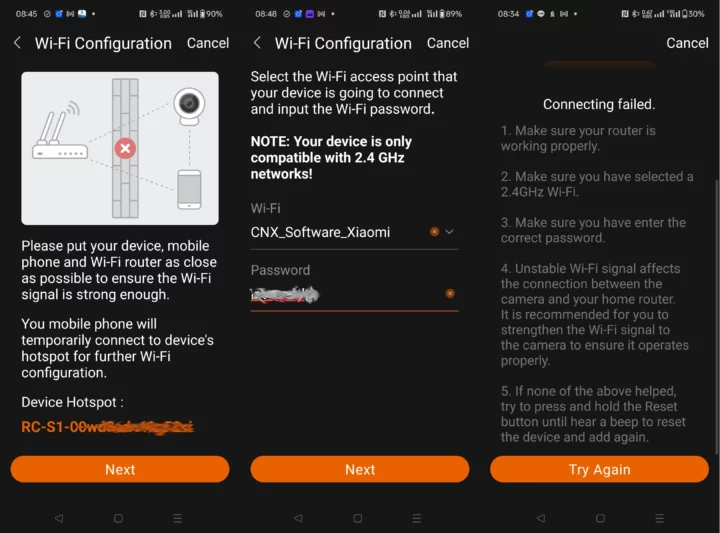
We’ll then need to go back to the Android app to select the WiFi SSID and enter its password. What’s odd is that we allegedly own a dual-band WiFi device, but somehow we’re now told: “Your device is only compatible with 2.4 GHz networks!”.
The app will try to connect within 120 seconds, but it failed at all my attempts. The S1 was already close to the router, so I reset it as requested in the user manual, but still no luck. I eventually contacted support but we were unable to find a solution. So I put back everything in the package and worked on other reviews for the next several weeks.
But one day (or night), some old memories were suddenly brought back to me… A couple of years ago, I configured a smart vacuum cleaner and had a similar issue. The trick was to disable Blokada (an adblocker that works as a VPN) on my phone, and I could finally complete the onboarding process. Blokada can be reenabled after that step.
Mounting the Napcat R1 video doorbell
Now that we know the camera is working it’s time to install it in a strategic location. I will mount the camera on the left side of my house’s gate. The bottom side of the screw hole positioning card should be placed at around 1.40m from the floor.
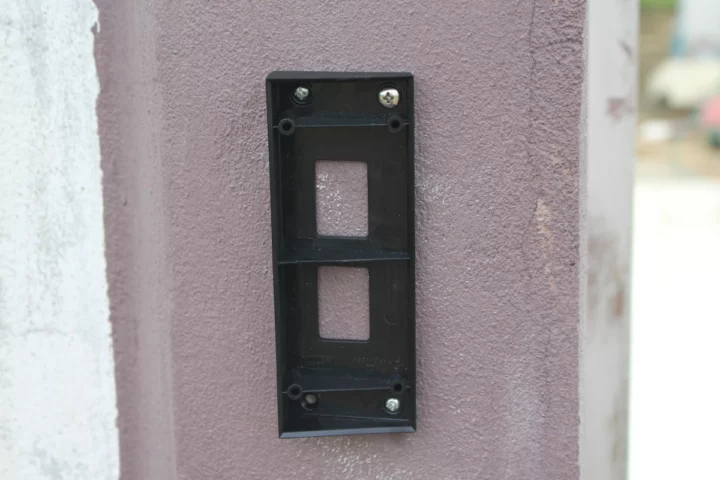
You’ll note two pairs of four mounting holes. That’s because “1” is for mounting the 15° mounting wedge, and “2” is for directly mounting the mounting bracket to the wall. I went with “1”.
The package only includes screws suitable for wood mounting and did not come with plastic drywall anchors. So I used some of my own to install the mounting wedge. One of the holes was not perfectly aligned and I had to skip. I should probably have used the time and test “pencil” method to mark the location of the holes…
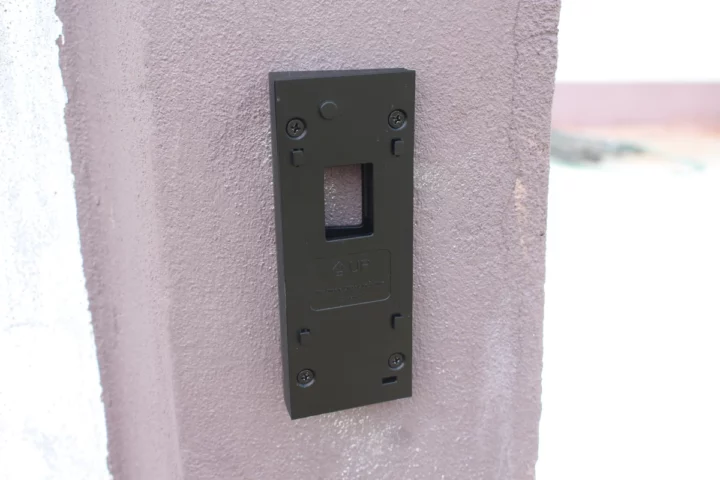
The next step is to install the mounting bracket using the screws provided in the package. Finally, we’ll need to slide the video doorbell into the four slots of the mount until it clicks and is firmly secure.
The video doorbell can be removed from the mount through the pinhole underneath and the provided doorbell detaching pin. It looks similar to pins used to open the SIM card holder in smartphones, so anybody could potentially steal it and where you install it the way I did depends on your neighborhood. An anti-theft alarm can be enabled if necessary so that when the camera is removed the alarm is triggered. Just remember to disable it before you remove the camera to charge it.
NapCat R112 video doorbell review with NapCat Life Android app
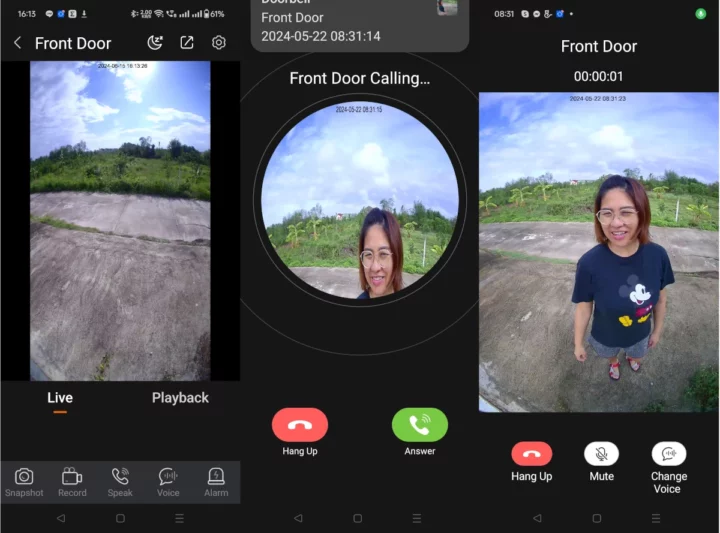
Within the app, there’s a live and playback view, and when somebody presses the button, you’ll receive a call on your phone with clear video and audio. I’ve tested audio with some security cameras in the past, but most are garbage, and the NapCat clearly shines with the video call being smooth and sharp and the audio crystal clear. The doorbell is loud and can be heard from both the S1 and R1 devices.
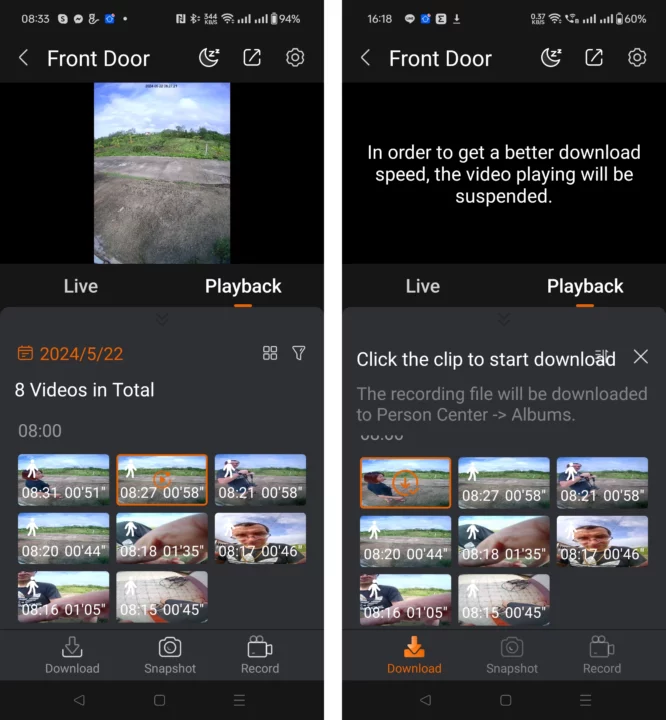
What’s less impressive is that I can’t share a video with you. There’s a download button in the Playback section, and downloading initially looks to be working, but you’re told to find it in Person Center -> Albums. I don’t see anything like that in the app or Android file systems. No new videos are showing up in Google Photos, the Downloads and Videos directories, etc… So in a desperate attempt to get a video sample, I took the microSD card out of the base station, but only a log (FAT32) partition is accessible from a Windows or Linux machine, and the rest (around 14GB) is not recognized and shows as an assigned partition.
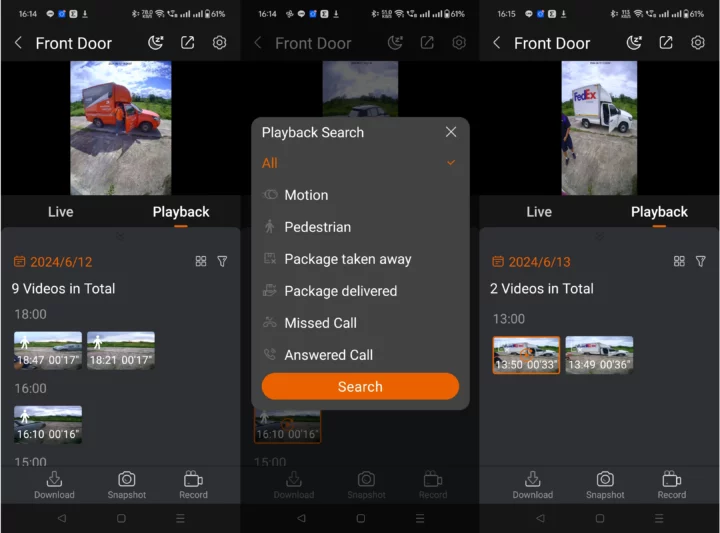
What’s nice is the ability to filter the video by smart events.
The app shows all videos by default, but in the screenshots above, I filtered the videos to only show package events and only the FedEx delivery videos were listed for the selected day.
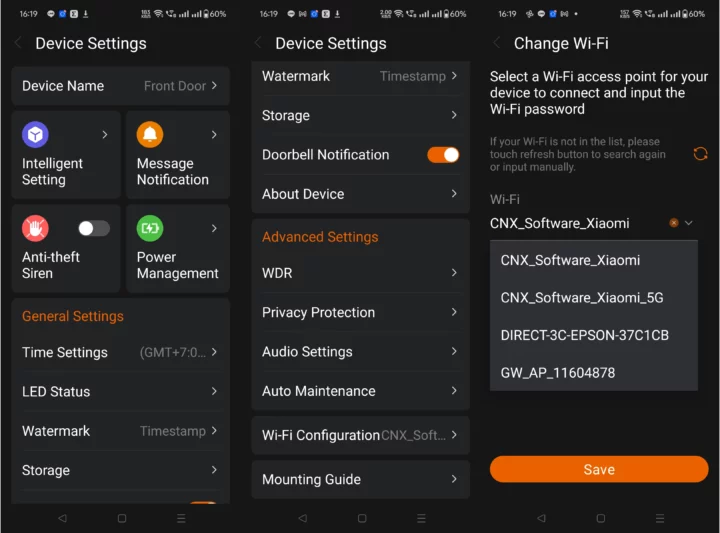
The NapCat Life app has plenty of settings for the camera, time, LED status, watermark, storage, notifications, and so on. I was not allowed to select 5 GHz WiFi access point when adding the device, but both 2.4 GHz and 5 GHz networks show in the settings.
The “Intelligent Setting” allows us to configure motion detection (including pedestrian detection) and package detection. The latter is only “beta” but seems to work OK. Based on the recordings I got, “Pedestrian” means actual pedestrians, motorbikes, and even cars with windows closed… It works great in my location with only a few pedestrians, cars, or motorbikes passing by my house every day, usually well under 10.
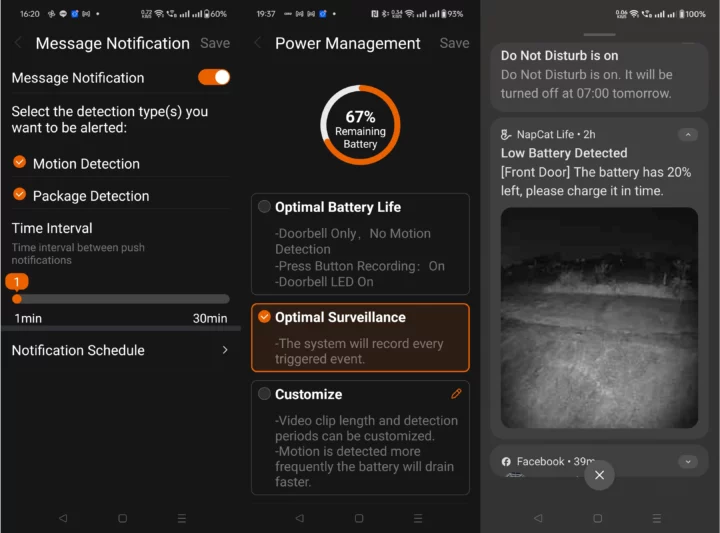
The “Message Notification” section can be used to configure whether you want to receive any notifications at all, what type of notifications (motion or/and package), and how often. The Power Management will be important for people who use the Napcat WiFi video doorbell using the battery. I selected the “optimal surveillance” option so my doorbell acts as a video doorbell and a security camera. The downside is that I got a low-battery notification within about 6 weeks (including a few weeks in its box) after fully charging the camera. I basically live in the middle of the jungle with very few alerts a day, but I imagine people living in a busier area may have to recharge the battery once or twice a month with this setting. I have other security cameras, so I’ve now switched to the “Optional Battery Life” settings to disable motion detection so that video recording only occurs when somebody presses the button.
I usually receive several packages a week, and I’ve noticed very few people are using the doorbell (I think only two). Instead, they are calling me on my phone before arriving, or simply shout “parcel” or “the name of the company” when they are at the door… Maybe the usage of the doorbell will increase over time as more people are aware of it… When somebody does ring the bell, I usually walk outside instead of answering the call, and it should be mostly useful when I’m not at home so I can see what parcel is being delivered.
Conclusion
I quite like the NapCat R112 WiFi video doorbell, and I’ll continue using it even though I’m mostly using it as a regular doorbell. It works well both as a video doorbell and a Smart security camera with person and parcel detection, although enabling the AI features will seriously impact battery life. The Android app is easy to use and video/audio quality during calls is great. I also appreciate when companies include storage for this type of device, and NapCat did provide a 16GB microSD card in the base station. It’s the rainy season in Thailand now, and the NapCat R1 video doorbell passed its waterproofness test perfectly.
There are some downsides too such as the EU plug adapter coming off easily from the base station potentially creating a safety hazard for families with young children. Another annoying issue is that videos can’t be downloaded to your phone (the feature is implemented but does not seem to work), so hopefully they’ll fix that soon. We are told the battery life should last half a year with 8 triggers per day and 15 seconds per video recording, but this was not my experience at all with the battery lasting about 6 weeks with less than 8 triggers per day. That number may be achieved when disabling motion-sensing using only the button as a trigger.
I’d like to thank NapCat for sending the R112 kit for review. It can currently be purchased for $79.99 on Amazon when ticking the box for the $50 discount coupon.

Jean-Luc started CNX Software in 2010 as a part-time endeavor, before quitting his job as a software engineering manager, and starting to write daily news, and reviews full time later in 2011.
Support CNX Software! Donate via cryptocurrencies, become a Patron on Patreon, or purchase goods on Amazon or Aliexpress


