We’ve started to see several Alder Lake-N platforms acting both as a mini PC and a router or network appliance with products such as iKOOLCORE R2 or CWWK x86-P5 which features not only the usual HDMI, USB, and single Ethernet port, but come with multiple Ethernet ports making them ideal to run Proxmox VE to simultaneous run a desktop OS such as Ubuntu 22.04 or Windows 11 and a headless network OS such as pfSense or OpenWrt.
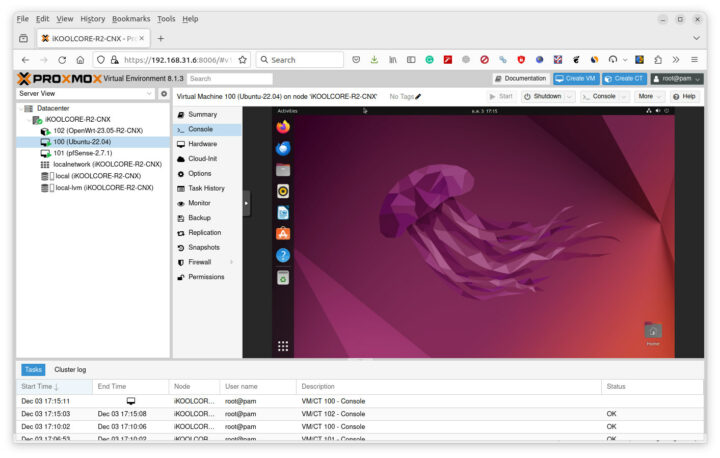
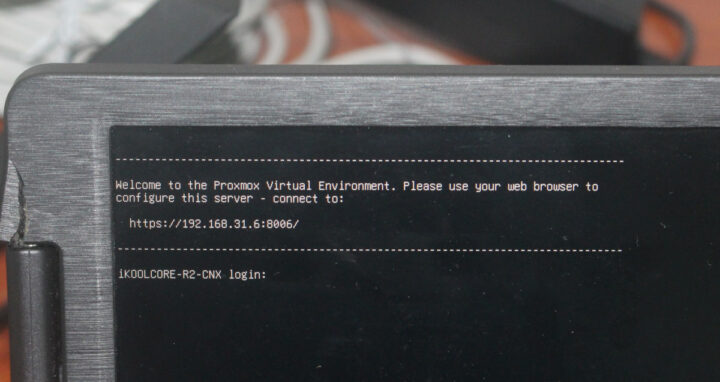
I’m currently reviewing iKOOLCORE R2 mini PC that comes with four 2.5GbE ports and I could install Ubuntu 22.04 Desktop, pfSense 2.7.1, and OpenWrt 23.05 relatively easily, but the Ubuntu desktop is only visible in the Proxmox VE dashboard and the HDMI display physically connected to the mini PC only shows Proxmox VE login prompt.
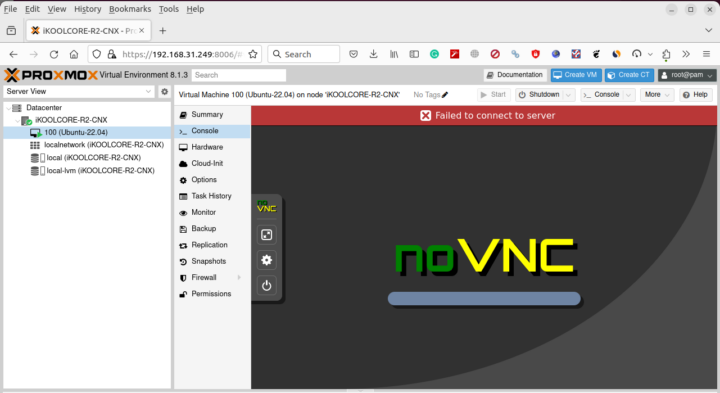
So at this point, I learned that I had to enable PCIe passthrough for the GPU in Proxmox to show the Ubuntu desktop on the physical display, so I tried to add the PCIe device for the Alder Lake-N (UHD graphics) in Promox. When I started the Ubuntu VM, the login prompt went away, but it was only replaced by a black screen… So I was at a dead end and I asked iKOOLCORE if they knew how to do it, and they pointed me to a YouTube video (in Mandarin) showing how to do this with Windows.
The process involves downloading a GPU ROM file from feijipan, and sadly my Chinese is not good enough to do that, so iKOOLCORE helped me again and provided the N300_gop.rom file since the iKOOLCORE R2 is powered by an Intel Core i3-N305 Alder Lake-N processor. A mirror with those Alder Lake-N GPU ROM files with easier to access outside of China would be a good thing to have, I’ll see what I can do. The Intel website explains how to dump the video BIOS, but it failed for me with I/O error, possibly because it requires a legacy BIOS boot instead of a UEFI boot (TBC), but I haven’t investigated this further.
The second file we need is the idg.rom file which we can get from GitHub. Since we are using a 12th Alder Lake-N processor, I downloaded the gen12_igd.rom file and renamed it to igd.rom before uploading both files to the /usr/share/kvm/ folder in our Proxmox VE instance:
|
1 2 3 |
jaufranc@CNX-LAPTOP-5:~/Downloads$ scp igd.rom N300_gop.rom root@192.168.31.249:/usr/share/kvm idg.rom 100% 18KB 9.8MB/s 00:00 N300_gop.rom 100% 186KB 30.6MB/s 00:00 |
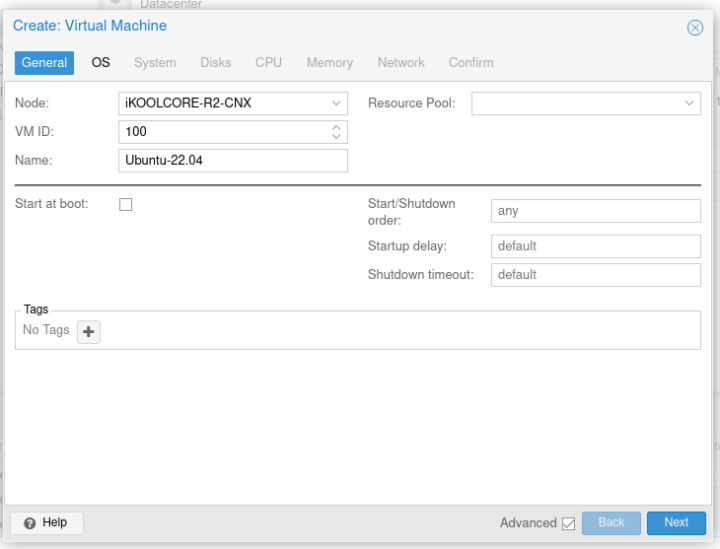
Once this is done, we can install Ubuntu 22.04 in Proxmox VE by creating a Virtual Machine.
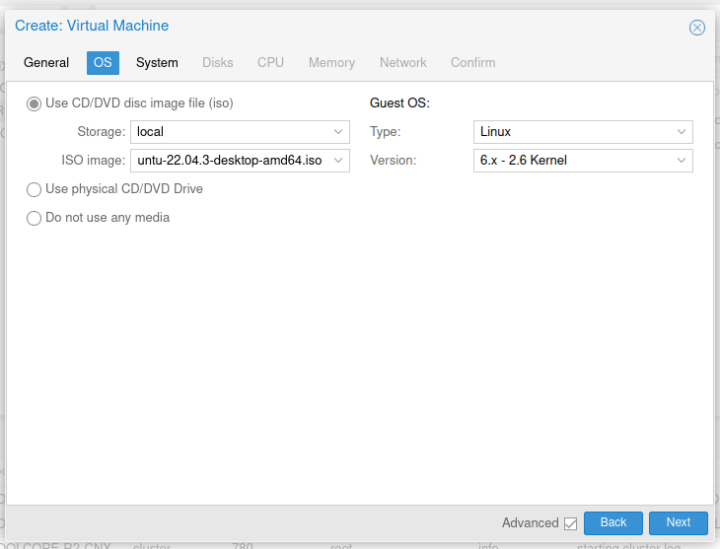
The next step will be in the OS tab, we can select the Ubuntu 22.04.3 Desktop ISO for installation.
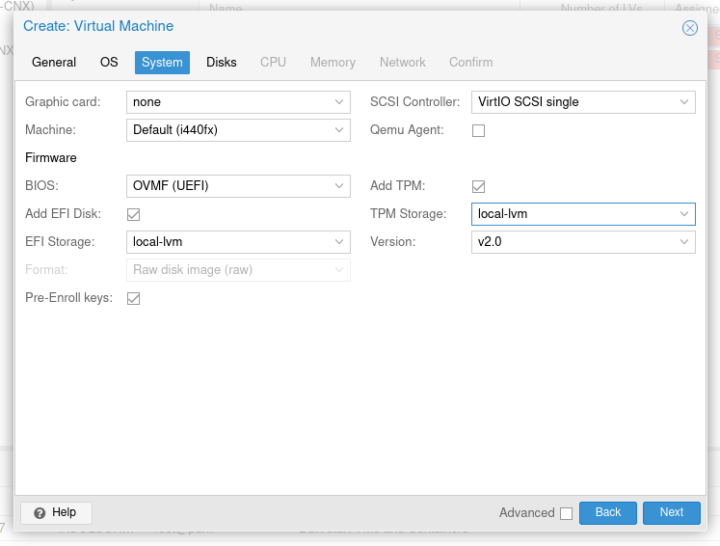
In the System tab, I mostly followed the instructions from the YouTube video by setting the Graphics card to “none”, the BIOS to “OVMF (UEFI)”, the EFI storage to “local-lvm”, and even added a TPM, something that’s probably not necessary for Ubuntu…
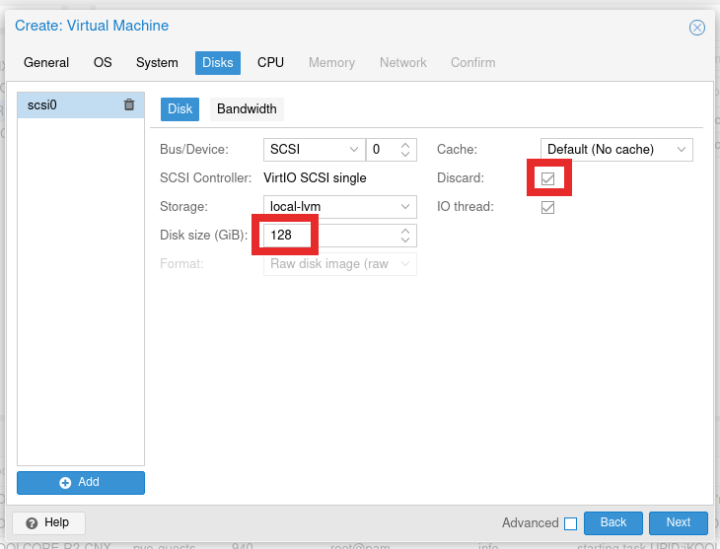
I then set the disk size to 128GB, which in hindsight is probably a bit too small considering we have a 512GB SSD, and I only plan to install pfSense and OpenWrt both of which don’t take that much space. I also ticked on Discard as I read somewhere it was better for performance (I just can’t remember where…).
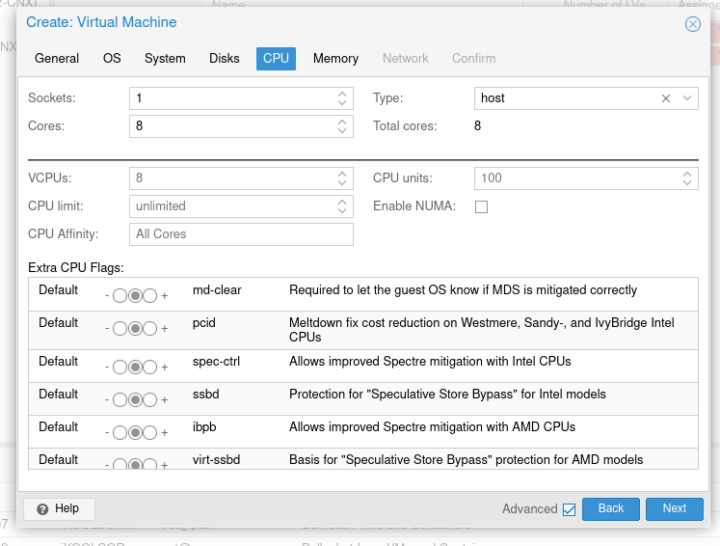
For the CPU configuration, I set the number of cores to 8 since the Core i3-N300 is an octa-core processor, and cores don’t need to be shared between VMs the way memory is. The CPU type should also be set to “host” for the best performance.
I also set the memory to 4096MB (since my system has 8GB RAM) and used the default networking setting with the vmbr0 bridge interface using “Virtio (paravirtualized)” model.
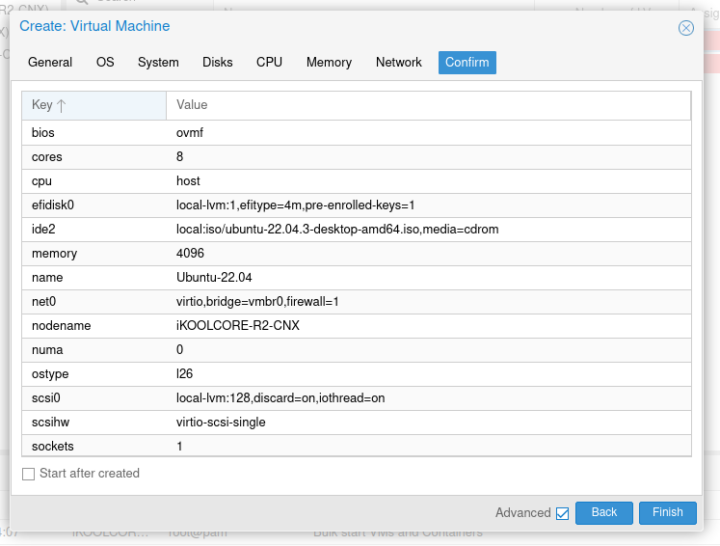
The last window summarizes all the options we’ve selected, and if we are happy with it we can click on the Finish button.
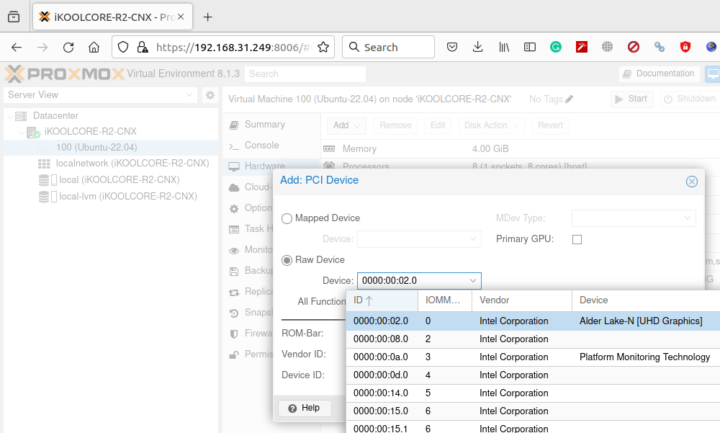
Now we can go to 100 (Ubuntu-22.04)->Hardware->Added->PCIe device to added PCIe device 00:02.0 “Alder Lake-N [UHD Graphics]…
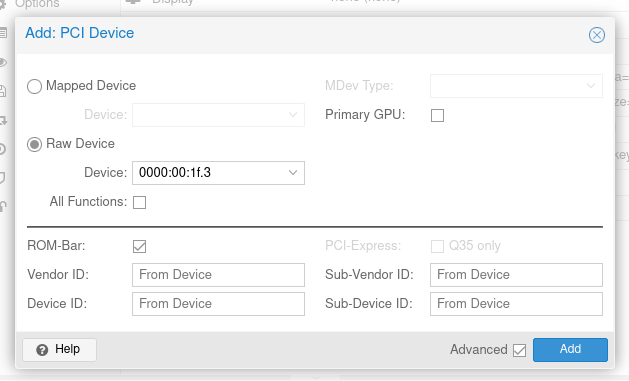
and then add PCIe device 00:1f:3.
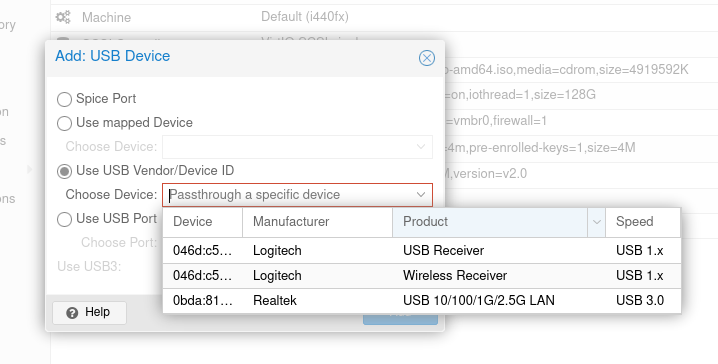
We’ll want to use a keyboard and mouse too, so I also added the two USB RF dongles for respectively a Logitech keyboard and mouse.
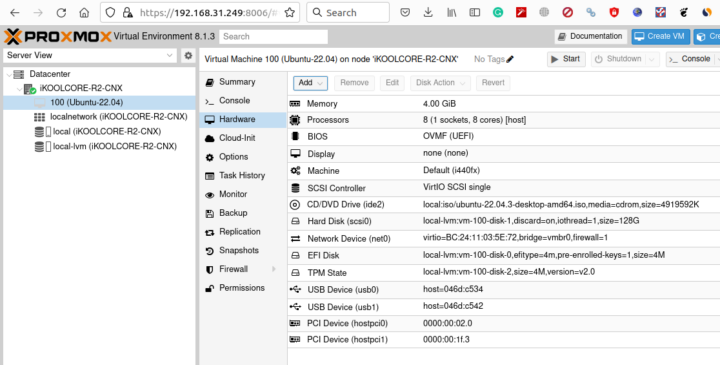
Once everything is done the hardware configuration should look as below with two USB devices and two PCIe devices. Some people may only have one USB device if they use a single RF dongle for both the mouse and keyboard.
We haven’t used our GPU ROM files so far, so we’ll use them now. Edit /etc/pve/qemu-server/100.conf in the Proxmox shell or via SSH to change the two hostpci lines as follows:
|
1 2 |
hostpci0: 0000:00:02.0,legacy-igd=1,romfile=igd.rom hostpci1: 0000:00:1f.3,romfile=N300_gop.rom |
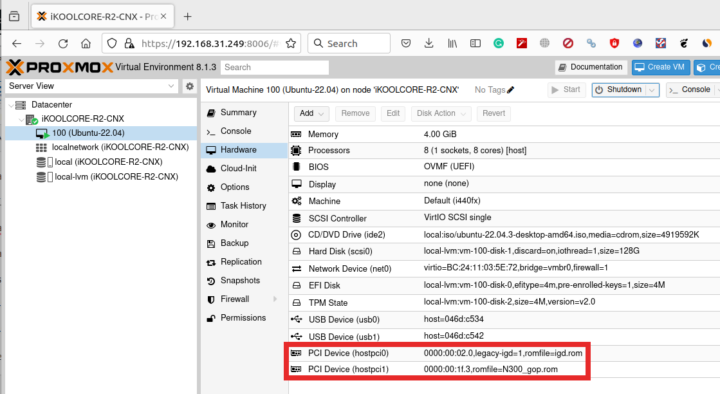
Save the file. The new parameters should show up in the Promox dashboard in the Hardware section of the Ubuntu VM as shown below.
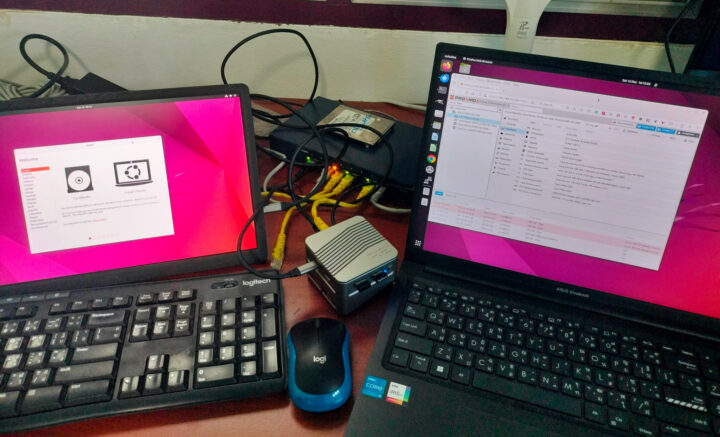
Let’s click on the Start button to see what happens… Awesome! After a little while, we have the Ubuntu 22.04 installation wizard on the HDMI display while we can monitor the VM in Proxmox VE dashboard.
What’s not working anymore is the VNC console in Proxmox VE showing the Ubuntu desktop as it’s now shown on the physical display. That’s perfectly normal.
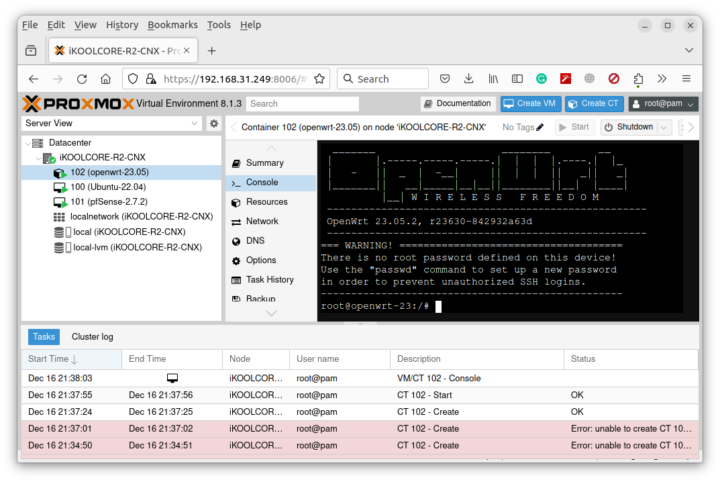
So I went through the Ubuntu 22.04 installation, removed the ISO image from the VM, repeated the procedure (minus the passthrough items) for pfSense, and also took the opportunity to install OpenWrt 23.05. That means we can run all three operating systems at the same time, with Ubuntu 22.04 used as a desktop OS showing on the HDMI display and pfSense and/or OpenWrt for networking, and a single device can be used as a mini PC and a firewall/router thanks to virtualization.
You could also add other instances such as Home Assistant for a Smart Home setup, but there’s a point where 8GB RAM is getting tight, and the 16GB RAM version of the system becomes more suitable… I’ll write more about using pfSense and benchmarking the iKOOLCORE R2 in Ubuntu 22.04 in the actual review of the device.

Jean-Luc started CNX Software in 2010 as a part-time endeavor, before quitting his job as a software engineering manager, and starting to write daily news, and reviews full time later in 2011.
Support CNX Software! Donate via cryptocurrencies, become a Patron on Patreon, or purchase goods on Amazon or Aliexpress


