Makerfabs MaTouch_ESP32-S3 4-inch Display Demo Kit is an ESP32-S3 development board with a 4-inch touchscreen display, a TVOC sensor, and a thermal camera. It can be used to make various projects such as electronic photo frames. air quality monitors, or patient screening devices
MaTouch_ESP32-S3 4-inch display demo kit unboxing
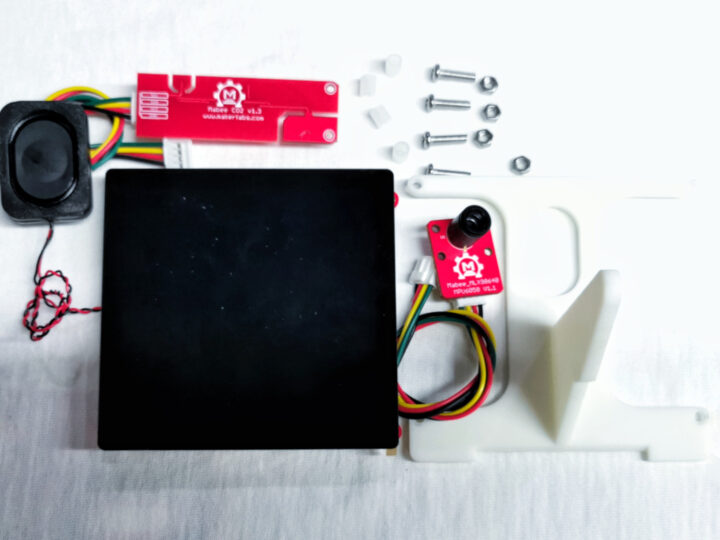
When we unpack the box, we will find the device as in the picture, consisting of the following items:
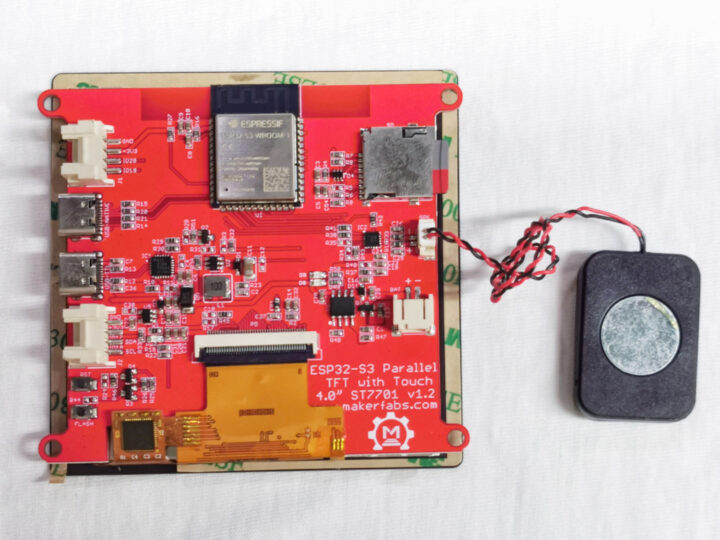
The mainboard of the MaTouch_ ESP32-S3 4-inch Display with the following specifications:
- Controller – ESP32-S3-WROOM-1, PCB Antenna, 16MB Flash, 8MB PSRAM, ESP32-S3-WROOM-1-N16R8
- Wireless – WiFi & Bluetooth 5.0
- Storage – MicroSD card slot
- LCD
- 4.0-inch IPS display with 480×480 resolution, 50+ FPS RGB 5/6/5+ SPI interface using ST7701S controller.
- 5 Points Touch, Capacitive via GT911 touch panel driver.
- Audio – MAX98357A
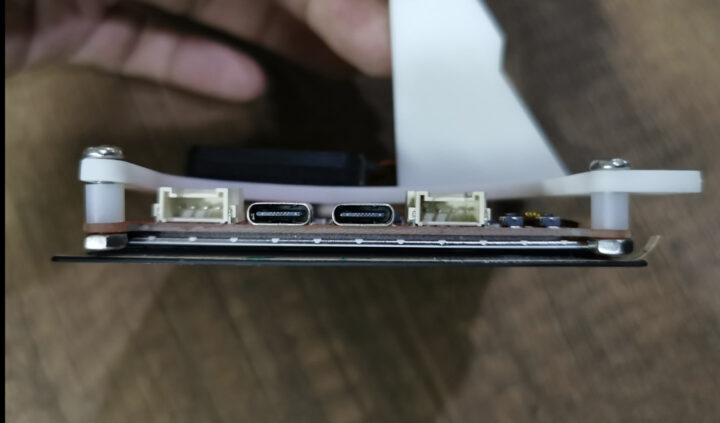
- USB – Dual USB Type-C (one for USB-to-UART and one for native USB); USB to UART Chip: CP2104
- Expansion – 2x Mabee interfaces: 1x I2C; 1xGPIO
- Misc – Flash button and reset button
- Power Supply
- 5V via USB Type-C (4.0V~5.25V)
- 3.7V Lipo battery
- Arduino support: Yes
- Temperature Range – -40°C to +85°C
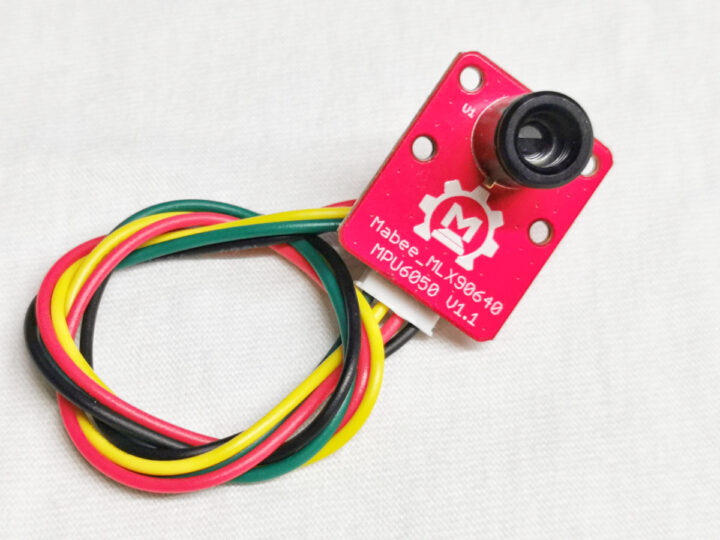
The Mabee MLX90640 thermal camera sensor with the following specifications:
-
- IR Thermal Sensor Array 32×24 (MLX90640)
- 55°x35° FOV(field of view)
- Temperature measurement range – -40°C~300°C, ±1.5°C resolution
- I2C Grove interface (0x33 address)
- Voltage – 3.3v
- Current: 18mA
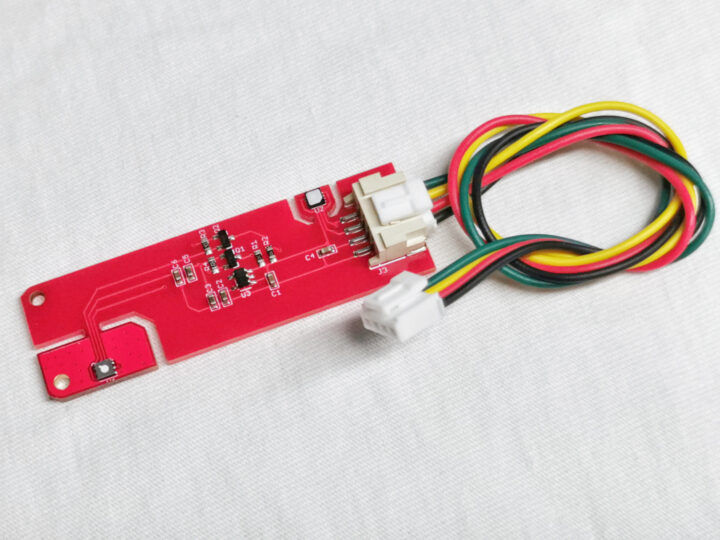
The “Mabee TVOC and eCO2 SGP30 & Temperature and Humidity SHT31” module, which as its name implies, combines an SGP30 TVOC and eCO2 sensor (I2C address: 0x58) and an SHT31 temperature and humidity sensor (I2C address: 0x44), and operates at 3.3V.
The kit also comes with a speaker attached to the main board, a 3D printed frame/holder, a microSD card, a USB Type-C cable, and a screw set.
Assembling the kit
We can mount the ESP32-S3 4-inch Display board to the 3D-printed frame with the provided spacers, bolts, and nuts. We can also peel the film on the adhesive paper on the speaker to attach it to the back of the frame.
Programming the Matouch_ESP32-S3 demo kit with Arduino/PlatformIO
The ESP32-S3 4-inch display board can be programmed with either Arduino or PlatformIO, and we’ll use the demo code provided by Makerfabs on GitHub for this review. The display relies on parallel RGB565 and SPI interfaces, and it’s supported by the ArduinoGFX library or the LovyanGFX library. We’ll use ArduinoGFX and configure the I/O pins as follows:
|
1 2 3 4 5 6 7 8 9 10 11 12 13 |
Arduino_ESP32RGBPanel *bus = new Arduino_ESP32RGBPanel( 1 /* CS */, 12 /* SCK */, 11 /* SDA */, 45 /* DE */, 4/* VSYNC */, 5 /* HSYNC */, 21 /* PCLK */, 39 /* R0 */, 40 /* R1 */, 41 /* R2 */, 42 /* R3 */, 2 /* R4 */, 0 /* G0/P22 */, 9 /* G1/P23 */, 14 /* G2/P24 */, 47 /* G3/P25 */, 48 /* G4/P26 */, 3 /* G5 */, 6 /* B0 */, 7 /* B1 */, 15 /* B2 */, 16 /* B3 */, 8 /* B4 */ ); Arduino_ST7701_RGBPanel *gfx = new Arduino_ST7701_RGBPanel( bus, GFX_NOT_DEFINED /* RST */, 0 /* rotation */, true /* IPS */, 480 /* width */, 480 /* height */, st7701_type1_init_operations, sizeof(st7701_type1_init_operations), true /* BGR */); |
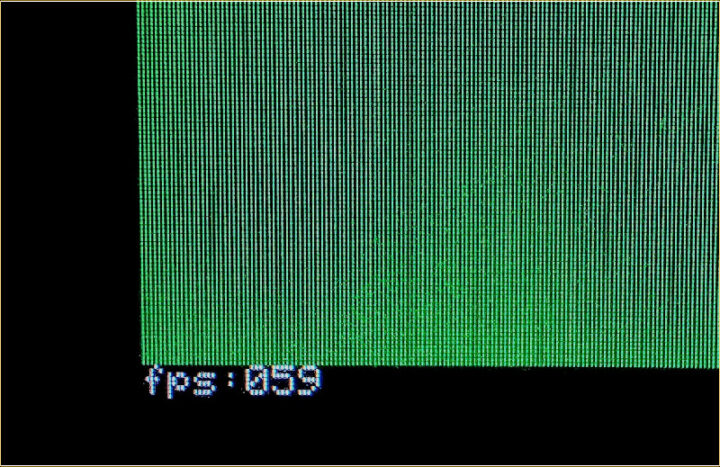
A quick test shows the platforms can render at 59FPS using the Arduino GFX library and a resolution of 480×480 pixels, which matches the claims in the specifications.
We also test the 5-point touch panel using the TAMC_GT911 library, installed through the Arduino library manager, to program the GT911 touch controller via I2C:
|
1 2 3 4 5 6 7 8 9 10 11 12 13 14 15 16 17 18 19 20 21 22 23 24 25 26 27 28 29 30 31 32 33 34 35 36 37 38 39 40 41 42 43 |
#include <TAMC_GT911.h> #define I2C_SDA_PIN 17 #define I2C_SCL_PIN 18 #define TOUCH_INT -1 #define TOUCH_RST 38 #define TOUCH_ROTATION ROTATION_INVERTED #define TOUCH_MAP_X1 480 #define TOUCH_MAP_X2 0 #define TOUCH_MAP_Y1 480 #define TOUCH_MAP_Y2 0 TAMC_GT911 ts = TAMC_GT911(I2C_SDA_PIN, I2C_SCL_PIN, TOUCH_INT, TOUCH_RST, max(TOUCH_MAP_X1, TOUCH_MAP_X2), max(TOUCH_MAP_Y1, TOUCH_MAP_Y2)); void touch_init(void) { Wire.begin(I2C_SDA_PIN, I2C_SCL_PIN); ts.begin(); ts.setRotation(TOUCH_ROTATION); } bool touch_touched(void) { ts.read(); if (ts.isTouched) { for (int i = 0; i < ts.touches; i++) { touch_last_x = map(ts.points[0].x, TOUCH_MAP_X1, TOUCH_MAP_X2, 0, 480 - 1); touch_last_y = map(ts.points[0].y, TOUCH_MAP_Y1, TOUCH_MAP_Y2, 0, 480 - 1); Serial.print("Touch "); Serial.print(i + 1); Serial.print(": ");; Serial.print(" x: "); Serial.print(ts.points[i].x); Serial.print(" y: "); Serial.print(ts.points[i].y); Serial.print(" size: "); Serial.println(ts.points[i].size); Serial.println(' '); break; } ts.isTouched = false; return true; } else { return false; } } |
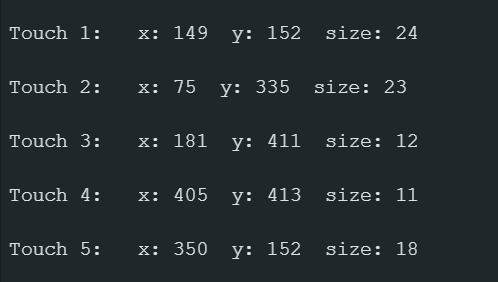
We can see the X/Y coordinates for five points in the serial console when touching five points on the display at the same time.
Playing MP3 files on ESP32-S3 through the built-in speaker
The MaTouch ESP32-S3 4-inch display board features a MAX98357A 3W mono power amplifier connected to the ESP32-S3 chip via I2S and driving the built-in speaker. We will play some MP3 files stored on a MicroSD card (while running a slide show) to check the playback quality which is acceptable.
Testing Mabee TVOC and eCO2 & Temperature and Humidity Sensor Module
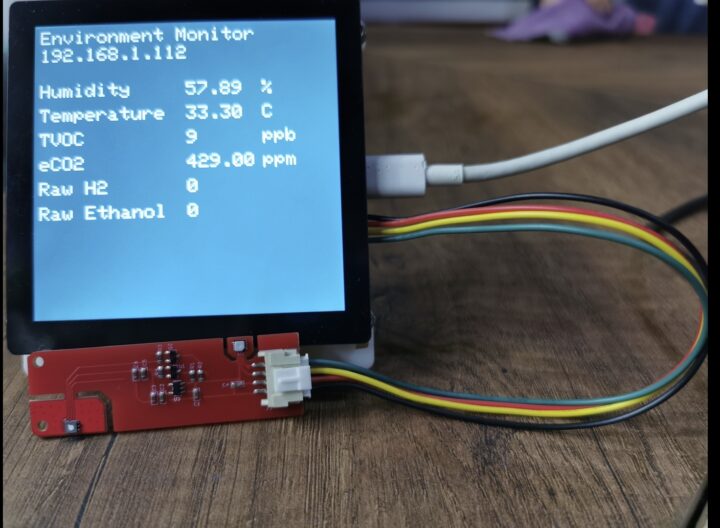
The MaTouch_ESP32-S3 4-inch display board comes with 2 Mabee expansion ports with I2C and I/O pins 19,20, and the kit includes a “Mabee TVOC and eCO2 & Temperature and Humidity sensor module ” with an SGP30 sensor measuring TVOC and eCO2, and an SHT31 measuring temperature and humidity. This allows us to build an air quality monitor to read the values from the sensors and show them on the display. The program includes the following libraries:
|
1 2 |
#include <Adafruit_SGP30.h> #include <Adafruit_SHT31.h> |
We can see the values from the sensors on the display.
Using Mabee MLX90640 thermal camera sensor module
The MaTouch_ESP32-S3 4-inch Display Demo Kit also includes a Mabee MLX90640 sensor module with a 32×24 resolution camera which can be used in a variety of applications that require non-contact temperature measurement, such as looking at heat dissipation of a board or make a body temperature screening point. The following library is used in the program:
|
1 |
#include <Adafruit_MLX90640.h> |
The code will read the values from the MLX90640 thermal camera, display them as a heatmap on the screen, and show the maximum temperature measured in the image frame. The video below shows the test results of readings from the Mabee MLX90640 module sensor. Arnon – the reviewer – shot the video in Thai, but it shows a candle on the left and a glass of water on the right and we can see the heatmap and temperature measurements on the display.
Using LVGL graphics library with the MaTouch_ESP32-S3 display kit
The 4-inch screen is large enough to be used in a variety of applications and is suitable for graphical user interfaces built with the popular LVGL open-source graphics library which allows users to create nice-looking user interfaces. After installing the LVGL library, and we used the sample for the ESP32-S3 4-inch display board as shown in the video below. The video is also in Thai language, but it shows the LVGL widgets, tab switching, charts drawing, etc… There’s a lag, which reminds me of the experience I had with a Windows PDA I owned many years ago, but this should be expected on low-end hardware and should still be fine for many HMI applications.
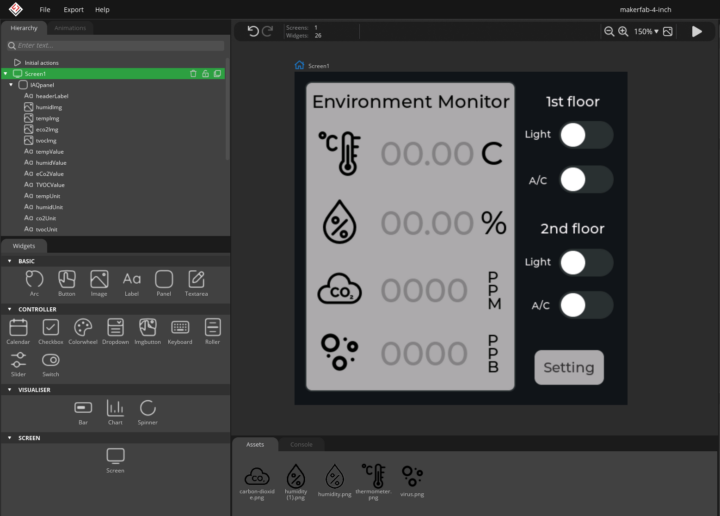
We can modify the user interface of the IAQ monitor with LVGL using SquareLine Studio.
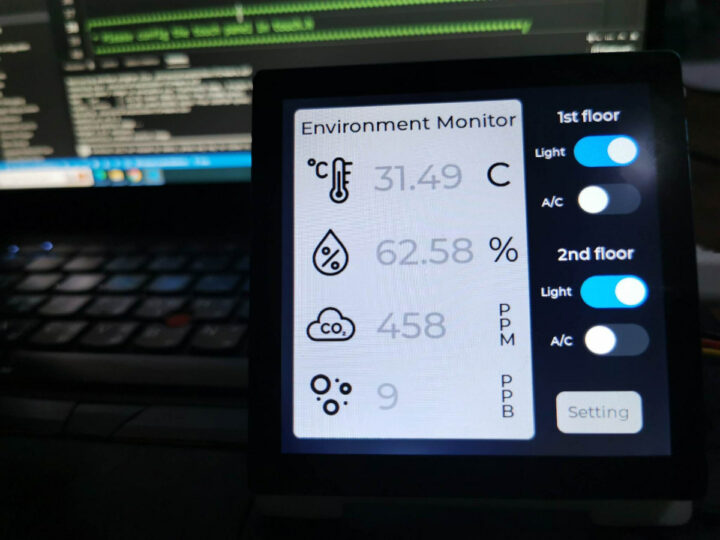
We can then “transfer” the new user interface to the Matouch_ESP32-S3 4-inch display board and it looks much better than the text-based-only interface we tested above.
Conclusion
The MaTouch_ESP32-S3 4-inch Display Demo Kit with its display board and sensors is very easy to use notably thanks to the provided Arduino samples. The MaTouch_ESP32-S3 4-inch display board works great and the speaker set is loud and clear. Sensor integration is made easy thanks to the Mabee/Grove connectors that accept many modules available on the market. The ability to work with a 3.7V LiPo battery is also a plus.
But there are two points that could be improved
- The mounting holes of the display board are just holes drilled into the PCB, and it’s difficult to assemble with the frame because we can’t insert the screws from the top since it’s covered by the edge of the screen with double-sided tape. If they could change those to SMD standoffs it would be more convenient
- This prototyping kit has two Grove I2C sensors but we can only connect one at a time. It would be even better if the kit included an I2C breakout so that two sensors can be connected at the same time.
We would like to thank Makerfabs for sending us the MaTouch_ESP32-S3 4-inch Display Demo Kit for review. The full kit can be purchased on the company’s store for $88.90 or you can buy the MaTouch_ESP32-S3 4-inch Display Board only for $38.90.
This review is a translation from the original article in Thai language published on CNX Software Thailand by Arnon Thongtem.

Jean-Luc started CNX Software in 2010 as a part-time endeavor, before quitting his job as a software engineering manager, and starting to write daily news, and reviews full time later in 2011.
Support CNX Software! Donate via cryptocurrencies, become a Patron on Patreon, or purchase goods on Amazon or Aliexpress


