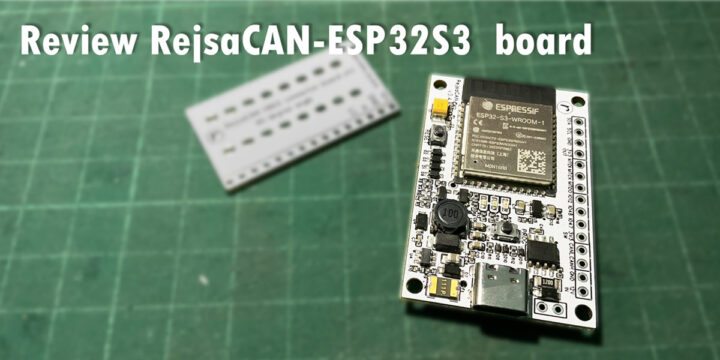
The RejsaCAN-ESP32-S3 is an ESP32-S3 board suitable for developers who want to build a car-related project. It can control or read the data from the OBD-II connector in your car using 2.4 GHz Wi-Fi or/and Bluetooth 5 (LE), or for IoT projects, connecting a sensor to the board and sending data to an app, the cloud, or log the data to a microSD Card. The board is designed to be small enough to be installed in a car.
The board is an evolution of the previous ESP32-based RejsaCAN-ESP32 with the developer – Magnus Thomé – switching to the ESP32-S3 chip as previously announced. The main specifications are similar, but the ESP32-S3 is a newer LX7 processor with Bluetooth LE 5.0 support, and the ESP32 board had to use a USB-to-serial chip to communicate or upload the program through a PC, but the new board uses the USB interface on the ESP32-S3 for serial debug/JTAG, and there’s no need to connect an additional chip.
Some interesting functions of the board include:
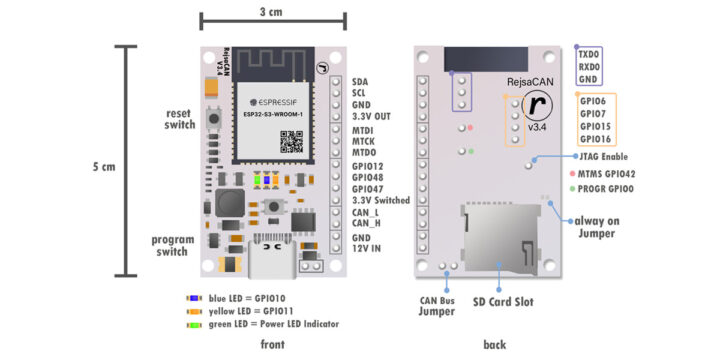
- Auto shutdown puts the board into sleep mode when the car is not being driven. You can see the details of this system in the previous article. The board can be adjusted to always work through the always-on jumper or developers can edit the feature in the program themselves.
- 3.3V HIGH DRIVER – The GPIO pins on the ESP32-S3 can, in addition to general digital circuitry, also drive 10-20mA loads like LEDs and other smaller loads. The RejsaCAN board adds a more powerful driver circuit that can drive larger loads of a few hundred mA at 3,3V in order to power external sensors or a small display
- Extra UART RX/TX adds a serial port which the ESP32 board doesn’t have.
- A microSD card reader allows the board to save data to the microSD card through the SPI port.
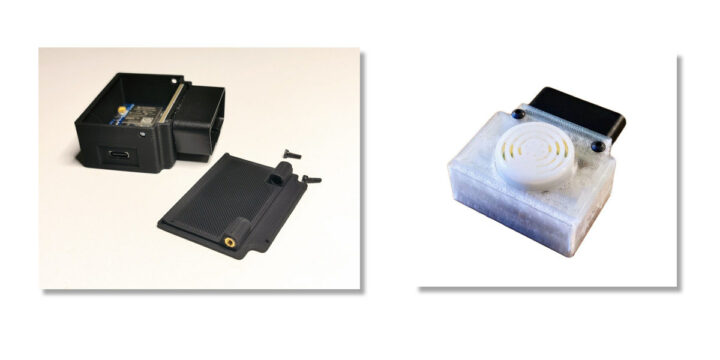
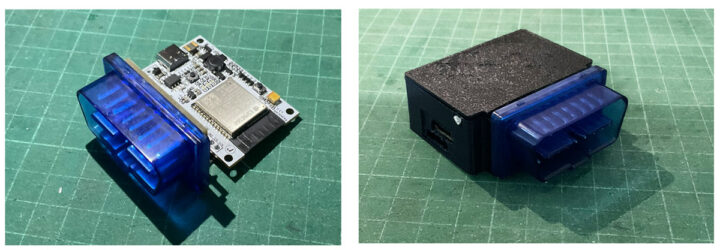
- 3D printed case. The developer designed an OBD-II compatible enclosure whose files can be found on GitHub.
Testing sample Arduino programs on RejsaCAN-ESP32-S3
When we look at the example section on GitHub, we can see that there are sample Arduino sketches such as:
- ESP32-S3 – SPI settings for SD card reader – Example program to set the SPI port, then list the name and size of the files on the SD card.
- ESP32-S3 – listen to all CAN broadcasts printed over USB – The program outputs the data sent on the CAN bus of the vehicle.
- ESP32-S3 – simple first test in car – Test program to read the engine RPM, and if the rotation speed is too high, the LED on the board will be turned on.
- Test AUTO-OFF keeping board on after engine stops – Sample program that sends a signal to the Switching Regulator chip to stop supplying power when it detects the engine stops, causing the MCU to turn off.
In this review, we will test samples 2 and 3. The ESP32 or ESP32-S3 chips have a CAN bus interface called Two-Wire Automotive Interface (TWAI) that supports ISO11898-1, Standard Frame Format (11-bit ID), and Extended Frame Format (29-bit ID) so we only need to connect a transceiver chip. You’ll find more details about the TWAI interface on Espressif’s developer website.
Configuring Arduino IDE to use ESP32-S3
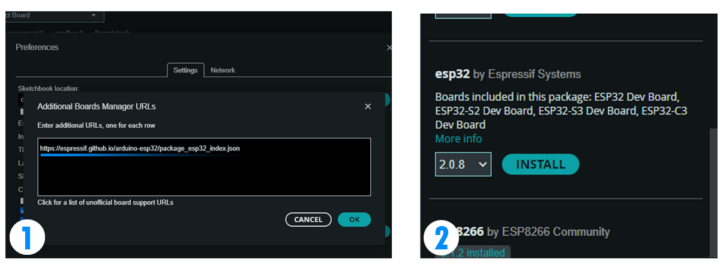
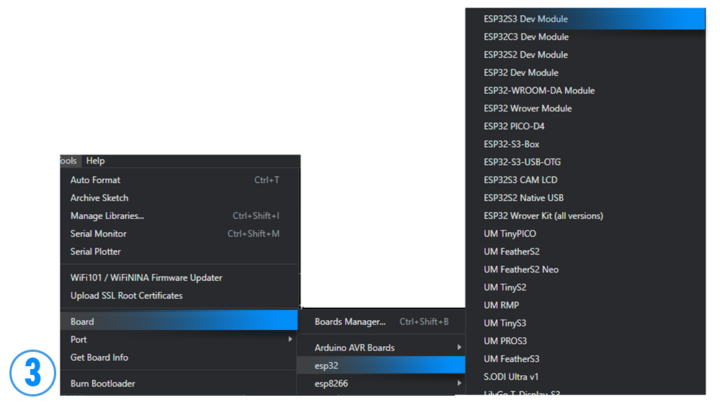
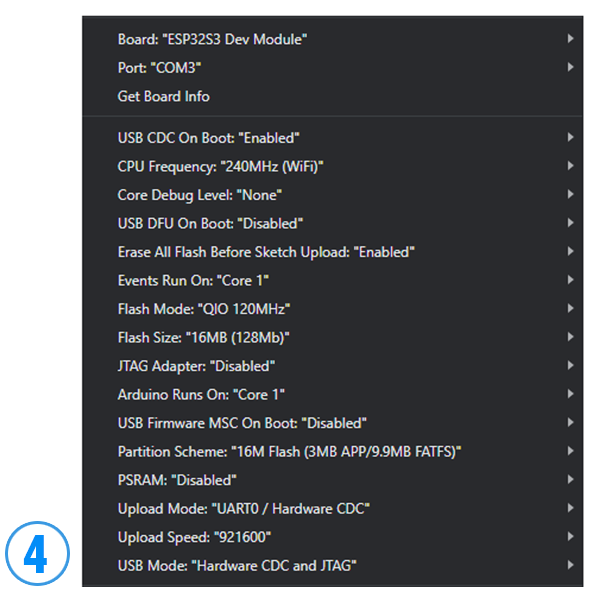
Before we test the board on the car, we’ll need to first install the Arduino IDE and configure it to work with ESP32. If you haven’t done so already, go to File->Preferences to add the URL in Additional boards manager URLs, then go to Tools->Board… -> Board Manager, search for ESP32 name, then press INSTALL. You can find the instructions for Arduino 2.0.0 on CNX Software. When the installation is complete, go to Board -> esp32 -> ESP32S3 Dev Module.
Verify the values for the configuration match the ones in the screenshot above, and if everything looks fine, open one of the sample programs, and press “Verify”. The output window should not show any errors.
Testing the RejsaCAN-ESP32-S3 board with a car
Let’s now prepare the RejsaCAN-ESP32-S3 board for review. We’ll use a USB-C cable for uploading, loading programs, and sending data to a PC, and place the board into an enclosure.
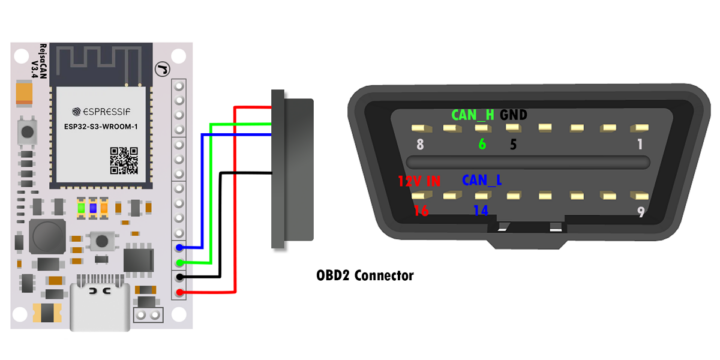
Wiring the board requires 4 wires, namely the power wire to the positive pole from the car, the GND wire, and two wires for the CAN_H and CAN_L signals. If we look at the ODB-II connector, all 4 signal pins can be seen in the illustration below.
We’ve tested on the RejsaCAN-ESP32-S3 board using the OBD-II port of a 2018 Mazda 2 located under the steering wheel near the switch to open the hood.
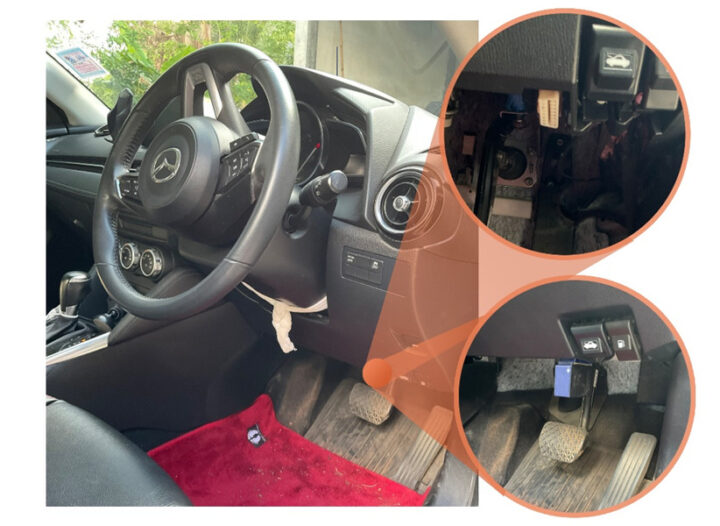
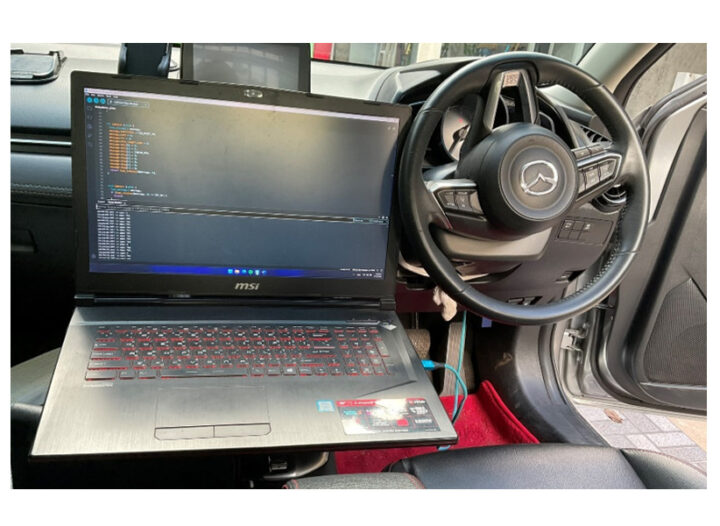 In this test, the sample program sends data values through the serial port, so we have to connect it to a laptop using a USB cable as shown in the picture above.
Example 1 shows all messages on the bus
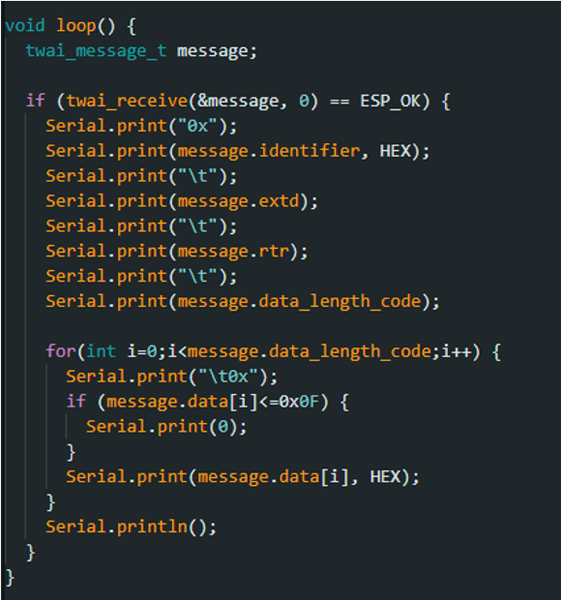
The setup function above sets up the CAN bus port and starts it. The main loop, shown below, checks for incoming data on the bus, and prints the details of the message on the serial port.
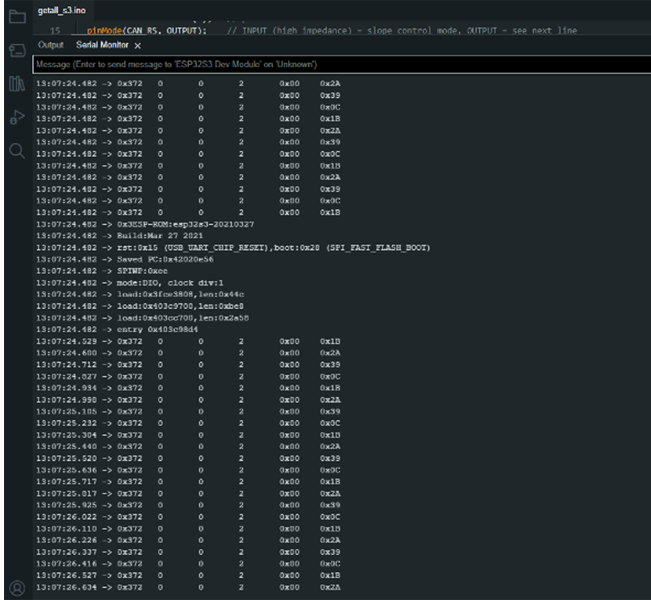
The serial output above shows the CAN bus data after we press the start/stop engine button
Example 2 read RPM and alert
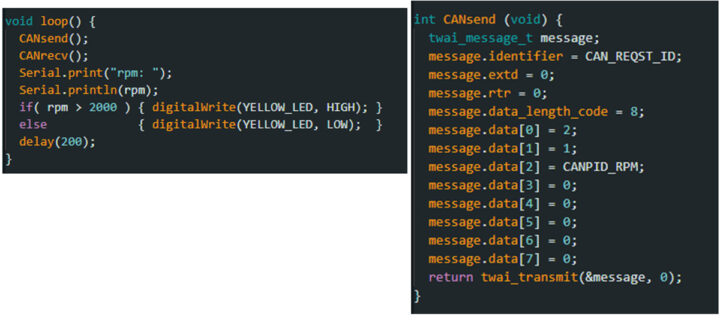
This example reads a car’s engine RPM. The setup code is the same as the previous example, but the loop has the CANsend() function that sends a message following the CAN Bus Data Frame format.

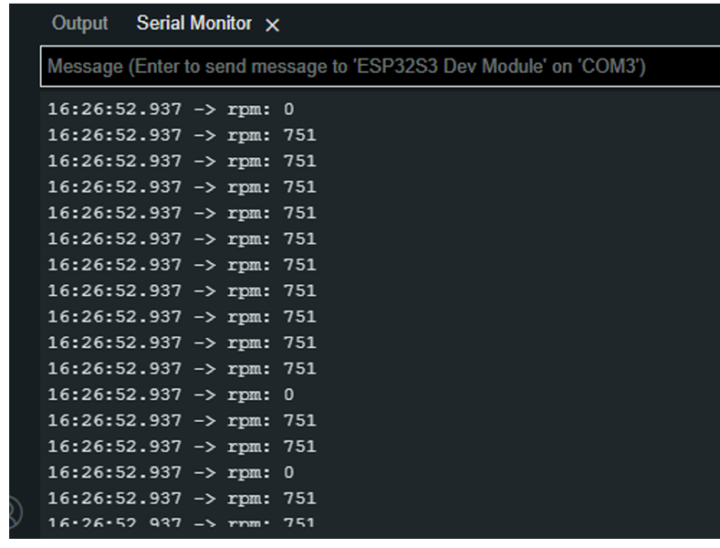 The CANrecv() function then examines the message on the bus and if the message contains the RPM ID (0x0C), it retrieves the remainder of the data and prints the value on the serial console. The formula and more information can be found on Wikipedia. If the RPM value is greater than 2000 rpm, the program will turn on the yellow LED, and if not, it will be turned off. The output from the board is shown in the Serial monitor as shown in the picture above.
Conclusion
The RejsaCAN-ESP32-S3 is an interesting board for CAN bus development and experiment that comes with wireless connectivity and can be extended with sensors or display using its I/O pins. Programming in the Arduino IDE is easy, and many libraries are available. If you want to understand the system or equipment in the car or do a DIY project, this board is great. Although this is a relatively new project on GitHub, there are some documentation and code samples, and the project is constantly being updated.
If you want to create a project with specific requirements, read values, operate from other devices, store values, connect via Wi-Fi or Bluetooth, and you have a basic understanding of the CAN bus communication standard, using the ESP32’s API, especially the TWAI part, make it easy. But if you just want to read values from your cars, we recommended using a standard OBD-II reader such as the ELM327.
We would like to thank Magnus for sending us the RejsaCAN-ESP32-S3 board to play around with. He did not request a review, but we did one anyway! It is a personal project, and not for sale at this time, unless Magnus has a few samples on hand.
This review/tutorial is a translation from the original article on CNX Software Thailand by Tinnapop Junsuta.

Jean-Luc started CNX Software in 2010 as a part-time endeavor, before quitting his job as a software engineering manager, and starting to write daily news, and reviews full time later in 2011.
Support CNX Software! Donate via cryptocurrencies, become a Patron on Patreon, or purchase goods on Amazon or Aliexpress


