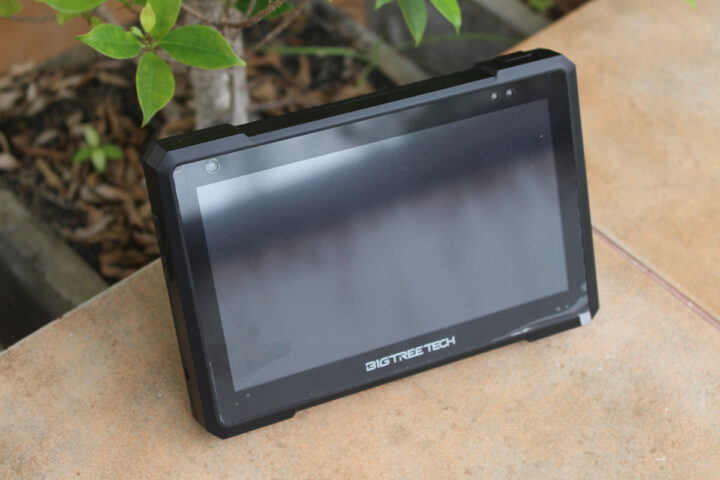
Yesterday, I wrote about the BTT Pi V1.2 Allwinner H616 SBC designed for 3D printers, but also mentioned I had received the Pad 7 from BIGTREETECH which is a software-compatible, but more complete solution with a 7-inch display and an Allwinner H616-powered CB1 system-on-module compatible with the Raspberry Pi CM4.
The BIGTREETECH Pad 7 should be more convenient to use with its integrated 7-inch touchscreen display, and if you ever decided you didn’t need it to control your 3D printer anymore, it could always be used as a small Linux computer running Raspberry Pi OS or another operating system.
BIGTREETECH Pad 7 specifications:
- Supported modules
- BIGTREETECH CB1 v2.2 (included in the kit) – Allwinner H616 quad-core Cortex-A53 CPU with Mali-G31 MP2 GPU, 1GB RAM, 802.11 b/g/n WiFi 4
- Raspberry Pi CM4 module with Broadcom BCM2711 quad-core Cortex-A72 CPU with VideoCore IV GPU, 1 to 8GB RAM, 0 to 32GB eMMC flash, optional WiFi 5 and Bluetooth 5.0.
- Storage – MicroSD card slot. Kit fitted with 32GB SanDisk microSD card preloaded with Debian OS and Klipper
- Display
- 7-inch display with 1024×600 resolution, 60 Hz refresh rate
- USB-HID touchscreen panel with 5-point
- Viewing Angle: 178°
- Brightness: 500 Cd/m²
- Viewing Area – 154.2 x 85.92 mm
- Audio – 3.5mm audio jack, built-in speaker
- Networking – 10/100M Ethernet (with CB1) or Gigabit Ethernet (with CM4)
- USB – 3x USB 2.0 ports, 1x USB Type-C port to flash OS to Raspberry Pi CM4
- Sensor – Light sensor
- Expansion
- CAN Bus (MCP2515) connector
- SPI connector for ADXL345 accelerometer module
- Note: It is not possible to use the CAN interface and the ADXL345 accelerometer SPI interface simultaneously due to the MCP2515 SPI to CAN conversion
- Misc – Power and volume buttons (for built-in speaker), RGB status light
- Power Supply – 12V/2A DC input
- Rated power – 7.3W
- Dimensions – 185.7 x 124.78 x 39.5 mm
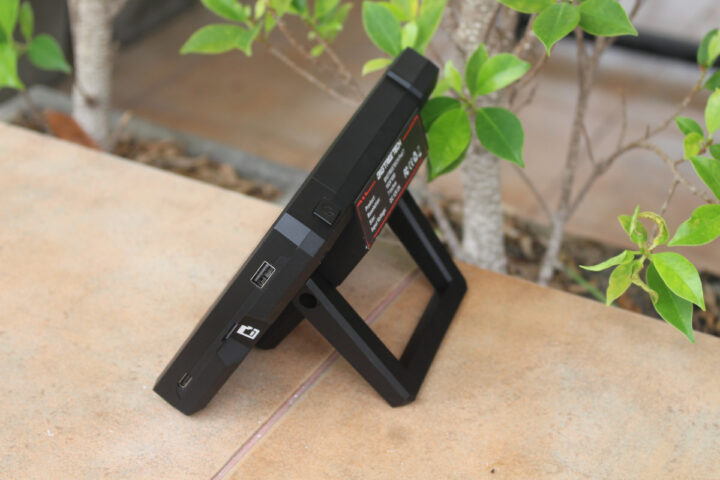
The Pad 7 has a handle on its back that makes it easy to transport and place on any desk. Note that if it gets in the way of your setup, the handle can be removed as well. The left side of the tablet comes with one USB 2.0 port, a microSD card slot, and a USB Type-C port. The power button can be seen on the top side of the display.
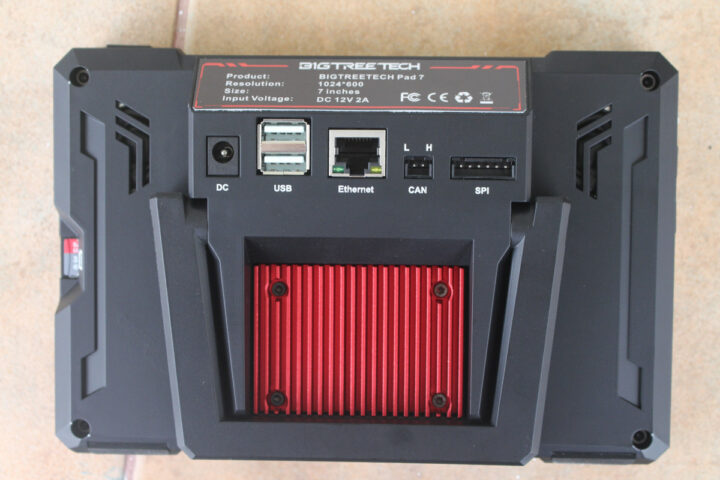
Most connectors can be found on the back of the tablet with a DC jack, two more USB 2.0 ports, the RJ45 Ethernet port, a CAN Bus connector, and an SPI connector. We’ll also notice the 32GB microSD card on the left side, and a heatsink covering the CB1 system-on-module.
Since I have the device, let’s go through the unboxing.
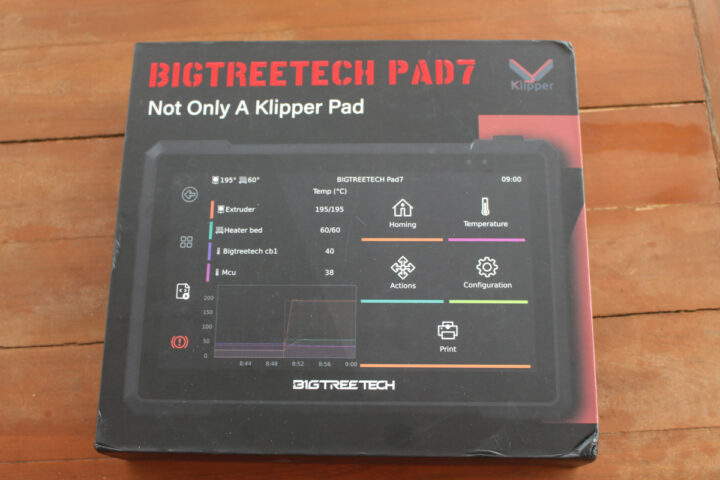
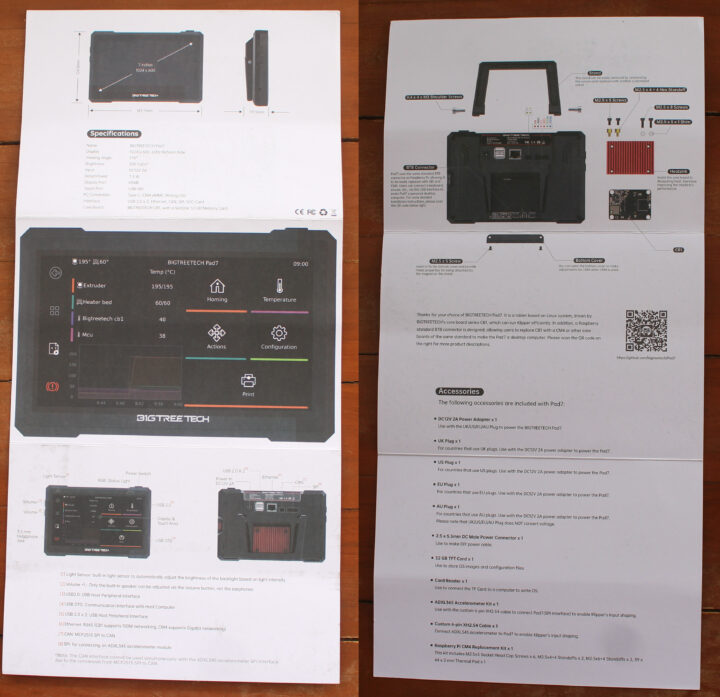
The first thing you’ll find when opening the package is a quick start guide with some specifications and a QR code linking to the user manual, 3D STEP files, and the PDF schematics on GitHub.
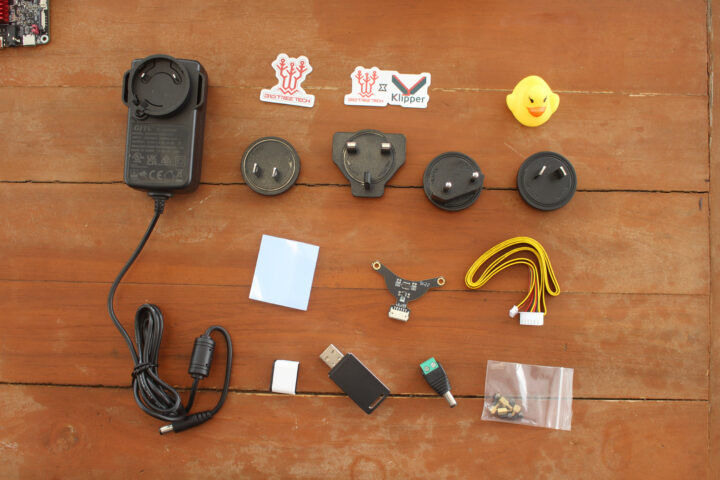
Several accessories are included in the Pad 7 package: a 12V/2A power supply with US, EU, UK, and AU plug adapters, some stickers, a plastic duck, a thermal pad for the system-on-module, an ADXL345 accelerometer module to enable Klipper’s input shaping along with its cable, a USB card reader to flash the OS, a 2-pin terminal to 5.5/2.5mm jack to make a DIY power cable and a spare screws set for the system-on-module.
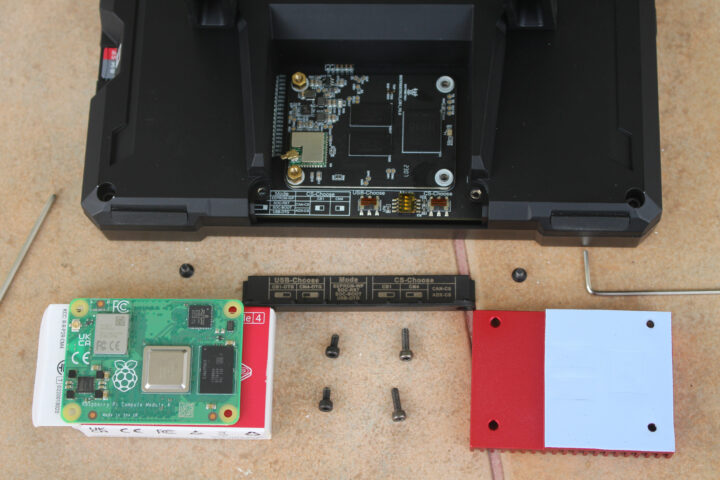
I removed the red heatsink on the back of the Pad 7 tablet to check out the CB1 module and cooling solution. A Raspberry Pi CM4 Lite is also shown for comparison, and because I’ll use it later with the tablet. Note that some switches need to be set to a different position when switching from CB1 to CM4. But more on that later.
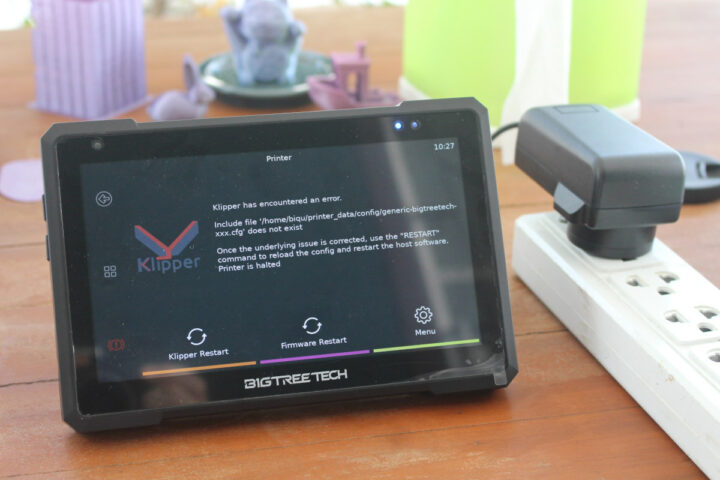
Let’s connect the Pad 7 to its 12V power supply to see if it boots properly.
The good news is that it indeed boots out of the box with me having to install the OS, but the less good news is that it ends up with a Klipper error possibly because I haven’t connected it to a 3D printer yet. I’ll need to do more reading on that part.
I’ll probably write two more parts for the BIGTREETECH Pad 7 review, first showing how to use it with a Raspberry Pi CM4 Lite since it looks like there are a few steps both in terms of hardware installation and software configuration to make that work, and then go back to the CB1 module and connect it to a 3D printer.
I’d like to thank BIGTREETECH for sending the Pad 7 tablet. They sell it on the biqu.equipment website for $129.99 plus shipping, but it does not appear to be for sale on their Amazon and Aliexpress stores just yet.
Continue reading
- “Using BTT Pad 7 touchscreen display with Raspberry Pi CM4“.
- “Review of BIGTREETECH Pad 7 Klipper pad with Creality Ender-3 Pro S1 3D printer“

Jean-Luc started CNX Software in 2010 as a part-time endeavor, before quitting his job as a software engineering manager, and starting to write daily news, and reviews full time later in 2011.
Support CNX Software! Donate via cryptocurrencies, become a Patron on Patreon, or purchase goods on Amazon or Aliexpress


