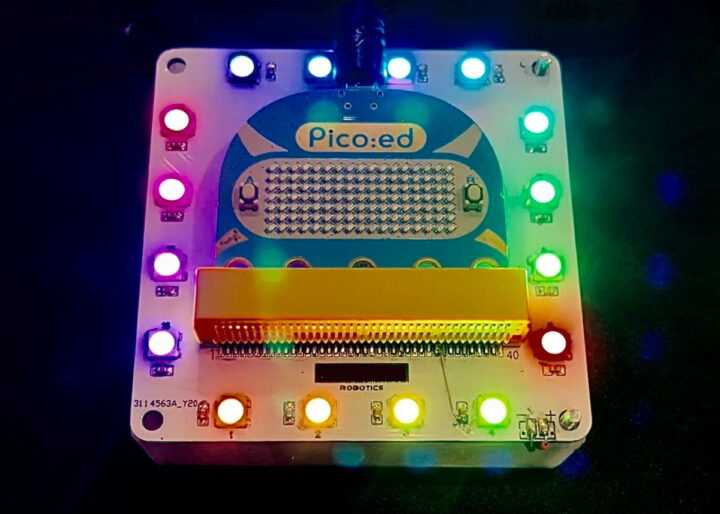
We’ve received a sample of the Pico:ed V2 board developed by ELECFREAKS and will show how to use it as a replacement for the BBC micro:bit in a project using CircuitPython.
We’ve already covered the board in detail with specifications, block diagram, and pinout diagram before, and it’s basically a Raspberry Pi Pico RP2040 board with BBC Micro:bit form factor including a 17×7 Dot Matrix LED display, some buttons, a buzzer, but no wireless connectivity, relying only on USB instead.
CircuitPython firmware installation on the Pico:ed V2 board
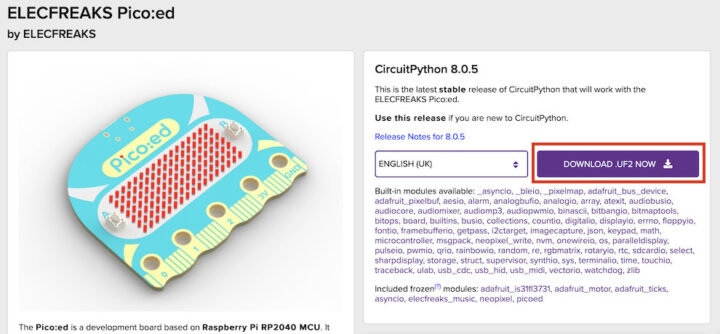
The board supports C/C++, MicroPython, and CircuitPython programming languages, and for this review, we’ve decided to download the CircuitPython UF2 firmware.
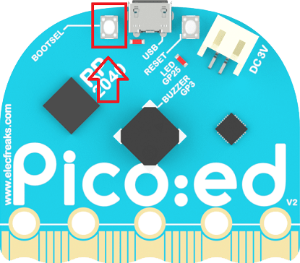
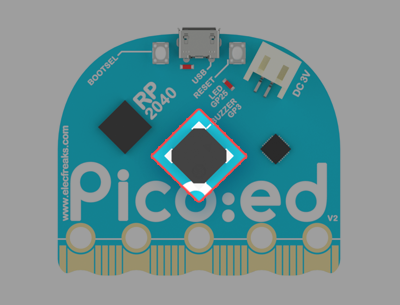
Press and hold the BOOTSEL button after having downloaded the firmware file…
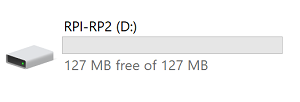
… and connect the board to your computer using a USB cable before releasing the BOOSEL button on the Pico:ed V2 board, which should then show up as the “RPI-RP2” drive in your file manager.
Now drag the previously downloaded UF2 file to the “RPI-RP2” drive and once the installation is complete, the “RPI-RP2” drive will disappear and the “CIRCUITPY” drive will appear in its place.
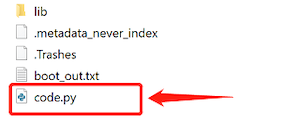
That’s all you have to do to install the CircuitPython firmware, and you can start writing programs in code.py file in the CIRCUITPY drive.
Programming the Pico:ed V2 board
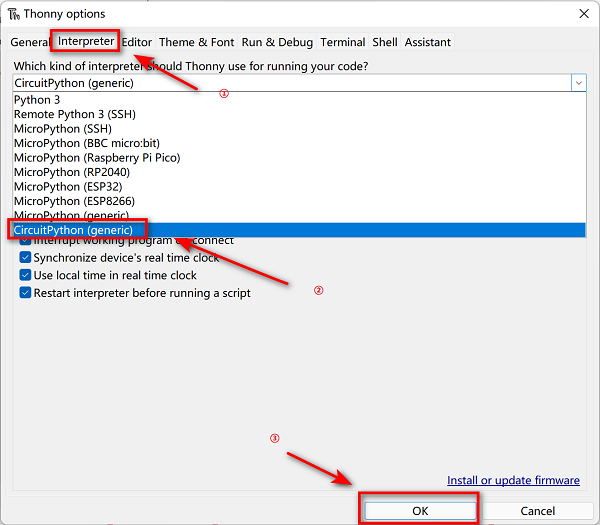
We’ll use the Thonny Python IDE for programming which can install on Windows, Linux, macOS, or even run from a Raspberry Pi SBC. Once the installation is complete, open Thonny, then click on the “Run” menu and select “Configure interpreter” and select “CircuitPython(generic)” as we did with the Wukong 2040 review.
Testing the onboard LED
We have to start somewhere and the easiest is to program the onboard LED on the Pico:ed V2 board to blink.
Blinky code:
|
1 2 3 4 5 6 7 8 |
import time from picoed import * while True: led.on() time.sleep(0.5) led.off() time.sleep(0.5) |
Buttons programming
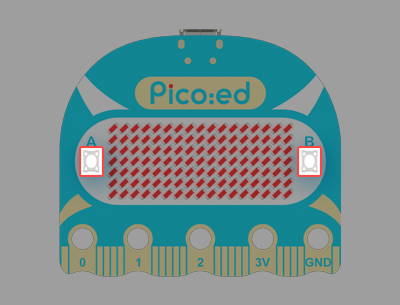
The Pico:ed V2 board also comes with two buttons which can be programmed individually or in combination.
The test code will display a number starting at 0. If the A button is pressed, the number will be -1, and if the B button is pressed, the number will be +1.
|
1 2 3 4 5 6 7 8 9 10 11 12 13 14 |
from picoed import * times = 0 display.show(times) while True: # Press button A once, count minus 1 if button_a.was_pressed(): times -= 1 display.show(times) # Press button_B once, add 1 to the count if button_b.was_pressed(): times += 1 display.show(times) |
Making the Pico:ed V2 buzzer play music
The board is also equipped with a passive buzzer which can be programmed to play sounds according to different types of music notes and also has more than 20 ready-made song commands as follows:
- DADADADUM, ENTERTAINER, PRELUDE, ODE
- NYAN, RINGTONE, FUNK, BLUES,
- BIRTHDAY, WEDDING, FUNERAL, PUNCHLINE
- PYTHON, BADDY, CHASE, BA_DING, WAWAWAWAA
- JUMP_UP JUMP_DOWN POWER_UP POWER_DOWN
Here’s the code to play DADADADUM:
|
1 2 3 |
from picoed import music music.play(music.DADADADUM) |
It could not be easier than that, but we can also write code to play music as defined in a music score.
|
1 2 3 4 5 6 7 8 9 10 11 12 13 14 15 16 17 18 19 20 21 22 23 24 25 26 27 28 29 30 31 32 |
import asyncio from picoed import music, led # play Prelude in C. notes = [ 'c4:1', 'e', 'g', 'c5', 'e5', 'g4', 'c5', 'e5', 'c4', 'e', 'g', 'c5', 'e5', 'g4', 'c5', 'e5', 'c4', 'd', 'a', 'd5', 'f5', 'a4', 'd5', 'f5', 'c4', 'd', 'a', 'd5', 'f5', 'a4', 'd5', 'f5', 'b3', 'd4', 'g', 'd5', 'f5', 'g4', 'd5', 'f5', 'b3', 'd4', 'g', 'd5', 'f5', 'g4', 'd5', 'f5', 'c4', 'e', 'g', 'c5', 'e5', 'g4', 'c5', 'e5', 'c4', 'e', 'g', 'c5', 'e5', 'g4', 'c5', 'e5', 'c4', 'e', 'a', 'e5', 'a5', 'a4', 'e5', 'a5', 'c4', 'e', 'a', 'e5', 'a5', 'a4', 'e5', 'a5', 'c4', 'd', 'f#', 'a', 'd5', 'f#4', 'a', 'd5', 'c4', 'd', 'f#', 'a', 'd5', 'f#4', 'a', 'd5', 'b3', 'd4', 'g', 'd5', 'g5', 'g4', 'd5', 'g5', 'b3', 'd4', 'g', 'd5', 'g5', 'g4', 'd5', 'g5', 'b3', 'c4', 'e', 'g', 'c5', 'e4', 'g', 'c5', 'b3', 'c4', 'e', 'g', 'c5', 'e4', 'g', 'c5', 'a3', 'c4', 'e', 'g', 'c5', 'e4', 'g', 'c5', 'a3', 'c4', 'e', 'g', 'c5', 'e4', 'g', 'c5', 'd3', 'a', 'd4', 'f#', 'c5', 'd4', 'f#', 'c5', 'd3', 'a', 'd4', 'f#', 'c5', 'd4', 'f#', 'c5', 'g3', 'b', 'd4', 'g', 'b', 'd', 'g', 'b', 'g3', 'b3', 'd4', 'g', 'b', 'd', 'g', 'b' ] async def blink(interval): while True: led.on() await asyncio.sleep(interval) led.off() await asyncio.sleep(interval) async def main(): player = asyncio.create_task(music.play_async(notes)) light = asyncio.create_task(blink(0.1)) await asyncio.gather(player) await asyncio.gather(light) asyncio.run(main()) |
LED DOT Matrix
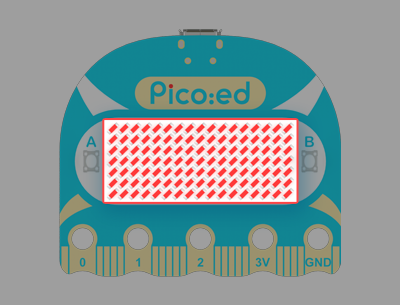
The ELECFREAKS board’s 7×17 LED dot matrix is driven by an IS31FL3731 chip to display graphics and text.
Sample code to show text and numbers:
|
1 2 3 4 5 6 7 8 9 10 11 12 |
import time from picoed import display # Display statically of 3 letters display.scroll("ABC") time.sleep(1) # Scroll to display the numbers display.scroll(1234567890) # Scroll to display the strings display.scroll("Hello, world!") |
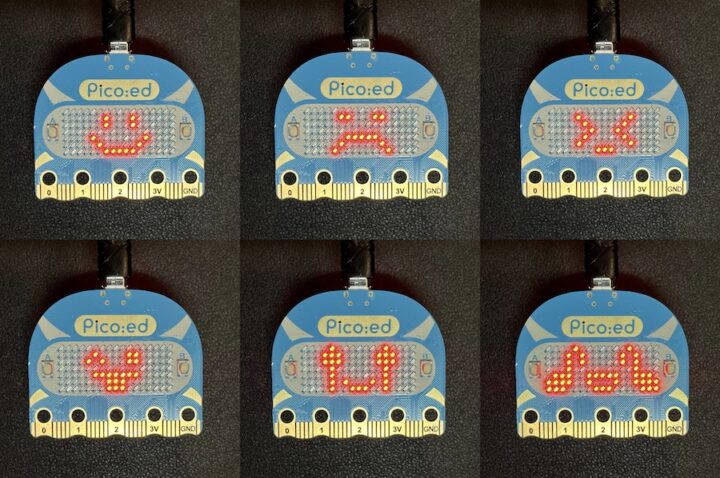
The firmware also supports over 25 preset graphics display commands:
- NO, SQUARE, RECTANGLE, RHOMBUS, TARGET
- CHESSBOARD, HAPPY, SAD, YES, HEART
- TRIANGLE, CHAGRIN, SMILING_FACE, CRY, DOWNCAST
- LOOK_RIGHT, LOOK_LEFT, TONGUE, PEEK_RIGHT, PEEK_LEFT
- TEAR_EYES, PROUD, SNEER_LEFT, SNEER_RIGHT, SUPERCILIOUS_LOOK, EXCITED
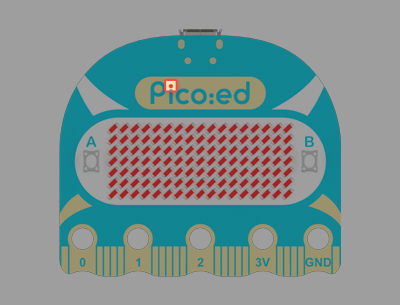
Here’s the code to display the HAPPY graphic as shown in the top left corner of the photo above:
|
1 2 3 |
from picoed import display, Image display.show(Image.HAPPY) |
Below is some sample code to display custom graphics with each number in the arrays representing the individual brightness of the LED with 1 being the dimmest, 9 being the brightest.
|
1 2 3 4 5 6 7 8 9 10 11 12 13 14 15 16 17 18 19 20 21 |
from picoed import display, Image while True: display.show(Image( '12345678987654321:' '12345678987654321:' '12345678987654321:' '12345678987654321:' '12345678987654321:' '12345678987654321:' '12345678987654321:' )) display.show(Image( '87654321112345678:' '87654321112345678:' '87654321112345678:' '87654321112345678:' '87654321112345678:' '87654321112345678:' '87654321112345678:' )) |
Using the Pico:ed V2 with accessories for the BBC Micro:bit V2 board
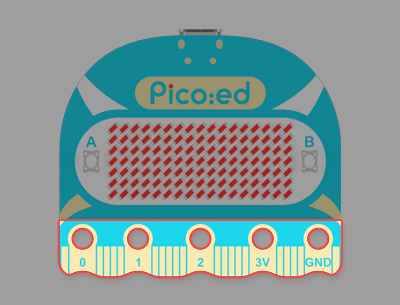
The Pico:ed V2 has the same edge connector as the BBC Micro:bit board compatible with accessories as well as the 5 larger pads suitable for crocodile clips.
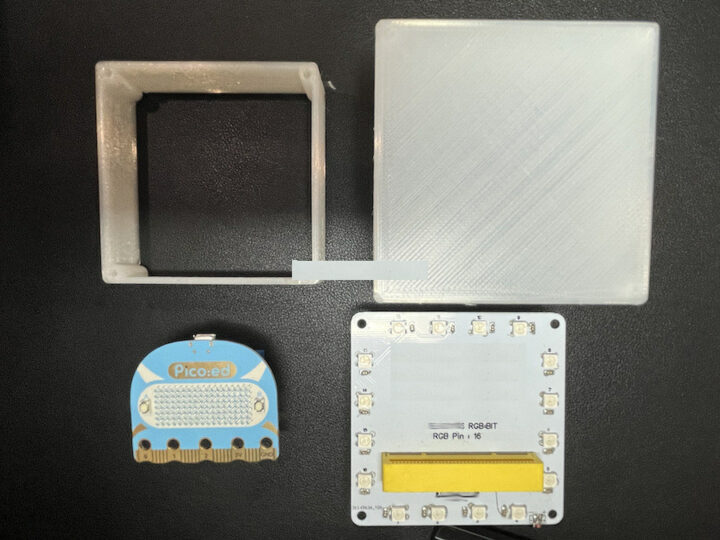
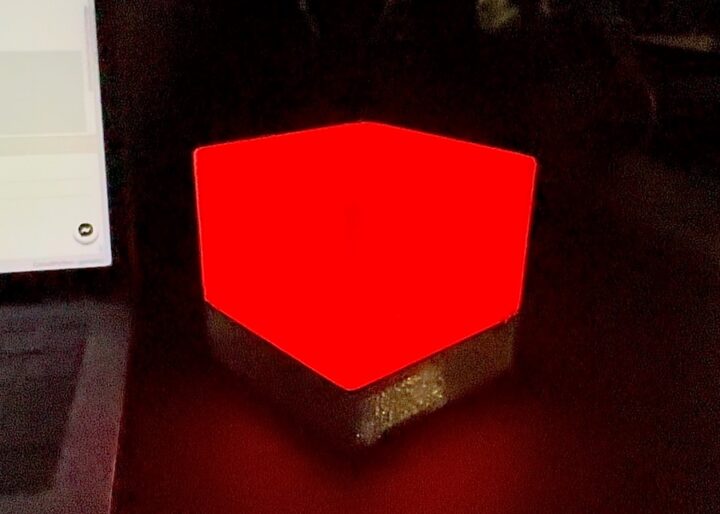
In order to test BBC Micro:bit compatibility, we’ll use the Pico:ed V2 board with an RGB:BIT board to drive 16 RGB lights (WS2812B) by connecting PIN16 (P16). We call this project the RGB Light Box. The structure is custom-designed and 3D printed, and the project is powered by two 3V AAA batteries.
We’ll need to install Adafruit’s Neopixel library in order to program the WS2812B RGB LED with CircuitPython. Download it and copy it into the “lib” directory on the “CIRCUITPY” drive.
![]() We have then inserted the Pico:ed V2 into the RGB:BIT board and written a test program to light the RGB lights in rainbow style.
We have then inserted the Pico:ed V2 into the RGB:BIT board and written a test program to light the RGB lights in rainbow style.
Here’s the code:
|
1 2 3 4 5 6 7 8 9 10 11 12 13 14 15 16 17 18 19 20 |
import time import board from rainbowio import colorwheel import neopixel pixel_pin = board.P16 num_pixels = 16 pixels = neopixel.NeoPixel(pixel_pin, num_pixels, brightness=0.9, auto_write=False) def rainbow_cycle(wait): for j in range(255): for i in range(num_pixels): rc_index = (i * 256 // num_pixels) + j pixels[i] = colorwheel(rc_index & 255) pixels.show() time.sleep(wait) while True: rainbow_cycle(10) # Increase the number to slow down the rainbow |
Assemble everything together and you will get a beautiful RGB Light Box that can change colors using the color chasing effect.
The code below is for the RGB LED color chasing demo:
|
1 2 3 4 5 6 7 8 9 10 11 12 13 14 15 16 17 18 19 20 21 22 23 24 25 26 27 28 29 30 31 |
import time import board from rainbowio import colorwheel import neopixel pixel_pin = board.P16 num_pixels = 16 pixels = neopixel.NeoPixel(pixel_pin, num_pixels, brightness=0.9, auto_write=False) def color_chase(color, wait): for i in range(num_pixels): pixels[i] = color time.sleep(wait) pixels.show() time.sleep(0.05) RED = (255, 0, 0) YELLOW = (255, 150, 0) GREEN = (0, 255, 0) CYAN = (0, 255, 255) BLUE = (0, 0, 255) PURPLE = (180, 0, 255) while True: color_chase(RED, 0.1) # Increase the number to slow down the color chase color_chase(YELLOW, 0.1) color_chase(GREEN, 0.1) color_chase(CYAN, 0.1) color_chase(BLUE, 0.1) color_chase(PURPLE, 0.1) |
Summary
The Pico:ed V2 board has a cute and colorful design and is user-friendly thanks to BBC Micro:bit compatibility and support for CircuitPuython programming language, as well as C/C++ and visual (drag-and-drop) programming. The board can be used to teach electronics and programming with many of the existing modules and is suitable for children in the classroom.
We were able to replace the BBC Micro:bit with the Pico:ed V2 Raspberry Pi RP2040 board in our own project with an RGB LED add-on board initially designed for the Micro:bit, but we had less luck with a SUMO ROBOT project where the Pico:ed V2 would not work. So compatibility with the Micro:bit board will depend on the specific extension board, and your mileage may vary.
We would like to thank ELECFREAKS for sending a Pico:ed V2 board for review and testing. The Pico:ed V2 can be purchased on Amazon or ELECFREAKS’ own store.
This guide/review is an adaption of the tutorial first published in Thai language on CNX Software Thailand.

Jean-Luc started CNX Software in 2010 as a part-time endeavor, before quitting his job as a software engineering manager, and starting to write daily news, and reviews full time later in 2011.
Support CNX Software! Donate via cryptocurrencies, become a Patron on Patreon, or purchase goods on Amazon or Aliexpress


