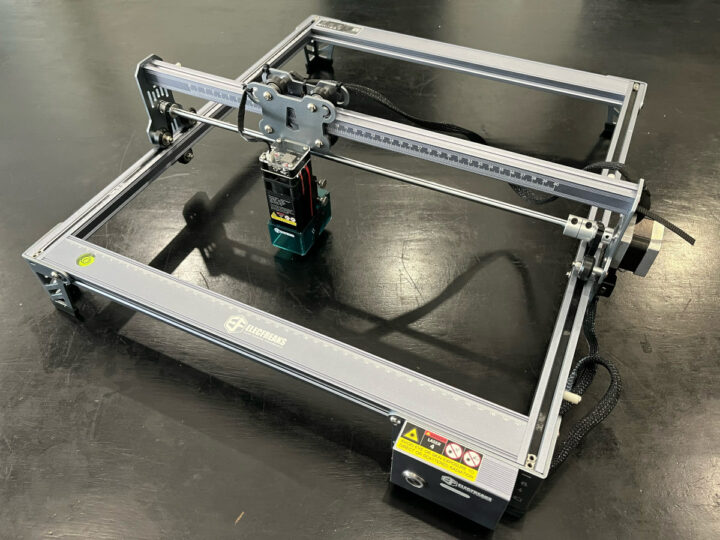
ELECFREAKS’ TOOCA Laser L1 is an affordable 5W laser engraver with a sturdy yet lightweight structure and that can engrave various materials including metals. It’s easy to use with a one-button press and suitable for education in schools.
TOOCA Laser L1 laser engraver unboxing
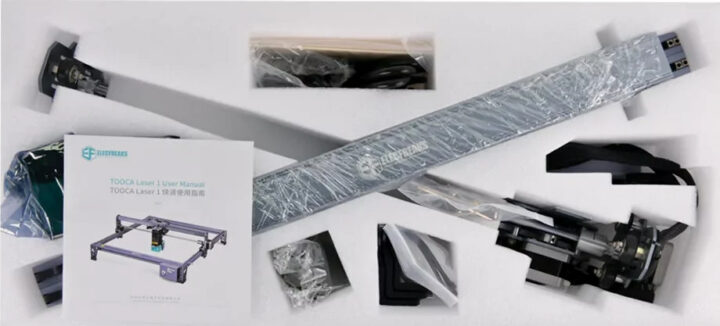
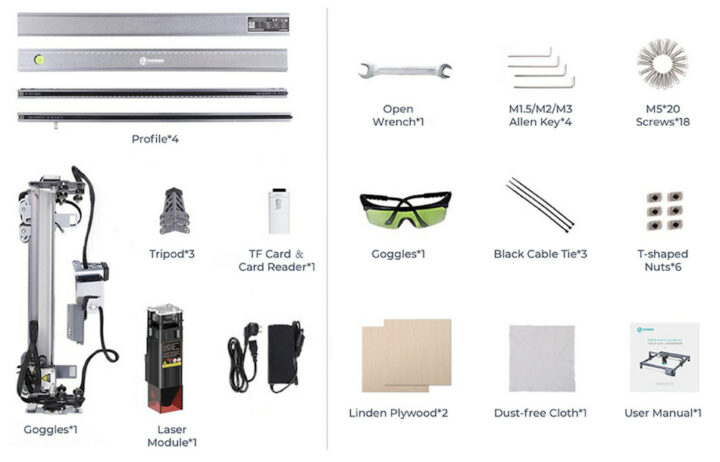
The laser engraver comes as a kit with components that can be easily assembled. It was well-packed with little risk of being damaged during transport. It also includes tools and instructions for assembly, and you don’t need any extra tools to complete the assembly.

 TOOCA Laser L1 specifications
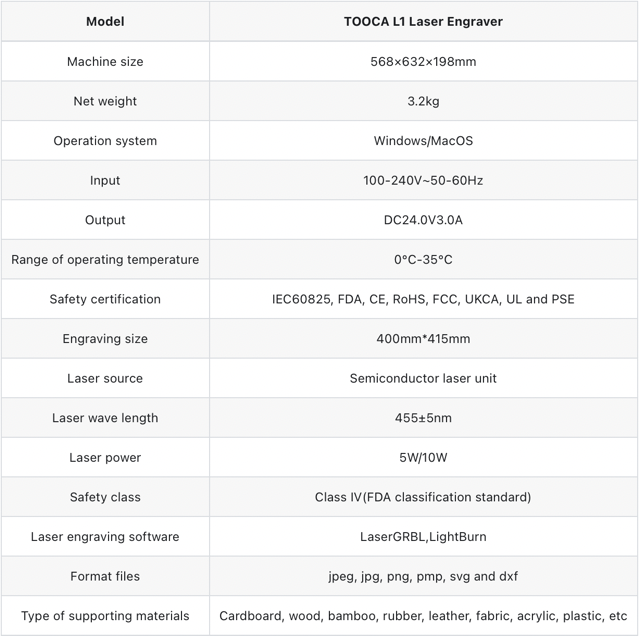
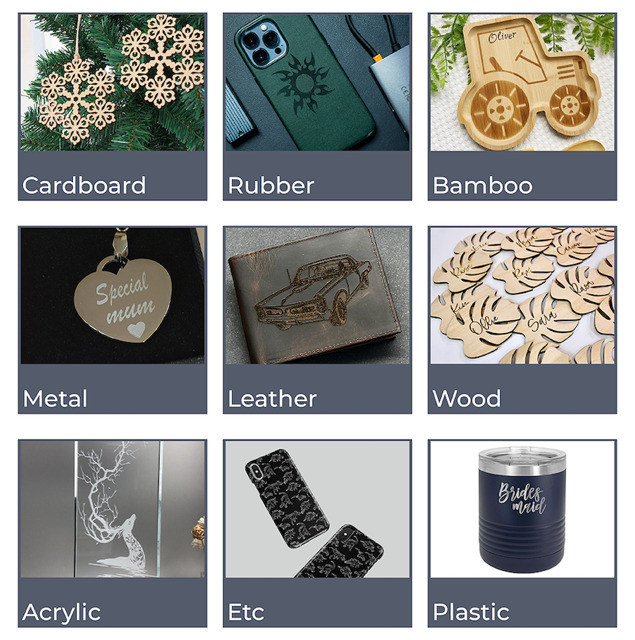
The machine measures 568x632x198 mm, weighs 3.2 kg only so it can easily be carried around, and offers a 400×415 mm working area. It works with Windows and macOS and only requires 24V power available through the provided power adapter. A wide range of file types are supported, and the device can engrave many types of materials and also cut some of the softer materials such as plywood.

 Assembly video
A closer look at the system design
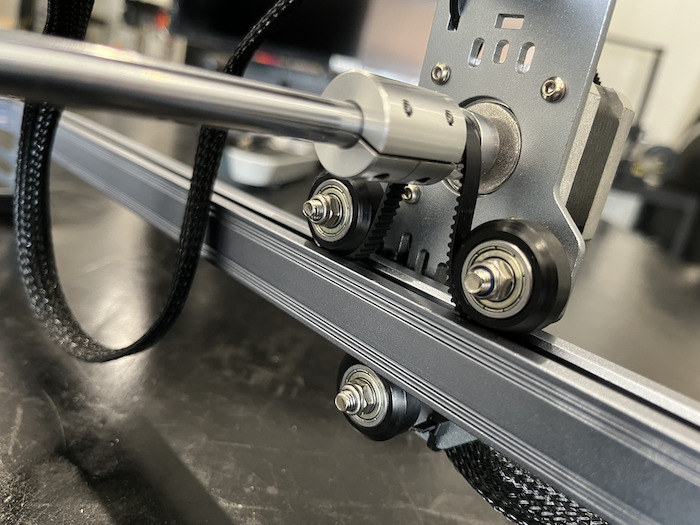
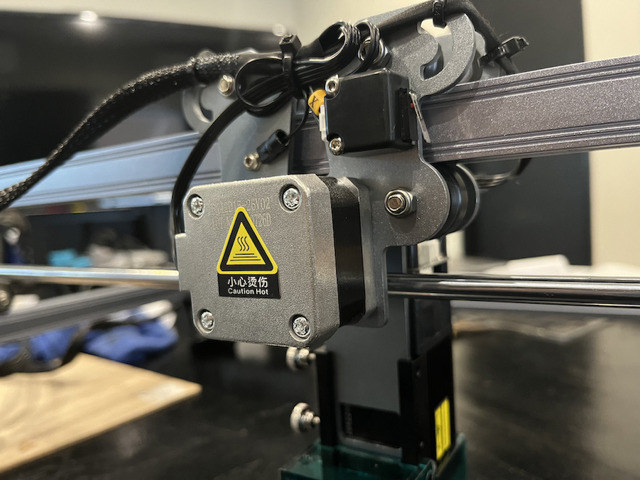
The system of the TOOCA Laser L1 laser engraver relies on the belt and pulley principle with a stepping motor and uses high-quality aluminum-profile roller wheels with roller bearings to help move in the various axes.
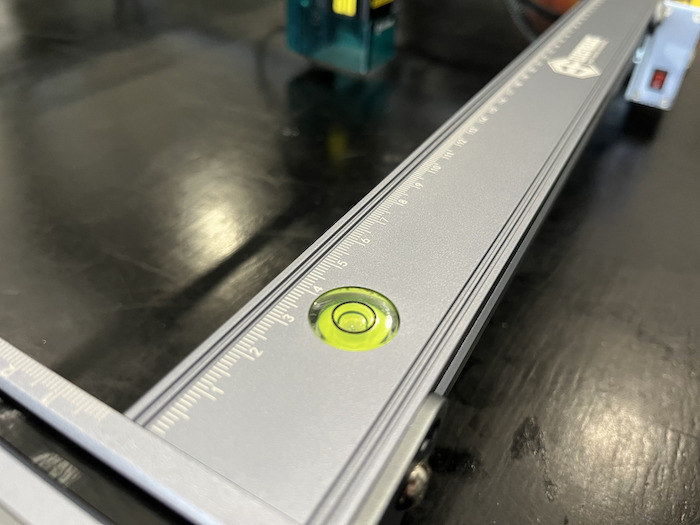
The TOOCA Laser L1 engraver also includes a bubble level to make sure the machine is properly leveled in order to increase the accuracy of the engraving/cutting and reduce the potential damage to the material.
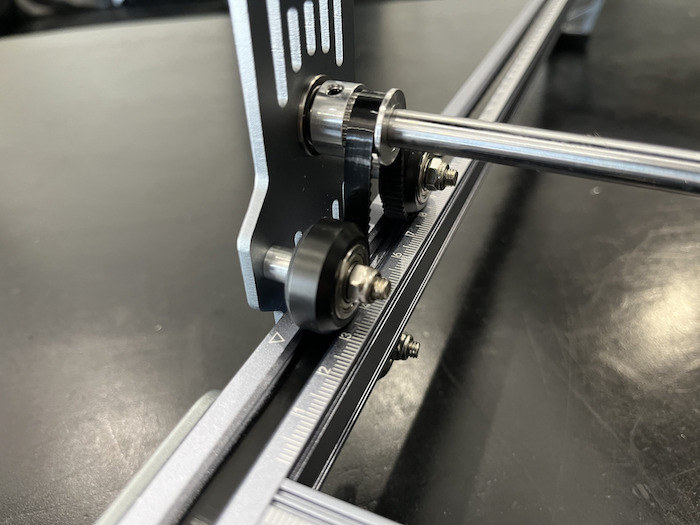
The machine’s X-axis and Y-axis feature millimeter markings to help the operator check the distance more accurately and easily.
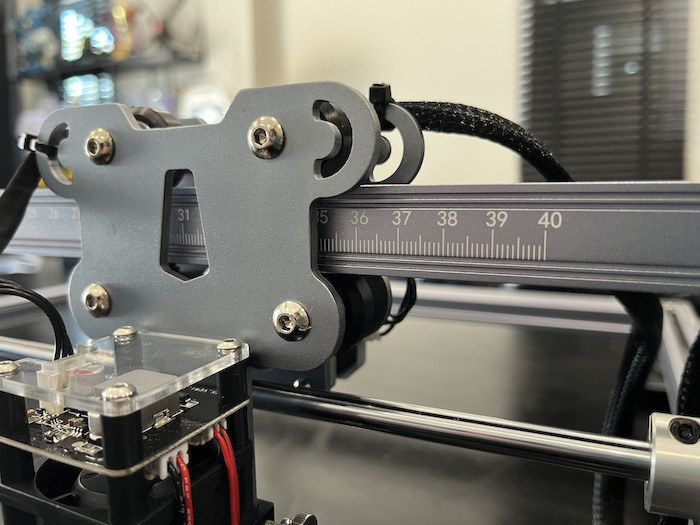 Y-axis frame with millimeter markings.
The TOOCA Laser L1 uses a high-quality BJ42D15 42 stepper motor powered by 5V and installed on the X-axis and Y-axis frames along with a Limit Switch End-Stop to check the end of each axis.
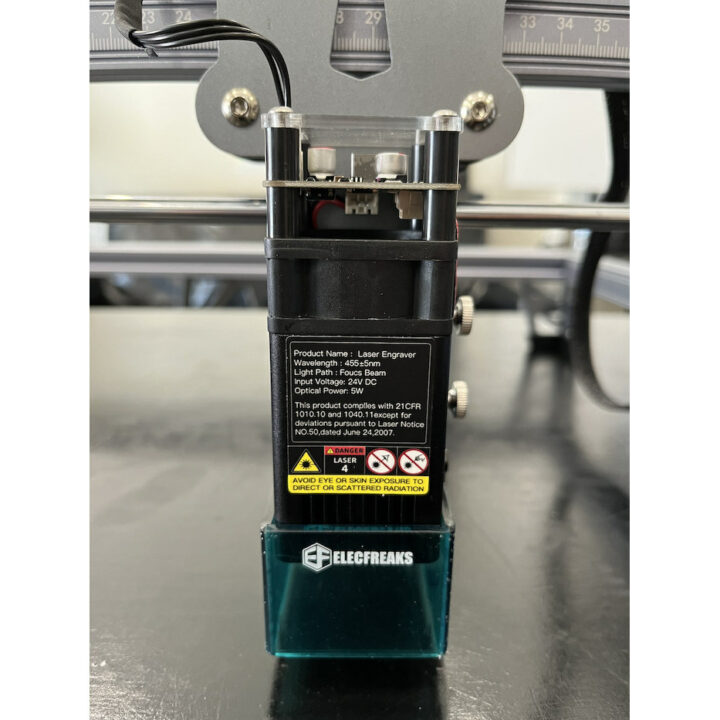
The laser head outputs light with a wavelength of 455 nm +/- 5 nm using 24V DC, up to 5 Watts of power and comes with a laser beam protection system with a blue light filter.
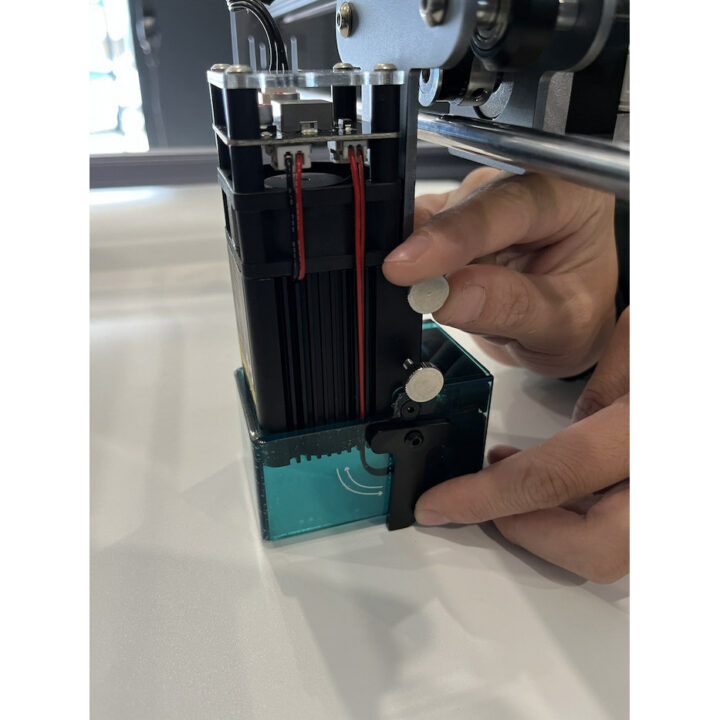
Focal distance adjustment on the TOOCA Laser L1
Adjusting the focus distance of the laser engraver is easy as you just need to turn 2 screw locks and the bottom position will have a leveler to hit the workpiece and tighten the lock. Then push the leveler back up to the top.
Safety goggles
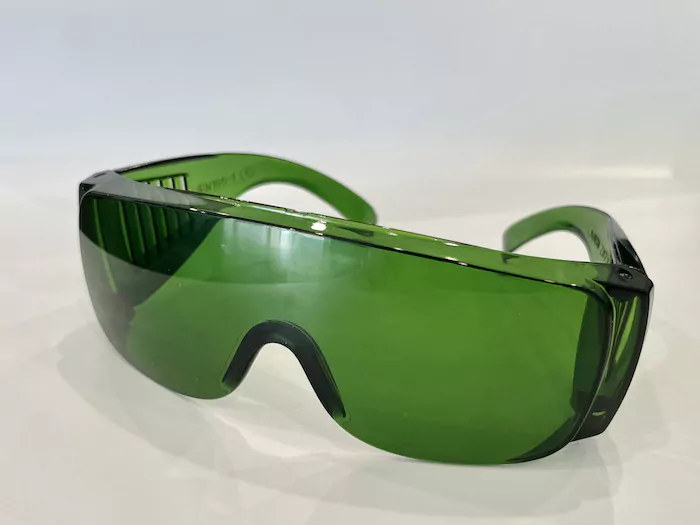
The TOOCA Laser L1 ships with goggles to prevent the beam from hitting the operator’s eyes. If we look at the light beam with the naked eye for a long time it will cause pain and irritation to the eyes, and therefore, the operator should wear glasses at all times.
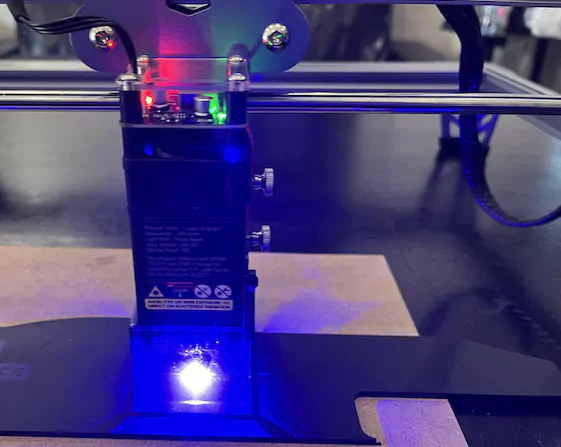
To demonstrate the usefulness of the goggles, we’ll take photos of the laser in operation with and without goggles. The TOOCA Laser L1 emits a strong blue light to engrave or cut the materials, and looking at it for too long may hurt your eyes.
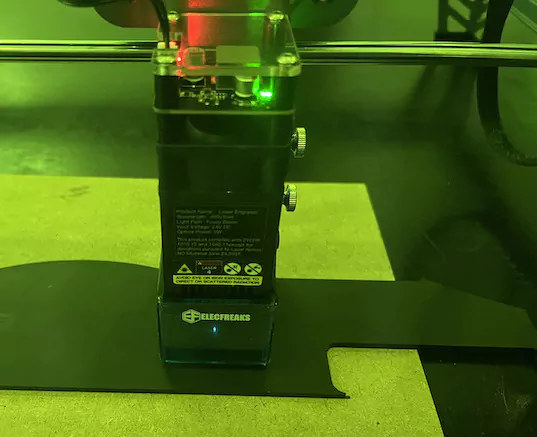
But when we use the green safety goggles, we can see the laser light is greatly attenuated making it safe to work.
Power supply
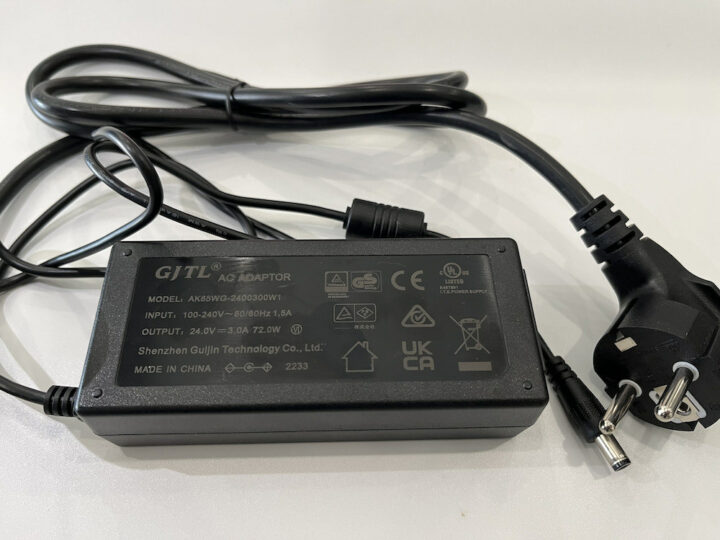
The laser engraver ships with a 24V/3A power adapter that works with 100-240V AC mains and features a 5.5 mm power jack.
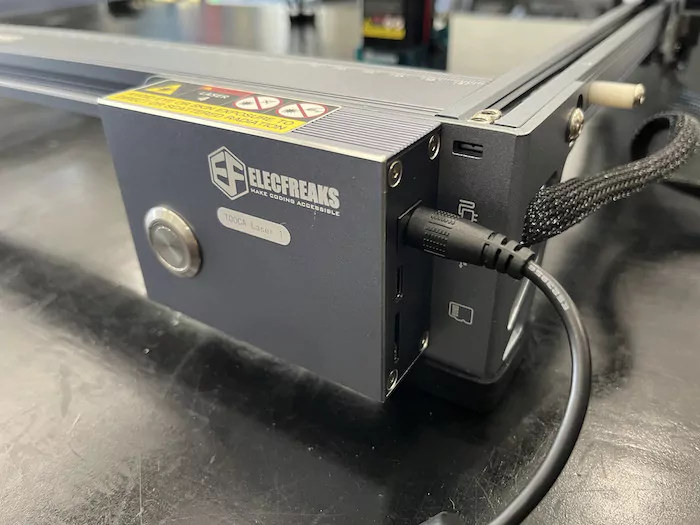
You just need to plug it into the machine’s controller, and you’re good to go.
TOOCA Laser L1 user manual
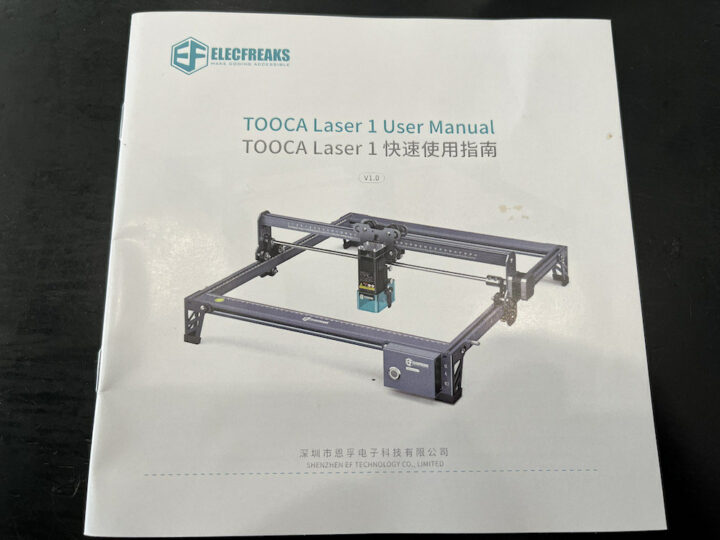
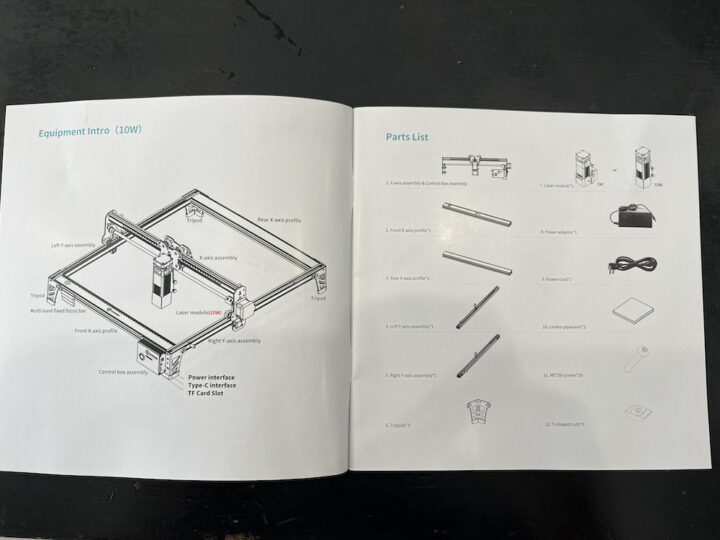
The laser engraver comes with an assembly guide that provides detailed instructions in English and Chinese. It’s actually called TOOCA Laser 1 on the user manual, instead of Laser L1.
The manual lists all parts from the kit and showcases all steps of the assembly in detail.
ELECFREAKS also provides online documentation with this user manual, other guides, as well as videos to help users get started.
A look at the buttons and ports on the TOOCA Laser L1 laser engraver
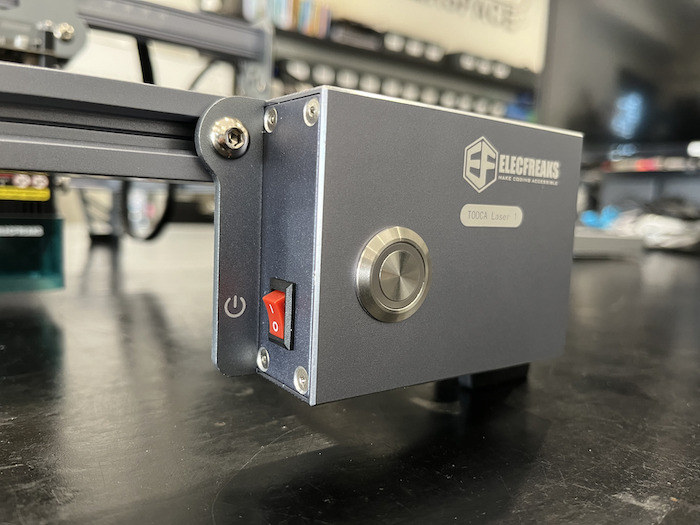
The machine will not automatically start as you connect the power, as there is an On-Off switch on the left side.
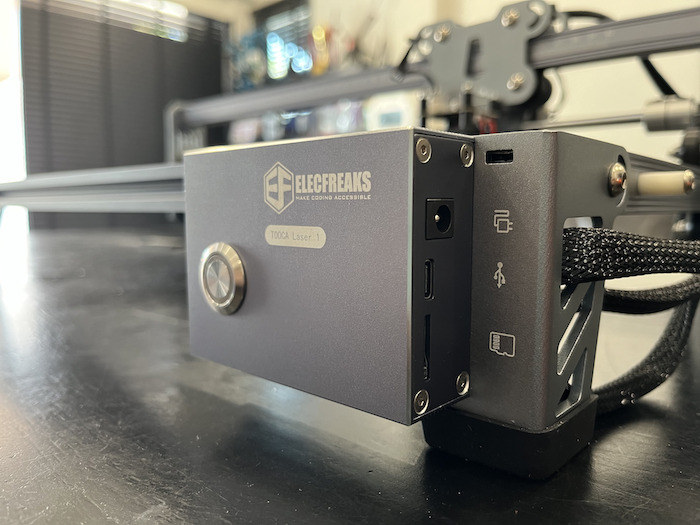
There are also 3 ports on the right side: The DC jack, a USB Type-C port to connect the laser engraver to the computer, and a MicroSD card socket used to store the files to be handled by the laser engraving machine.
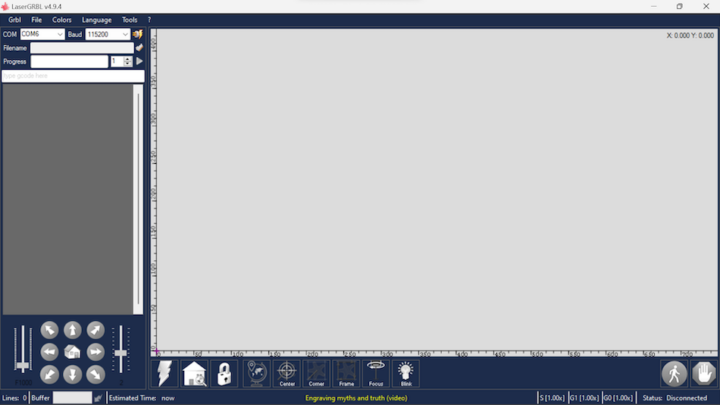
LaserGRBL program
We will use the free LaserGRBL program for Windows to control the TOOCA Laser L1 laser engraver. Once the installation is complete, let’s start the program.
You may also have to install CH340 drivers, but in most cases, this will probably not be necessary if you have already used other hardware with a CH340 USB to TTL controller such as Arduino boards.
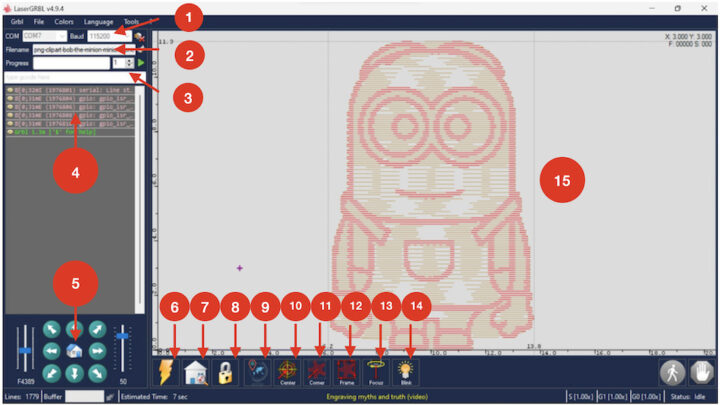
Before going further with our own design, let’s have a look at LaserGRBL user interface with the following main components:
- COM port and baudrate selection
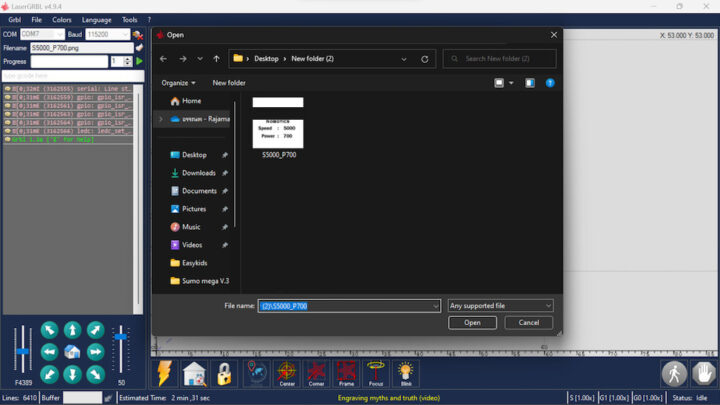
- File control to select the image file to be carved or cut out
- Manual commands (G-Code)
- (G-Code) command log and command return codes
- Jogging control to manually control the movement and speed of the laser engraver
- Stop the laser machine.
- Return to the starting point
- Position lock on each axis
- Adjust position to 0
- Move to the center of the template
- Move to the lower left corner of the template.
- Move to see the size of the workpiece.
- Momentary activation of the laser beam
- Test firing a laser beam at 10% power
- Preview area of the design
The software supports various file formats such as jpeg, jpg, png, bmp, svg and dxf.
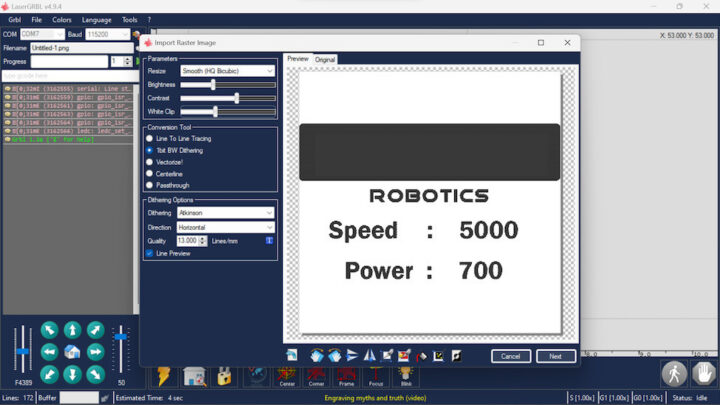
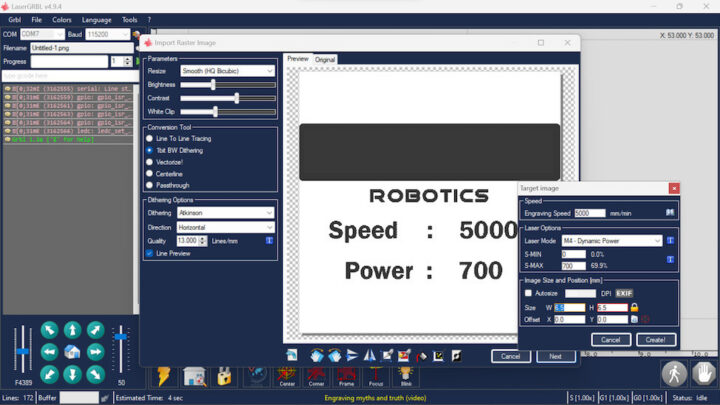
After importing the file, there will be a pop-up window as shown below. For engraving, select the 1bit BW Dithering option in the Conversion Tool section and click on Next.
The next step is to select the engraving speed, image size & position, as well as laser options, for example, S-MAX which is the power of the laser head in percent. Refer to the manual for the best laser values based on the material used. Finally, click on the Create! button.
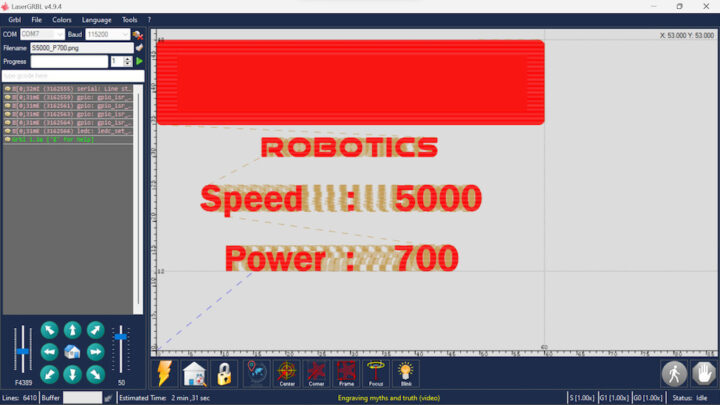
The program will then show a preview of the engraving process. If it looks OK, click on the green triangle on the left of the Progress area and the laser engraver will start its job.
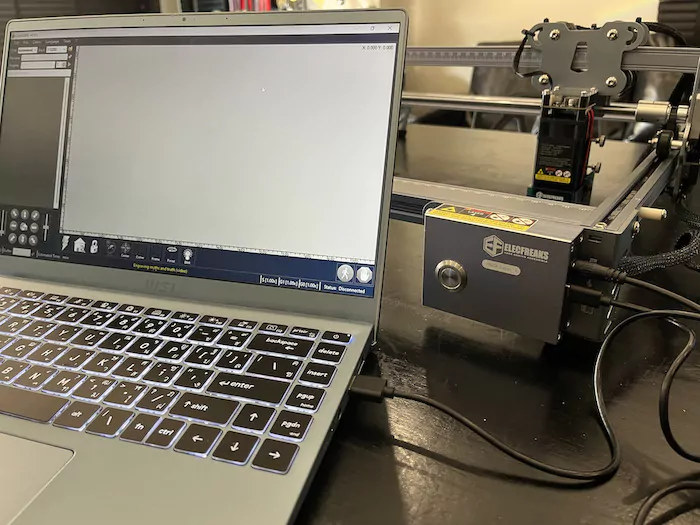
That’s provided you’ve already connected the machine to a host computer. In this review, we opted to connect the TOOCA Laser L1 laser machine to a laptop through a USB Type-C cable in order to customize the machine’s operation freely.
Testing engraving with different materials and settings
Plywood
We tested engraving with Plywood at 5,000mm/min speed and various laser power:
- Power 400 = 40% – Not clear
- Power 500 = 50% – Not clear
- Power 600 = 60% – Clearer but there are still some points that are not clear.
- Power 700 = 70% – Even clearer but there are still some points that are not clear.
So we tested again with a higher 7,000mm/min speed and higher power levels:
- Power 700 = 70% – Still not clear
- Power 800 = 80% – Not much better
- Power 900 = 90% – It’s much better
- Power 1000 = 100% – The resulting engraving is fairly good and of acceptable quality
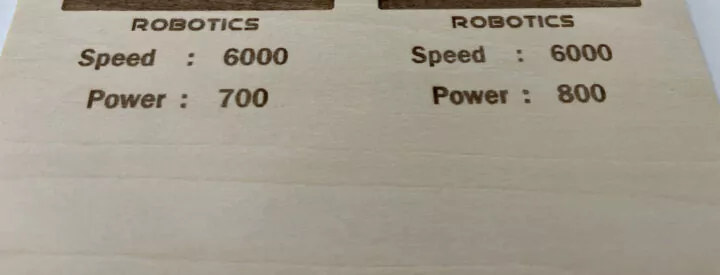
But it could still be improved, so since we have already tested at max power, we’ve reduced the speed to 6,000mm/min to further improve the quality of the engraving:
- Power 700 = 70% – Fairly clear and overall good quality
- Power 800 = 80% – Usable result
- Power 900 = 90% – Usable result
- Power 1000 = 100% – Usable result
We do not notice much difference with 10% increments.
Acrylic
We have tested laser engraving on an acrylic plate with 6,000 mm/min speed and power set to 600 (60%).
Silicone phone case
Tested at 6000 mm/min and power set to 50%.
Aluminum
Tested at 5000 mm/min and power set to 100%.
Laser cutting with TOOCA Laser L1
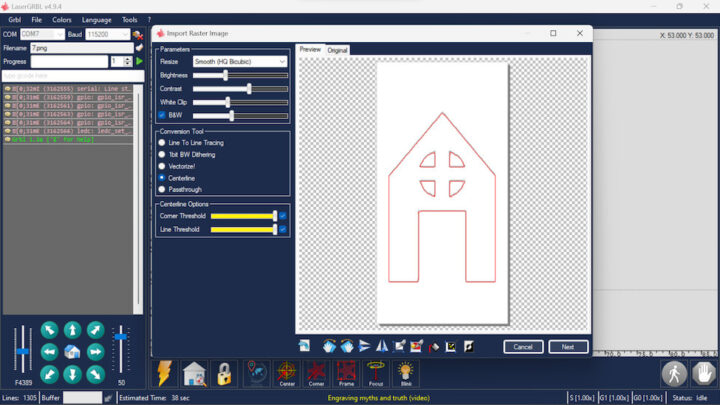
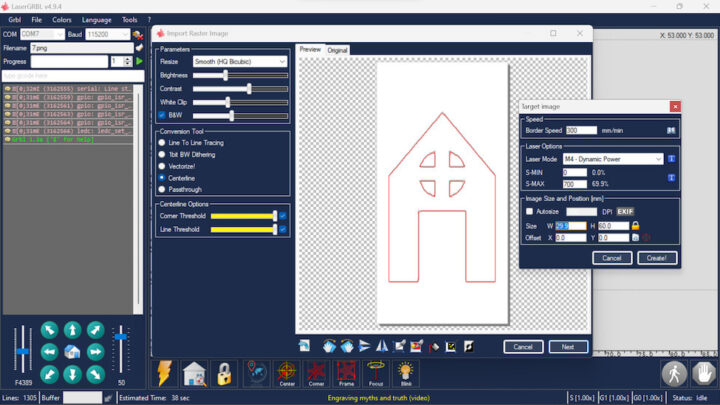
LaserGRBL can also be used for laser cutting. It is mostly the same procedure as engraving, except Vectorize! must be selected in the Conversion Tool section when importing the image.
Other settings are pretty much the same, except the speed must be quite lower to allow time for cutting the material.
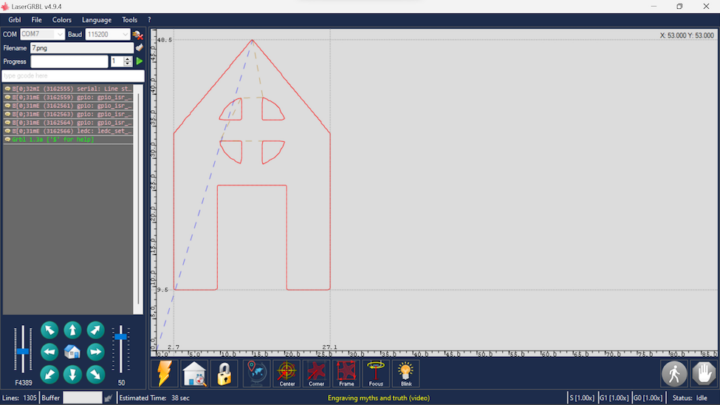
After click on on the Create! button, the program will show a preview of the laser cutting process, and if we want to go ahead we can just click on the green triangle on the left panel to start cutting.
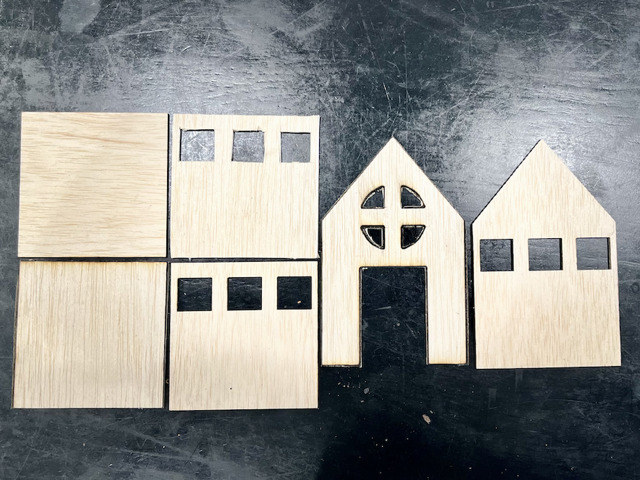
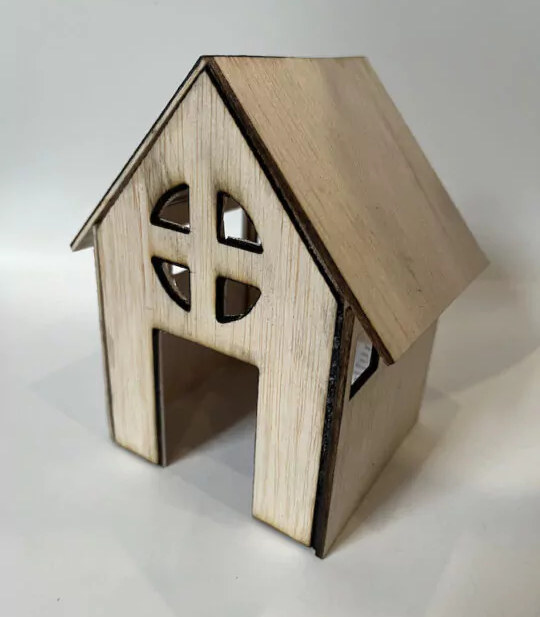
We designed a small house to put RGB lights in order to teach students how to create a realistic house.
After the cut is complete, we can glue the pieces together to make a small house.
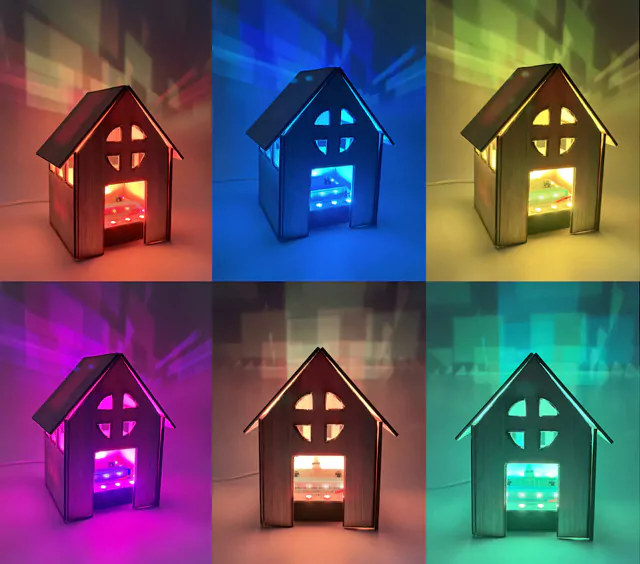
We also added some RGB lights controlled by a BBC micro:bit board to display various colors in the house.
Here’s a video of the assembly process and the final product with the RGB lights.
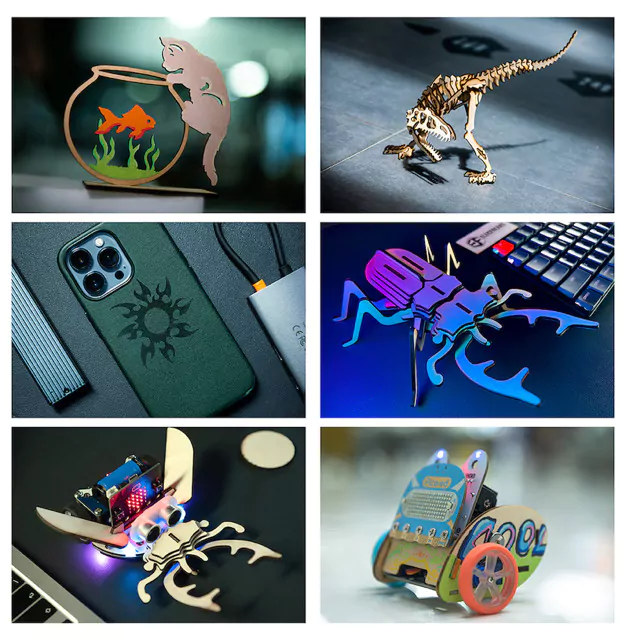
More laser engraving/cutting resources provided by ELECFREAKS
If you want to learn more about laser engraving and cutting with the TOOCA Lase L1 and other machines, ELECFREAKS has a WiKi with manuals, projects, and other resources.
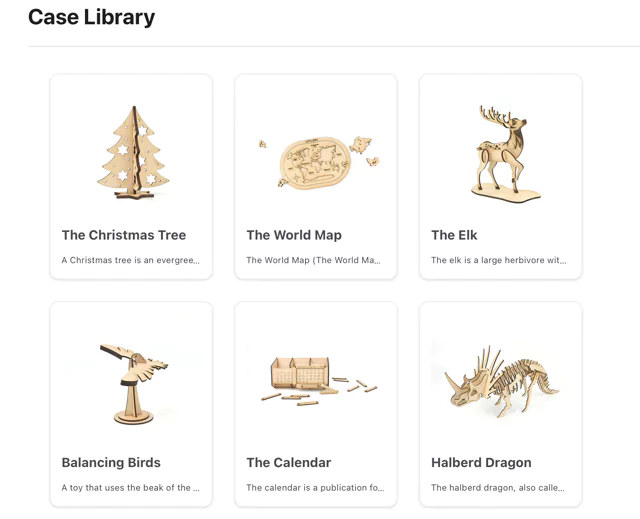
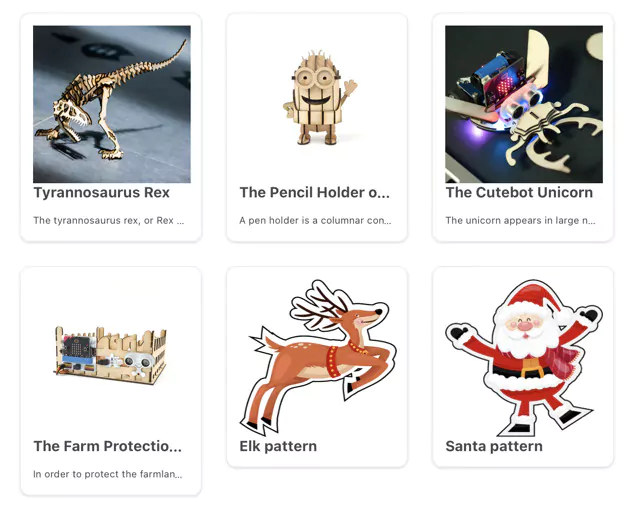
The company also provides some cute designs with all files required to get started quickly as well as the laser’s speed and power settings for each design and material. Visit the Case Library for more details.
Final words
The TOOCA Laser L1 (5W) is an entry-level engraving machine that will allow you to learn about Grbl and have fun while learning to design 2D pieces, and assembled them into objects. It is well-suited to classrooms teaching STEAM, and both children and adults can learn and play. I’d thank ELECFREAKS for sending this cost-effective laser engraving machine. It can be ordered from the ELECFREAKS shop for $319 with free shipping to the US, Canada, and Australia. The company also ships to Europe and other countries with an additional shipping fee.
Note: This is a translation from the Thai language review on CNX Software Thailand with some adaptations.

Jean-Luc started CNX Software in 2010 as a part-time endeavor, before quitting his job as a software engineering manager, and starting to write daily news, and reviews full time later in 2011.
Support CNX Software! Donate via cryptocurrencies, become a Patron on Patreon, or purchase goods on Amazon or Aliexpress


