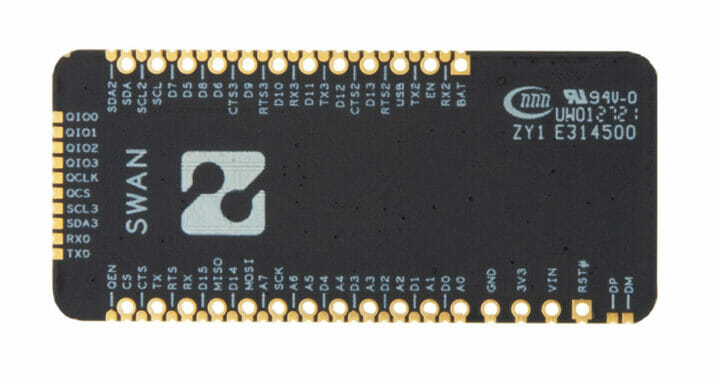
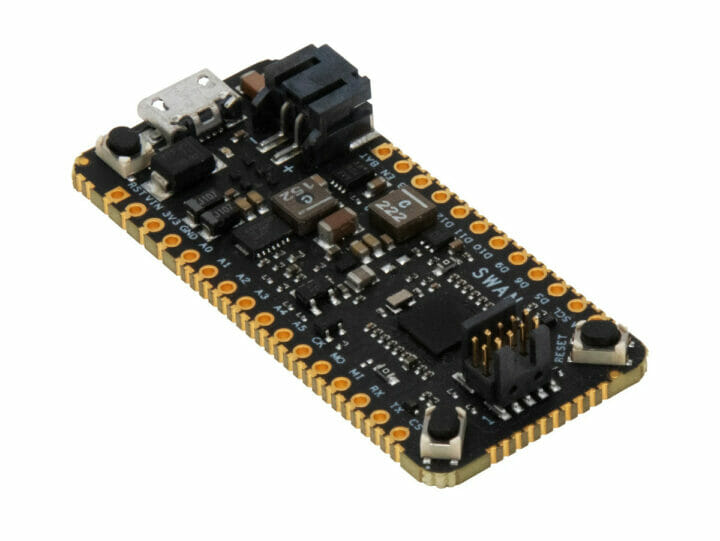
We’ve often written about Adafruit Feather-compatible boards in the past, but Blues Wireless Swan board is a little different, as the STM32L4-based board comes with castellated holes instead of just through holes which allows the board to expose up to 55 GPIOs, or 36 more pins than a traditional feather-compatible board.
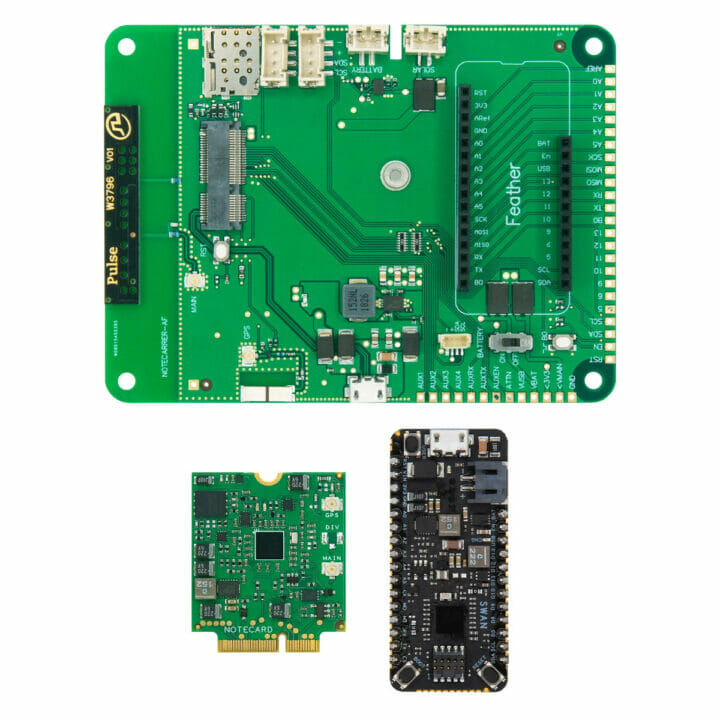
The company also introduced the “Feather Starter Kit for Swan” that enables the board to work with the company’s Notecard LTE Cat-M/NB-IoT M.2 modem that ships with 10-year (up to 500MB) of IoT connectivity, as well as GPS/GNSS connectivity.
The Swan board
- MCU – STMicro STM32L4R5 Arm Cortex-M4 microcontroller clocked at 120Mhz with 2MB of flash and 640KB of RAM
- USB – 1x Micro USB port for power and programming
- Castellated holes giving access to 55 GPIO including:
- 8x analog input
- 16x digital
- 4x I2C, 3x SPI
- 1x USB OTG full speed
- 1x 14-channel DMA
- 12-bit ADC, 2 x 12-bit DAC
- Debugging – Cortex Debug connector
- Misc – Red LED; Reset, Boot and user buttons; On-chip features: low-power RTC, TRNG, CRC calculation peripherals
- Power Supply
- 5V via Micro USB port
- JST PH connector for LiPo battery
- Consumption – 8uA in low-power mode
- Dimensions – Feather form factor
 The Swan board can be programmed with C/C++, Arduino, and CircuitPython, and the Cortex Debug connector used in conjunction with a debugger like the STLink-V3 Mini the use of more advanced development tools such as Visual Studio Code, IAR, and STM32CubeIDE. You’ll find more technical details about the board on the developers’ website.
Feather Starter Kit for Swan
The company also offers the Feather Starter Kit for Swan that adds the Notecarrier baseboard and a Notecard for cellular IoT connectivity. Somehow, the kit does not make use of the castellated holes at all, so I suppose you’d need to come up with your own carrier board, or solder some wires to the board if you intended to use those…
Since we’ve already written about Swan and Notecard hardware, let’s focus on the Notecarrier baseboard highlights:
- Adafruit Feather compatible header socket.
- USB – Micro USB port to power Notecarrier and provide a USB Serial command interface to Notecard.
- Cellular connectivity
- Notecard edge connector socket and mounting screw receptacle.
- Onboard cellular and active GPS antennas.
- External Nano-SIM slot for additional carrier connectivity.
- Expansion
- 2x Grove I2C ports
- JST SH 3.3V I2C port (Adafruit STEMMA QT and Sparkfun QWiic compatible)
- Breadboard compatible Notecard 13-pin header
- Breadboard compatible 24-pin Adafruit Feather breakout header
- Misc – Momentary button connected to Feather B0 pin.
- Power Supply
- JST PH connector for a LiPo battery.
- JST PH connector for a solar panel.
- Battery slide switch to disconnect the battery when not in use.
The kit also comes with 2 U.FL connector cables for connecting cellular and GPS antennas, and there’s no need for an external SIM card, although that’s an option, since the Notecard SoM comes with an embedded SIM (eSIM). The company says that with two lines of code you can send data to the cloud thanks to a JSON-based API that does most of the work. The kit can work with the company’s Notehub.io solutions for secure device connectivity, project and fleet management, as well as third-party cloud services.
Price and availability
Te Swan board is available now for respectively $25, while the Starter Kit is expected by October 31st, and can be pre-ordered for $99 with an NB-IoT and LTE-M Notecard.
Via Hackster.io

Jean-Luc started CNX Software in 2010 as a part-time endeavor, before quitting his job as a software engineering manager, and starting to write daily news, and reviews full time later in 2011.
Support CNX Software! Donate via cryptocurrencies, become a Patron on Patreon, or purchase goods on Amazon or Aliexpress


