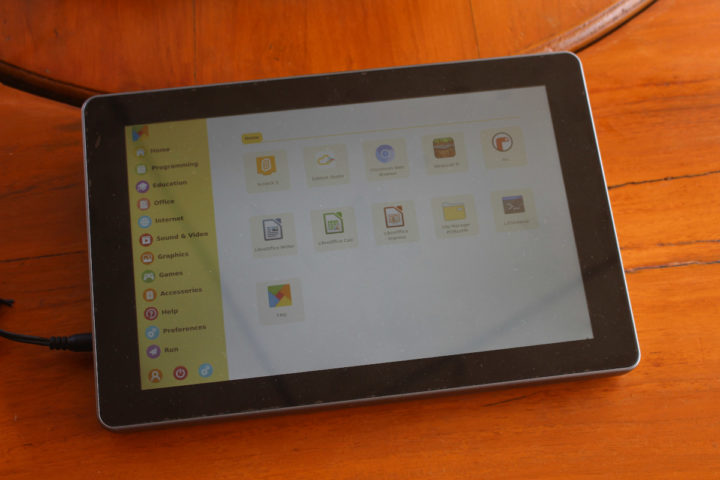
I started RasPad 3 review last week with an unboxing of the tablet shell for Raspberry Pi 4, together with assembly instructions, and a first boot after flashing Raspad OS to the system.
In the first part of the review, I mentioned that I’d probably focus the remainder of the review on Ezblock Studio visual programming IDE, as the rest of the software is almost the same as using a standard Raspberry Pi 4, the other difference being the touchscreen-friendly RasPad launcher.
But Sunfounder explained to me it would be hard to check out Ezblock as it’s designed to control robots and other hardware platforms, and requires an extra HAT (see Kickstarter campaign) to allow the Ezblock APP to connect through Bluetooth (it cannot be directly linked to Raspberry Pi through the built-in Bluetooth). Here’s an example of a robot that is compatible with Ezblock Studio: Picar-X.
Finally, I was also told Ezblock is not necessarily related to RasPad 3 and Raspad OS, so I’ll mostly skip the IDE, and focus on other parts of the review. Notably, workarounds for some issues I encountered, benchmarks to check for eventual thermal throttling, and some use cases where Raspad 3 form factor and features may be suitable.
RasPad 3 orientation & motion sensor calibration
The first time I used RasPad 3, everything seemed fine, until I decided to put it on a tablet and would automatically switch to portrait mode, making the tablet unusable that way.
So I went to enable SSH in the settings as it is disabled by default (good for security), and accessed the terminal using username “pi” and password “raspad”. From here, I disabled the motion sensor (I2C) and forced the display to landscape in /boot/config.txt:
|
1 2 3 4 5 6 7 |
# Uncomment some or all of these to enable the optional hardware interfaces #dtparam=i2c_arm=on #dtparam=i2s=on #dtparam=spi=on # Force landscape mode lcd_rotate=0 |
You can also set lcd_rotate to 1 to rotate 90 degrees, 2 (180 degrees), or 3 (270 degrees). While I was in the terminal, I also configured the system to remotely take screenshots over SSH, and I took the occasion to update the system with:
|
1 |
sudo apt full-upgrade |
since the image is adapted from Raspberry Pi OS released last year.
I notified Sunfounder about the issue and asked if it was possible to calibrate the sensor, and indeed, they shortly replied with a solution. So I reverted my changes to config.txt and ran the command:
|
1 |
auto-rotator calibrate |
Press “s” to start calibration, rotate the device 360 degrees around 3-axis, and press Ctrl-C once done.
|
1 2 3 4 5 6 7 8 9 10 11 12 13 14 15 16 17 18 19 20 21 22 23 24 25 26 27 28 29 30 31 32 33 34 35 36 37 38 39 40 41 42 43 44 45 46 47 48 49 50 51 52 53 54 |
press the s to start calibrate, quit use ctrl c s start_calibrating cal max_list: [0, 600, 0] min_list: [-1468, 0, -1845] max_list: [0, 600, 0] min_list: [-1468, 0, -1845] max_list: [0, 600, 0] min_list: [-1488, 0, -1845] max_list: [0, 600, 0] min_list: [-1628, 0, -1845] max_list: [0, 766, 0] min_list: [-1665, 0, -1845] max_list: [0, 766, 0] min_list: [-1787, 0, -1845] max_list: [0, 766, 0] min_list: [-1787, 0, -1845] max_list: [0, 766, 0] min_list: [-1787, 0, -2062] max_list: [0, 766, 0] min_list: [-1787, 0, -2437] max_list: [0, 766, 0] min_list: [-1787, 0, -2517] max_list: [0, 793, 0] min_list: [-1787, 0, -2517] max_list: [0, 863, 0] min_list: [-1787, 0, -2570] max_list: [0, 1079, 0] min_list: [-1787, 0, -2766] max_list: [0, 1306, 0] min_list: [-1787, 0, -2936] max_list: [0, 1340, 0] min_list: [-1787, 0, -3112] max_list: [0, 1340, 0] min_list: [-1787, 0, -3112] max_list: [0, 1340, 0] min_list: [-1787, 0, -3112] max_list: [0, 1340, 0] min_list: [-1787, 0, -3112] max_list: [0, 1396, 0] min_list: [-1787, 0, -3112] max_list: [0, 1766, 0] min_list: [-1787, 0, -3112] max_list: [0, 1965, 0] min_list: [-1787, 0, -3112] max_list: [0, 1965, 0] min_list: [-1787, 0, -3112] max_list: [0, 1965, 0] min_list: [-1787, 0, -3112] max_list: [0, 1965, 0] min_list: [-1787, 0, -3112] max_list: [0, 1965, 0] min_list: [-1787, 0, -3112] max_list: [0, 1965, 0] min_list: [-1787, 0, -3112] max_list: [0, 2000, 0] min_list: [-1787, 0, -3112] max_list: [0, 2000, 0] min_list: [-1787, 0, -3112] max_list: [0, 2000, 0] min_list: [-1969, 0, -3112] max_list: [0, 2000, 0] min_list: [-2011, 0, -3112] max_list: [0, 2000, 0] min_list: [-2011, 0, -3112] max_list: [0, 2000, 0] min_list: [-2011, 0, -3112] max_list: [0, 2000, 289] min_list: [-2011, 0, -3112] max_list: [0, 2000, 406] min_list: [-2011, 0, -3112] max_list: [0, 2000, 406] min_list: [-2011, 0, -3112] max_list: [0, 2000, 406] min_list: [-2011, 0, -3112] max_list: [0, 2000, 406] min_list: [-2011, 0, -3112] max_list: [0, 2000, 406] min_list: [-2011, 0, -3112] max_list: [0, 2000, 406] min_list: [-2011, 0, -3112] max_list: [0, 2000, 2677] min_list: [-2011, 0, -3112] max_list: [328, 2000, 2677] min_list: [-2011, 0, -3112] max_list: [534, 2348, 2677] min_list: [-2011, 0, -3112] ... max_list: [2108, 4461, 3638] min_list: [-3833, -3308, -4683] max_list: [2108, 4461, 3638] min_list: [-3833, -3308, -4683] max_list: [2108, 4461, 3638] min_list: [-3833, -3308, -4683] max_list: [2108, 4461, 3638] min_list: [-3833, -3308, -4683] max_list: [2108, 4461, 3638] min_list: [-3833, -3308, -4683] ^Coffset: (-862.5, 576.5, -522.5) |
Then log out/in again or reboot, and it’s now working fine.
RasPad OS User Interface
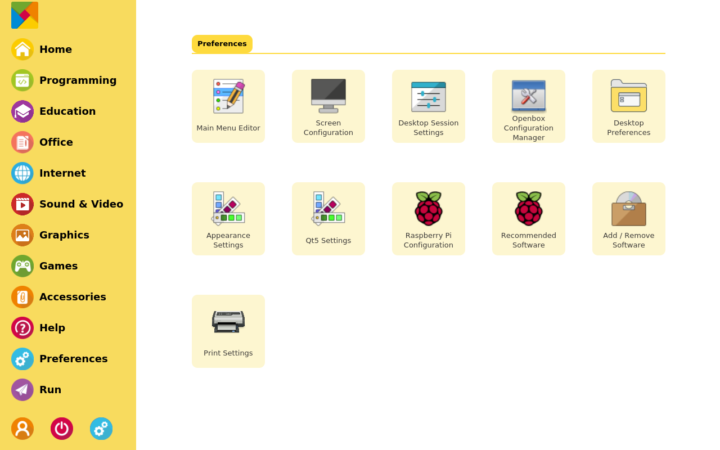
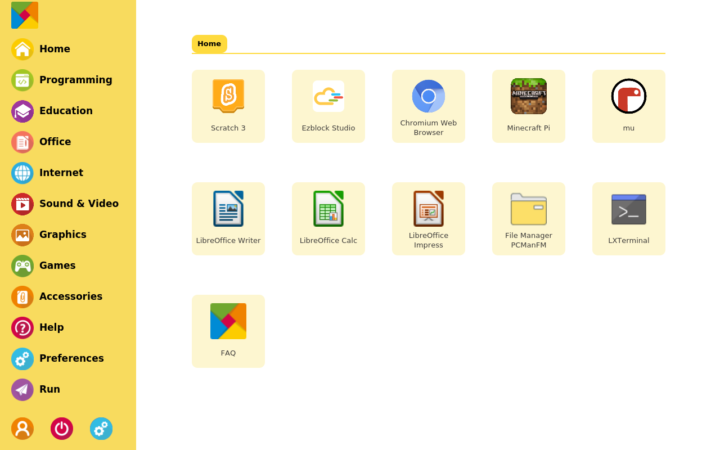
While RasPad OS is based on Raspberry Pi OS, the interface is quite different due to the customer launcher.
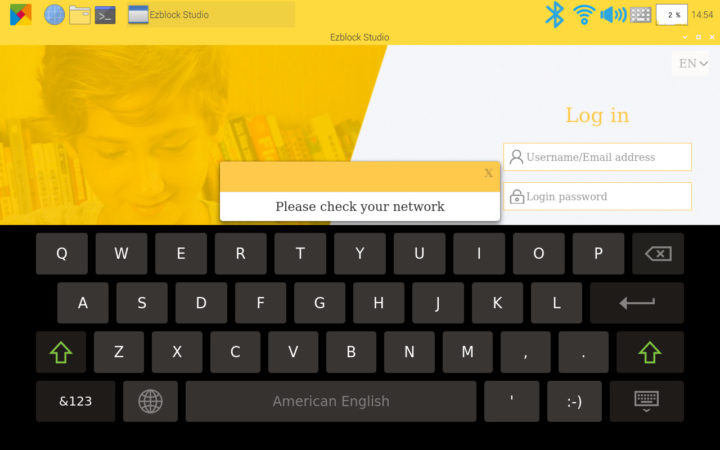
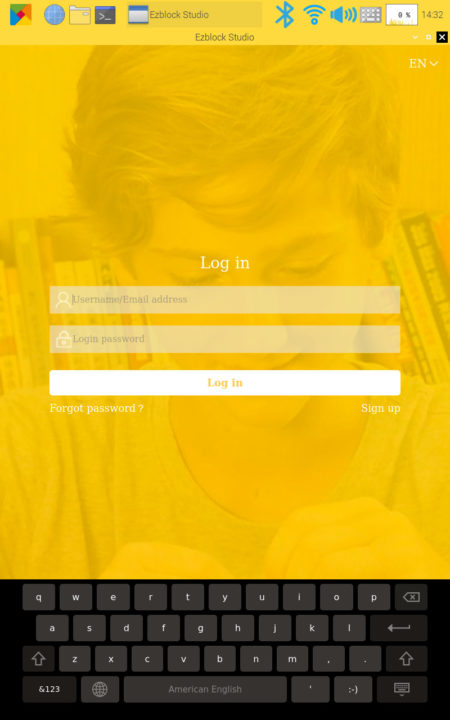
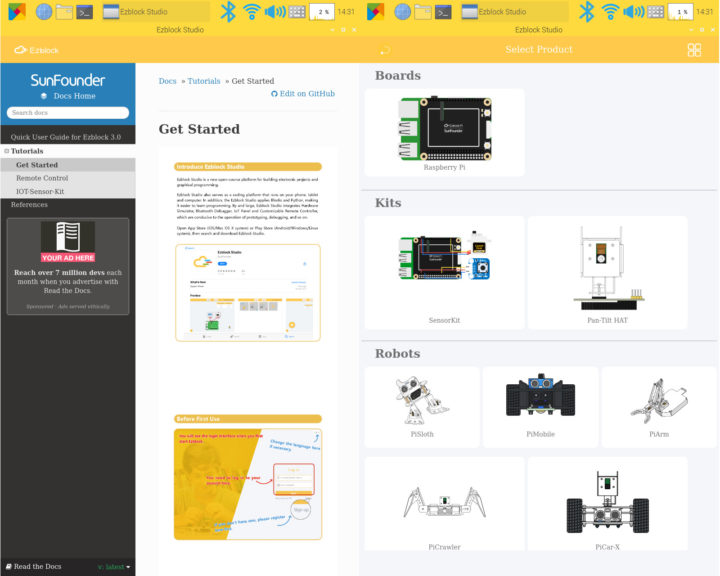
You’ll be able to log in or sign in, and with a black keyboard taking half the screen in landscape mode. Better switch to portrait mode!
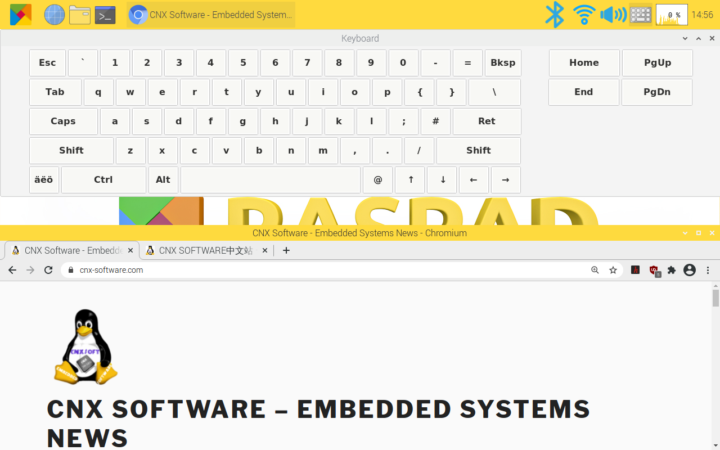
As a side note, that keyboard is only available in Ezblock Studio, and other programs rely on a top keyboard that can be shown from the top bar. The keyboard does not show automatically when selecting a field.
Back to Ezblock Studio. After logging in, we’ll get brought to the getting started guide, which tells us to tap on an icon to select a product that is either Ezblock HAT, some kits based on Ezblock HAT, or robots.
AFAICT, settings are also the same as with any other Raspberry Pi SBC, but just presented in a different way.
Raspad 3 Benchmarks & Thermal Design
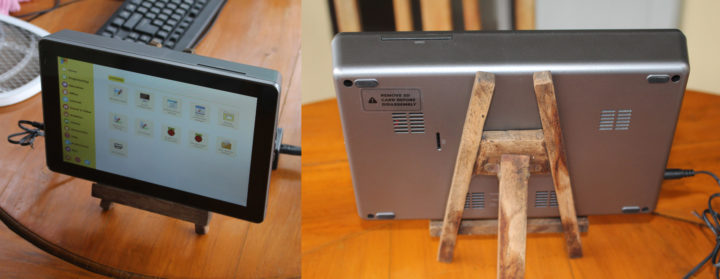
When I first put Raspad 3 tablet in the hands of my girlfriend, she said it was quite heavy (960 grams), and then asked why it was noisy (that’s the fan). But I noticed something interesting… The noise almost entirely goes away when the tablet is placed on a table, as the holes for air intake are blocked which could lead to overheating and then throttling.
So I decided to run benchmarks twice. Once on a stand with optimal airflow, and the second time on a table.
|
1 2 3 4 5 6 7 8 |
sudo /bin/bash ./sbc-bench.sh -c Average load is 0.1 or higher (way too much background activity). Waiting... System too busy for benchmarking: 14:42:53 up 16 min, 3 users, load average: 0.34, 0.39, 0.28 System too busy for benchmarking: 14:42:58 up 16 min, 3 users, load average: 0.31, 0.38, 0.27 System too busy for benchmarking: 14:43:03 up 17 min, 3 users, load average: 0.28, 0.38, 0.27 System too busy for benchmarking: 14:43:08 up 17 min, 3 users, load average: 0.26, 0.37, 0.27 |
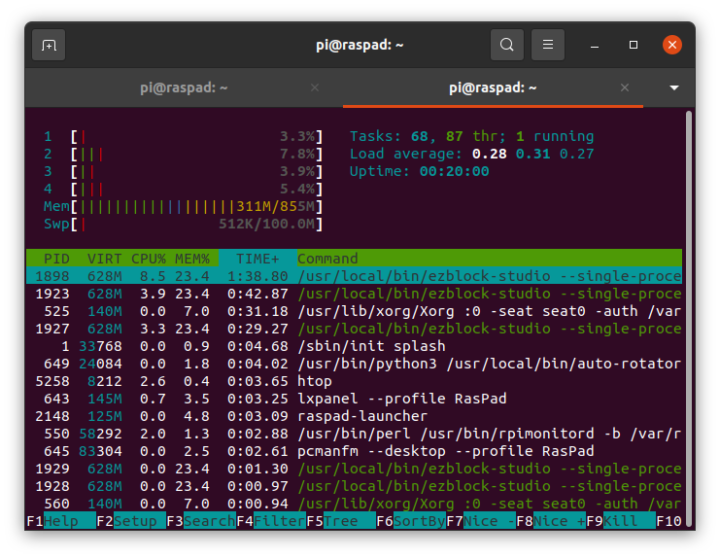
But it would never start showing too high CPU usage. After looking at the CPU usage in htop I understood why.
|
1 2 3 4 5 6 7 8 9 10 11 12 13 14 15 16 17 18 19 20 21 22 23 24 25 26 27 28 |
sbc-bench v0.7.7 Installing needed tools. This may take some time... Done. Checking cpufreq OPP... Done. Executing tinymembench. This will take a long time... Done. Executing OpenSSL benchmark. This will take 3 minutes... Done. Executing 7-zip benchmark. This will take a long time... Done. Checking cpufreq OPP... Done. It seems neither throttling nor frequency capping has occured. Memory performance: memcpy: 2455.5 MB/s memset: 3303.4 MB/s (0.3%) 7-zip total scores (3 consecutive runs): 5612,5617,5582 OpenSSL results: type 16 bytes 64 bytes 256 bytes 1024 bytes 8192 bytes 16384 bytes aes-128-cbc 62273.63k 76687.40k 82957.31k 84572.84k 85196.80k 85011.11k aes-128-cbc 62343.48k 76551.34k 82743.38k 84629.85k 85000.19k 85054.81k aes-192-cbc 56046.23k 67203.46k 72001.96k 73211.22k 73463.13k 73580.54k aes-192-cbc 56025.64k 67350.57k 71886.17k 73306.11k 73626.97k 73394.86k aes-256-cbc 50845.90k 59917.72k 63506.35k 64613.72k 64795.99k 64831.49k aes-256-cbc 50566.05k 59933.99k 63601.49k 64433.49k 64875.18k 64880.64k Full results uploaded to http://ix.io/3qws. Please check the log for anomalies (e.g. swapping or throttling happenend) and otherwise share this URL. |
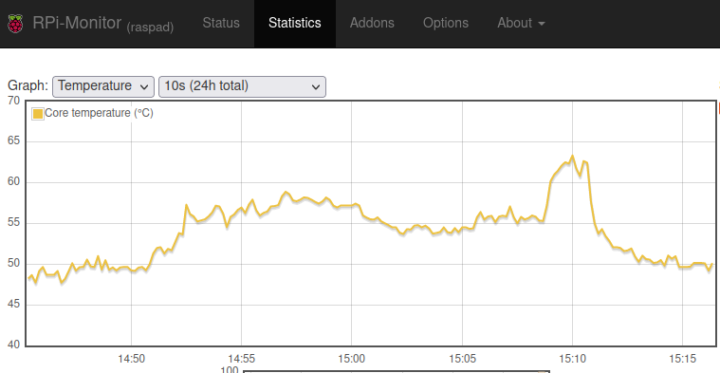
Let’s move the Raspad 3 tablet flat on a table, and wait for a few minutes to check if the idle temperature is higher.
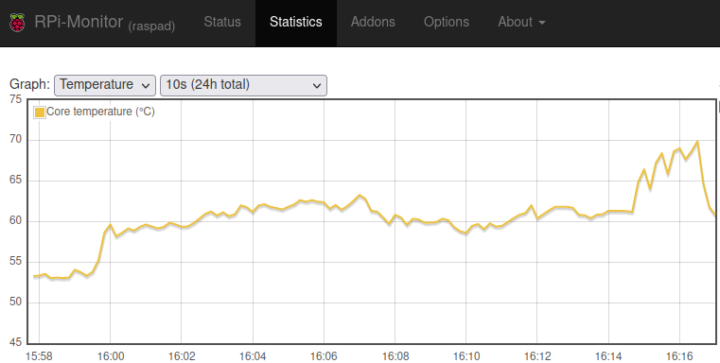
It is, but not that much more at around 53°C. I can imagine the result could be worse on a different desk/table, as my table here is not perfectly flat, but still reduces the airflow.
Let’s run sbc-bench.sh again and see what the results are:
|
1 2 3 4 5 6 7 8 9 10 11 12 13 14 15 16 17 18 19 20 21 22 23 24 25 26 27 28 |
sbc-bench v0.7.7 Installing needed tools. This may take some time... Done. Checking cpufreq OPP... Done. Executing tinymembench. This will take a long time... Done. Executing OpenSSL benchmark. This will take 3 minutes... Done. Executing 7-zip benchmark. This will take a long time... Done. Checking cpufreq OPP... Done. It seems neither throttling nor frequency capping has occured. Memory performance: memcpy: 2560.6 MB/s memset: 3388.4 MB/s (0.2%) 7-zip total scores (3 consecutive runs): 5641,5760,5714 OpenSSL results: type 16 bytes 64 bytes 256 bytes 1024 bytes 8192 bytes 16384 bytes aes-128-cbc 62341.77k 76635.75k 83090.77k 84531.20k 85215.91k 85235.03k aes-128-cbc 62350.70k 76483.20k 83012.52k 84758.53k 85139.46k 85235.03k aes-192-cbc 56086.06k 67255.66k 71826.43k 73249.11k 73471.32k 73547.78k aes-192-cbc 56151.22k 67437.97k 71932.84k 73364.14k 73730.73k 73602.39k aes-256-cbc 50706.82k 60020.46k 63566.76k 64635.90k 64935.25k 64741.29k aes-256-cbc 50739.24k 60028.84k 63679.57k 64560.13k 64907.95k 64946.18k Full results uploaded to http://ix.io/3qwV. Please check the log for anomalies (e.g. swapping or throttling happenend) and otherwise share this URL. |
Results are about the same, and throttling did not occur either.
What can I use Raspad 3 for?
While Sunfounder calls the Raspad 3 a Raspberry Pi 4 tablet, people should not think they are getting a tablet when purchasing Raspad 3, unless they are fine with the thickness (49mm max), a close to one kilogram weight or about twice as heavy as a standard 10.1-inch tablet, noise due to the fan, and short battery life again due to the fan plus unoptimized apps like Ezblock Studio that uses about 15% of the CPU usage while idle. For reference, after a full charge, the battery was fully depleted after four hours not doing that much apart from updating the OS, and taking a few screenshots over SSH.
So instead, I’d rather see Raspad 3 as a mini PC with integrated display, a bit like GOLE 10 Windows 10 mini PC, but using a Raspberry Pi 4 and Linux. I can think of two main use cases:
- As a control terminal (HMI) for a 3D printer, smart home display, etc… where the inclined touchscreen display might make a more convenient to use a graphical interface, and the USB ports and GPIO header can help you connect a webcam, control I/Os directly from the device.
- For the education market, in combination with Ezblock Studio program, and hardware including robot kits sold by the company.
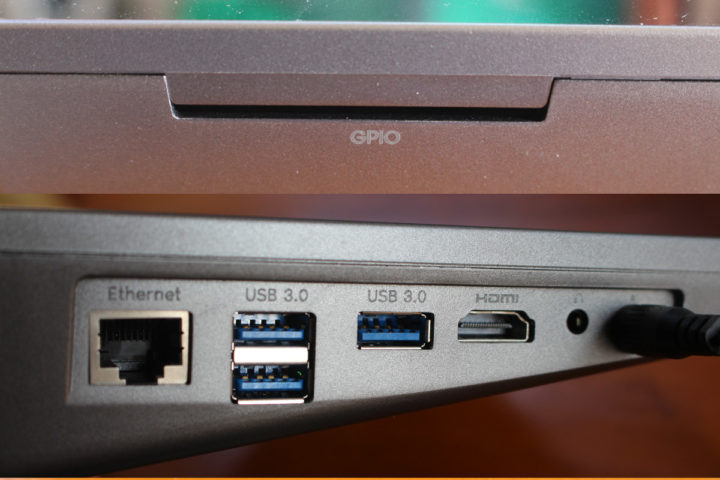
Note that if you want to use the GPIO, you’d need to separately purchase something like T-Cobbler to get easy access to the pin outside of the “tablet”. You’d also need to take apart the enclosure each time you insert or remove the GPIO ribbon, which may not be very convenient.
I’d like to thank Sunfounder for sending RasPad 3 for review. If you think think it’s for you, Sunfounder sells the mini PC on Amazon or directly on RasPad website for $219 and up. Note that does not include the Raspberry Pi 4 SBC nor a microSD card.

Jean-Luc started CNX Software in 2010 as a part-time endeavor, before quitting his job as a software engineering manager, and starting to write daily news, and reviews full time later in 2011.
Support CNX Software! Donate via cryptocurrencies, become a Patron on Patreon, or purchase goods on Amazon or Aliexpress


