
The Raspberry Pi Foundation introduced the Linux-capable Raspberry Pi board in 2012 to teach programming and computers. Since then, the company has introduced models with faster processors, more memory, faster interfaces, culminating with the launch of Raspberry Pi 4 in 2019.
The board also comes with a 40-pin header to teach electronics, but relying on a Linux SBC to blink a LED, gather data from sensors, or controlling servos is a bit over the top. So the Raspberry Pi Foundation decided to create their own MCU board called Raspberry Pi Pico powered by RP2040 dual-core Cortex-M0+ microcontroller designed in-house by the foundation.
Raspberry Pi RP2040 microcontroller
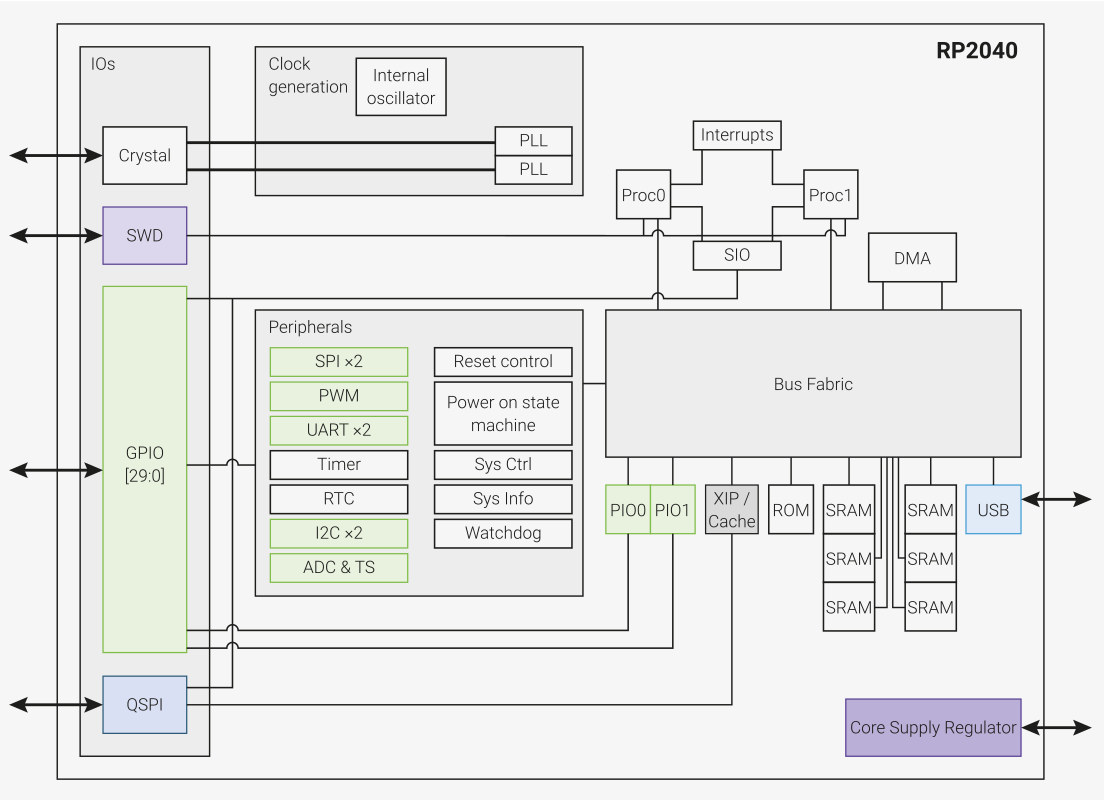
Before we look at the board, let’s check out RP2040 specifications highlights:
- Core – Dual Cortex M0+ cores up to 133 MHz (48MHz default)
- Memory – 264 kB of embedded SRAM in 6 banks
- Peripherals
- 30 multifunction GPIO
- 6 dedicated IO for SPI Flash (supporting XIP)
- Dedicated hardware for commonly used peripherals
- Programmable IO for extended peripheral support
- 4 channel ADC with an internal temperature sensor, 0.5 MSa/s, 12-bit conversion
- USB 1.1 Host/Device
- Debugging – SWD Debug interface
- Package – QFN56 7x7mm
If you wonder why RP2040 is called that way, RP stands for “Raspberry Pi”, “2” is the number of cores, “0” refers to the MCU core used (e.g. Cortex-M0+), and the last two number “4” and “0” use floor(log2(x/16k)) formula to calculate a number representing the SRAM and non-volatible storage capacity inside the chip.
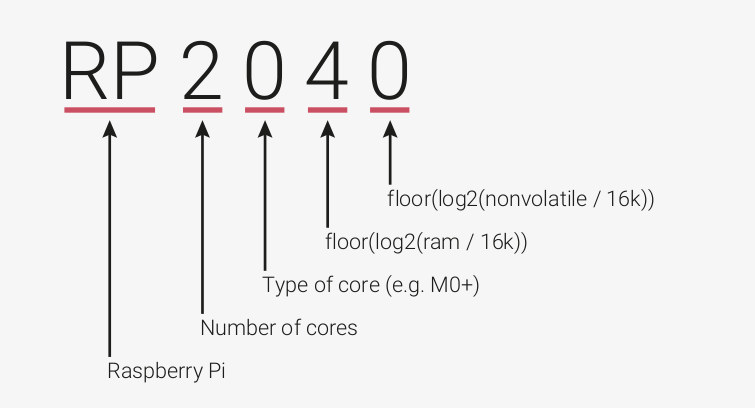
So for example, if the Raspberry Pi Foundation decided to create a single-core Cortex-M4 microcontroller with 264KB SRAM and 256KB storage, it could be named RP1444. Not sure how a dual-core Cortex-M4/M0+ MCU would be called though.
But why create a custom MCU? I’m pretty sure they could have found an existing microcontroller that does the job. But in my humble opinion, they did so to avoid having people copy the hardware too easily and use their software. They’ve probably seen what happens with the Arduino clones, and the Raspberry Pi Foundation has made it clear they do NOT allow other Broadcom BCMxxxx boards to run Raspberry Pi software in the past. As we’ve seen with STM32 fakes and clones, it’s still possible to copy the chip, but it’s much more difficult than just making another PCB.
Another reason is that they can now sell RP2040 microcontroller to makers creating their own projects/products, and this will happen as they provide a document called “Hardware design with the RP2040” to help people design their own boards and products around the microcontroller. [Update: Adafruit, Arduino, Sparkfun, and Pimoroni have already announced RP2040 boards]
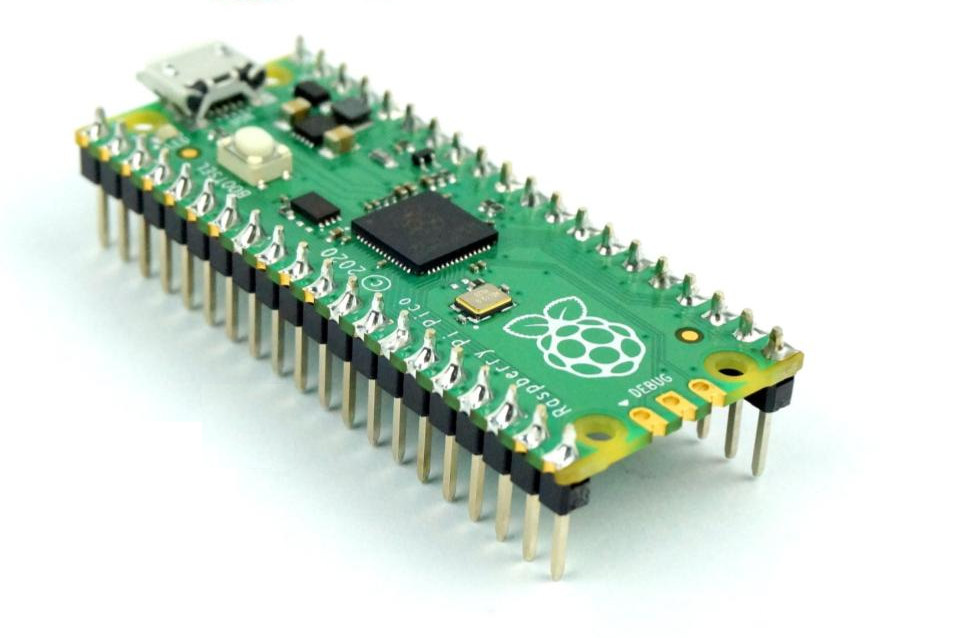
Raspberry Pi Pico
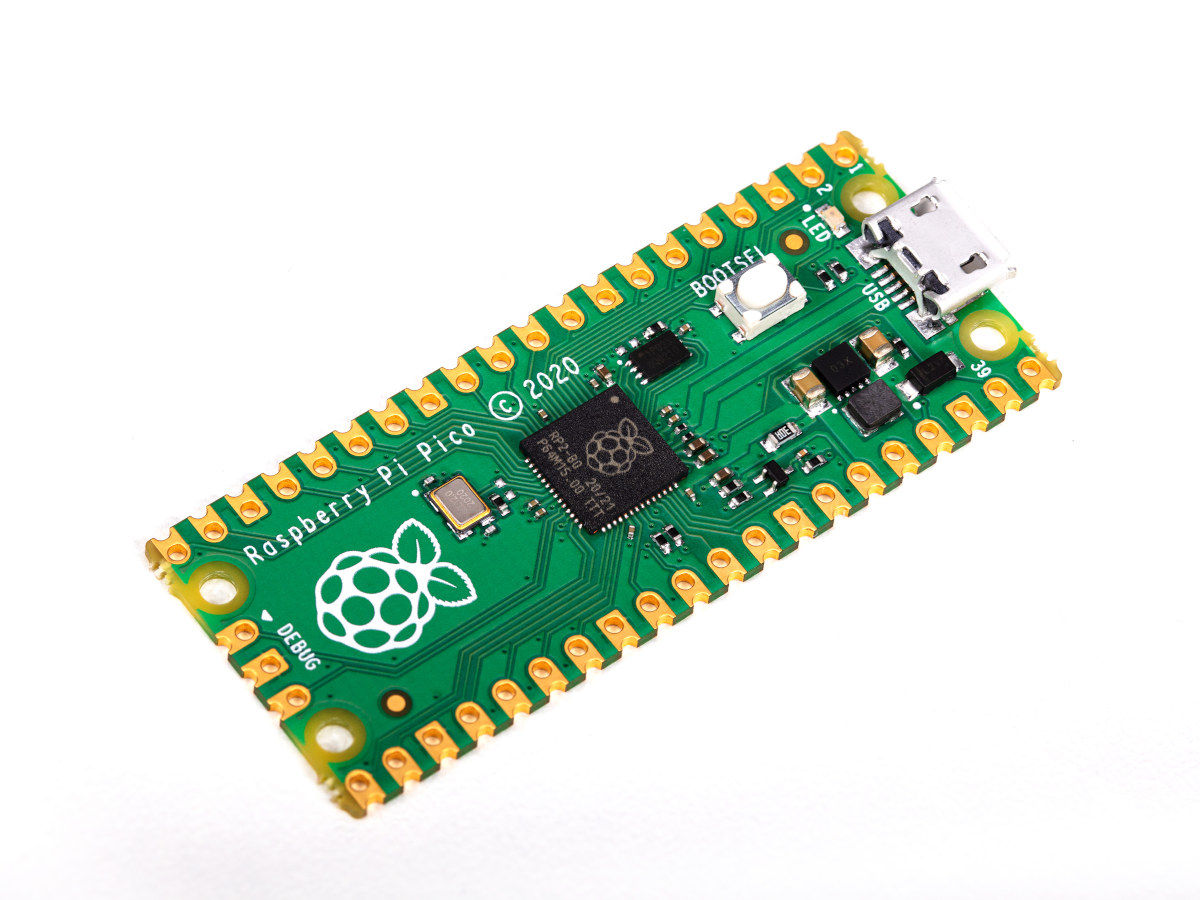
Let’s get to the board itself, with Raspberry Pi Pico specifications:
- MCU – Raspberry Pi RP2040 dual-core Cortex-M0+ microcontroller @ 48 MHz (overclockable to 133 MHz) with 264KB SRAM
- Storage – 2MB QSPI flash
- USB – 1x Micro USB 1.1 port used for power and programming
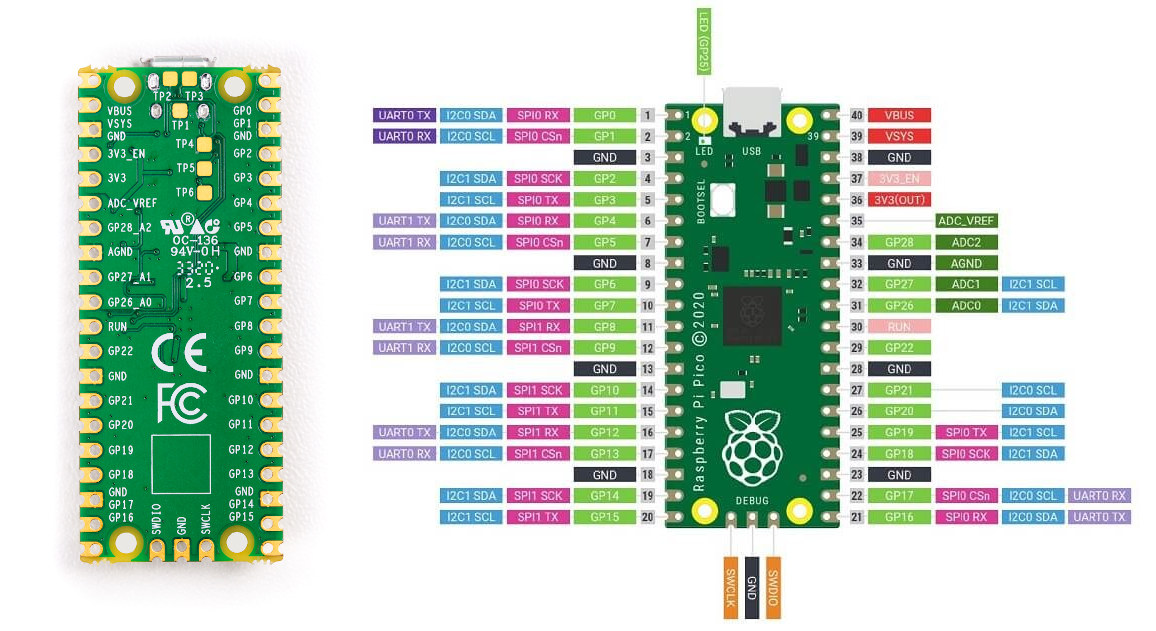
- Expansion
- 2x 20-pin 2.54mm pitch header and castellated holes with 26 GPIOs, 3x 12-bit ADC up to 500 Kbps, 2x UART, 2x I2C, 2x SPI, 16x PWM, 2x programmable high-speed I/O (for SD card, VGA, etc…)
- 3.3V I/O voltage
- Sensor – 12-bit temperature sensor
- Debugging – 3-pin Arm Serial Wire Debug (SWD) port
- Misc – BOOTSEL button, user LED (GP25), 1x Timer with 4x alarms, RTC
- Power Supply – 5V via Micro USB port or 2 to 5V DC via VSYS pin
- Dimensions – 51 x 21mm
It appears Raspberry Pi Pico has been designed for not only the education and hobbyist markets but also for commercial products with castellated holes allowing integration into products. The board ships without headers by default, so you’d either have to solder those yourself if needed, for example, to insert the board into a breadboard, or purchase the version with soldered headers.
Raspberry Pi Pico Software and Documentation
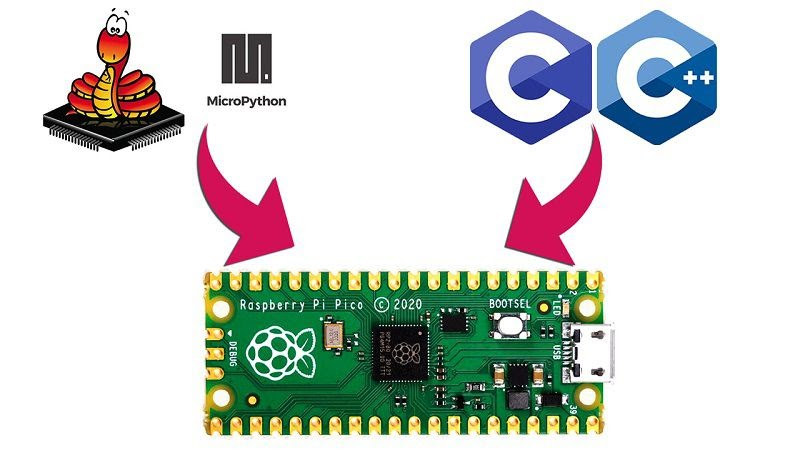
It should not come as a surprise that Raspberry Pi Pico does not support Arduino, and instead, the foundation provides supports for MicroPython and C/C++ programming with the command line or Visual Studio Code. The Python code and compiled C/C++ binary can be easily copied to the board since it shows as a USB mass storage device on the host computer, which can be any computer with a USB port running Windows, macOS, or Linux including the Raspberry Pi 4 Model B or Raspberry Pi 400 keyboard computer.
You’ll find both the MicroPython and C/C++ SDK on Raspberry Pi’s Github account, and detailed hardware and software documentation that will explain how to get started with your chosen SDK or hardware design.
Pricing and availability
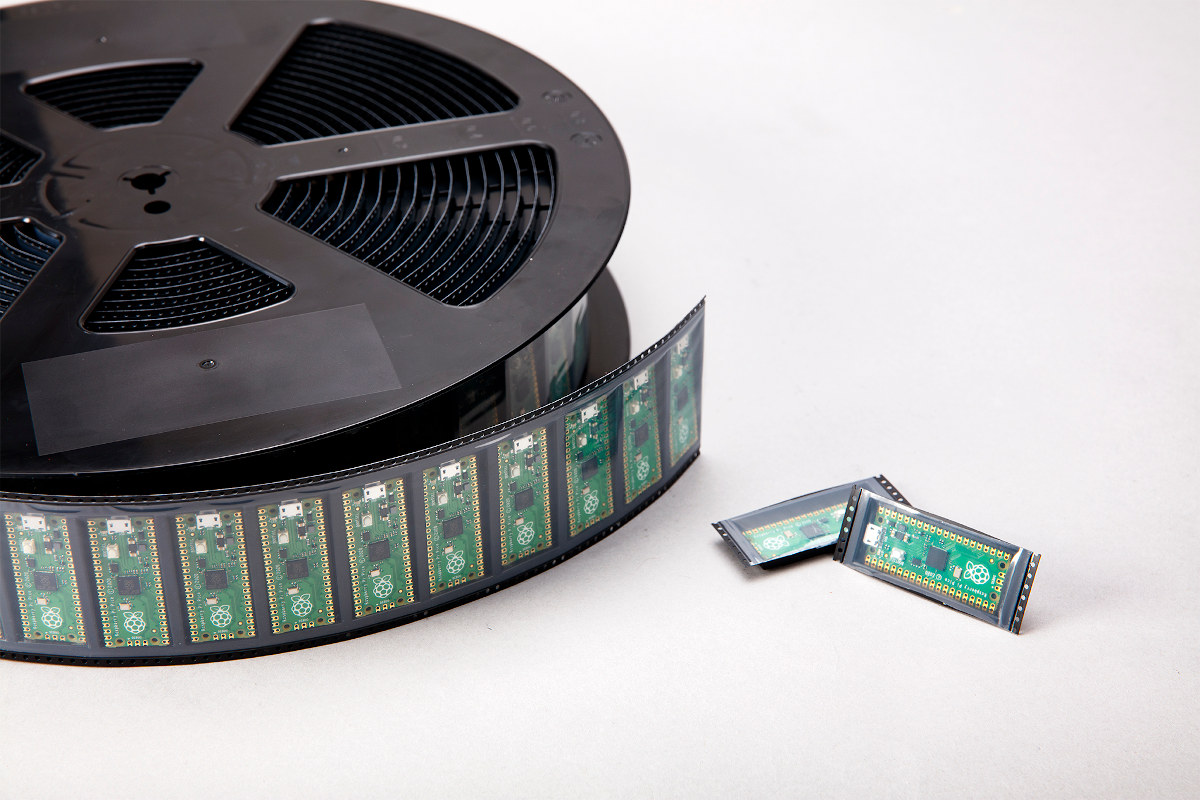
Raspberry Pi Pico official price is $4 excluding taxes and shipping. You can also purchase Raspberry Pi Pico with pre-soldered headers, and a Raspberry Pi Pico Basic Kit without or with a Pico board. The basic kit includes a breaboard, jumper cables, and some components like LEDs. You’ll find all those on the usual resellers including RS Components, Cytron (ASEAN only), and Seeed Studio. Eventually, it may be possible to purchase reels with Pico boards, but it’s not possible right now unless you are a reseller, and since stocks are limited, vendors may also limit the number of boards they sell per order.
The MCU board market is pretty crowded with the official Arduino boards (which now even look more overpriced), Arduino clones, STM32 boards like the sub-$2 BluePill, and obviously ESP8266 and ESP32 modules and boards that also include wireless connectivity for about the same price, or even a bit lower once taxes and shipping are included. All those competitors already have good software support for Arduino and/or MicroPython, C/C++ SDKs, etc… so it remains to be seen whether Raspberry Pi Pico will also be successful, but years have taught me to never underestimate the Raspberry Pi “marketing machine”!
I should receive my Raspberry Pi Pico board later today from Cytron, and a review / walk-through guide should hopefully be up this weekend or earlier next week.

Jean-Luc started CNX Software in 2010 as a part-time endeavor, before quitting his job as a software engineering manager, and starting to write daily news, and reviews full time later in 2011.
Support CNX Software! Donate via cryptocurrencies, become a Patron on Patreon, or purchase goods on Amazon or Aliexpress


