How to Recover from a Bad Firmware Upgrade on Anet ET4 3D Printer
Hey, Karl here with a really quick how-to. This how-to is to help everyone who has bricked their Anet ET4 printer after upgrading firmware on the printer. Anet reached out for a review of the ER4 and I recently gave one printer to a buddy of mine and he showed a lot of enthusiasm. I thought it would be interesting to do a review from someone less experienced. I asked him if he would like to do it and he accepted. I wanted to help him with unboxing and initial setup so we fired up a YouTube Livestream. The build went smooth but because the UI is lacking finish I went searching for updates. It is not uncommon to flash firmware, and after a little googling I found updated firmware and was hoping to fix the UI. We followed the directions but the machine got hung at the logo after rebooting. Damn. After a little more searching found directions from Anet showing how to recover. It required a specific version of J-link software and I was unable to find it. I believe it is not free after reading posts. No one would upload it to the FB files section and had to be shared directly. Unfortunately due to holiday and the coronavirus outbreak in China I didn’t bother to contact Anet and set out on my own to resolve the issue. After some searching, I found one user who took a firmware snapshot of a working ET4 with an ST-Link V2 debugger and thankful he shared it with me. I will share the process and files below.
Why
I was curious why the firmware didn’t work. Some people in the Facebook forum had no issues but a lot did. After we got stuck I joined the FB group and starting searching. It turns out that everyone said to format the SD card before flashing. What we experienced was the printer getting stuck at the boot logo. I put the SD card in my reader and connected it to my PC. It needed to be formatted and everything was lost. I suspect Anet SD cloning process left the card in a bad state.
What is needed
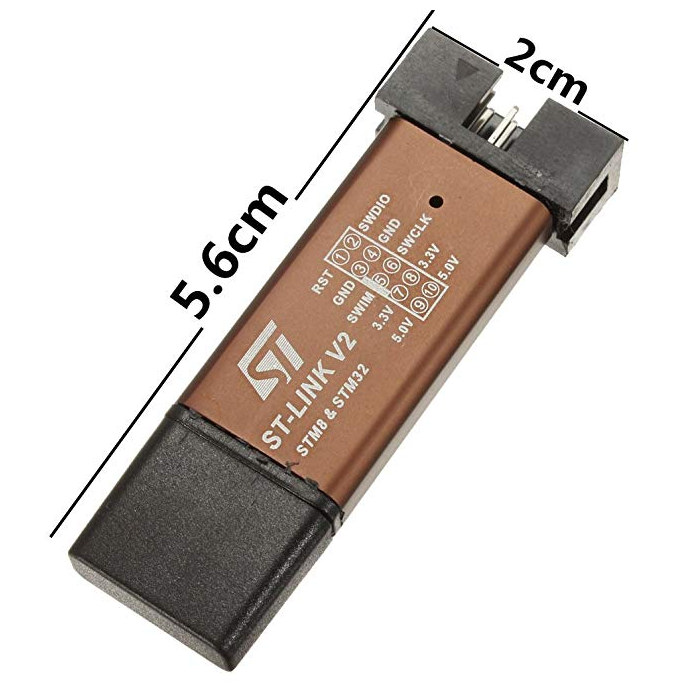
I wasn’t sure I was going to be successful so I bought the cheapest ST-Link debugger on Amazon: $6.29 shipped with prime and 2-day shipping. Here is a link to ST-Link Utility and 2 versions of the firmware. If you want to download utility direct it is here. Original recovery instructions are also included using J-link software. I also used a USB extension cable I already had.
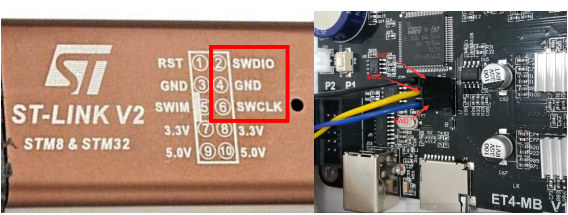
I used the included jumpers connecting GND SWC and SWD. Notice the notch on the pinout diagram of the st-link adapter. Turn the printer on.
Picture pulled from Anet instructions
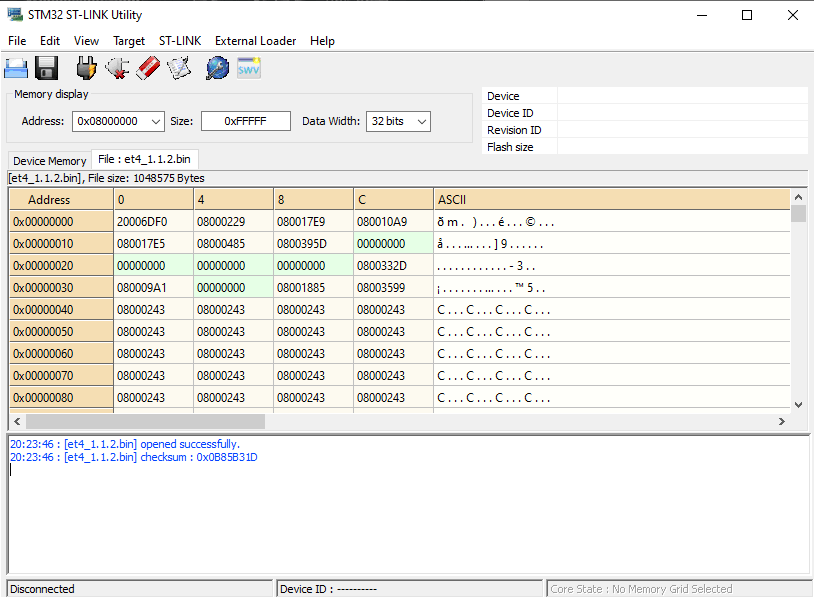
Open one of the bin files
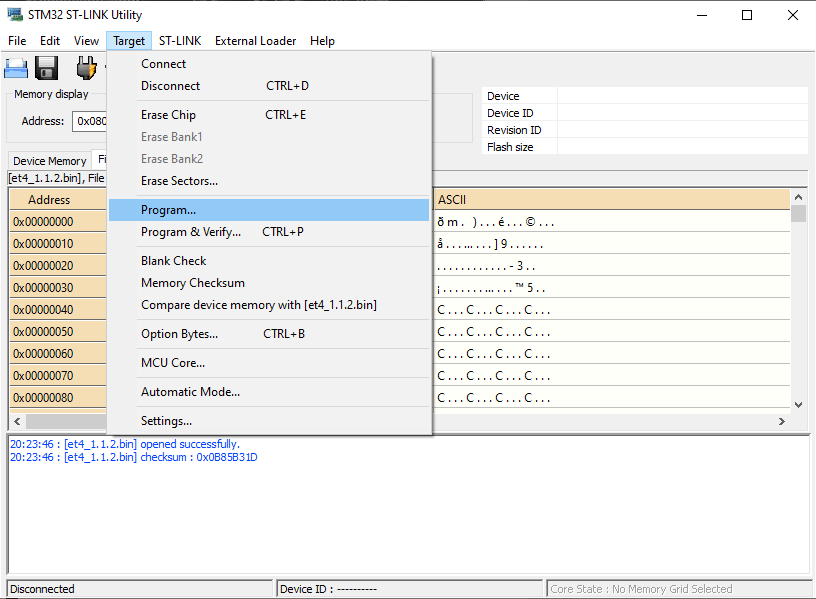
Click on Target->Program
That’s it. Super easy and no proprietary hardware. Big thanks to Michal for downloading the original img. Happy printing!
This website uses cookies to improve your experience. We'll assume you're ok with this, but if you don't like these, you can remove them Accept
Privacy & Cookies Policy
Privacy Overview
This website uses cookies to improve your experience while you navigate through the website. Out of these, the cookies that are categorized as necessary are stored on your browser as they are essential for the working of basic functionalities of the website. We also use third-party cookies that help us analyze and understand how you use this website. These cookies will be stored in your browser only with your consent. You also have the option to opt-out of these cookies. But opting out of some of these cookies may affect your browsing experience.
Necessary cookies are absolutely essential for the website to function properly. This category only includes cookies that ensures basic functionalities and security features of the website. These cookies do not store any personal information.
Any cookies that may not be particularly necessary for the website to function and is used specifically to collect user personal data via analytics, ads, other embedded contents are termed as non-necessary cookies. It is mandatory to procure user consent prior to running these cookies on your website.