
[Update July 2020: It is now recommended to use Calibration Generator program instead of the Google Doc Spreadsheet in this article]
Hey, Karl here with a short article on retraction tuning. I really enjoy reviewing 3D printers and all things 3D printing with one exception…. when I have to calibrate retraction (aka retraction tuning). It takes so much time.
What is Retraction?
While 3D printing on a standard FDM printer, the filament is pushed with an extruder motor that has a gear attached. It pushes the filament, either directly into the hotend assembly or through a Bowden tube to the hotend. Molten plastic is then layered to produce a model. When it is printing nearly all prints require non-extruding movements. During the extruding moves pressure builds up and in order to stop stringing and blobbing during non-printing moves, a retraction happens.
There are 2 main variables that affect this: the speed it moves and the distance. In the past, I would take a calibration model and adjust these 2 variables and test. This can take a long time. First, I had to slice the model into G-code the printer can read and take a stab in the dark with variables. Then print. I had to wait for build plate to heat up…, then hotend to heat…, then the print time. It takes about 10-15 minutes for 1 test. Time adds up quickly.
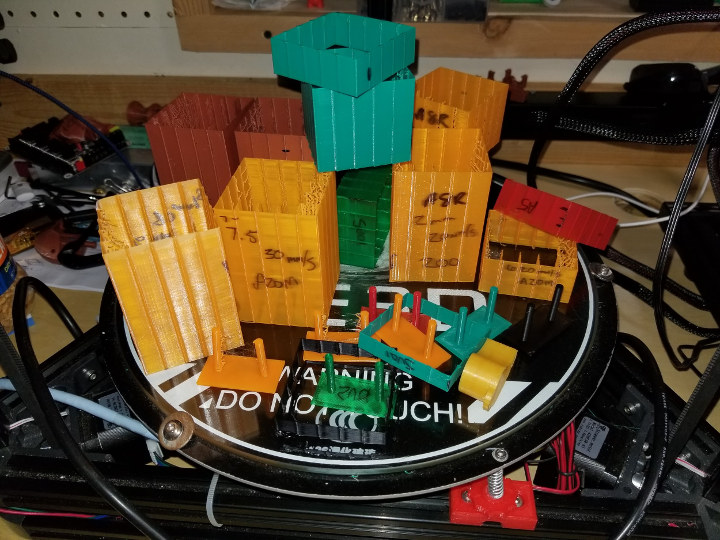
I am currently reviewing a printer – the Sovol SV01 – and I finally took the time and created a spreadsheet that generates G-code to programmatically test a lot of different combinations in 1 print. I think this is very useful and that is why I am sharing this here now.
Retraction Calibration Method & Spreadsheet
I setup the code in a Google Sheets doc here. This is a work in progress. I have only tested on the printers that I have on hand. If you have any suggestions feel free to email me. My email is in the sheets doc.
To start you will need to download and open in excel or open in your sheets instance. The link is for read-only.
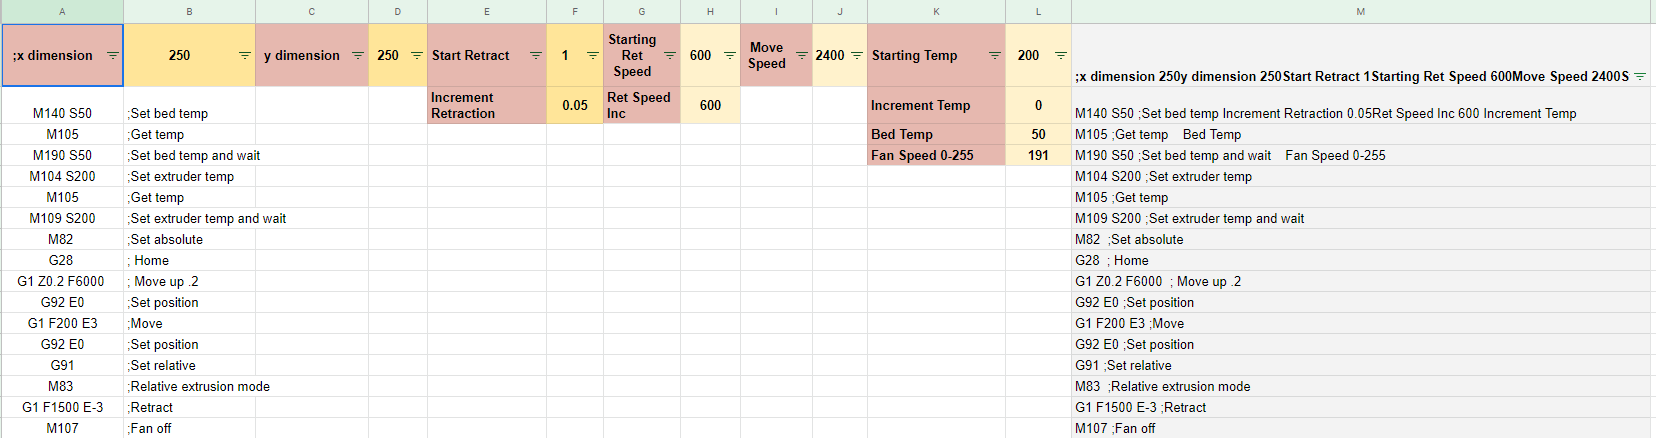
Let’s start with the G-code sheet. This is where you setup the G-code for your specific printer.
- X and Y dimension – Pretty self-explanatory. With the exception of a delta…set both to 0. Or any printer that homes to the center
- Start Retract – Shortest retraction distance it tests
- Increment Retraction – How much it increments for each test. There are a total of 16 tests
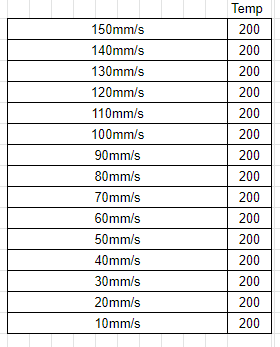
- Starting Ret Speed – First speed it test. From 0 to 5mm height (it will make more sense later)
- Ret Speed Inc – Every 5 mm in height it will increase the speed this amount
- Move Speed – The speed for non-extruding moves
- Starting Temp – Hotend starting temperature
- Increment Temp – Temp will increase this amount every 5mm in height I haven’t used this for testing.
- Bed Temp – Temp of the heated bed.
- Fan Speed – Fan speed at layer 2. 0 is off: 255 is 100%, 127 is 50%, 191 is 75%
Once you set all your parameters copy column M into a G-code file all 30000+ lines. Before you print go into your settings and find out what the max extruder speed is. In Marlin 1.1.6 Control>Motion>Velocity>Vmax E and note the fastest movement. You can stop the print early once it reaches max speed. Before removing from the bed mark your origin corner. It should be obvious, but just in case it isn’t.
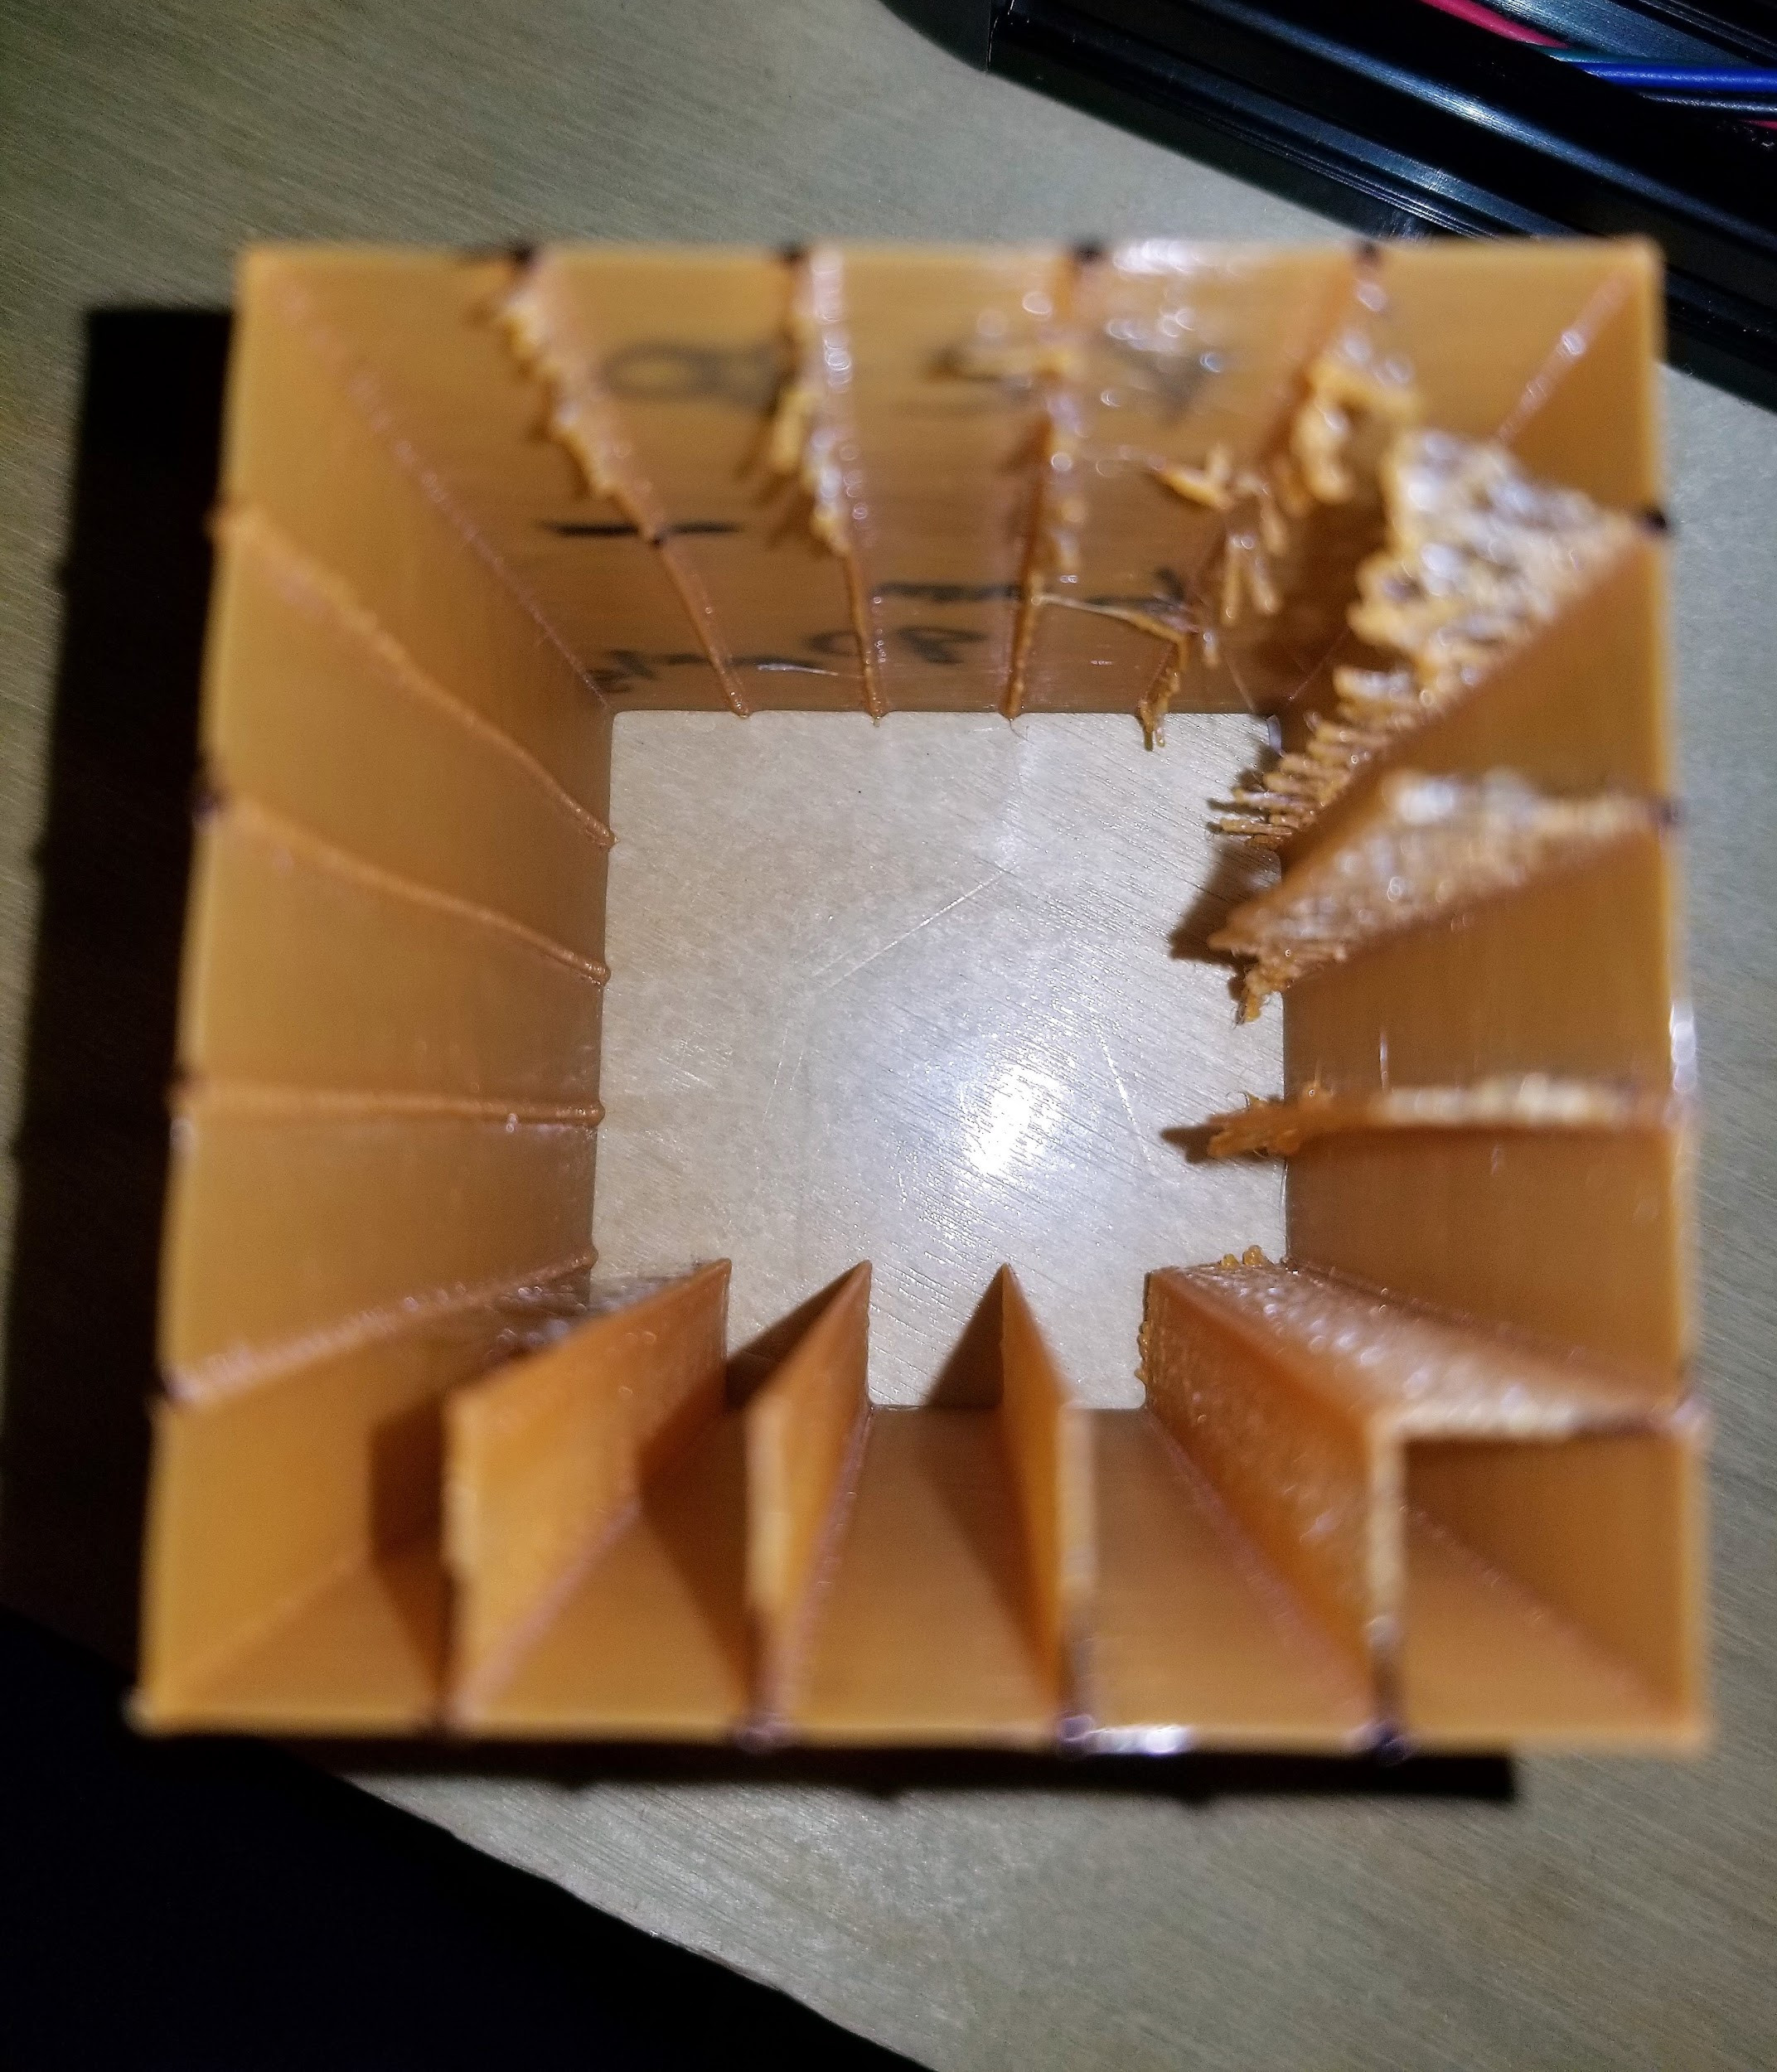
Here it is from the top. You can see as it moves around stringing blobbing gets better as the retraction increases. Origin is bottom left.
How it Prints
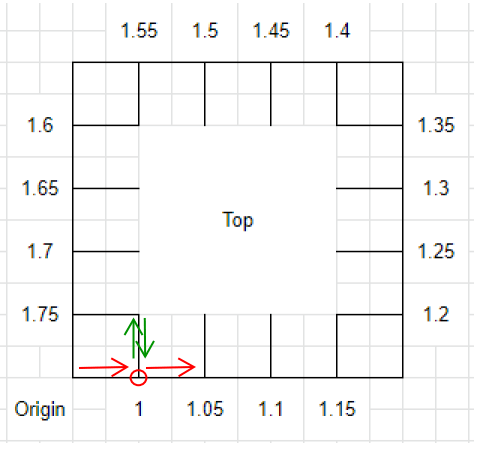
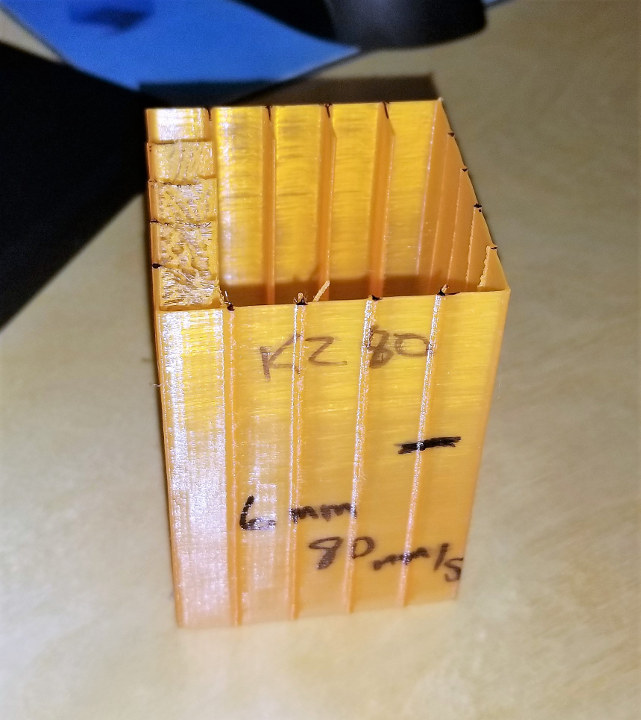
The print starts at the origin moves right …retracts at the circle then a non-extrude movement for the green arrows then un-retracts at the circle then starts over and moves all the way around.
As the print progresses every 5mm in height the speed increments.
Interpreting the Print

Now that the print is complete we have to interpret the print. As you change the variables on the other sheet it will update the instructions sheet for easy interpretation. I mark the spot that looks the best. I then reference this page and measure to find settings. On some printers, I had to look very close and be very critical. You might even skip over the best one if the increments are too much. If you think that is the case print a second one with lower increments and increase your starting point based on the first print.
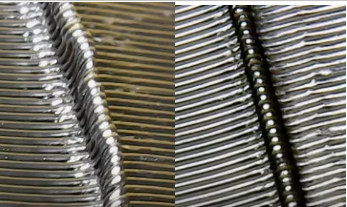
I have found that in general if it is hard to tell opt for the shortest fastest. It will lower your print time.
If you test this please leave some feedback on your experience. I can also start logging retraction settings on a separate sheet if you think it is a good idea. You can send me an email with your settings. If you want to see this in action I did a Livestream on YouTube where I tuned ABS live for the SV01.

Karl is a technology enthusiast that contributes reviews of TV boxes, 3D printers, and other gadgets for makers.
Support CNX Software! Donate via cryptocurrencies, become a Patron on Patreon, or purchase goods on Amazon or Aliexpress


