
Most of us know the Raspberry Pi 4 can get pretty hot, and a heatsink is required if you intend to get the maximum performance out of your board under heavy loads and/or high ambient room temperature.
Some even designed a large fansink for Raspberry Pi 4 to prevent the board from throttling. It’s actually a bit over the top, but Seeed Studio sent me a sample of their “ICE Tower CPU cooling fan”, so I’ve had the chance to test it.
ICE Tower Cooling Fan Unboxing & Assembly with Raspberry Pi 4
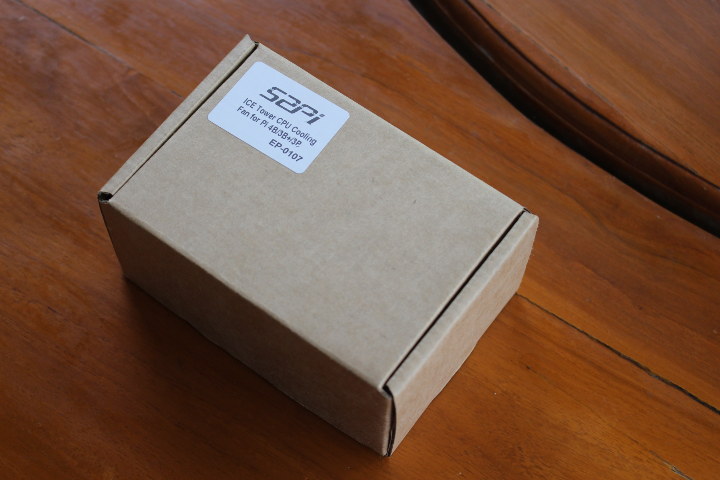
The package tells us it’s made by 52Pi and design specifically for Raspberry Pi 4B/3B+/3B SBC’s. It’s probably not that useful for the last two.
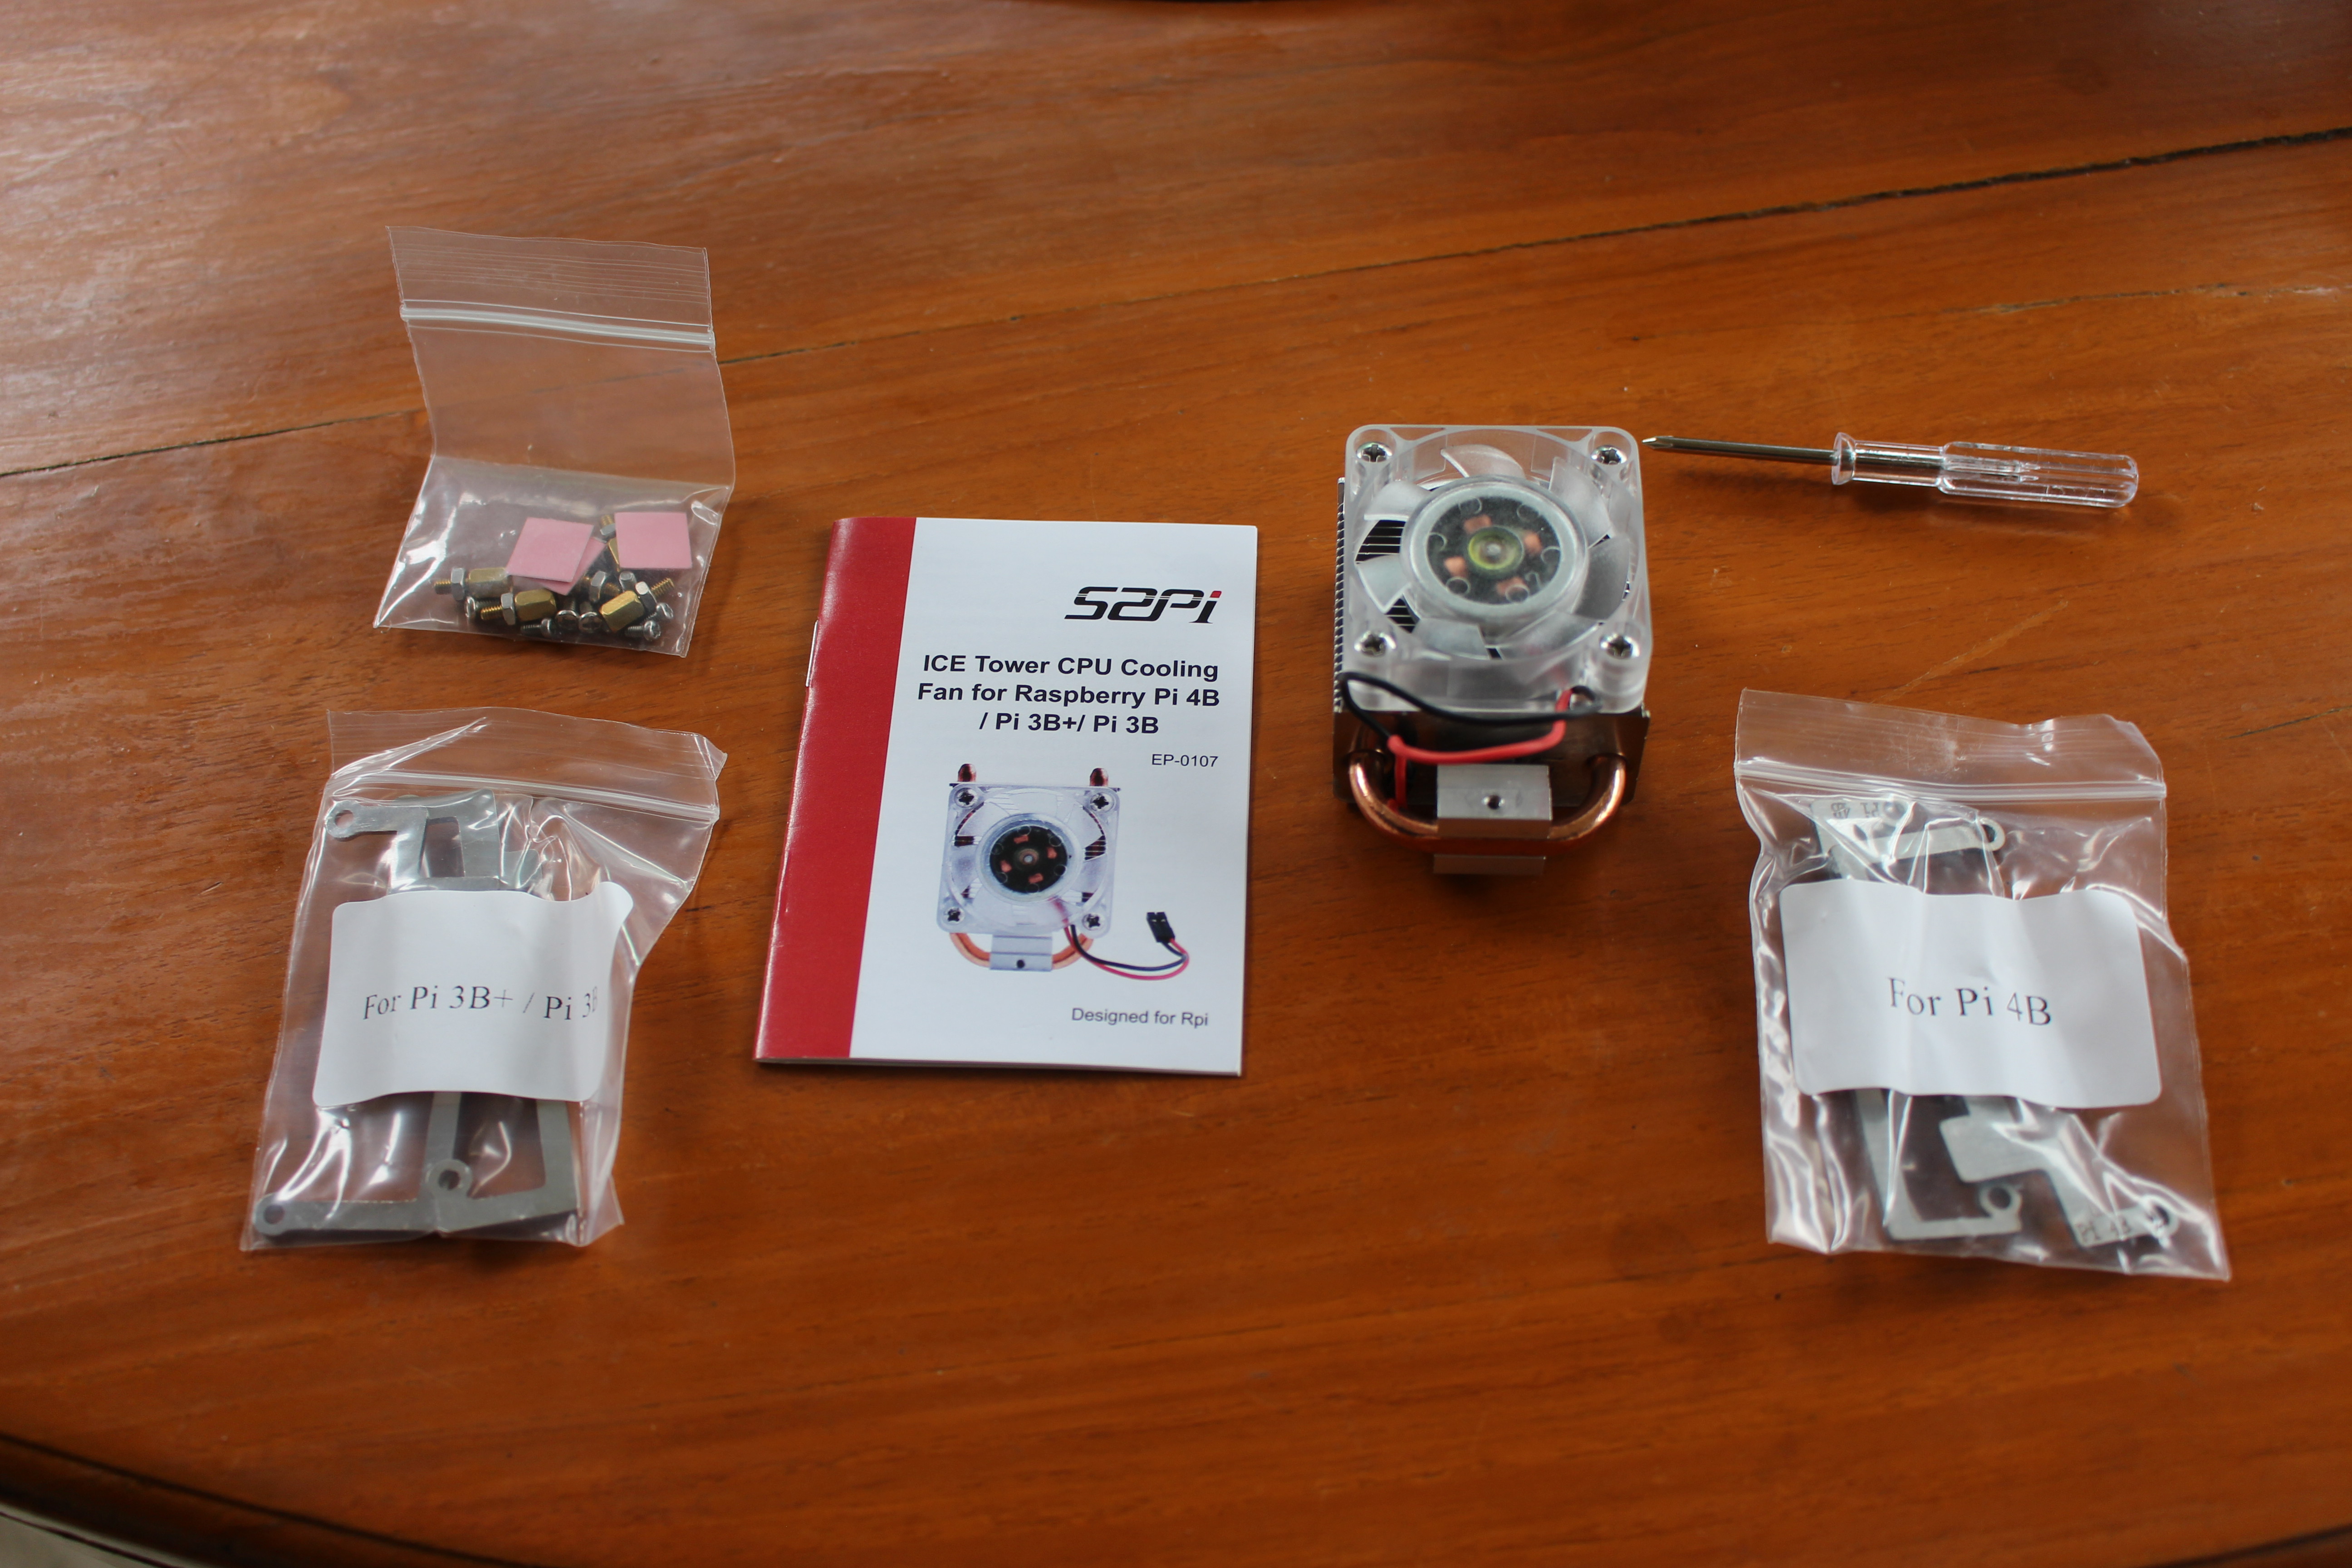
 The package contains the heatsink with fan attached, screw sets, a screwdrivers, mounting brackets for Raspberry Pi 3/3B+ and RPi 4, as well as a useful user manual.
Raspberry Pi 3 and 4 are almost the same mechanically, so I wonder what may be the differences between the two backets.
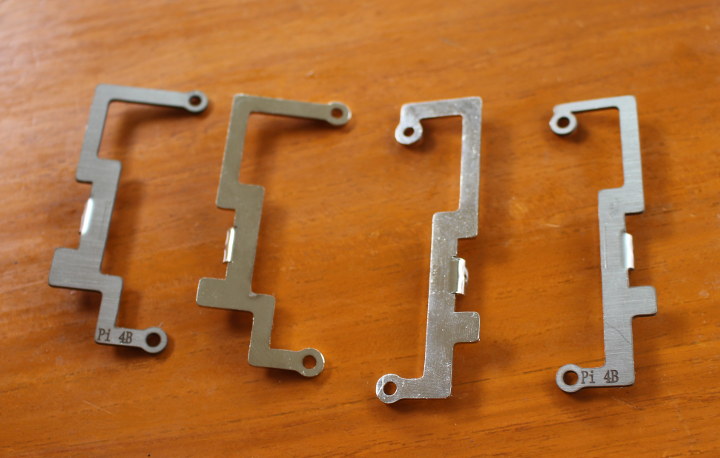
There are just some small differences in terms of thickness due to different positions of headers on the new board.
.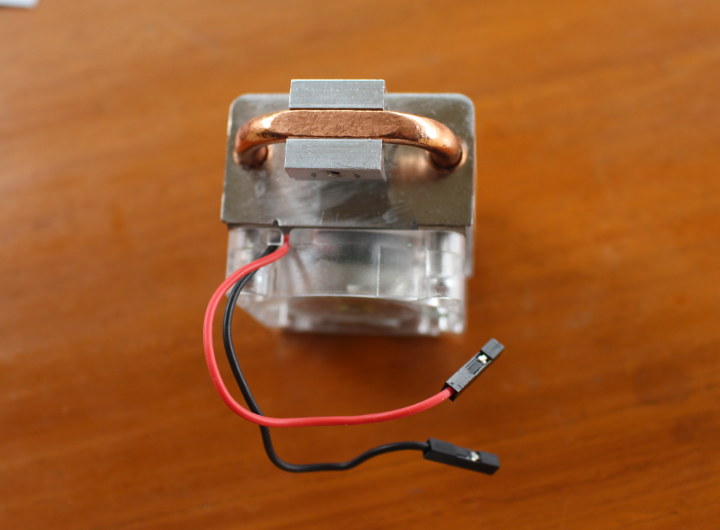
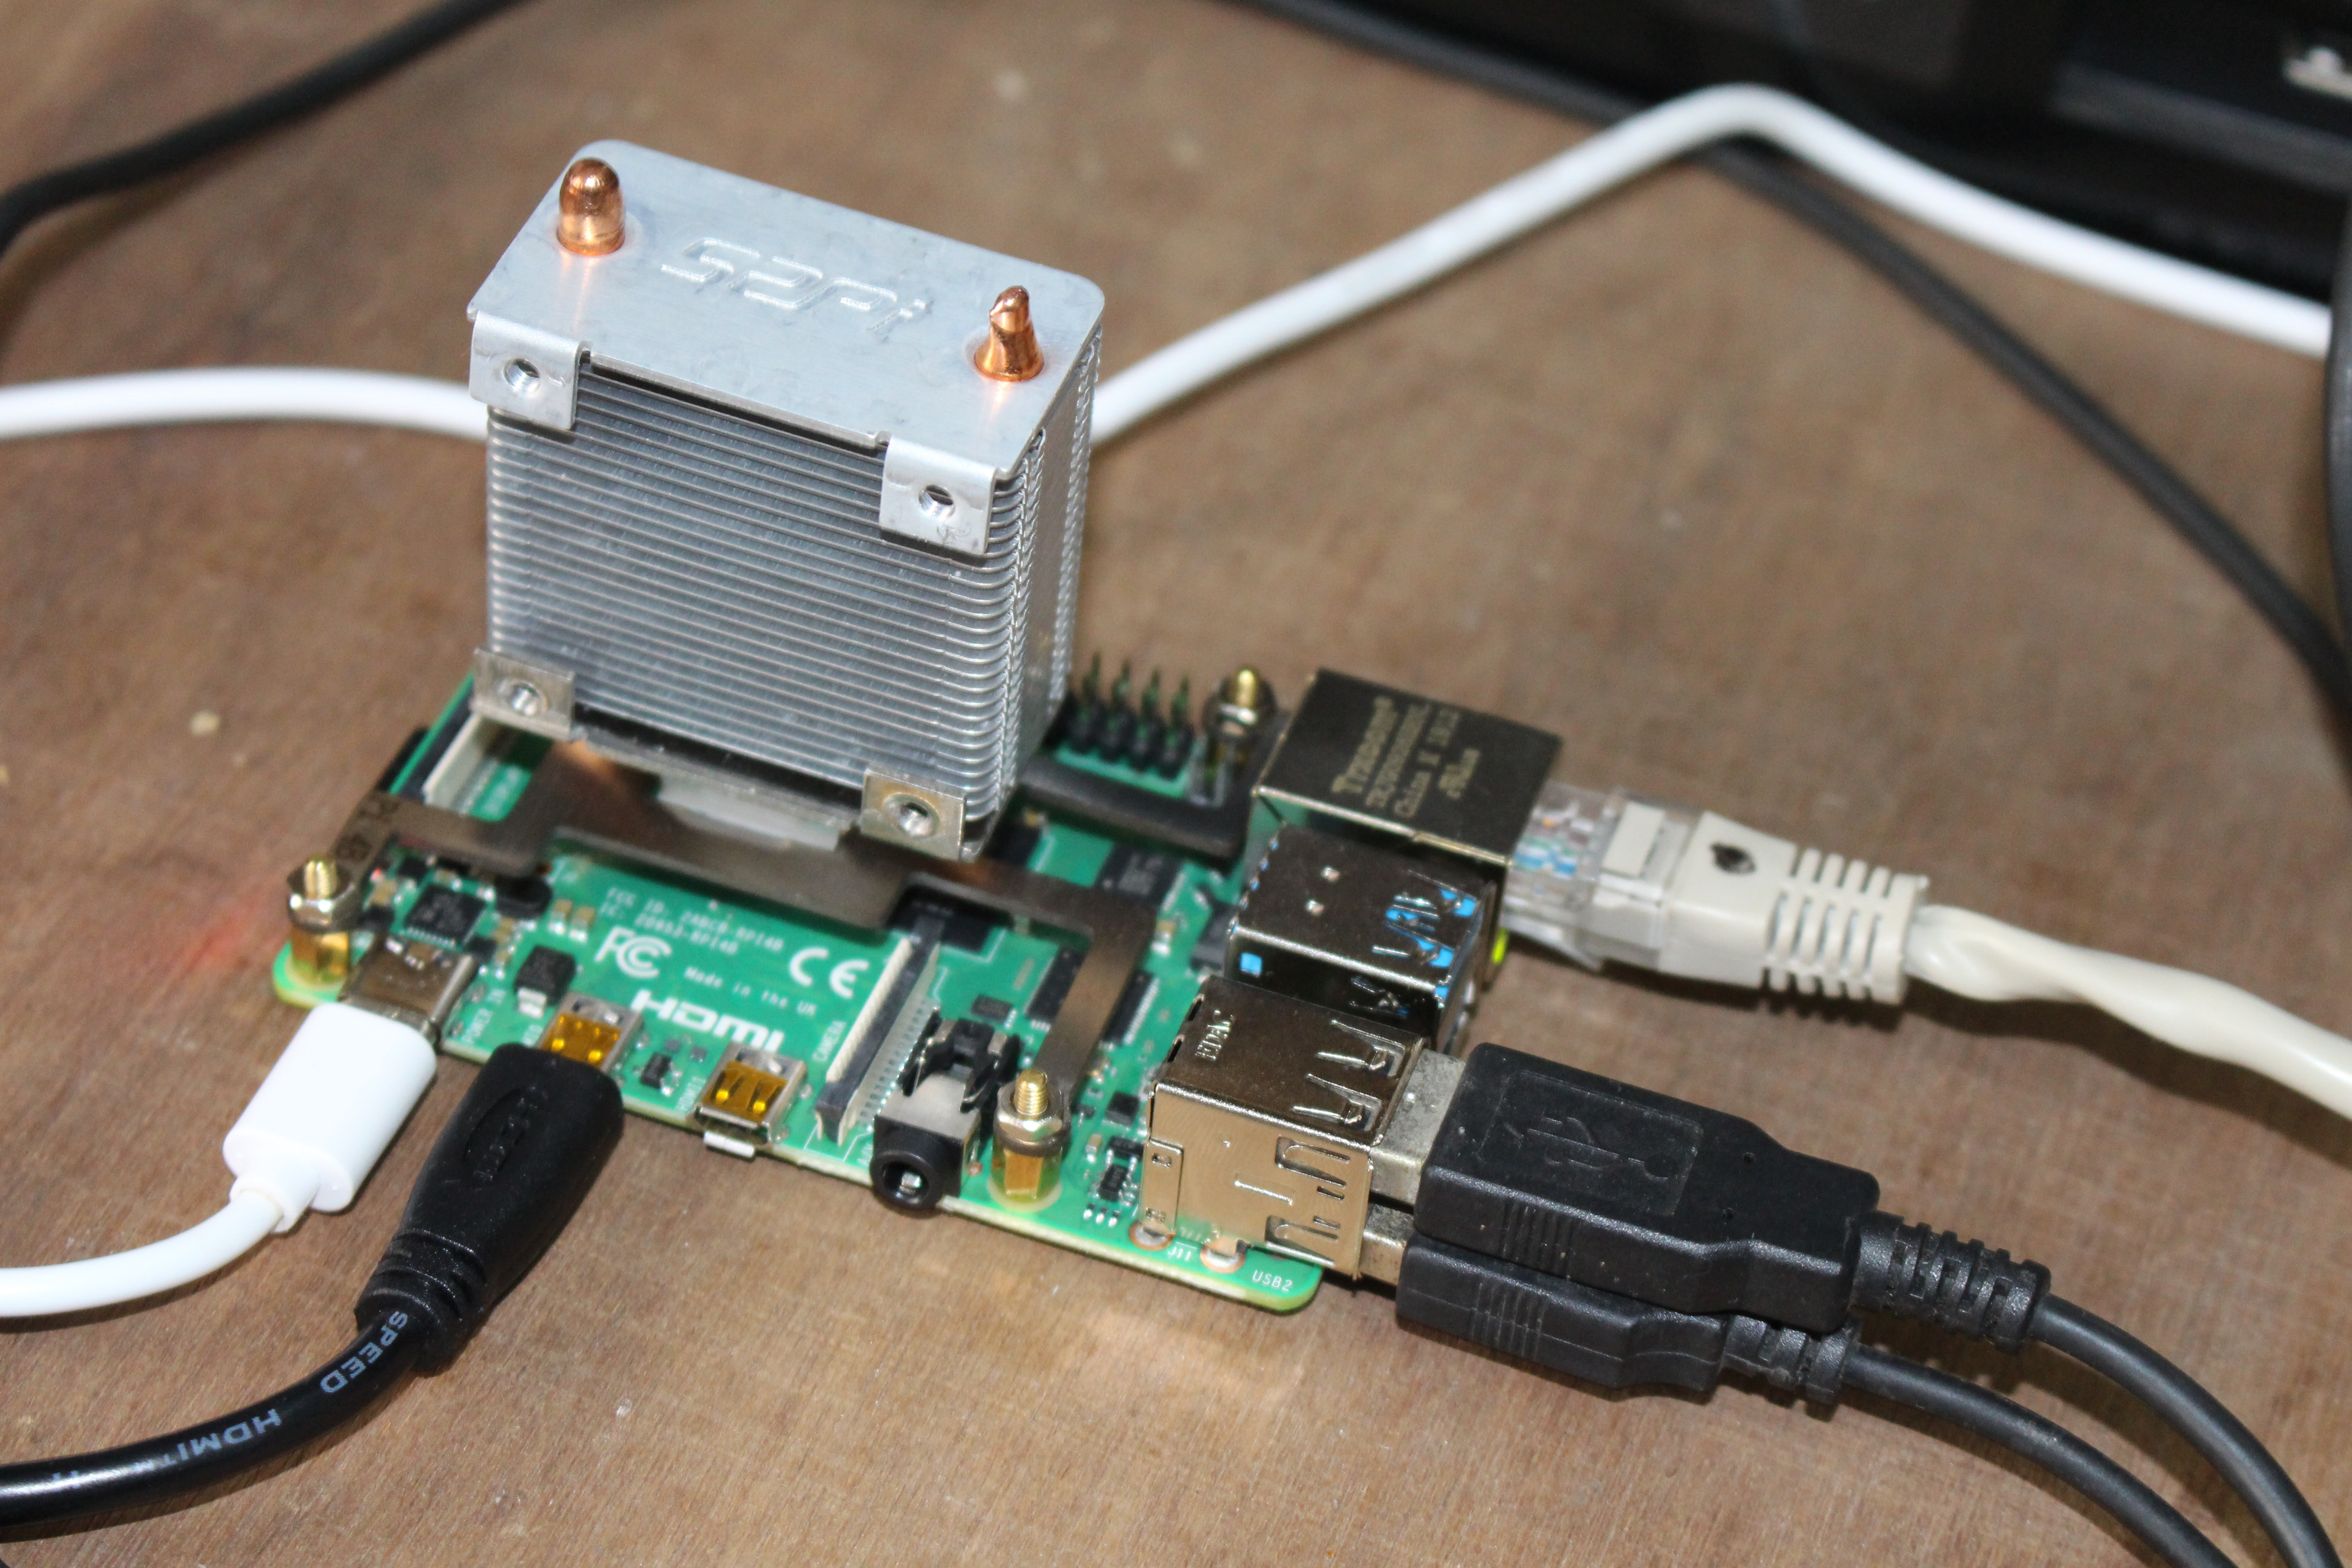
We’ll have plenty of photos of the sides and top of the heatsink latter on, but here’s a shot that shows the side that will be in contact with the processor through a thermal pad.

Let’s start the assembly. We’ll be asked to place the thermal pad on top of the processor (after having peel the protective films), and install the first bracket with an M2 screw as shown above.
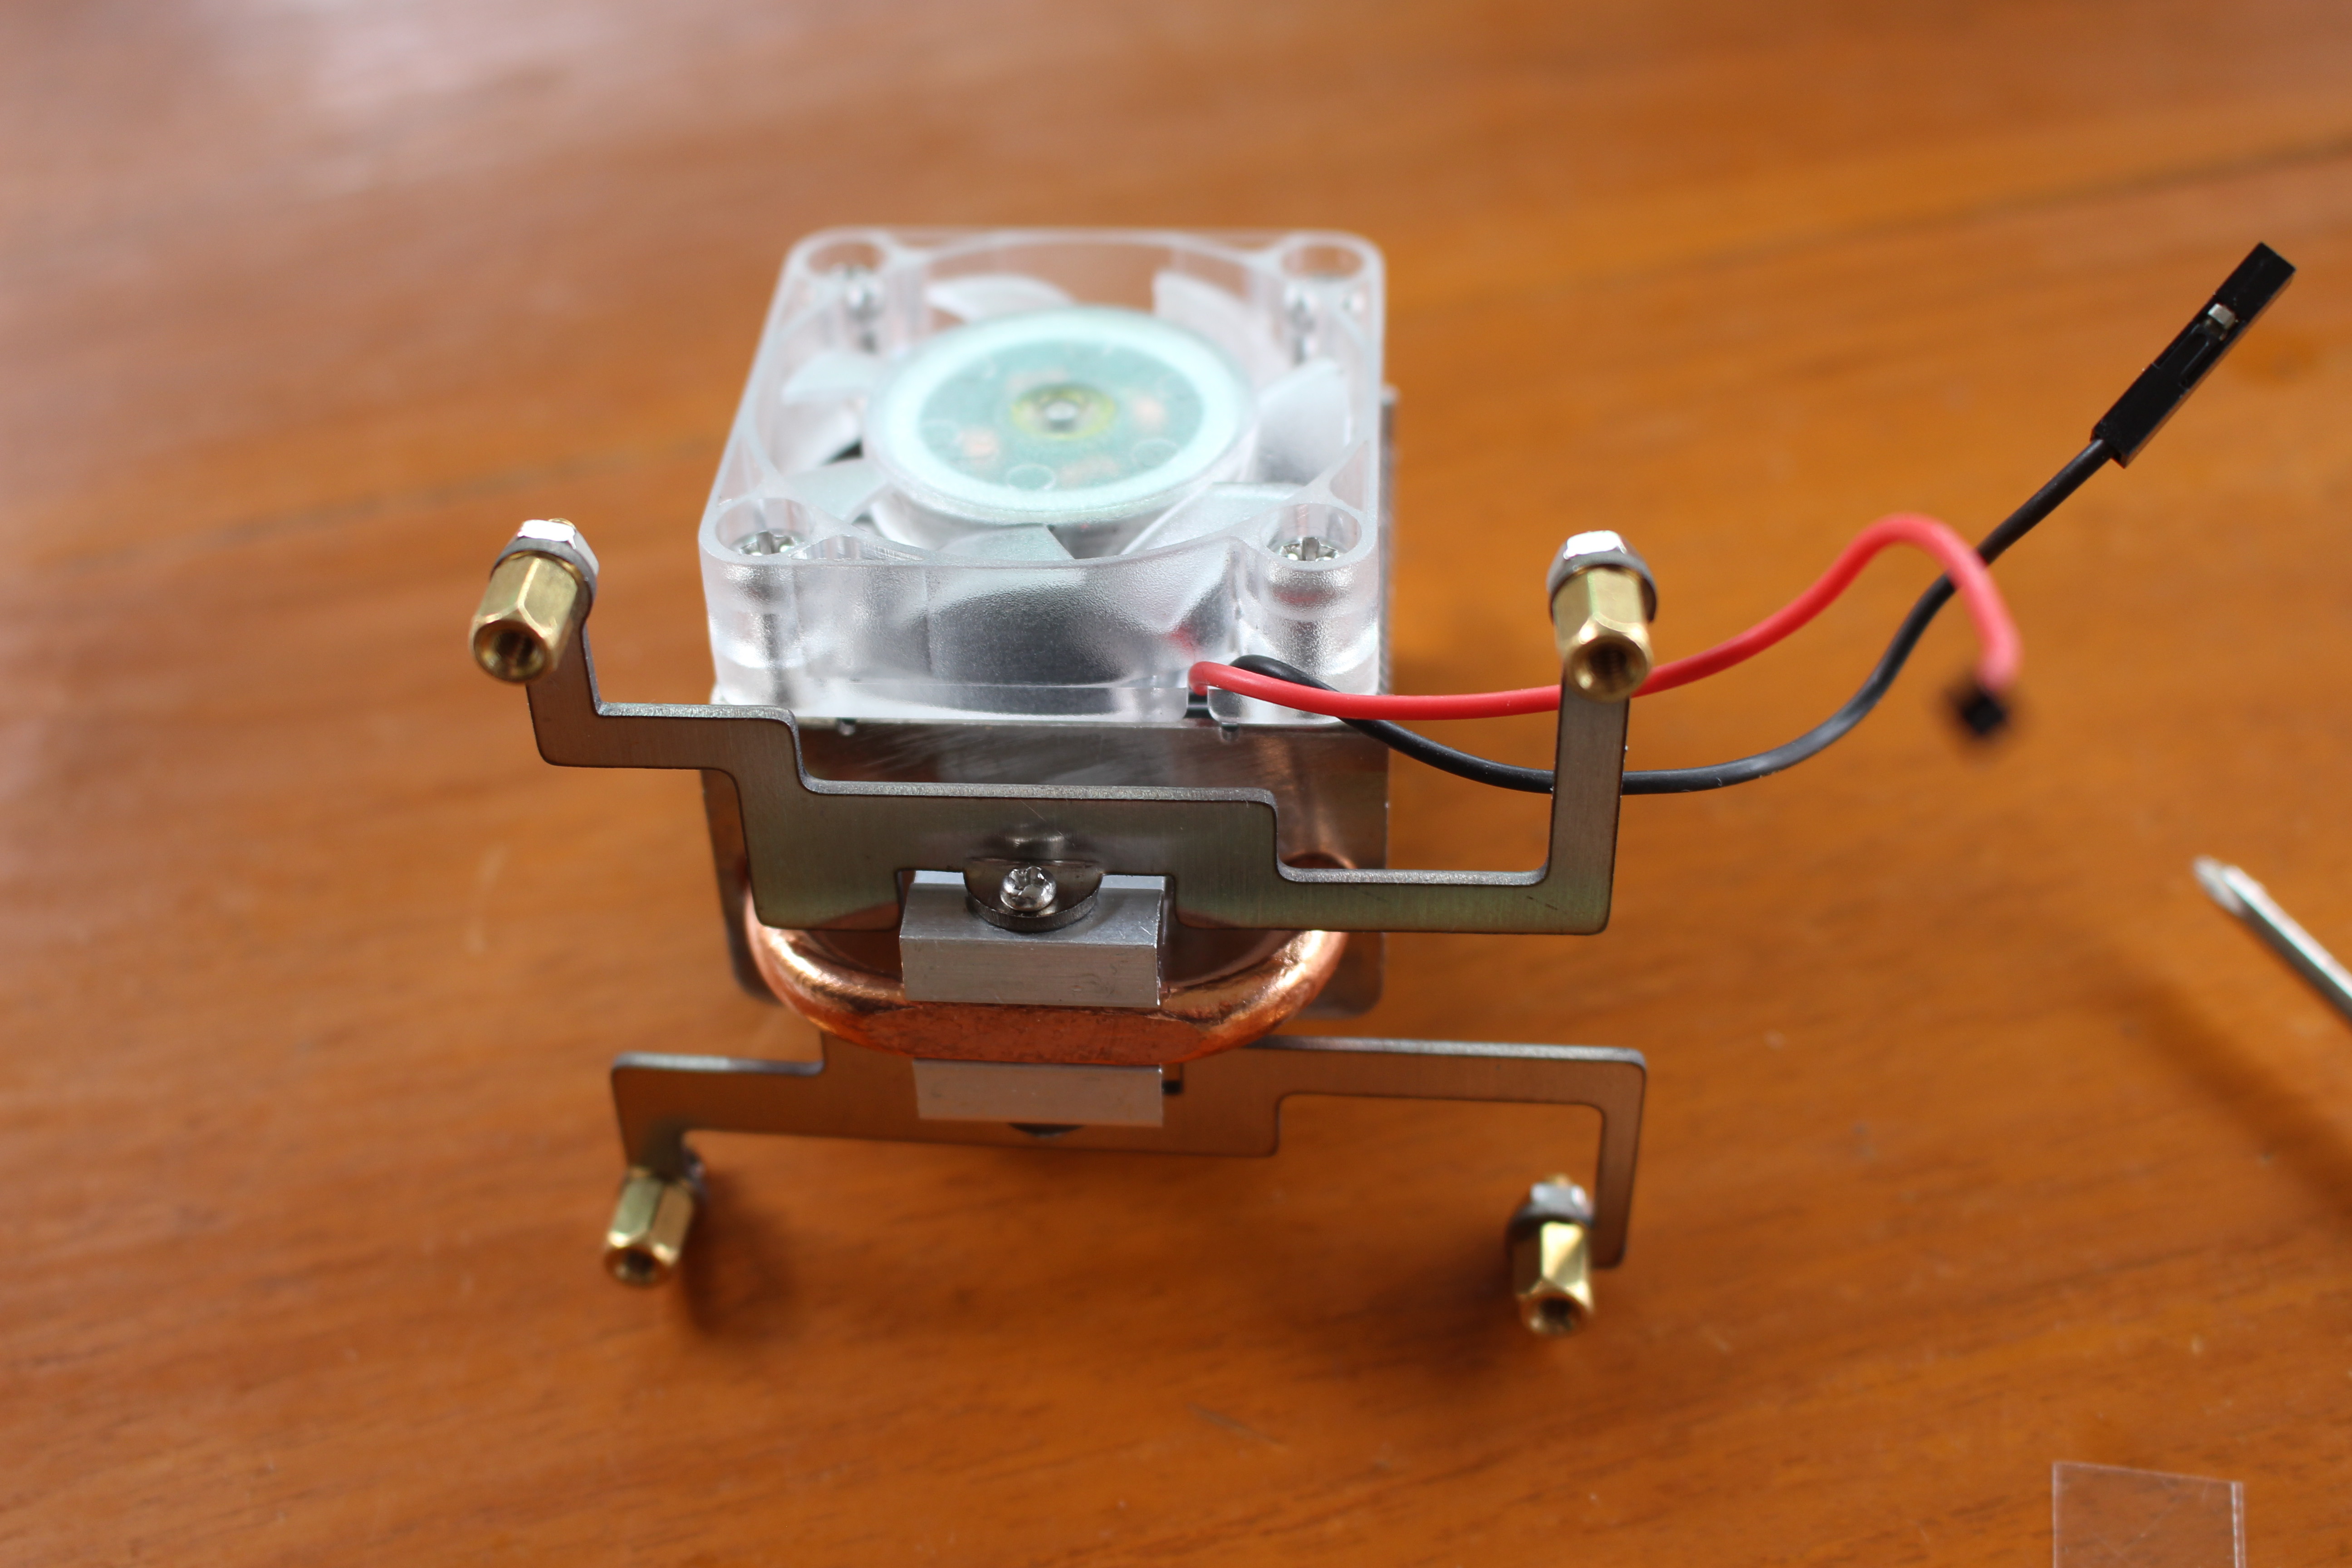
We can then install the second bracket, as well as the four spacers secured with nuts.
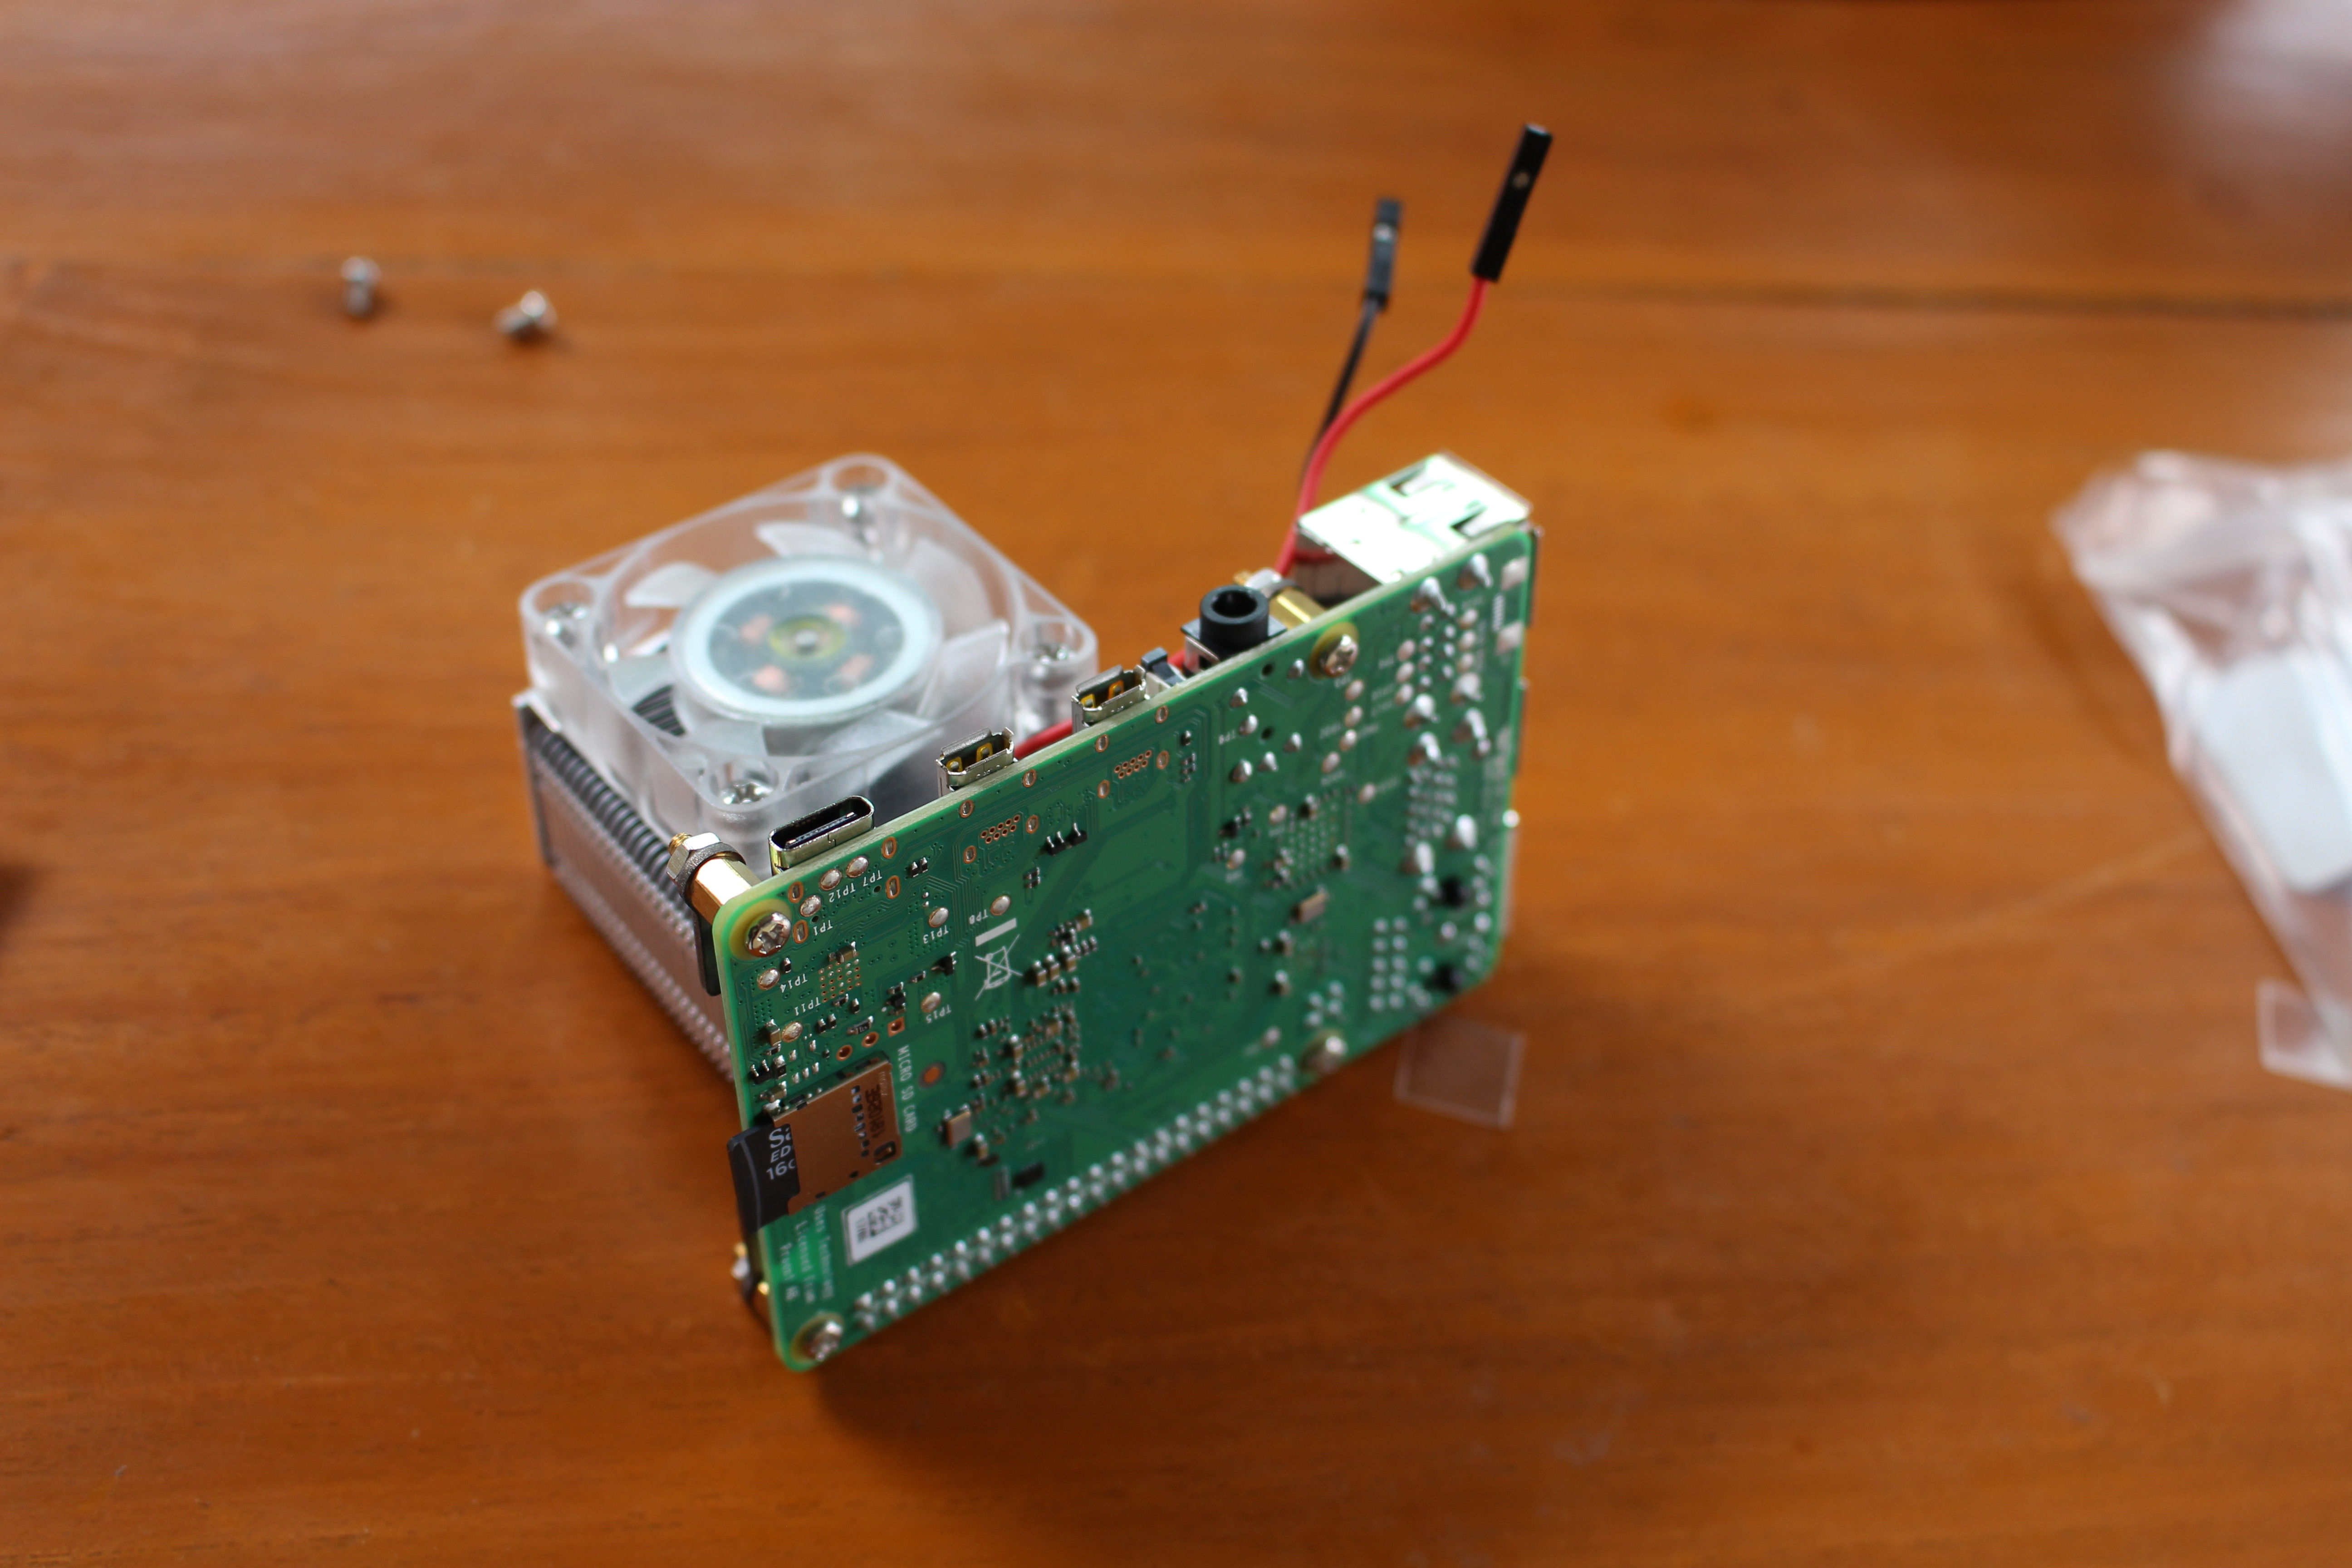
The next step is to place the ICE tower CPU cooling fan on the board with the fan facing the micro HDMI ports, and tighten everything with M2.5 screws. Note that you may have two M2 screws left over, so if if somehow you find out you can’t tighten the heatsink… have a second look in the zip bag looking for M2.5 screws.
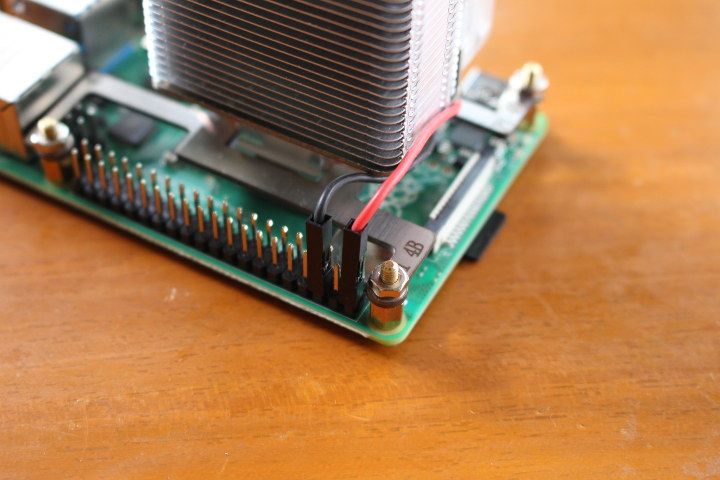 The final step is to connect the fan to the 5V and GND pins on Raspberry Pi header, and we’re good to go.
Temperature Tests
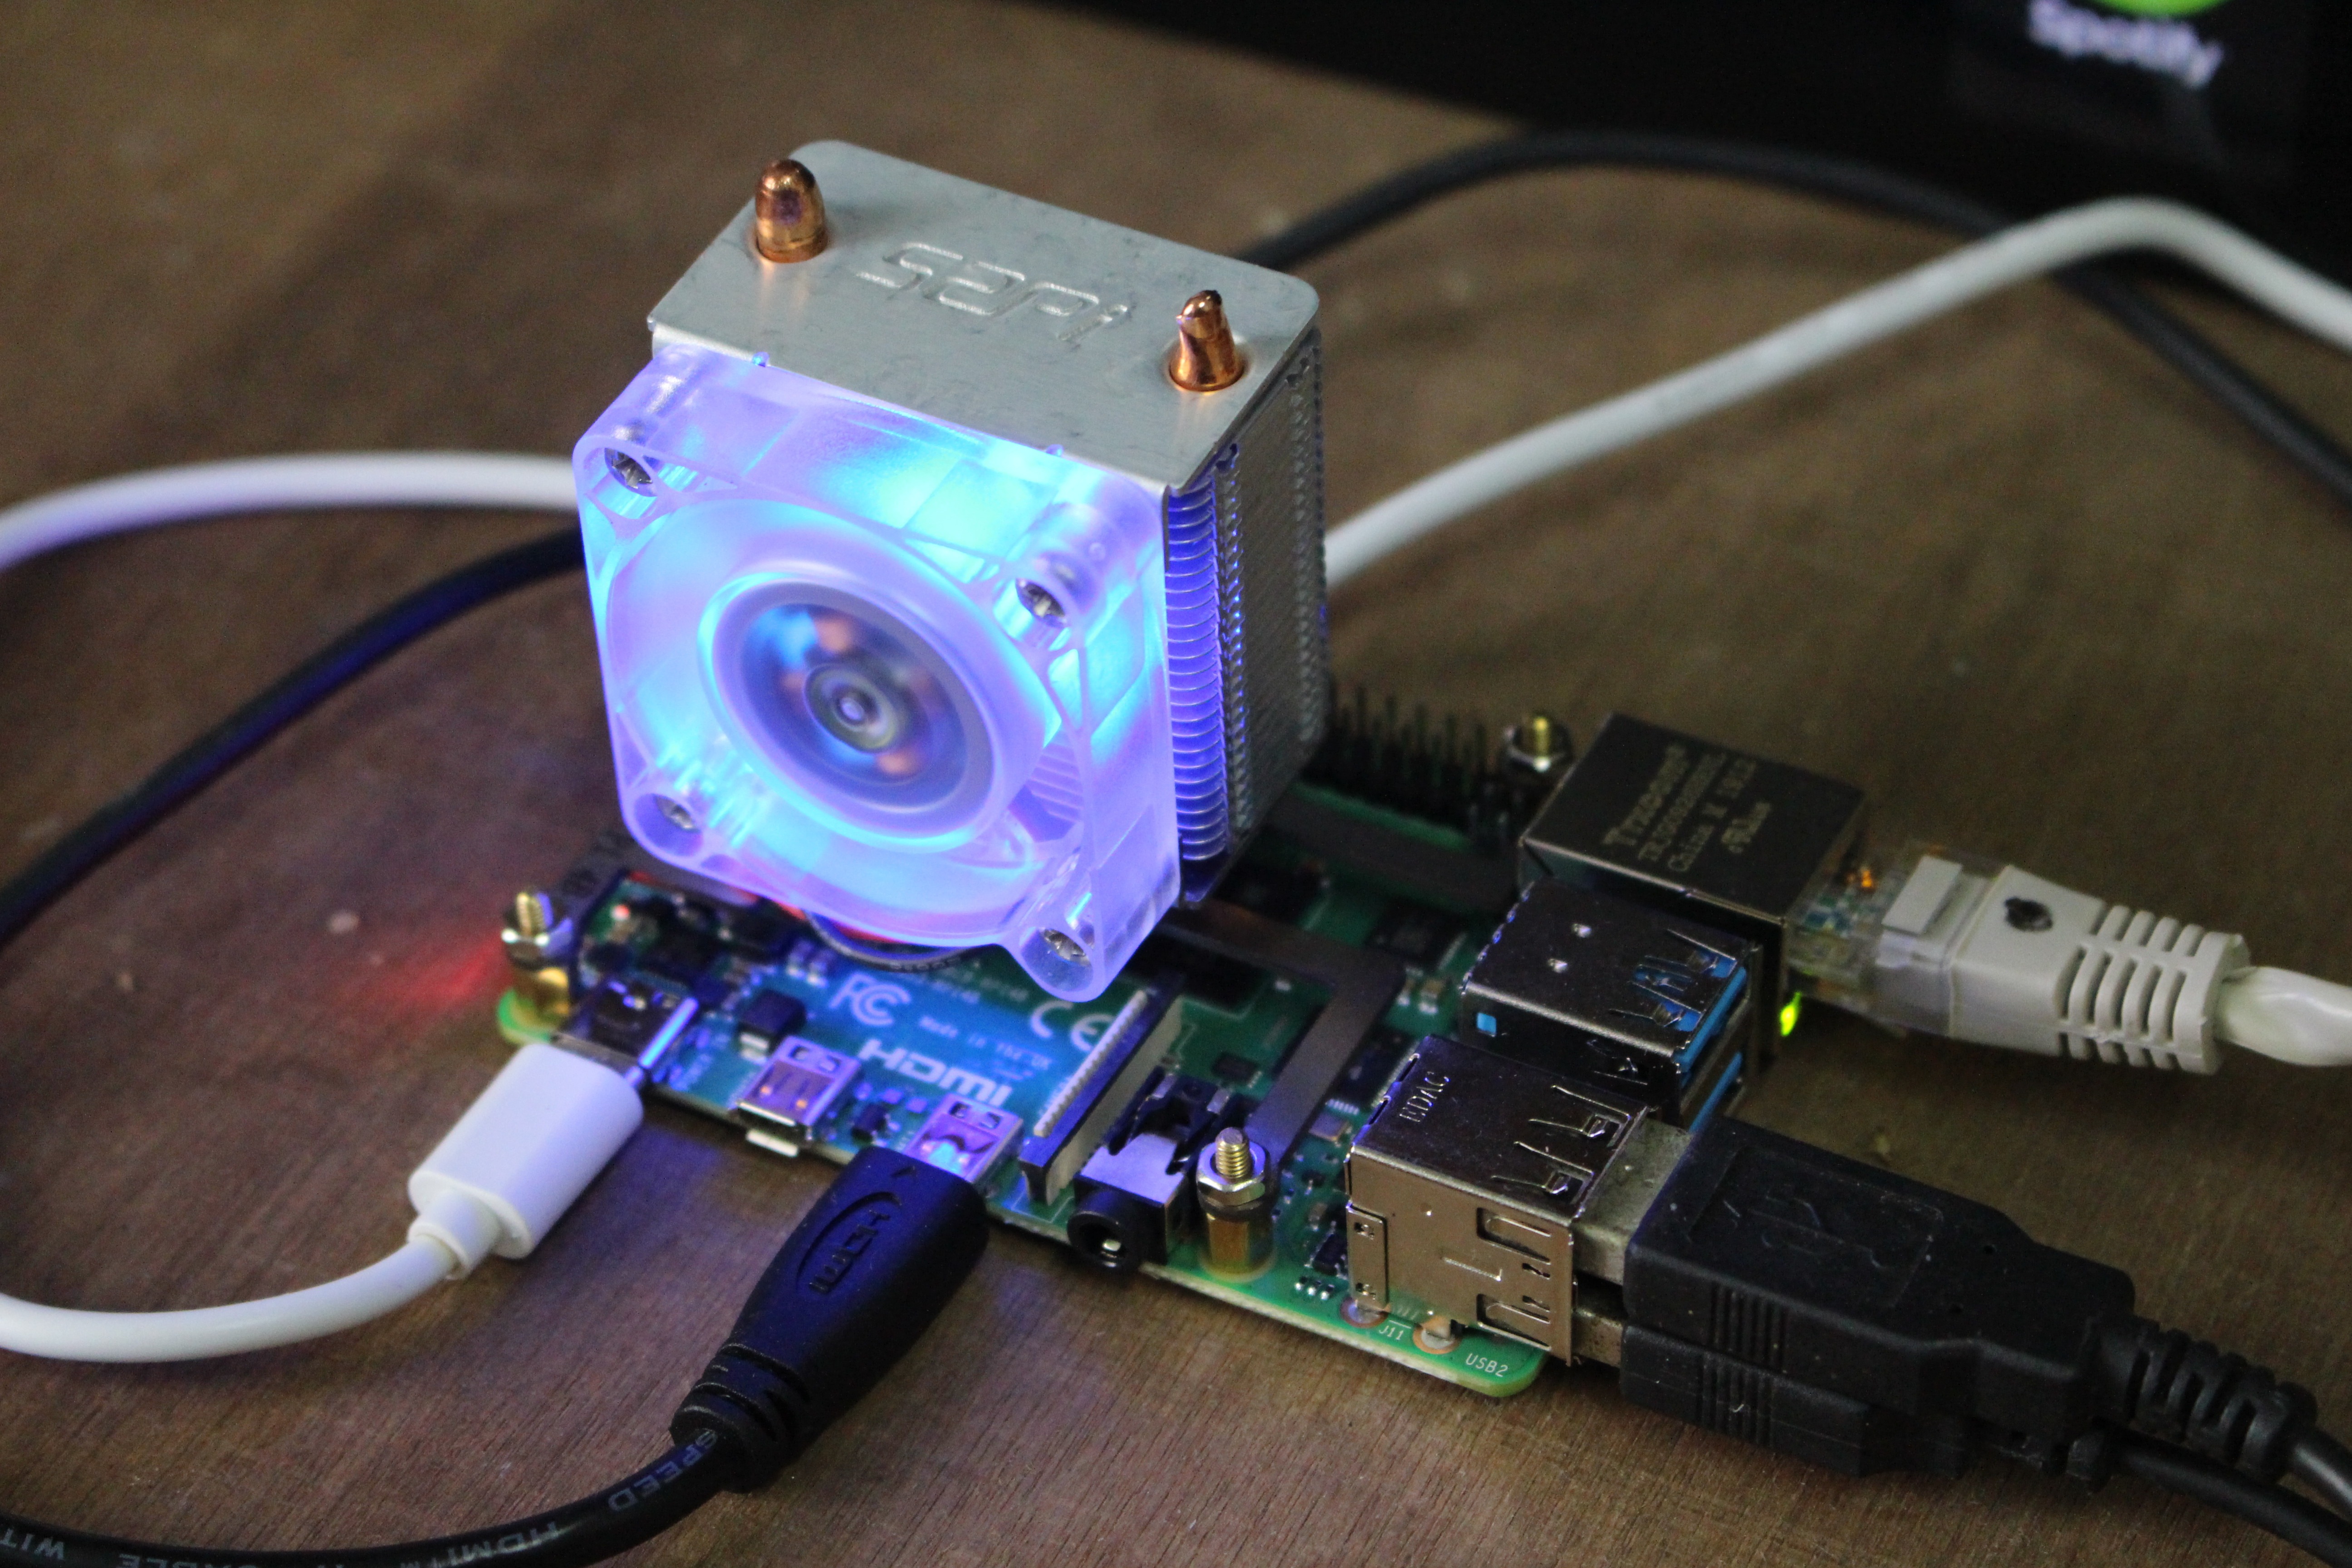
Time to connect the power, and oh…. pretty blue LEDs are included in the fan 🙂
You may remember I installed a new VLI firmware (PCIe USB controller firmware) that lowers temperature of the board, but sadly messes up with USB performance and stability, so I revert to the old firmware before the tests. I also enabled ZRAM on the board to avoid using swap.
Heatsink and Fan
I’ve run SBC Bench benchmark as I did previously.
|
1 2 3 4 5 6 7 8 9 10 11 12 13 14 15 16 17 18 19 20 21 22 23 24 25 26 27 28 29 30 31 32 33 34 35 36 37 38 39 40 |
sudo /bin/bash ./sbc-bench.sh -c WARNING: this tool is meant to run only on Debian Stretch or Ubuntu Bionic. When running on other distros results are partially meaningless or can't be collected. Press [ctrl]-[c] to stop or [enter] to continue. Average load is 0.1 or higher (way too much background activity). Waiting... sbc-bench v0.6.7 Installing needed tools. This may take some time... Done. Checking cpufreq OPP... Done. Executing tinymembench. This will take a long time... Done. Executing OpenSSL benchmark. This will take 3 minutes... Done. Executing 7-zip benchmark. This will take a long time..../sbc-bench.sh: line 600: 4899 Killed taskset -c 0 "${SevenZip}" b -mmt 1 >> ${TempLog} ./sbc-bench.sh: line 600: 5166 Killed "${SevenZip}" b >> ${TempLog} ./sbc-bench.sh: line 600: 5328 Killed "${SevenZip}" b >> ${TempLog} ./sbc-bench.sh: line 600: 5467 Killed "${SevenZip}" b >> ${TempLog} Done. Checking cpufreq OPP... Done. It seems neither throttling nor frequency capping has occured. Memory performance: memcpy: 2432.8 MB/s memset: 3676.2 MB/s (0.5%) 7-zip total scores (3 consecutive runs): OpenSSL results: type 16 bytes 64 bytes 256 bytes 1024 bytes 8192 bytes 16384 bytes aes-128-cbc 55707.06k 73550.23k 82137.43k 84408.32k 85240.49k 85289.64k aes-128-cbc 62474.97k 76502.66k 83107.93k 84614.14k 85144.92k 85284.18k aes-192-cbc 56188.73k 67307.50k 72079.96k 73335.81k 73572.35k 73684.31k aes-192-cbc 56289.17k 67400.87k 71970.90k 73364.14k 73708.89k 73657.00k aes-256-cbc 51019.48k 60064.62k 63479.98k 64658.77k 64929.79k 64913.41k aes-256-cbc 45727.39k 58163.75k 63111.68k 64359.77k 64921.60k 64902.49k Full results uploaded to http://ix.io/1Po0. Please check the log for anomalies (e.g. swapping or throttling happenend) and otherwise share this URL. |
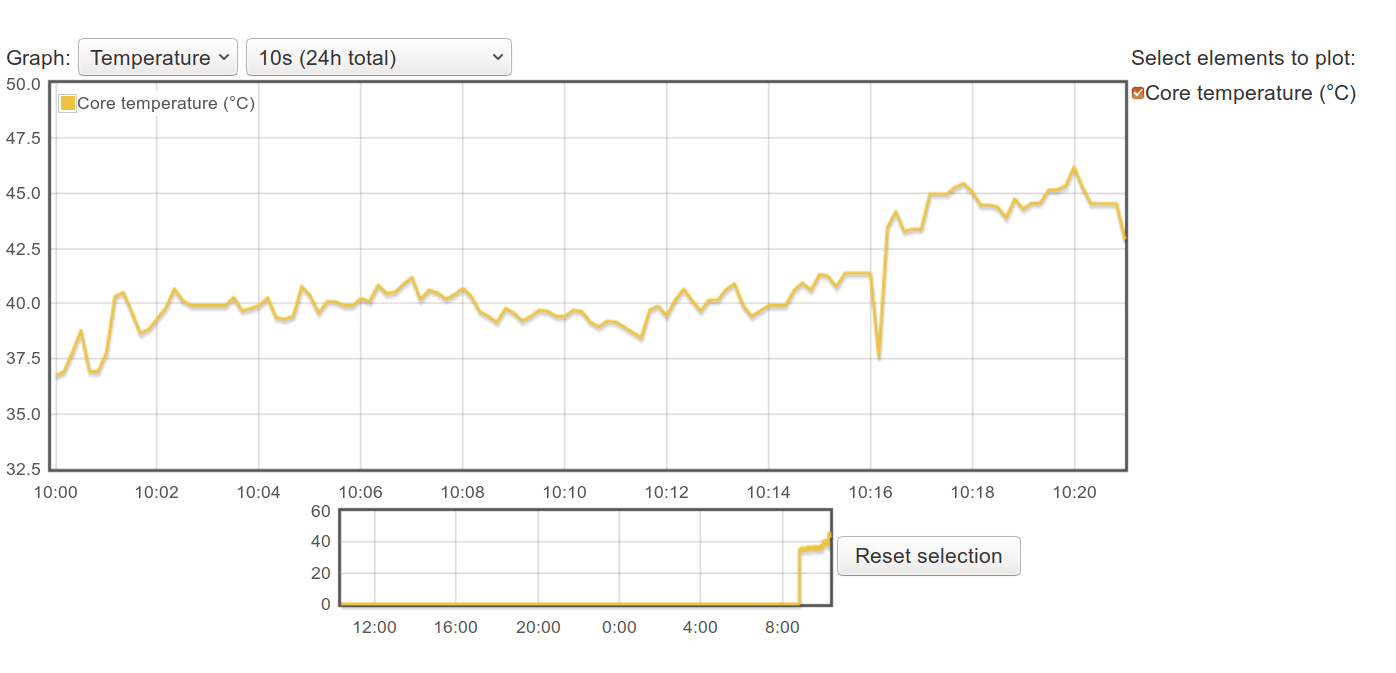
7-zip ran out of memory during testing, but we still get our data. With the heatsink the Raspberry Pi 4 will idle at around 37°C, and tops at 46.2°C when all four cores are used (7-zip multi-threaded compression/decompression). Note: room temperature was 27-28°C
Compare this to running the same benchmark without any heatsink at all, although at 28°C room temperature.
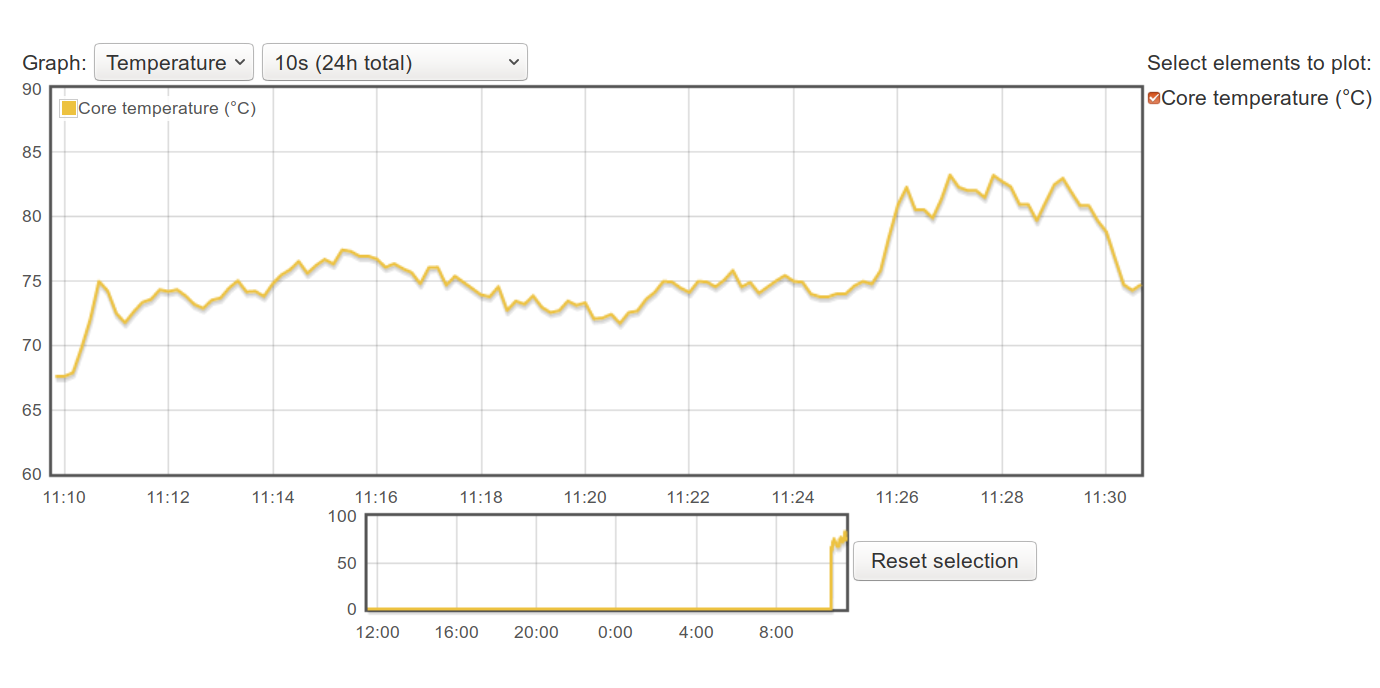
The board would idle at around 65°C going up to well above 80°C, and frequently throttling, as Broadcom BCM2711 processor will throttle if the temperature reaches 85°C.
So the fansink clearly does the job, but I hear some say they did not buy a Raspberry Pi 4 to install a noisy fan on top, and it also increases power consumption (by 0.4W).
Heatsink only
No problem.. We can disconnect the wires, and even completely remove the fan since it’s simply fastened with four screws.. We’ll lose the pretty LED light, but gain silence.
Let’s repeat the test… [Update: This section has been updated, as the first time I did not wait long enough for the idle temperature to stabilize]
|
1 2 3 4 5 6 7 8 9 10 11 12 13 14 15 16 17 18 19 20 21 22 23 24 25 26 27 28 29 30 31 32 33 34 35 36 37 |
sudo /bin/bash ./sbc-bench.sh -c WARNING: this tool is meant to run only on Debian Stretch or Ubuntu Bionic. When running on other distros results are partially meaningless or can't be collected. Press [ctrl]-[c] to stop or [enter] to continue. sbc-bench v0.6.7 Installing needed tools. This may take some time... Done. Checking cpufreq OPP... Done. Executing tinymembench. This will take a long time... Done. Executing OpenSSL benchmark. This will take 3 minutes... Done. Executing 7-zip benchmark. This will take a long time..../sbc-bench.sh: line 600: 17426 Killed taskset -c 0 "${SevenZip}" b -mmt 1 >> ${TempLog} ./sbc-bench.sh: line 600: 17678 Killed "${SevenZip}" b >> ${TempLog} ./sbc-bench.sh: line 600: 17991 Killed "${SevenZip}" b >> ${TempLog} Done. Checking cpufreq OPP... Done. It seems neither throttling nor frequency capping has occured. Memory performance: memcpy: 2636.2 MB/s (0.5%) memset: 3707.9 MB/s (0.5%) 7-zip total scores (3 consecutive runs): 5454 OpenSSL results: type 16 bytes 64 bytes 256 bytes 1024 bytes 8192 bytes 16384 bytes aes-128-cbc 62640.67k 76617.19k 83103.74k 84619.61k 85256.87k 85153.11k aes-128-cbc 62581.94k 76663.19k 83075.16k 84637.35k 85144.92k 85207.72k aes-192-cbc 56280.12k 67309.10k 72107.01k 73197.91k 73607.85k 73618.77k aes-192-cbc 56254.31k 67503.72k 71990.95k 73212.93k 73031.68k 73575.08k aes-256-cbc 51016.31k 60022.59k 63578.20k 64652.63k 64913.41k 64940.71k aes-256-cbc 50874.54k 60039.40k 63685.72k 64490.84k 64569.34k 64744.11k Full results uploaded to http://ix.io/1PoN. Please check the log for anomalies (e.g. swapping or throttling happenend) and otherwise share this URL. |
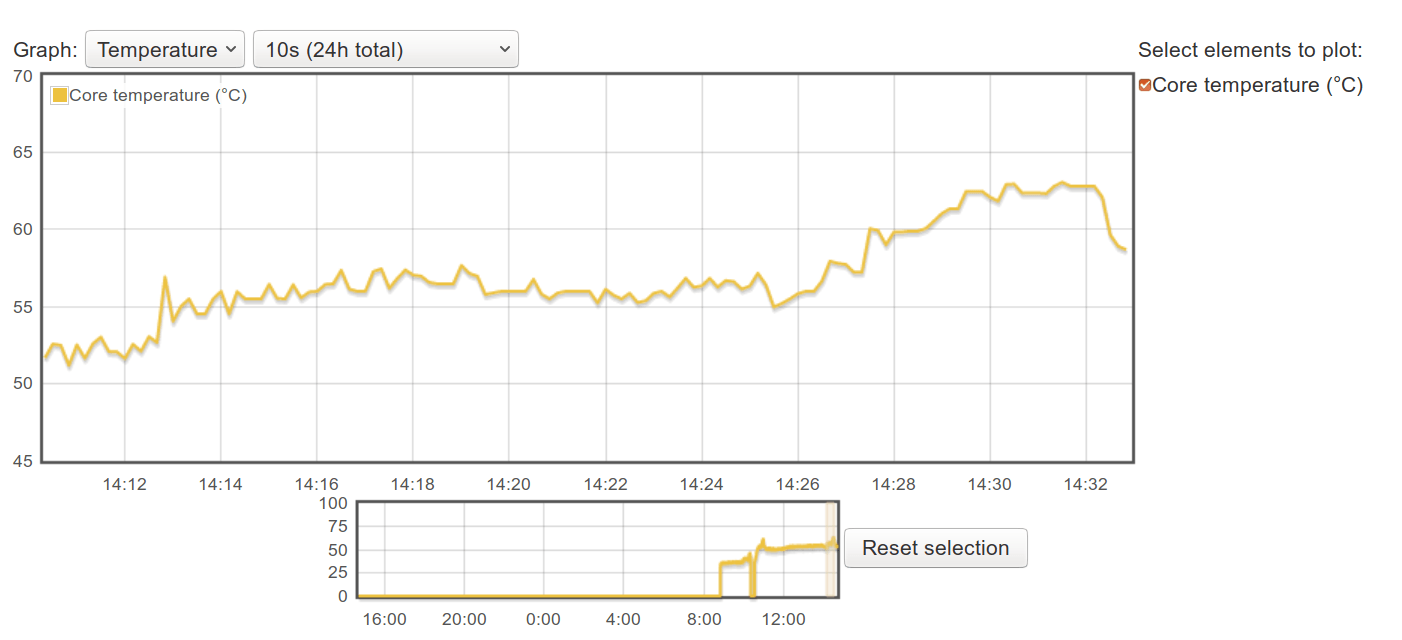
Temperature is higher, but still fairly cool with idle at ~42°C 52°C and the maximum being 61.2 around 63°C.
Conclusion
That means the heatsink itself is more than sufficient, and for most people use cases it’s even too big as a much smaller heatsink should be enough. The fansink can still have its use if you’re going to run the board in very high ambient temperature (60°C and up), but I don’t have an oven to test that part… Laughs and giggles is another proper use case for the ICE tower…
Seeed Studio sells the ICE Tower CPU cooling fan kit reviewed above for $20 plus shipping.

Jean-Luc started CNX Software in 2010 as a part-time endeavor, before quitting his job as a software engineering manager, and starting to write daily news, and reviews full time later in 2011.
Support CNX Software! Donate via cryptocurrencies, become a Patron on Patreon, or purchase goods on Amazon or Aliexpress


