A while ago, I tested Dodocool DC30S USB type C Hub with HDMI, USB port, and a card reader, and recently the company asked me whether I wanted to review another of their accessories.
My ISP has recently taken the habit of being down several hours each month, so I rely on my neighbor’s WiFi (with he’s permission) in those case, but since the signal is too weak, I’m using a wireless audio streamer and a power bank to extend the signal and connect it to my router using WDS Bridging. Then I saw Dodocool DC24 802.11ac WiFi repeater, so I decided to give it a chance.
Dodocool DC24 A750 Repeater Unboxing
I received the device is a cardboard box with some specifications.
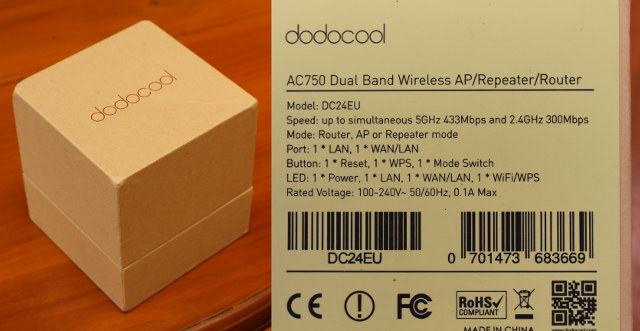
It’s an AC750 router/repeater with 300 Mbps @ 2.4 GHz + 433 Mbps @ 5 GHz. The product page linked above has some more details with the Ethernet port being Fast Ethernet (10/100M), and the solution is apparently based on Realtek RTL8881AN + 8192ER, but more on that later.
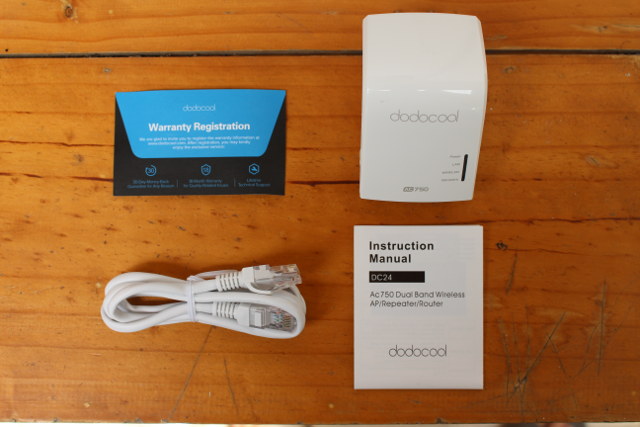
The router comes with an instruction manual, a warranty registration card, and an Ethernet cable.
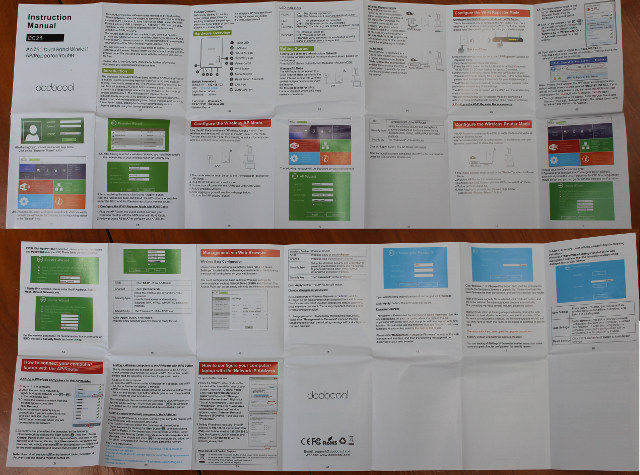
The manual is actually pretty good, and useful.
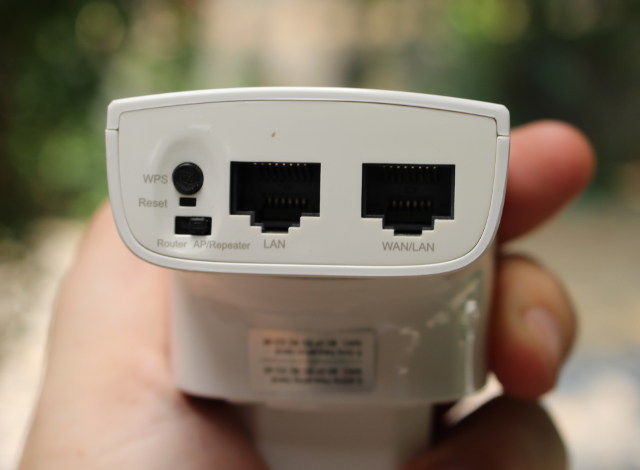
We’ll find the LAN and WAN ports, as well as WPS and reset buttons, and router AP/ repeater mode switch on the bottom side.
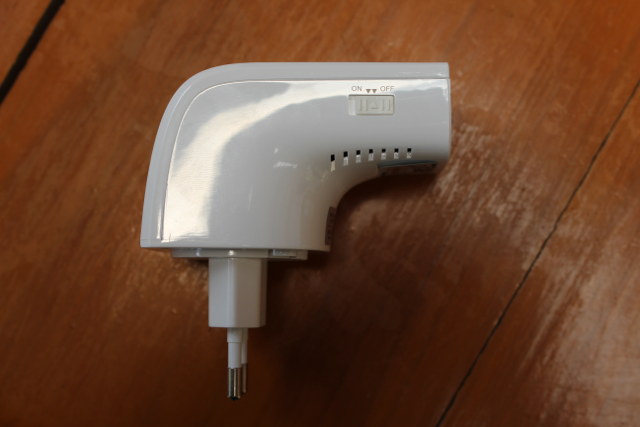
There’s also on on/off button on the side, and I asked for the EU plug version since it’s the most convenient for me.
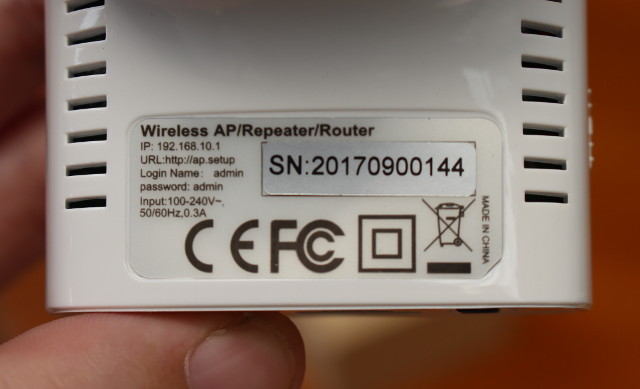
You may want to note the default IP address (192.168.10.1), and default username/password (admin/admin) before connecting it to an AC socket.
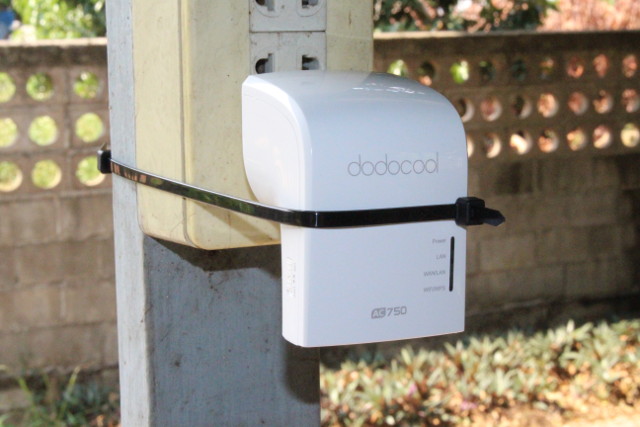
The repeater was a little loose in the socket I used, so I secured with cable ties.
Testing DC24 WiFi Repeater with an AC Router
 My neighbor’s router only works at 2.4 GHz, so since the device supports 802.11ac, I first tried it with my own TP-Link TL-WDR7500 AC1750 router.
The instruction’s manual says the easiest method is to use WPS, but to cut a long story short, the WPS button is also a reset button, and I must have pressed it a little too long, and instead it set my router to factory settings. No problem, I reconfigured it, I went with the second method that did not look too complex either.
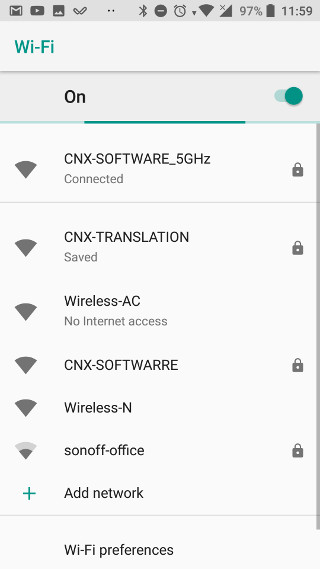
First, we should make sure the mode switch is set to Repeater, and we can connect the device to the mains. My phone could then detect two new SSID’s: Wireless-AC and Wireless-N.
I went with Wireless-AC, and then connected to http://192.168.10.1, using admin/admin credentials we previously noted.
I was then asked to change the password for security reasons. That’s a good point, as most routers I’ve used in the past are happy to stay on admin/admin forever… So now, we are in the web interface’s main page.
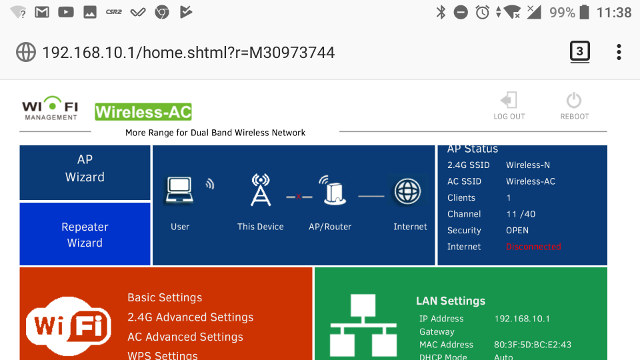
Let’s tap on Repeater Wizard…
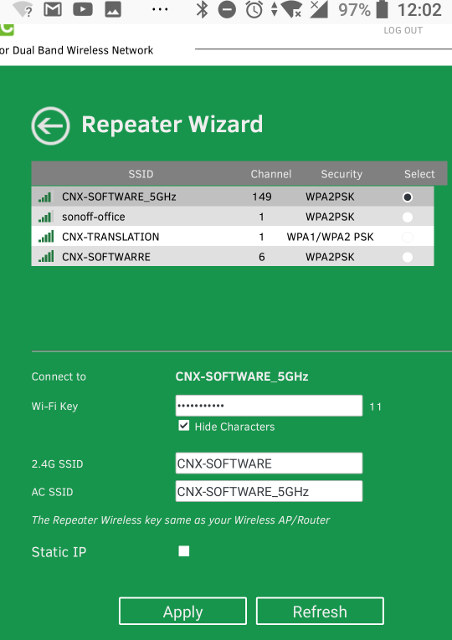
You should get a list of detected SSD, select the one you want to use, input the WiFi password, and optionally change the 2.4G & AC SSID fields before tapping on Apply.
A Blue Screen of “We are Applying your Settings” follows…
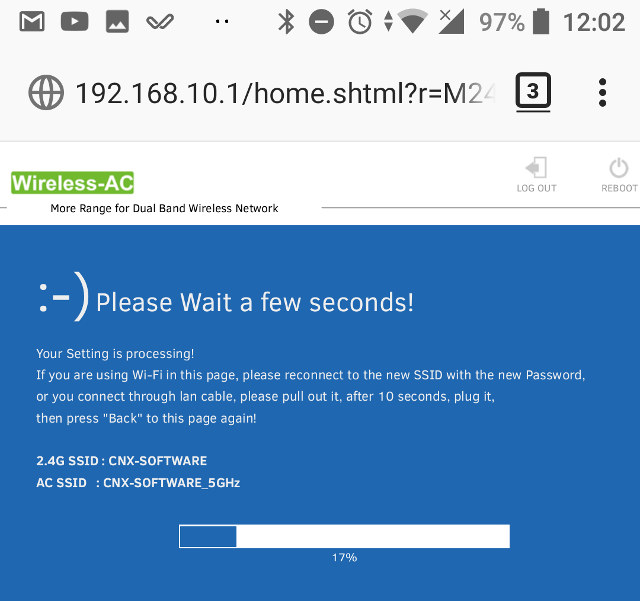 and after around a minute, we are ready to use our repeater. So I’ve done some measurements using WiFi Analyzer, Ookla speedtest and Magic iperf Android apps.
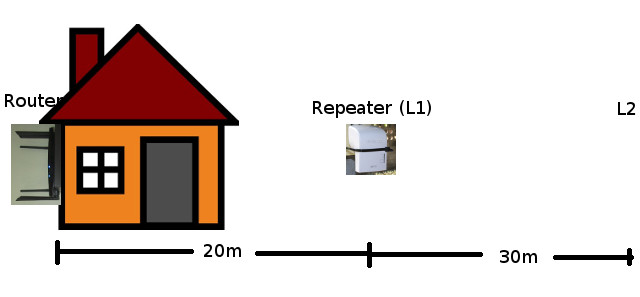
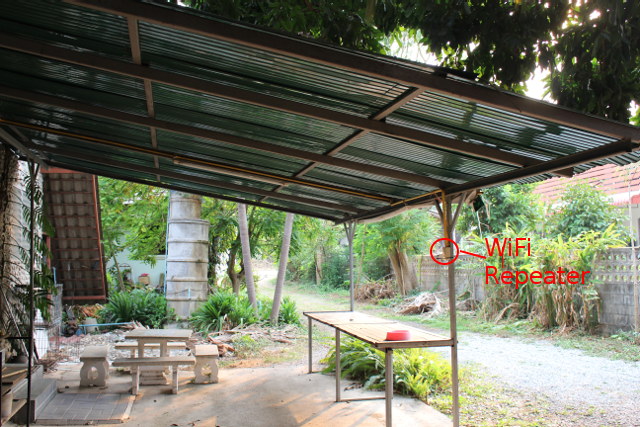
The router is on one side of the house, the WiFi repeater about 20 meters facing the other side (Position L1), and I also made measurements 30 meters further away from the repeater in a line of sight location (Position L2). Graphical representation of my setup.
The charts above show the signal strength for the TP-Link router (Blue) and WiFi repeater (Cyan) in L1 and L2 positions.
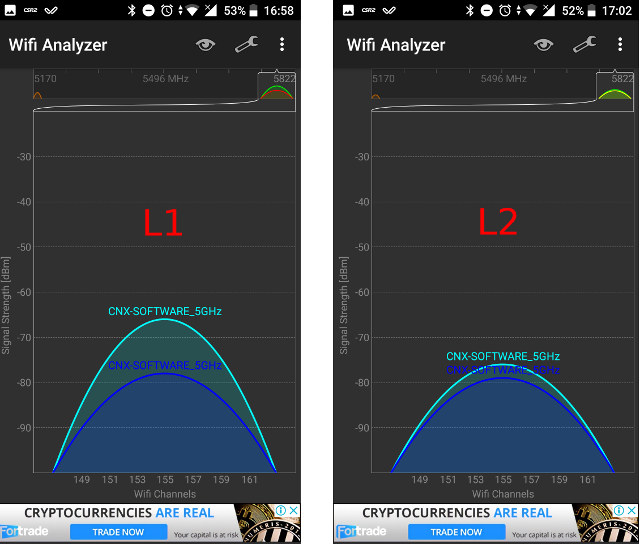
Close to the WiFi repeater there’s a clear different, but the further I go the less difference there is, and if I go far enough, I could even invert the blue and cyan signal. So in this case, the repeater should work better to target specific areas (e.g. blind spots), rather than extend the range.
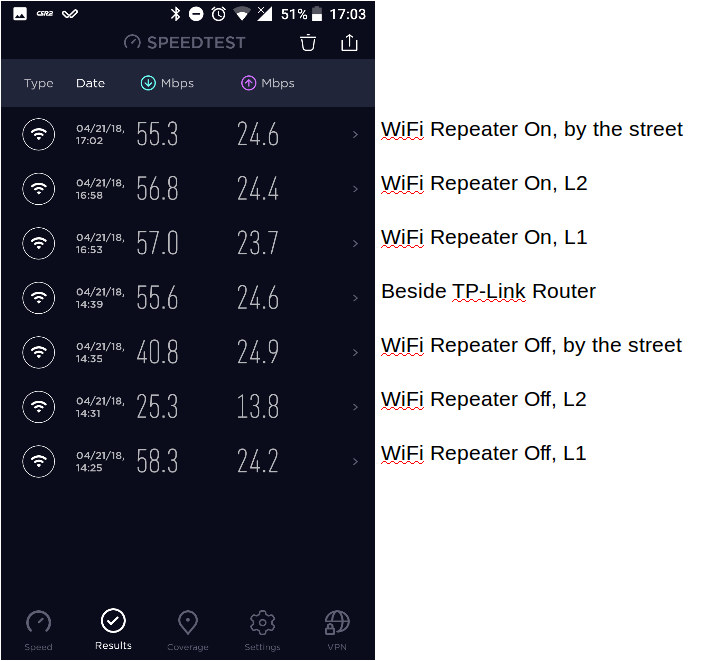
When I first subscribe to my ISP I purchase a 20/10Mbps fiber optic connection, but then while running Speedtest I go number above 50 and 20 respectively, and it turns out my connection got upgraded without me knowing or noticing it. Anyway the results are interesting and should be read from bottom to top in chronological order.
“By the street” is a location about 10 meter further away from L2, around 60 meters from the TP-Link router. If I’m not using the WiFi repeater, I can still connect, but the performance is not as consistent. There’s a drop in L2, but for some reasons the connection gets better when I move further away… There’s a large metal roof somewhat on the way of the signal, which may explain it…
When the WiFi repeater is enable I get good speed in all locations I tried.
Let’s see if iperf data corroborates those results.
| Upload | Download | |
| WiFi Repeater On, by the street | 21.8 Mbps | 27.1 Mbps |
| WiFi Repeater On, L2 | 42.8 Mbps | 50.7 Mbps |
| WiFi Repeater On, L1 | 60.7 Mbps | 117 Mbps |
| Beside TP-Link Router | 214 Mbps | 214 Mbps |
| WiFi Repeater Off, by the street | N/A | N/A |
| WiFi Repeater Off, L2 | 24.2 Mbps | 26.4 Mbps |
| WiFi Repeater Off, L1 | 43.6 Mbps | 54 Mbps |
Somehow I forgot to take a screenshot by the street while the WiFi repeater was off… But available results are pretty consistent with the Speedtest ones, including the drop in L2 without the WiFi repeater, and the improved performance overall with the WiFi repeater turned on. I was not expecting a better performance in L1, but it’s likely the repeater – which does not need to run on batteries – delivers more power than my smartphone, so that’d explain it.
Dodocool DC24 Teardown
At this point, I was done with testing using my own WiFi router, and wanted to change the settings. How to do that? According to the user manual, pressing the reset pinhole for three seconds will do. I tried that with a pencil, then a toothpick, but it did not work, and I could not feel any click when doing so.
So I decided to open the thing. It’s quite easy. Remove two screws hidden behind two plastic bits, and pop the cover up with some plastic tool.
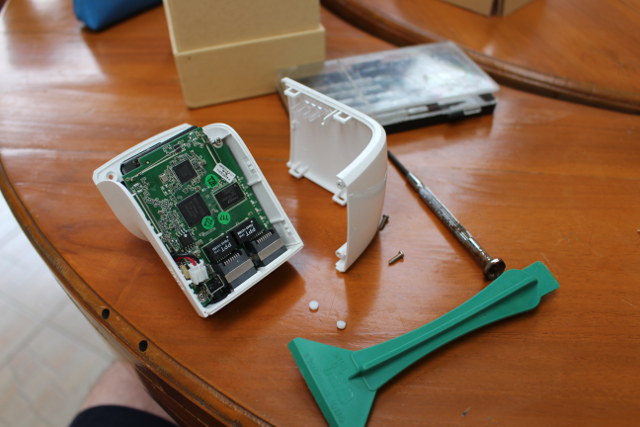
If we look at the board we can see, it’s not based on Realtek chips, but instead Mediatek MT7628AN MIPS processor – just like Vocore 2 board – and Mediatek MT7610EN 802.11ac WiFi chip, and comes with Zentel A3R12E40DBF DDR2 chip (512 Mbit / 64 MB) & a serial flash.
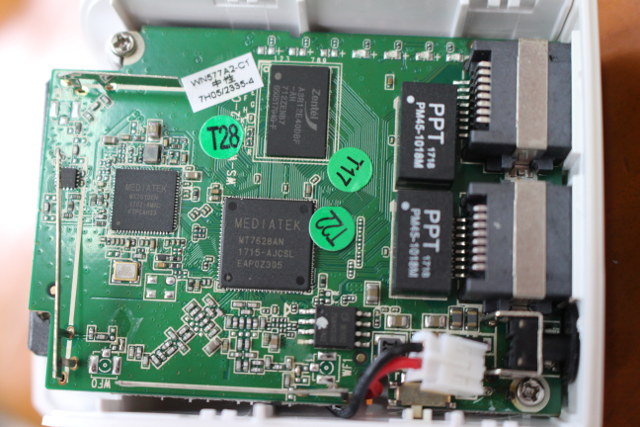
But let’s remove two more screws, to check out that reset button.
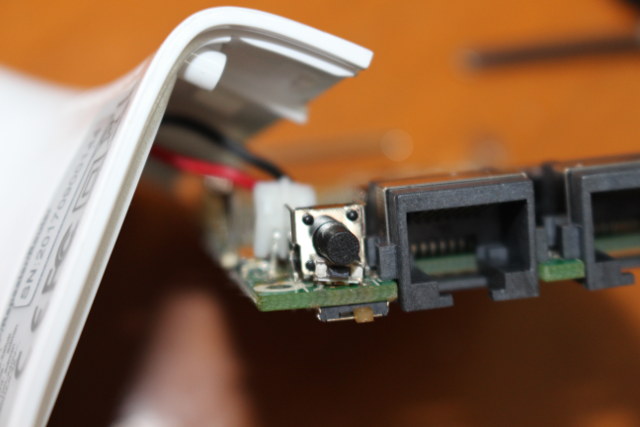
Oops, I think I know the problem. It got dislodged, as I may have a pushed a little too hard… I could completely remove it with a pair or tweezers, but it’s a SMT push button, which does not look easy to resolder, especially with that WPS switch right on top. I tried to shortcut the pins manually, but it did not work either
Software reset, and Connection to 2.4 GHz Router
So I thought there must be another way. Since the device is configured in repeater mode, I could not access it, but I tried to switch to AP mode, and not much more success, maybe because of conflicting SSID. So I turned off my TP-Link router, and tried to connect to CNX-SOFTWARE_5GHz SSID. Success, I could access the web interface in 192.168.10.1, and selected “Load Default” to reset the device to factory settings.
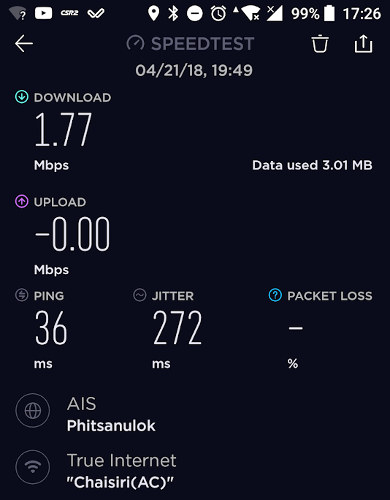
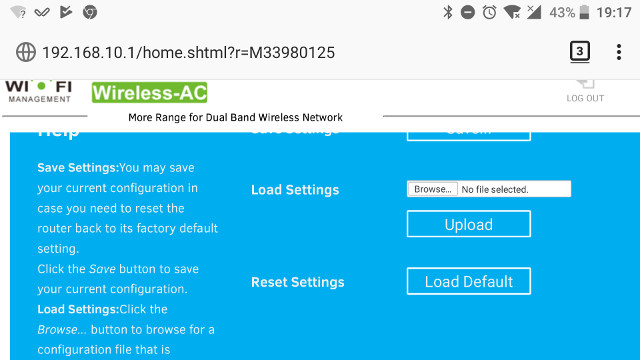 I could go through the repeater wizard as shown in the first section of this review, and connect to my neighbor’s router using the device. But when I switched to my phone, it also got stuck to “Obtaining IP address”, before switching back to access point mode, because the connection was not good enough. I moved the repeater to another AC socket location, and it worked once, but the connection is pretty slow and unreliable.
My audio streamer + power bank method works better because I can place it in an optimal location. I could improve the situation with the repeater using a power extension to place it in the same location, but it’s not really that practical in my case (15 meters from socket, needs protection from rain).
But if all you want is to get rid of some blind spots inside your house or office, Dodocool DC24 should do the job. Just be gentle with that reset button 😉 The WiFi repeater can be purchased on Amazon for $27.99.

Jean-Luc started CNX Software in 2010 as a part-time endeavor, before quitting his job as a software engineering manager, and starting to write daily news, and reviews full time later in 2011.
Support CNX Software! Donate via cryptocurrencies, become a Patron on Patreon, or purchase goods on Amazon or Aliexpress


