
Hello Karl here again with another 3D printer review. Today we are looking at an HE3D K280. I saw the brand for the first time on Gearbest a couple months ago and asked for it to review. I never heard of this brand before and have been wanting to review a delta style printer. In my case, I should have been careful what I asked for. It took me quite some time to get it to print utilizing the whole print bed. I experienced several challenges and after defeating them I enjoy this printer quite a bit. Delta style printers mesmerize me with the movements that they make and all the math that goes into moving the extruder in the X, Y and Z. Regular Cartesian printers are rather simple in this respect.
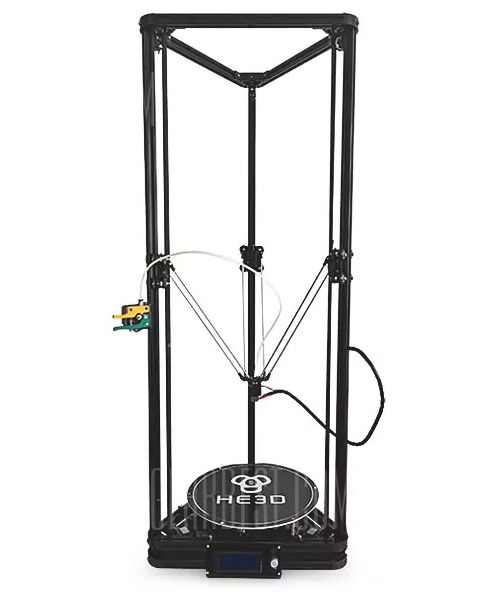
- Build Volume – 280×600 mm
- Heated bed
- No Parts cooling
- 2020 aluminum and all injected molded parts except effector
- Bowden Style
- 24V system
HE3D K280 Build
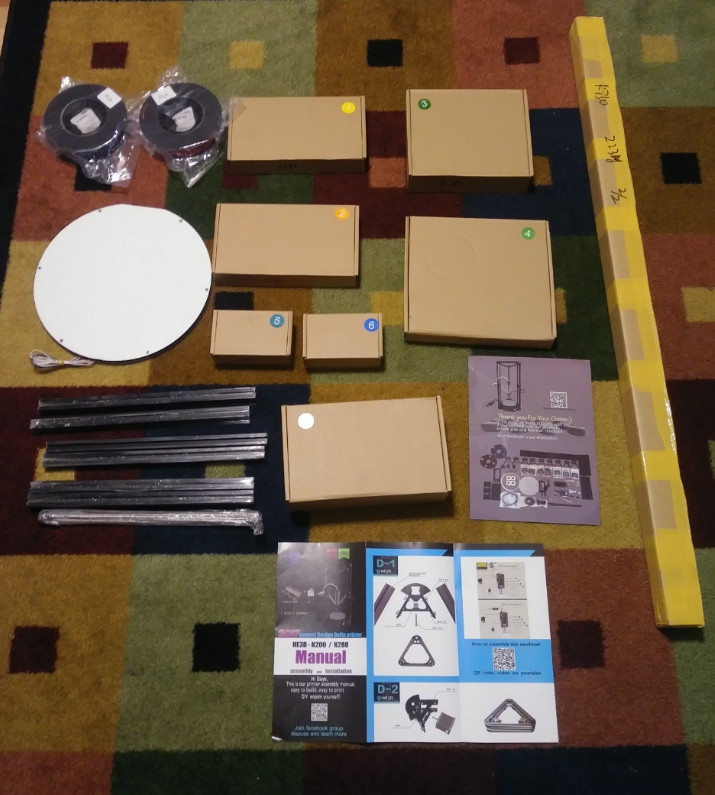
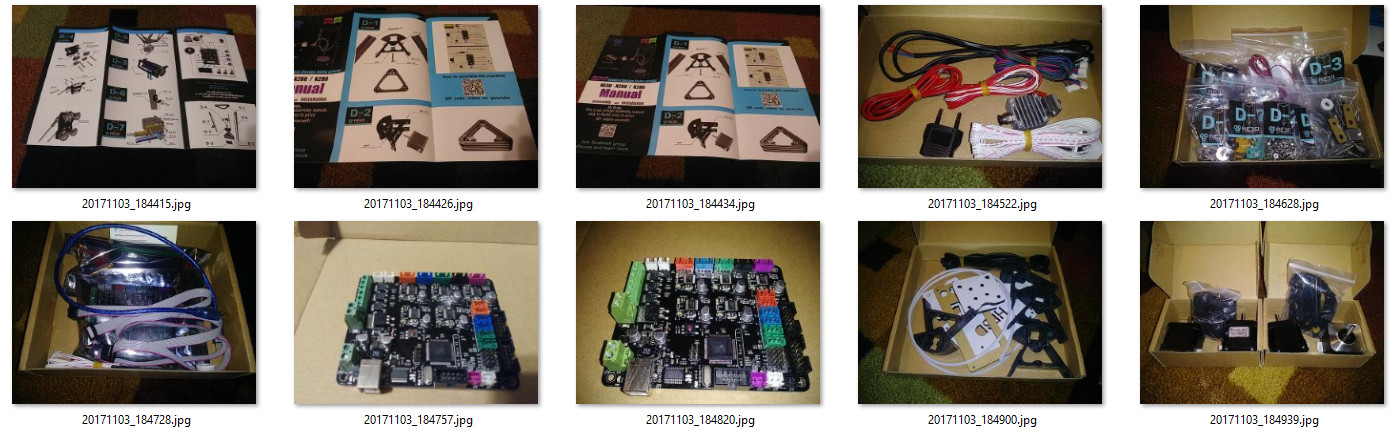
Building a delta printer I found out is quite a bit easier to build than a Cartesian printer. The instructions for this kit are not the greatest. I followed the K200 Youtube videos for the majority of the build. I utilized the printed instructions that came with the printer and I also used the Facebook group. I wish instructions were all in one place but I was able to work through it. I contacted the HE3D Facebook representative and found him extremely helpful. I had about 6 hours build time.
I really liked that it came with some important spares/piece parts. Extra nozzles from .2 to .5 came with the kit. Extra heater block. Extra sensor for probing the bed.
HE3D Firmware
I hate to admit how much time I spent trying trying to calibrate this printer with the stock repetier firmware. I worked every night after the kids went to bed trying to calibrate for over a week. For giggles, I started compiling Marlin and I worked through all the configs, and if you use Marlin firmware you can go from build to printing in about 10 minutes with calibration. Here is a copy of Marlin Bugfix Config. Clone the Bugfix Branch and replace the 2 config files in the marlin directory. This branch is in active development so if an error occurs you might need to compare my configs with generic delta in the example configurations directory. I use Beyond Compare for this task.
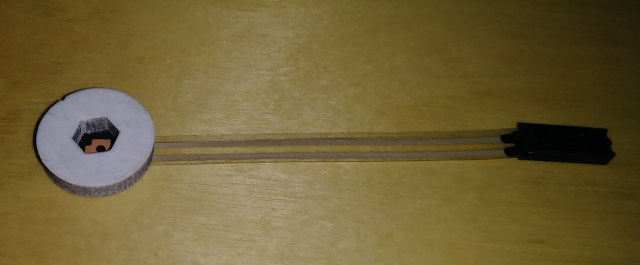
One feature I like is the sensor that is included. It fits over the hot end and it is used for calibrating. When pressure is applied it closes a contact.
This sensor is used to calibrate the machine. While building I made sure everything was as square and as tight as possible. I pushed the endstops for the three towers against the top bracing. I also leveled the bed with a speed level.
Once the firmware is flashed, I connected the sensor from above to the pins shown in the manual and placed over the nozzle. I went to Delta Calibration under Prepare in the menu. And let it do its thing. It probes the bed and several points around the perimeter of the bed then homes then does it over and over up to 10 times. At this point all I needed to do is set the Z offset, and save the configuration to EEPROM. In the marlin firmware, I defaulted the offset to -.15 but as I ran through testing -.3 works just about every time for my sensor.
If you make a change and flash firmware again please go into the menu and have it restore failsafe. That was another pain in my side realizing some changes that I made were not taking affect.
After this, I had very successful prints and the nozzle was not digging into the bed near the perimeter.
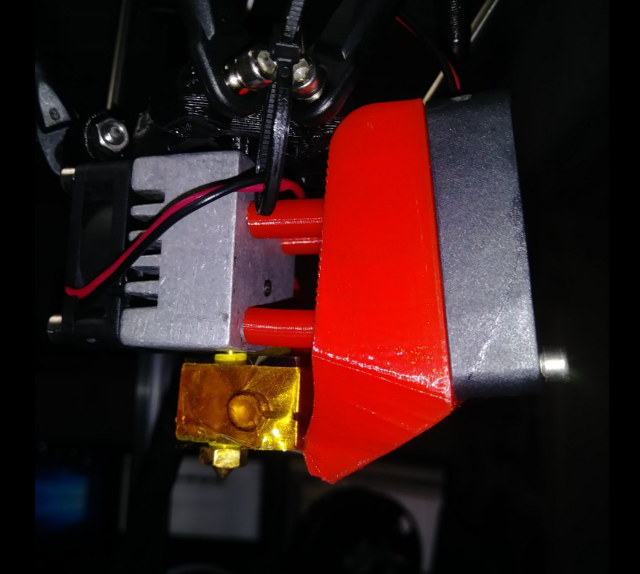
Please note you must insulate your heat block with at least some Kapton tape or run the chance of heating error if using a parts cooler.
Bed
I did not like the bed mounting system that came with it. If you needed to get to the board it meant unmounting the bed and recalibrating the bed. So I designed some simple removable mounts. 3 are needed. They can be found here on Thingiverse. I put everything together like the picture below then place on 2020 and line everything up. Then tighten the t-nuts. After this I was able to pop the bed off with no tools and get underneath without worrying about calibration each time.
Parts Cooling
The K280 did not come with a parts cooler and it is a 24v system. A while ago purchased several 40mm fans and radial fans off of Ebay. In this case they were 12v. I didn’t want to purchase any more fans so I opted for a buck converter to step down the 24v to 12v. I connected and adjusted to voltage to about 13v. I used this parts cooler. In my second part I will print out this fan on Thingiverse provided by HE3D and try a radial fan.
First Couple Prints
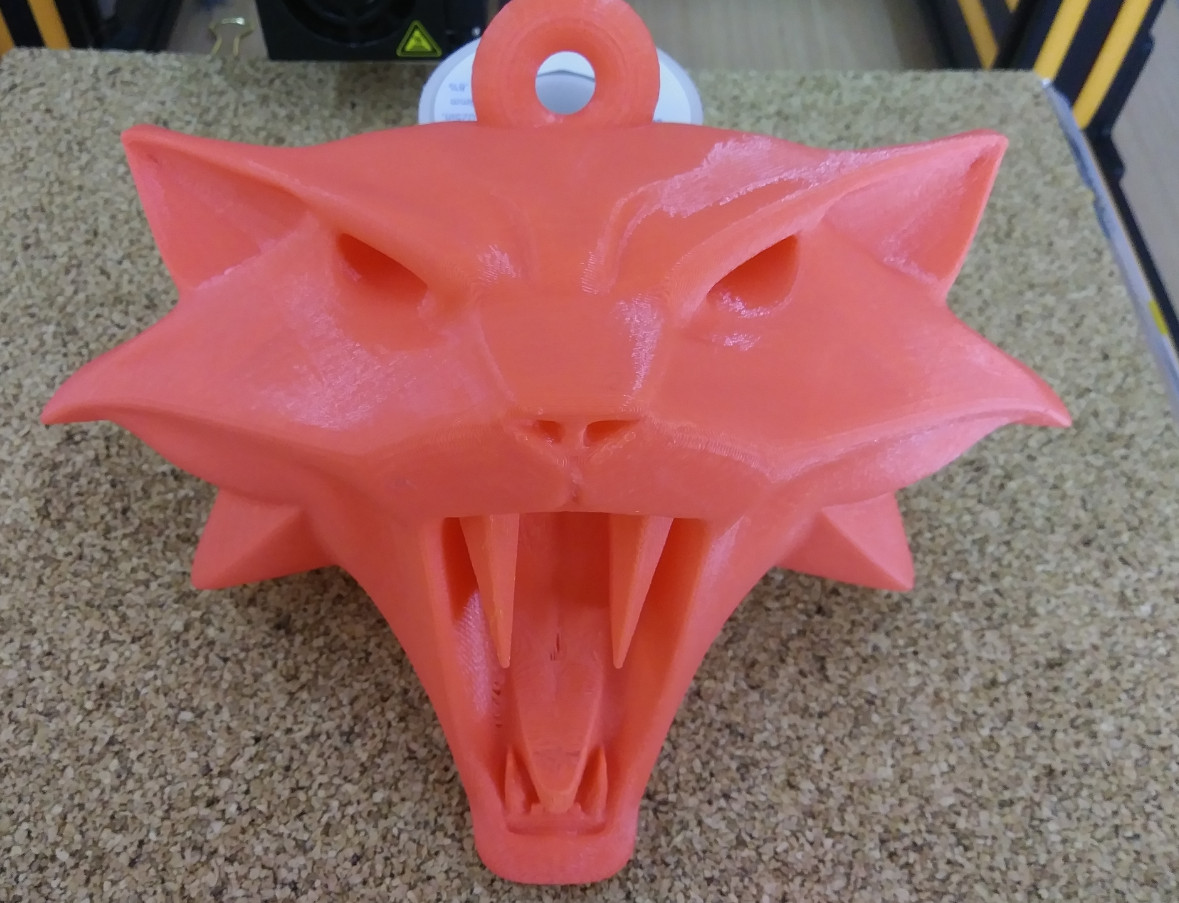
This turned out really good. I have a couple holes in the mouth but that is a slicing problem. I try to save time so I use very little infill and only 3 top layers.
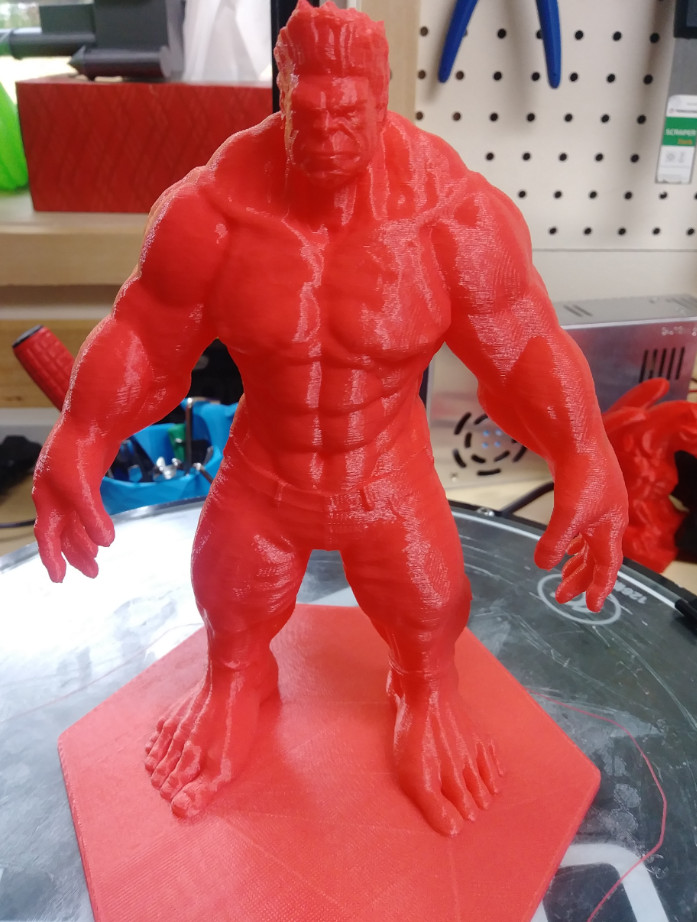
This one turned out very well as well. It took me several times to print. There was supports already in the STL that were generated by Meshmixer but were thin. After I scaled up the print it worked the first time.
First thoughts
I really wish the printers that I have been reviewing came with good build documentation with the printer and I didn’t have to search for it. This is the biggest downfall of these kit printers. Parts cooling is the next biggest item I don’t know why that is not standard. I was able to overcome the build with the help of the FB group and the HE3D rep was very helpful. One thing that I have to look into fixing is dimensional accuracy. I found parts were off more than I am accustomed to and I believe a calibration issue and will look into this in the next part. They were off over 1 mm. I will also try to find a 12” mirror to print on. I would like to thank Gearbest for sending a review unit. If you are interested in purchasing you can find a link here. [Update 13/12/2017: The following injected molded effector and fans are now included with all printers]
Continue reading HE3D K280 Delta 3D Printer Review – Part 2: Upgrades, Calibration, and More 3D Prints

Karl is a technology enthusiast that contributes reviews of TV boxes, 3D printers, and other gadgets for makers.
Support CNX Software! Donate via cryptocurrencies, become a Patron on Patreon, or purchase goods on Amazon or Aliexpress


