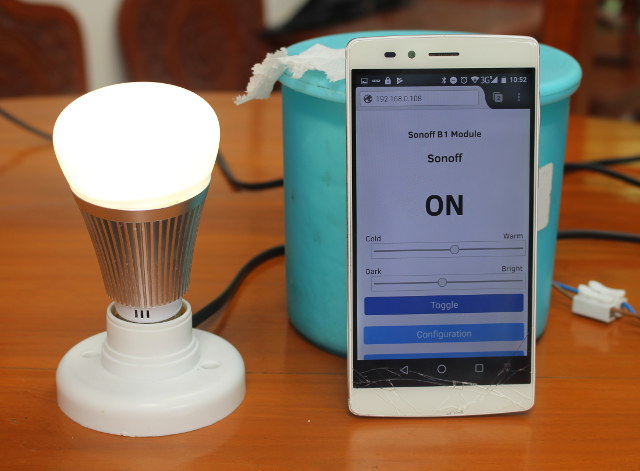
I’ve already reviewed Sonoff B1 light bulb using the stock firmware combined eWelink app for Android, and as promised in the first part of the review, I’ve also tested the ESP8285 based WiFi light bulb with Sonoff-Tasmota open source firmware, and report my findings in this new post.
Before we can play with the new firmware, we need to install it, and I’ve just explained how to upgrade Sonoff devices to Sonoff-Tasmota firmware either using some soldering skills and a USB to serial board, or some network configuration skills and perform an OTA update using ITEAD Studio/eWelink original firmware update mechanism.
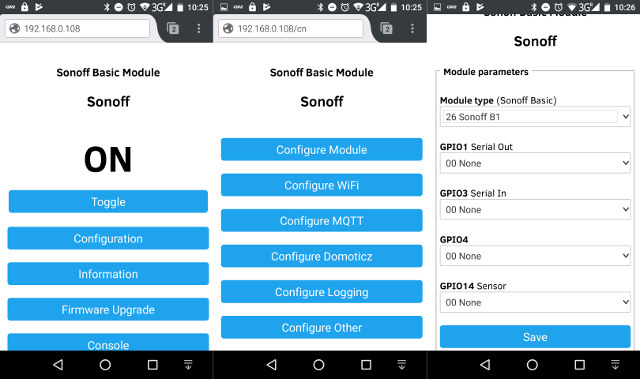
 So for this part of the review, I’ll assume we have just freshly update the light bulb with Sonoff-Tasmota using the binary images released by the developer. First, you’ll need to find the IP address of the light bulb with your router or tools like nmap or arp, and access the web interface in your web browser with for example http://192.168.0.108. You’ll probably want to setup a fixed IP address for easier access later on. By default the firmware is set to use Sonoff Basic, but we can go to Configuration->Configure Module, to change that to Sonoff B1, and click Save.
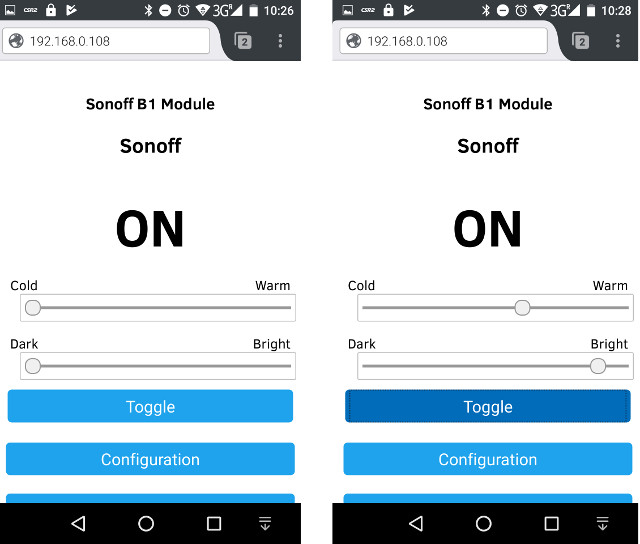
This will reboot the light bulb with Sonoff B1 configuration, and you should be able to turn on the light bulb by adjusting the Color or Brightness sliders, or pressing the Toggle button.
It works with some lag, one or two seconds, just like on the eWelink app. What you don’t get in the current web interface is the ability to adjust RGB values, so only the white lights can be controlled easily. More on RGB control later. You’ll also lose timer and schedule ability from the web interface, because that’s more of a task for your home automation server using either MQTT or Domoticz whose options are available in the Configuration menu as shown below.
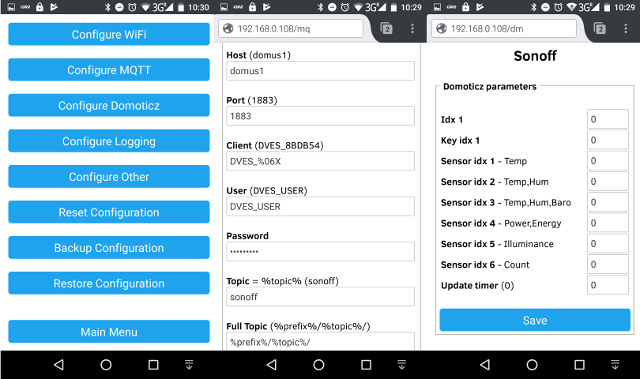
I won’t explain how to use those in details, as Karl’s has already written a tutorial using MQTT it with his home automation project with Sonoff-Tasmota (aka arendst’s firmware), and one my side, I have published instructions to setup MQTT and Domoticz with ESPurna open source firmware for a Sonoff POW switch.
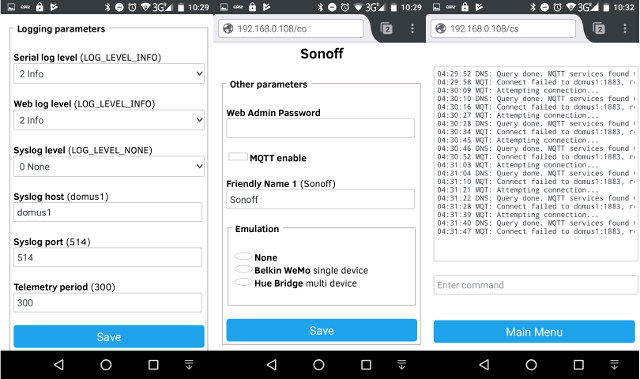
Other menus in the configuration include reset/backup/restore configuration, logging parameters, and other parameters such as Belkin Wemo or Hue Bridge emulation. If we go back the back to the main menu, we have some more buttons beside Toggle and Configuration such as access to the console, which you can use to monitor the output log, and send various commands, including ones to control the RGB lights. For example, I could set to the light to green with the command “Color 00FF000000”, since for Sonoff B1 they use hexadecimal values for Red, Green, Blue, Warm White, and Cold White. You can also use those commands over serial, MQTT, and a web API. For the latter the command
|
1 |
http://192.168.0.116/cm?cmnd=Color%20FF00000000 |
will set the color to red, and return:
|
1 |
RESULT = {"POWER":"ON", "Dimmer":100, "Color":"FF00000000"} |
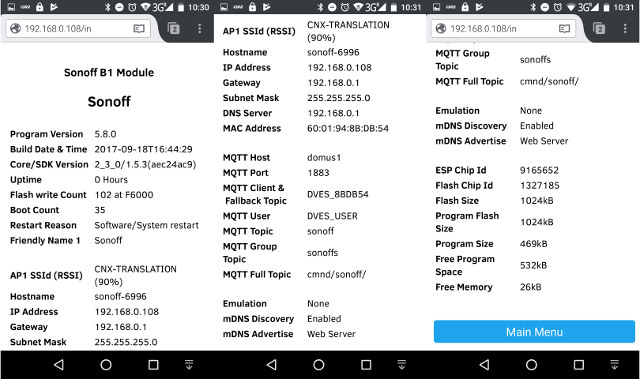
Other options include Information with a complete overview of most parameters…
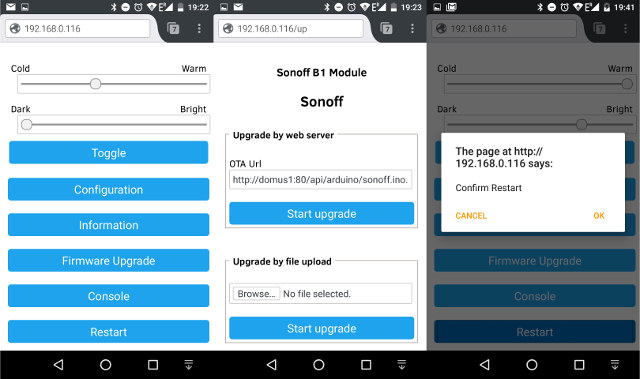
Firmware Upgrade to do so either from an update server, or a local file, and Restart to reboot the device.
Sonoff B1 with ITEAD Studio’s stock firmware and eWelink app is pretty much plug and play, and you can control multiple lights from one app, configuring the white and RGB lights, and setting timers and schedules, all right from your smartphone. The downsides are that it requires the Internet to communicate with the cloud service, the firmware and app are both fully closed source so you can’t add features or easily integrate it with your home automation system using standard protocols such as MQTT or a REST API. It does integrate with Amazon Alexa or Google Home however.
Going the open source firmware route is more a hack-flash-configure-get confused-setup-learn-and-play solution. Once you have overcome the steps to upgrade firmware to Sonoff-Tasmota, it’s not at all convenient to control your devices from the built-in web interface, especially if you have many. The firmware has really been designed to use with an home automation gateway like Domoticz, where you can manage with your lights or switches from a single web interface. So you’d have to setup your gateway, and you’ll likely get an Android app with it to do something like eWelink app, except you’ll have much more flexibility. You can get a bunch of lights to change colors in sync with your music (likely with a short delay), turn them on when motion and low light conditions are detected, or when specific persons are detected using face detection, etc.. The limit is only your imagination, and willingness to learn new skills.
I’d like to thank ITEAD Studio for sending a review sample. If you are interested, you can purchase the light bulb directly from them for $18 plus shipping. It can also be found on sites like Amazon US or Banggood.

Jean-Luc started CNX Software in 2010 as a part-time endeavor, before quitting his job as a software engineering manager, and starting to write daily news, and reviews full time later in 2011.
Support CNX Software! Donate via cryptocurrencies, become a Patron on Patreon, or purchase goods on Amazon or Aliexpress


