
NanoPi Duo is an inexpensive Allwinner H2+ quad core board with 256MB or 512MB RAM that can fit into a breadboard, and FriendELEC also provides a starter kit with a carrier board, heatsink, enclosure, USB debug board and cable, as well as optional accessories such as an half-length SSD drive. The company sent me two kits for review, so I’ll first check out what I got, and show how to assemble the kit, before actually playing with the board and kit next month.
NanoPi Duo Starter Kit Unboxing
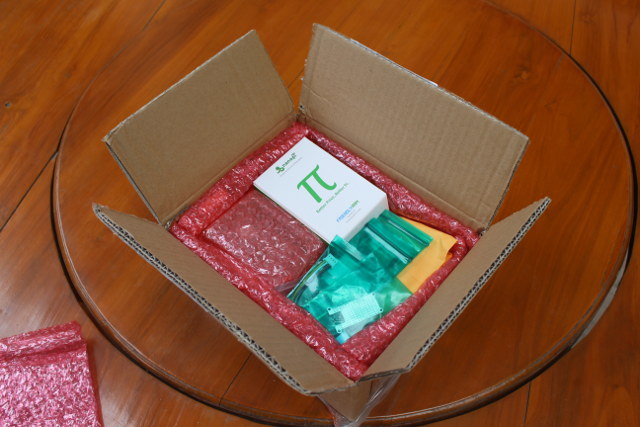
I got a bunch of boxes and bubble wraps in the package…
… and indeed received two identical kits.
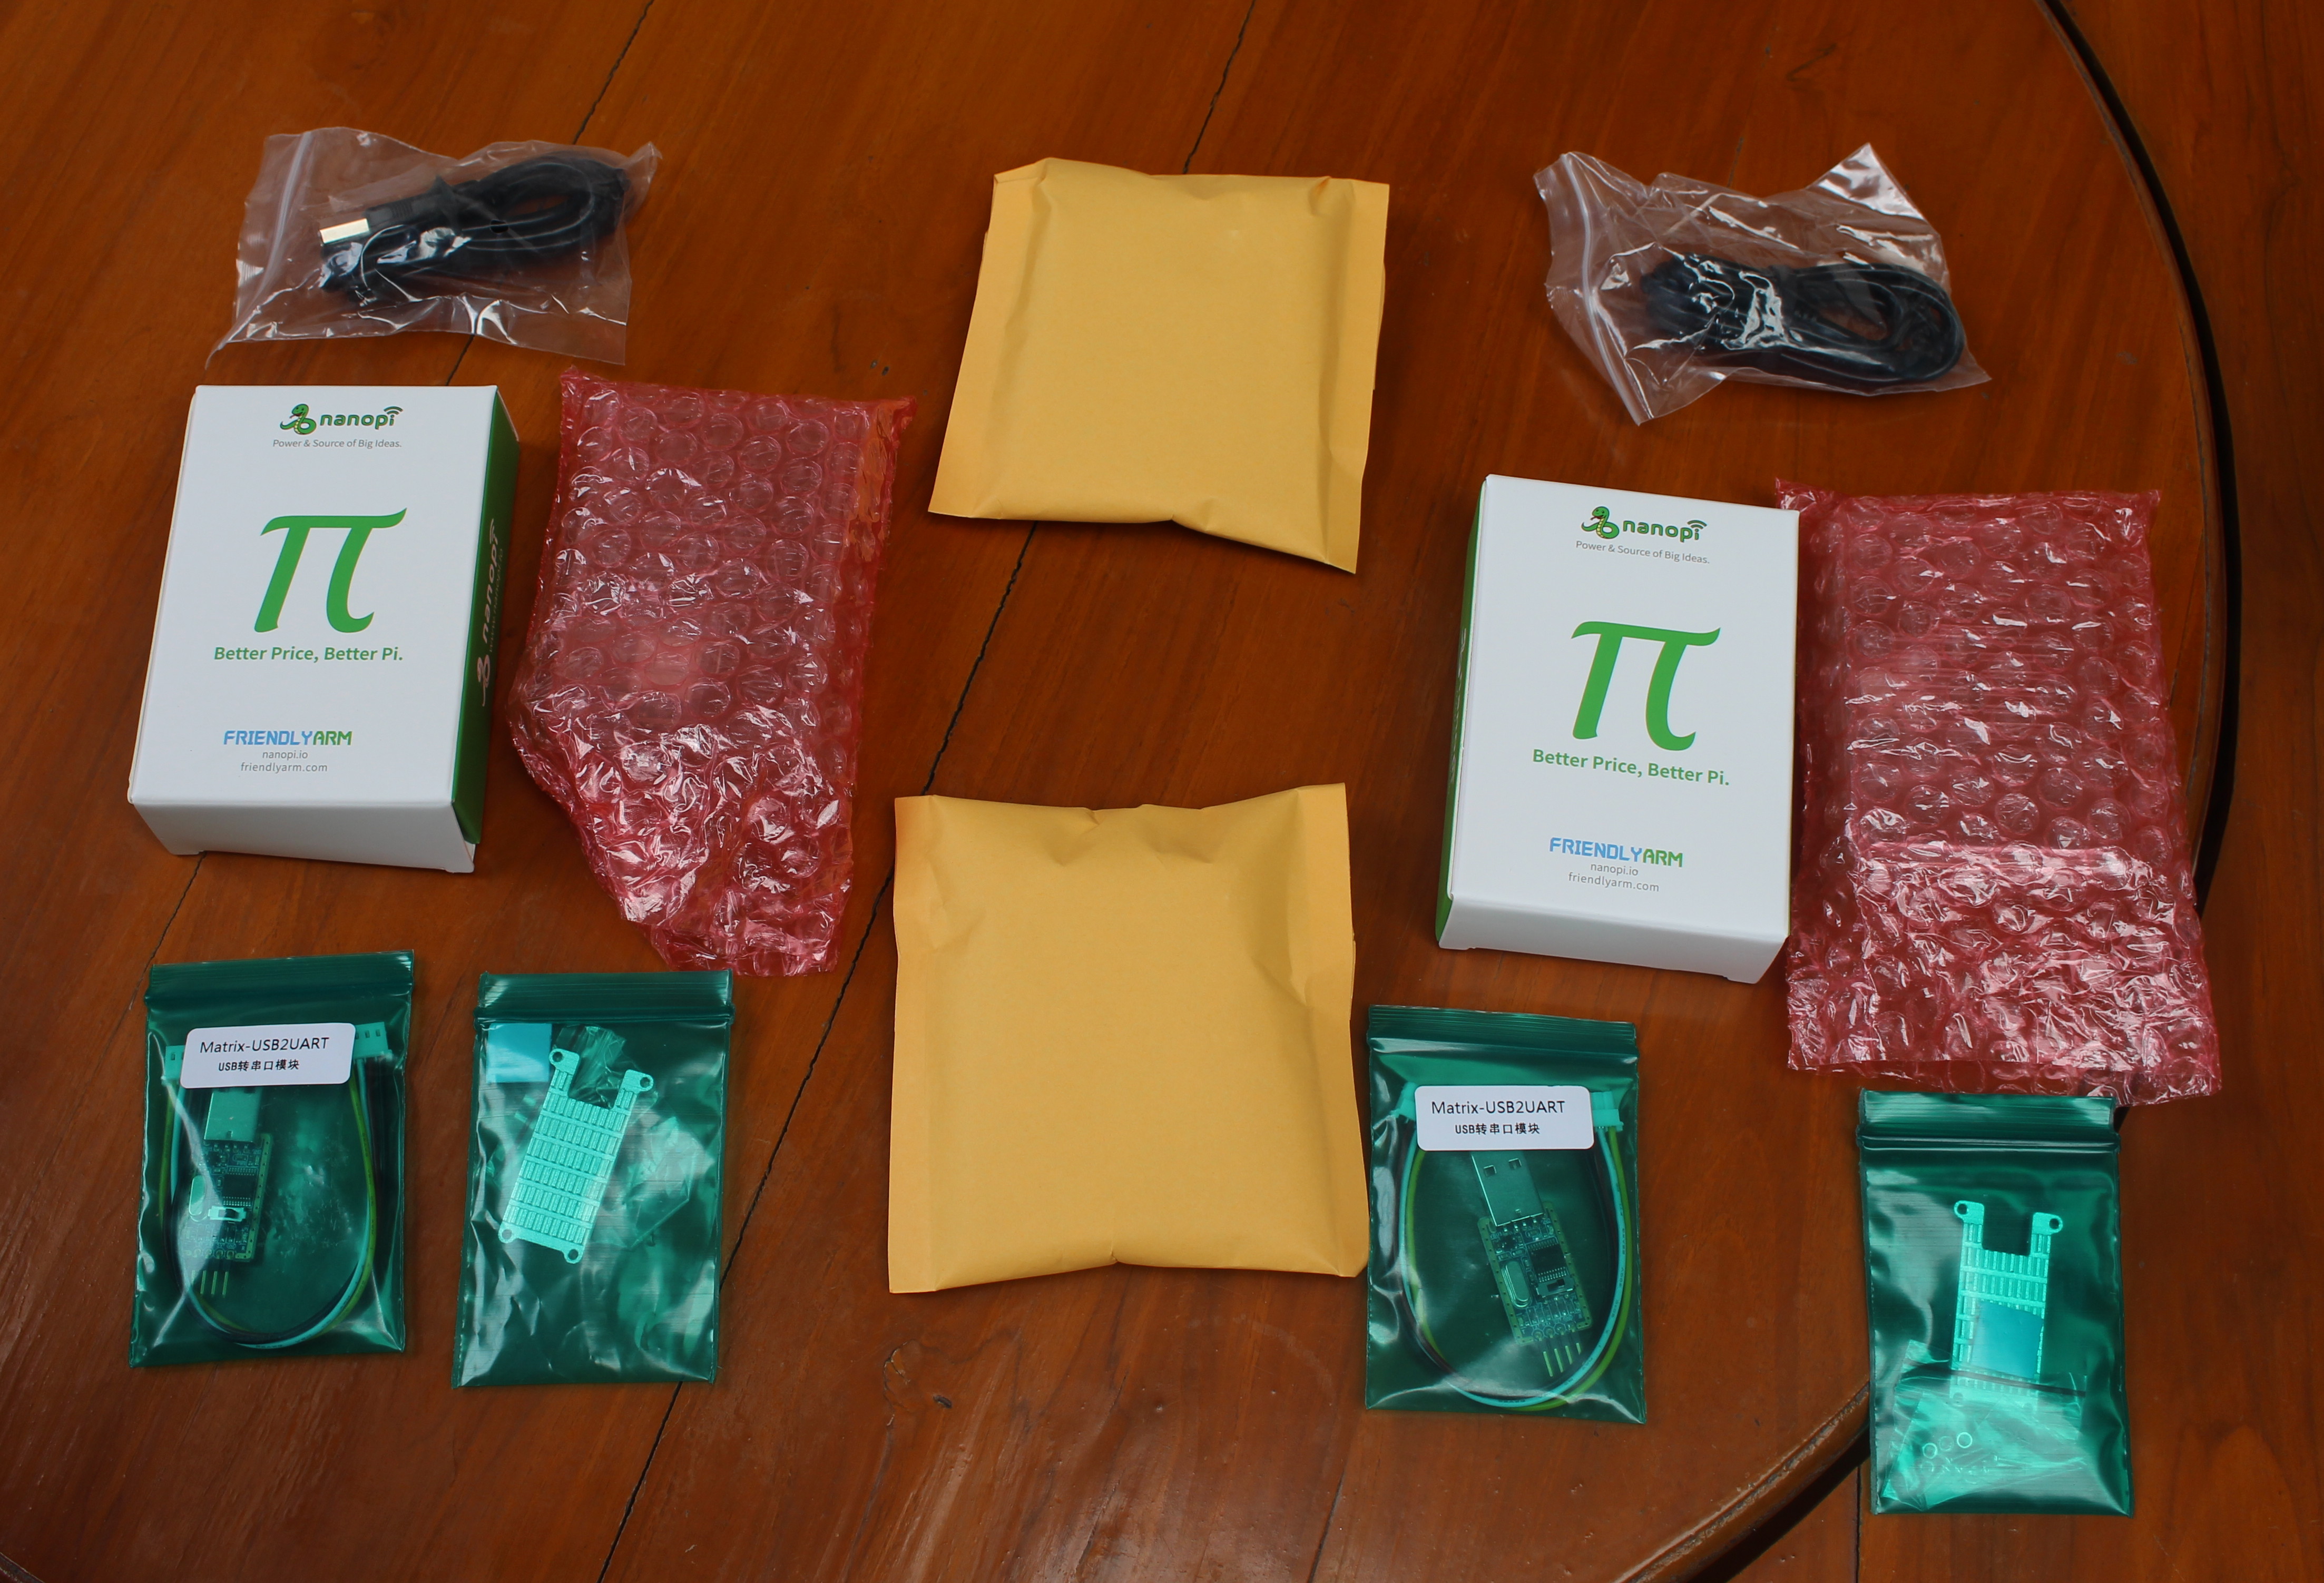
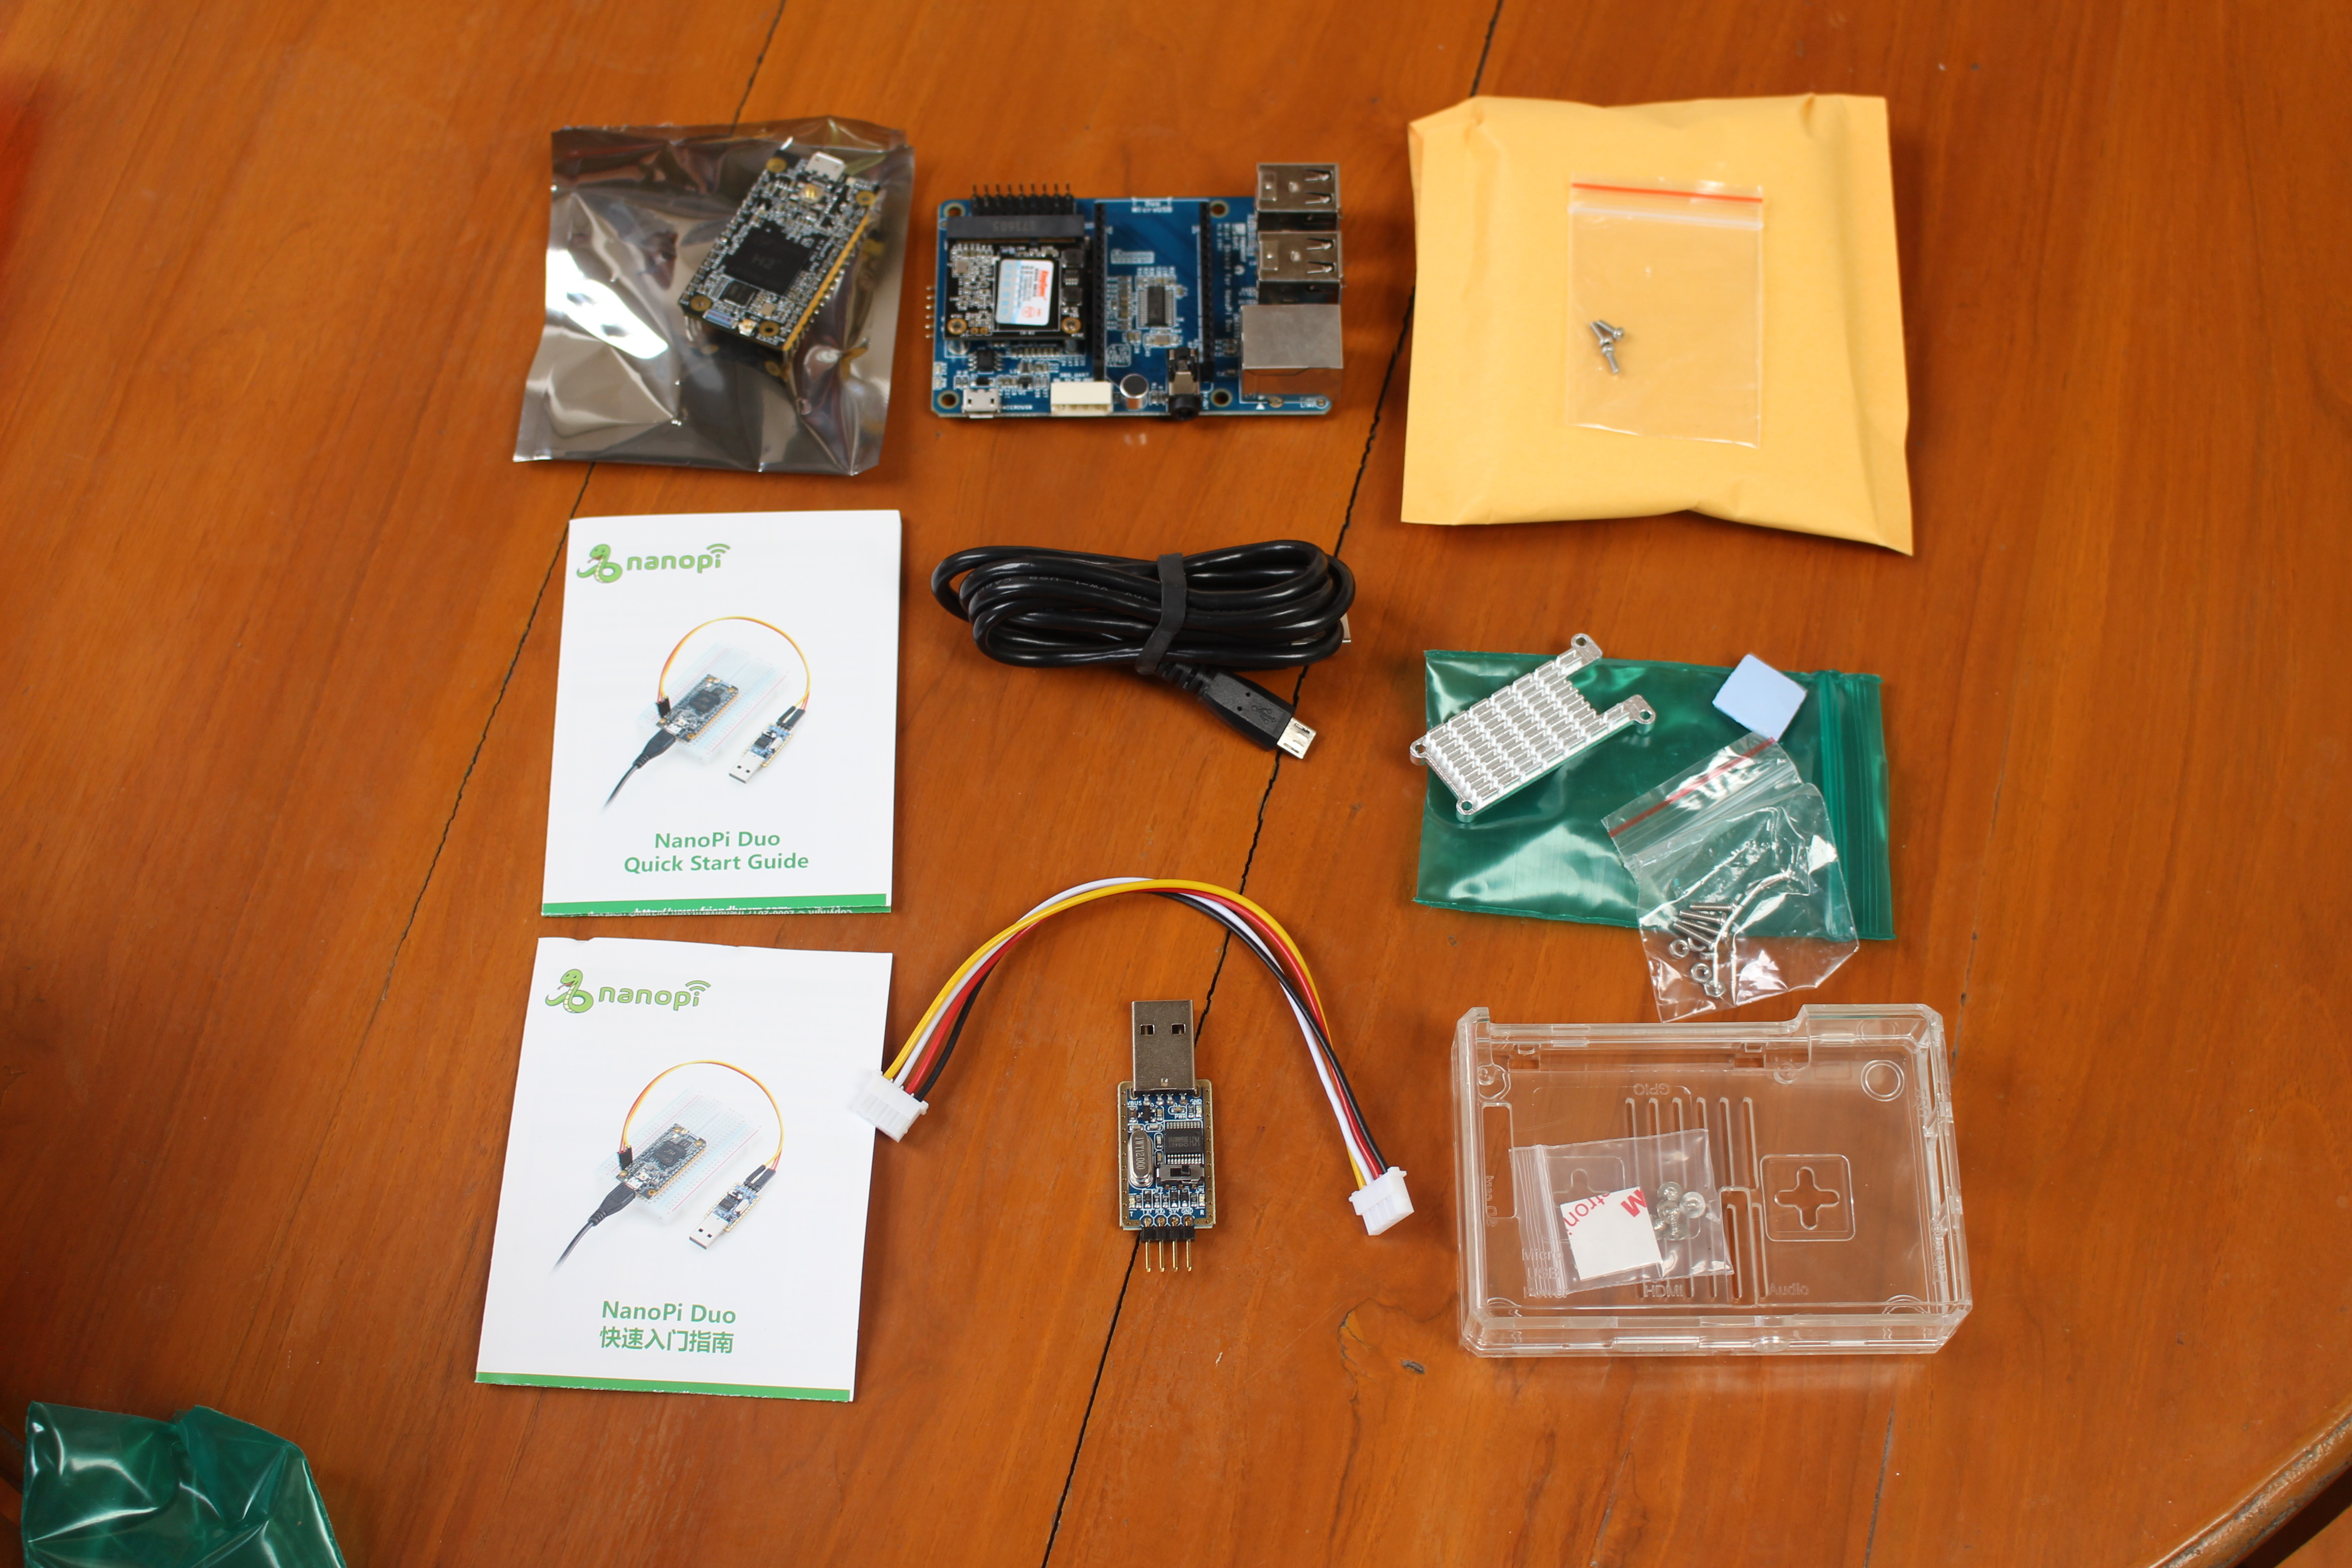
Each kit comes with a NanoPi Duo board with soldered headers, a mini Shield for NanoPi Duo, a heatsink and thermal pad set, a micro USB to USB cable, a USB to TTL debug board and cable, and acrylic case, and user manuals in English and Chinese languages.
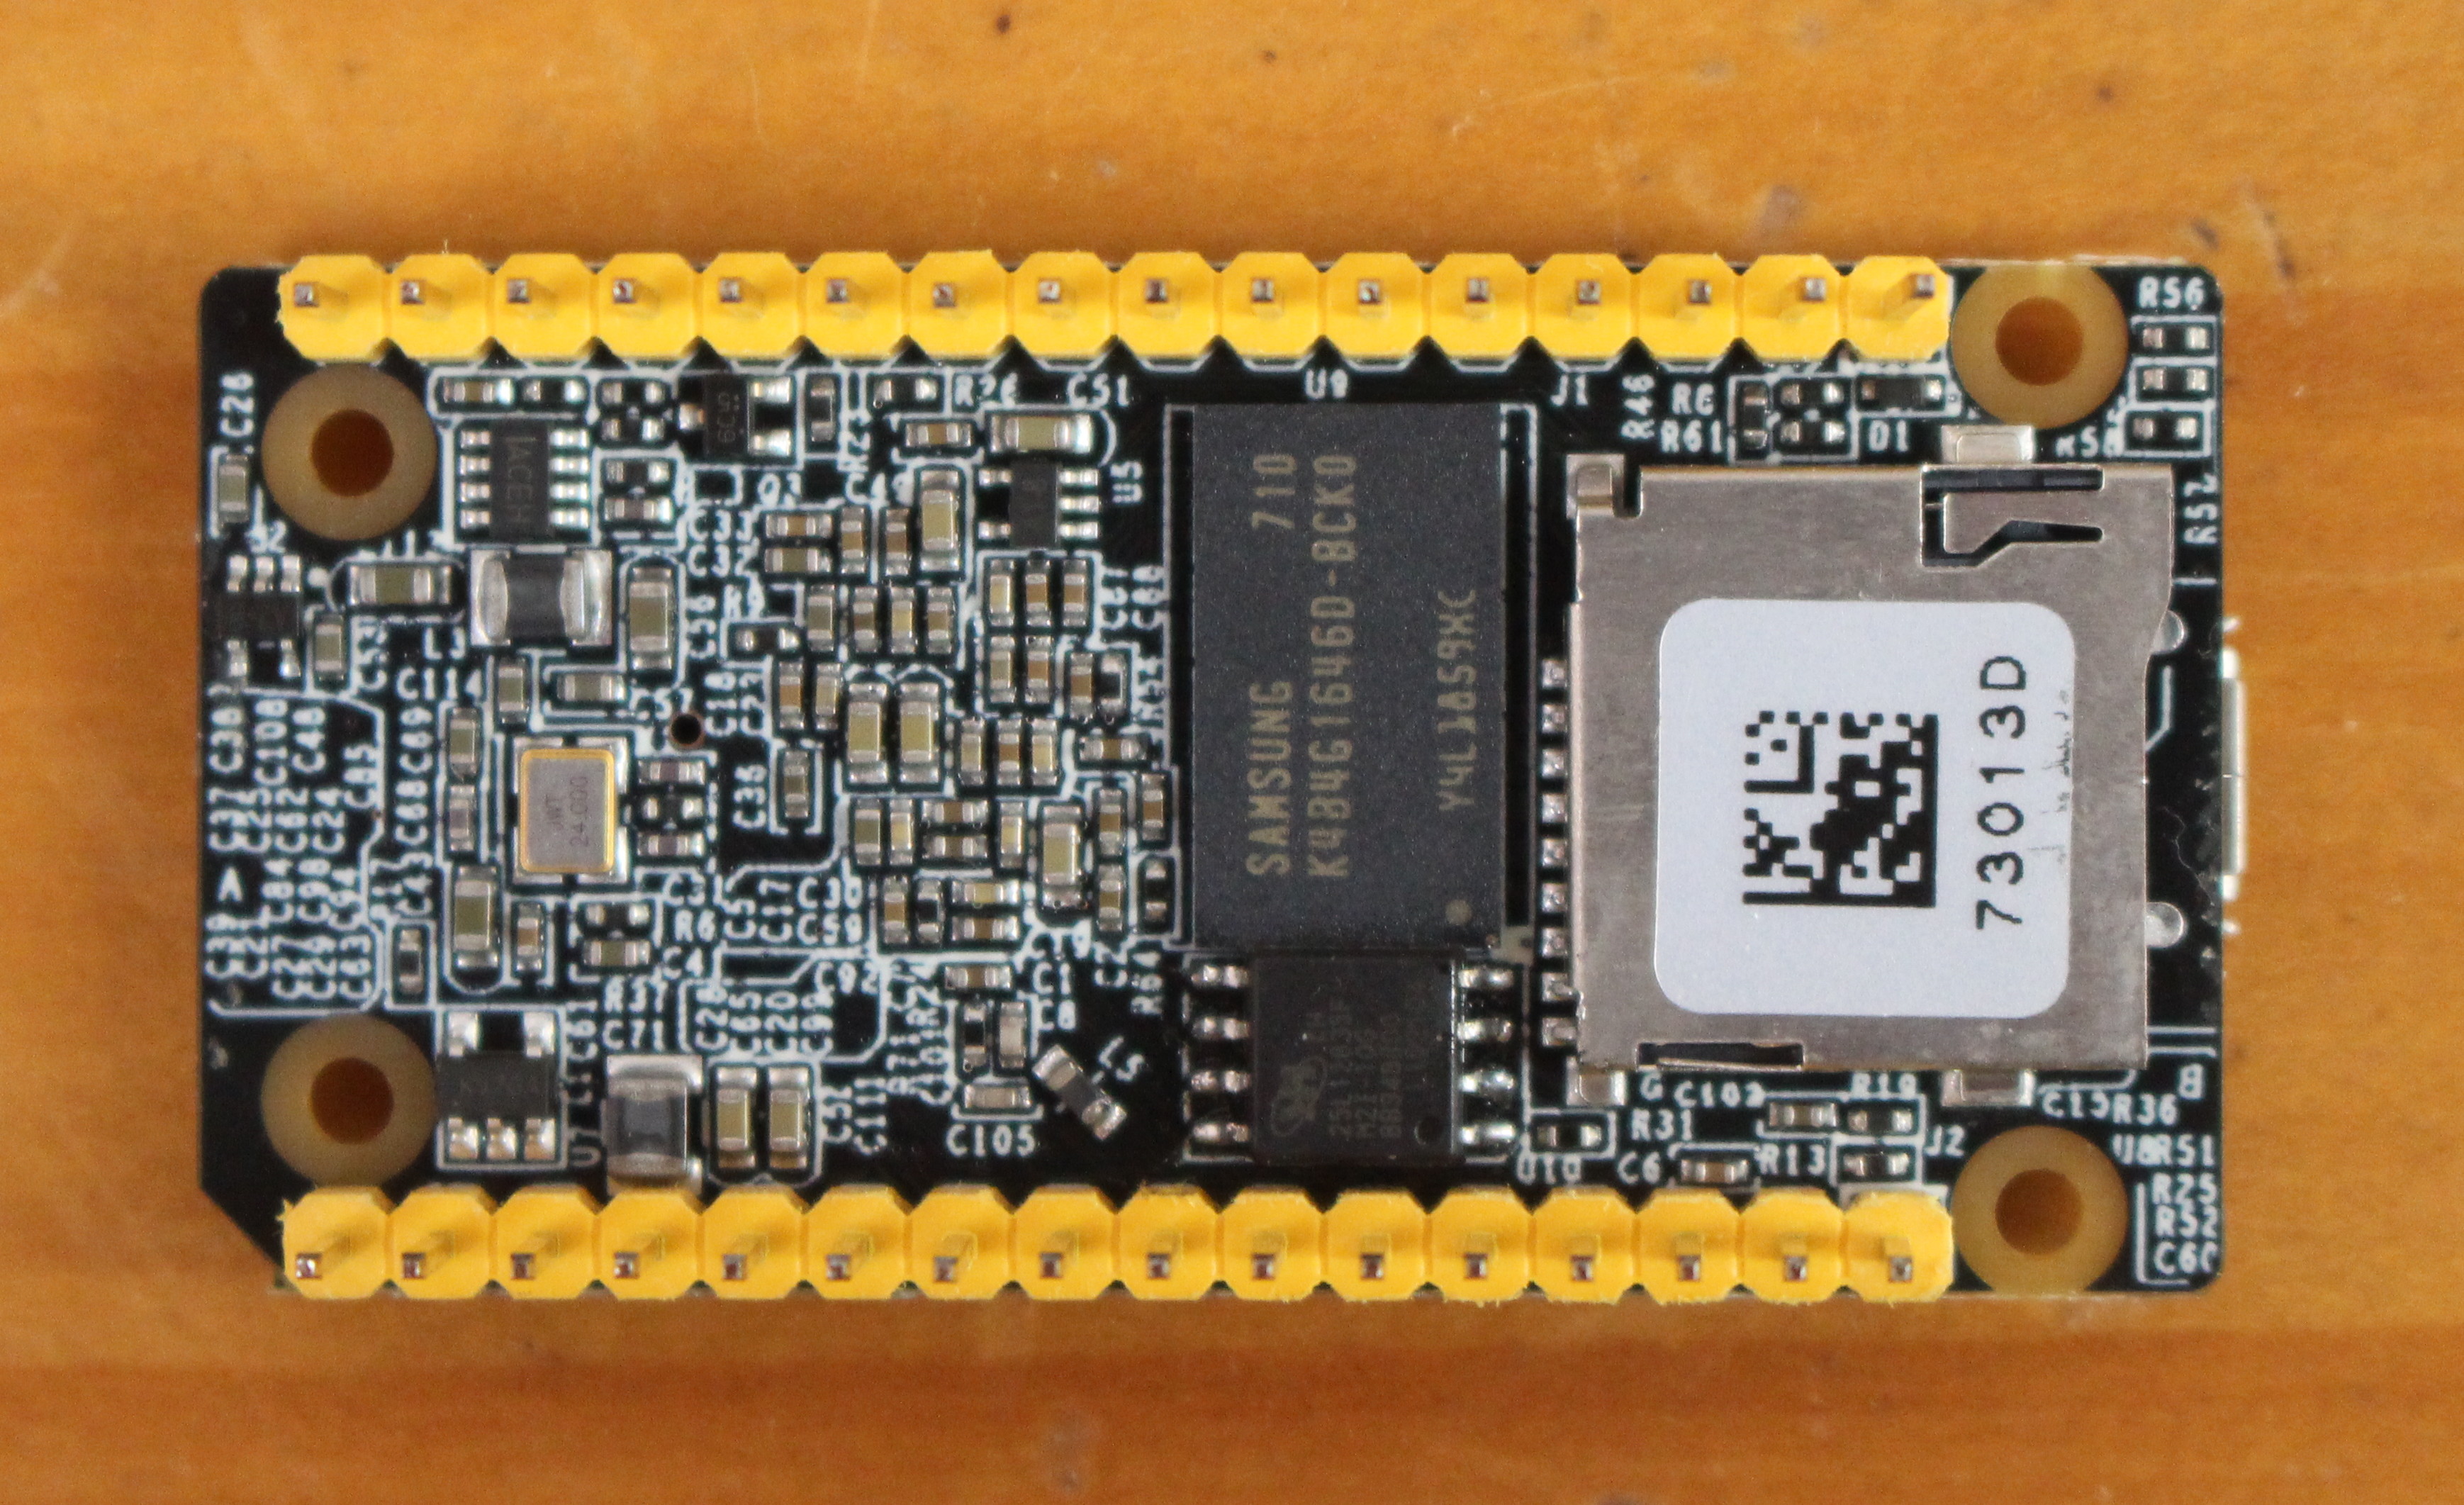
If we look closer at NanoPi Duo board itself, we’ll find the micro USB port , a button, Allwinner H2+ processor, Allwinner XR819 WiFi chip together with a board antennas and u.FL WiFi antenna connector on the top.
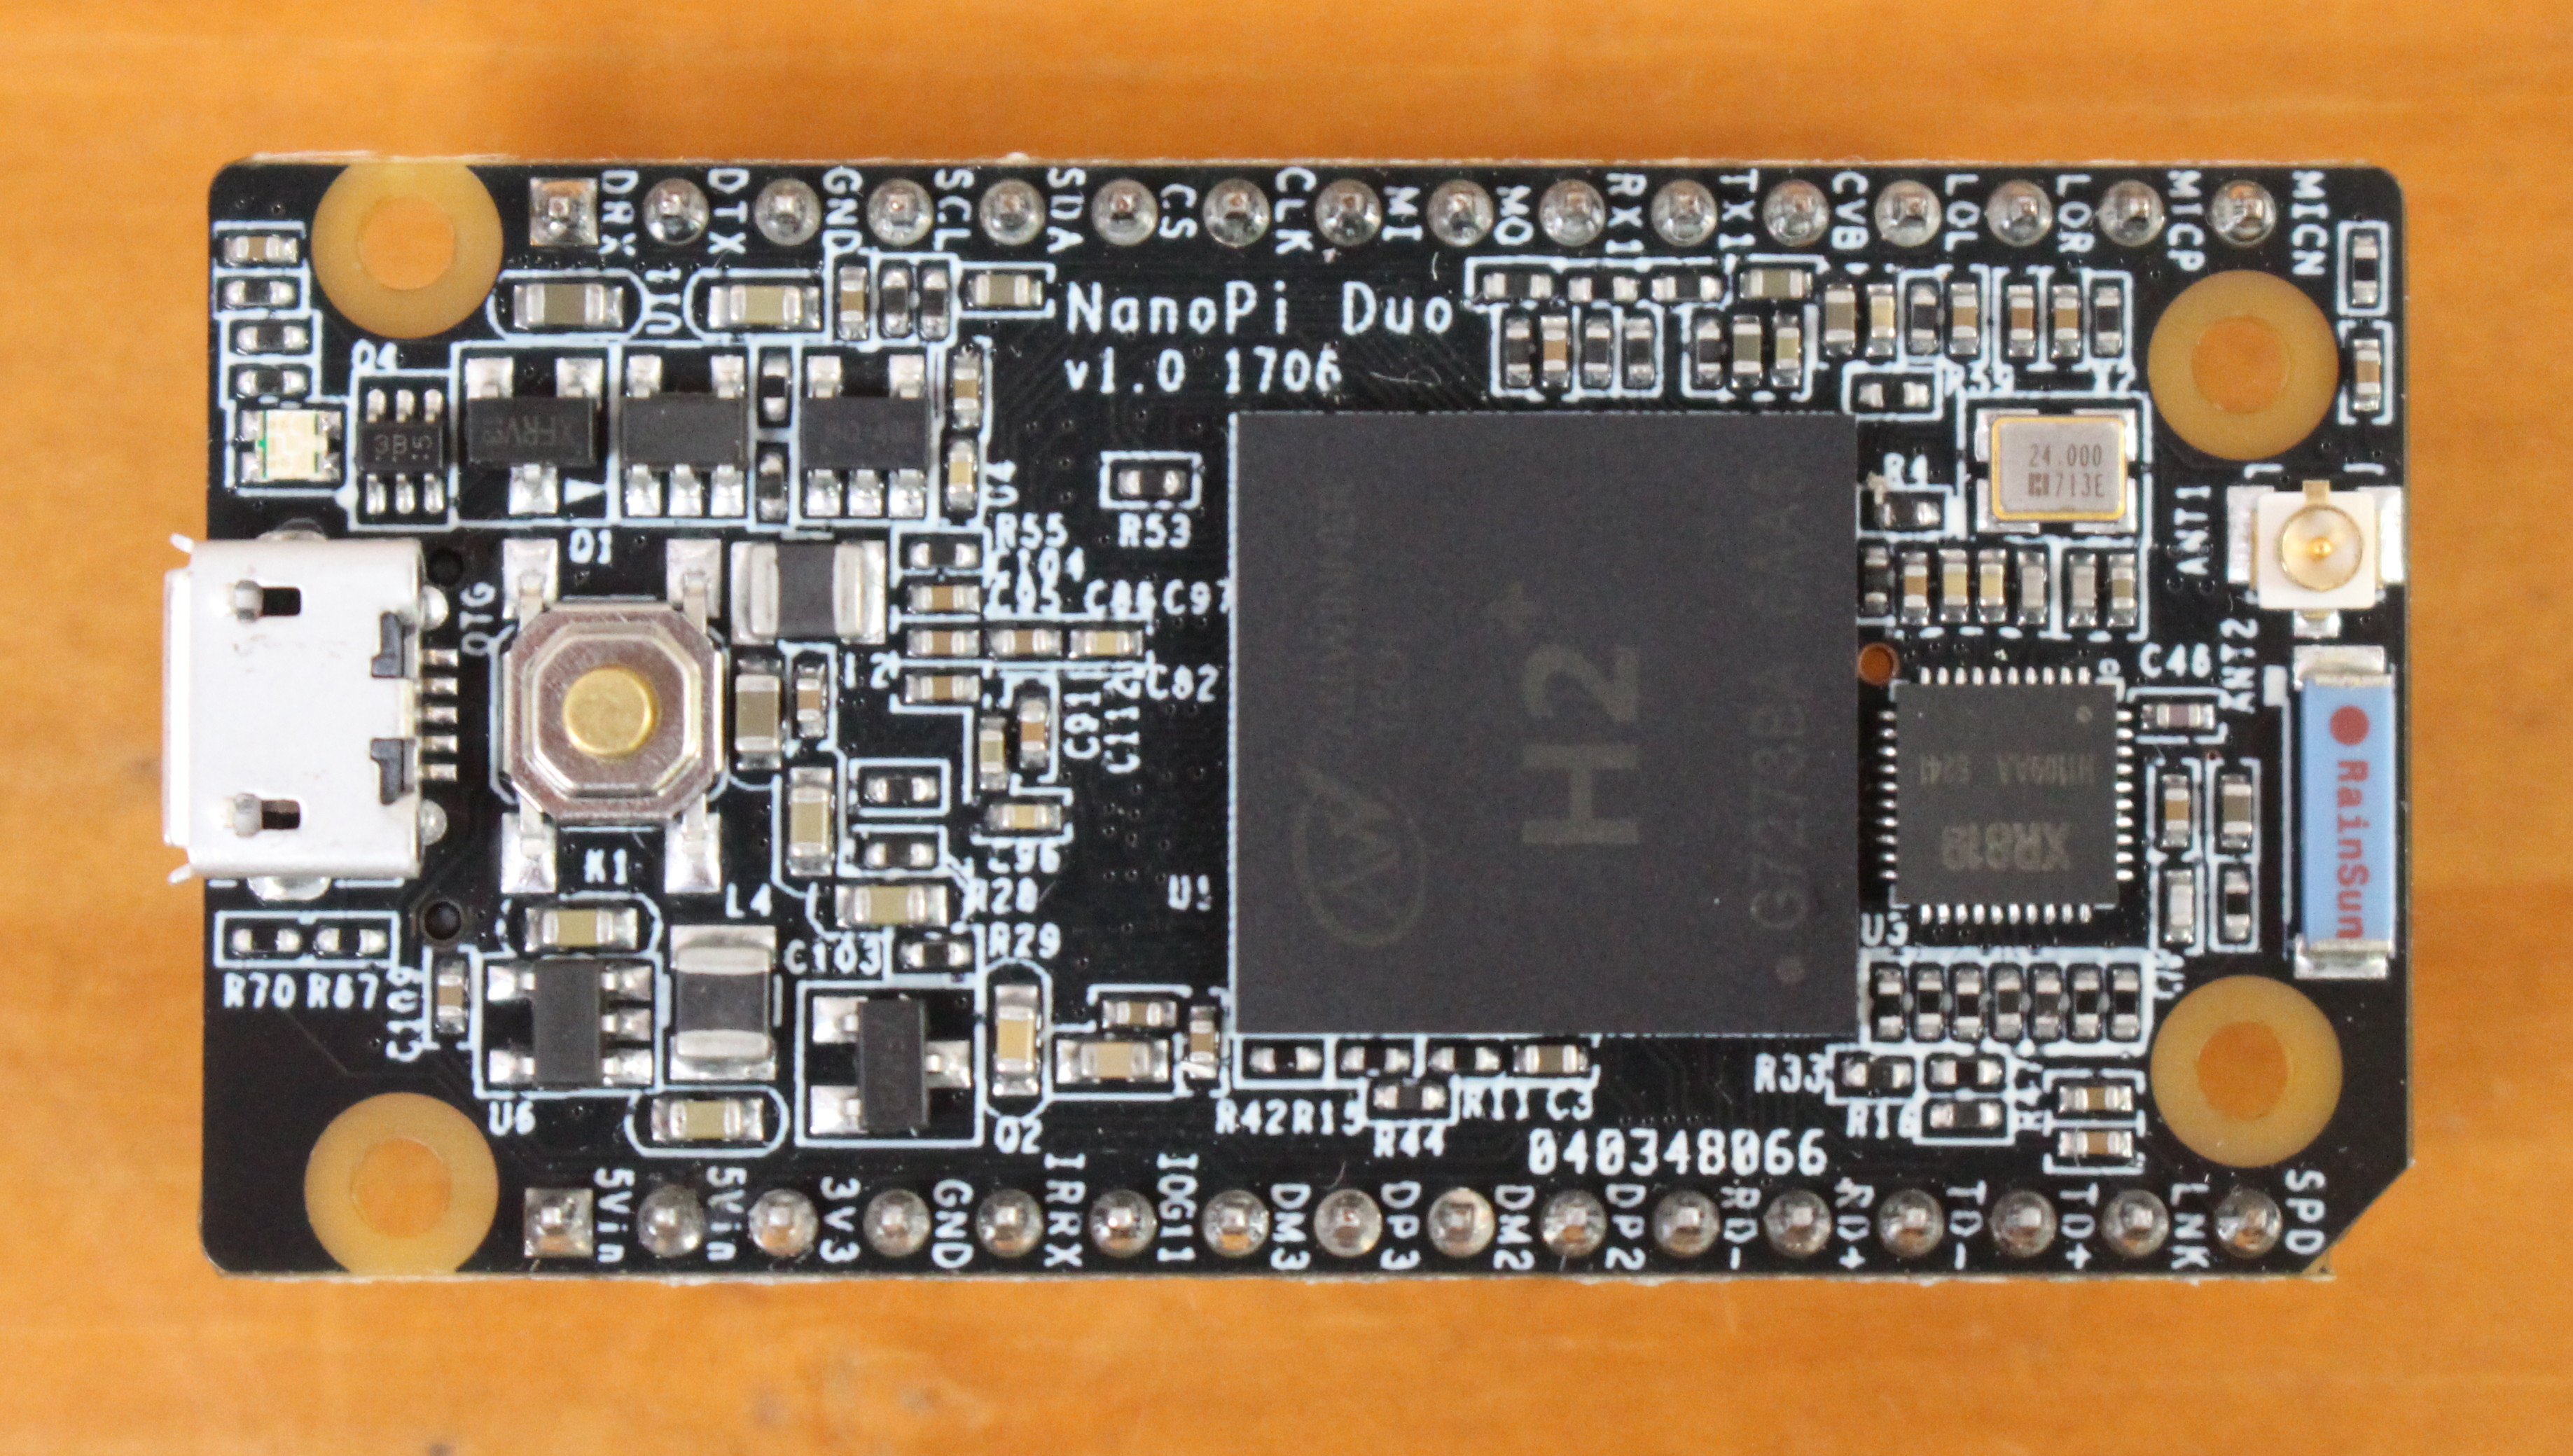
The bottom of the headers has two 16-pin headers, Samsung K4B4G1646D-BCK0 DDR3-1600 chip (meaning I got the 512MB RAM version), MXIC MX25L12835F 128 Mbit (16MB) SPI flash, and the micro SD slot.
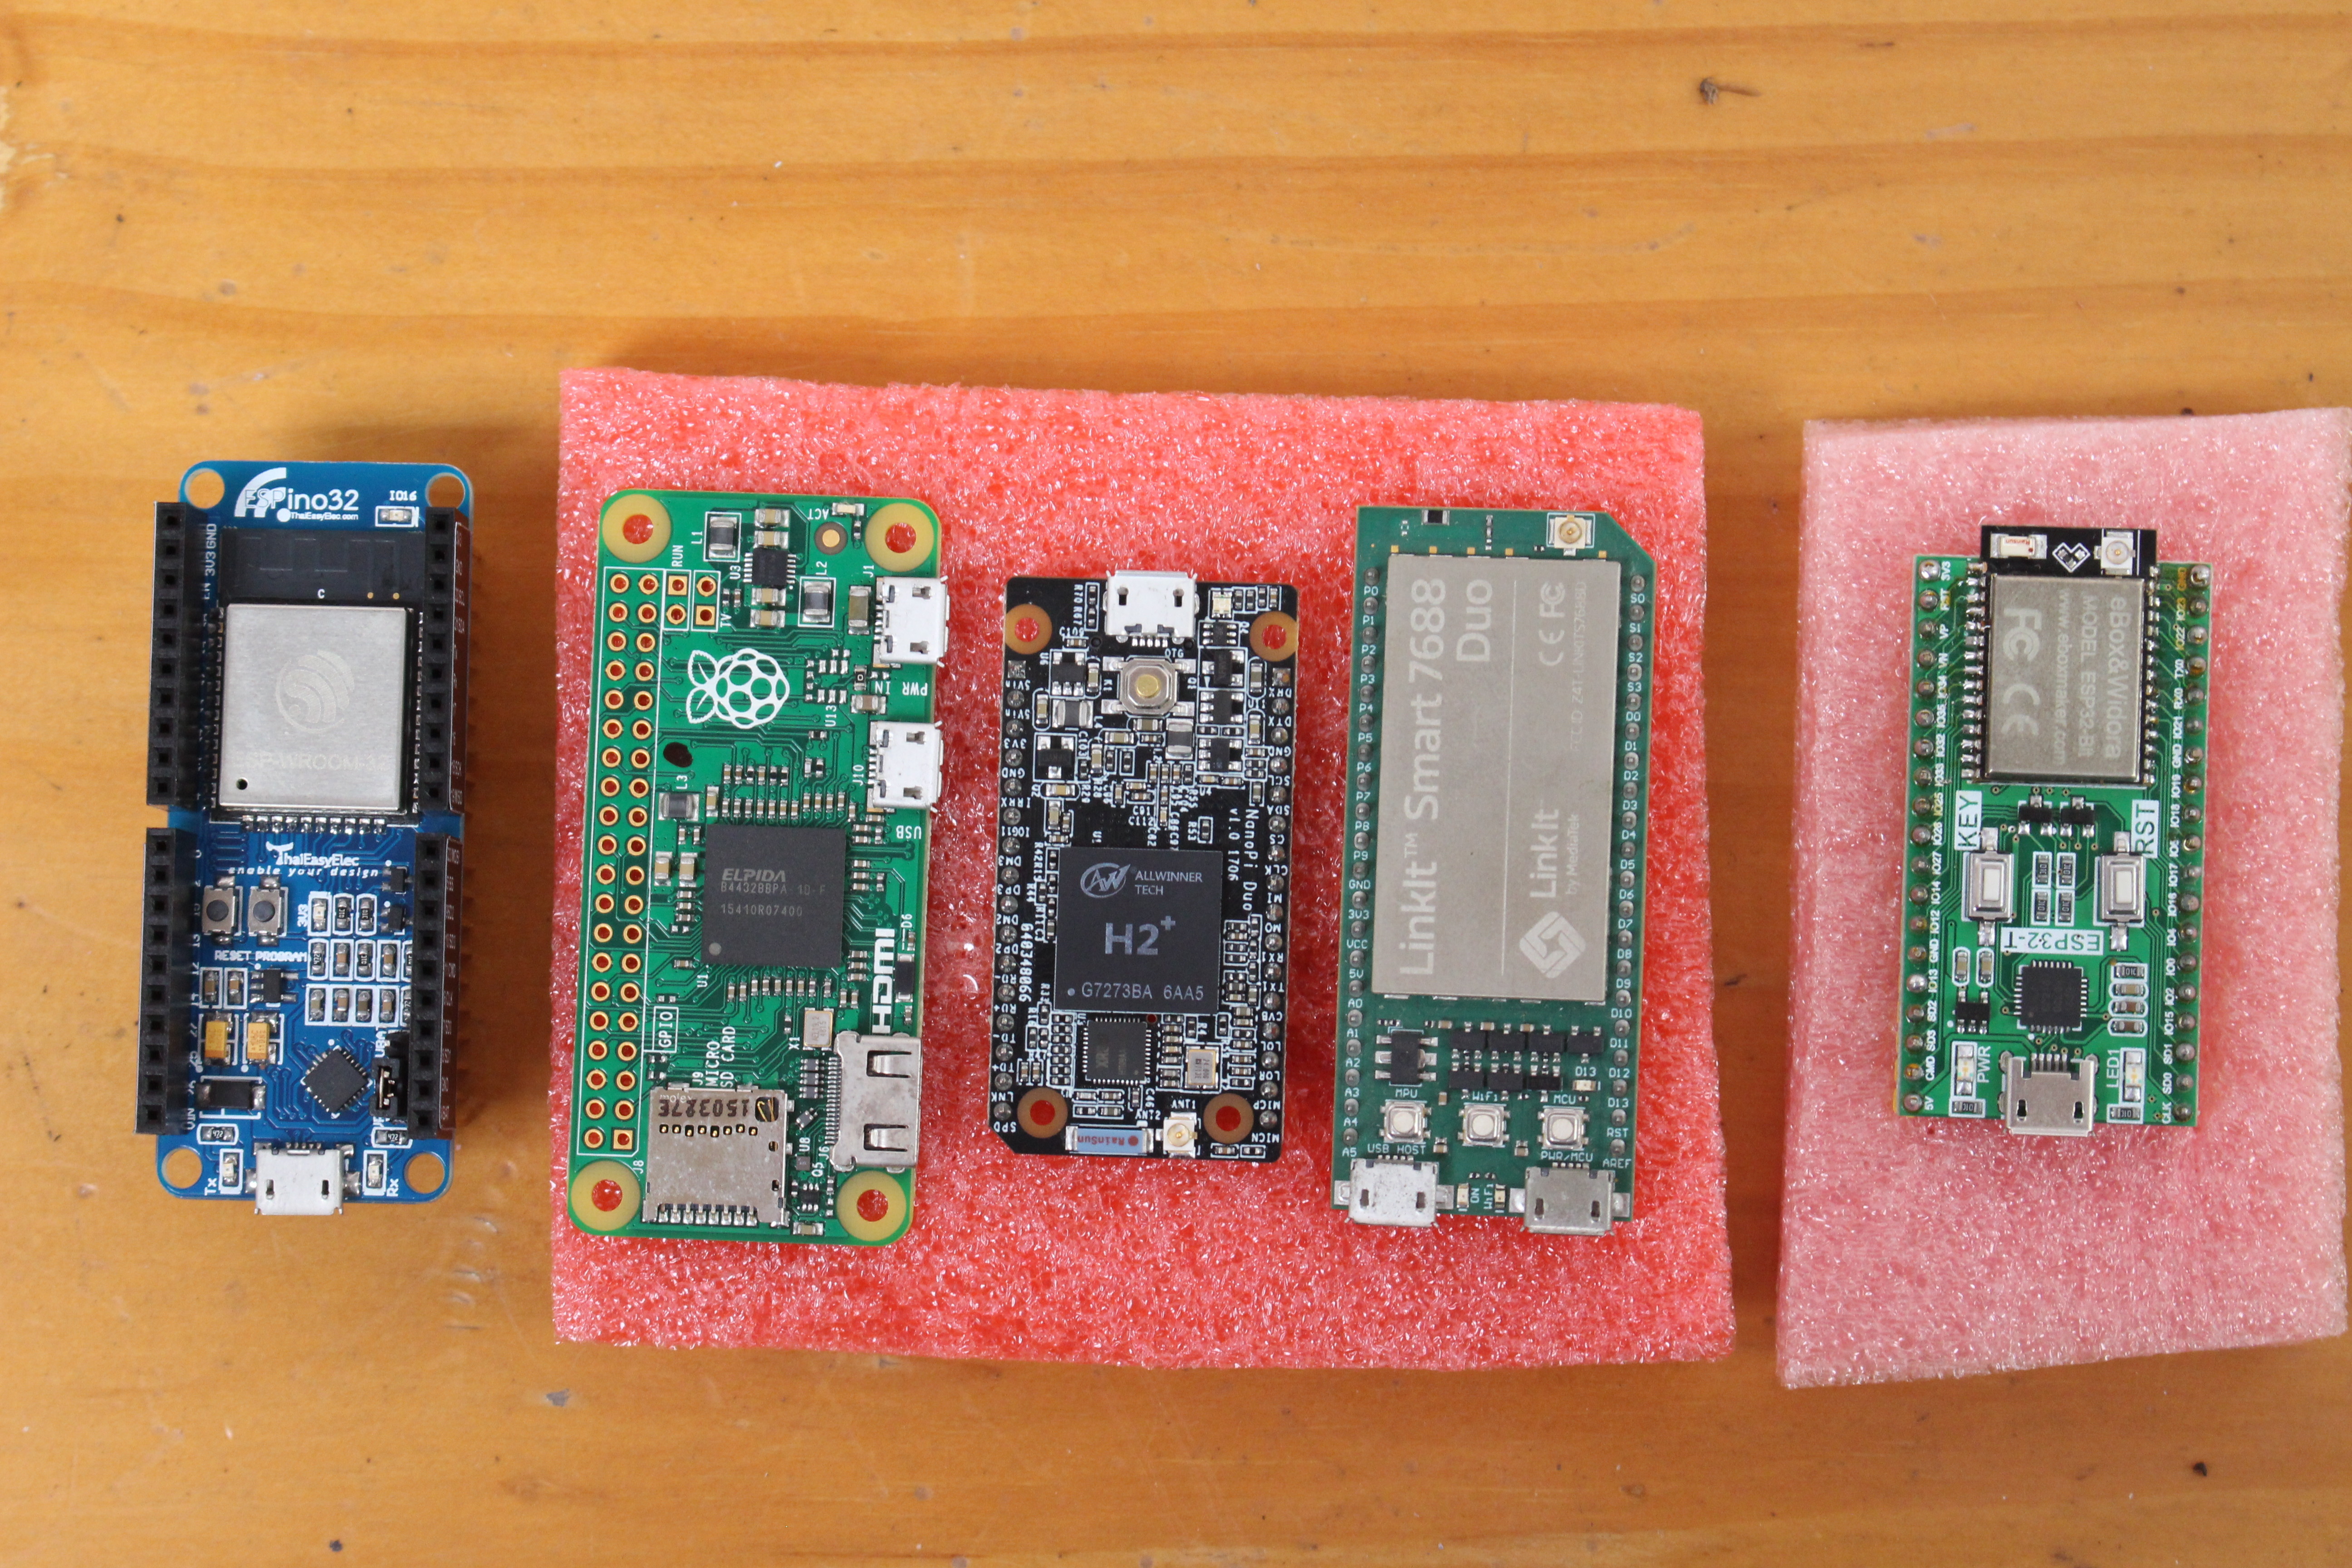
NanoPi Duo is really small. For reference, I compared it to ESPino32, Raspberry Pi Zero, LinkIt Smart 7688 Duo, and ESP32-T boards (from left to right), and despite NanoPi Duo being the most powerful of the lot, it’s also the smallest. Raspberry Pi Zero almost looks gigantic compared to it 🙂
My mini shield for NanoPi Duo came with a KingSpec 64GB SSD, but note that’s a $45 option while purchasing the starter kit, and it’s not included by default.

The mini shield exposes four USB ports, a Fast Ethernet port, a micro USB port for power, a 4-pin debug port that connects to the USB to TTL board, a built-in microphone, an AV port, and J4 expansion header with 18-pin exposing I2C, UART, GPIO, SPI, 5V, 3.3V, and GND. Two main chips can also be found in the shield: FE1.1s USB 2.0 hub, and JMicron JMS567 USB to SATA (hidden under the SSD).
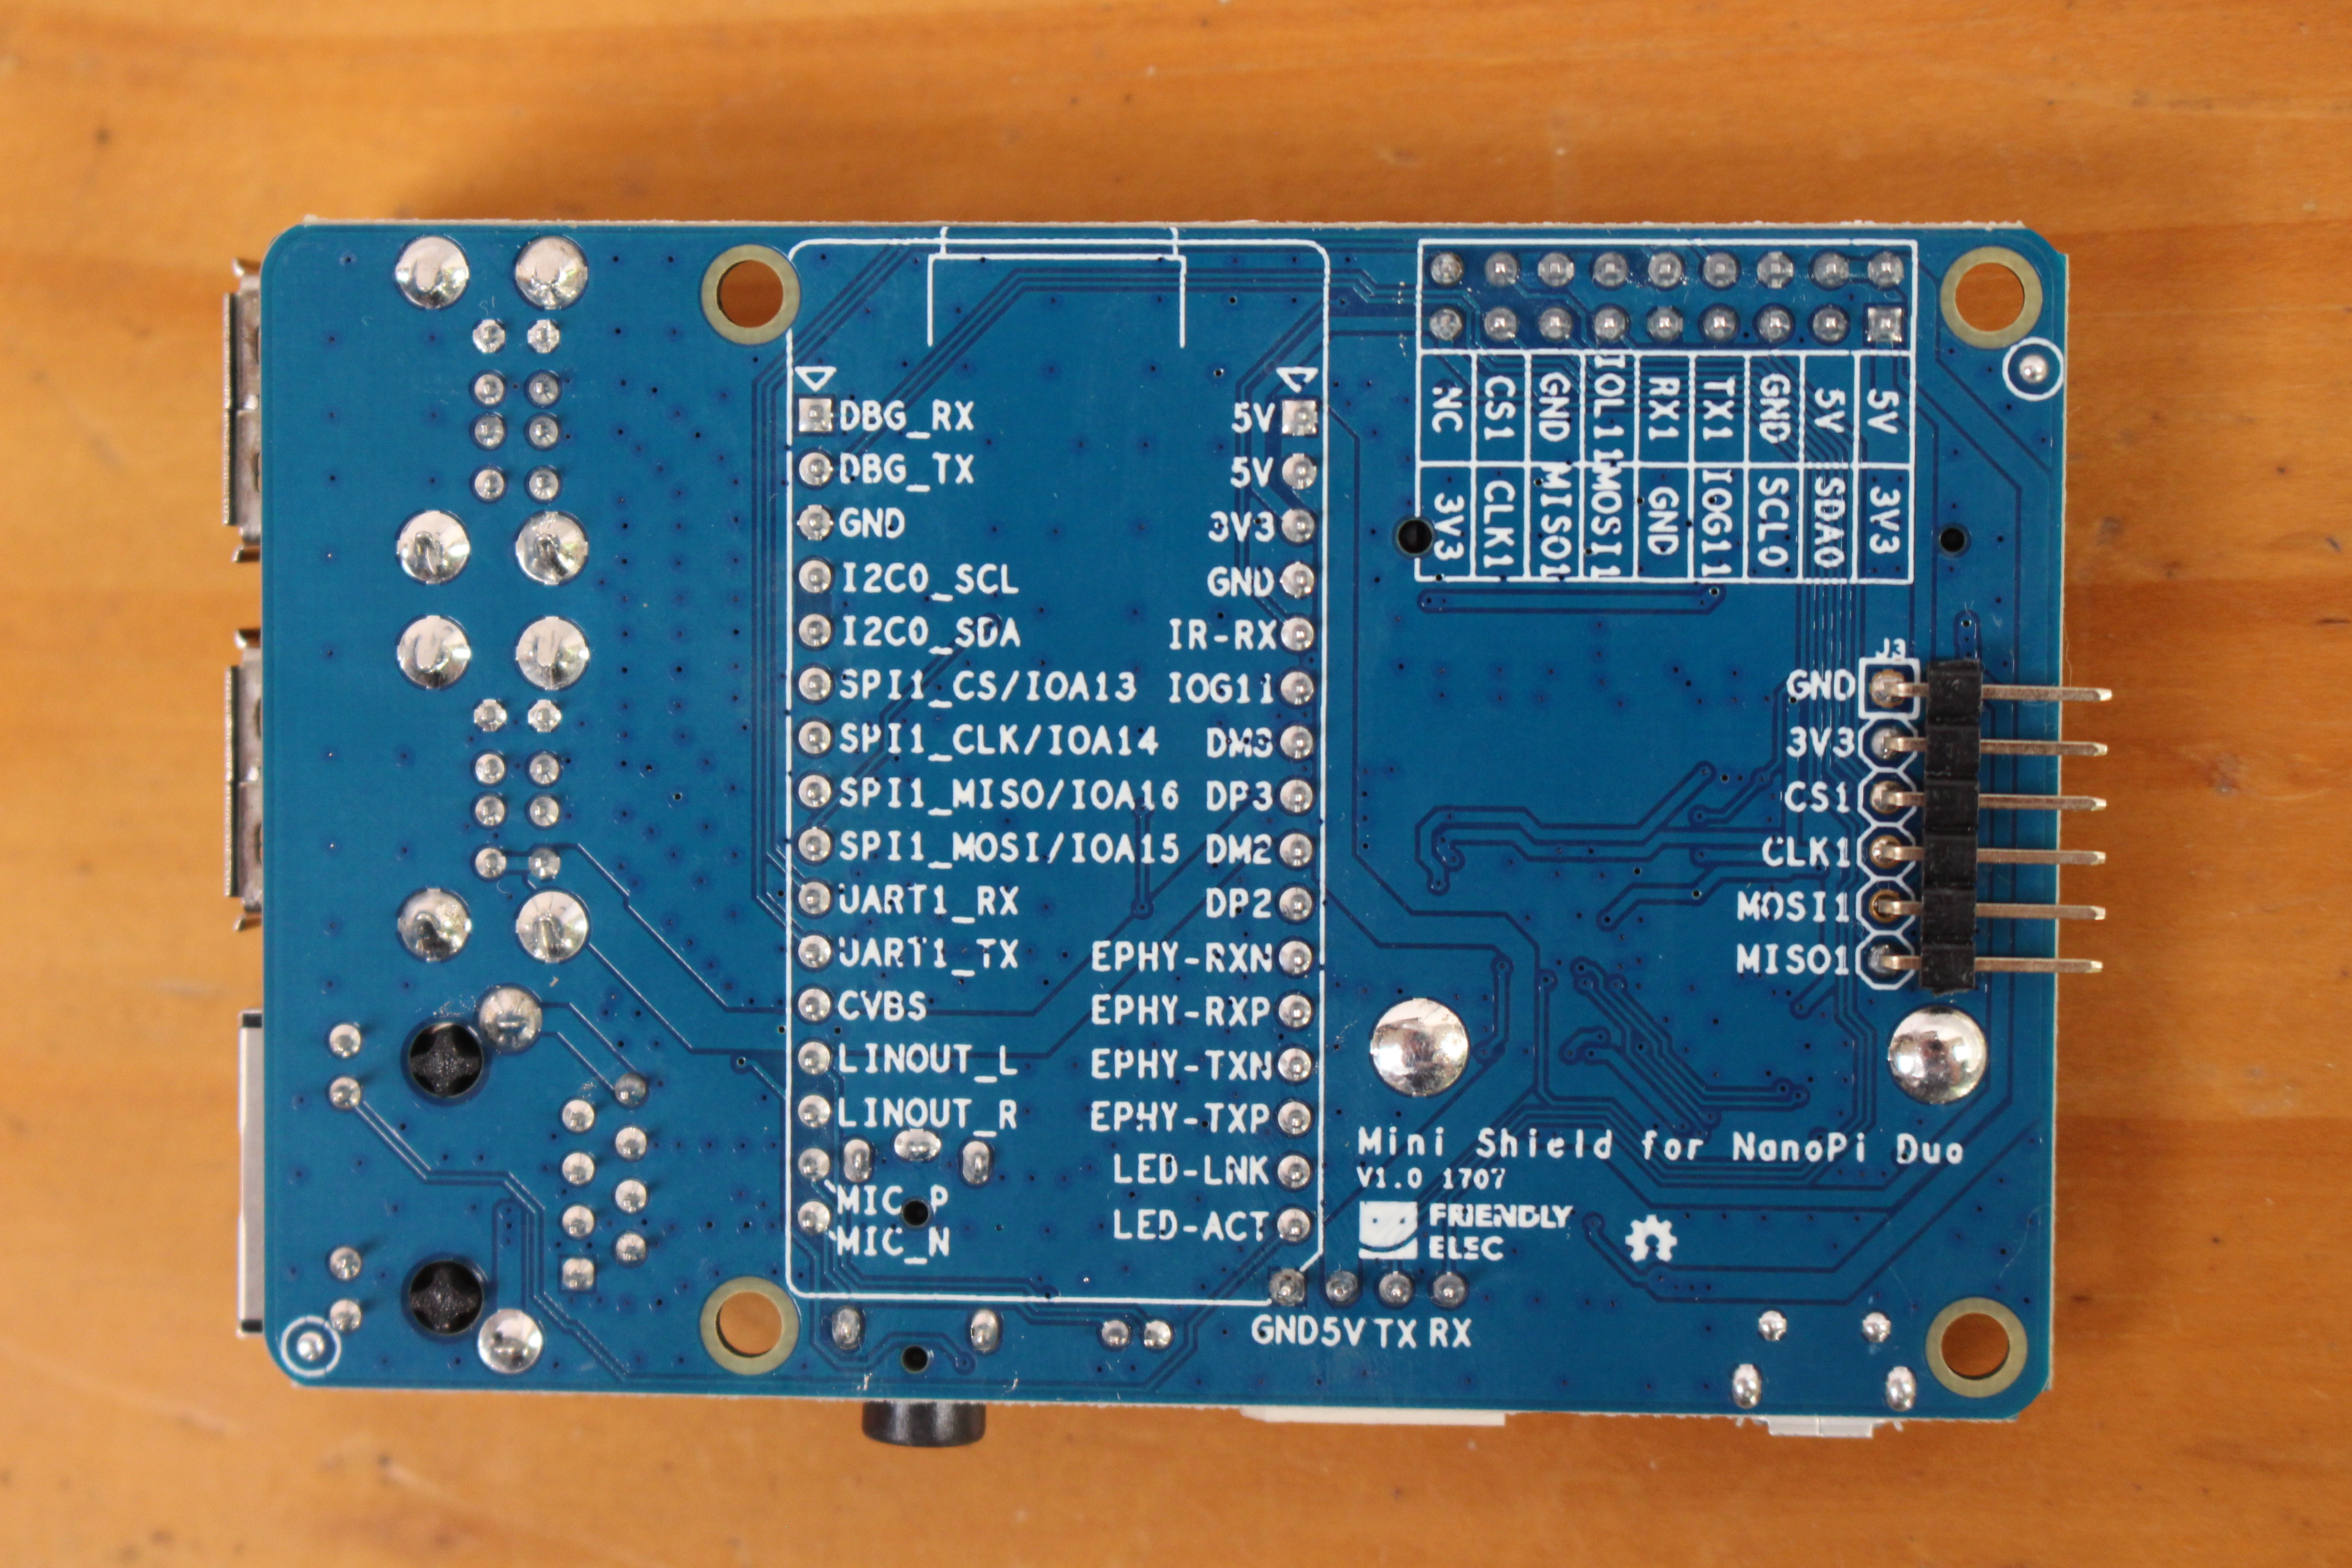
The bottom side of the board features marking with I/O names, as well as an extra 6-pin SPI header. The shield has the same dimensions as Raspberry Pi 3 board, so RPi enclosures should work with the board, and the one included in the starter kit actually look like an RPi case, as the SPI header opening is named “SD card”, the debug header is aligned with what would be the HDMI port, and the AV port is in the exact same place as the one in Raspberry Pi boards.
NanoPi Duo Heatsink Assembly and Breadboard Compatibility
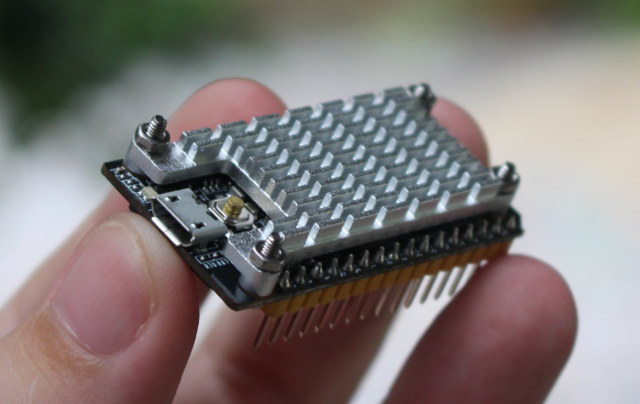
Let’s now install the heatsink kit. First peel off the plastic cover from one side of the purple thermal pad, place it on Allwinner H2+ processor, peel off the second plastic cover, install the heatsink on top of the board, and tighten it with the four bolts and nuts. Note that I place the nuts on top. More on that later.
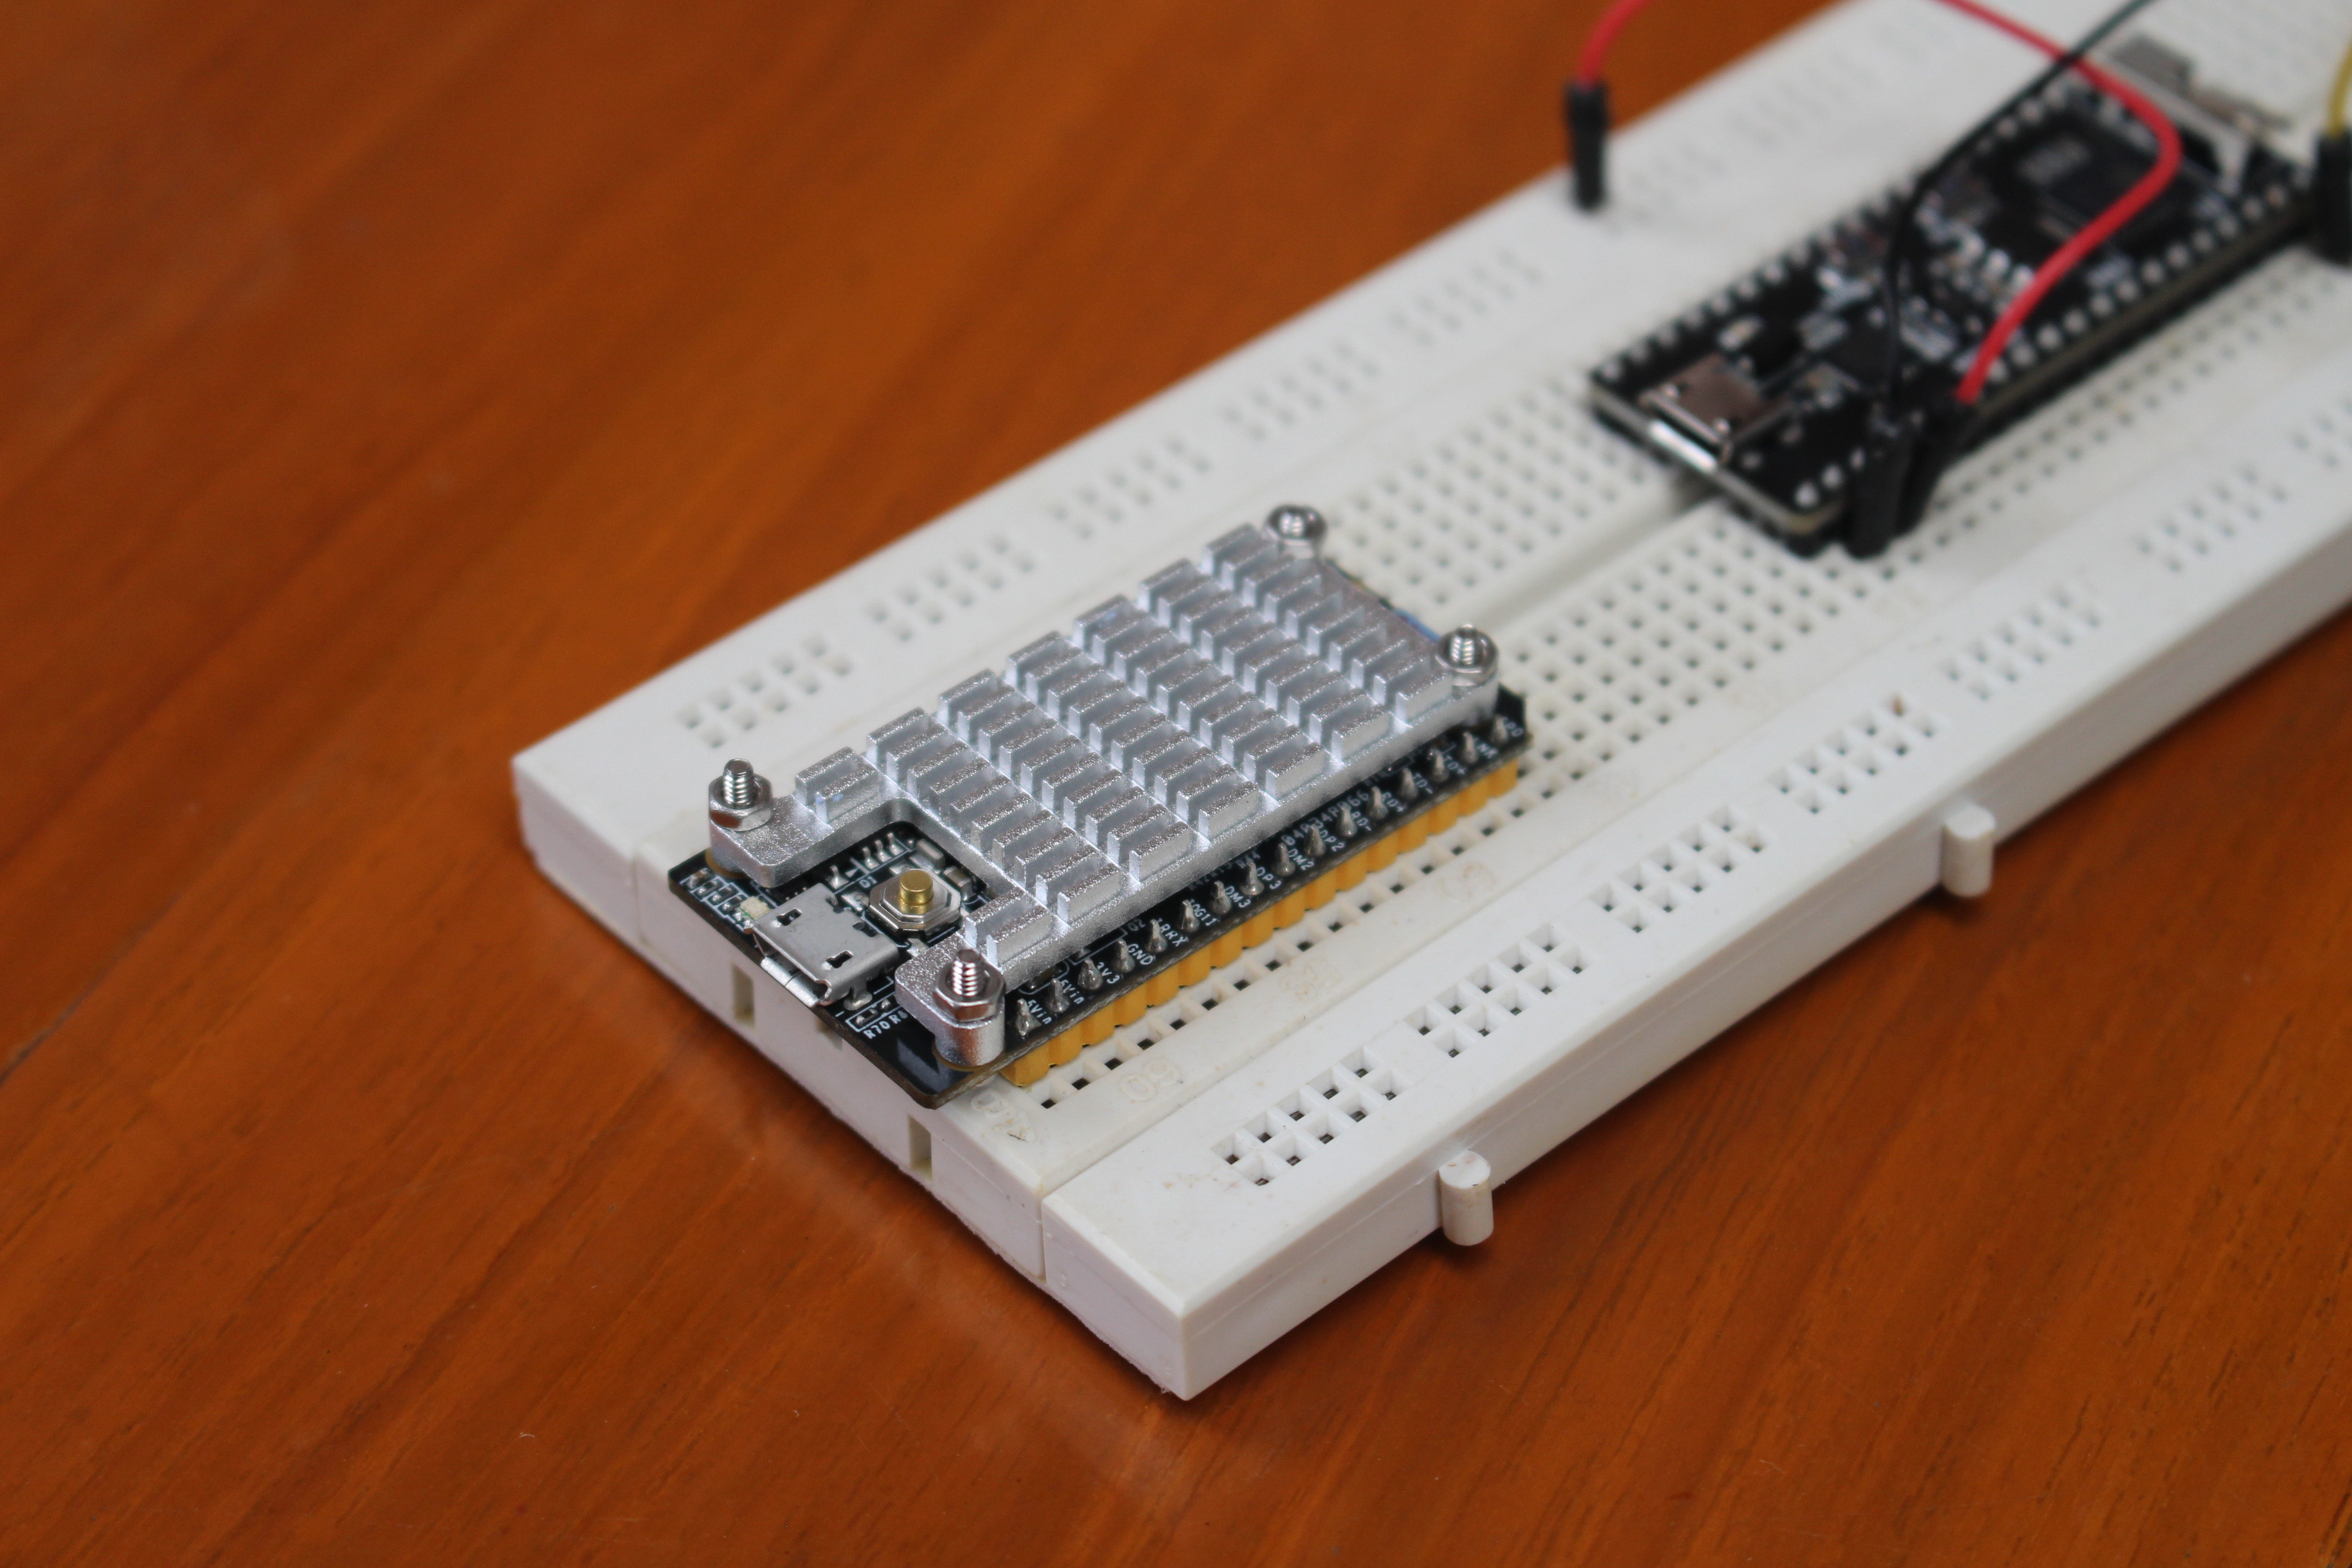
 The board is supposed to be breadboard friendly, and indeed I had no troubles inserting it in mine, with one row usable on each sides.
NanoPi Duo Starter Kit Assembly
Next I inserted NanoPi Duo into the mini shield, and tried to put the lot inside the case, but I came across a small issue…
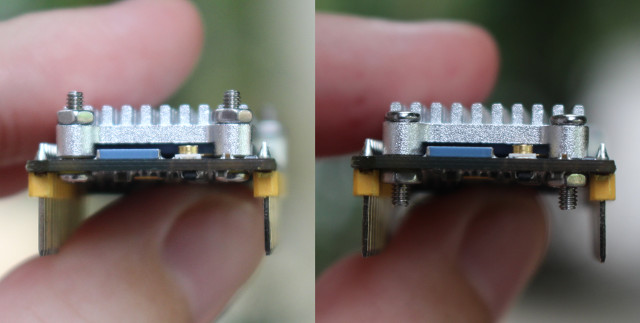
If you install the heatsink with the nuts on top, the bolts will then be higher than the heatsink, and will prevent us from closing the enclosure, as there’s not enough headroom on top. So instead I had to reassemble the heatsink with the nuts under, and I could mount it in the case. The first way (left) of mounting is a little better if you use a breadboard as you can fully insert the board, while with the second way (right) will leave a gap of 2 or 3 mm when NanoPi Duo is inserted in the breadboard. This still worked for me though, so better always puts the nuts on the bottom of the board. Another way would be to use shorter bolts, or cut them to size.
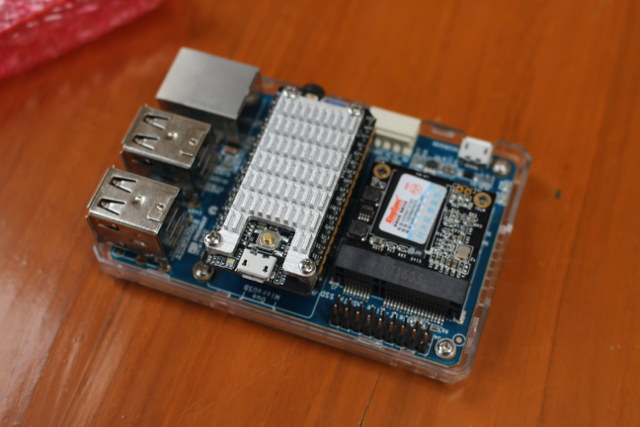
You can now place the board on the bottom part of the case, and tighten it with the four short screws provided, although I found out the board is quite fit without screws, so you may fine by skipping them too.
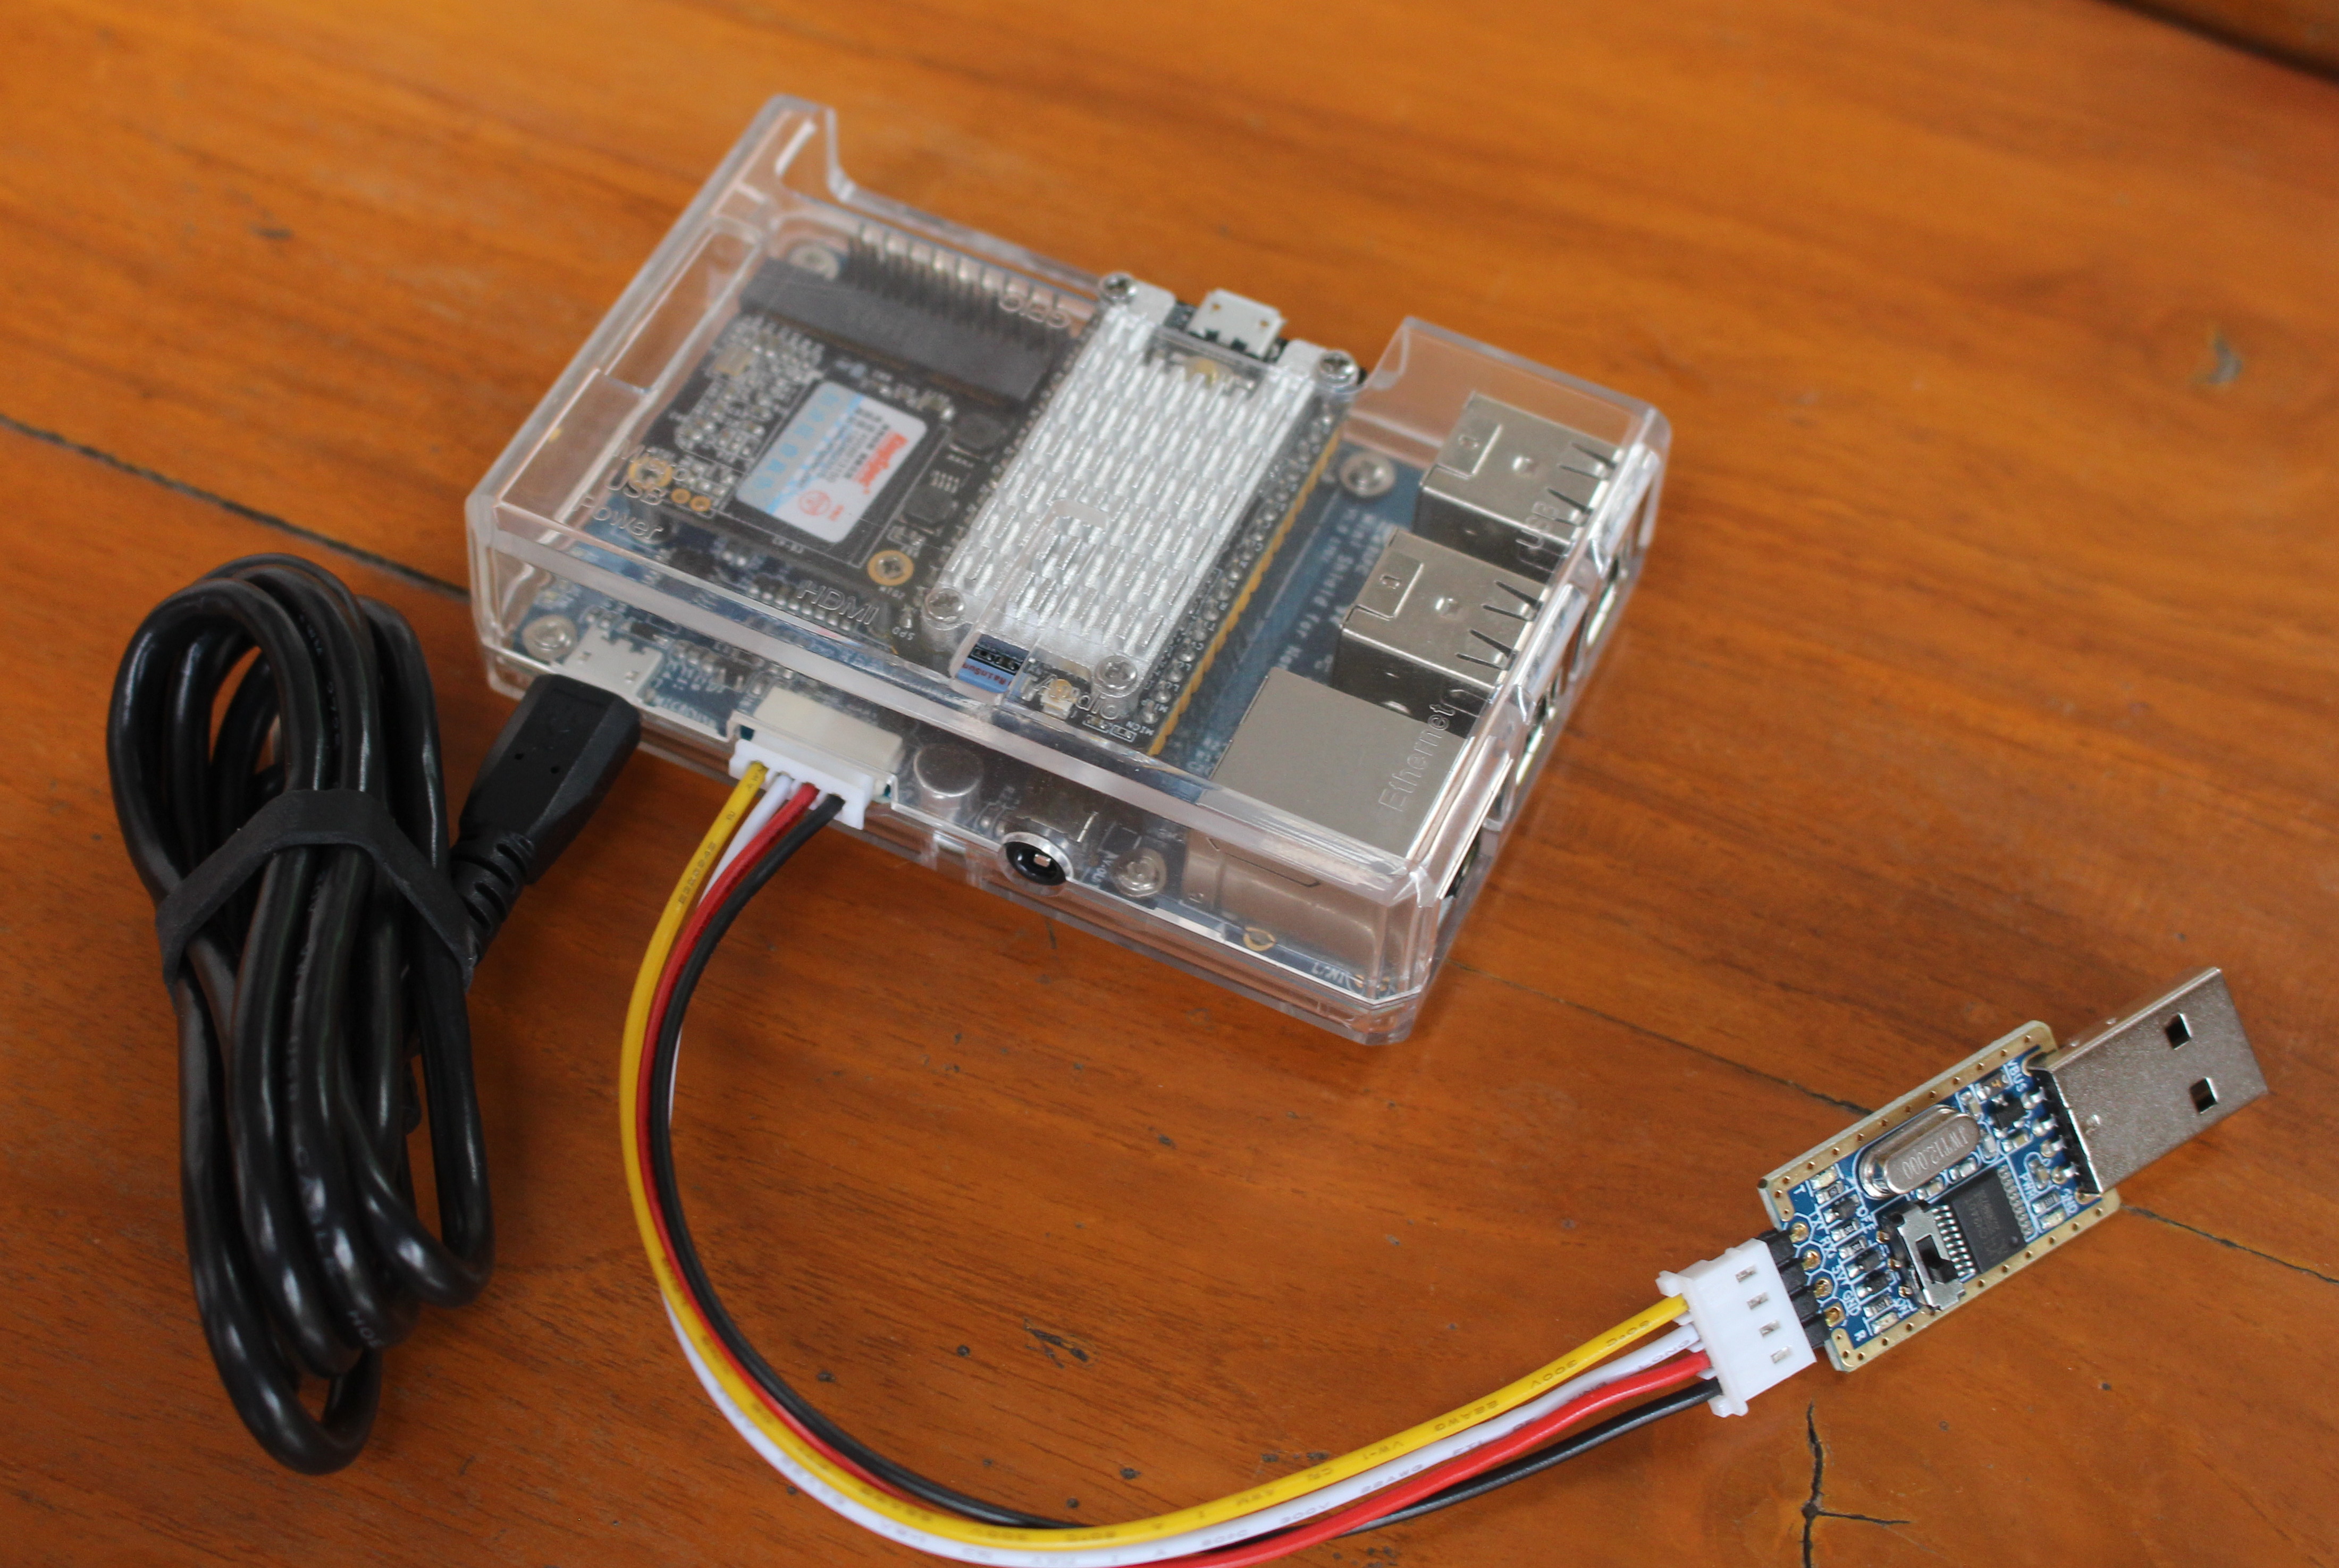
Finally, we can clip the top cover, stick the four rubber pads underneath, connect the micro USB to USB cable for power, optionally the USB to TTL board, and we should be good to go.
NanoPi Duo Starter Kit is sold for $17.98 (256MB RAM) / $19.98 (512MB) plus shipping, and you may also consider options such as the $45 64GB KingSpec SSD, USB or I2C LCD modules, a 2.8″ resistive touch LCD display, etc… If you don’t feel the mini shield is useful for your project, you can also get NanoPi Duo board only for $7.99 with 256MB RAM, or $11.99 with 512MB RAM.
Continue reading part 2: NanoPi Duo Quick Start Guide – Ubuntu, Breadboard, Mini Shield & mSATA SSD.

Jean-Luc started CNX Software in 2010 as a part-time endeavor, before quitting his job as a software engineering manager, and starting to write daily news, and reviews full time later in 2011.
Support CNX Software! Donate via cryptocurrencies, become a Patron on Patreon, or purchase goods on Amazon or Aliexpress


