Venus Supply Co., Ltd, better known as ThaiEasyElec, is a company based in Thailand, selling embedded systems and development board, as well as providing development services based in Thailand. The company sent me their latest board called ESPino32 powered by Espressif ESP-WROOM-32 WiFi and Bluetooth module for evaluation. While the board is supported in Arduino-esp32, I’ve already tested Arduino with ESP32-Bit module & ESP32-T board, so after checking out the hardware, I’ll load it with something different: Espruino, a firmware allowing for JavaScript programming over the serial console, or a Web based IDE.
ESPino32 Unboxing and Soldering
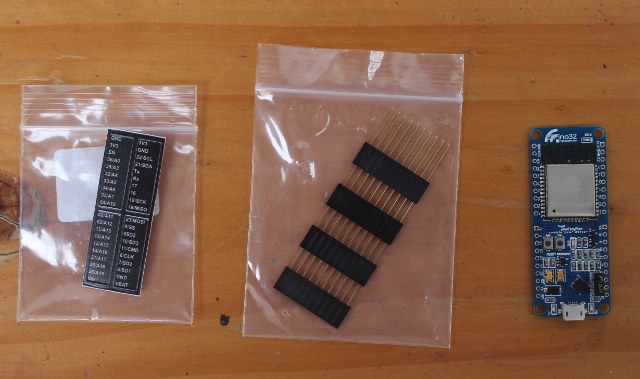
The board shipped with four female headers, and I/O stickers.
The board includes ESP-WROOM-32, exposes I/Os through four 10-pin headers, features CP2104 chip for serial to USB debugging via micro USB port, two buttons (reset and program), a user LED connected to IO16, and a jumper to select between regulated power supply (micro USB or Vin), or battery power (Vbat).
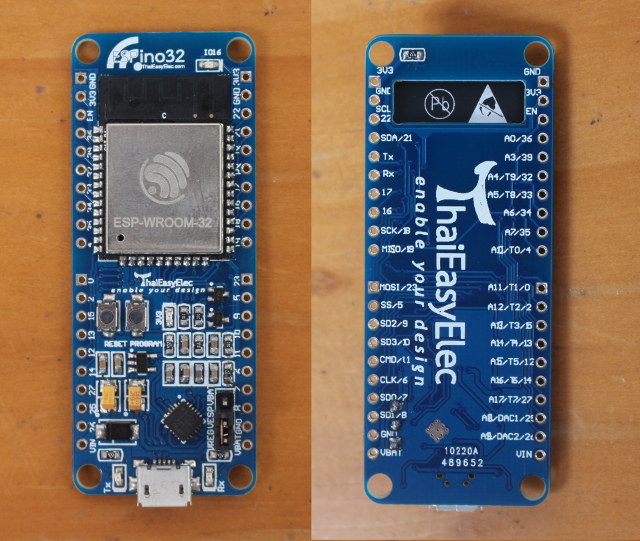
If you’re going to integrate your board in a project, you may want to use it asif without header to save on space, but for prototyping and use with a breadboard, we should start by soldering the four female headers. It’s even a little easier than with other headers, since you can simply place the board on top of the headers to do the soldering.
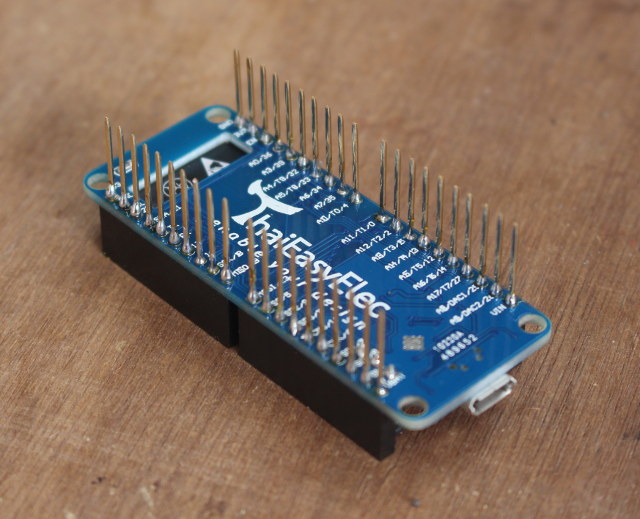
Once we’re done, we can apply the stickers on all four headers, which will make it easier to play with while connecting the jumper cables.
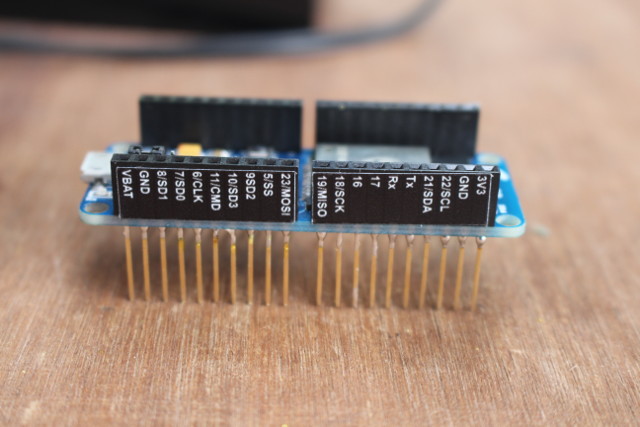
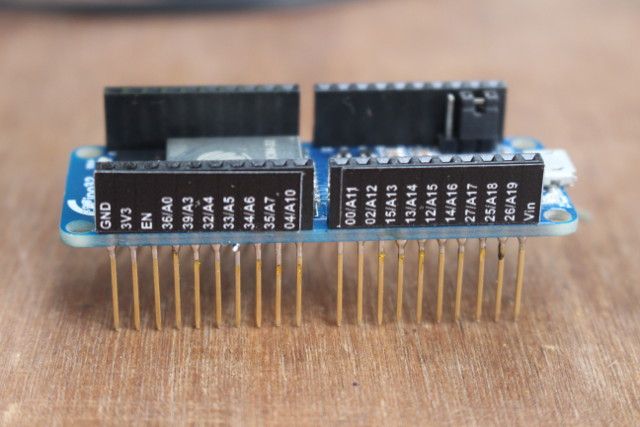 Now we can insert the board into a breadboard, connect an external 5V LED through pin 16, and connect a micro USB cable to a computer to get power and access the board.
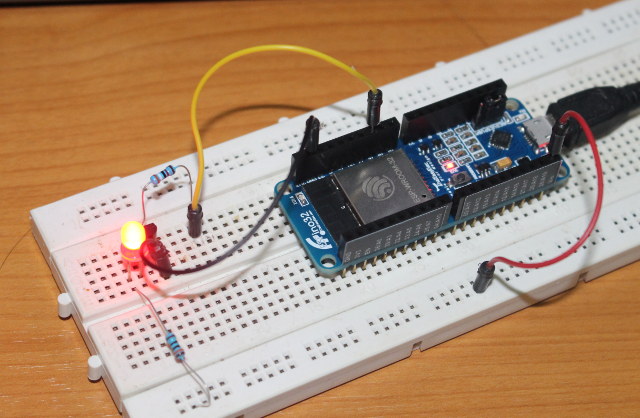
A board with female headers has the advantage of providing two usable rows on each side of the board. With male-only you’d lose that extra row, unless you use a narrower board such as ESP32 Pico Core board.
That’s the output I get when connecting the board to my Linux computer:
|
1 2 3 4 5 6 7 8 |
[ 7809.352096] usb 5-3: new full-speed USB device number 4 using ohci-pci [ 7809.547130] usb 5-3: New USB device found, idVendor=10c4, idProduct=ea60 [ 7809.547134] usb 5-3: New USB device strings: Mfr=1, Product=2, SerialNumber=3 [ 7809.547137] usb 5-3: Product: CP2104 USB to UART Bridge Controller [ 7809.547140] usb 5-3: Manufacturer: Silicon Labs [ 7809.547142] usb 5-3: SerialNumber: 013CF2B2 [ 7809.551174] cp210x 5-3:1.0: cp210x converter detected [ 7809.561307] usb 5-3: cp210x converter now attached to ttyUSB0 |
Quick Start Guide for Espruino on ESP32
Espruino has a page about ESP32 support that explains what is working:
- onewire
- hardware SPI
- hardware I2C
- DAC
- ADC
- Serial
- WIFI – as a client and access point
and what is not (yet):
- Over-The-Air (OTA) firmware updates.
- Bluetooth and BLE
So we can’t play with Bluetooth, but WiFi and GPIO should work. There are also some instructions in that page which I will follow and adapt (since some are not working/out of date) below.
First we need to download the latest version of Espruino, in my case Espruino 1.94.
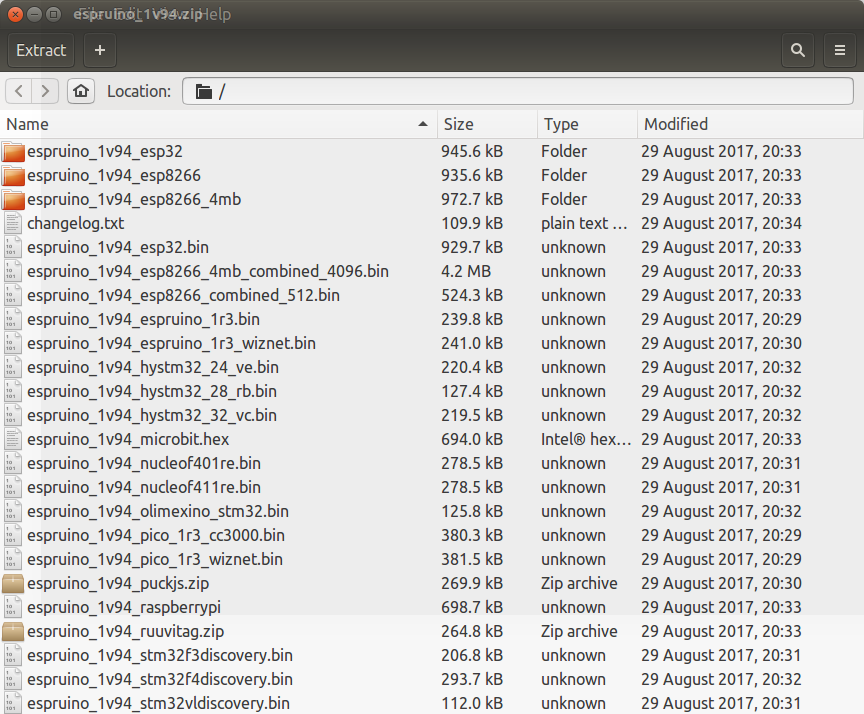
The zip file includes firmware for all supported platforms include the company’s own Espruino boards & Puck.js, Micro::bit, OlimeXino, Raspberry Pi, STM32 discovery boards, and more..
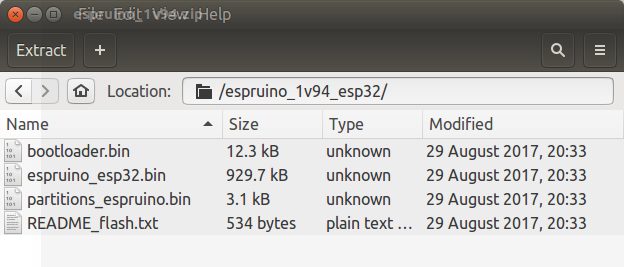 For our use, we need to get into espruino_1v94_espruino, where we’ll find 3 binary files (bootloader.bin, espruino_esp32.bin, and partitions_espruino.bin), as well as README_flash.txt that explains how to do the update in Windows with flash_download_tools_v3.4.4.zip, or in Linux with esptool.py from the ESP-IDF SDK. I’m running Ubuntu 16.04, so I’ll go with the later, but since most people won’t need to install the ESP-IDF SDK, you can instead get esptool from pip for Python 2.7 or 3.4 or newer:
|
1 2 3 |
sudo apt install python-pip sudo pip install --upgrade pip sudo pip install esptool |
if you’ve used esptool previously for other esp32/esp8266 board(s) before, you can upgrade esptool with:
|
1 |
sudo pip install esptool --upgrade |
In my case, I had installed an older version of esptool (v0.4.6) with apt when I played with NodeMCU board, so I removed it:
|
1 |
sudo apt remote esptool |
Now that we have the latest esptool utility installed, we can flash the image we’ve just extracted:
|
1 2 3 4 5 6 7 8 9 10 |
esptool.py --chip esp32 \ --port "/dev/ttyUSB0" \ --baud 921600 \ write_flash \ -z \ --flash_mode "dio" \ --flash_freq "40m" \ 0x1000 bootloader.bin \ 0x10000 espruino_esp32.bin \ 0x8000 partitions_espruino.bin |
It worked the first time. Log of successful installation:
|
1 2 3 4 5 6 7 8 9 10 11 12 13 14 15 16 17 18 19 20 21 22 |
esptool.py v2.1 Connecting........_ Chip is ESP32D0WDQ6 (revision 0) Uploading stub... Running stub... Stub running... Changing baud rate to 921600 Changed. Configuring flash size... Auto-detected Flash size: 4MB Compressed 12272 bytes to 7603... Wrote 12272 bytes (7603 compressed) at 0x00001000 in 0.1 seconds (effective 961.3 kbit/s)... Hash of data verified. Compressed 929680 bytes to 516107... Wrote 929680 bytes (516107 compressed) at 0x00010000 in 9.3 seconds (effective 802.6 kbit/s)... Hash of data verified. Compressed 3072 bytes to 136... Wrote 3072 bytes (136 compressed) at 0x00008000 in 0.0 seconds (effective 6143.7 kbit/s)... Hash of data verified. Leaving... Hard resetting... |
At this point, in theory, you can install Espruino Web IDE chrome extension, click on the connect icon on the left top corner, select /dev/ttyUSB0 port, and program away.
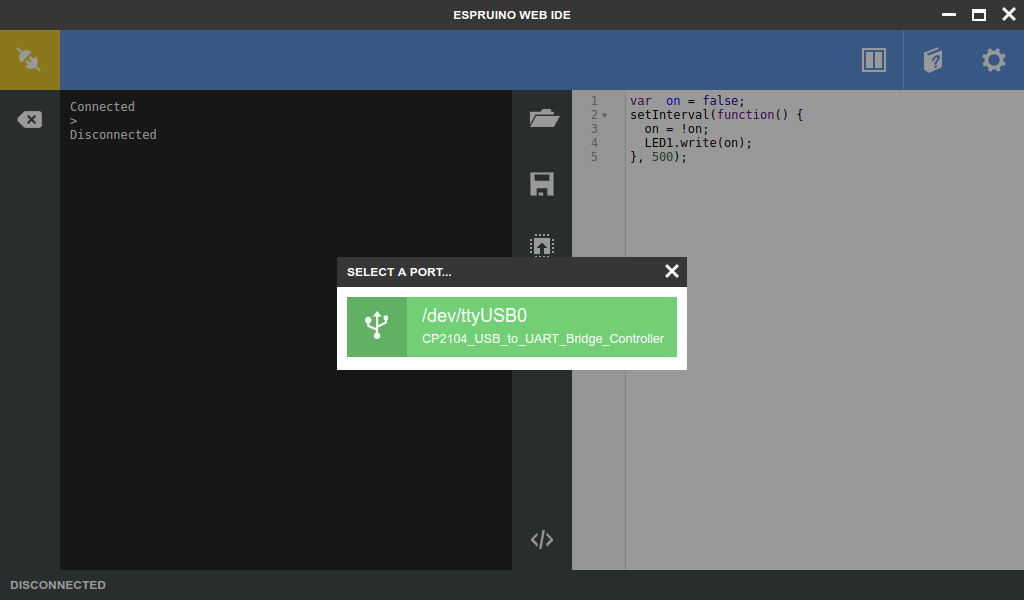
Espruino Web IDE will also show in Ubuntu 16.04 dash. But in practise, there’s a known issue that the first time you won’t be able to connect through the Web IDE, and indeed I could not.. The work around is to first connect using screen or minicom in a terminal window:
|
1 |
minicom --baudrate 115200 --device /dev/ttyUSB0 |
We can then run an hello world sample:
|
1 2 3 4 |
>console.log('Hello ESP32!'); Hello ESP32! =undefined > |
That “=undefined” is a little confusing, but Espruino developers explain that is expected :
This is normal and it indicates the result of the last operation, which in this case is the return value of
console.log, which is alwaysundefined.
The next step is to configure a WiFi connection to your access point:
|
1 2 3 4 5 6 7 8 |
var ssid = 'YOUR_SSID'; var password = 'YOUR_SSID_PASSWORD'; var wifi = require('Wifi'); wifi.connect(ssid, {password: password}, function() { console.log('Connected to Wifi. IP address is:', wifi.getIP().ip); wifi.save(); // Next reboot will auto-connect }); |
Replace “YOUR_SSID” and “YOUR_SSID_PASSWORD” with the value for your WiFi router. If this is successful, you should see a message like shortly after:
|
1 |
Connected to Wifi. IP address is: 192.168.0.112 |
The line wifi.save() will make sure the WiFi connection is permanent, so the board will reconnect to the router automatically after each reboot.
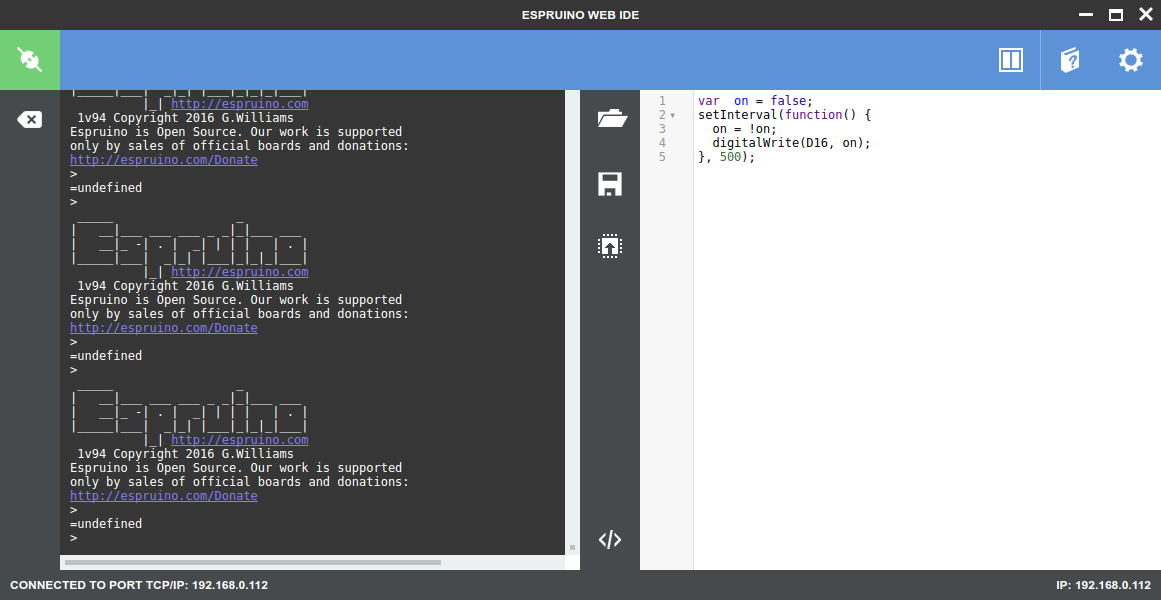
We can now go back to Espruino Web IDE, click on the Setup icon on the top right corner, go to Communications tab, and input the IP address (192.168.0.112 in my case) in the field “Connect over TCP Address“.
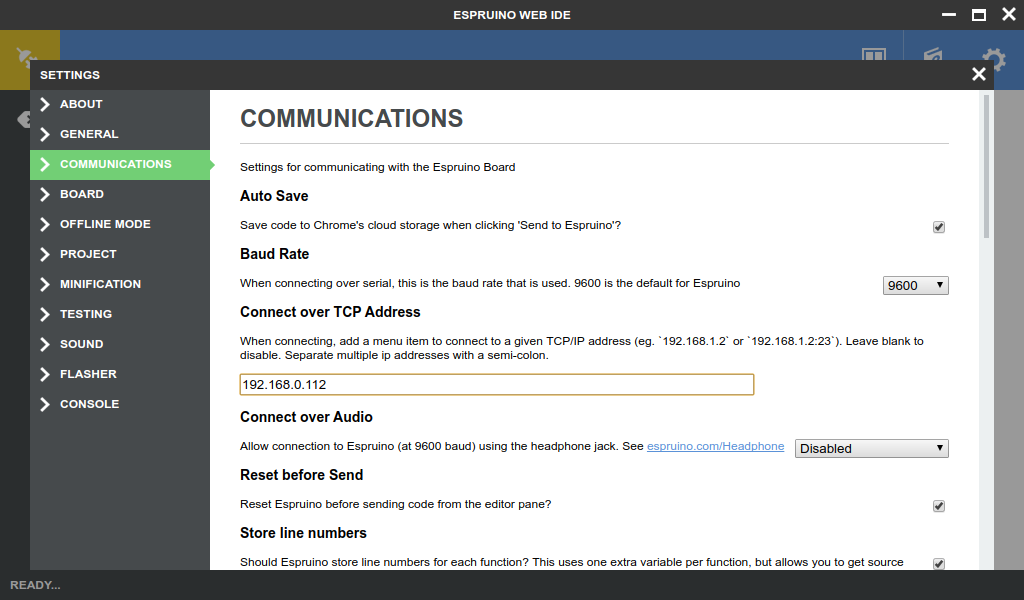
You don’t even need to connect the board to your computer at this stage, if you be powered by a battery, or a USB power adapter. If we click on the Connect icon again, we’ll have the option to select TCP/IP: 192.168.0.112.
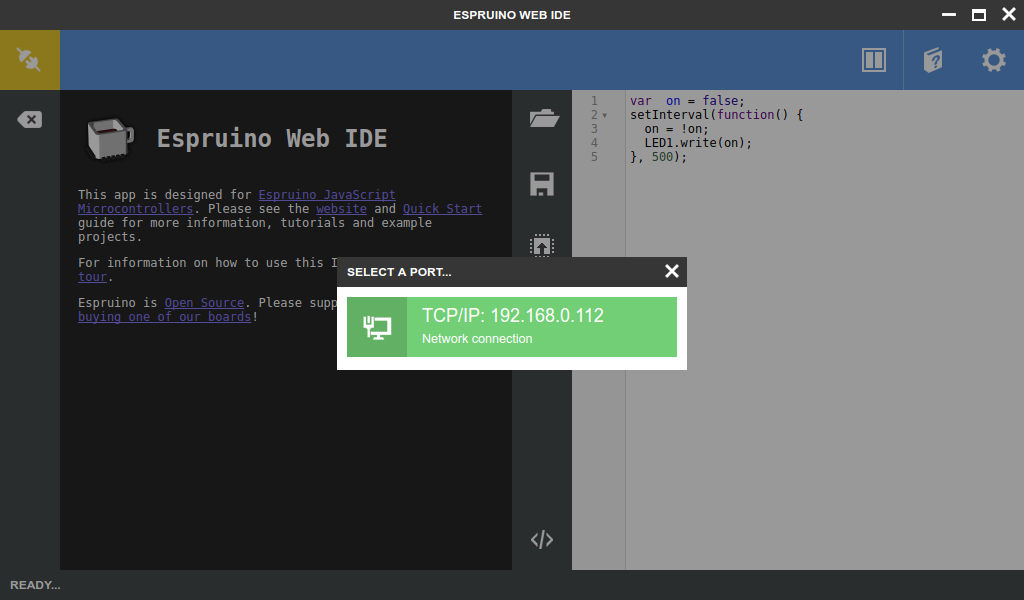
I wrote a simply LED blink demo in the right part of the window, and clicked on he Upload button (third button in the middle) to upload and start the program:
|
1 2 3 4 5 |
var on = false; setInterval(function() { on = !on; digitalWrite(D16, on); }, 500); |
D16 is connected both the board’s IO16 LED and the LED on the board. IO16 will be turned on when D16 is low, and my LED when D16 is high every half second. I’ve shot a quick demo below.
However, if you reboot or power cycle the board, your program will not automatically start. So if you want the program to be “permanent”, add save command at the end of your code:
|
1 |
save(); |
The output from the console should look like when you click on Upload button.
|
1 2 3 4 5 |
Erasing Flash.................. Writing..... Compressed 80000 bytes to 2998 Checking... Done! |
I could turn off and on the board, the LED demo resumed automatically without having to upload the code from the IDE.
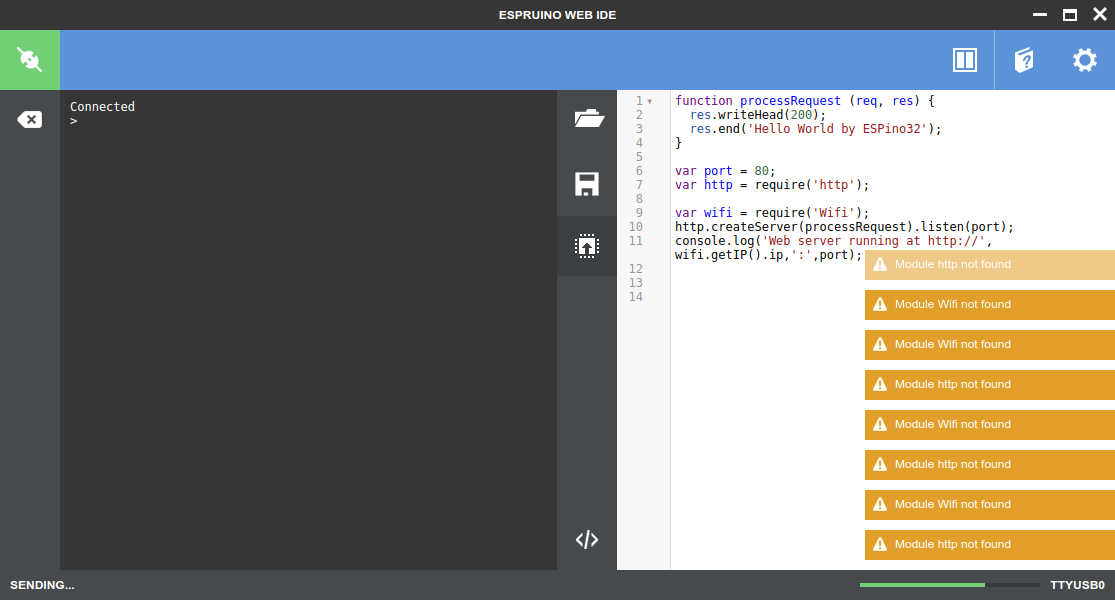
Note that at this stage, I started to have some strange issues, like failure to connect to the board, and sometimes it would should “module http not found” or “module wiki not found”, as I wrote code for a web server.
It could be you need include the code for a permanent WiFi connection, before running the save command. It was still working sometimes, but I decided to connect through micro USB cable via Espruino Web IDE (it worked at this stage) to carry on with my tests more reliably.
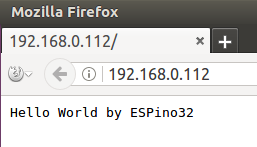
In case you want to use ESPino32 board as small webserver, you can do so by creating a access point, and returning a simple “hello world” with the following code:
|
1 2 3 4 5 6 7 8 9 10 11 12 13 14 |
function processRequest (req, res) { res.writeHead(200); res.end('Hello World by ESPino32'); } var ssid = 'YOUR_SSID'; var password = 'YOUR_SSID_PASSWORD'; var port = 80; var http = require('http'); var wifi = require('Wifi'); wifi.connect(ssid, {password: password}, function() { http.createServer(processRequest).listen(port); console.log('Web server running at http://', wifi.getIP().ip,':',port); }); |
I click on Upload button, and I could access web server from Firefox.
 The main advantage of Espruino over the Arduino IDE is that it’s much faster to try your code on the target, since there’s no need to compile a binary, upload to the board, and flash to storage during development. Another advantage depends on your skill set, as if you’re a seasoned web developer with a good knowledge of JavaScript, you won’t need to learn C programming used in Arduino IDE.
For other interface (SPI, I2C, ADC…) and more advanced tasks, you may check Espruino ESP32 page, but be forewarned, as the blink and web server samples did not work for me (unknown variable and missing semi-colon) by default. So you may want to read through the API reference in case the samples do not work. The company behind Espruino, Pur3 Ltd, is likely focusing most of the development efforts of their own hardware platforms like Puck.js and Espruino boards, and there’s more activity for those in the forums. So if you are interested in JavaScript on micro-controllers, but don’t want too many issues, ESP32 may not be best platform to learn, but if you like challenges, go ahead! 🙂
I’d like to thank ThaiEasyElec for sending an ESPino32 board sample. The company sells the board locally and globally for respectively 590 THB / ~$16 plus shipping on their website, where you’ll also find some documentation in English and Thai language. If you are based in Thailand, you can get further discount and free shipping if you purchase through LINE app.

Jean-Luc started CNX Software in 2010 as a part-time endeavor, before quitting his job as a software engineering manager, and starting to write daily news, and reviews full time later in 2011.
Support CNX Software! Donate via cryptocurrencies, become a Patron on Patreon, or purchase goods on Amazon or Aliexpress


