
A preview release of Google Assistant SDK working with Raspberry Pi 3 and other ARMv7 boards was released in May, and soon after, AIY Projects Voice Kit was offered for free with Raspberry Pi Magazine in order to a complete smart speaker kit working with RPi 3. I wanted to try it on one of FriendlyELEC or Shenzhen Xunlong Allwinner board, since all we need is audio input and output, and an Internet connection. Earlier this month, I came across Orange Pi Zero Set 6 Kit that had all I needed: Orange Pi Zero ARM Linux board, an expansion board with built-in microphone and audio output jack, and a cute and small case to neatly put everything together.
Orange Pi Zero Set 6 Kit Unboxing and Assembly
Shenzhen Xunlong sent me the kit so that I can try it out.
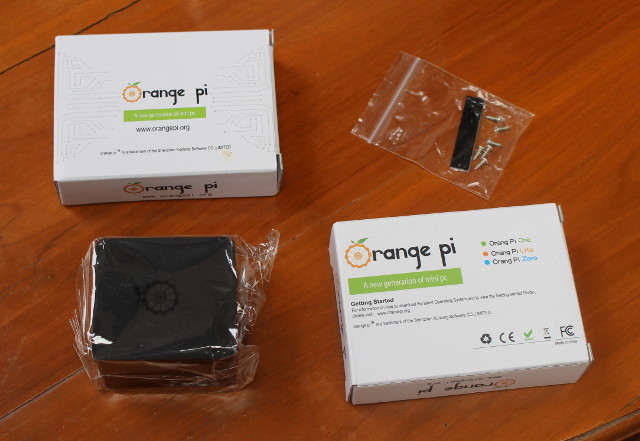
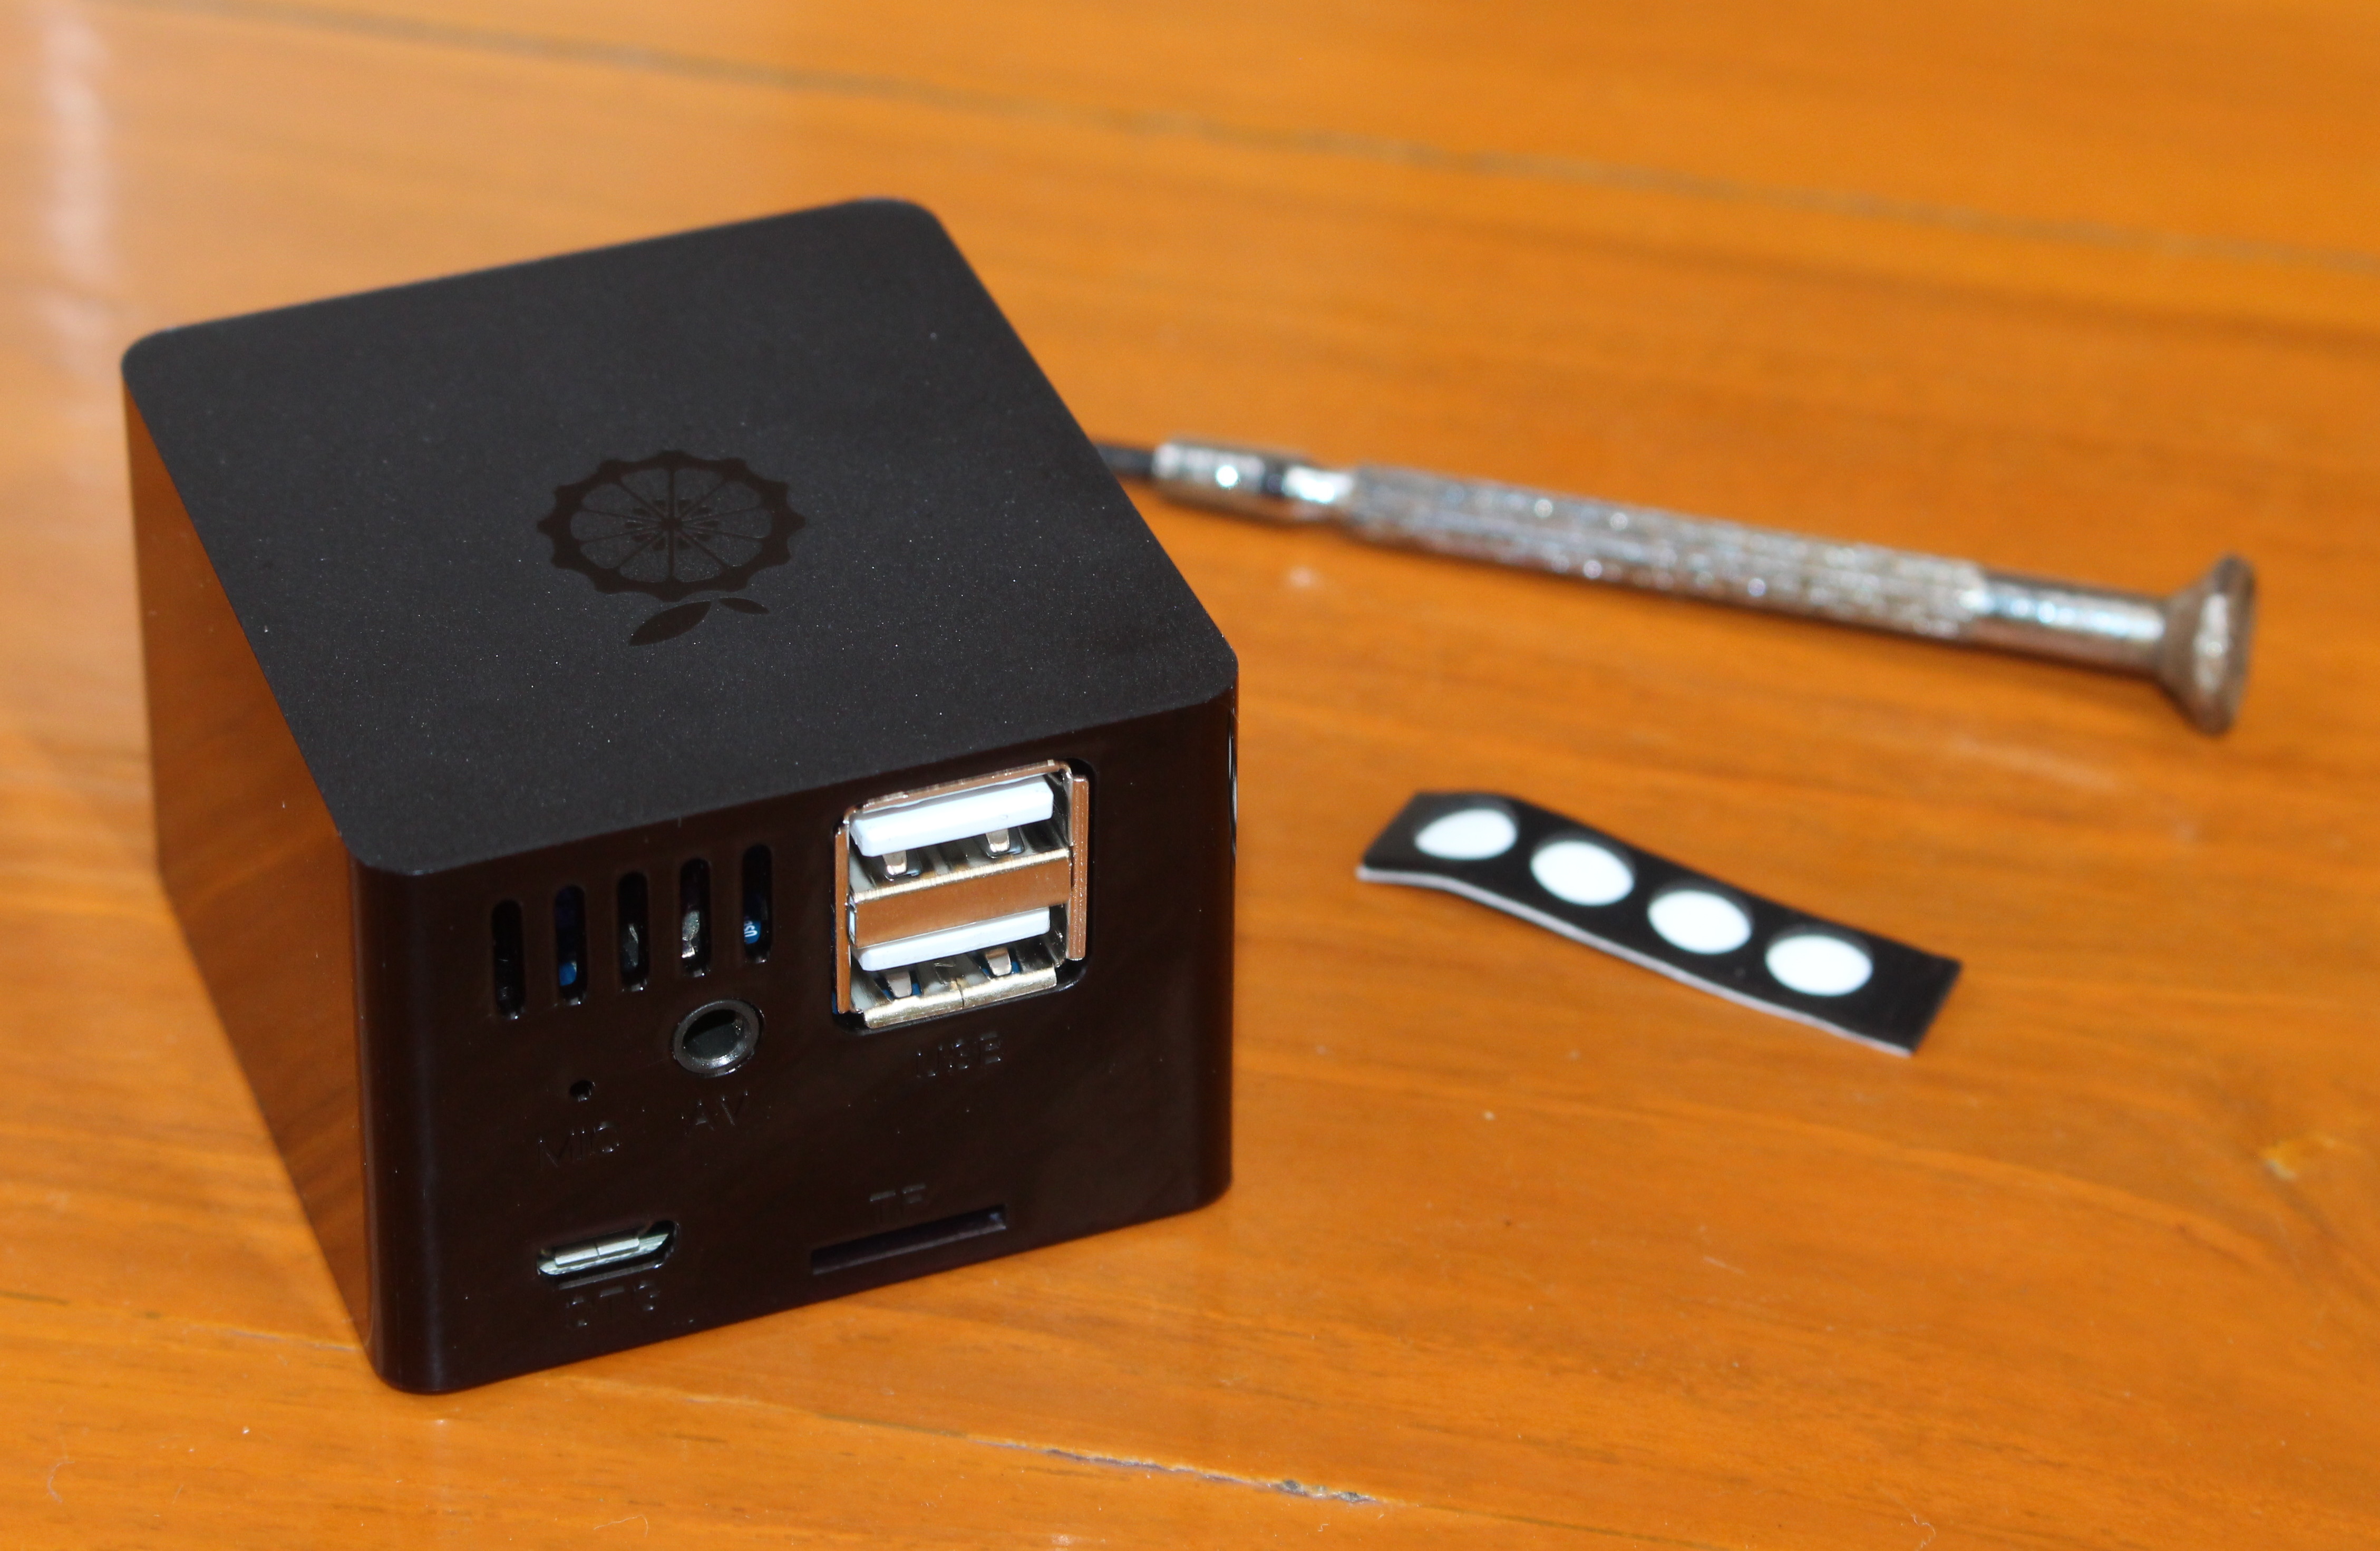
The package includes two Orange Pi packages, the plastic case, some a bag with screws and rubber pads.
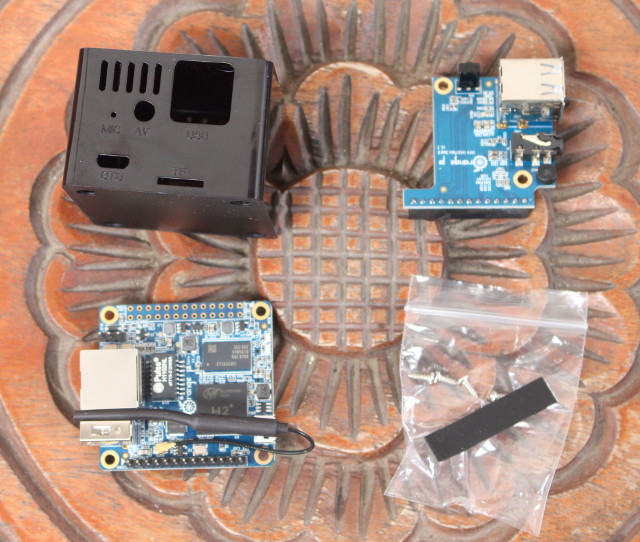
One of the package comes with Orange Pi Zero board powered by Allwinner H2+ quad core processor with 512 MB RAM, micro USB for power, 10/100M Ethernet, a USB port, a WiFi antenna, and expansion headers on the top…
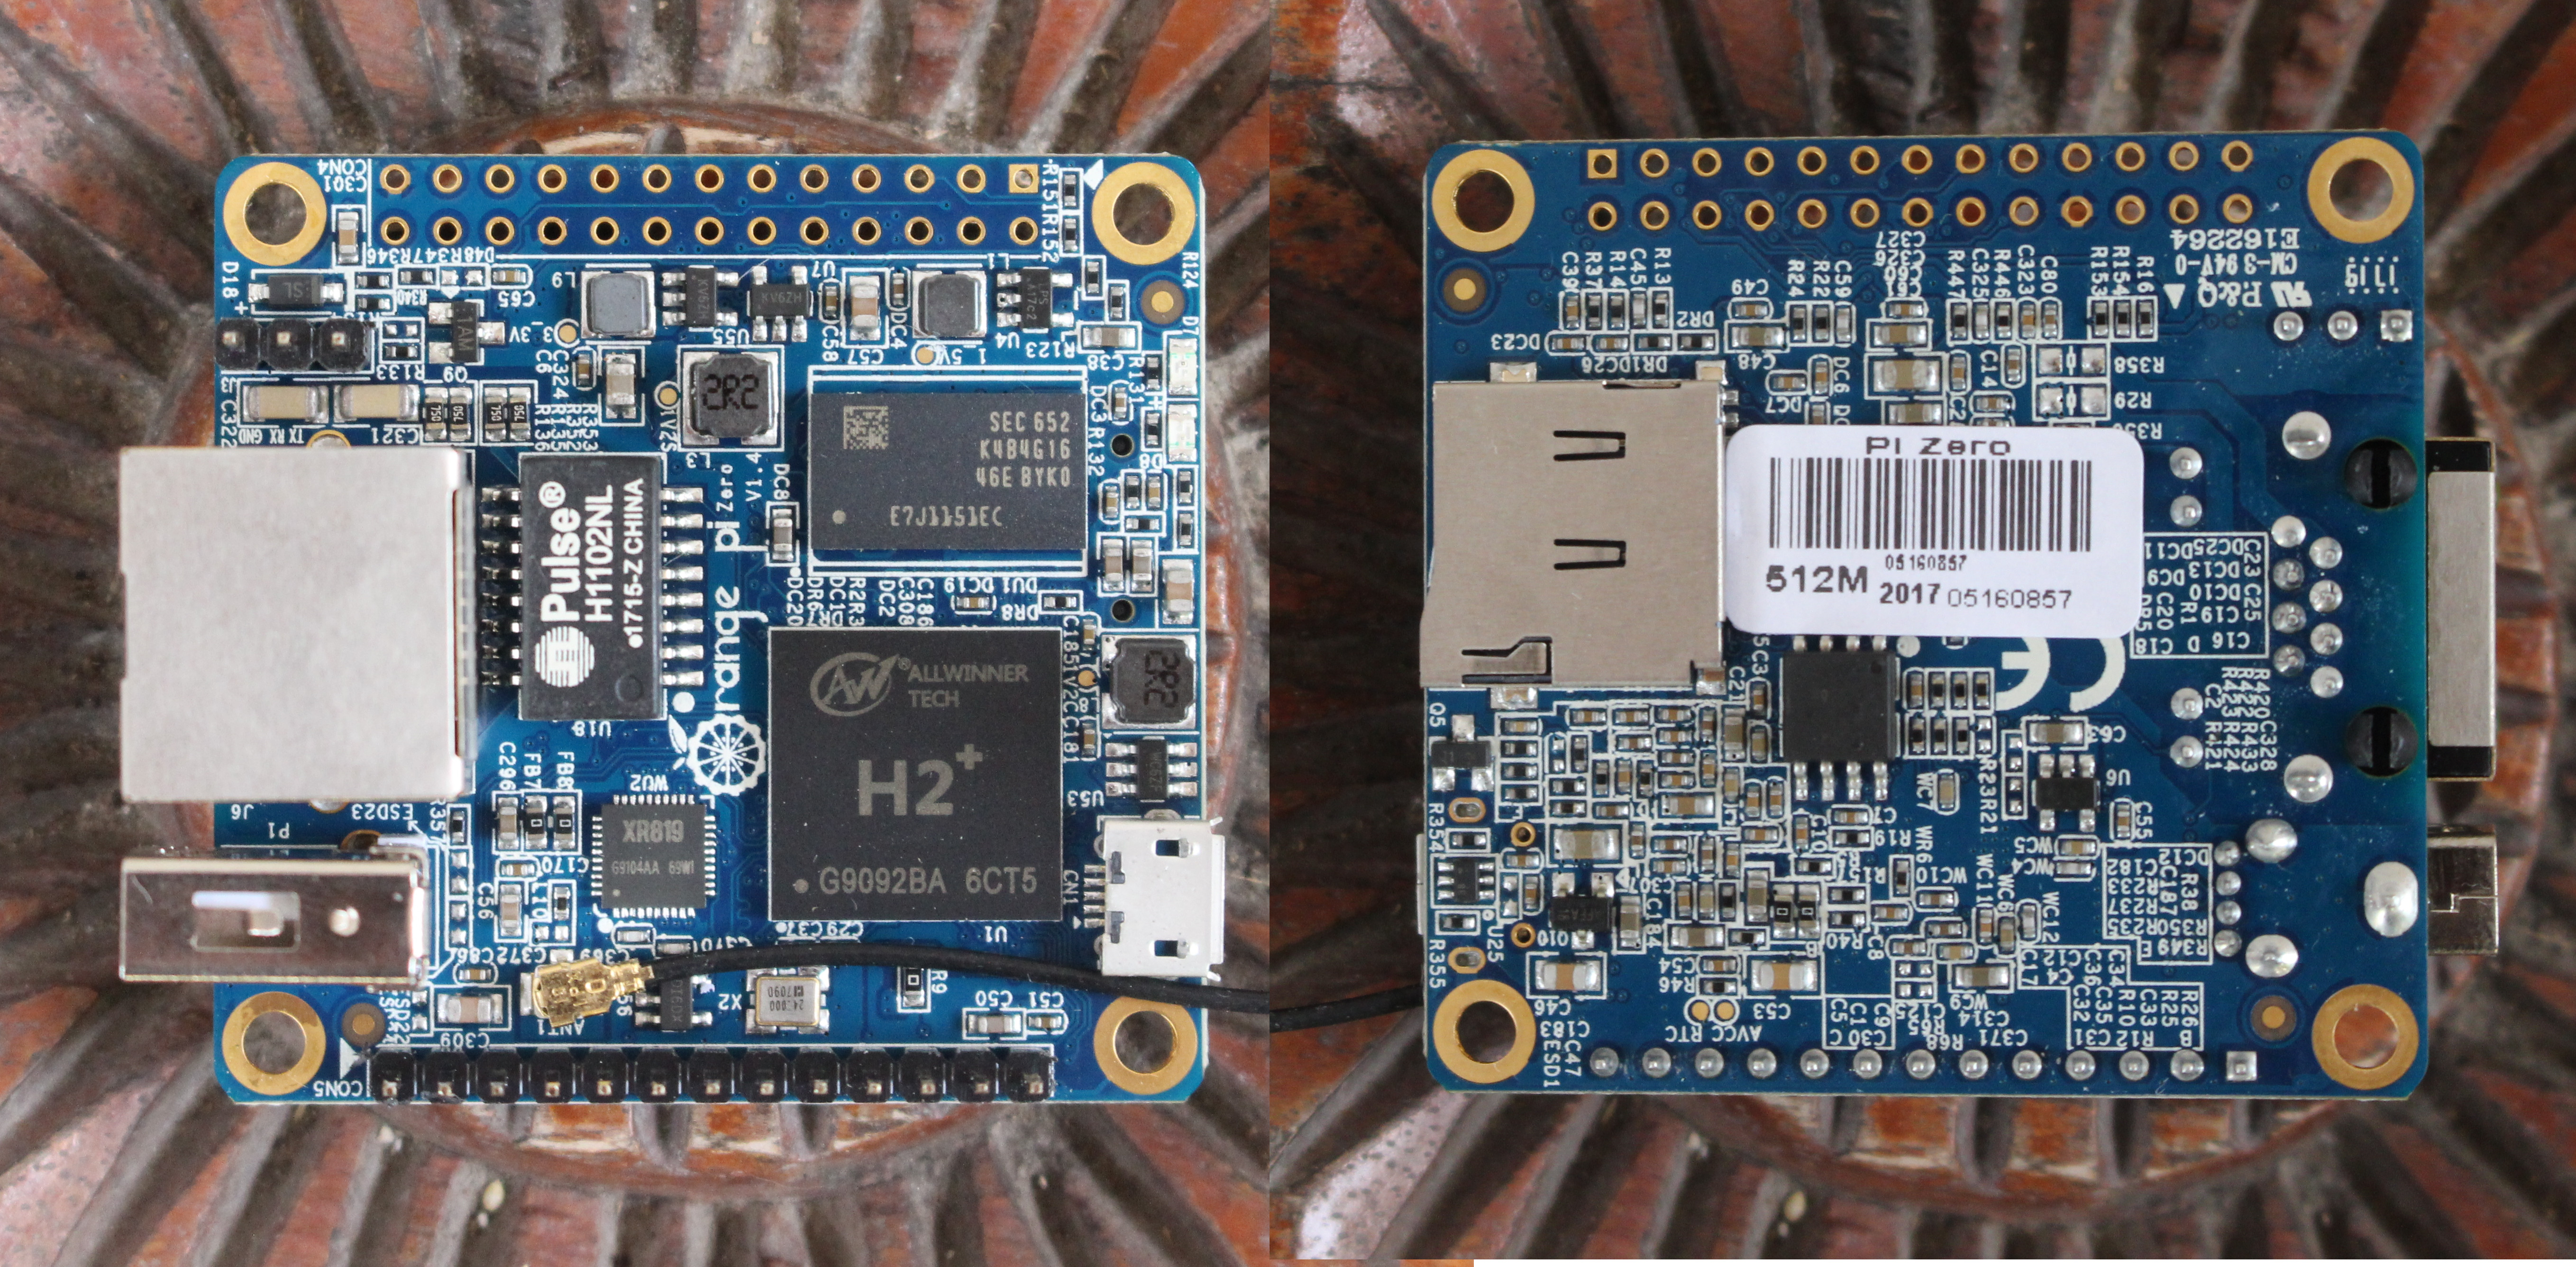
.. and a micro SD card slot on the bottom, which we’ll use to boot the operating system.
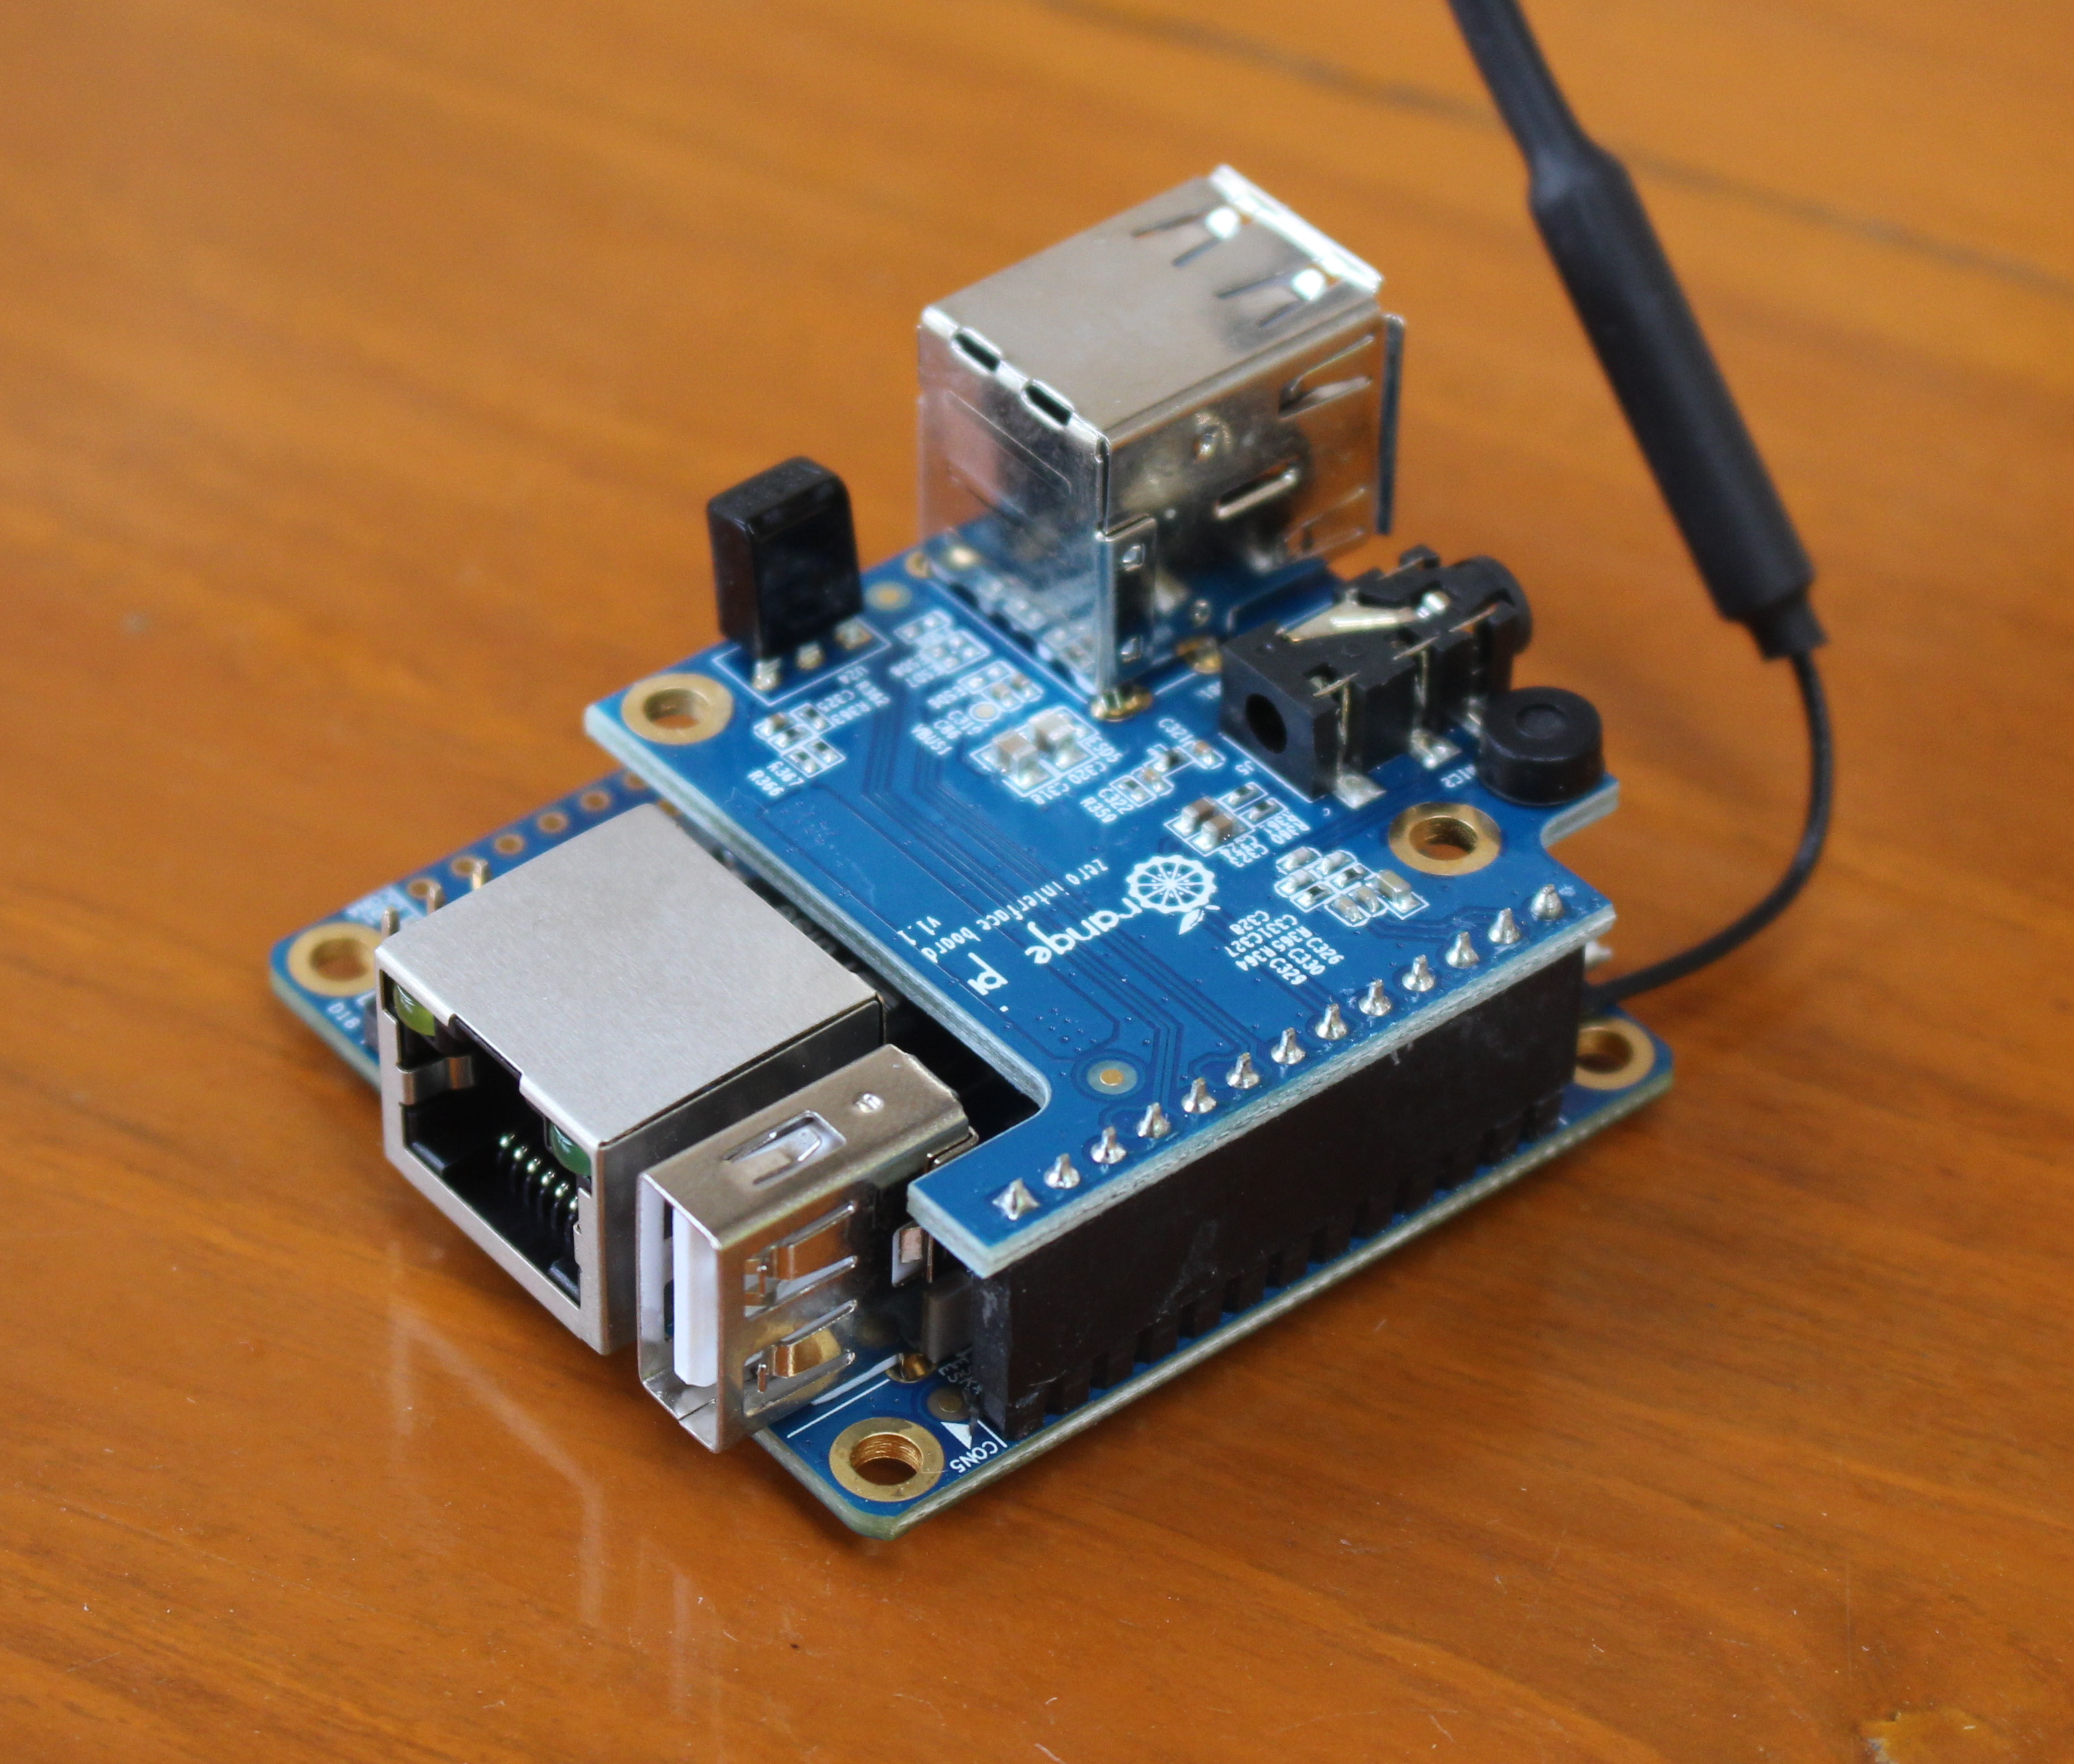
The second package is for Orange Pi Zero Interface board v1.1 with two more USB port, an IR receiver, a 3.5mm audio jack, and a built-in microphone (top right).

The next step is just to plug the interface board into Orange Pi Zero board, bending the WiFi antenna between the two boards…
… before pushing the board from the bottom of the enclosure, tightened the cover with the 4 screws, and adding the 4 rubber pads.
Installing Ubuntu on Orange Pi Zero & Configuring Networking and Audio Input & Output
Google Assistant SDK requires Ubuntu or Debian operating system, so I downloaded Ubuntu server legacy image on Armbian website, since the mainline image does not support XR819 WiFi module at all. I then extracted Armbian_5.30_Orangepizero_Ubuntu_xenial_default_3.4.113.7z and flashed Armbian_5.30_Orangepizero_Ubuntu_xenial_default_3.4.113.img with Etcher on a micro SD card using my main computer.
Once it was done, I took the micro SD card to Orange Pi Zero board, connected my own speakers to the 3.5mm audio jack and USB for power, as well as a 5V/2A USB charger to power the system.
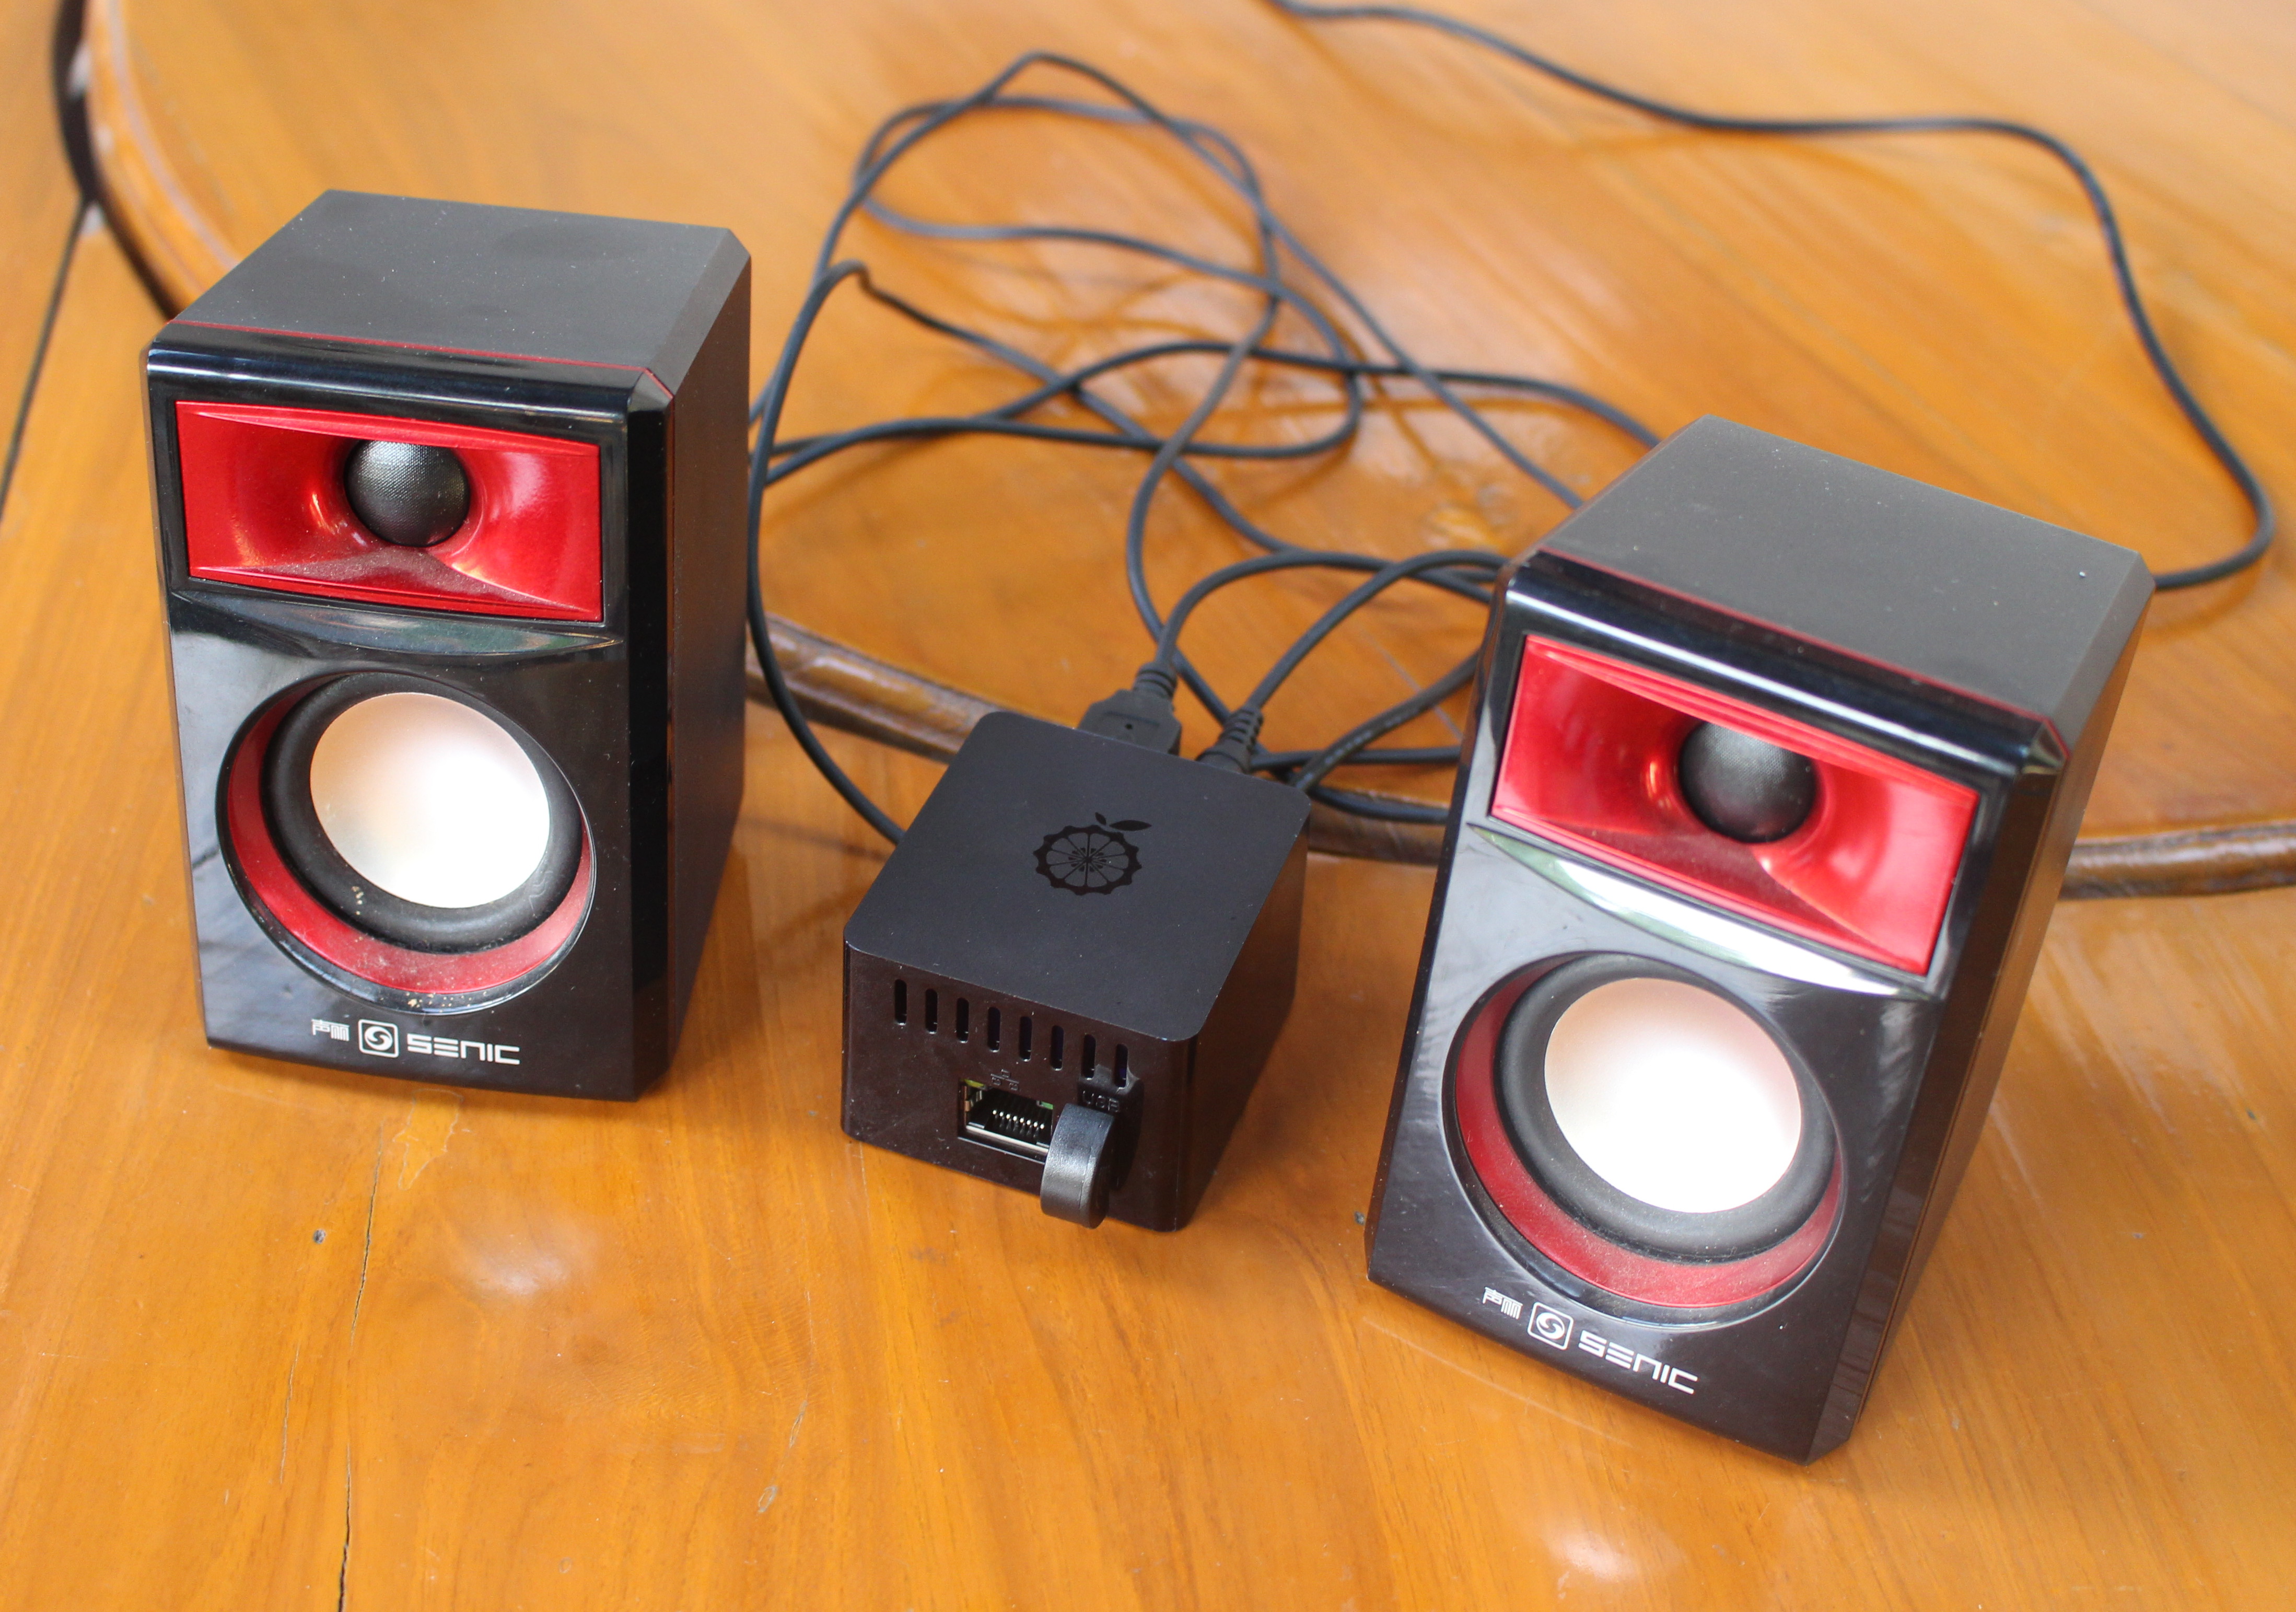
You may notice an extra USB dongle on the picture above, but we’ll talk about that later.
I’ll use WiFi to test Google Assistant, but I also connected an Ethernet cable to make it easier for first time setup. If you don’t have Ethernet, you could also connect the board via a USB to TTL board to access the serial console.
After looking up the IP address of the board in my router, I connected with SSH using root (password: 1234):
|
1 2 3 4 5 6 7 8 9 10 11 12 13 14 15 16 17 18 19 20 21 22 23 24 25 26 27 28 29 |
ssh root@192.168.0.113 root@192.168.0.113's password: You are required to change your password immediately (root enforced) ___ ____ _ _____ / _ \ _ __ __ _ _ __ __ _ ___ | _ \(_) |__ /___ _ __ ___ | | | | '__/ _` | '_ \ / _` |/ _ \ | |_) | | / // _ \ '__/ _ \ | |_| | | | (_| | | | | (_| | __/ | __/| | / /| __/ | | (_) | \___/|_| \__,_|_| |_|\__, |\___| |_| |_| /____\___|_| \___/ |___/ Welcome to ARMBIAN 5.30 stable Ubuntu 16.04.2 LTS 3.4.113-sun8i System load: 0.21 0.06 0.06 Up time: 1:08 hour Memory usage: 5 % of 494MB IP: 192.168.0.113 CPU temp: 79°C Usage of /: 81% of 1.4G [ General system configuration: armbian-config ] Last login: Sat Jul 29 04:56:32 2017 from 192.168.0.104 Changing password for root. (current) UNIX password: Enter new UNIX password: Retype new UNIX password: Thank you for choosing Armbian! Support: www.armbian.com Creating a new user account. Press <Ctrl-C> to abort Please provide a username (eg. your forename): ... |
The very first boot it will ask your to change the root password, and create a new user. You may want to create “pi” user at this stage. We should not be able to access the command, and run the following command to configure Orange Pi Zero board:
|
1 |
armbian-config |
I first changed the timezone.
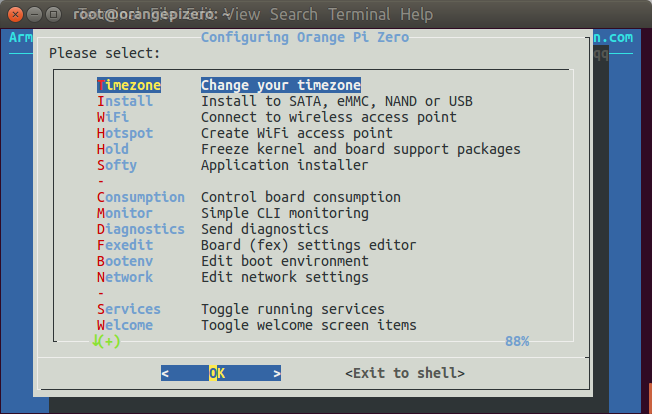 Then selected WiFi – Connect to wireless access point to connect to my WiFi router.
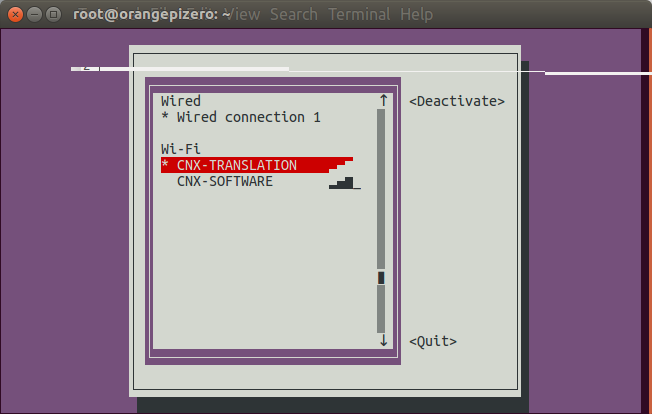 We can quit armbian-config, and optionally disconnect the Ethernet cable, and reconnect SSH over WiFi, which I did.
Back in the command line, I tested audio recording & playback with the built-in microphone and speakers using the same commands as in ReSpeaker guide:
|
1 2 |
arecord -M -f S16_LE -r 16000 -c 1 --buffer-size=204800 -v /tmp/sample.wav aplay -M /tmp/sample.wav --buffer-size=204800 -v |
The first command recorded my voice, and then I pressed Ctrl+C to stop, and play it back with the second command. I worked fine for me. If you wish you can adjust the playback and recording volume with:
|
1 |
alsamixer |
We’ll also need to create .asoundrc file for Google Assistant to work with ALSA. For we need to note the microphone card and device number (0,0):
|
1 2 3 4 5 6 7 8 |
root@orangepizero:~# arecord -l **** List of CAPTURE Hardware Devices **** card 0: audiocodec [audiocodec], device 0: SUNXI-CODEC sndcodec-0 [] Subdevices: 1/1 Subdevice #0: subdevice #0 card 1: sndhdmi [sndhdmi], device 0: SUNXI-HDMIAUDIO sndhdmi-0 [] Subdevices: 1/1 Subdevice #0: subdevice #0 |
as well as speaker card and device number (0,0):
|
1 2 3 4 5 6 7 8 |
aplay -l **** List of PLAYBACK Hardware Devices **** card 0: audiocodec [audiocodec], device 0: SUNXI-CODEC sndcodec-0 [] Subdevices: 1/1 Subdevice #0: subdevice #0 card 1: sndhdmi [sndhdmi], device 0: SUNXI-HDMIAUDIO sndhdmi-0 [] Subdevices: 1/1 Subdevice #0: subdevice #0 |
If you want to use your TV as speaker, you’d use Card 1, device: 0.
If you have not created a pi or other user yet, you’ll want to add one belonging to sudoers and audio groups, and go the home directory:
|
1 2 3 4 5 |
adduser pi adduser pi sudo adduser pi audio su pi cd ~ |
Now create a ~/.asoundrc with the following match the card and device for our mic and speaker:
|
1 2 3 4 5 6 7 8 9 10 11 12 13 14 15 16 17 |
pcm.!default { type asym capture.pcm "mic" playback.pcm "speaker" } pcm.mic { type plug slave { pcm "hw:0,0" } } pcm.speaker { type plug slave { pcm "hw:0,0" } } |
[Update: As we’ll see below this won’t work with the built-in microphone, but as indicated in the comments below, this can be fixed by changing pcm.mic section with:
|
1 2 3 4 5 6 7 |
pcm.mic { type plug slave { pcm "hw:0,0" format S16_LE } } |
I have not changed the rest of the post, but the built-in microphone on Orange Pi Zero does work now]
Setting Up Google Assistant on Orange Pi Zero
Now that audio and networking are both setup and working, we can carry on with the instructions to install Google Assistant SDK and demo. Those are the same for all boards, and I’ll describe them below in details.
We need to configure a Google Developer Project.
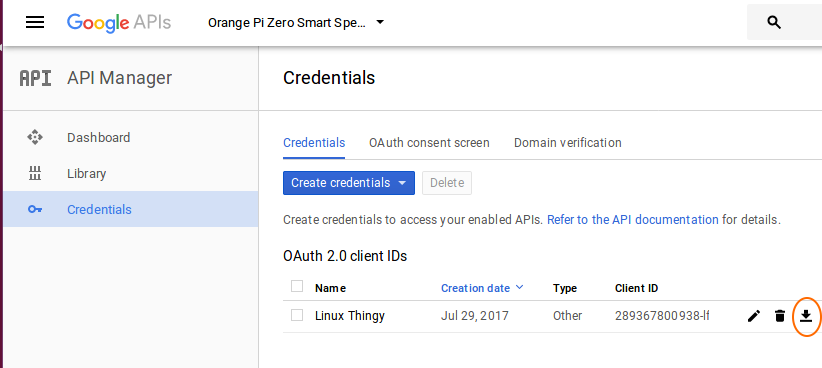
Go to the Project page in Google Platform Console, and click on Create Project.
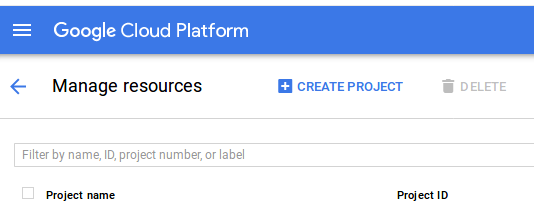
I called it Orange Pi Zero Smart Speaker, and clicked on Create.

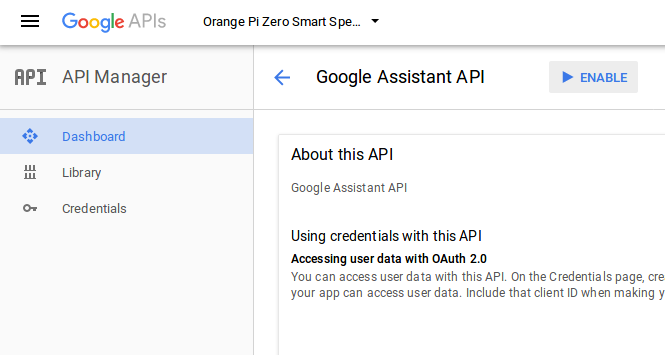
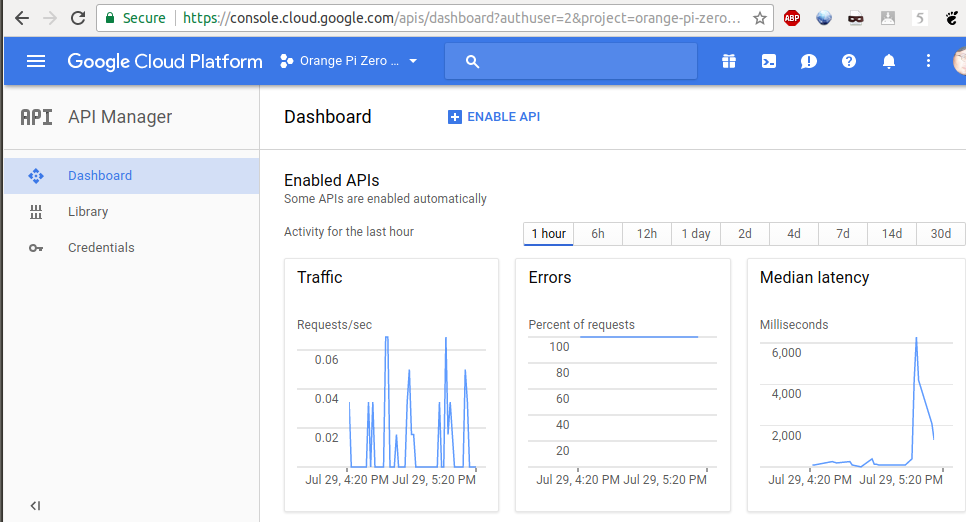
Next, we’ll need to enable Google Assistant API for our project. Simply click on Enable on that page. The “Orange Pi Zero Smart Speaker” project was already selected in my case.
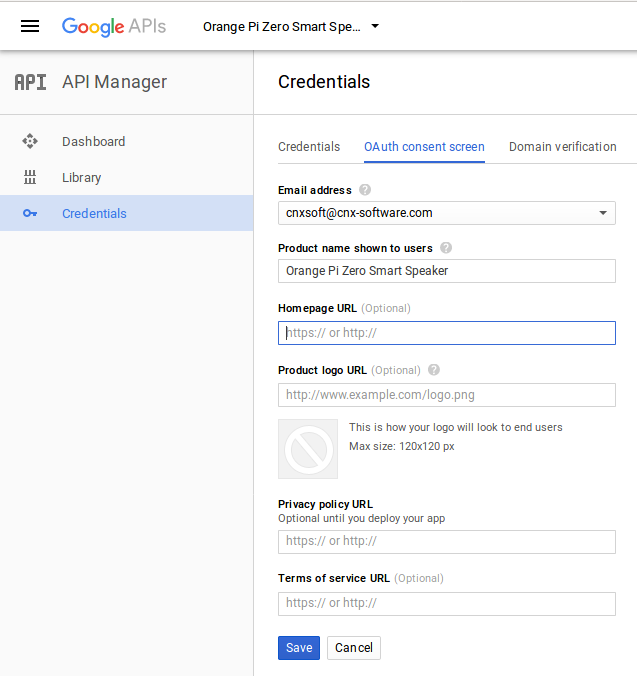
We’re then being asked to create an OAuth Client ID. I only filled my email address, and a product name before clicking on Save.
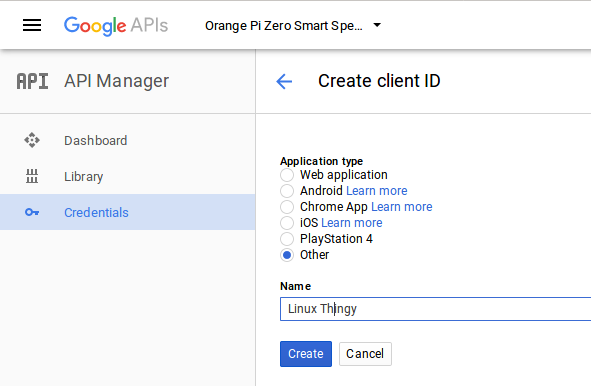
Select Other in the next page, and give another name – I used “Linux Thingy” – before clicking on Create.
You should now see an OAuth client pop-up window with your client ID and secret. You can just click OK, no need to copy or save either.
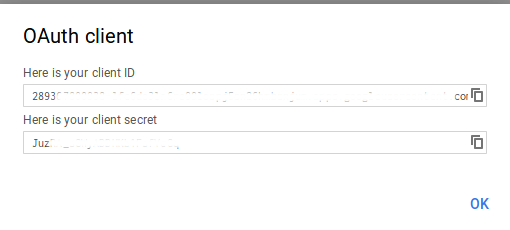
Instead we’ll download client_secret_[your_client_id].json file on the next page by clicking on the arrow circled in red.
I then copied that file to Orange Pi Zero board using scp (change [your_client_id] with your actual client ID):
|
1 |
scp client_secret_[your_client_id].json pi@192.168.0.114:~ |
Now that we have configured most options we need in Google Cloud platform, let’s install Python 3 and dependencies:
|
1 2 3 4 5 |
sudo apt-get update sudo apt-get install python3-dev python3-venv python3 -m venv env env/bin/python -m pip install --upgrade pip setuptools source env/bin/activate |
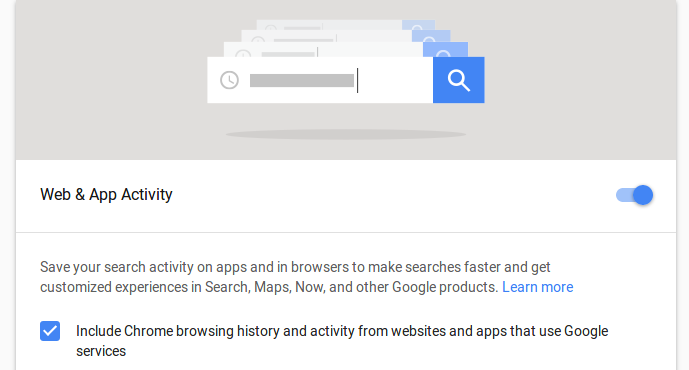
At this stage to need to make sure “Web & App Activity” with “Include Chrome browsing history and activity from websites and apps that use Google services” checked, Device Information and Voice & Audio Activity are enabled in the Activity Controls page. All options were already enabled for me by default.
We can now install Google Assistant SDK package including library and sample code:
|
1 |
python -m pip install --upgrade google-assistant-library |
and the authorization tool:
|
1 |
python -m pip install --upgrade google-auth-oauthlib[tool] |
Run the authorization tool:
|
1 |
google-oauthlib-tool --client-secrets ~/client_secret_xxxx.apps.googleusercontent.com.json --scope https://www.googleapis.com/auth/assistant-sdk-prototype --save --headless |
This should show a text reading “Please visit this URL to authorize this application: https://….”. Select the URL and open it in a web browser, and copy/paste the authorization code you see in the web browser back into the terminal.
We can now start the demo
|
1 |
google-assistant-demo |
That’s the initial output
|
1 2 3 |
ON_MUTED_CHANGED: {'is_muted': False} ON_START_FINISHED |
I went to say “OK Google” and “Hey Google”, and… nothing. No answer, and no info in the terminal window either. I tried several times, and also played with:
|
1 |
export ASSISTANT_MIC_SENSITIVITY=-6 |
as explained in the troubleshooting section in Google Assistant documentation, incrementing the value by 6 until I reached -60, before running the demo, and no luck. So I thought maybe my “American accent” could have been the problem, so I launched Google Translate in my phone, and make it say “OK Google”. Same disappointing result. I went to Google Cloud Console, and good see some activity, but with 100% errors.
So I did some searching on the web, I could find one person changing the .asoundrc file, but I did not work for me with the file generating plenty of sound related errors when running the demo, and another fix a similar problem by changing the microphone. Which reminded me, I had bought a cheap USB microphone on eBay for $1.45. So I connected it to Orange Pi Zero board, and that’s the extra USB dongle in the photo with the speakers higher in this guide, and check the card and device number:
|
1 2 3 4 5 6 7 8 9 10 11 |
arecord -l **** List of CAPTURE Hardware Devices **** card 0: audiocodec [audiocodec], device 0: SUNXI-CODEC sndcodec-0 [] Subdevices: 1/1 Subdevice #0: subdevice #0 card 1: sndhdmi [sndhdmi], device 0: SUNXI-HDMIAUDIO sndhdmi-0 [] Subdevices: 1/1 Subdevice #0: subdevice #0 card 2: Device [USB PnP Sound Device], device 0: USB Audio [USB Audio] Subdevices: 1/1 Subdevice #0: subdevice #0 |
We can see the USB card 2, device 0, so I update the relevant line in pcm.mic section in .asoundrc:
|
1 |
pcm "hw:2,0" |
and ran the demo again. Success! The device would reply to make “OK Google” request, and tell me the time, my name, the weather for tomorrow, sing a song, do some calculus and so on.
This is what the output looks like when the demo works:
|
1 2 3 4 5 6 7 8 9 10 11 12 13 14 15 16 17 18 19 20 21 22 23 24 |
google-assistant-demo ON_MUTED_CHANGED: {'is_muted': False} ON_START_FINISHED ON_CONVERSATION_TURN_STARTED ON_END_OF_UTTERANCE ON_RECOGNIZING_SPEECH_FINISHED: {'text': 'what do you want'} ON_RESPONDING_STARTED: {'is_error_response': False} ON_RESPONDING_FINISHED ON_CONVERSATION_TURN_FINISHED: {'with_follow_on_turn': False} ON_CONVERSATION_TURN_STARTED ON_END_OF_UTTERANCE ON_RECOGNIZING_SPEECH_FINISHED: {'text': 'I will be back'} ON_RESPONDING_STARTED: {'is_error_response': False} ON_RESPONDING_FINISHED ON_CONVERSATION_TURN_FINISHED: {'with_follow_on_turn': False} |
Bear in mind that Google Assistant SDK is in preview mode right now, and it’s mainly aimed at developers. First, I understand you can’t do automation tasks, or play music like you can on an actual Google Home. The good news is that you can roll you own implementation, and for example, somebody made his AIY Project Voice Kit work with Google Music, something you should be able to reproduce on other boards. Google Home also includes a microphone array, which will make hot word detection more reliable even in noisy environment. Orange Pi Zero + USB microphone did a decent job though, as I could use it 5 or more meters away.
Next time you boot the board, you can login as pi user, and run the following commands to run the demo:
|
1 2 |
source env/bin/activate google-assistant-demo |
You could also use systemd to automatically start the demo, or your own implementation, and I did so with instructions adapted from Nordic Semi’s Google Assistant Wiki.
First, create /etc/systemd/system/google-assistant-demo.service file with the following content:
|
1 2 3 4 5 6 7 8 9 10 11 12 13 14 15 16 17 18 |
[Unit] Description=google assistant service After=network.target ntpdate.service [Service] Type = idle Environment=VIRTUAL_ENV=/home/pi/env/ Environment=PATH=/home/pi/env/bin:/usr/local/sbin:/usr/local ExecStart=/home/pi/env/bin/google-assistant-demo WorkingDirectory=/home/pi StandardOutput=inherit StandardError=inherit Restart=always User=pi [Install] WantedBy=multi-user.target Alias=google-assistant.service |
I add “Type = idle” as other the app would not run, possibly because it would start after the audio was enable. I did not find any audio specific services handled by systemd, so “type = ilde” will make sure the service starts after other are loaded.
Now we can enable the service, and start it:
|
1 2 |
sudo systemctl enable google-assistant-demo.service sudo systemctl start google-assistant-demo.service |
The demo will run at this point, and it will start automatically each time your boot the board. I played with it for several hours and it seemed stable. Some people have however expressed concered about WiFi on Orange Pi Zero, so if you encountered some instability issues, you may want to switch to Ethernet instead, or use a WiFi USB dongle, or use another Orange Pi or NanoPi board with a time-proven WiFi module.
I’d like to thank Shenzhen Xunlong Software for sending the kit my way. If you are interested, you can purchase it for $12.95 + shipping.

Jean-Luc started CNX Software in 2010 as a part-time endeavor, before quitting his job as a software engineering manager, and starting to write daily news, and reviews full time later in 2011.
Support CNX Software! Donate via cryptocurrencies, become a Patron on Patreon, or purchase goods on Amazon or Aliexpress


