
Karl here. This was article originally going to be how to setup Octoprint 3D printer server on an Orange Pi Lite. But after looking and running through the instructions it seemed like it would be too much so I created an img to simplify things. I also explored running Octoprint on an Amlogic S905x or S912 device and it turned out to be an even better solution. You get a case, power supply, and eMMC flash storage.
What is Octoprint?
I use Octoprint mainly for its ability to start and stop prints without having to use an sd card. Time lapse is also a nice feature. And one last thing is that I setup a pushbullet notification when it is complete. For a full list of features check out http://octoprint.org/.
What is needed?
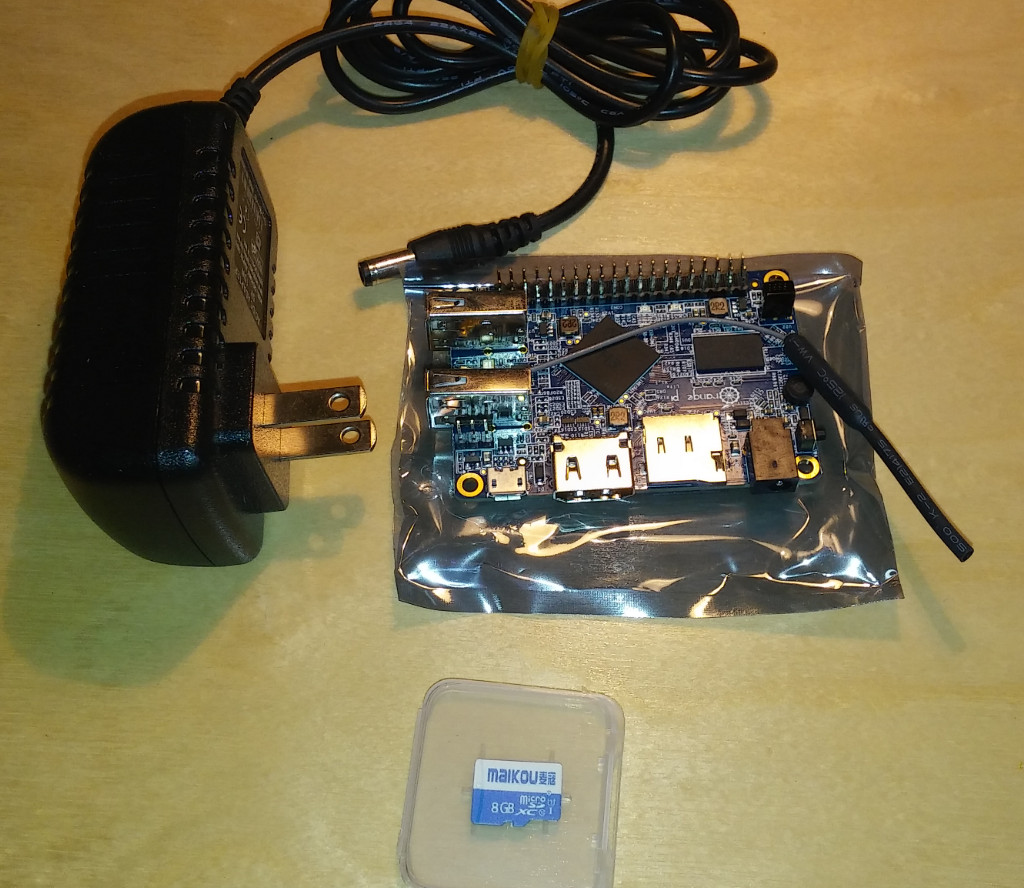
- Orange Pi Lite board provided by GearBest for the article, or an Amlogic S905X or S912 Android box.
- At least a 4GB micro SD card or good Samsung for Orange Pi Lite
- A good power supply if you choose Orange Pi Lite
Octoprint Setup
Common Instructions
- Download Orange Pi Lite img from here and Amlogic img from here.
- Burn to your micro SD card with Win32DiskImager, dd, or Etcher..
Credentials
Login: root password: octoprint
Login: cnx password: cnx
Hostname
Orange Pi Lite: orangeocto.local
Amlogic: amlogicocto.local
Amlogic Instructions
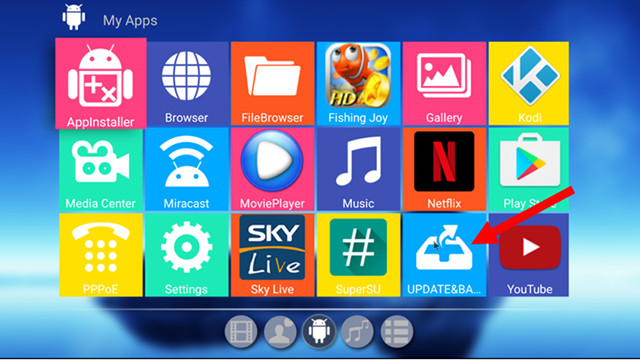
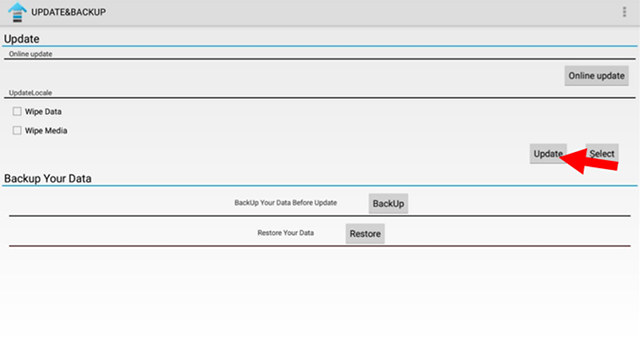
- Boot and find the update app

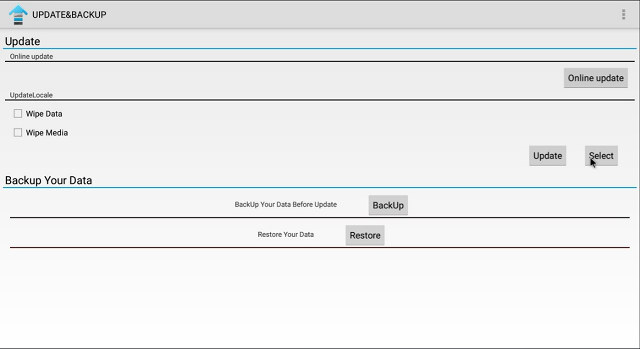
- Click Select

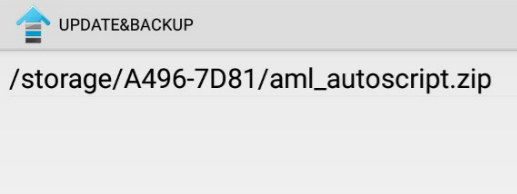
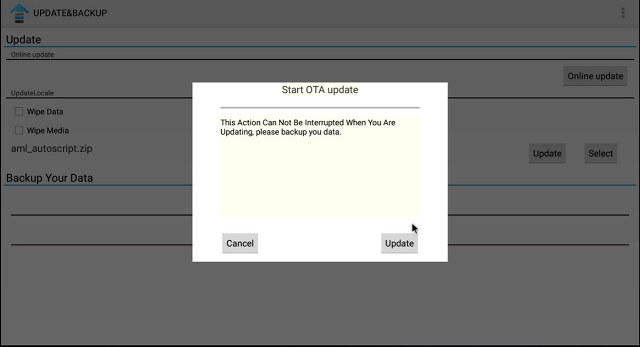
- Choose the aml_autoscript.zip

- Click Update

- Then Update again
- Once it boots log in with root and run “sudo /root/install.sh”
- Now we need to see if WiFi is working. Run “nmtui”. This should be self explanatory, and if you see your access point stop. Don’t bother to connect. Exit run “shutdown” wait for it shutdown, remove the SD card, and pull the power and power back on. You can skip the next few steps in this section.
- If you did not see your access point exit out of “nmtui” and run the command “sudo modprobe wifi_dummy” repeat looking for access point in step 7.
- If you still don’t see your access point run the command “sudo modprobe dhd” repeat looking for the access point in step 7.
- If you have to modprobe either to get wifi working once you boot from the internal storage log in with root and run the command “sudo nano /etc/rc.local” and add your “sudo modprobe xxxxxx“ command before exit 0. Cntrl X then y then enter to exit nano and save. Reboot and continue.
Orange Pi Lite Instructions
- Connect a keyboard and connect to a monitor or tv
- Login with root
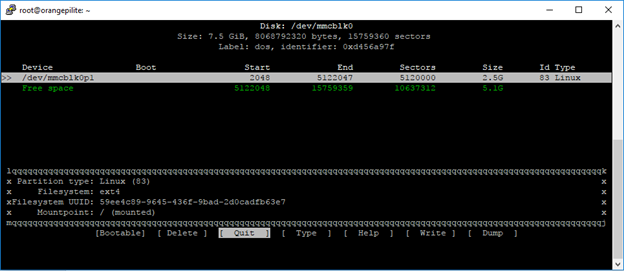
- Run the command “sudo cfdisk /dev/mmcblk0”
- Delete /dev/mmcblk0p1 with the arrow keys

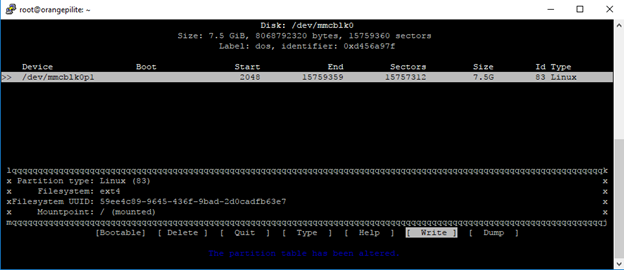
- Make a new one and it should fill in the full size of your sd card.

- Then finally write. It will prompt you are you sure and type out yes.
- Arrow over to quit and enter.
- Reboot with the command “sudo reboot” and wait for the Orange Pi to reboot.
- Log back in with root and run the command “sudo resize2fs /dev/mmcblk0p1”
- Reboot again with the command “sudo reboot” and wait for the Orange Pi to reboot.
Remaining Octoprint detup instructions common to all devices
- Log back in and run the command “nmtui” to connect to your network. This should be self explanatory. After connecting to wifi if you choose to set a static IP address quit and go back in to nmtui and edit the connection to set the IP address. When setting the IP address suffix the IP address with a /24 to denote a 255.255.255.0 subnet mask

- Finally quit and run the command “shutdown” and wait for it to turn off.
- Move the Octoprint server and connect to your printer.
- To log in open your browser and navigate to http://x.x.x.x:5000 or orangeocto.local:5000 or amlogicocto.local:5000.
- Run through the setup it is self explanatory and in settings add /home/pi/OctoPrint/ as your git update path.


Notes
I really recommend setting static IP addresses through your router if it has the ability. Or you can use the .local address above if you have zeroconf/avahi on your machines .
I also recommend the Amlogic server. You get a board, enclosure, power supply, and eMMC flash to run off of. You still need an SD card to get started, but it is not permanent. I ran into trouble on Orange Pi Lite, but it does work. I think the Orange Pi Lite board I received is flakey.
You have a lot of headroom on these to provide other services, e.g.. home automation, media server with no transcoding, NAS, Minecraft server, or anything else that runs on Linux.
Big thanks to balbes for making Linux work, Jean-Luc, and Armbian forum members who tested Orange Pi Lite version.
Tested on
- X96 1/8 S905X with wifi dummy
- X96 2/16 S905X with wifi dummy
- Tanix TX 5 Pro S905X with dhd
- Yoka KB2 S912 with wifi dummy
It looks like Realtek (RTLxxxx) WiFi chips need the wifi dummy, and Ampak (apxxxx) chips need the dhd.
Cura
Cura 2.6 came out just just recently with the ability to connect directly to Octoprint. It is really cool feature.
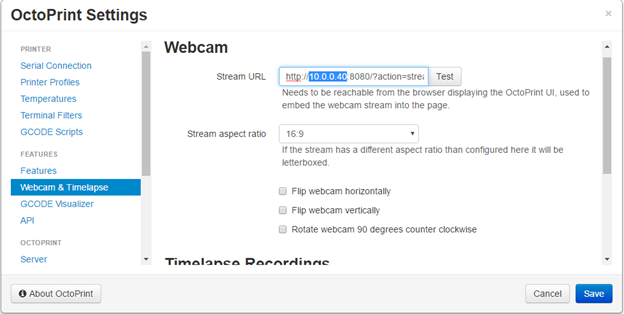
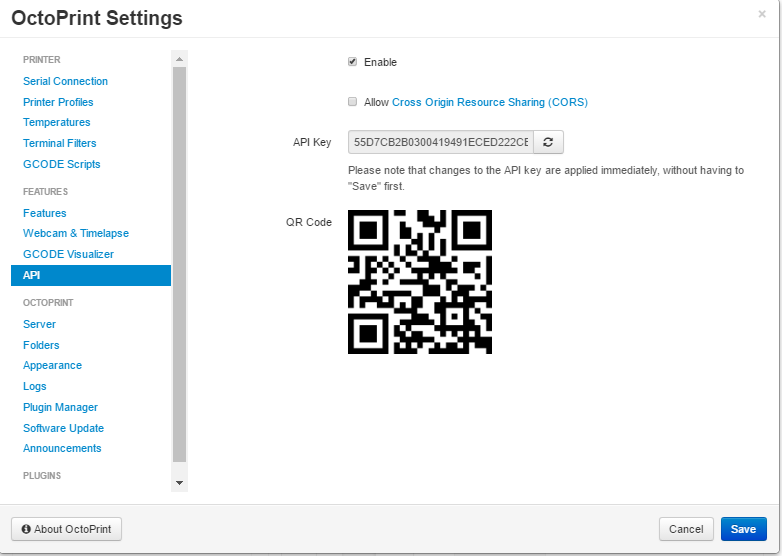
To setup login to octoprint and grab API key.
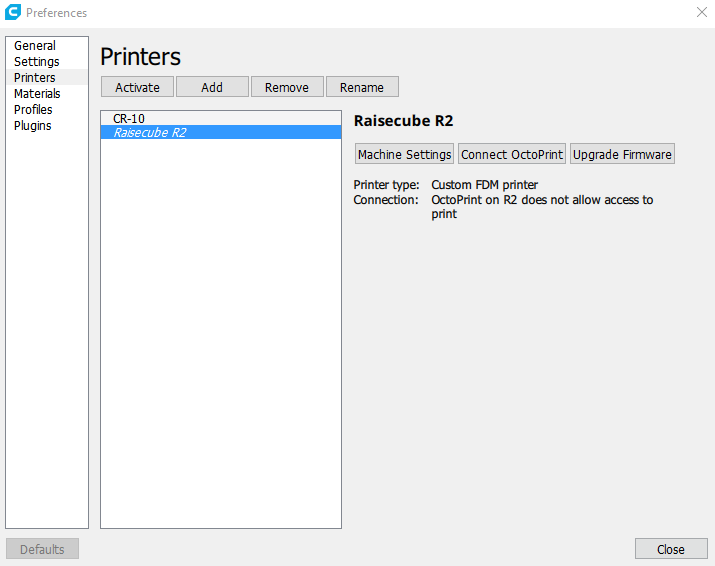
Then open Cura 2.6 and go to manage printers. Highlight printer and press Connect Octoprint.
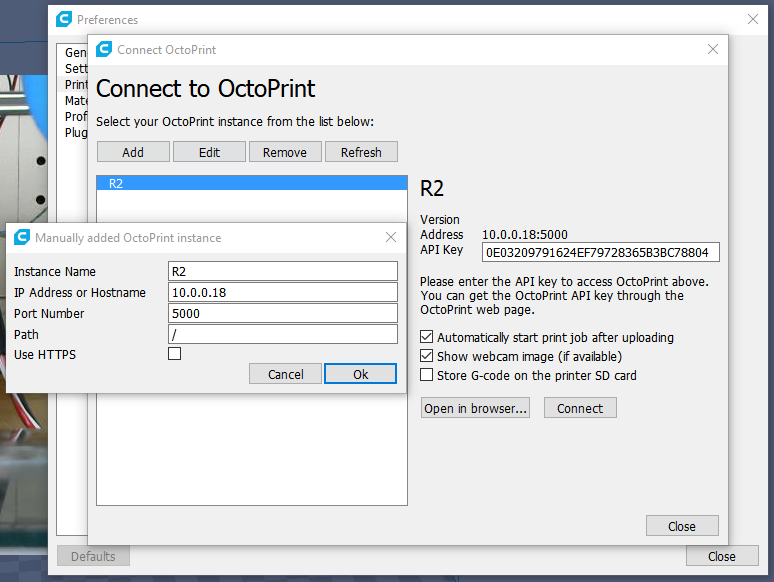
Add an Octoprint instance, set preferences, and input API key.
Now you can start prints directly from Cura and monitor prints.

I would really like to thank Gearbest for sending the Orange Pi Lite board, power supply, and SD card, as well as Amlogic boxes and 3D printers from previous reviews. If you decide to do this project yourself, please think about ordering from Gearbest through our links. It helps us out to continue to experiment with different hardware and provide these articles.

Karl is a technology enthusiast that contributes reviews of TV boxes, 3D printers, and other gadgets for makers.
Support CNX Software! Donate via cryptocurrencies, become a Patron on Patreon, or purchase goods on Amazon or Aliexpress


