
NAS Dock v1.2 for Nano Pi NEO / NEO 2 is, as the name implies, a complete mini NAS kit for 2.5″ drive for NanoPi NEO or NEO 2 board. The NEO 2 board is strongly recommended, since it’s not much more expensive, but should deliver much better results due to its Gigabit Ethernet interface. I’ve received two of those kits together with several other boards & accessories from FriendlyELEC, and today I’ll show how to assemble the kit, configure OpenMediaVault, and run some benchmarks.
NAS Kit V1.2 Assembly with NanoPi NEO 2 Board
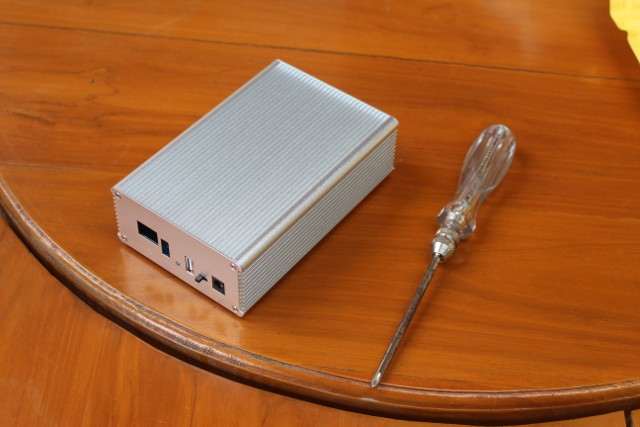
The only extra tool you’ll need is a screwdriver, and potentially a soldering iron as we’ll see further below.
 The metal box is stuff wih accessories so the first thing is to open one or two sides to take out the content. We have the mainboard, NanoPi NEO back plate, NanoPi NEO 2 back plater, a heatsink and thermal set, and a set of 5 screws to tighten the hard drive which mean there’s one extra screw. FriendlyELEC always adds extra screws, and I find it’s a nice touch, as it can be a real pain if you happen to lose one.

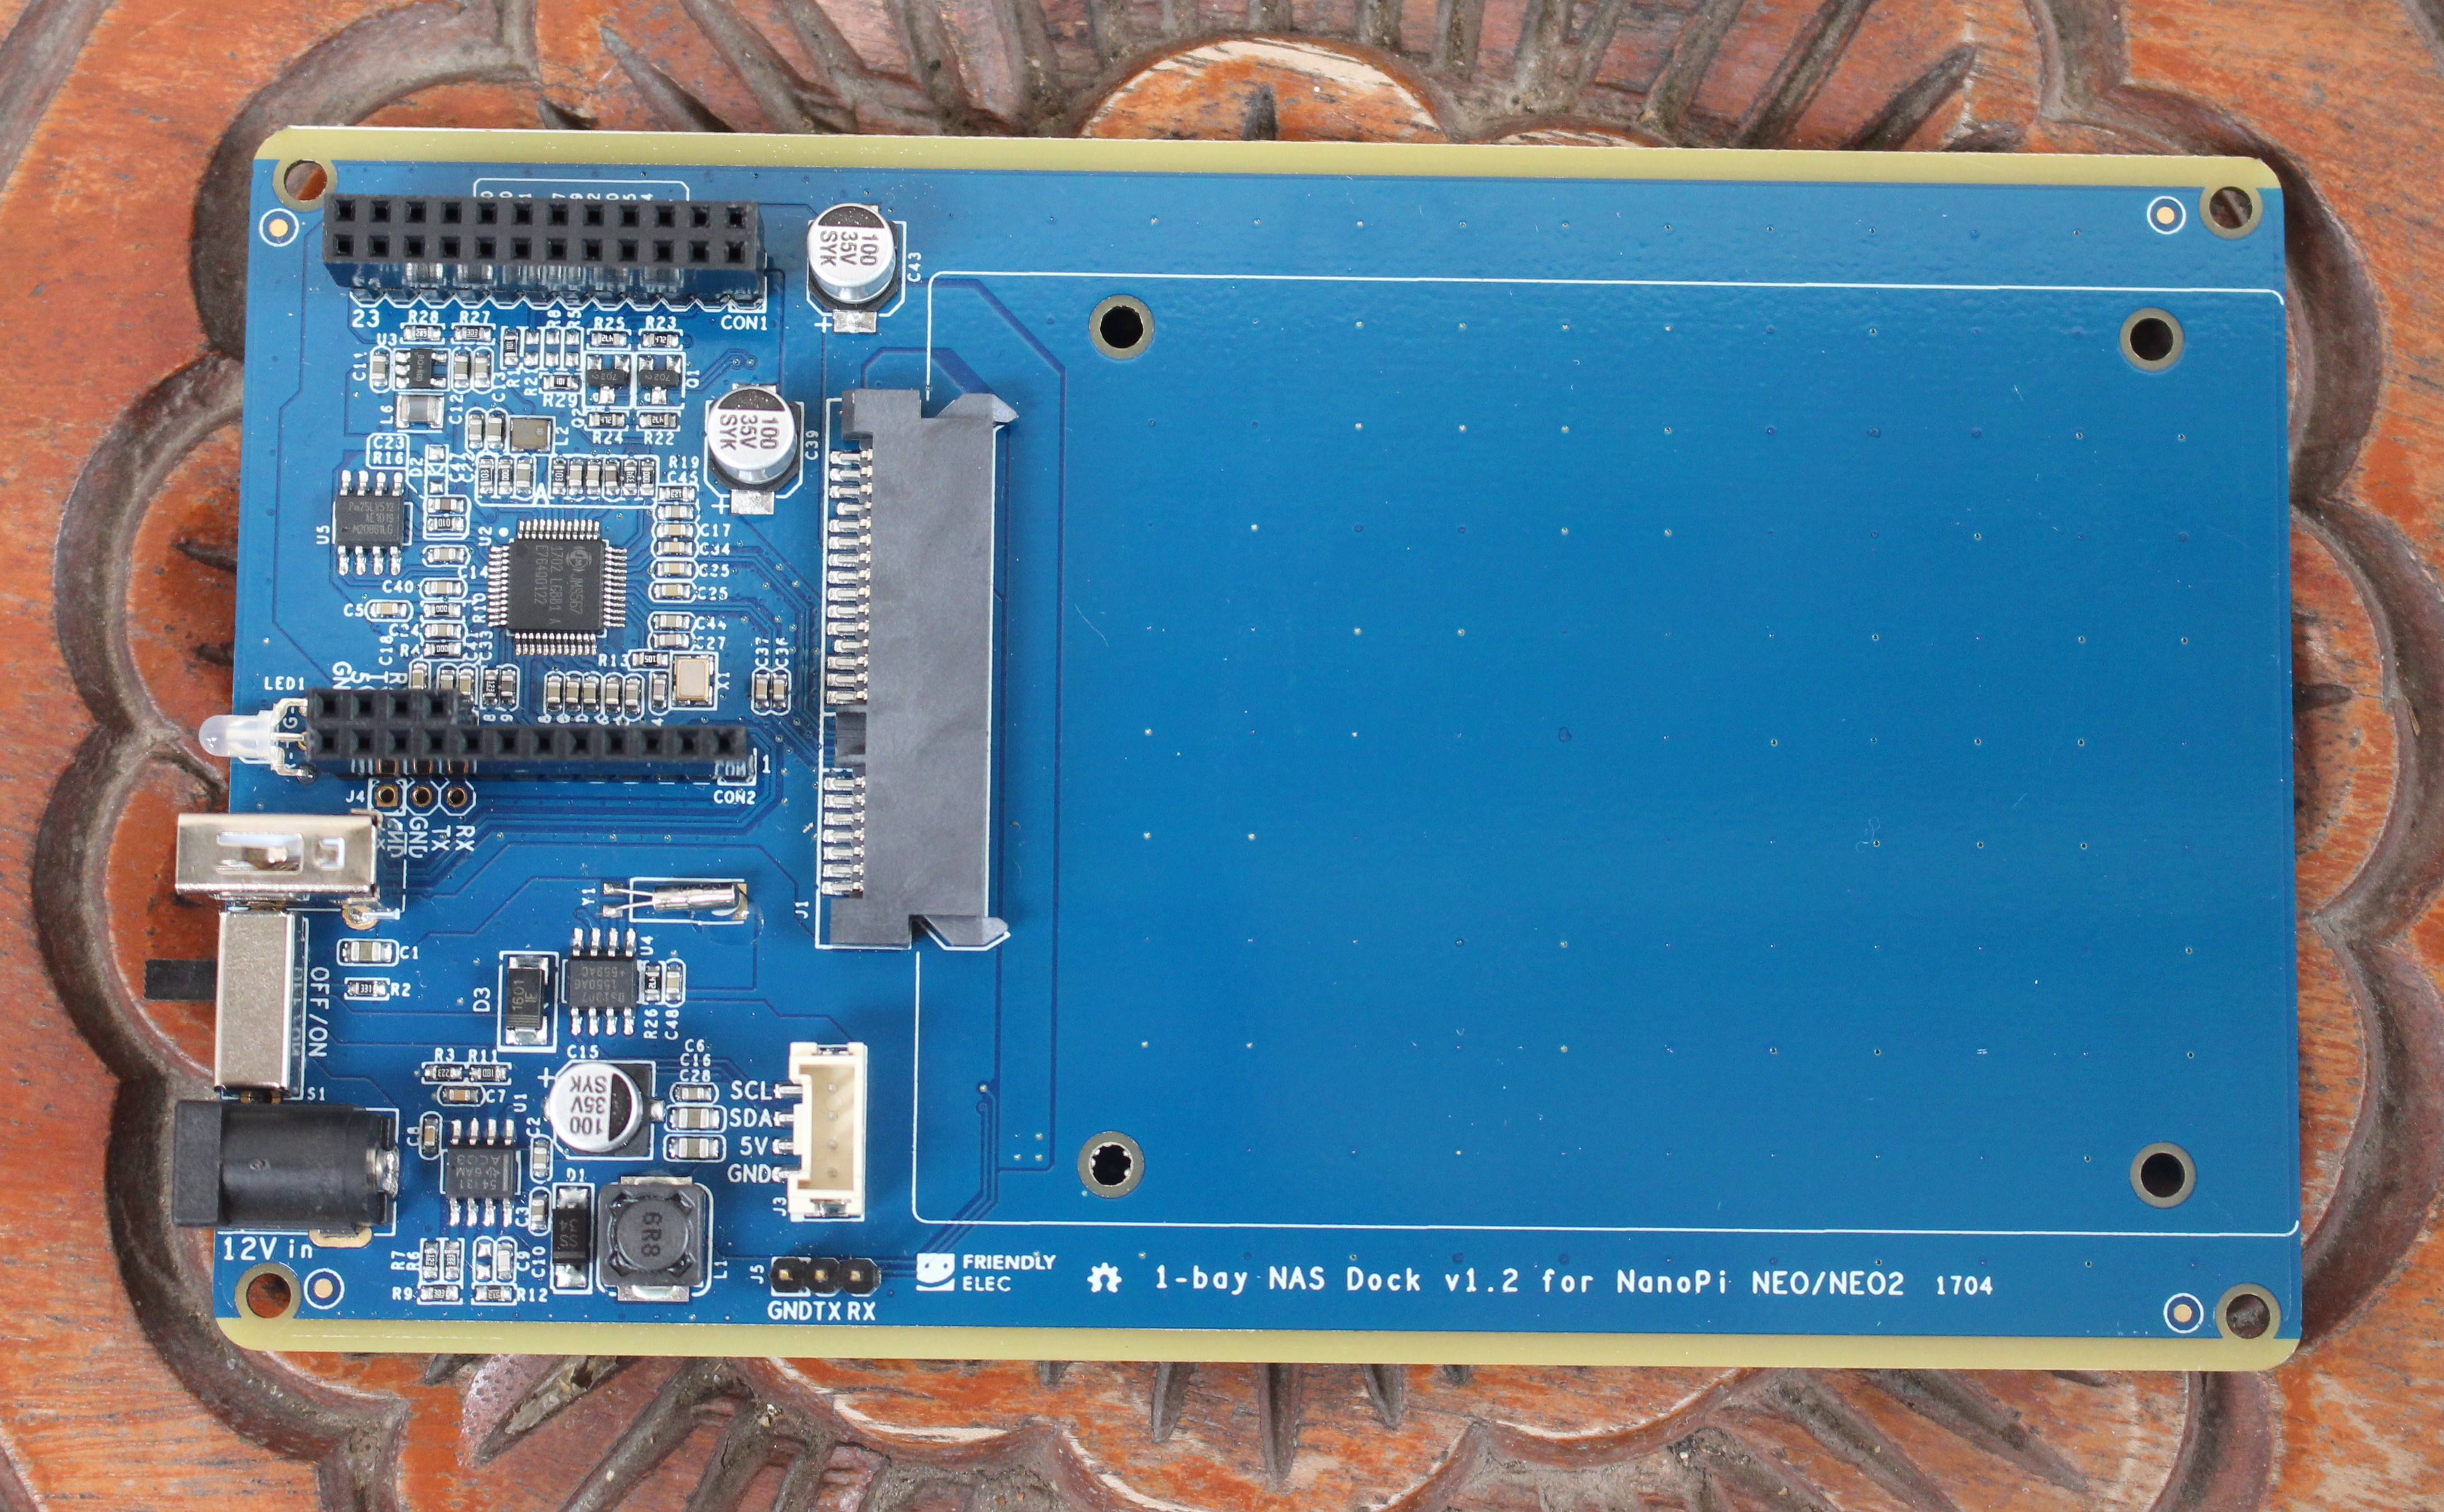
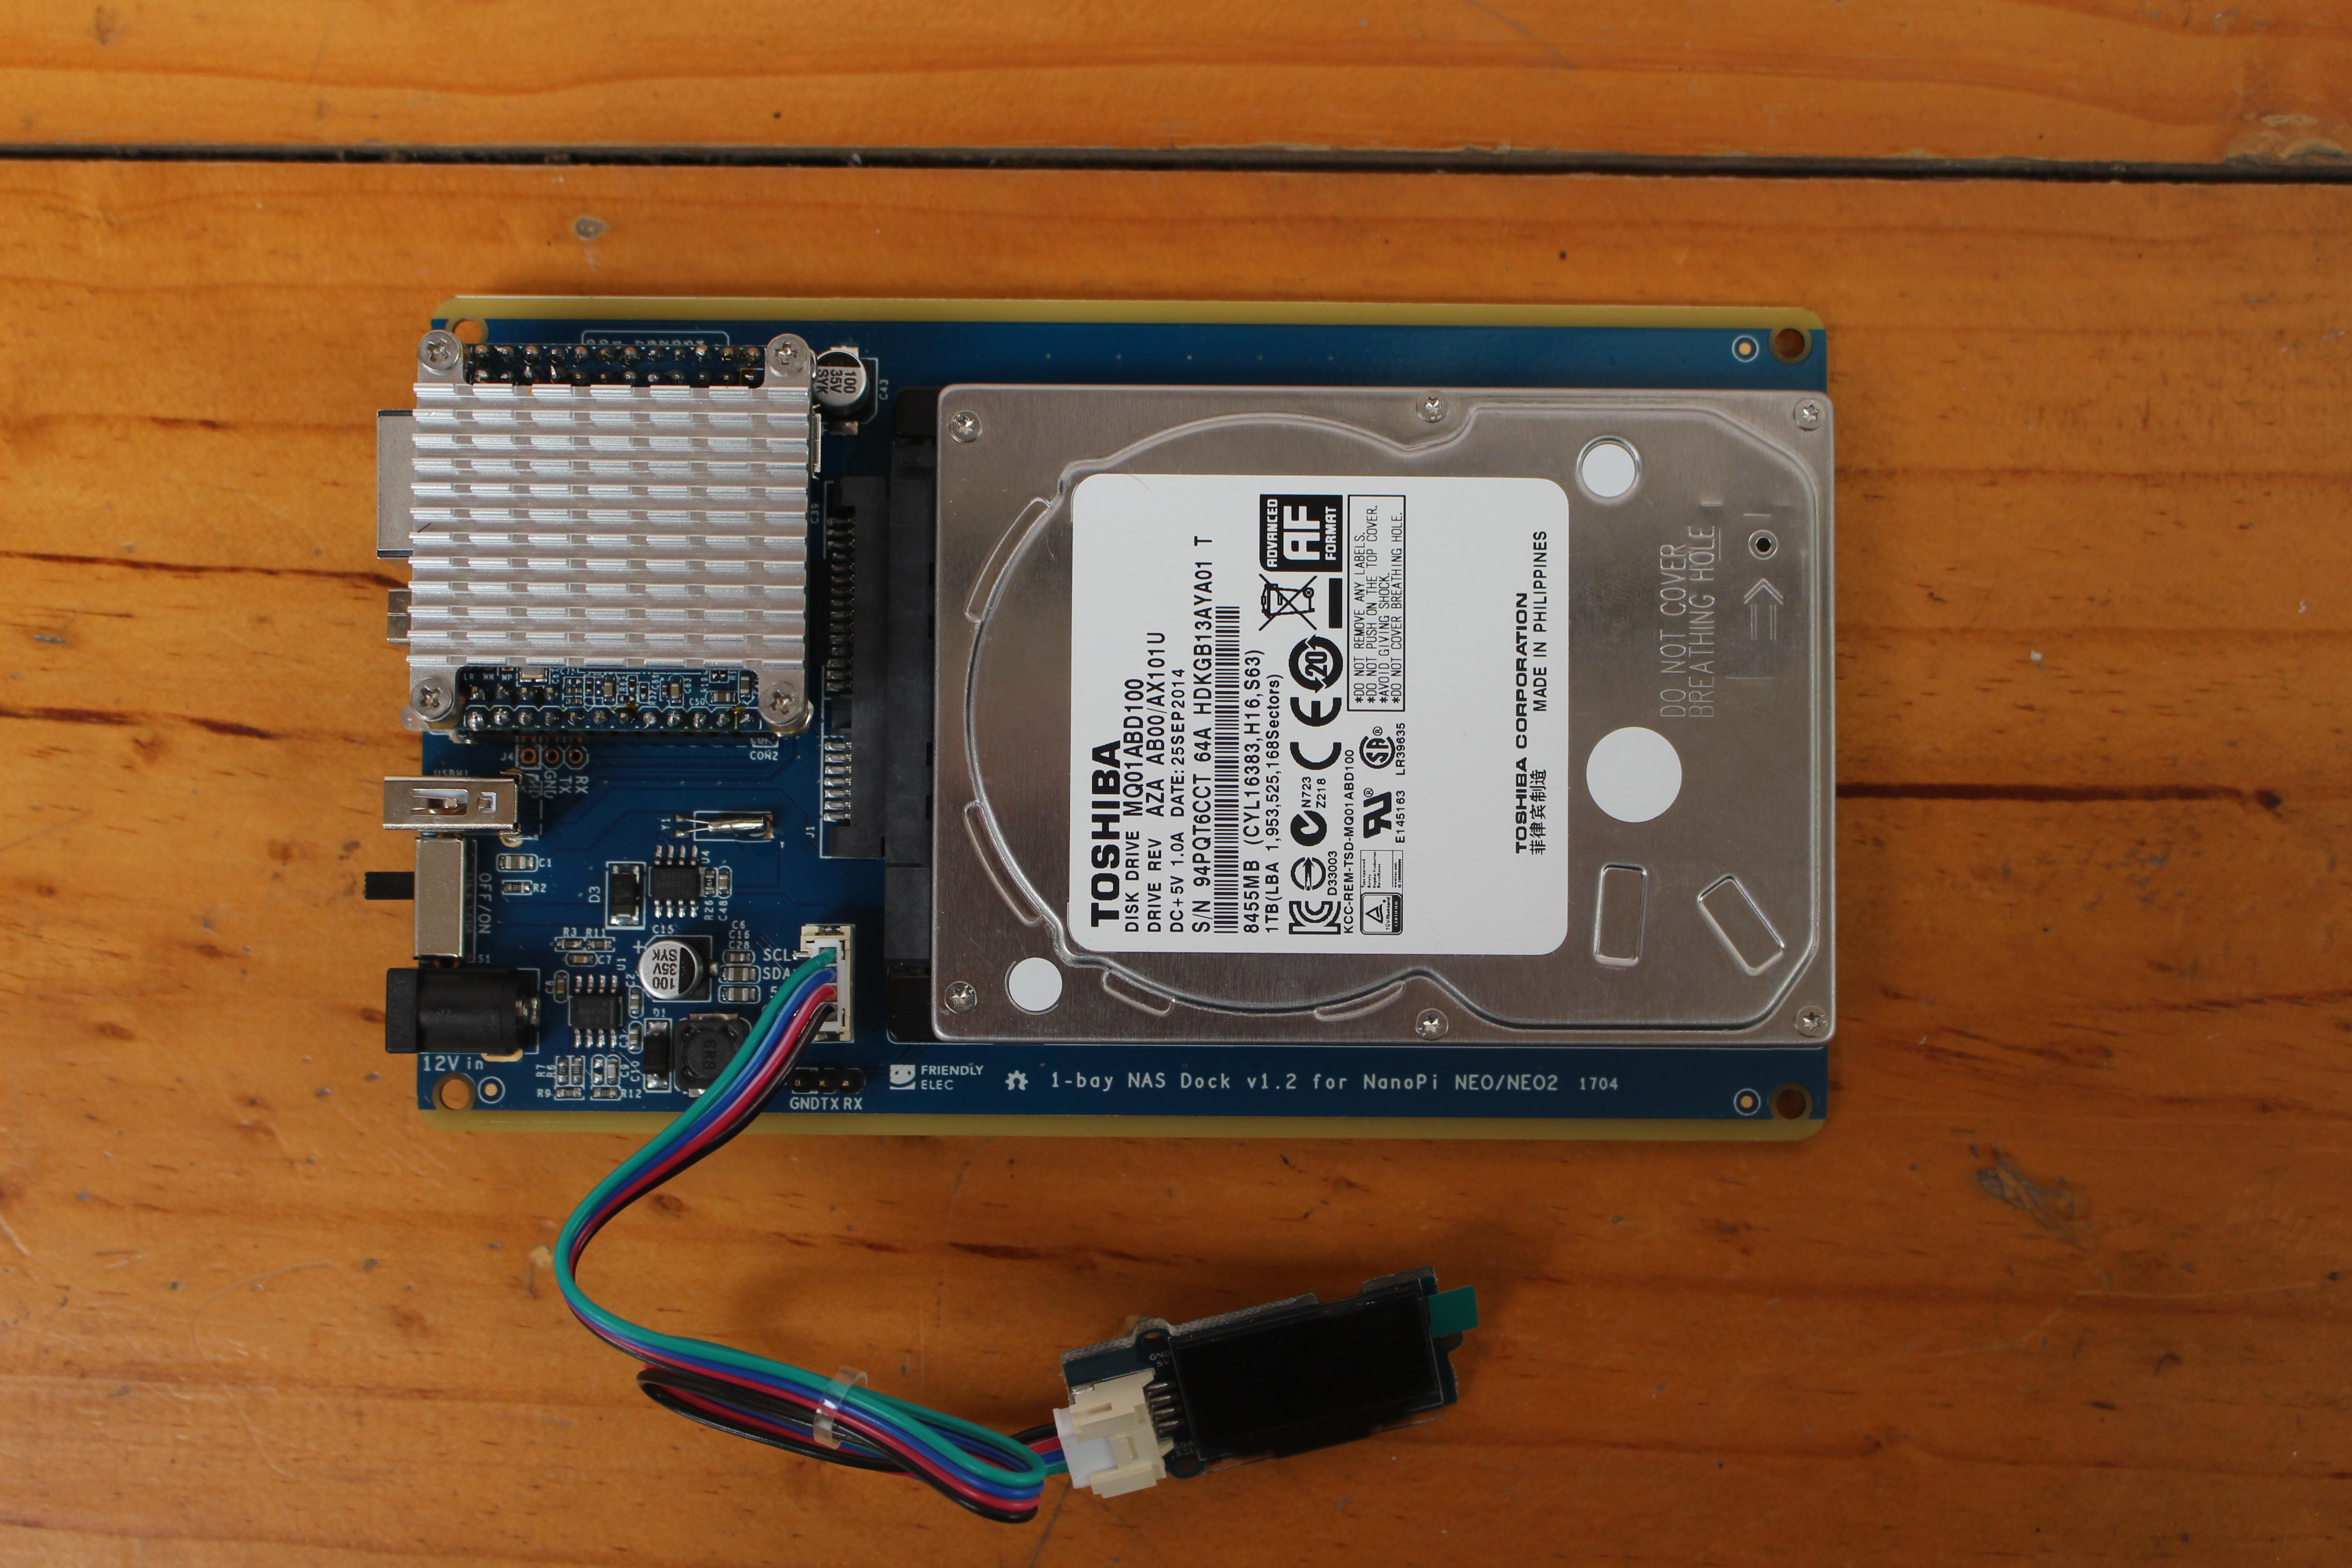
Let’s have a closer look at the “1-bay NAS Dock v1.2 for NanoPi NEO/NEO2” board. We have a UAS capable USB 3.0 to SATA brige chip between the two header for NanoPi NEO board (note that the USB connection will be limited to USB 2.0 since the board only supports that), an LED, a USB 2.0 host port for a printer, WiFi dongle, or webcam, the power switch, the power jack, a 3-pin serial header, an I2C connector for Grove modules, and of course the SATA connector.
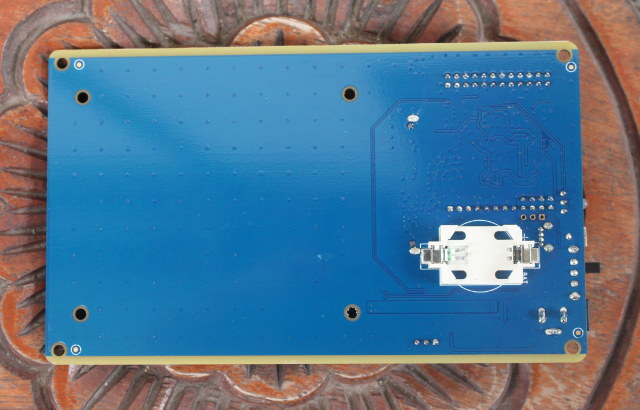
There’s not much on the other side of the board, except a CR2032 battery slot for the RTC.
Before going further, you’ll need to go to the Wiki, and get the latest OpenMediaVault firmware, in my case nanopi-neo2_debian-nas-jessie_4.11.2_20170531.img.zip, which I then flashed with Ether program to a micro SD card..
Once this is done, install the heatsink and thermal to your NanoPi NEO 2 board, and insert the micro SD card into the board.
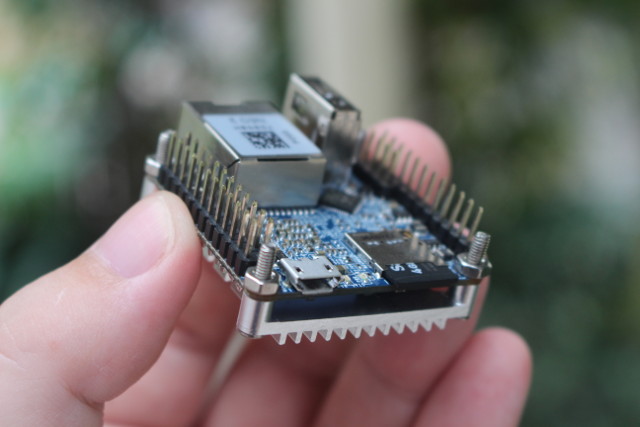
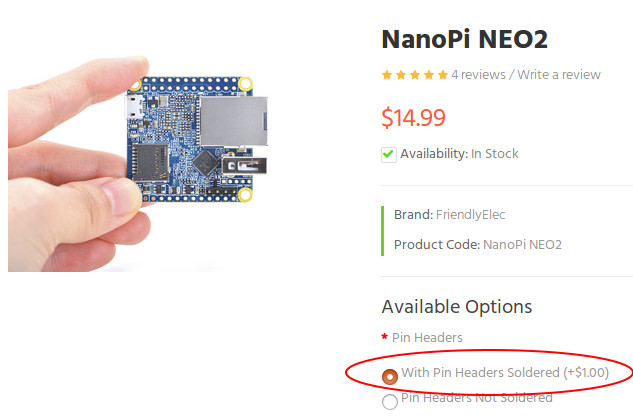
Notice that I also soldered the headers. While it would be obvious to people would have looked at the pinout diagram, I’ve read some people have justed connect the board using the (pre-soldered) 4-pin header, as they may have believed it was a USB header, but it’s just the serial console instead, and obviously the hard drive was not detected. If you don’t feel like soldering the headers to the board yourself, make sure you tick the option “with pin headers soldered” when ordering. It just costs $1 extra.
Now we can insert our board into the “1-bay NAS Dock” board, instead the hard drive, and optionally an I2C module. I connected an I2C OLED display i the picture below for illustrate, as using the display would require cutting out the case. Some people may want to connect an I2C temperature sensor instead.
I used four screws to tighen the hard drive on the other side of the board, and install a CR2032 battery for the real-time clock.

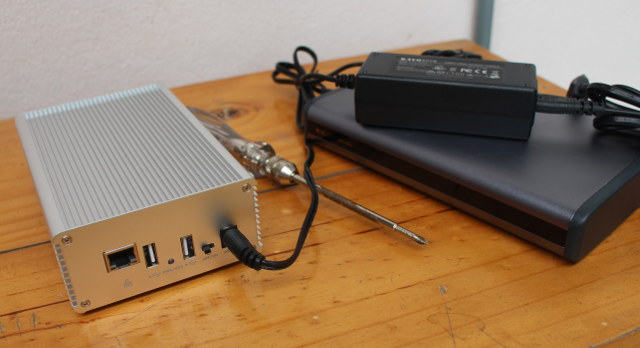
Finally, you’ll need a 12V power supply with at least 1A, but I could not find any (safe) spare ones so I used Maxoak K2 power bank instead, since it can output 12V @ 2.5 A max.

OpenMediaVault Setup on NanoPi NEO 2 Board
So I connected everything, and applied power, but the board would not boot with the Ethernet Link LED blinking in a regular fashion, meaning something was very wrong. So I took out the board, and connected a serial debug board, connect to the console via minicom using 115200 8N1, and that’s what I got:
|
1 2 3 4 |
U-Boot SPL 2017.05 (May 27 2017 - 15:41:23) BOARD: DRAM: 512 MiB Trying to boot from MMC1 |
The boot was just stuck there. I re-inserted the micro SD in my PC, and I could see both boot and rootfs partitions, so everything looked good.
Then I powered the NanoPi NEO 2 board with a 5V/2A power supply only, and the boot succeeded:
|
1 2 3 4 5 6 7 8 9 10 11 12 |
U-Boot SPL 2017.05 (May 27 2017 - 15:41:23) BOARD: DRAM: 512 MiB Trying to boot from MMC1 U-Boot 2017.05 (May 27 2017 - 15:41:23 +0800) Allwinner Technology CPU: Allwinner H5 (SUN50I) Model: NanoPi H5 DRAM: 512 MiB MMC: SUNXI SD/MMC: 0, SUNXI SD/MMC: 1 |
Then I went back to the 12V power input on NAS Kit with the power bank and the boot succeeded. Very strange. It turns out the board would not boot most of the time, but the symptoms are not reproducible 100% of the time. This kind of random behavior is usually a timing or distorted signal issue. So I thought the micro SD card might not play well with the board, and the power bank signal might not be so clean. So I first flashed another micro SD card, but same results. I used another 12V/5A power supply, and it did not really help either. Finally, I used another NanoPi NEO 2 board and it appears to be stable.
You can find the board using FriendlyELEC.local if bonjour services are running in your computer:
|
1 2 3 |
ping FriendlyELEC.local PING FriendlyELEC.local (192.168.0.110) 56(84) bytes of data. 64 bytes from 192.168.0.110 (192.168.0.110): icmp_seq=1 ttl=64 time=0.316 ms |
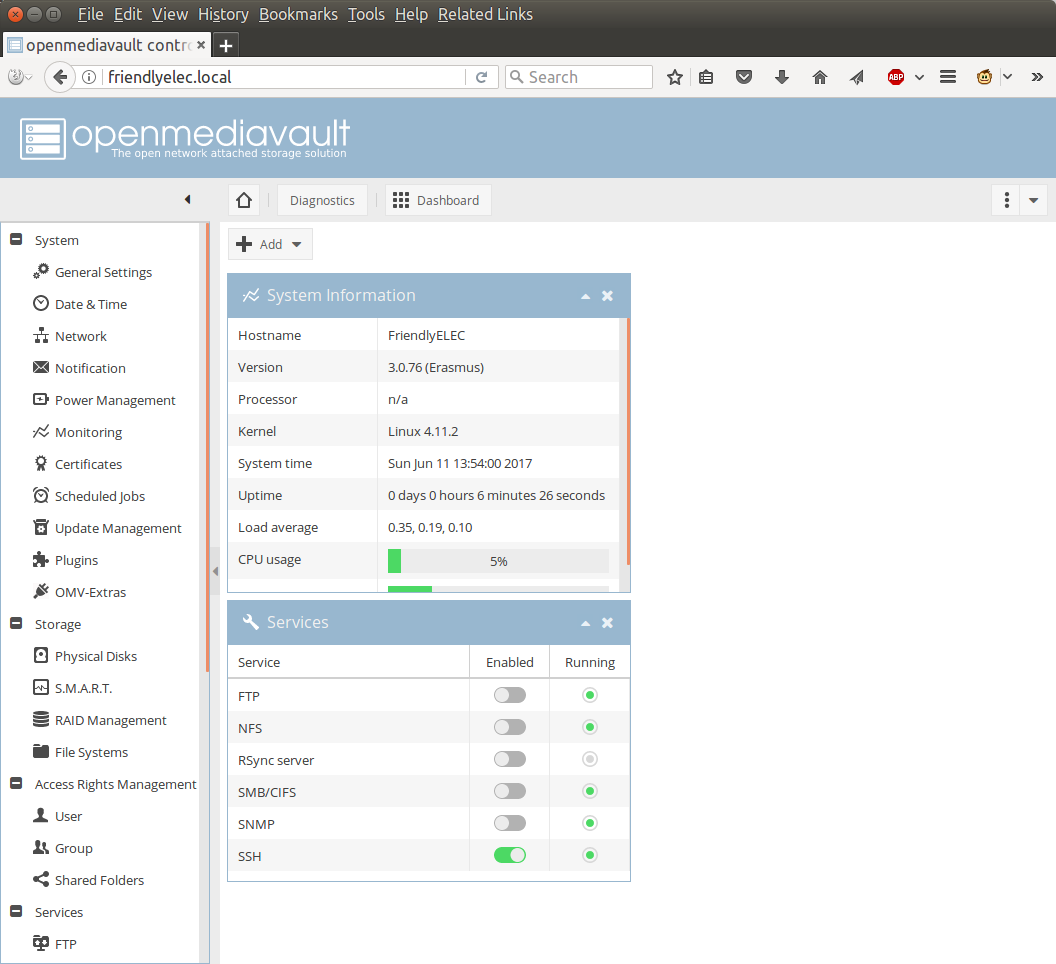
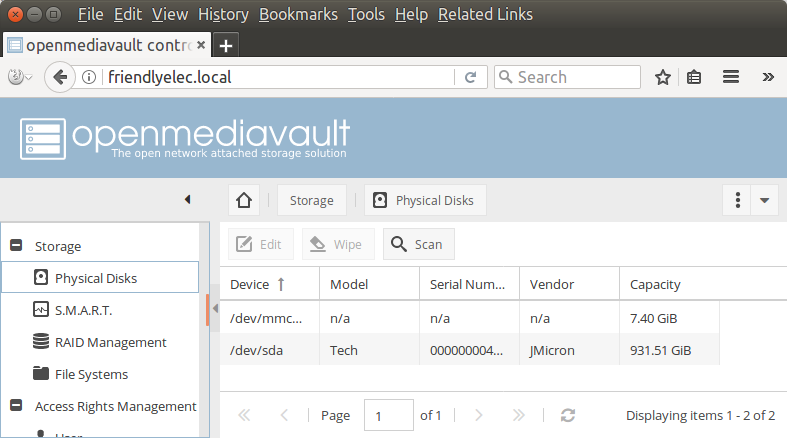
Alternatively, you could check out the IP address in other ways. In my case, I just type friendlyelec.local in Firefox to access the web interface. The default username and password are admin and openmediavault.

After login, you can access the dashboard showing system information, and which services are running. You may want to disable the services you don’t need.
You can go to Storage->Physical Disks to check if your hard drive has been detected. No problem for me here with a 931.51 GiB drive detected.
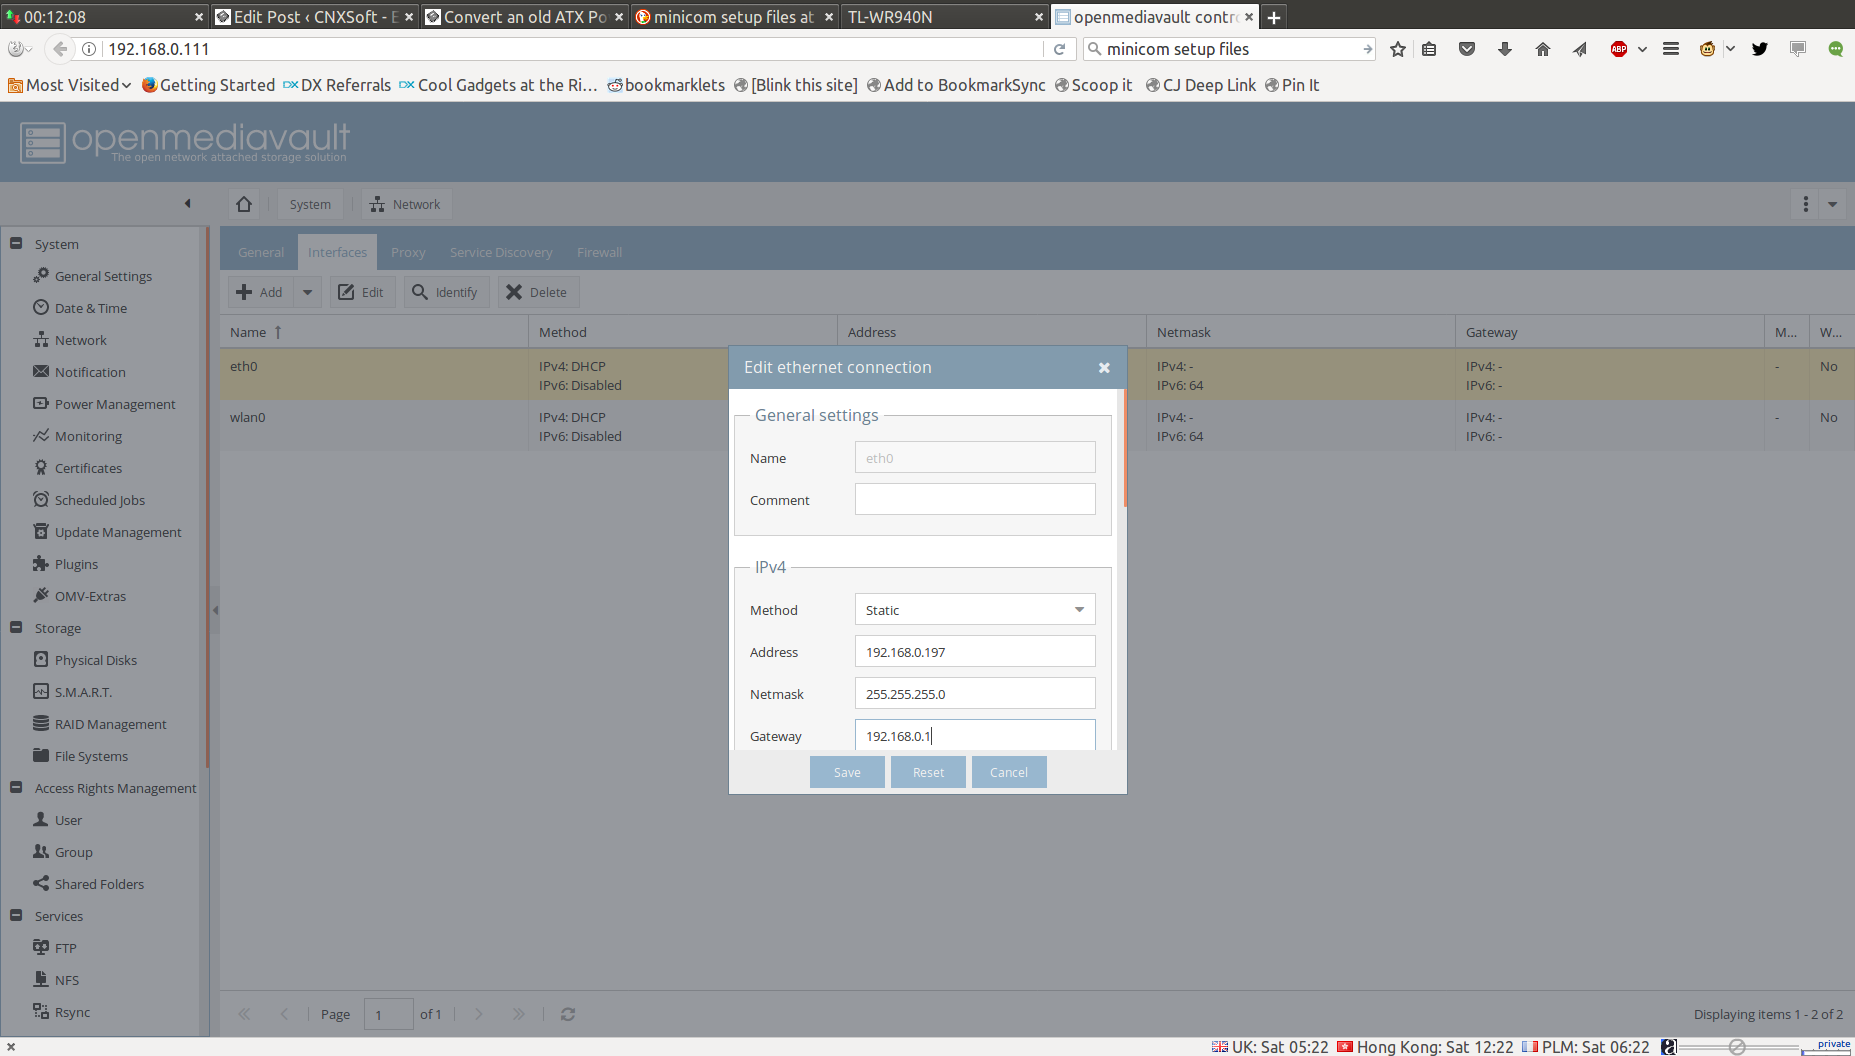
You may then want to setup a fix IP address. There are various ways to do this but I went to Network->Interfaces and set eth0 to a fixed IP address. You’ll be asked to apply the changes once it’s done.
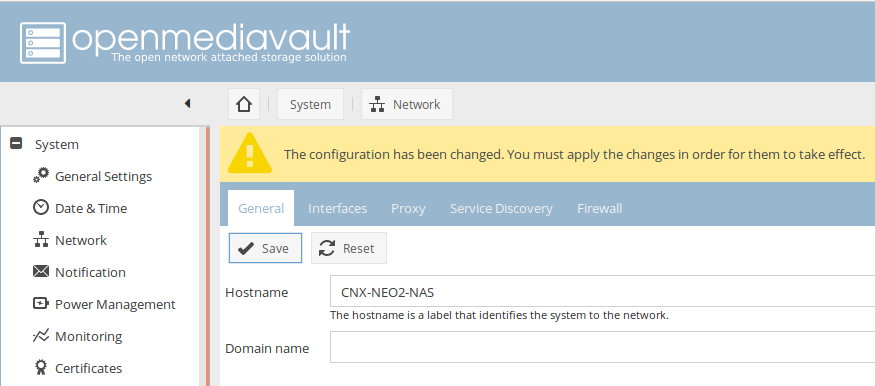
I also changed the hostname to CNX-NEO2-NAS in the General tab.
After that I decided to address some security issues. First by changing the administrator password in General Settings->Web Administrator Password.
I then went to Access Rights Management->User to find out there were two pre-configured users: pi and fa. I deleted fa user, changed pi’s user password, and added it to ssh group. It’s actually even probably better to just delete both user, and create your own.

The root user is not shown, but you’ll want to login as root through ssh first and change the password, as the default password is fa. Once it’s done, you’ll have better security, and your system should not be easily accessible via basic “hacks”. For more security, you’ll still want to install an RSA certificate. A self-signed one should do if you plan to use it only in the local network, but you may also consider a free Let’s Encrypt certificate instead.
We can now take care of the hard drive. I went to Storage->File Systems, and clicked on +Create file system which will let you choose between BTRFS, EXT3, EXT4, XFS, and JFS. I’ve gone with EXT4 first.

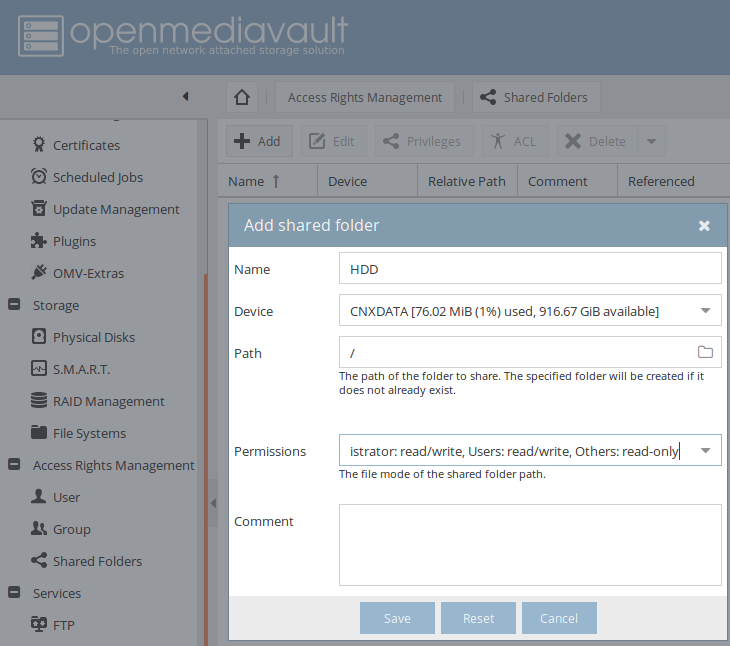
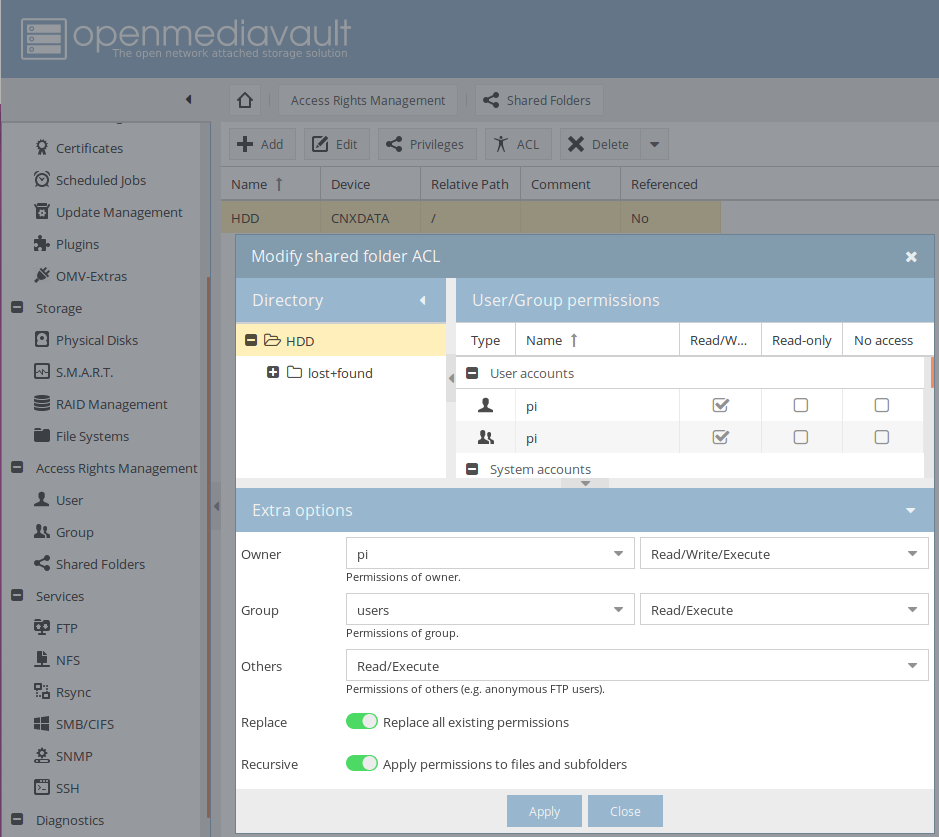
After a few minutes you drive should be formatted, so we can configure network shares. I want to use SAMBA and SFTP to transfer files for the purpose of this review, so I went to Access Rights Management->Shared Folders to add a new share called HDD for the root of of hard drive. You may want to add multiple share if you plan to split videos, documents, music and so on.
I clicked Save, and selected ACL to add permissions to pi and admin users. You can add whatever users you plan to use to access the share.
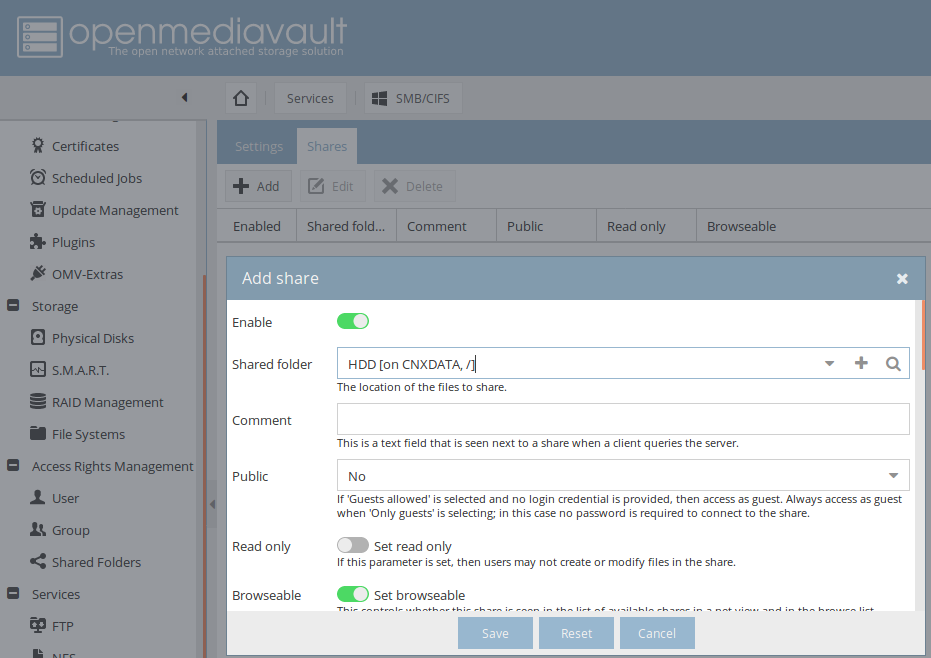
That share3d folder can now be assigned to the services you plan to use. SFTP is enabled by default when SSH is running, so I create a SAMA/CIFS share by going to Services->SMB/CIFS->Shares to add the share.
Browsing the Network with Nautilus would show both cnx-neo2-NAS – SMB.CIFS and cnx-neo2-nas – SSH (SFTP) shares.

Configuration is now complete. I have not find a clean way to power off the system, so I normally open a terminal session via ssh and run the shutdown now command. A software button to turn of the NAS would have been a nice features on the kit.
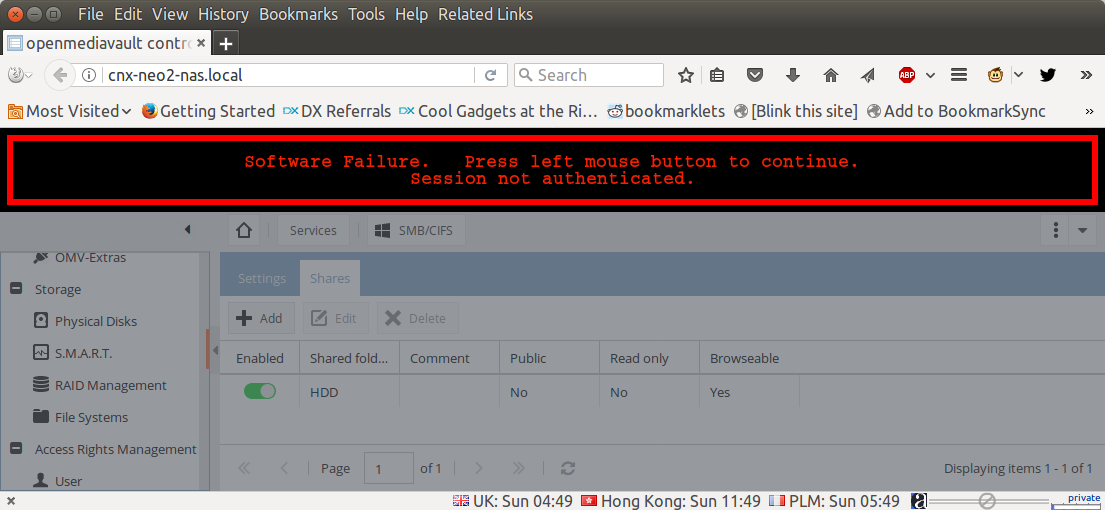 I also often encountered the error “Software Failure. Press left mouse button to continue. Session not authenticated.” before the session timeout is set to 5 minutes. If you prefer a longer timeout, you can change it in General Settings->Web Administration.
In case you want to use the RTC, you may first want to set the timezone:
|
1 |
dpkg-reconfigure tzdata |
Check the date is correct, and write it to the hardware clock:
|
1 2 3 |
date Sun Jun 18 16:53:20 +07 2017 sudo hwclock -w -f /dev/rtc-ds1307 |
before reading it back.
|
1 2 |
sudo hwclock -r -f /dev/rtc-ds1307 Sun Jun 18 17:03:53 2017 -0.494575 seconds |
You can test it by rebooting the board without the Ethernet cable:
|
1 2 3 4 5 6 7 8 9 10 11 12 |
sudo reboot ... date Thu Jan 1 07:00:34 +07 1970 sudo hwclock -r -f /dev/rtc-ds1307 Sun Jun 18 17:05:32 2017 -0.781570 seconds hwclock -s -f /dev/rtc-ds1307 date Sun Jun 18 17:07:28 +07 2017 |
Perfect! You’d just have to make sure the “set” command is run automatically at boot time if the time in the RTC is set. It would be good if FriendlyELEC updated their image to do that automatically at boot time.
NAS Dock V1.2 + NanoPi NEO 2 Benchmarks
Since I can now copy files and folders over SAMBA and SFTP, we can start running some benchmarks to evaluate performance. I’ll use EXT-4, BTRFS, and XFS file systems on the hard drive, and run iozone to specicially test storage performance, following by copying large and small files over SAMBA or SFTP to test real-life NAS performance. For large file copy, I’ll use a folder with 7 large files totaling 6.5 GB, and for small files, I’ve done a fresh checkout of the Linux kernel in my computer:
|
1 |
git clone https://github.com/torvalds/linux |
and removed symlinks since they may cause issues during copy, as well as .git directory with a huge 1.8GB file:
|
1 2 |
find -type l -delete rm -rf .git |
The end result is a directory with 64,013 files totaling 748.6 MB.
Iozone results
|
1 2 3 4 5 6 7 8 9 10 11 12 13 14 15 16 17 18 19 20 21 22 23 24 25 26 27 28 29 30 31 32 33 |
root@cnx-neo2-nas:/srv/dev-disk-by-label-CNXDATA# iozone -e -I -a -s 100M -r 4k -r 16k -r 512k -r 1024k -r 16384k -i 0 -i 1 -i 2 Iozone: Performance Test of File I/O Version $Revision: 3.429 $ Compiled for 64 bit mode. Build: linux Run began: Sat Jun 17 07:46:20 2017 Include fsync in write timing O_DIRECT feature enabled Auto Mode File size set to 102400 kB Record Size 4 kB Record Size 16 kB Record Size 512 kB Record Size 1024 kB Record Size 16384 kB Command line used: iozone -e -I -a -s 100M -r 4k -r 16k -r 512k -r 10242 Output is in kBytes/sec Time Resolution = 0.000001 seconds. Processor cache size set to 1024 kBytes. Processor cache line size set to 32 bytes. File stride size set to 17 * record size. random random bkwd record stride kB reclen write rewrite read reread read write read rewrite read fwrite frewrite fread freread 102400 4 8668 8947 8978 9164 486 732 102400 16 20660 21090 20761 21579 1891 3512 102400 512 24643 25185 38237 40271 24545 26282 102400 1024 25676 26720 38948 40451 30554 26253 102400 16384 25365 26658 39299 41369 40647 26235 iozone test complete. |
BTRFS:
|
1 2 3 4 5 6 7 8 9 |
random random bkwd record stride kB reclen write rewrite read reread read write read rewrite read fwrite frewrite fread freread 102400 4 8225 7763 8776 7939 491 7971 102400 16 19279 18923 20854 21008 1874 17037 102400 512 35049 34780 37170 36023 23173 33961 102400 1024 35323 35730 37113 37428 28020 34652 102400 16384 37381 37348 40899 41318 40575 37479 iozone test complete. |
XFS:
|
1 2 3 4 5 6 7 8 9 |
random random bkwd record stride kB reclen write rewrite read reread read write read rewrite read fwrite frewrite fread freread 102400 4 7896 8199 9681 9392 510 756 102400 16 20343 21484 20715 21173 1983 4372 102400 512 23512 24129 39104 40450 25062 25884 102400 1024 31040 33526 39122 40805 31155 34293 102400 16384 34323 35551 39752 41428 40645 34403 iozone test complete. |
I’ve taken results with 16384kB reclen for read, write, random read and random write values to draw a chart, since most people are likely going to store large files in their NAS. The smaller reclen could be interesting if you plan to handle smaller files.
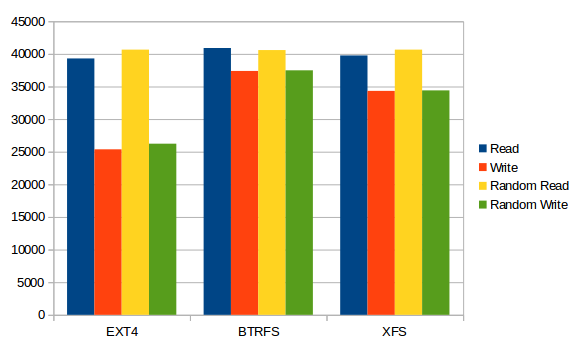 All three file systems have a very good read speed of around 40 MB/s, but BTRFS write appear to be the fastest among the three, with EXT-4 being the weakest at around 25 MB/s. But for some reasons, those results are useless in practice, as we’ll see below. Finding out the exact reason would possibly require studying and profiling iozone and the kernel source code which would be outside of the scope of this review.
File copy over SAMBA and SFTP
Results for large files in minutes and seconds.
| File Copy Large Files | SMB | SFTP | ||
| Write | Read | Write | Read | |
| EXT4 | 02:49.00 | 02:40.00 | 03:54.00 | 04:15.00 |
| BTRFS | 03:20.00 | 02:40.00 | 03:48.00 | 04:32.00 |
| XFS | 02:45.00 | 02:38.00 | 03:36.00 | 04:23.00 |
Chart converted to MB/s.
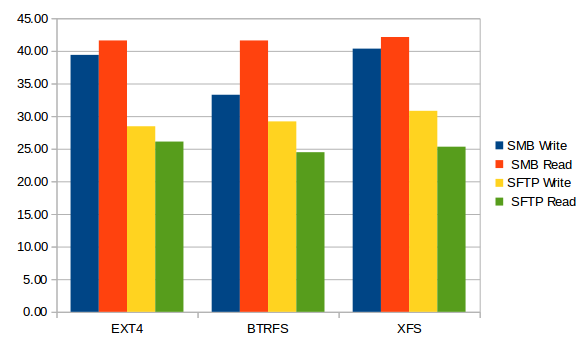
First, we can see very good read performance from the NAS (NAS to my PC) with 41 to 42 MB/s close to the theorethical limit of a USB 2.0 connection. Write speed is a a little different as the files were transferred more slowly with BTRS, and around 40MB/s with EXT-4 and XFS. Since SFTP is encrypted the transfer speed is roughly the same for all three file systems. Overall the file system you choose does not really impact performance with large files.
Results for small files in minutes and seconds.
| File Copy Small Files | SMB | SFTP | ||
| Write | Read | Write | Read | |
| EXT4 | 15:26.00 | 18:34.00 | 09:02.00 | 12:48.00 |
| BTRFS | 18:48.00 | 18:02.00 | 10:30.00 | 11:30.00 |
| XFS | 17:33.00 | 18:22.00 | 09:18.00 | 12:35.00 |
Chart converted to MB/s.
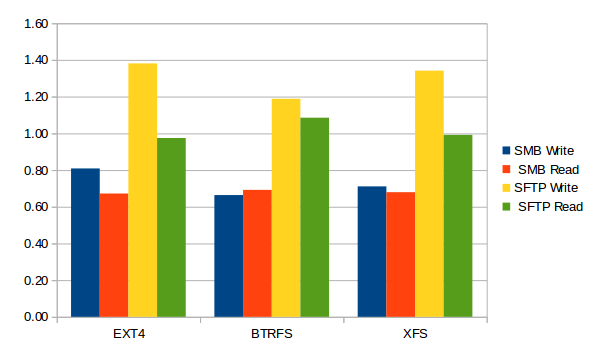 Transferring a large number of small files over SAMBA is really slow, and barely faster over SFTP. Again,there aren’t any significant differences between file systems here. If you are going to transfer a large number of small file over the network, you may want to either compress the files before transfer, or compress the files on the fly using the command line:
|
1 2 3 4 5 6 |
time tar zcf - Network_Test_Files_Small | ssh pi@cnx-neo2-nas.local "cd /srv/dev-disk-by-label-CNXDATA; tar xzf -" pi@cnx-neo2-nas.local's password: real 1m49.704s user 1m29.036s sys 0m8.272s |
It took just 1 minute and 49 seconds to transfer all 64,013 files, or over five times faster than SFTP write to XFS, at around an effective 6.86 MB/s. So knowing your tools may matter as much as having the right hardware.
I was going to run a last part after enabling optimizations provided by tkaiser, but it turns out FriendELEC has already done that in their firmware image.
If you want to reproduce the setup above, you’ll need to purchase NAS Kit v1.2 for $12.99, and a NanoPi NEO 2 with soldered headers for $15.99. If you don’t have a 2.5″ hard drive, you’ll need to add this, as well as a 12V power supply which you could purchase locally, or on FriendlyELEC website for under $10. All in all that’s cheaper than a similar kit with a Raspberry Pi 3 board, and you’ll get close to four times the SAMBA performance for large files since RPi 3 will be limited to 10 to 12 MB/s due to the Fast Ethernet connection.

Jean-Luc started CNX Software in 2010 as a part-time endeavor, before quitting his job as a software engineering manager, and starting to write daily news, and reviews full time later in 2011.
Support CNX Software! Donate via cryptocurrencies, become a Patron on Patreon, or purchase goods on Amazon or Aliexpress


